Not just the board, but well over 200 boards. And, actually, there were no chairs involved. Lots of standing, though. Here’s how it happened.
All those flooring blanks I made in the previous post? They took a pass through the router table to get an interlock feature on one edge.
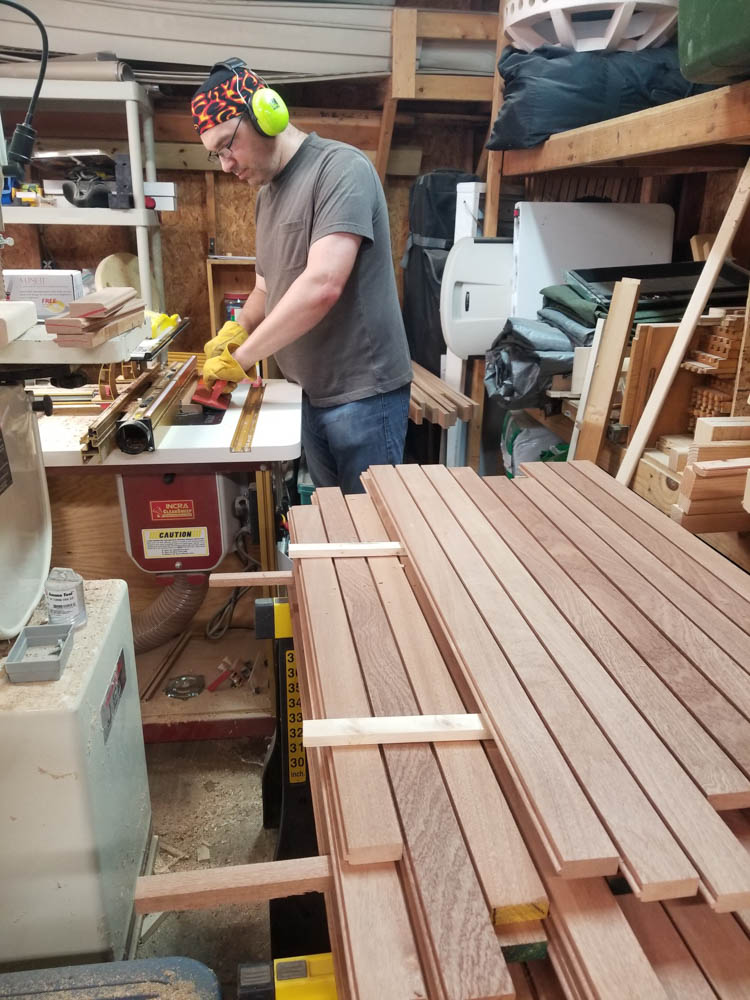
Here’s a close-up showing the rotary cutter imparting the profile the edge of the board as I drag it along to the left.
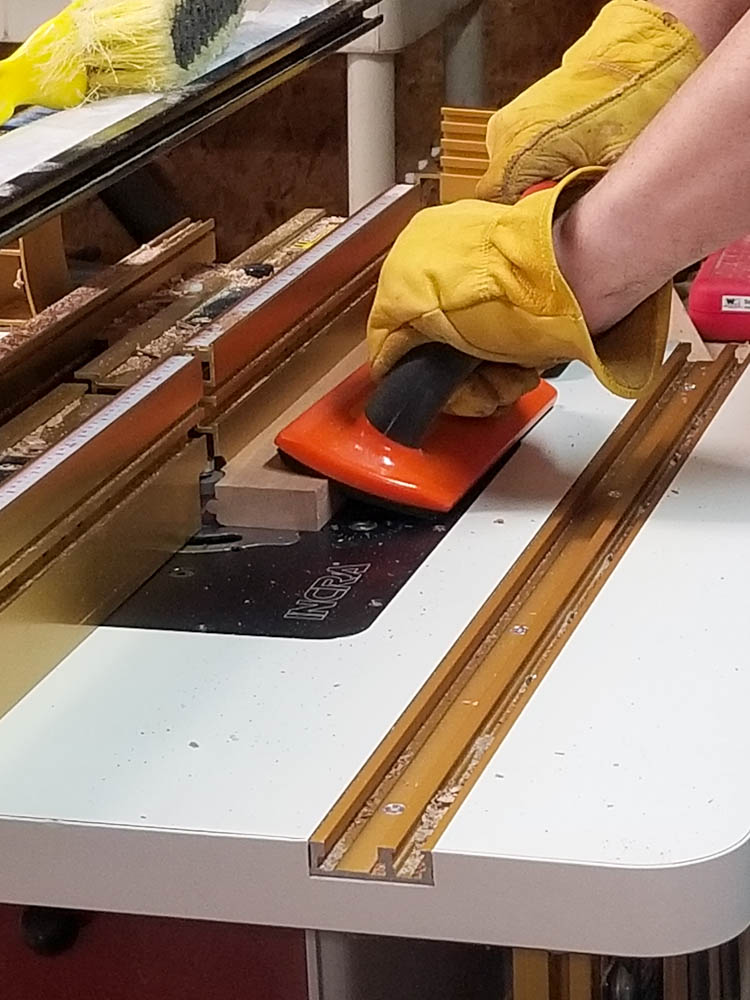
220 of that. All the while, maintaining some downward force to keep the board totally flat (sometimes they like to bow on their own) for a consistent cut and some outward force (toward the metal fence surrounding the cutter) to ensure the board stays flush (sometimes they like to bow in this direction, too, called “crowning”). This, as it happens, is fairly fatiguing, maintaining pressure in two directions while also feeding the board from right to left through the machine. Two hundred twenty times.

Oh, and did I mention? In order to maintain pressure and keep the thing moving, I went hand-over-hand as I fed the board across the table. You might be surprised at how much of an upper body isometric exercise this turned out to be.
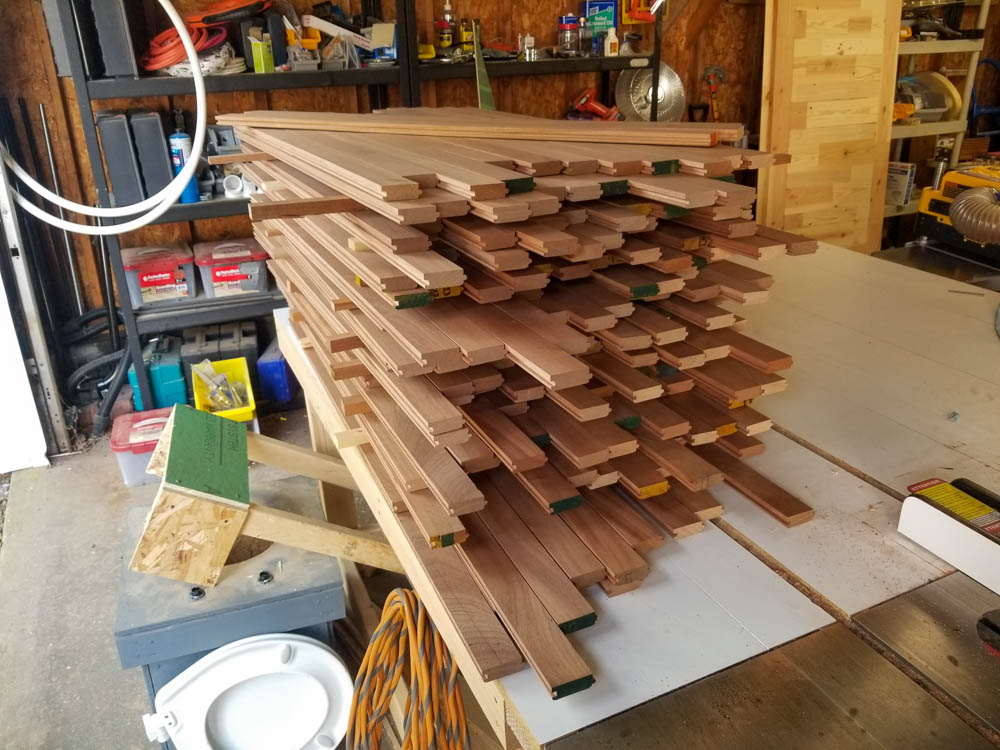
But after all that, two hundred twenty times, I had this lovely stack of boards with that interlock profile on the edge. Of course, I had to do it all again to get the mating interlock profile on the other edge… of every board.
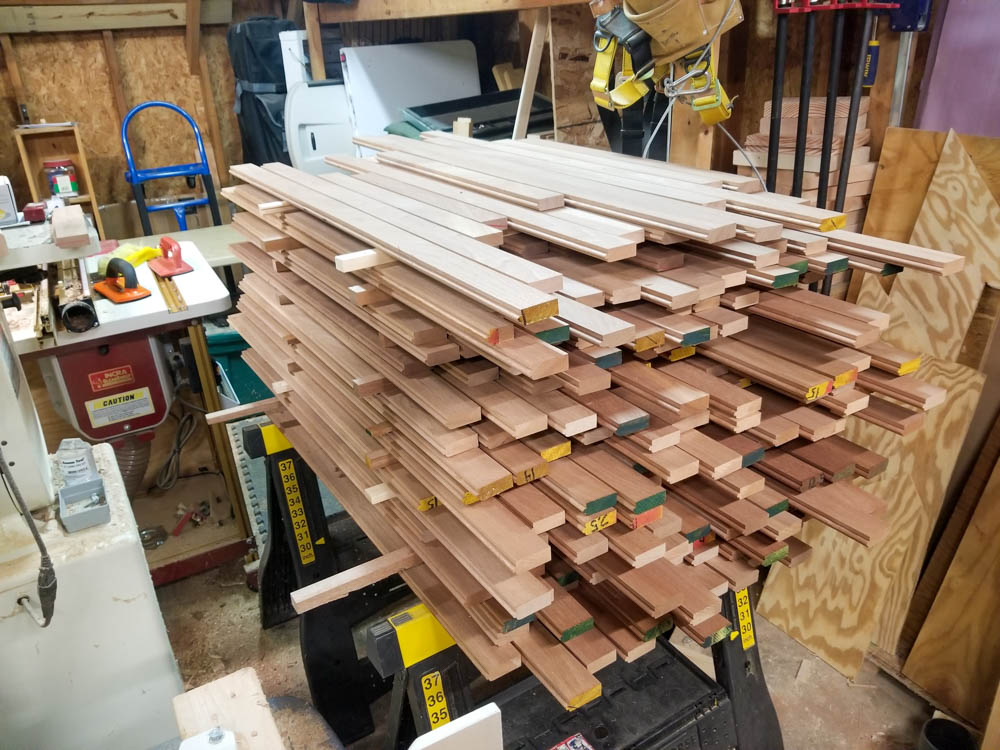
At last, done. All the boards are formed for interlocking flooring. They are, however, all approximately the same length, give or take, and that is going to be a problem for installation, which both looks and happens better with random lengths. I’ll take care of that as I go.
But before anything can be done… well, you know.
In this case, the thing that must first be done is to get all the junk off the subfloor, sweep it, check for (and remedy) level issues, and apply underlayment.
I did find a corner sticking up, actually. It turns out that the screw holding down the corner had somehow sheared off and thus wasn’t holding down the corner so much as simply filling the hole.
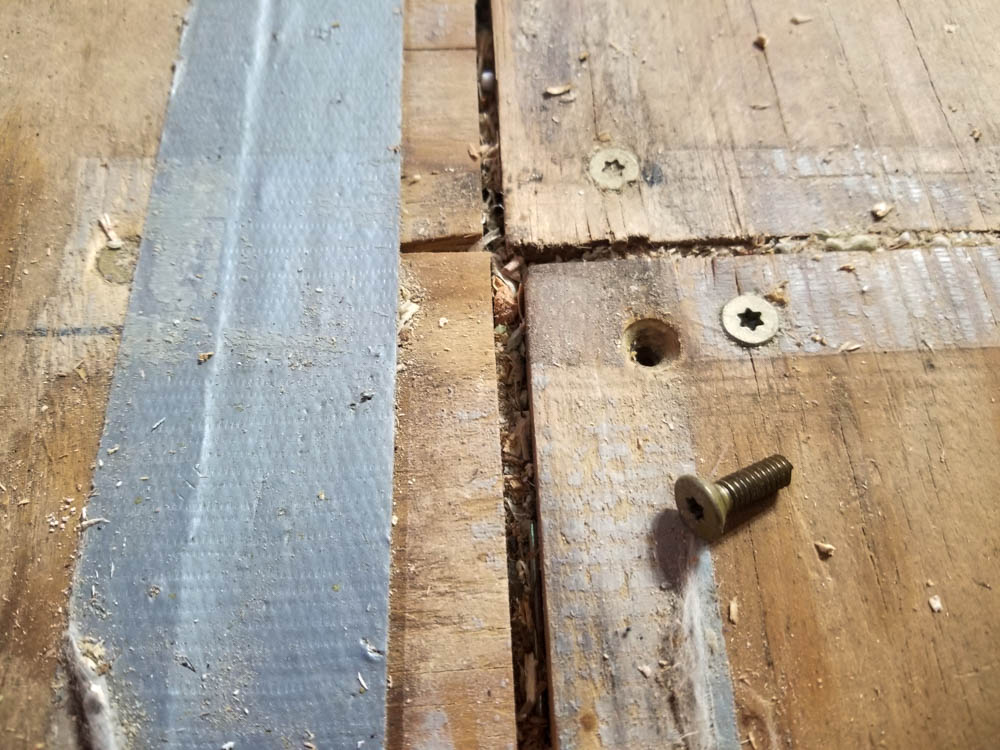
You might be thinking, wow, that’s pretty rough looking subfloor. And you’d be right. Part of the discoloration is from formerly-present duct tape which had been sort-of sealing the joints, but there was definitely some water damage in the early days between the installation of the deck (which had to precede the walls which had to precede the roof which keeps the rain off) and the installation of any kind of roof-like thing. This subfloor has also taken three years of my traipsing about, the occasional dropped tool or lumber, etc. It was never meant to take that kind of abuse for so long, but it did, and admirably so. And in the process, got a bit beat up. We’ll take care of that soon. Meanwhile, though, I drove a new screw in to pull the subfloor back level with its neighboring panels.
Floor swept and newly level (enough), it’s time to install the underlayment. This is some high density foam sheeting that serves both as a final vapor barrier (though the rigid foam blocks under the floor probably do that for me anyway) as well as cushioning and largely de-squeakifying the hardwood boards which are soon to follow.
In an ordinary rectangular room, it’s no big deal to unroll the stuff and cut it to size. In my tiny house, of course, there are the wheel boxes to negotiate as part of the scene. Also, lots of tools and parts are stacked up on both of them, making what would be simply unwieldy some other day into a game of don’t-topple-the-tools.
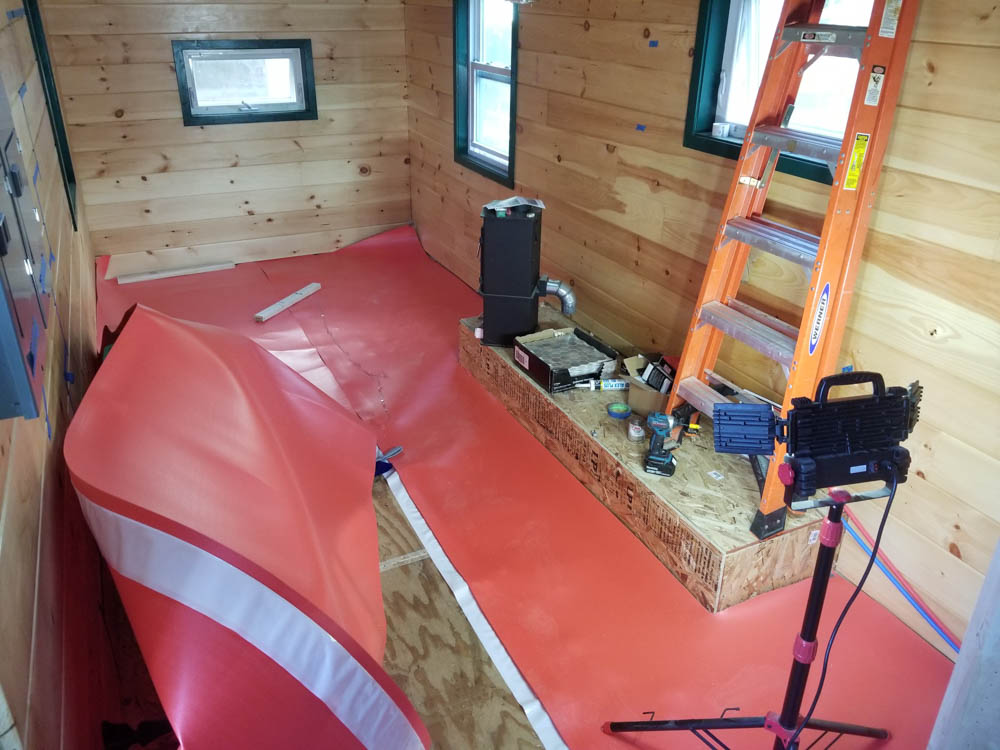
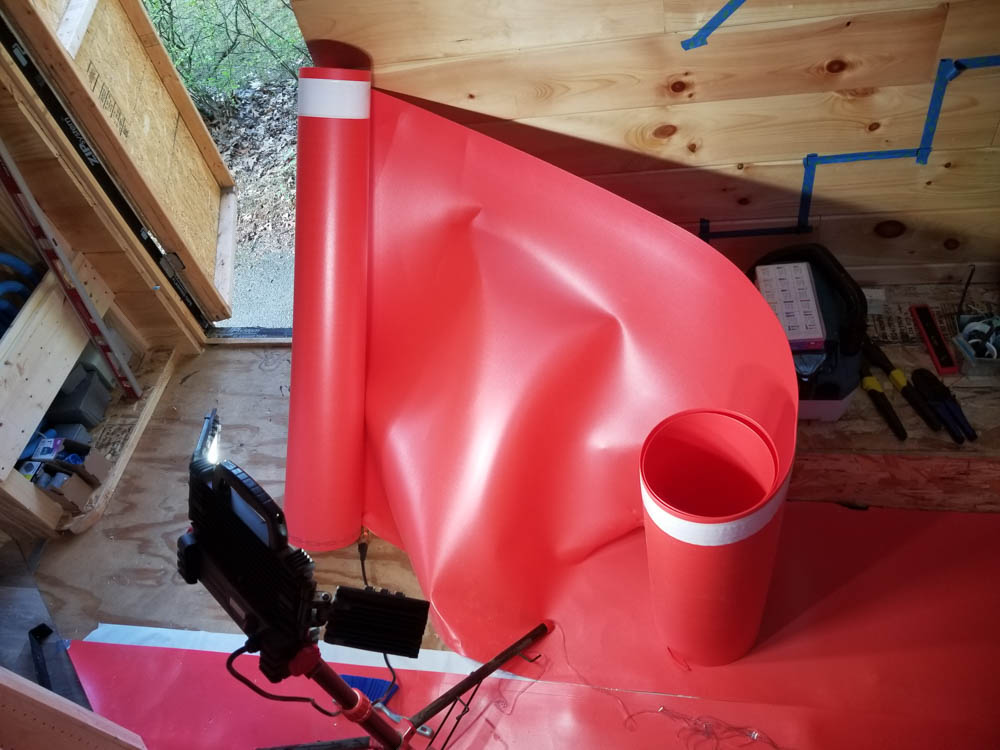
The fun increased at the far end of the wheel box where I had the off-cut from what would have been over the box as well as the loose end of the roll (that wanted to roll itself back up) to contend with as I was trying to fit the underlayment around that last corner. It seems only moderately inconvenient in this picture but remember I’m actively doing stuff and these two end-rolls are free to move and they do — a lot — pulling everything with them as I try to make careful cuts.
And finally, it is done. Without flooring to hold it down, though, the underlayment wants to curl back up and make a nuisance of itself. I tried taping it to the walls but that didn’t work so well. A couple of scraps of lumber, a PEX crimp tool, and the feet of my jobsite lamp did the trick well enough.
Okay, okay, is it time to actually install the flooring yet? Is it? Is it??
Yes.
The first few courses are too close to the wall to use the purpose-built flooring nailer, so this finish nailer will have to get things started. Plywood shims around the edges set a 1/4″ gap to allow for seasonal movement.
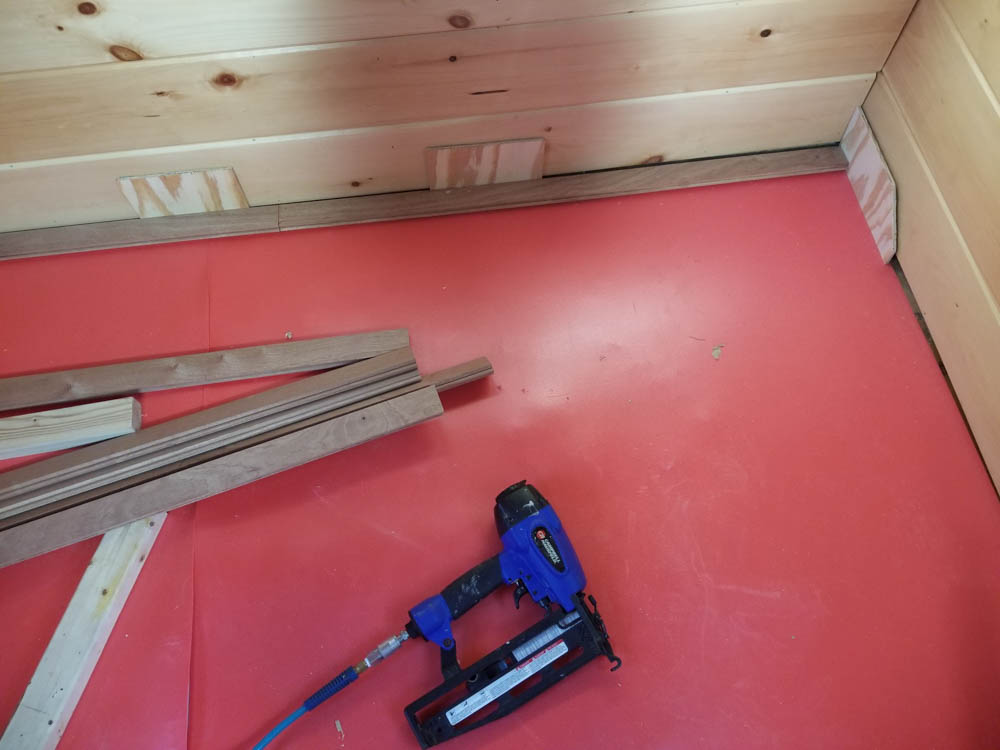
The finish nailer is really the wrong tool for the job, though (that’s why there is a flooring nailer), since it is very hard to align with the proper place to nail (just above the tongue) and hard to get it to set the nail fully deep there. I have to hand-set pretty much all of them to be flush enough not to interfere with the next course. Needless to say, I am eager to use the proper tools as soon as possible.
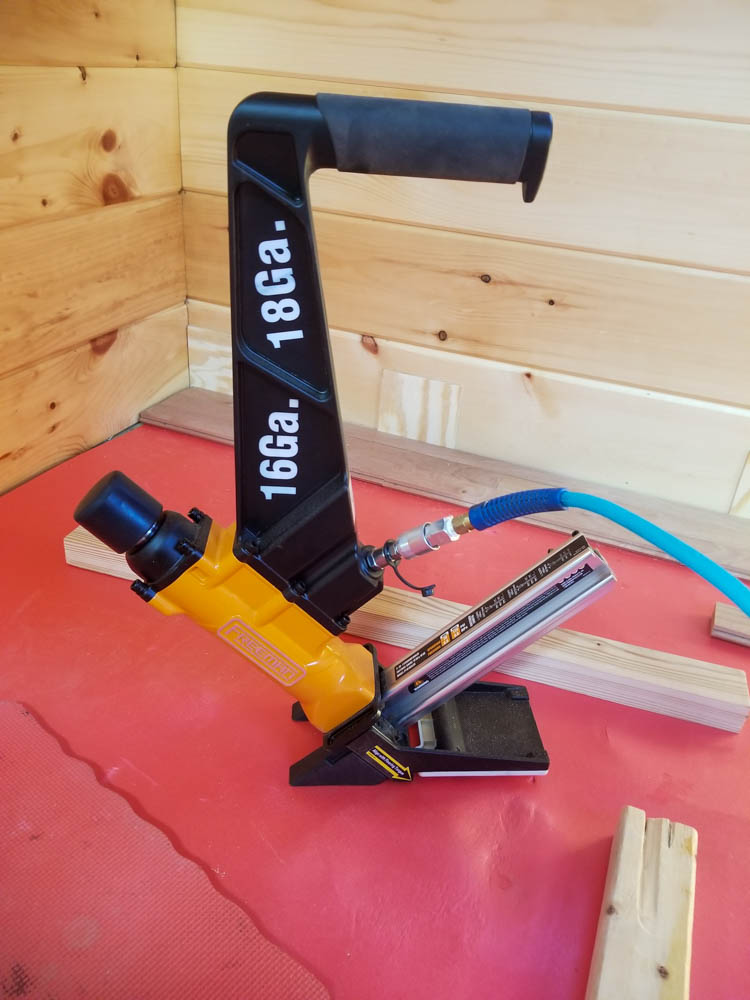
This monster is the proper tool. You’ll notice it is already at the right angle to drive the nails. Is also has this special foot which aligns perfectly with the lip on the floor boards, getting that nail exactly where it needs to be and sets it perfectly flush. Unlike other nailing tools that have some kind of trigger, this one you actually strike with a mallet on that knob on the head of the yellow chamber. Why not just have a trigger? I wondered about that. Well, aside from it being inconveniently low — this tool can be operated by a medium-height person standing upright and a tall person (me) stooping a little — the hammer action also gives a hefty nudge to the board being installed, ramming it into the one behind it just as the nail is driven to hold it there. This means the nail doesn’t have to do the pulling together, the hammer blow does. The machine drives the nail (fed from the angled magazine) at the perfect angle and placement. A bit odd, but it totally works.
Speaking of a bit odd, the nails it uses are unlike any I have seen before. They’re called “L-Cleats” and look like this:
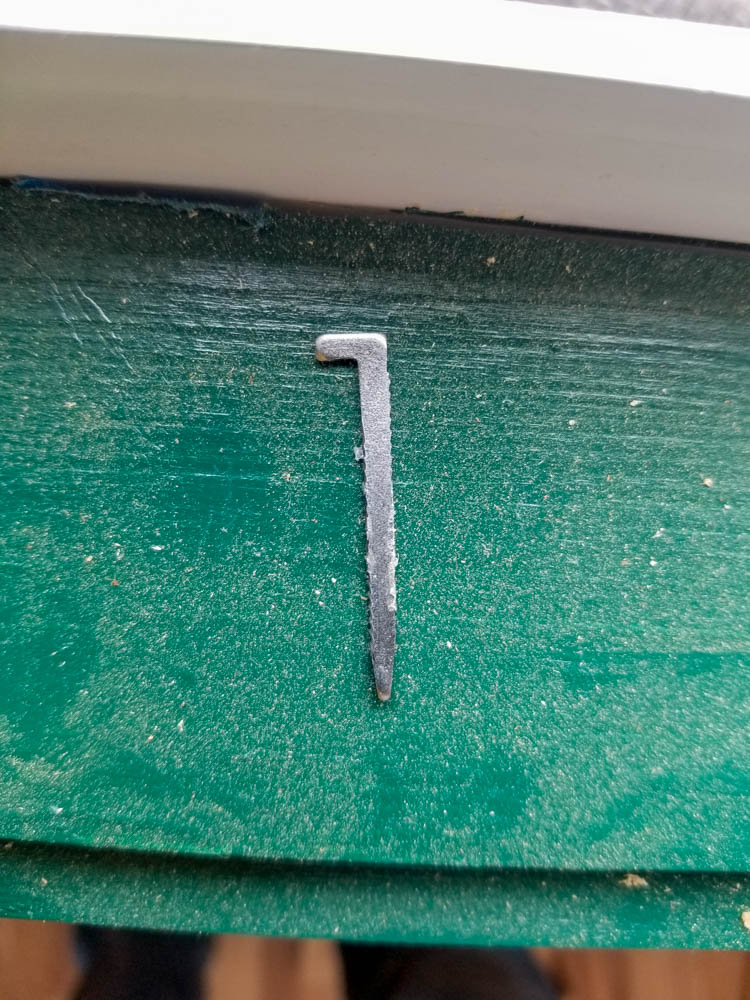
Since a proper nail head would get in the way of the interlocking features, these have a tang that sticks out to the side, grabbing the wood next to the nail shank. Having never laid a hardwood floor before, these were new to me, too, but I totally get why they are how they are. Clever, actually.
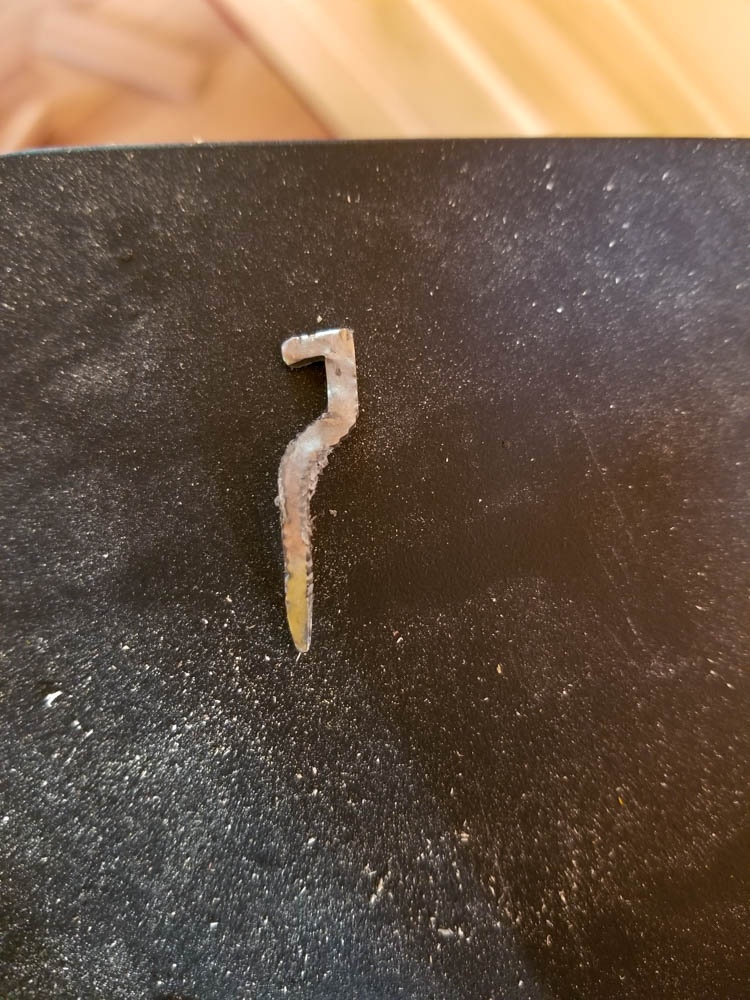
Sometimes, though, they don’t go in quite right…
Usually this is due to accidental double-firing of the nailer, attempting to drive a nail over another nail. It makes a cute question-mark as if to ask, “Dude, why’d you do that?”
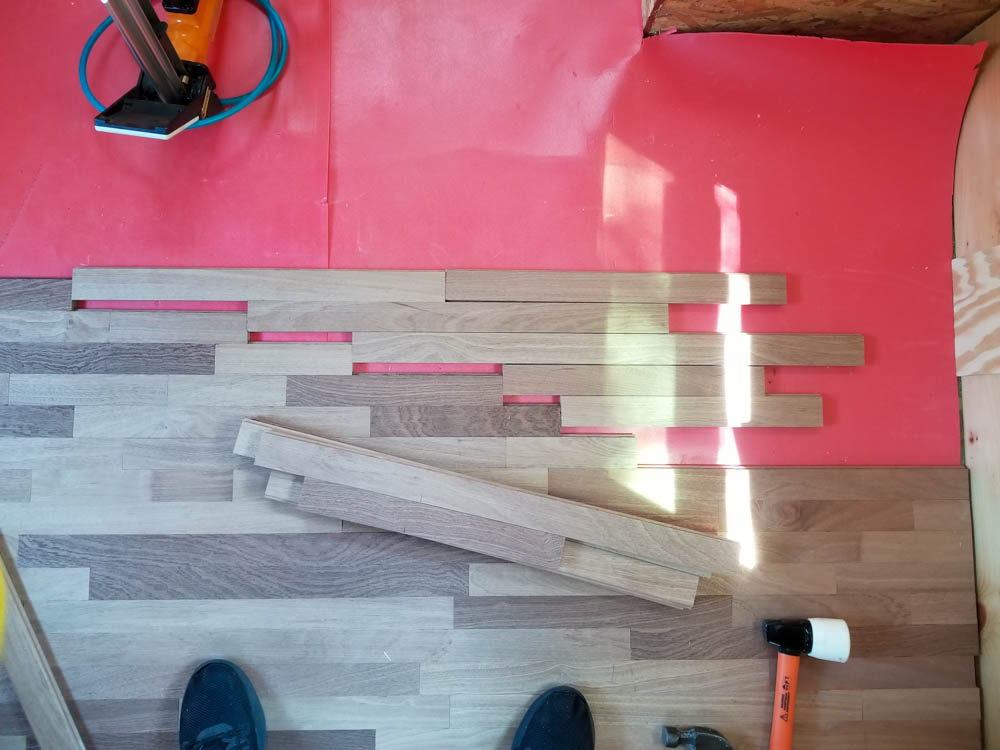
I remembered a trick from when I was doing the siding, which was also a multi-course tongue-and-groove installation. I can actually work multiple courses at a time as long as they are staggered at the start. Indeed, they don’t even need to be strictly stair-stepped to do this, any random arrangement is fine. I then continue the lower course as far as I can, followed by the second course as far as I can without locking in the first, etc., then measure for all the remaining stubs and go cut them all at once. When working on the siding, this was especially important, as I was on the ladder for most of it and coming down to do cuts was time consuming. If I could do four or six cuts per trip down the ladder, all the better. In this case, because I could lay things out loosely, on the floor, I could do even better. When I got as far as I could stacking courses (shown below, six courses stacked, nailed in), I then simply laid out additional boards to complete the course as far as I could without hitting the wall (shown here as the offset boards). These boards don’t get nailed in yet since to do so would make it impossible to nail in the final stubs to the right because they all interlock. However, I can dry fit them to get close to the wall and then take measurements for each course to know how long a stub I need.
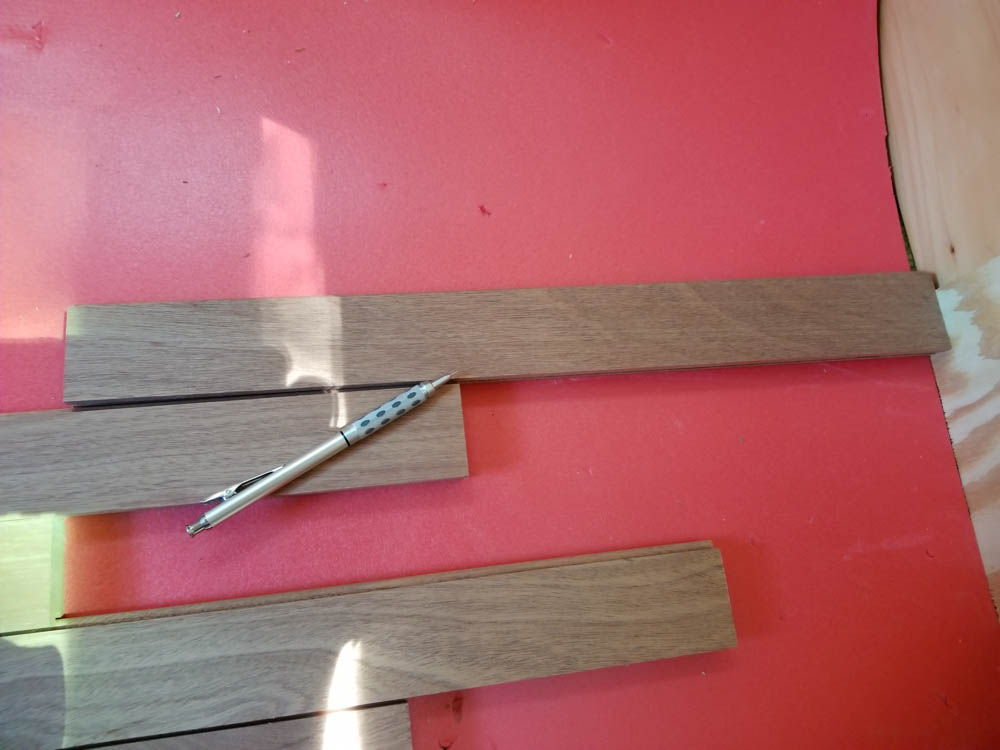
Here, I lay a board across the final course and make it flush to the (shim on the) wall on the right. Now I know exactly how long the stub for that course should be and I mark it with a pencil on the board and write #6 on the back (this is the 6th course of the set).
Next, take all six boards to the chop saw and trim them to size. Then bring them back and put them where they go, one course at a time.
Presto! Perfection. This really speeds up installation, as I am not constantly going to the saw for every course one at a time. It also lets me make the best use of the random length pieces I have at hand, as I can puzzle them all around to see what looks and fits best across the multiple courses I am working at any given time.
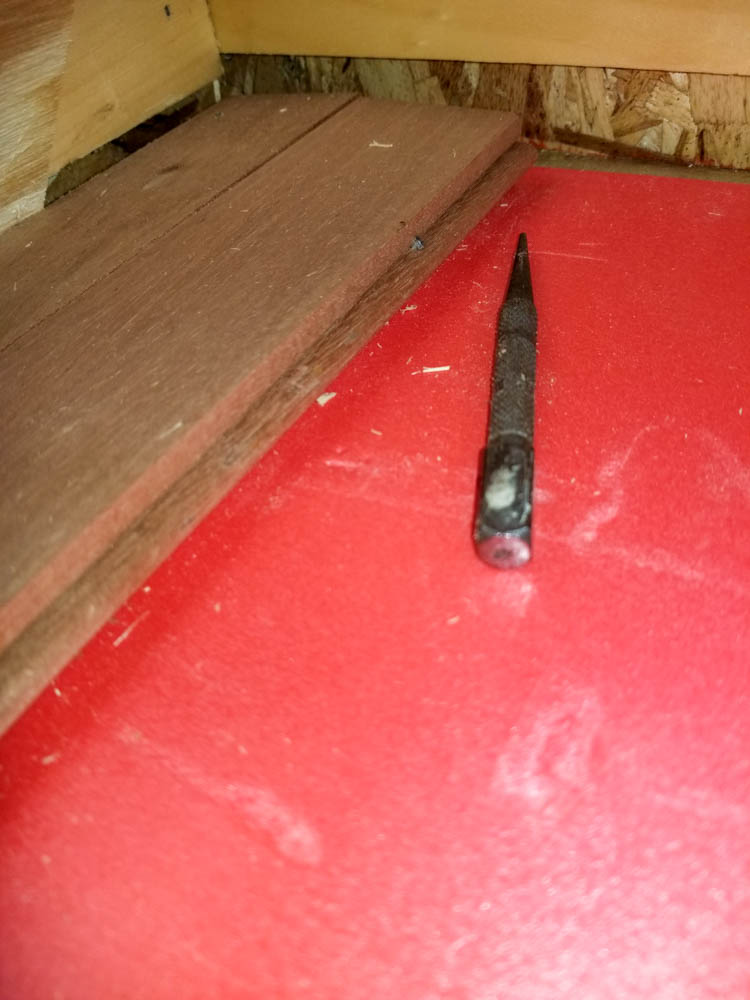
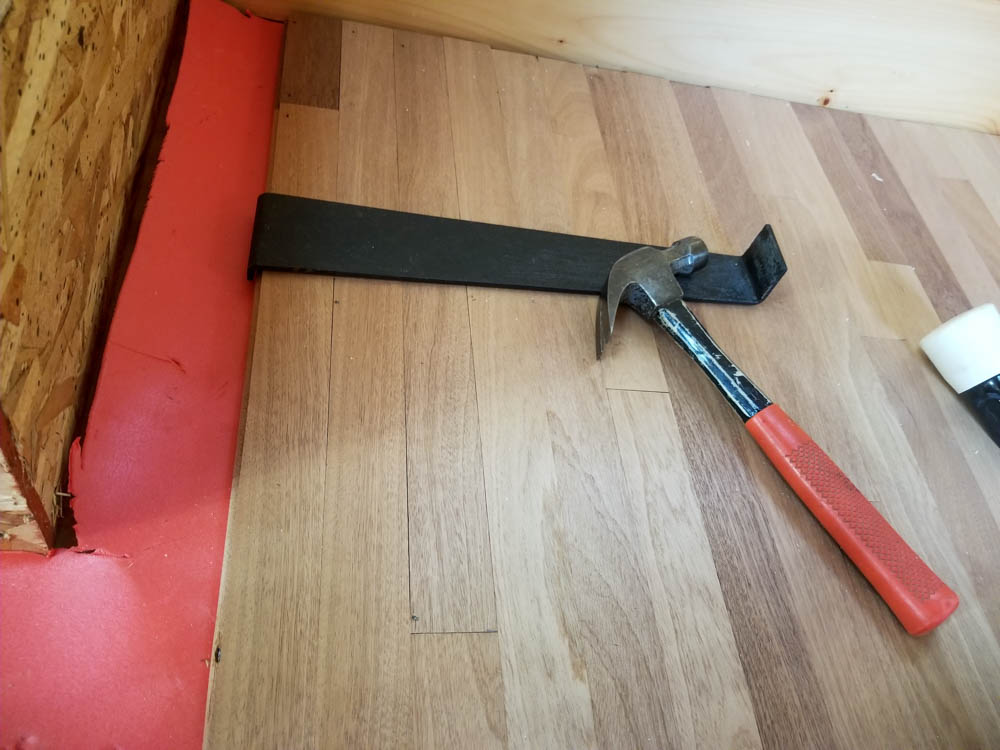
Close to the wheel box, the big floor nailer won’t fit. This also means the hammer technique that rams the boards together doesn’t apply. Conveniently, I have this flooring pull bar which is purpose-built to solve this problem. It grabs the edge of the board and provides a strike plate for a hammer at a suitable offset so one can actually swing the hammer. Because the flooring nailer doesn’t fit here, I have to go back to the finish nailer and even then, the fit is too close to get the nails concealed after a couple of courses.
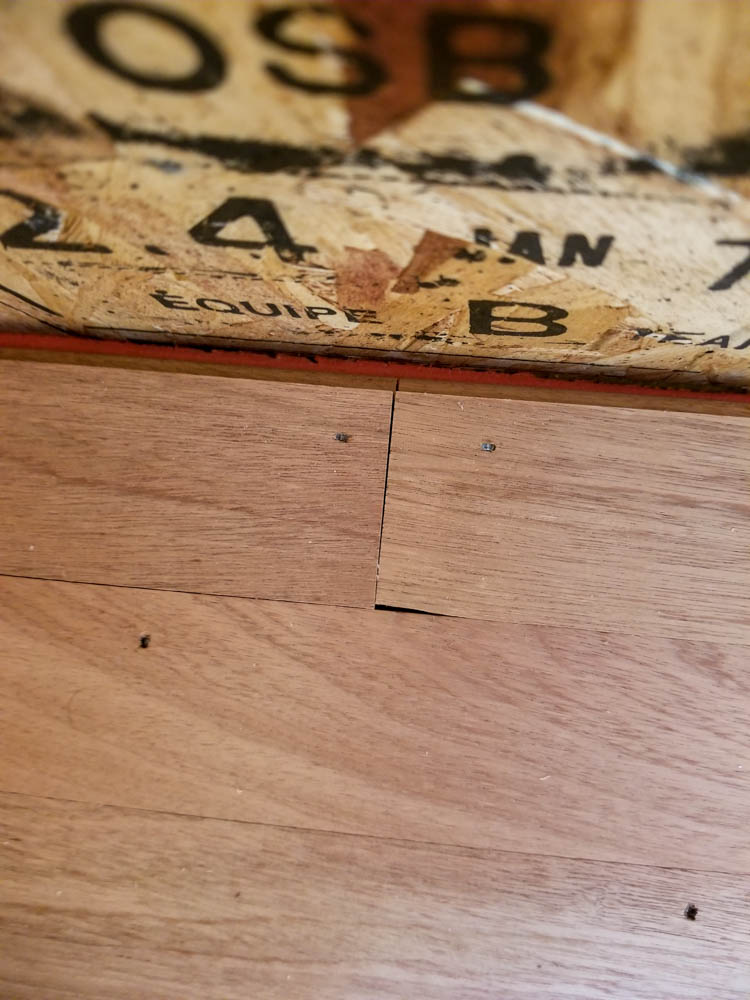
The consequence of that is I must face-nail (the ordinary way you nail stuff that isn’t flooring – from the front/top) these last few courses. The finish nails are small and are sunk below the surface. I’ll need to fill these holes with a little bit of wood filler before applying the finish.
In what has been a long series of challenges, every once in a while, I get lucky when building this house. Shown here, the last course of flooring just before the wheel box just so happens to fit perfectly without needing any additional rip cuts.
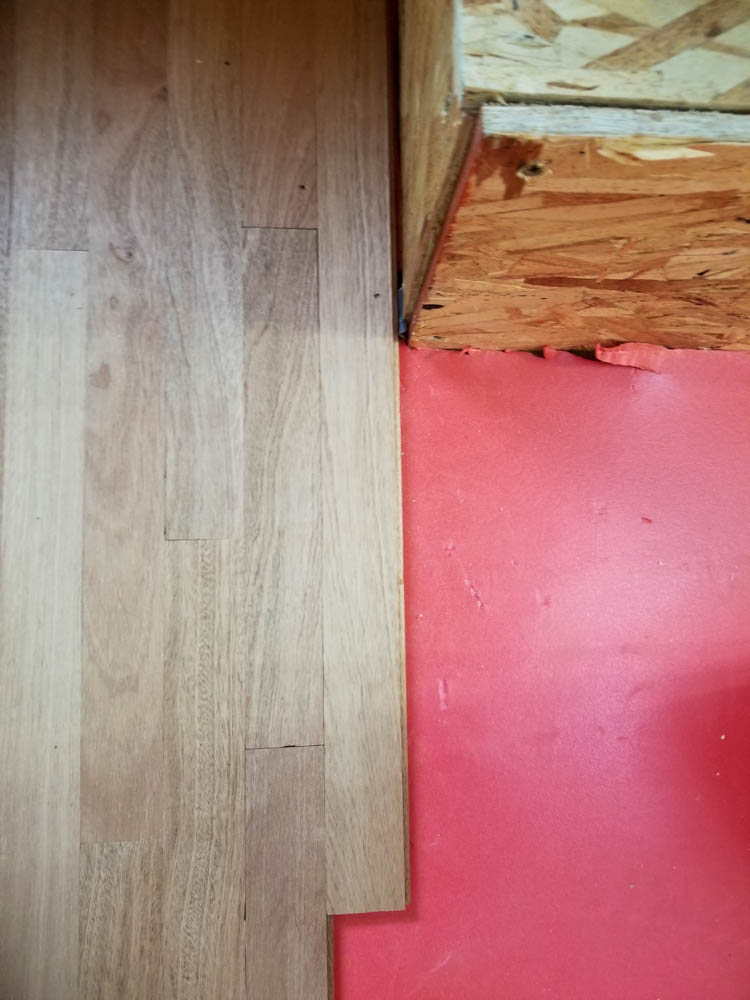
As it turned out, the other wheel box, being slightly offset for no apparent reason, did require a rip cut to get its last course in snugly. Ah, well, luck will only take one so far.
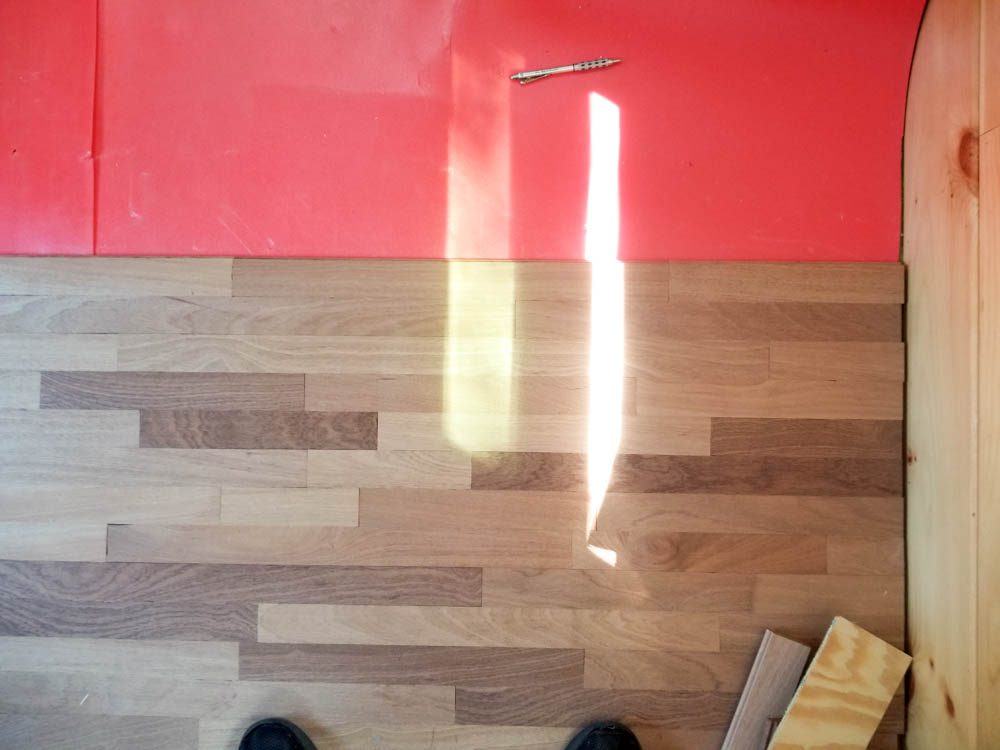
And voila, this is how much floor I managed to get installed before the fatigue of the last few days of intense woodwork followed by stooping and bending and hammering finally made me call it quits for the weekend. It’s just under half the length of the house, though a good 2/3 of the length of the actual wooden floor, as the T.H.R.O.N.E. Room has its own floor already.
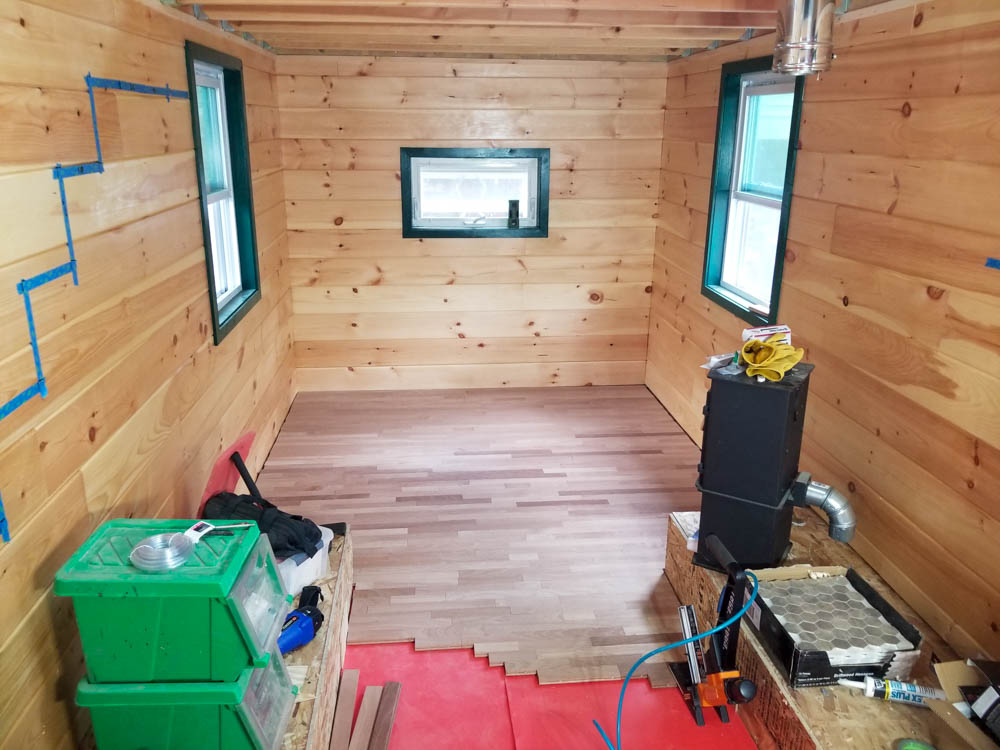
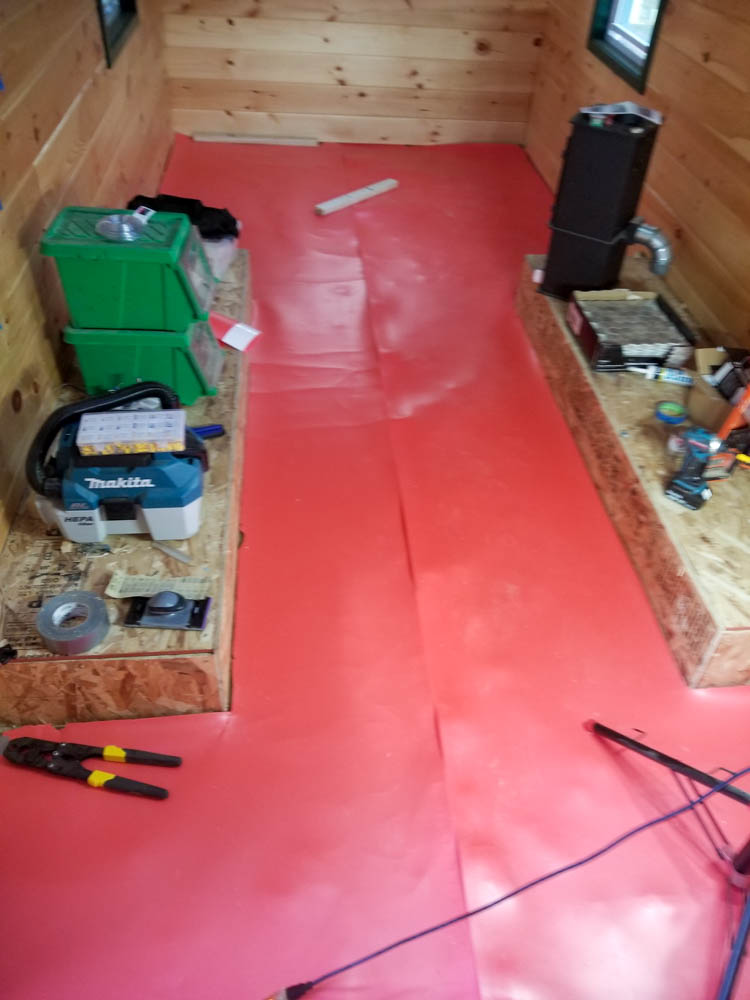
Here’s what remains (everything in red) — and in this view, you can see especially well all the stuff I had to negotiate around while installing the underlayment around the wheel boxes, too.

That big fan helped, but at >85F and humid today, even with HomeBox’s excellent insulation, it was definitely hot in there while I was working, to the point where I worried that I’d leave salt stains on things with all the sweat. Charming, I know.
Lastly, here’s the latest video tour featuring the T.H.R.O.N.E. Room mural, flooring, and a bonus tour of my workshop, where all this stuff gets made.