For every vision…
…there is an equal and opposite revision.
Today’s update is brought to you by the letters “C” for change (and conduit) and “R” for revision (and frustration).
But first, let us speak of things that actually worked out okay and the first such thing is an experiment for the tansu stairway I was talking about a couple of weeks ago. I had it in mind to make the stairway out of 18mm cabinet grade plywood, which is simultaneously extremely strong, good looking, and not overly thick (this is 18mm stock). Before committing a few $100s to materials and a day of labor, though, I wanted to know if the thing would take my weight (about 250#) on the open spans as I intended to build it. The pink arrow shows the weakest point in the system. The greatest stress on that point is when I step on that upper tread and put my weight toward the outside.
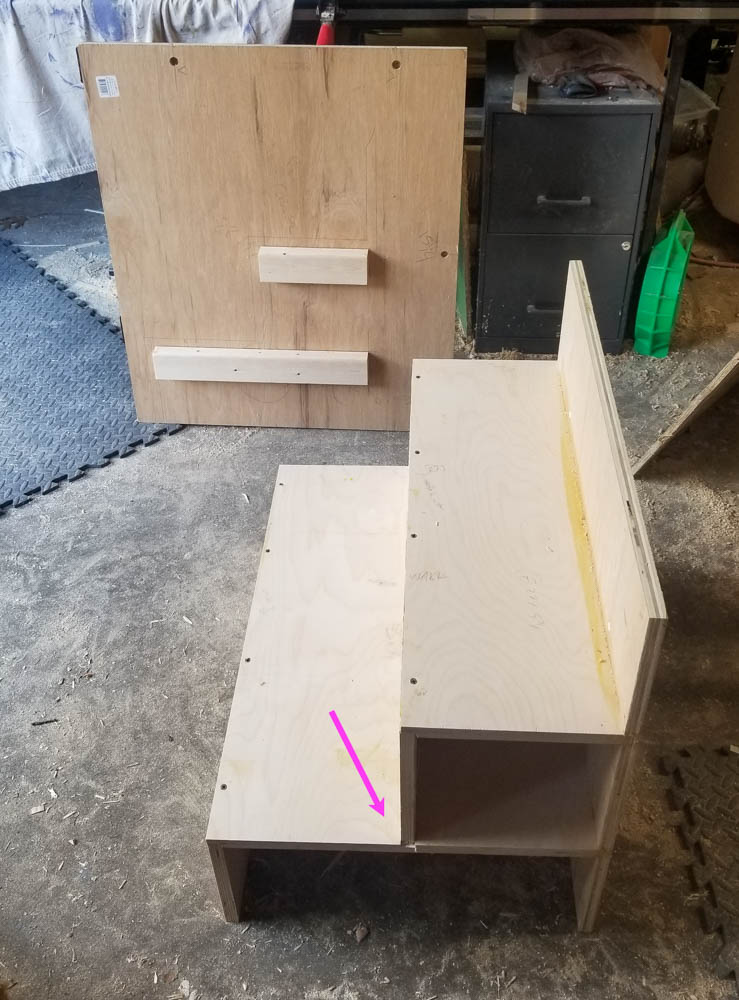
That panel in the background is standing in for the wall. Its job is to hold the cleats to which the treads are fastened on that side. That lends them some extra staying power, too, because physics. So I did the test and had M hold a close-fitting piece of wood just under that arrow to see if the tread deflected enough to make it tight-fitting. This, I thought, would be far easier than trying to hold a tape measure or some other gauge down there at ankle level — and just in case the thing collapsed destructively, who would want to have their face in the middle of that? Exactly. So a stick of wood and a quick grab-test it was. It turns out the stair was indeed quite sturdy and took my weight no problem, though there was enough deflection – maybe 3/16″ – to give me pause. I’m sure it will hold but don’t want it impinging down on the drawer fronts. I think the answer is simply to double up on the horizontal sheet goods for those spans. If the single thickness was almost good enough, double should be plenty fine (the two sheets would be glued and screwed together for stiffness). I’ll have to see if I have enough material on hand to test this.
I also bought a set of router bits for making my own flooring from square-edged stock. No pictures for that, but I can tell you it worked fine on a scrap of maple and the plan to fabricate my own floor boards is a go.
And now… on to our main theme for today: revision!
The water heater arrived recently, at long last. My original intention was to have the water heater live under the counter in the kitchen. Like this (base cabinetry and counter are for you to supply with your imagination). That big box on the right is the water heater.

Looking at this, I realized that once I add the stove/oven and the space heater, that entire under-counter area will be spoken for, if not actually over full. No bueno. M asked if the heater could go in the SUL. Hm. Maybe? Let’s take a look.
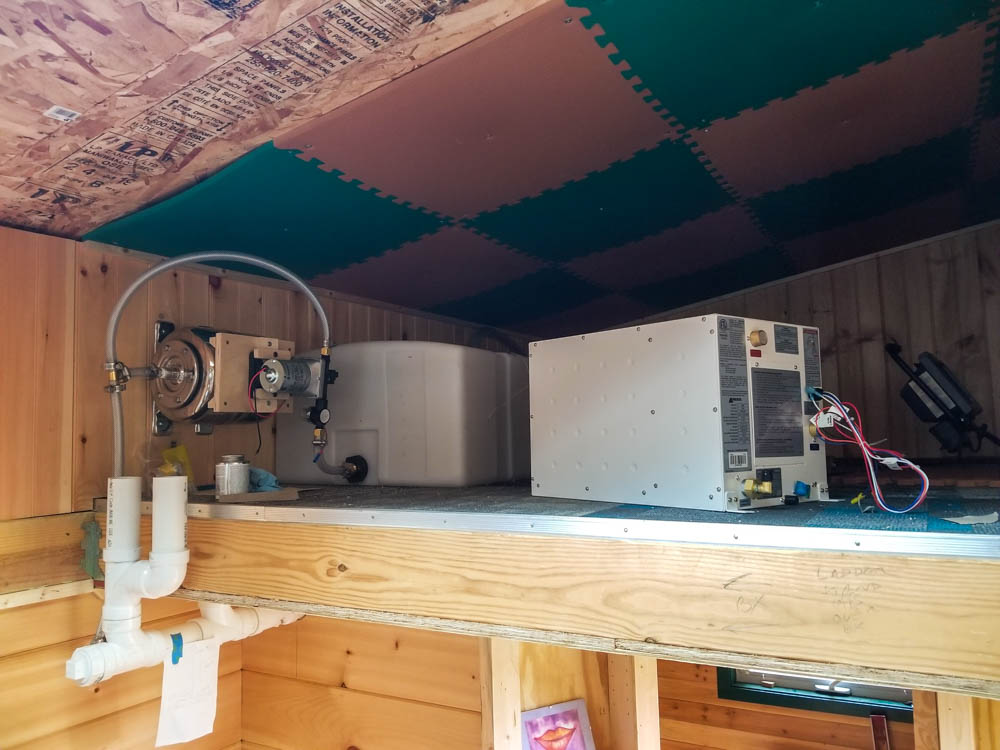
The only sane place to put it would be right there where the pressure pump & accumulator tank are mounted to the wall. That would be a pretty good place for it, actually, where it could tap into the cold water supply readily, its vent could go right through the wall, and it’s a good use of that cramped space. But of course the pressure pump and accumulator tank are there already and I had no plan to get propane up to the loft. We’ll get back to that in a bit.
Meanwhile, as I contemplated the power system, I realized that I had not properly accommodated the feed from the backup generator in my conduit plans from the Propane Porch (where all the utilities enter) up to the loft. There was no route for the generator feed. Sure, there was conduit run already, but there wasn’t really room to also run the entirety of the generator feed (four heavy wires) in a single conduit and splitting it between the two runs in place seemed like it was asking for trouble/confusion. Further, the two runs were closed and had no easy way to inject the generator wires anyhow without some major revisions. Okay, then, major revisions it is.
First, remove the two runs of smaller conduit and replace it with a single run that’s big enough to carry everything that goes in and out of this area. Shown here, the new larger conduit approaching from the left and the stubs of the two smaller ones floating in the air. The new conduit is only 1/4″ bigger, but that’s critically enough bigger to make everything fit. What comes next is I have to wait a couple of weeks for parts to arrive (yay supply chain disruptions due to C19) to then install a nexus box where the two blue lines (going to exterior junction boxes, one for the well pump and one for the solar array) will come together to then feed the bigger conduit. But what about the generator? That hookup will be on the other side of the wall at marker G. It will have its own blue flex conduit coming through which will also meet at the nexus box. Now all three junction box feeds come together where they can neatly enter the conduit that goes up to the SUL. There are a few nice things about this. First, the holes in the wall were accidentally drilled too big and the bigger conduit fills (one of) them better. Second, of the two conduit holes already drilled into the T.H.R.O.N.E. Room (to the left), one is now vacant and can be re-purposed for propane. I was going to drill yet another hole for that but now I don’t have to because I had two.
While I was in here, I converted another error from long ago, the hole at marker V, into something useful. With a screen on it, this is now a safety vent, in case any propane might leak. Propane is heavier than air, so it would fall to the floor if not properly confined to plumbing. With the vent, it can just exit and disperse rather than accumulate (dangerous) in this compartment.
So now that there’s just one electrical conduit from the Propane Porch, I can use the other hole in the ceiling between the T.H.R.O.N.E. Room and the Storage/Utility Loft, formerly for the second conduit, for the propane line, now that I will need propane up there to run the water heater.
The water heater in place, but not plumbed or wired in at all — I’ll need to re-do a bunch of that interconnect given their new positions/orientation and the introduction of the water heater. The FW tank now really crowds the junction box on the wall. There’s probably still enough room to get in there, but not easily. Of course, it wasn’t easy putting it there when the freshwater tank was in its original position, either.
This is me doing that, before pushing the tank closer.
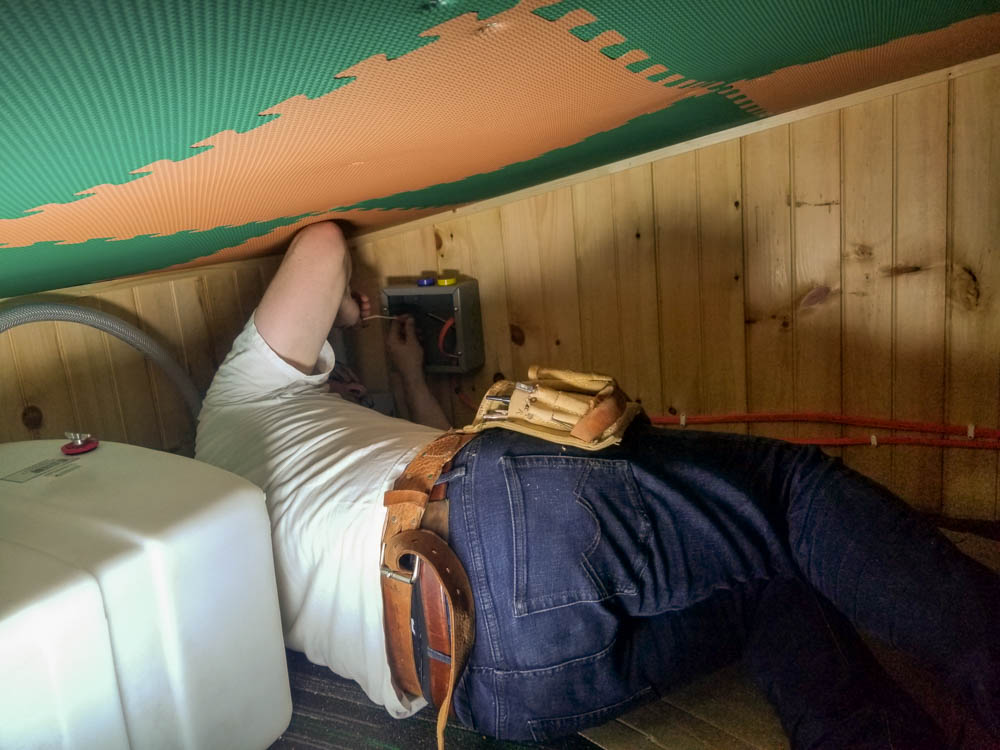
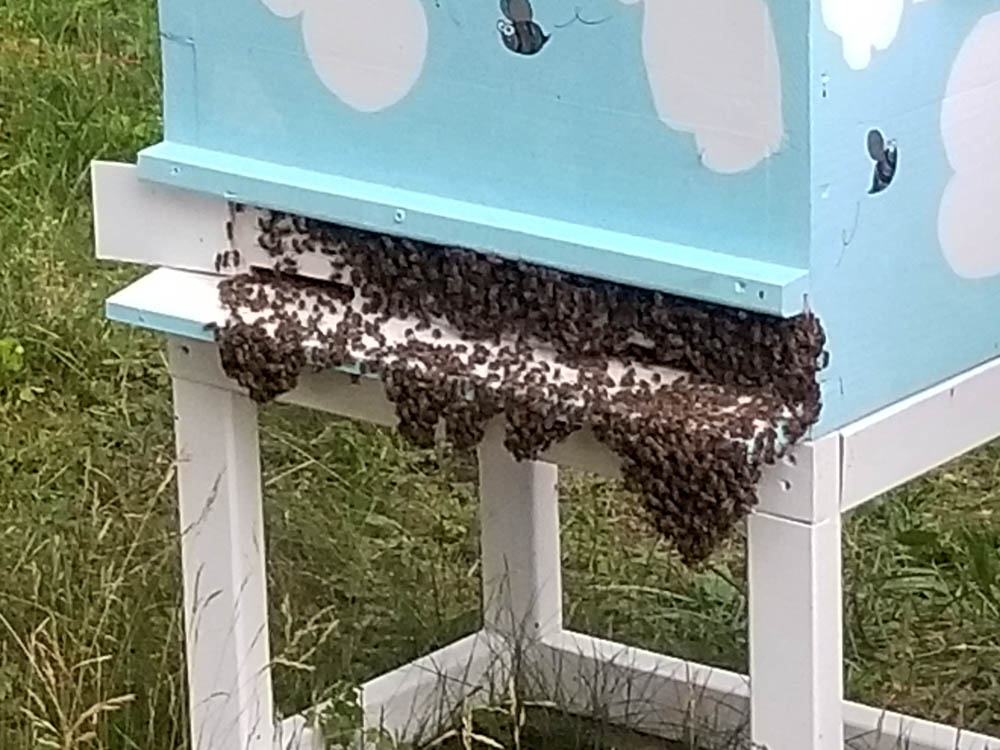
Besides being cramped, it was also hot. Today was 86F in the shade. The HomeBox has good insulation, but for now, all the windows were open, and the SUL is the only place inside without ventilation (I’ll fix that…). How hot is hot? So hot that even our bees didn’t want to be inside.
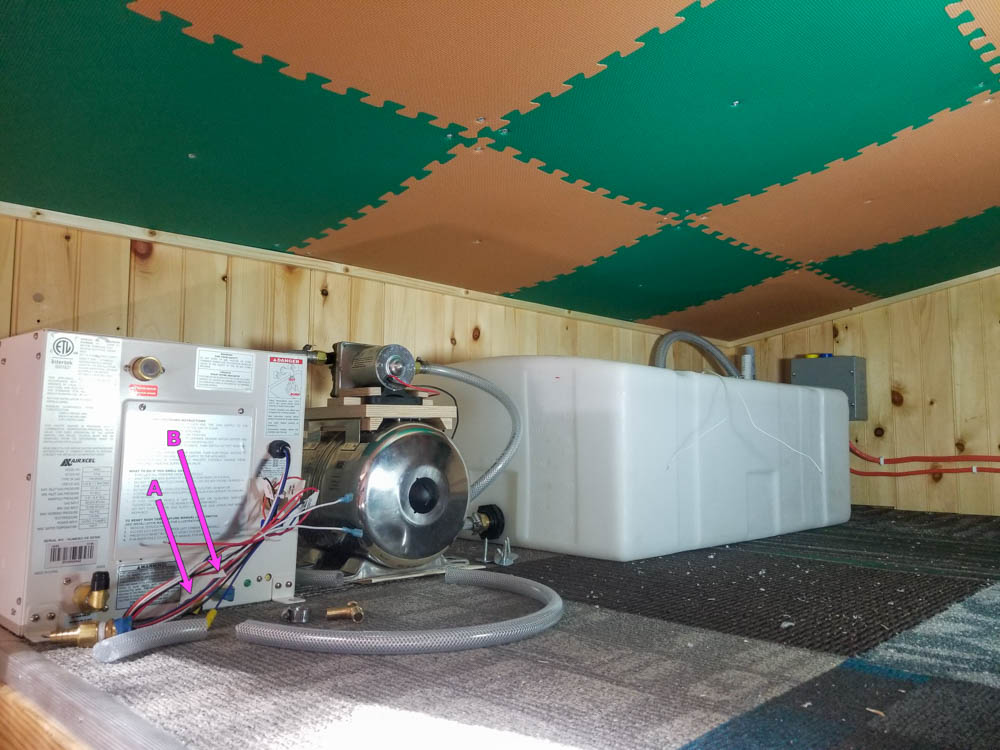
So, what’s that junction box about, anyway?
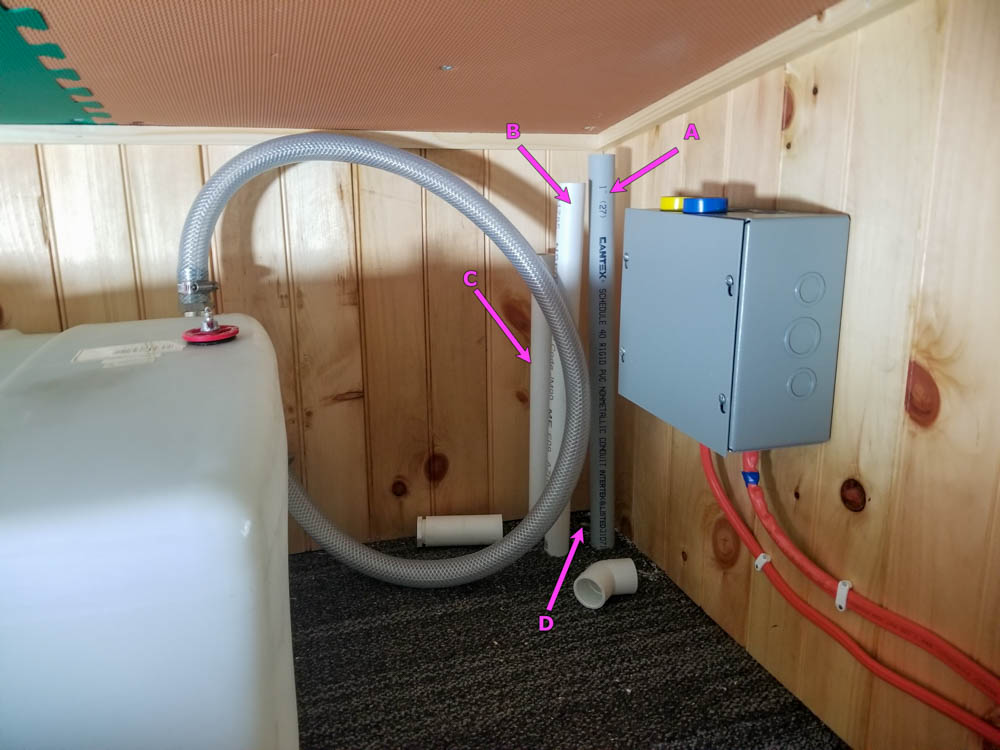
This is where the pipes/conduit come up from the T.H.R.O.N.E. Room. The pipes/conduit have not been cut to length yet. They’re waiting for additional parts to arrive which will drive their final sizing as I get everything hooked up properly.
“A” is the electrical conduit and it will connect to the gray box. The conduit has the generator and solar feeds, which convert to ordinary wire in the box and are routed from there to the power center (orange cables exiting to the right). It also has the well pump feed, which will be turned on and off by a thing. That thing may or may not fit in that big gray box. If it does, it goes there. If it doesn’t, it goes in another gray box to be mounted next to it. The supply for the well pump comes from the AC breaker box (first floor, by the door) and will arrive here following the same path as the orange cables. The on-off widget will interrupt the power for the pump accordingly, and pass it on to the conduit to bring it down stairs to the front of the Propane Porch, where there’s a junction box on the outside just waiting to be hooked in to the actual well pump. Obviously, that doesn’t happen until there is an actual well pump. But for now, I can at least wire it up all the way to the junction box. How do I know what to wire? For good measure, I’m allocating a 240V-20A circuit. I’ve done some research on well pumps and ones good for >400ft of lift run at 240V/12A, so I’m confident this circuit will handle whatever my actual well pump winds up needing. If it needs less, or just 120V, no problem, just cap off one of the hot feed lines.
“B” is the gray water riser. It will take a turn to the right and approach the in-ceiling gray water tank, the inlet for which cannot be seen here.
“C” is the fresh water riser. It will connect to the fresh water tank via that reinforced hose. It was actually already connected before I started moving things around, the doing of which necessitated removing the previous fresh water riser, so I ran a new one and haven’t yet sized it nor attached the fitting and the hose.
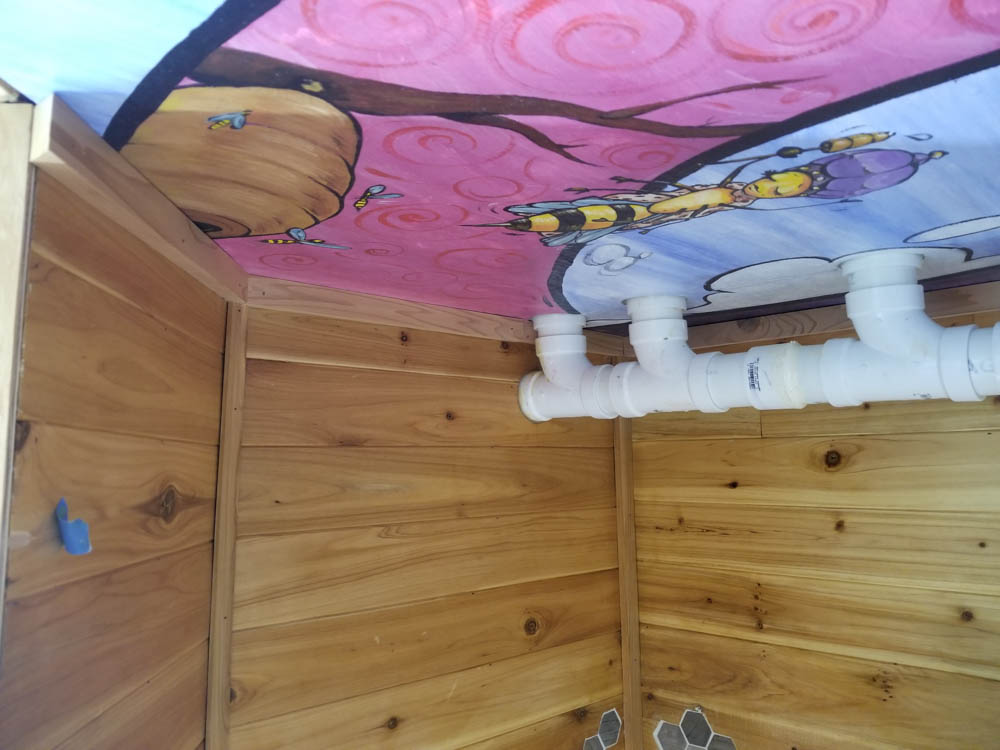
“D” is where the (newly arriving) propane line will emerge. It will travel along the top of that short wall to the left where it will approach the water heater and branch off to the first floor to feed the stove and the space heater. It will have the hot & cold supply lines to keep it company.
Before we leave the SUL, I wan to to show you something.
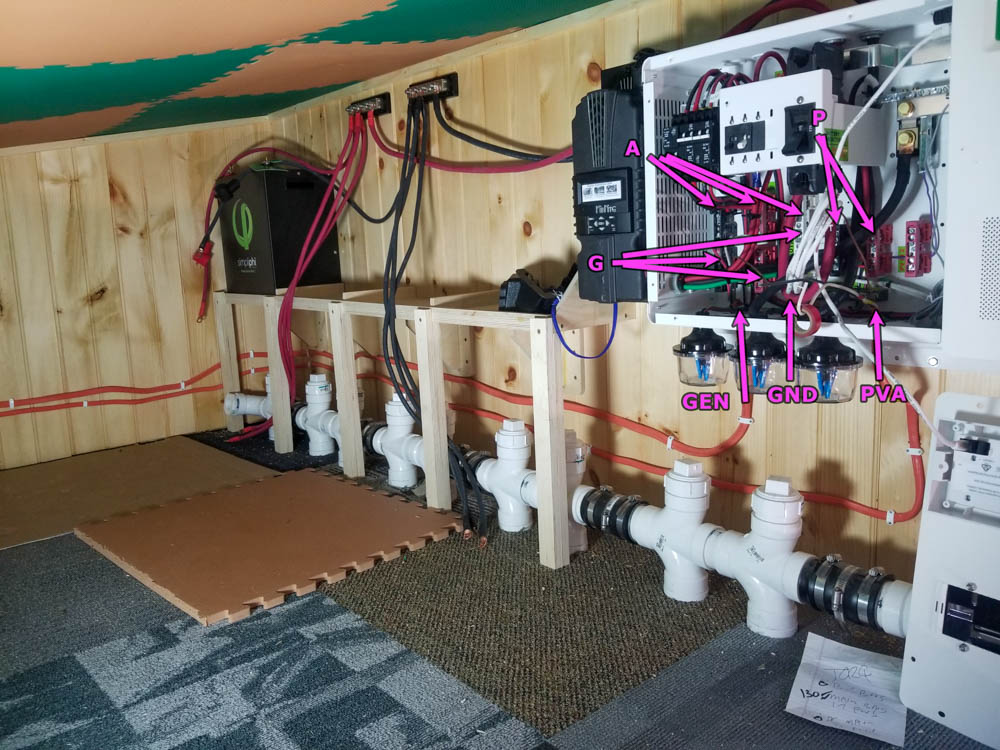
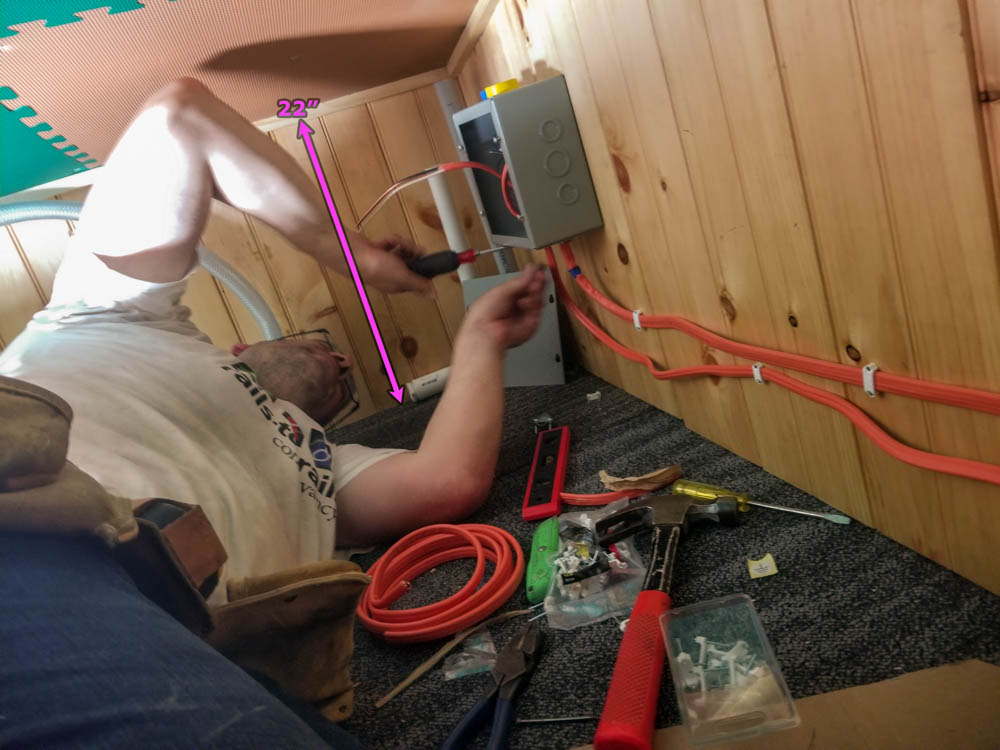
There’s a lot of “fun” in this picture. First, you can see the orange cables from the conduit junction box coming into the power center. Now take a moment to think about how much fun it was to hammer in those wire staples (white bands, not all of which can be seen) behind the battery bank shelf legs and trying not to hit the pipe heads. Speaking of pipes, the graywater inlet, previously mentioned, can be seen here at the far corner, under the big black battery module, pointing toward the conduit/pipe arrival area.
More fun: see how crowded the power center is? Now imagine the fun it will be to hook up the 4 wires from the generator cable (enters at “GEN”) to the three points indicated by “G” and then also one wire to “GND”. Now think about the feed from the photovoltaic array (a/k/a “solar panels”) which enters at “PVA” and has to arrive at the two points marked “P” and also one wire to “GND”. But the most fun comes with the cable that isn’t even run to the power center yet, the AC line to the breaker box that will run the house appliances. That one is like the generator, with three wires to “A” and, like everybody else, one to “GND”. There is seriously a lot going on in this thing. And I thought the power center was big before I got started. If it were 30% bigger, it wouldn’t be too big.
If I’d wired this whole thing myself from the start, I could have had a better time getting some of this done, being able to carefully layer everything as I went, but there were good reasons to buy it mostly pre-wired (and pre-tested!), so that’s what I did, but also it makes finishing the job considerably harder, given the (lack of) space available. I expect to be able to get it done — in fairness, this angle makes the power center look more crowded than it already is, though it really is crowded.
Let’s go back downstairs to the T.H.R.O.N.E. Room.
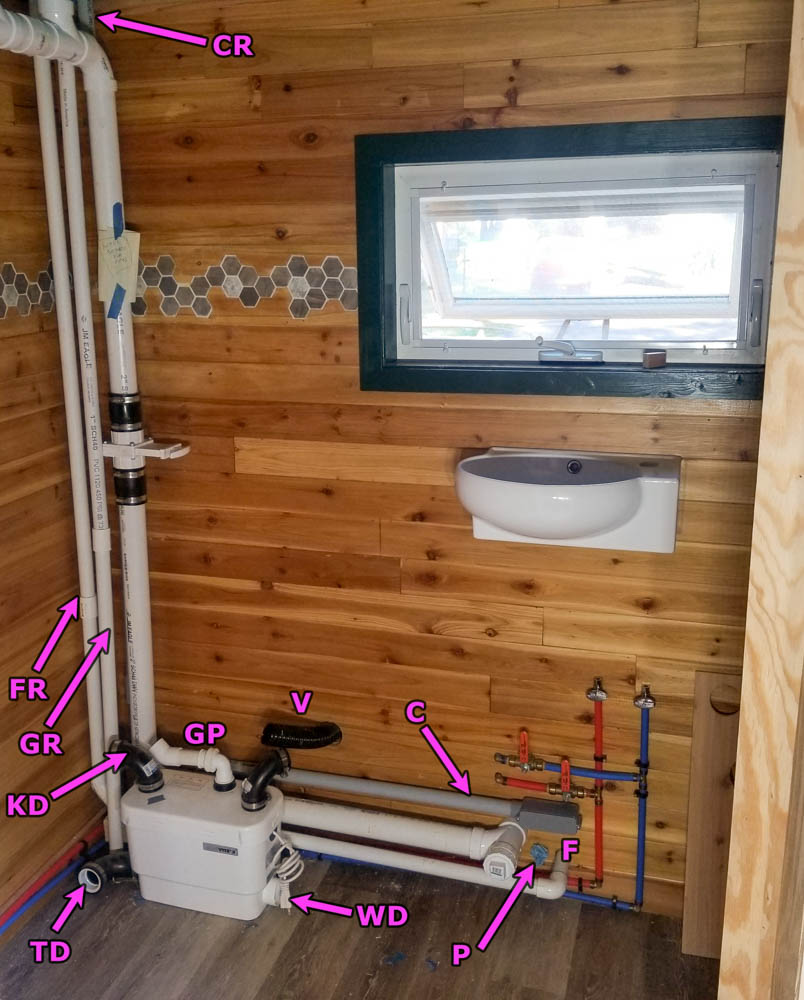
Here’s the other side of the conduit/pipe picture… and the new wash sink! You may notice that the wash sink is missing its faucet and drain. This is true and they will come in due time (but not before I buy them, which hasn’t yet happened).
The big pipe with the gate valve is the gray water drain. Everything else is…
- C – electrical conduit (the bigger one)
- CR – conduit riser to SUL
- F – freshwater inlet
- FR – freshwater riser to SUL
- P – currently a shop towel stuffed in a hole; in the future it is the propane inlet which will travel under the graywater pipe, take a turn upward, and sneak in to the SUL through the conduit hole newly made available.
- V – vent for graywater lift pump (white box), eventually attaches at elbow.
- GP – graywater lift pump output, eventually attaches to GR (not sized yet, just sitting on the floor)
- GR – graywater riser to SUL
- KD – kitchen drain (will approach from left, behind tub (not present))
- WD – wash sink drain inlet (I’ll figure something out…)
- TD – tub drain inlet (I have already figured something out)
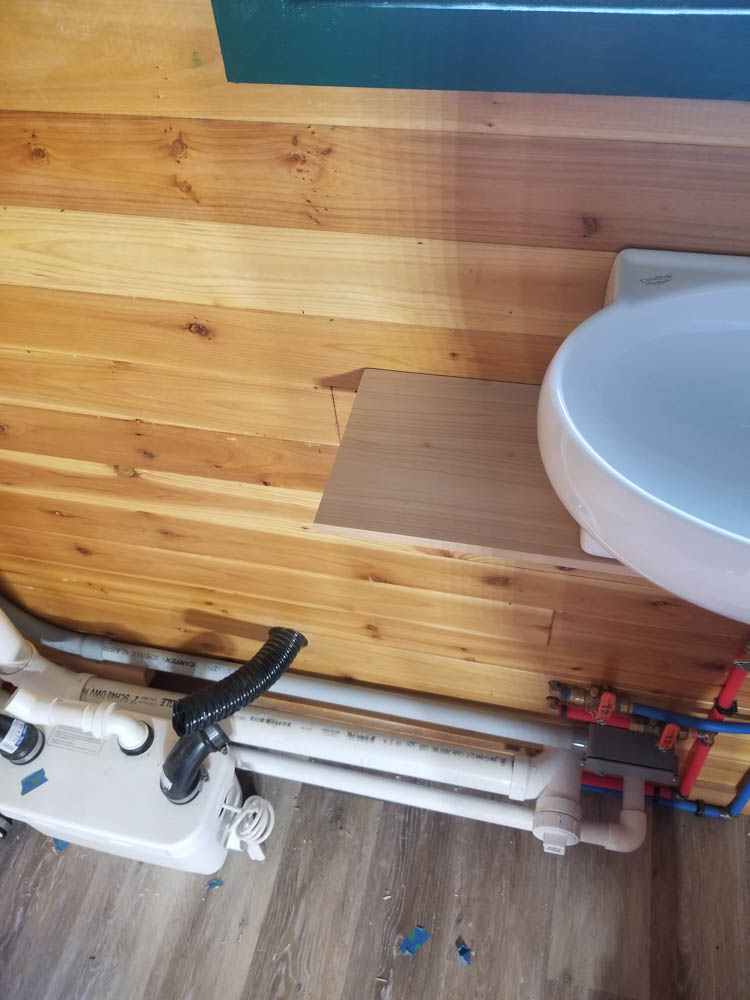
Oh, and while the area around the wash sink is critical open space for getting on and off the T.H.R.O.N.E., there is room to the left, at least, for just a little place to put a little something like a drinking cup, a tooth brush holder, that kind of thing. This little tongue-table is also part of the wash sink brace which cannot be installed until the drain and faucet are, which they have not yet been.
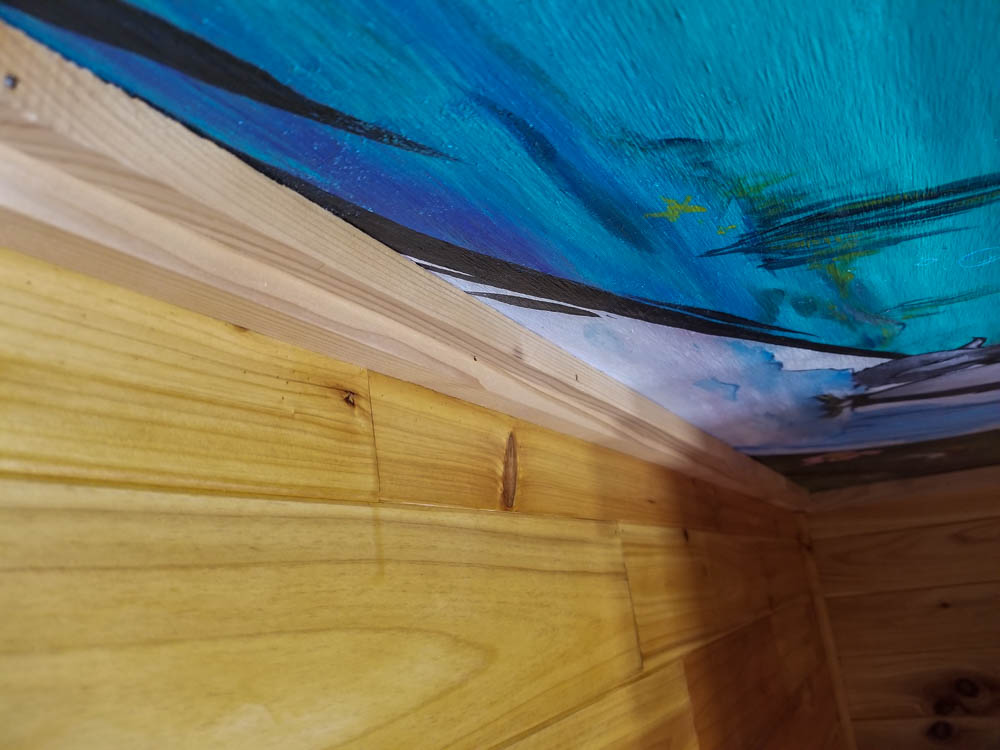
Construction by wayfinding definitely has its revisions. There have been several. There will be more. Recent efforts also included adding crown trim to the T.H.R.O.N.E. Room. Of course, when I installed the corner trim, I didn’t know what the crown trim was going to be, so I simply expected to trim the prior trim to fit the new trim. why didn’t I do the crown trim first? I had to install the mural before the crown trim and I wasn’t ready to do that at the time and wanted to move forward with the corner trim. Anyway, here I am, once again spending time with my best friend on the construction site, Dremel Multimax, who is very good at making fine plunge cuts like this.
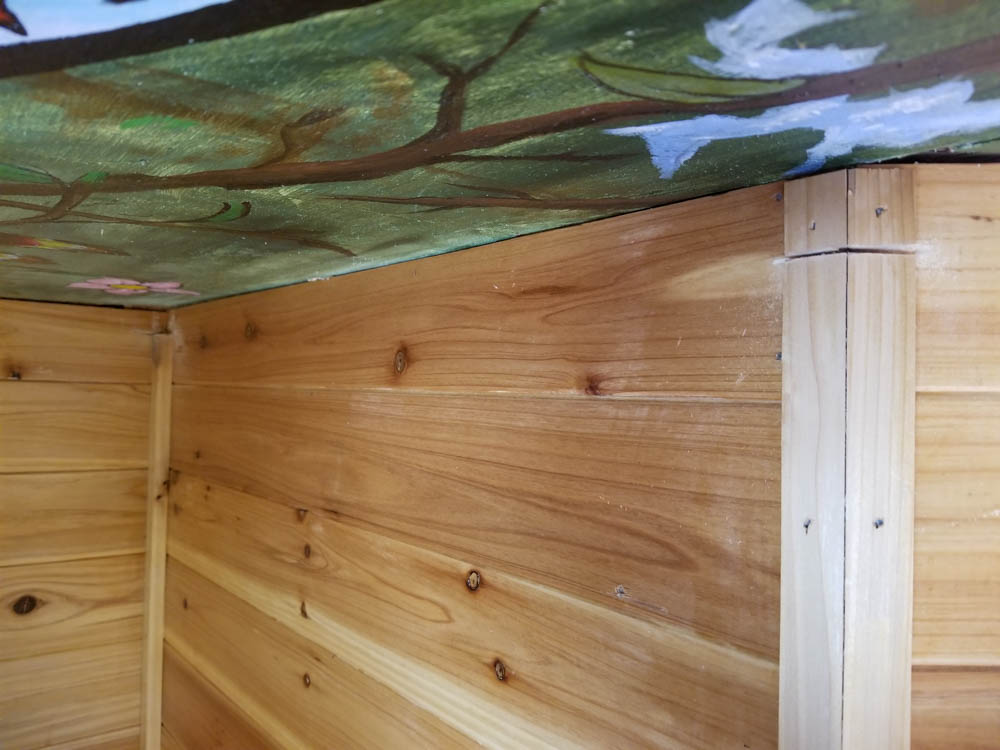
So I can install crown trim like this and have it look like it was always supposed to be there.
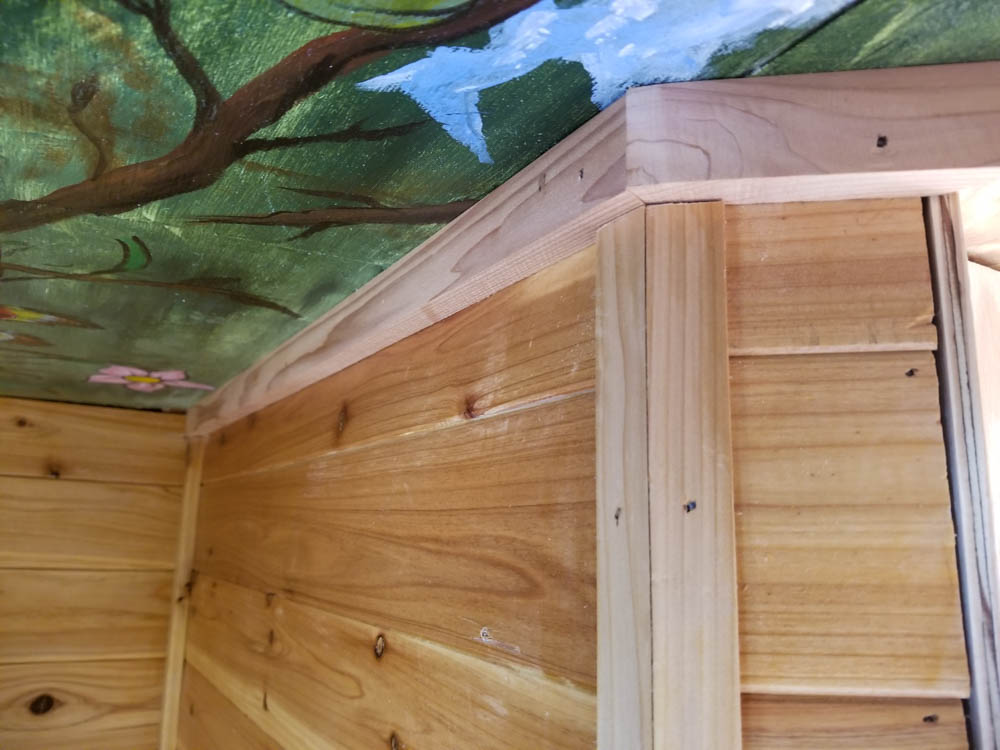
Of course, there are consequences to this wayfinding stuff. Sometimes, it turns out things like the necessary thickness of the crown trim, sized to hide the gaps between the edge of the mural and the wall, (hey, speaking of bees, there’s the Queen Bee now!)…
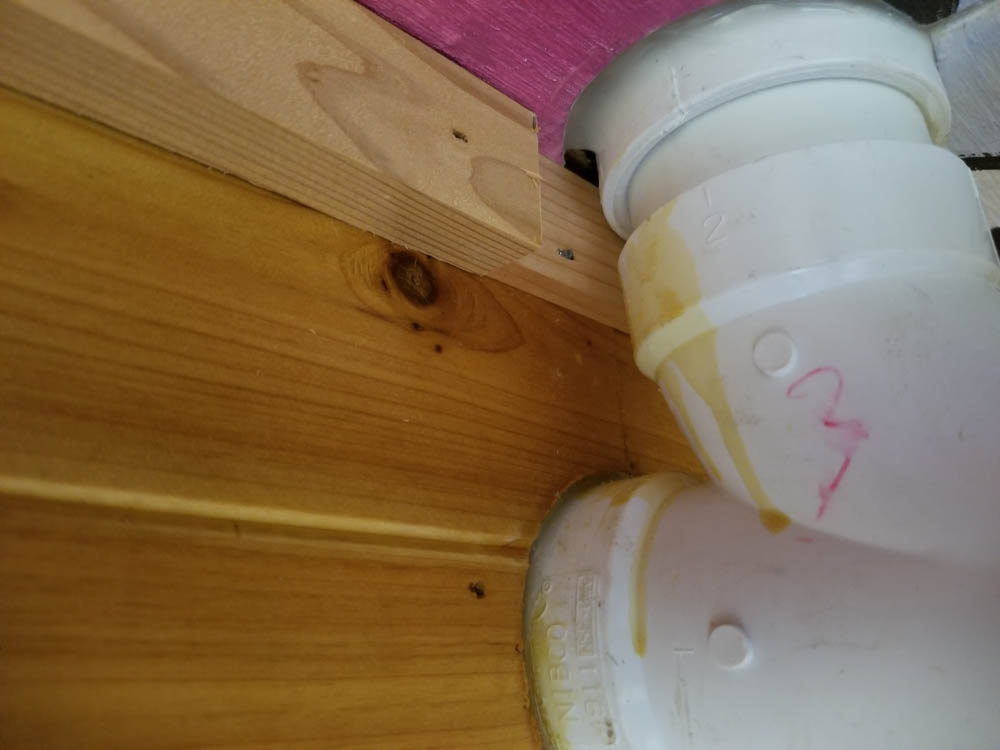
… is actually too thick to get behind a pipe! So, naturally, a skinny piece is slipped in there. You’d never know if I hadn’t shown you… unless you were absolutely scrutinizing my house, which would be impolite.
It’s all about making it work, whatever it takes. Such as this extra sub-trim required to cover an extra big gap because I had some alignment troubles installing the mural. In my defense, it was a set of large, fragile sheets being installed overhead, solo, in a confined space, maneuvering delicately as there was a bunch of adhesive pre-applied to the back of each sheet.
It was a lot of tricky business getting it done. So, yeah, there was an oversize gap on this wall. So now there’s oversize trim to match. Honestly, it actually looks nice 🙂
I spent quite a lot of time yesterday just sitting in the HomeBox, looking at all the things, contemplating what needs to be done and what can be done next (and writing it all down). This, I hope, as prepared me to be efficient at selecting tasks as I proceed, occasionally having to wait on some of them for materials to arrive. Don’t get me started on what it’s like at Home Depot these days…
More to come, but that, surely, is enough for today.