There are really just two ways of doing something: right and again.
Today was a day of do-overs. Just in case you somehow thought that I was getting all this way-finding right the first time… nope. Mistakes happen. Plans change. And sometimes, a thing I think is gonna be fine, isn’t. So it goes.
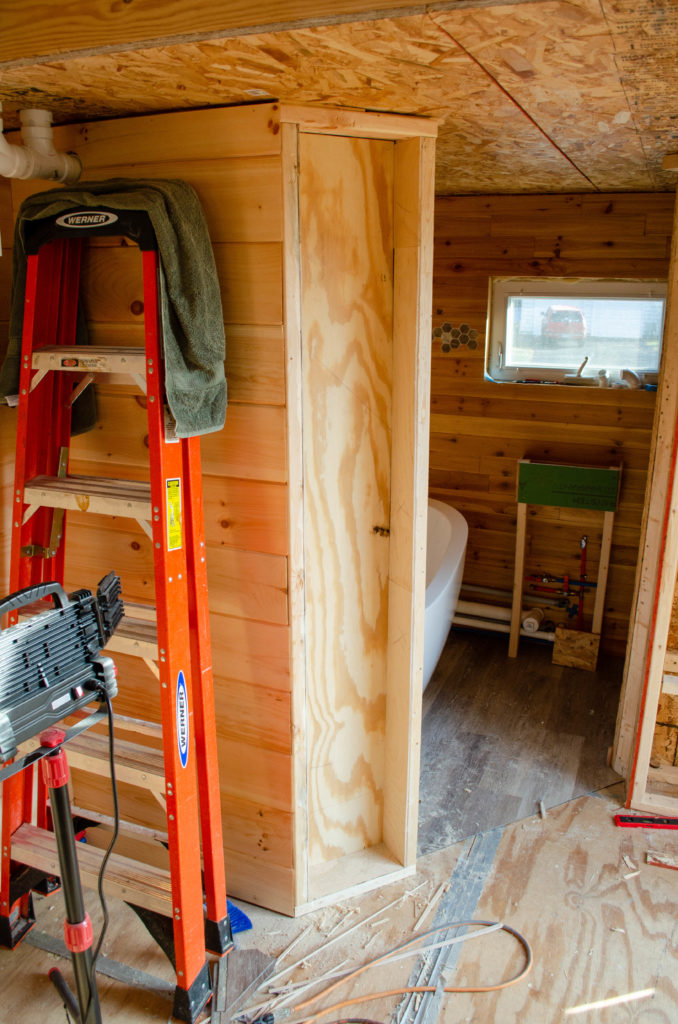
This here is the Skinny Pantry. I meant for this little hollow to hold spices, canned goods, small boxes and jars, that kind of thing. I realized I had some thin plywood that had a very nice surface (it was originally purchased to serve as a replacement rear panel on some old furniture) and thought: hey, this would be a great interior facing for the Skinny Pantry. So, without thinking too hard about it, I went ahead and installed it. Looks great. But then I realize: I really should have drilled for shelf pins first. Ah, well, I can make a jig and drill the holes in situ, I guess. It’s the hard way, but the wood won’t survive being taken out, so, okay, live and learn, right?
Wrong. I take a closer look at the shallow space and worry maybe my drill won’t actually be able to get in close enough to drill for those shelf pins. So I grab the drill to check clearance. Yep. Won’t fit. The holes can’t be anywhere near the edges where they need to be for shelf stability. Crap. Stubbornly, I think to myself: maybe if I get a flexi drill driver extender, then I could drill those holes, keeping the bulk of the drill body itself away from the crowded quarters. I’ve just about convinced myself of this when I realize how ridiculous that is and resign myself to simply tearing out the stuff that’s there and doing it over.
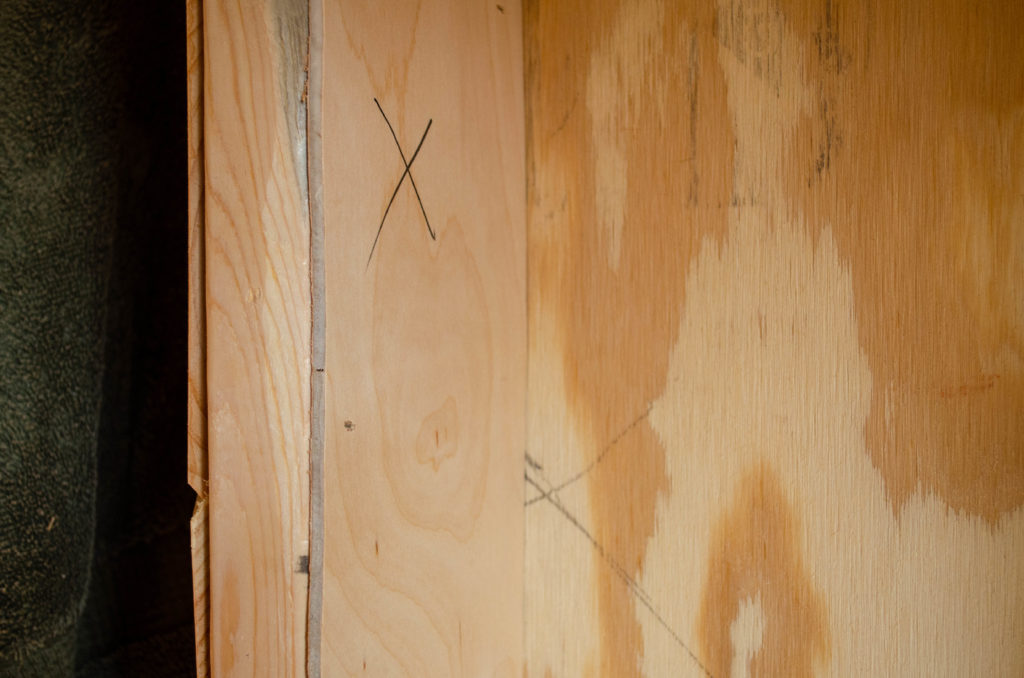
But no, I can’t do it over with the material I have. Look at this close-up. See how thin the facing (with the big X) is? The nice part about it being thin is that I maximize open space and thus shelf capacity. The not-so-nice part is that it’s only about half the depth of the shelf pin length! Even if I pre-drilled it all the way through, I couldn’t insert the shelf pins far enough to be stable. I’d still have to drill into the shell and I still can’t get my drill in there. Awright. The do-over is gonna have to use some other, thick-as-a-shelf-pin-is-long material. Off to the store I go.
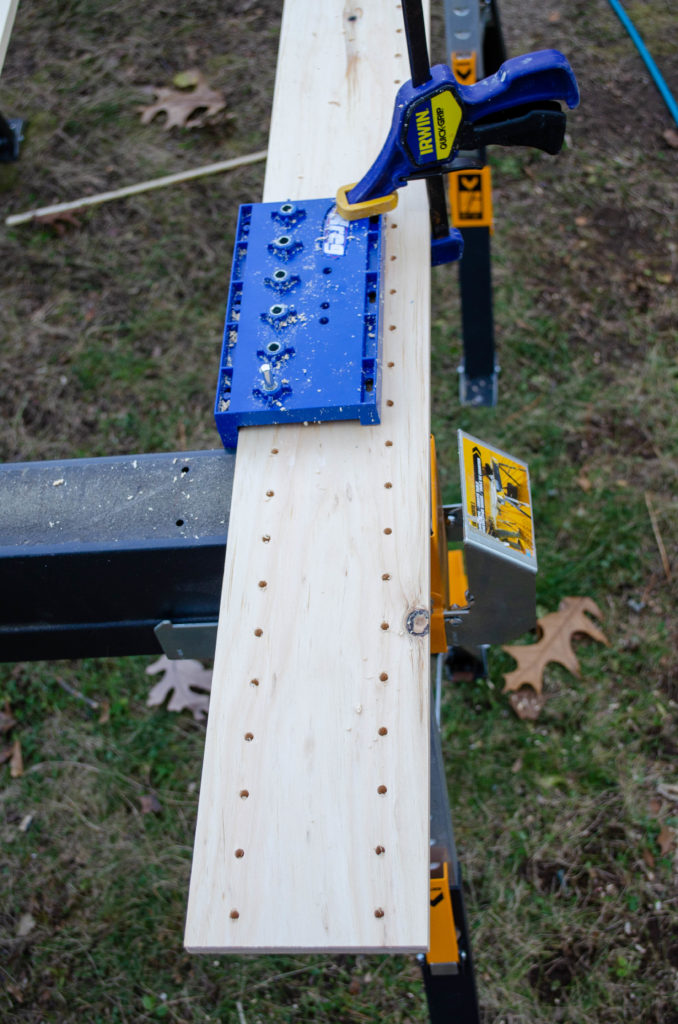
I buy some boards and pick up this very handy jig that makes perfectly spaced and placed shelf pin holes. What makes it superior to some random block of wood with guide holes drilled through it is that these guide holes have metal inserts that, unlike a block of wood, won’t wear and get sloppy after a few uses. The jig also comes with a stop collar for the drill bit (prevents it from going too deep) and a long metal pin that fits exactly in the drilled holes and the jig, allowing the jig to index off the previously drilled set of holes, continuing the spacing perfectly. Yeah, I could have used a dowel with my theoretical block of wood, but it would not have fit as well and like the block, would be subject to wear. This is a job for metal.
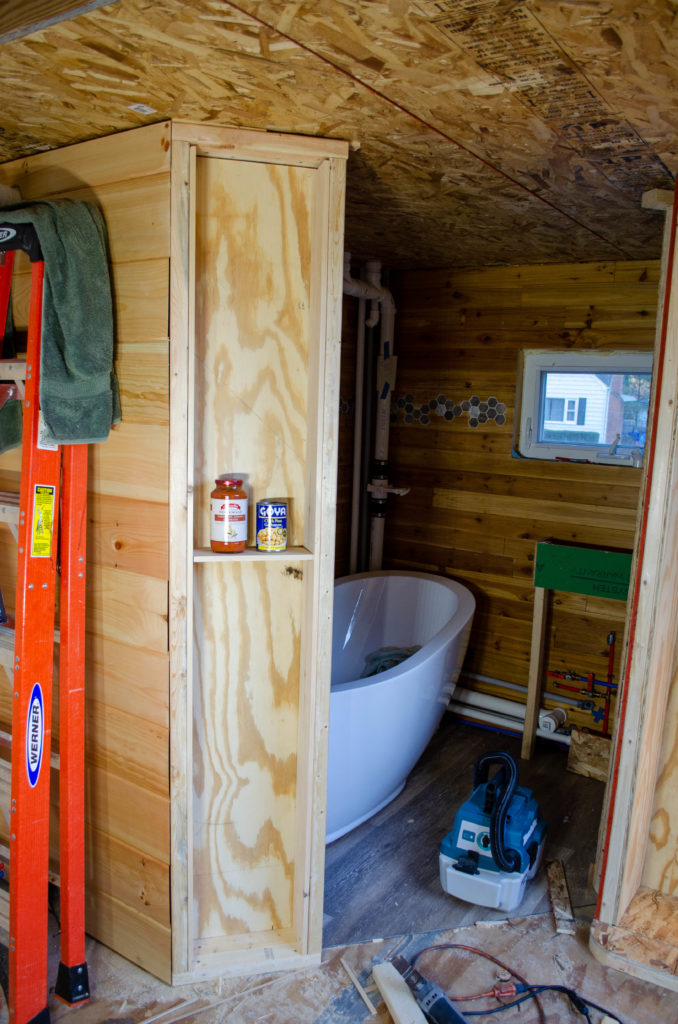
So there it is, re-done. You can’t really see the shelf pin holes, but they’re there, I tell you. I make a single shelf for demonstration purposes. Three or four cans of beans would fit. Two or three jars of sauce. As you can see from the picture with the jig, I ran shelf pin holes all the way up with fairly close spacing. If I want 20 shelves for cans, I can have 20 shelves for cans. The only thing missing from this pantry is a face frame to dress the front and help retain the shelves. That will come later. It’s done enough for now.
This is not the only storage for the kitchen. There will also be in-ceiling storage in the BeDeLiA rafters and of course the entire Storage Wall, yet to be designed, will go right behind the kitchen.
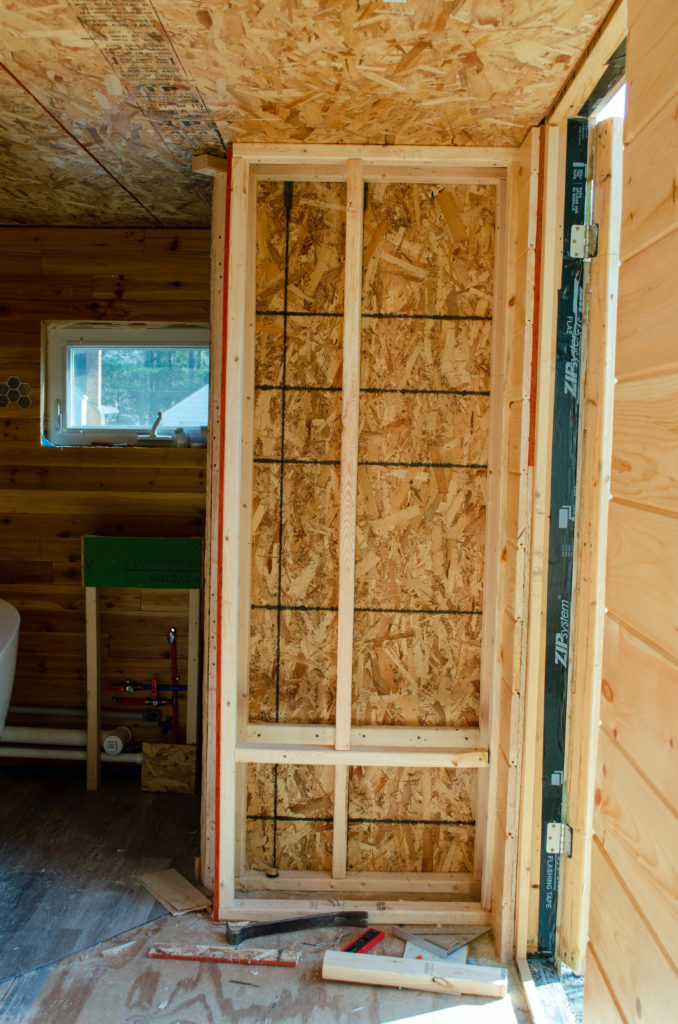
This is the coat closet & boot dock, first edition. Because I wasn’t thinking that far ahead at the time, when I made the bathroom partition wall, of which this is the rear view, I built it like any other wall, with studs on 16″ centers. It really didn’t need to be, since it was just a partition wall that had no bearing duty, but that’s just my default. It was only later that I decided to make this coat closet off the back of that wall. Suddenly, that middle stud was kind of in the way. At first I figured I would just make a two-compartment closet – a wider one for coats and a narrower one for… I dunno, umbrellas or fishing poles or boffer swords? A little while later, I realized that the lower section of this closet would be a great place for a shoe repository (a/k/a boot dock), so I started to box it out, as seen here.
A little while after that, I realized that my feet are longer than this closet is deep — I have a dire dock depth deficiency! Sometimes, when you build stuff on the fly, you think of things to do that doesn’t fit well with what you’ve already done. Like I said, today was a day of do-overs. This was the other one of those.
As long as I was doing it over, it occurred to me that this closet would serve far better as a single space rather than a partitioned one (I rarely use umbrellas and never use fishing poles or boffer swords). That central stud wasn’t doing anything useful so I took it out. Doing so made the wall a better bass drum, as well as making the interior of the coat closet much more roomy and therefore more useful.
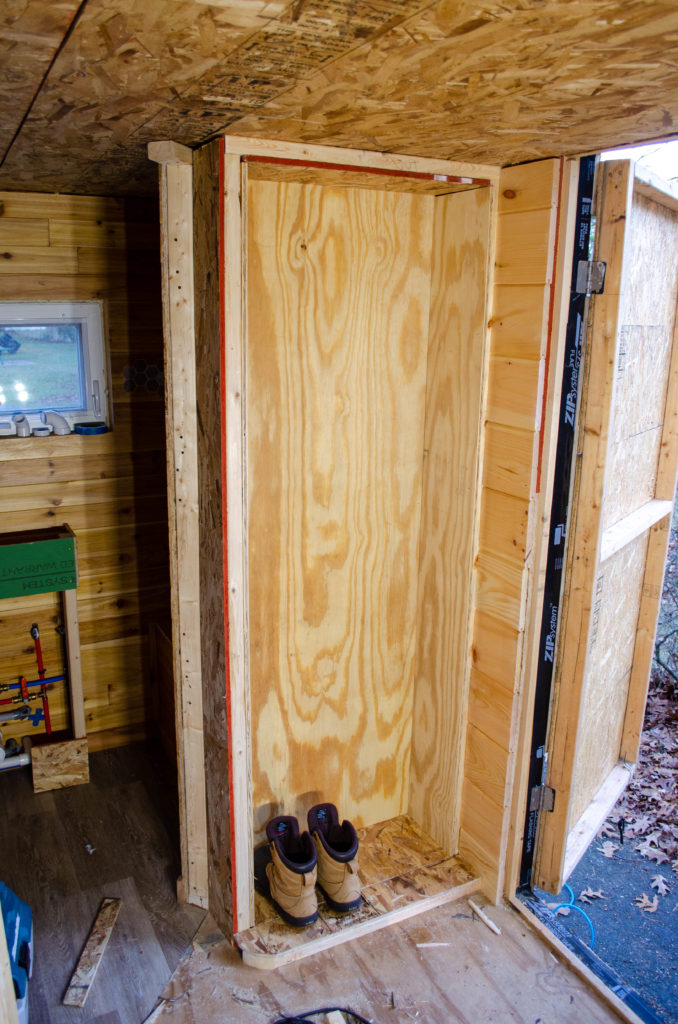
While I was at it, I removed the boxing-out I did for the boot dock and extended the floor of the closet outward a bit into an apron so there was room for the big boots that fit my big feets.
I will close off the closet part by adding a floor for it, above the boot dock, and then fabricate and install some kind of cabinet doors to keep it tidy-looking. Who wants to see coats and hats just hanging there all the time? If there were cabinet doors, that’s another place to hang some art (or to do some art, such as inlay on the doors themselves).
Just above the boot dock, I plan to install a flip-down bench for performing shoe transactions. The pictures below are from the vendor of the bracket, showing the stowed position (left) and how two of them might be used for a bench seat.
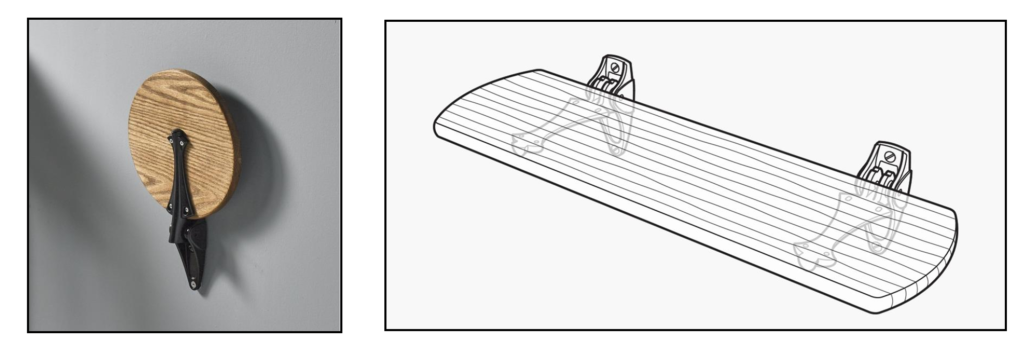
I’ll put a 2×6 ledger board across the front of the coat closet, just above the boot dock, into which these brackets will be screwed. This will also define the bottom of the coat closet – the point above which will be its doors and below which will be the open boot dock. I plan to put a floor in the coat closet at this level, as well, to catch any scarves or hats before they land on the shoes — or on the snow melt and grime left by the shoes.
I’d like to have this little bench be pretty — something more than a basic slab — and since it’s now very cold in my workshop, chances are this part of the project won’t even get started til spring. I’m planning to register for some woodworking classes on the subject of making things pretty (inlays, other decorative treatments) over the winter, so when spring comes, I hope to be in a position to make this utility bench somewhat less… utilitarian.
For now, it’s time to clean up the job site, un-disasterize my workshop, and generally prepare for winter.
Hey, speaking of winter – it’s been a while since I’ve talked about the T.H.R.O.N.E. We’re still using it as our primary toilet in the conventional house. It’s been working just fine since we started last spring — no complaints — and we really like that we’re using so much less fresh water for toilet activities (just a half gallon or so every week to clean the buckets). The compost pile has been going strong but is definitely showing signs of slowing down in the cold weather. I’m not surprised, but it is at an inconvenient stage for that. The current pile is really more of a pen and that pen is about 80% full. During the summer, it was cooking down pretty quickly, keeping pace with or actually going down while we were adding to it. Now it’s growing again and I’m concerned that it will become full in the middle of winter.
Why is that a problem? Well, it’s too cold to build a new pen, for starters, and I’m not convinced that starting a new pen, even now, will have a chance to reach critical mass such that it becomes self-heating to the point of not freezing solid in the winter. That will make adding new material impossible, since the protocol is to dig into the core a bit and add new material there rather than simply layering it on top. I guess the thing to do is build that new pen ASAP and maybe transfer some material from the active one to get it started. Hm. Maybe I’ll do that.
So that’s about it for this construction season, my dear readers. I may be back from time to time with musings about interior design, perhaps, an update or two on how the T.H.R.O.N.E. goes in winter, or maybe I’ll just take a break from it all for a while and focus on some other projects.