While there’s a lot to be really concerned about regarding climate change, one thing that is handy about it is that unstable weather patterns also means sometimes it’s 50F in January here in the northeast. A week ago it was near zero. I took the opportunity to build the new flue supports and snow break system I showed you last post.
Step 1 is to make somewhere to step. Or, more importantly, somewhere to put the ladder. The back of the workshop has about a foot of stone pad followed by a rather steep slope. There’s no good place to put a ladder at a decent angle. Well, there’s no good place to put a ladder at a decent angle until I build one. So I built one.
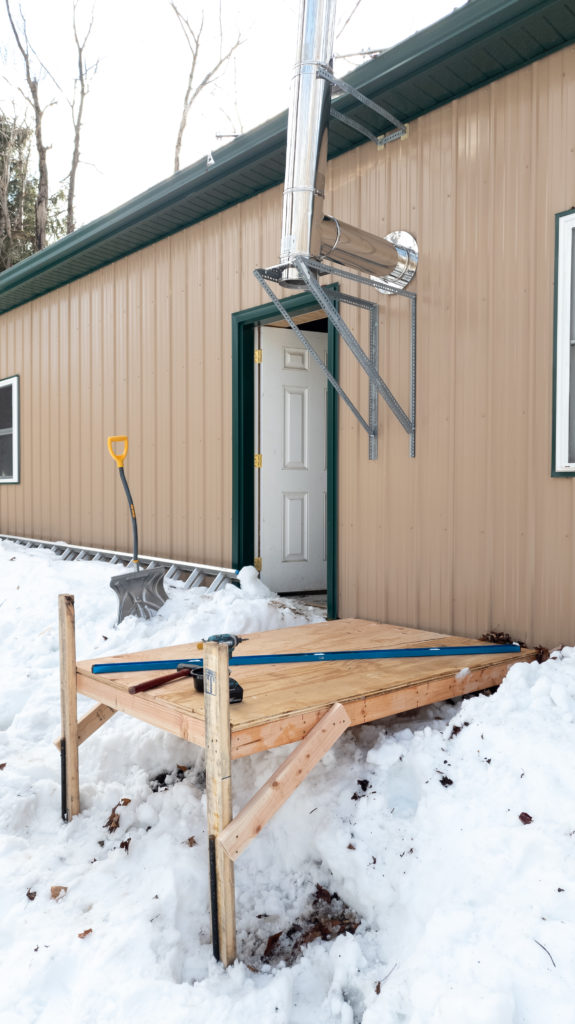
Those are 3ft long steel spikes driven into the ground and screwed to the back legs of the stage. Their purpose is to keep the stage from shifting, especially in the downhill direction. If you understand that the legs are made of 2x4s, you can get a sense for how much slope is involved here. The stage is 6ft long and 4ft wide and over the course of that 6ft in length, the ground drops off easily upwards of 2ft. And of course it’s covered in snow and ice. No bueno for a ladder. Hence the stage. But like everything else, before anything can be done, something else must first be done. Shovel away snow. Build stage. Install and level stage. Secure stage with spikes. Then I can start thinking about working on the flue. After this picture was taken, one more feature was added to the stage: a backstop — some 2x4s screwed flat to the deck just before the legs: something to catch the foot of the ladder in case it slips.
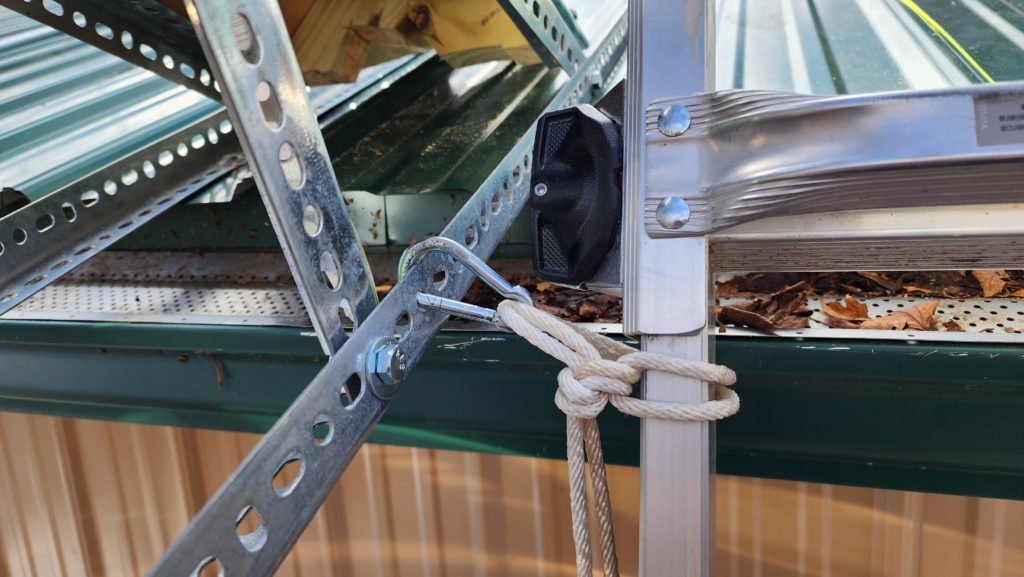
Speaking of which, as someone working solo on a ladder (or about to be on a ladder), all the safety I can add to this scene is worth adding. So I tie off the ladder to the existing wall brackets so as I’m up there horsing around with angle iron and flue parts, the ladder has an above-average chance of staying put, even if my attention to the forces on the ladder is diluted.
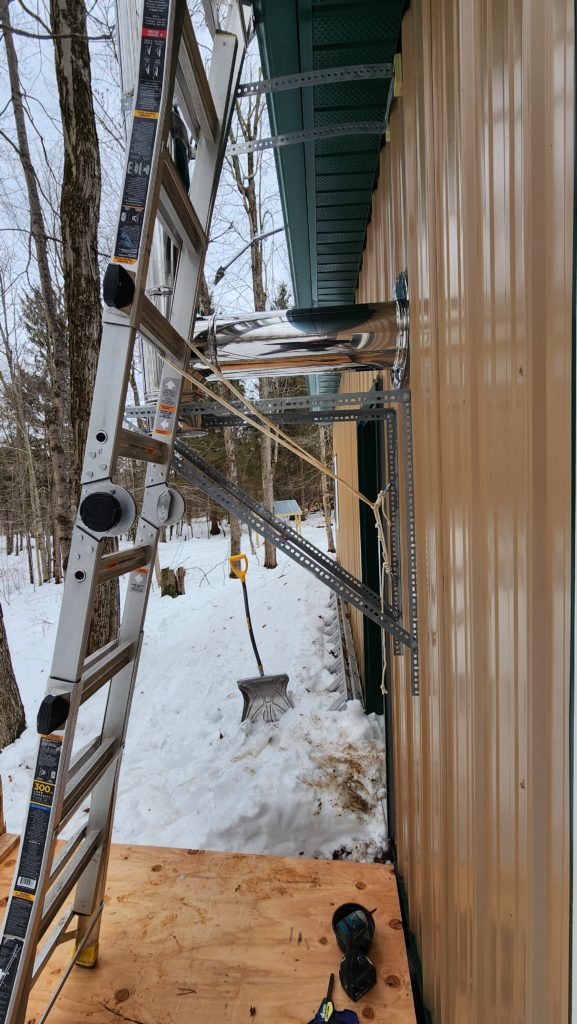
Note the tie-off is both above the halfway point on the ladder as well as having a general vector both down and toward the brackets. This is the best place for it given what’s here and it will help keep the ladder snug to the work area. I’m also using a ladder with splayed legs, which really helps with lateral stability for tall climbs.
At ladder-top, I finally get to see what, exactly is left after the collapse of the prior flue supports. As I expected, the stay arms are bent. I’m pleased to see that the anchor points, though distressed, did not actually destroy the roof in any way.
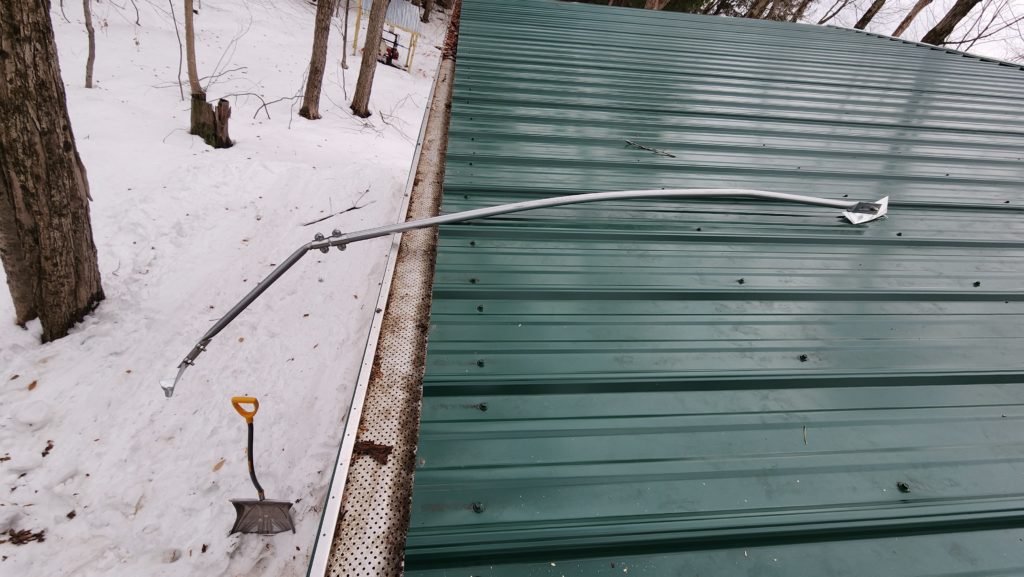
First things first – install the roof runners for my new support system. These get anchored to the purlins below the roof surface, easily located by the rows of screws. A quick and generous glorp of silicone sealant is squozen out under the angle-irons and around the lag bolts before I cinch them down. This will prevent water infiltration into the roof system below.
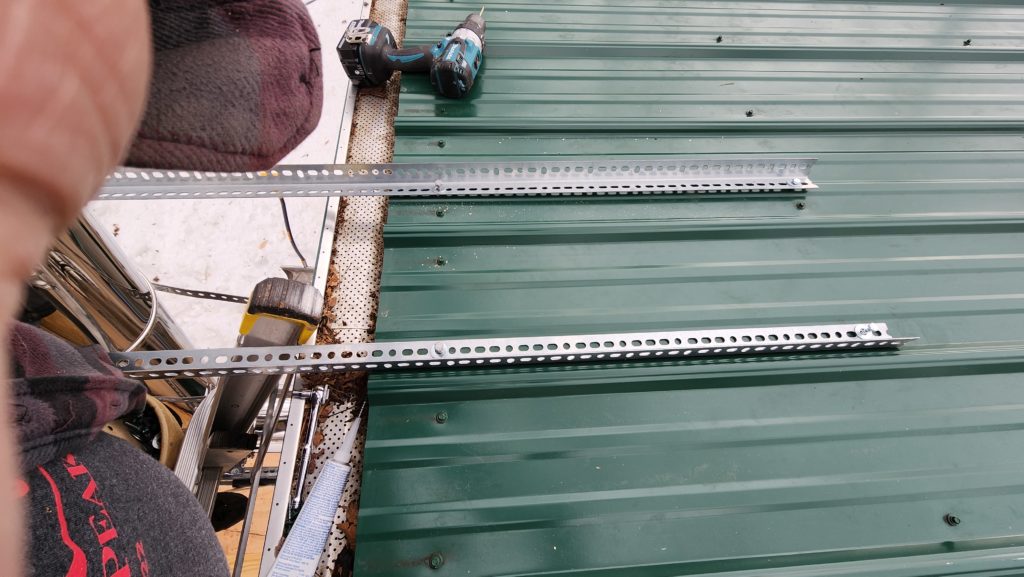
The rest of the structure goes in easily. I didn’t take any pictures of that in progress, but it sure looks a lot like the CAD model from the last post. Once the structure is in place, I have a new safety option available – I can tie the ladder to the top of the system – greatly improving the resistance to tipping. So I do that as soon as there’s enough structure to use.
It turns out that the snow break device is especially difficult to make. It doesn’t look that way from the design, but there’s a compound angle where the peak of the snow break meets the roof (I have yet to master compound angles), the miter at the peak of the snow break is sharper than any angle my tools can natively (53 degrees), and the ribs on the roof confound everything.
So how DOES one cut such a sharp angle on the edge of a piece of plywood when one’s table saw can only cut as steeply as 45 degrees?
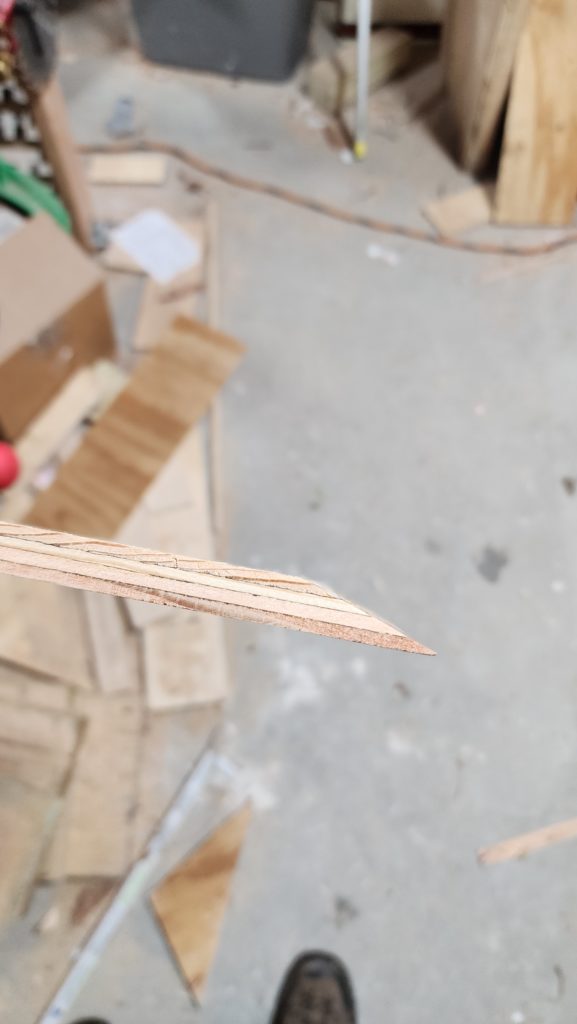
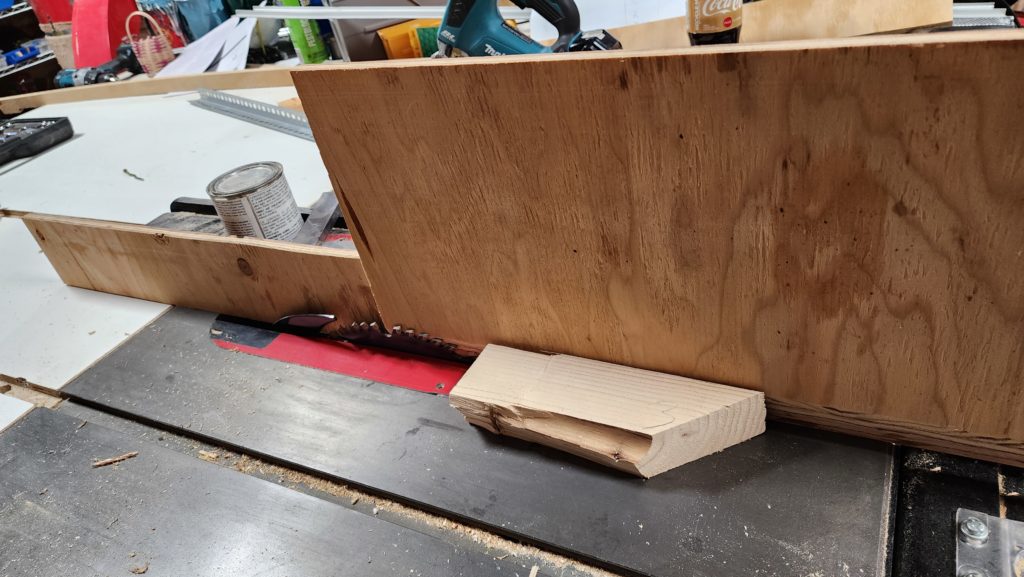
A point of clarification. The peak of the snow break is 37 degrees. Miter cuts would be half of that, or 18.5 degrees. But my table saw can cut angles from 0 to 45, so surely it can cut 18.5, right? Yes. But that’s 0 to 45 from vertical. Vertical being a 90 degree cut, not zero. So the saw can cut 90 – 0 ( = 90) down to 90 – 45 ( = 45). It can’t get close to 18.5 degrees from horizontal. But it can cut 18.5 degrees from vertical, so that’s how it must be done. Shown here, to prevent cutting into the rip fence, a plywood spacer rides behind the work piece and a scrap of 2×4 is used to keep the work piece flush to the fence (behind it) so the angle stays true. The scrap does get cut by the blade.
This picture is staged after having actually cut it, so you can see the steep angle toward the bottom right. Easy peasy, right? Not so much. As the workpiece moves past the blade, it now rides not on the 1/2″ thickness of the board, but the knife-edge just cut. That edge is fragile and wants to dip down into the clearance space around the blade and the table insert (red). It’s a bit of a finesse job to keep it moving while holding it perfectly vertical and not letting it pitch down into any gaps in the insert.
The inside of the snow break looks something like this, though this is the first edition and the second edition is what ultimately got to the roof. What I’m showing you here is that there are massive peaked ribs made from 2x4s under some 1/2″ plywood. I didn’t like this one once it was built — the 90 degree angle seemed too oblique for the job, though it definitely made assembly easier. I changed the design to have a sharper angle to better break snow glaciers but that then meant much more interesting angles happening in the ribs.
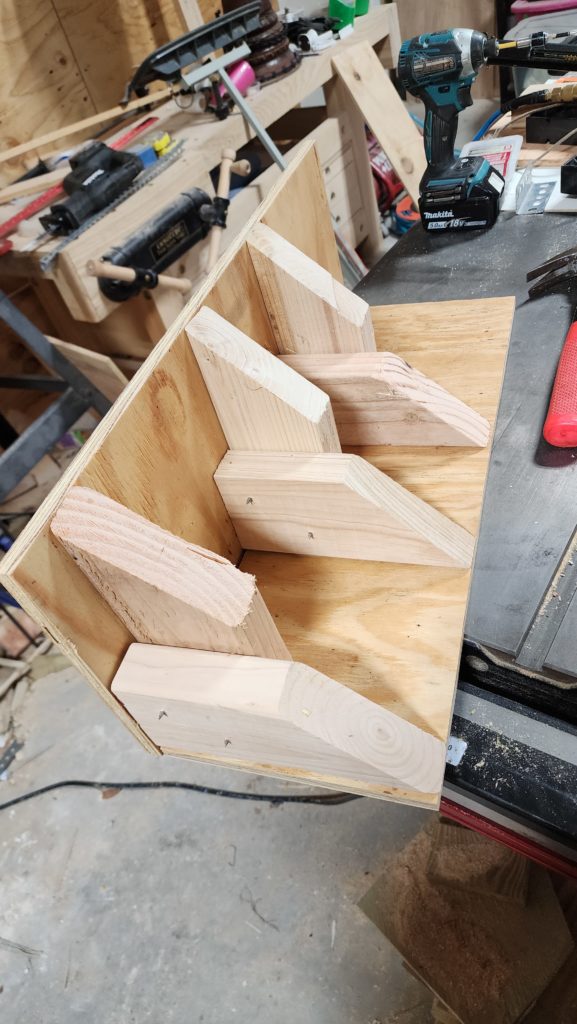
I was racing against waning daylight when I was making the snow break, so no pictures of the 2nd edition.
The really hard part, though, was figuring out the compound angle where the break meets the roof. I tried a bunch of things and ultimately realized the best way was just to cut a template to fit in situ. So I did that. The cardboard is taped to the square front of the snow break and then cut to match the profile of the roof.
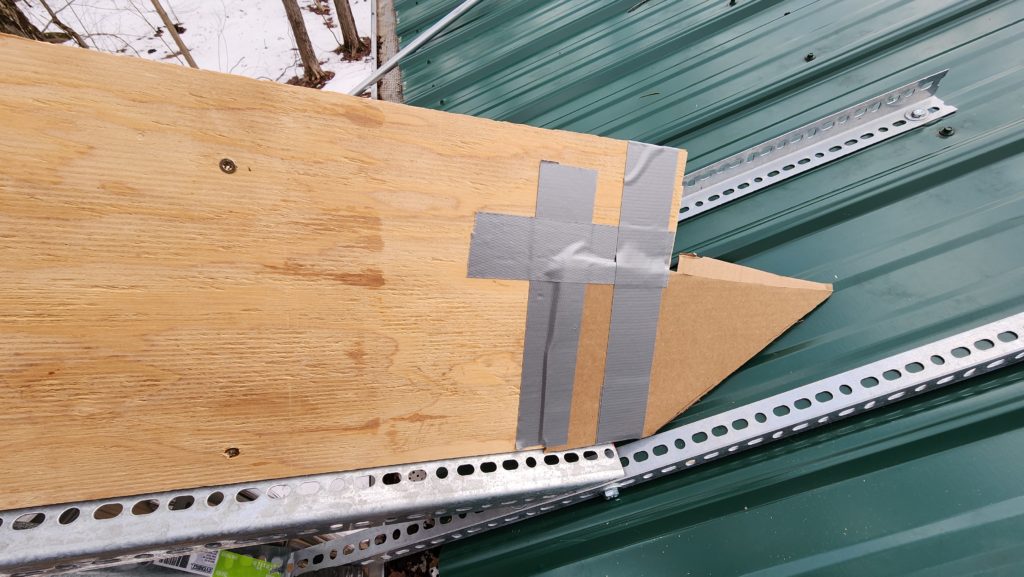
This seemed about perfect and a nice, direct way to get the angle I need. Somehow, though, even after doing this and then cutting the square front of the snow break to match this angle, it didn’t add up. To this day I don’t know what went wrong, but there was a lot of modification of the whole system that was very difficult because it was already assembled. There may have been some expleting.
Before installing the snow break, though, I wanted to get the flue stack mostly back in place. Remember, the whole thing had tipped considerably to one side, bending some of the support apparatus. I managed to bend that back and it didn’t seem the worse for wear, so all good on that. Except the twist-lock features of the flue sections didn’t line up any more. Or, rather, when I had the twist lock twisted and locked, the flue wasn’t vertical. Not even mostly. Ultimately, I realized that the twist lock features on the flue pipes were part of a fitting that was crimped on to the end of the pipe such that it could conceivably rotate along the major axis of the pipe if it experienced a great deal of torque.
Okay, so I gave the thing a bit of a twist, hoping to advance it along to the point of being vertical again, but it wasn’t moving after I applied as much torque as I dared. Hm.
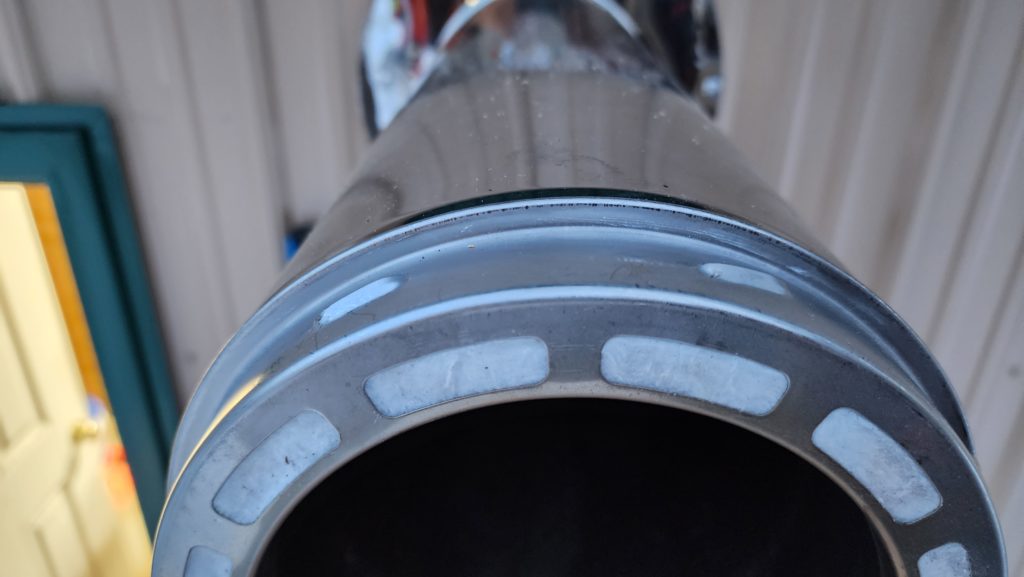
Then I had a seemingly brilliant idea! If the horizontal part of the flue – the section that comes through the wall from inside to outside, had gotten twisted, I could swap that out for a section of previously-vertical pipe, which did not experience the torque and thus should still have its twist lock features in proper alignment. The previously-horizontal pipe, believed to have its twist lock out of alignment, could be used vertically as-is — it doesn’t matter at all how the twist locks align on the vertical part, as long as they lock. Cool. Let’s do that.
I do that.
It doesn’t help.
Shit.
What does that mean?
It means that the horizontal (either previously or newly installed) pipes aren’t the ones out of alignment. It means one or both of the T fittings on either end of the horizontal section is/are the problem. Crap. There’s no way around this other than to just force it and hope that the thing slides just enough to get vertical without going too far or destroying the twist lock of one or more sections (four are involved in the wall transit – two tees and two straight sections). Well, I could buy some new tee fittings — and lose a few $100 as well as the nice weather while I wait for them to be delivered — or I could force it and hope. If I break them, I’m no worse off. If it works, it works. So I do that.
And it works.
Nothing broke and now the flue stack is vertical again, twist locks all nicely locked.
Precious time has been spent, though, and the day is growing dark.
By the time the flue is righted and all is well with it, it’s too late to install the snow break. The project must bleed into another day, sadly.
And so it did.
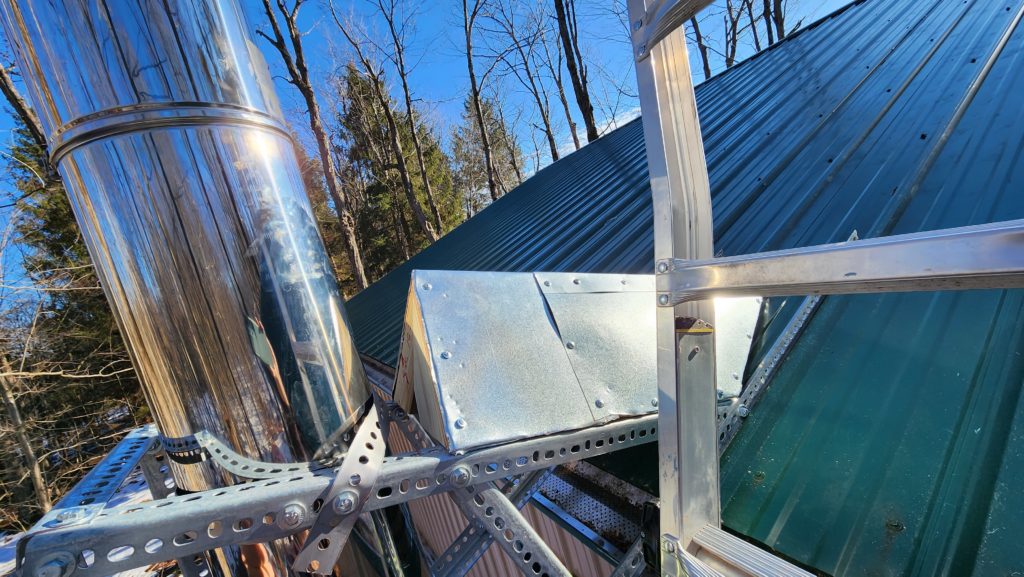
The snow break was installed the following day. It’s not beautiful and the interface with the roof isn’t as neat as I’d hoped for, but it should do the job, I think. You’ll also see I’ve re-arranged the placement of flue sections so there’s no joint appearing anywhere near where a glacier front might hit it. The framework behind the snow break effectively immobilizes the flue in the whole area where the glacier might appear, should it actually ride up the snow break more than a little. If it rides up a lot and fails to break away, well, then my design hasn’t met its goal. We’ll just have to wait and see how it performs.
Now the only work left to do is remove the old stay arms so the next snow glacier doesn’t get hung up on the mangled anchors and tear up the roof. Before I walk on the steep roof of the workshop, though, I need a safety rope. Last time, we sent a pilot line over the building with a drone and then pulled the rope over with the pilot line. That was fun and effective, but the owner of the drone and the drone are far away this time. Hm. What to do? It occurs to me that throwing something over the building would be easier to do from the top of the ladder. That subtracts 10 ft from the vertical height I need to achieve with the throw as well as a little bit of horizontal travel, too. But what to throw to give some weight to the line but still be gentle on whatever it might hit on its way? I know!
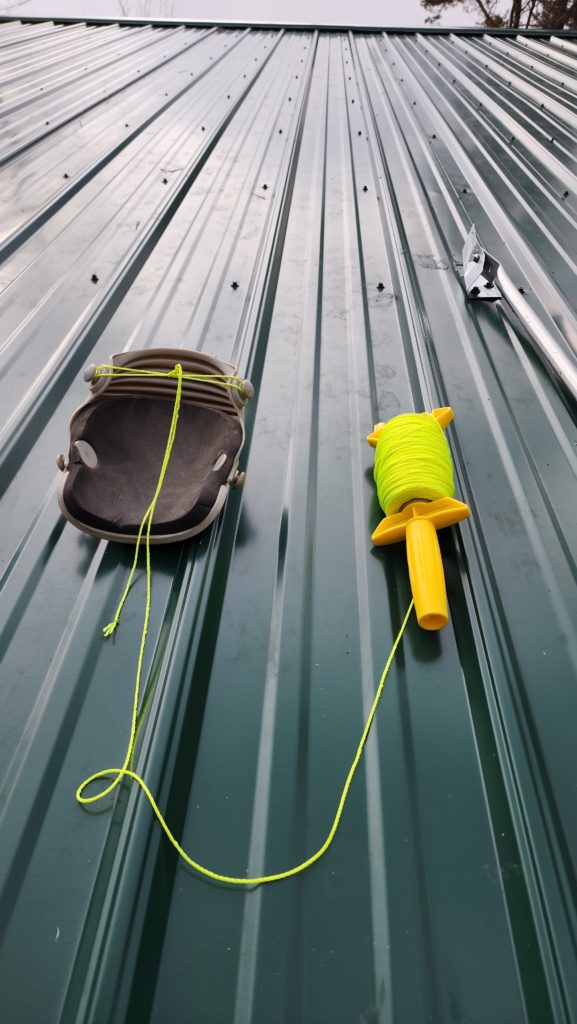
Yep. A knee pad!
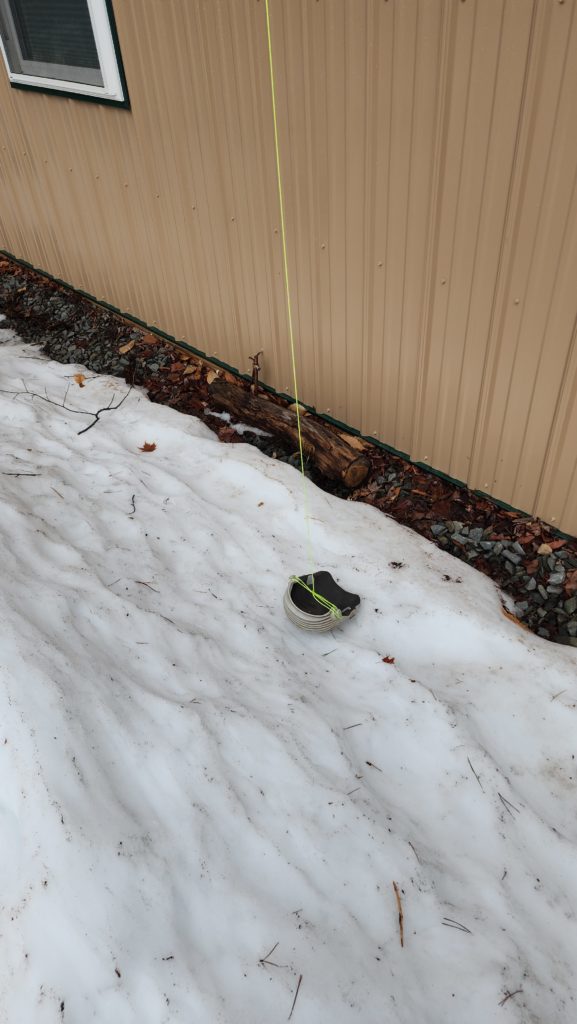
Worked like a champ. It flew right over the peak and bounced once or twice maybe on its way down and tumbled happily to the ground. Perfect.
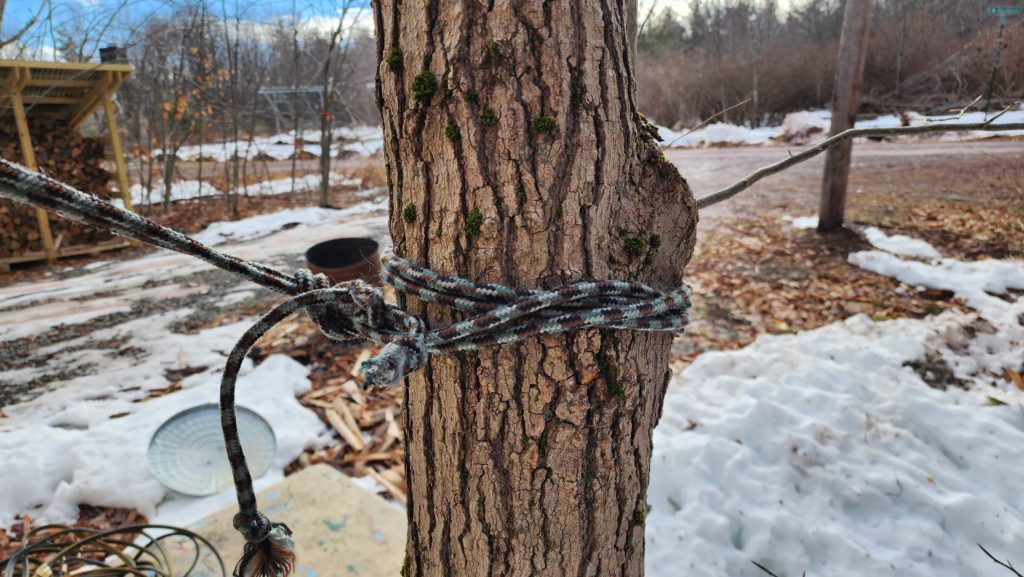
Now to tie off the safety rope to a tree and pull it back over for use. Note the intentional placement of the rope just below the knee in the tree. This helps prevent the loop from sliding up the tree.
In the day it’s been since I installed the snow break, rain and warm temps have melted a lot of the snow on the ground. I didn’t realize the stage had been set on any ice, but evidently it had, since it shifted a fair bit on that third day. See the lower triangle of holes?
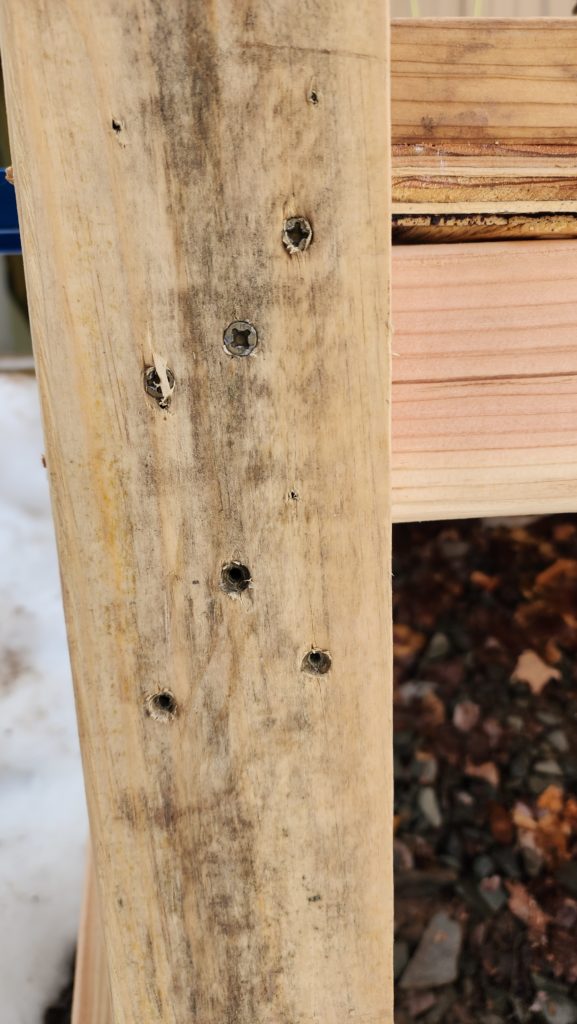
That’s where the screws were the day before. I had to re-level the deck and in the process, re-attach the leg to the deck frame considerably higher up, as evidenced by the screws shown. It’s always best to have a level surface for your ladder! Definitely worth the time to check and adjust as needed.
Lastly, up I went, to remove the old, mangled flue stay arms and seal up the screw holes. In point of fact, I tried to do this the day before, but discovered my work shoes had hard rubber soles which had no traction on the sheet metal roof! Not stepping off the ladder without traction! I didn’t think I had any other shoes that would do it, though later I realized I did, and wore those on the last day.
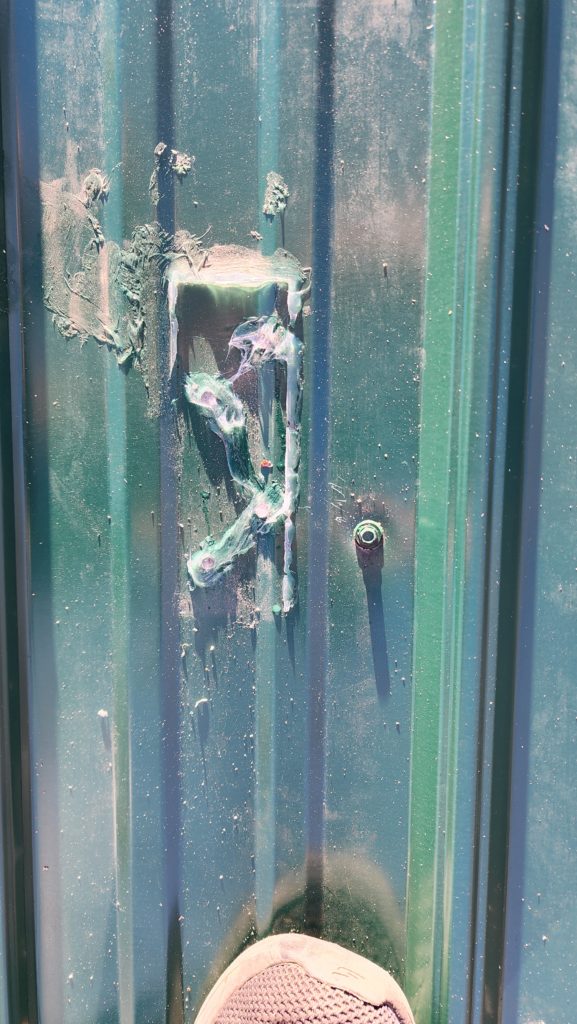
You can see here the rectangular outline (in silicone) of where the stay arm bracket used to be, where it had been sealed to the roof. I just squeezed some new silicone into the screw holes after removing the bracket and smeared it in a bit for good measure. It doesn’t have to be pretty and would have been hard to make pretty, actually, given the conditions at hand.
Finally, it was done.
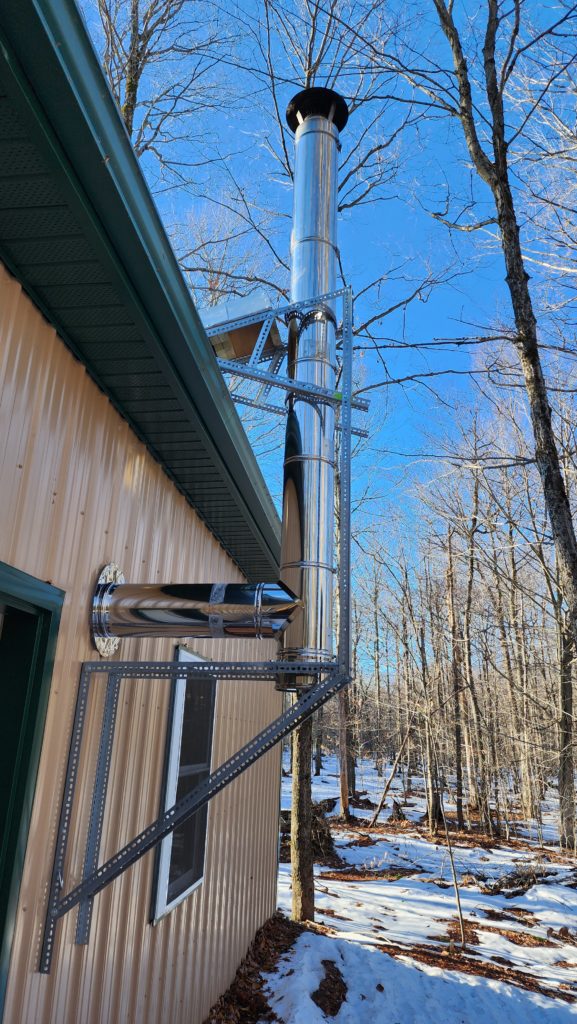
The astute observer will notice the upper diagonals from the CAD model are not installed. I was in the process of installing them when I realized that they presented an attack surface for the glacier and could do more harm than good. I think what’s here will be enough.
And if Mother Nature dumps another load of impossibly dense, heavy snow which then turns into a glacier and somehow defeats this mitigation system and topples my flue once again, I have a Plan C. That’s to move the stove to the gable end of the building, where snow doesn’t shed from the roof at all. I didn’t want the stove there, which is why it’s here, but if here proves untenable, so be it. I may have some trouble patching the 10″ hole in the side of the building left by the pass-through, though. I’d have to find some matching sheet metal, which may or may not be difficult. I’ll look into that if it should prove necessary. For now, at least, I’m back in business, though I do need to re-apply the flue-to-stove-collar cement inside, since it got well and truly destroyed by all the aforesaid ruckus.
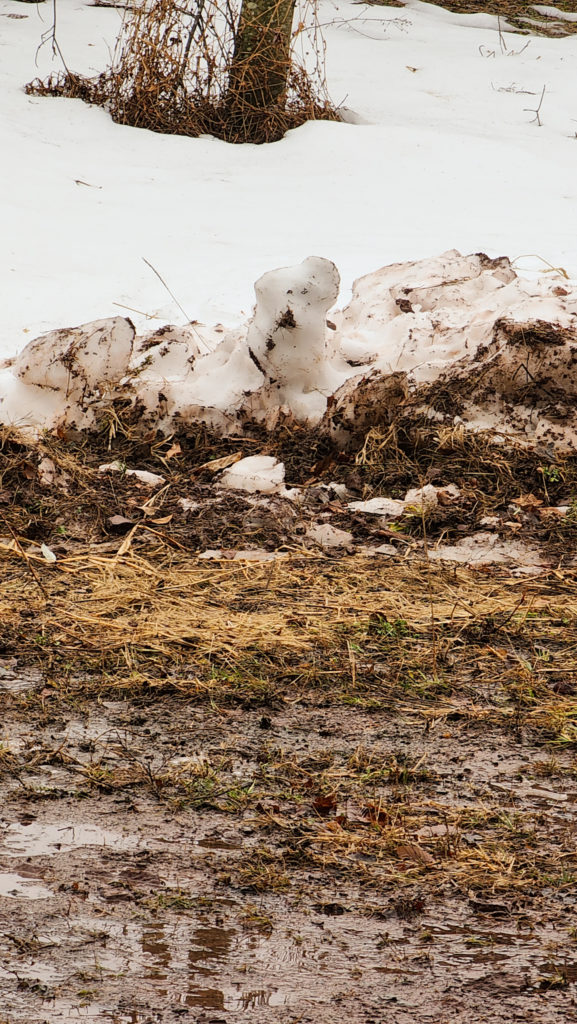
And here’s an image of a puppy, revealed by melting snow.
