Remember the heavier wire installed in the junction box by the solar array? Of course you do. Time to do the inside part of that, which happens in here:
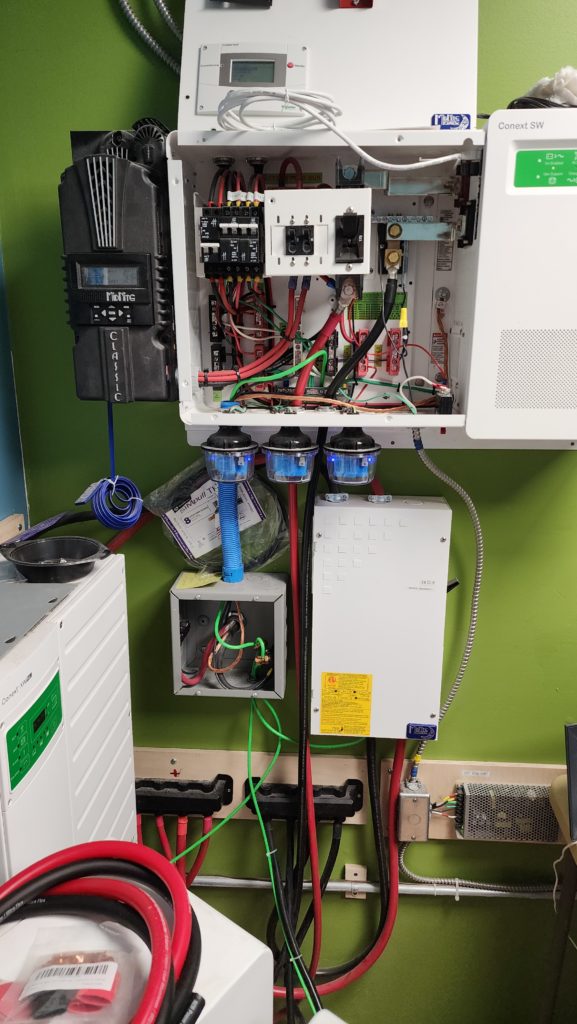
It’s only kinda crowded in those two wiring boxes, but definitely crowded enough to make this job harder than it would have been had I installed the larger gauge wire early on. The wires go to the red and black terminal blocks in the middle at the bottom (just above the right-most bulbous thing). Ah, well, this whole project features a great deal of experience-based learning!
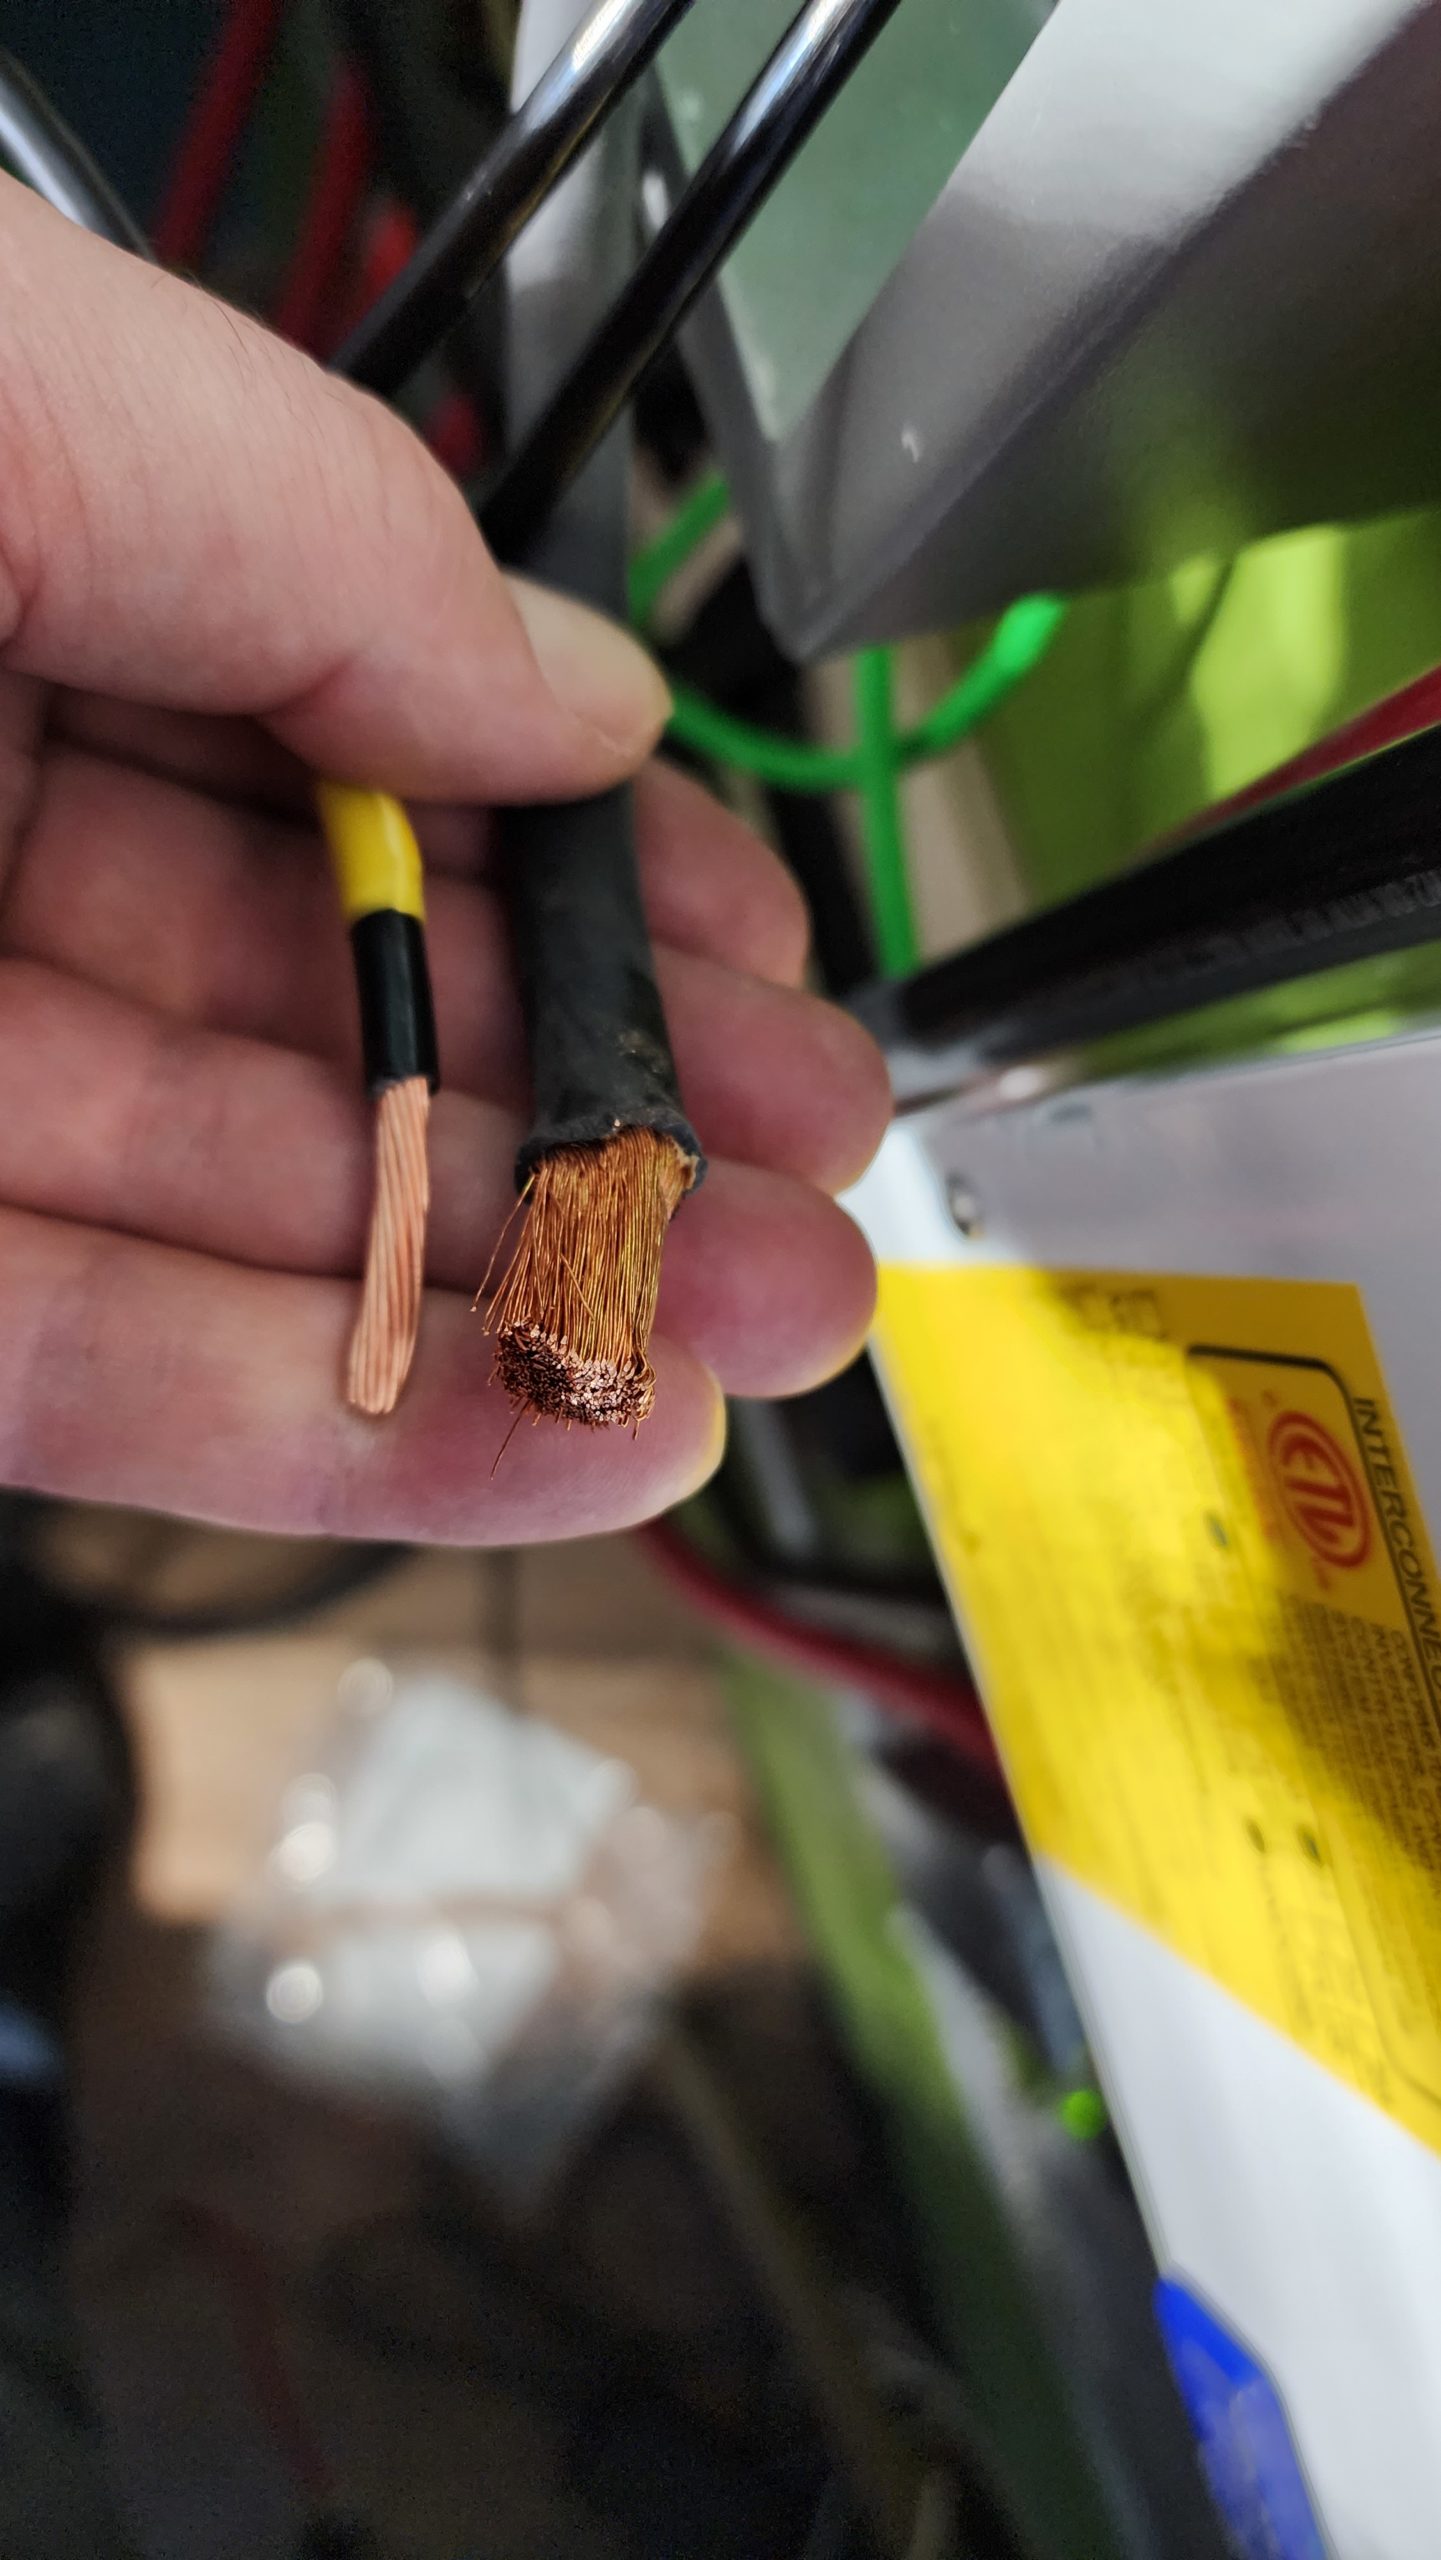
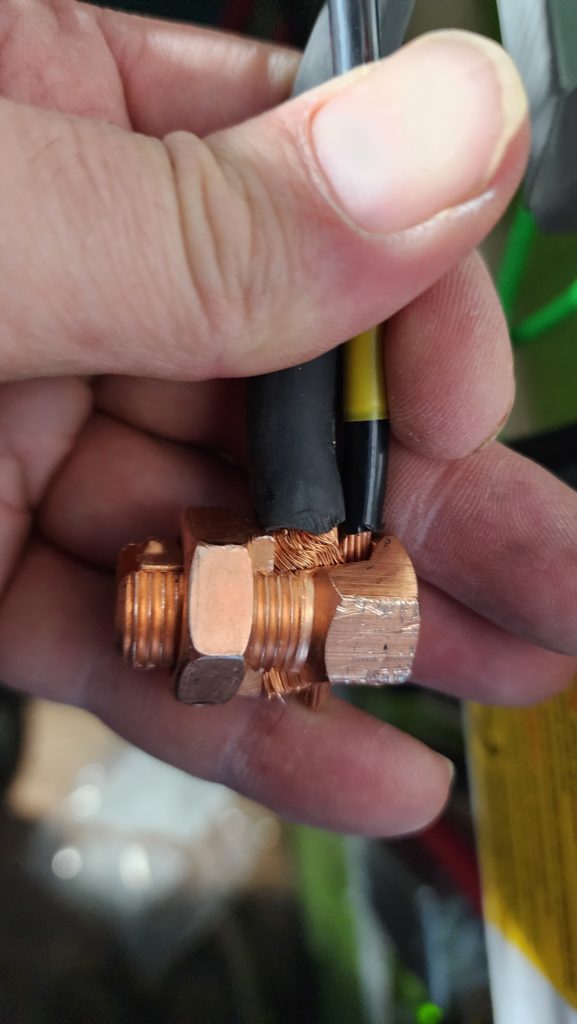
It starts with the AWG 2 wire coming in from the array, into the square box, where this clever fitting called a “split bolt” is used to squeeze it together with the new AWG 8 wire that will go into the upper box.
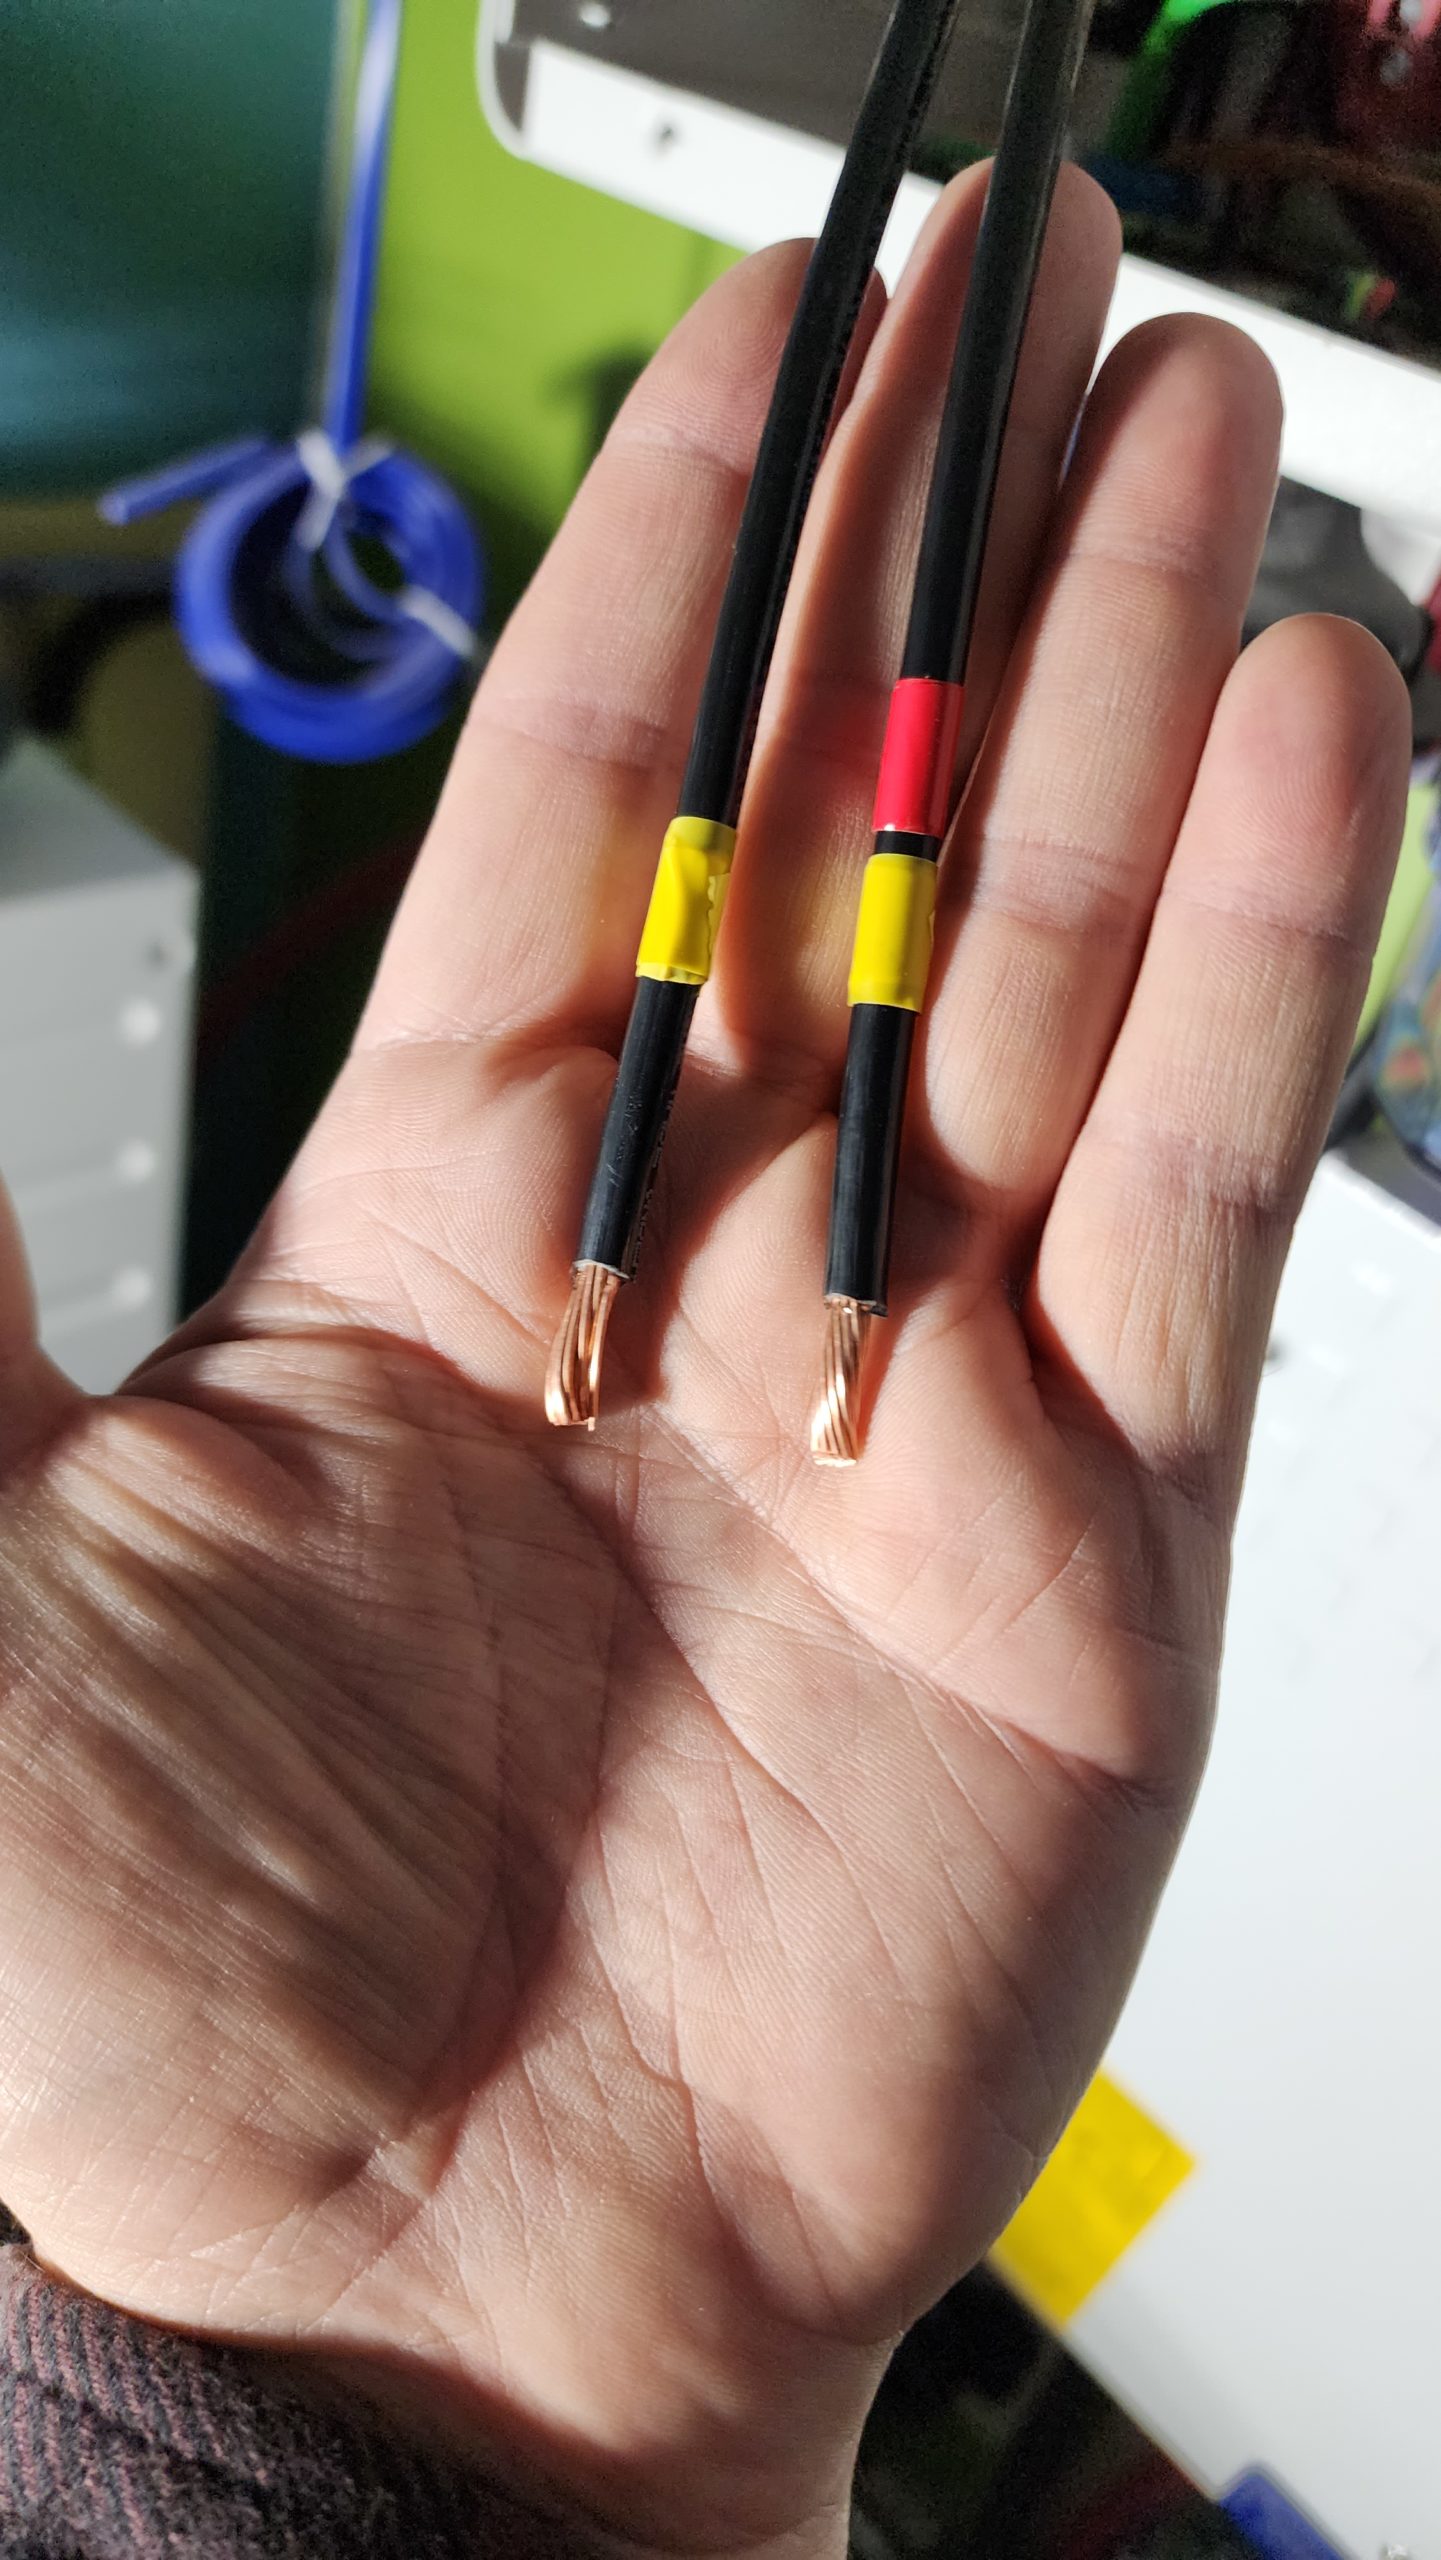
It’s hard to see the difference between the new AWG 8 wire (yellow tag only) and the old AWG 10 wire (red tag), but the new wire is just bigger enough to safely carry as much current as the solar array is capable of delivering, and that’s what matters. The old wire was only a little bit too small, but it was indeed to small, which meant I had to throttle the current so it wouldn’t overheat. Now it’s wide open and I can harvest every last drop of energy the array can capture.
Speaking of capturing energy, although I thought at first that just one battery module (7.5kWh) would be enough for the workshop, and then two (15kWh), it turns out that my interest in using the workshop exceeds the number of sunny days in the dark part of the year, such that yet a third battery module would be put to good use if I had one. It’s so sad on a sunny day to see the batteries FULL — that means there’s energy pouring in that I can’t keep for a gray day. Well, now I can keep more 🙂 And with the wiring upgrade, on a very bright day, I can get every last drop.
Of course, installing the new battery module wasn’t without difficulty, even though none was absolutely necessary.
One thing that WAS necessary was to build a new battery dolly. The existing one definitely didn’t have room for another module and anyhow, its casters were only so-so.
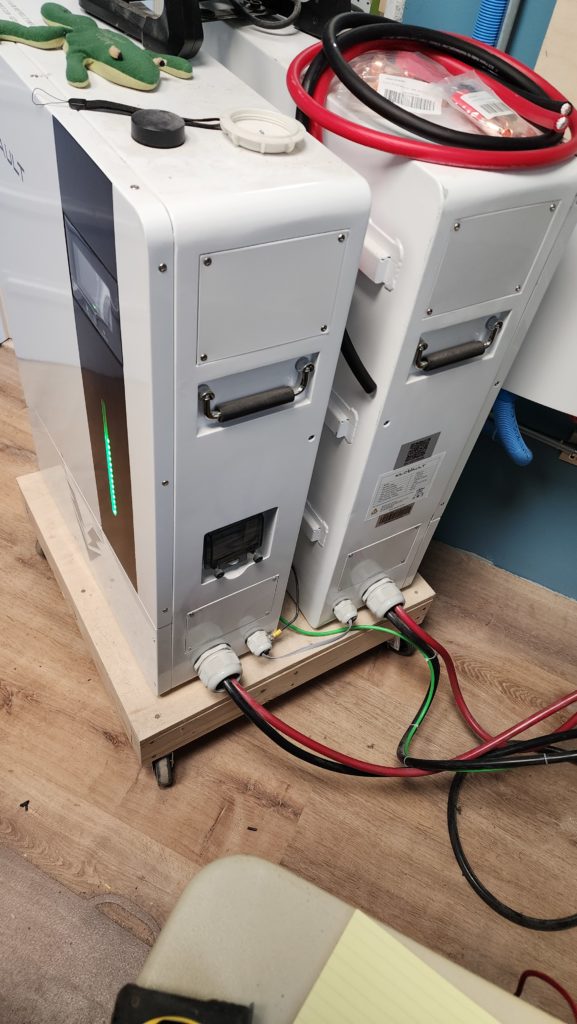
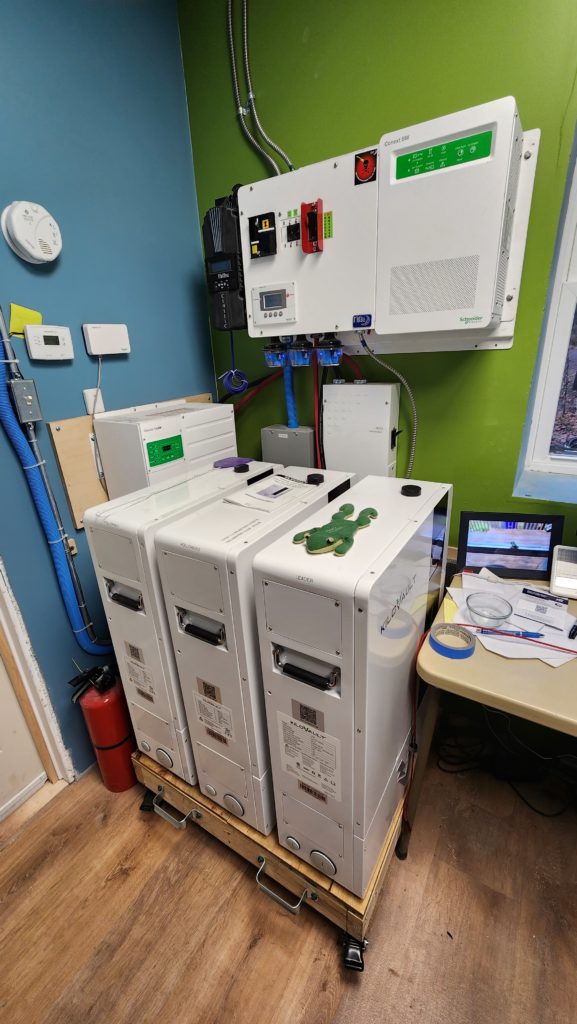
Okay! Build a new dolly. I happened to have some more rugged casters on hand, so I put them to use. Obviously, 3 modules is the limit — otherwise I’ll need to re-arrange the office!
I wired up the new module… yup, those wires are almost as big as my fingers!

The last step is to connect the data cable which allows all three battery modules to talk to each other and coordinate things they might care about, such as keeping things balanced, dealing with fault conditions, etc.
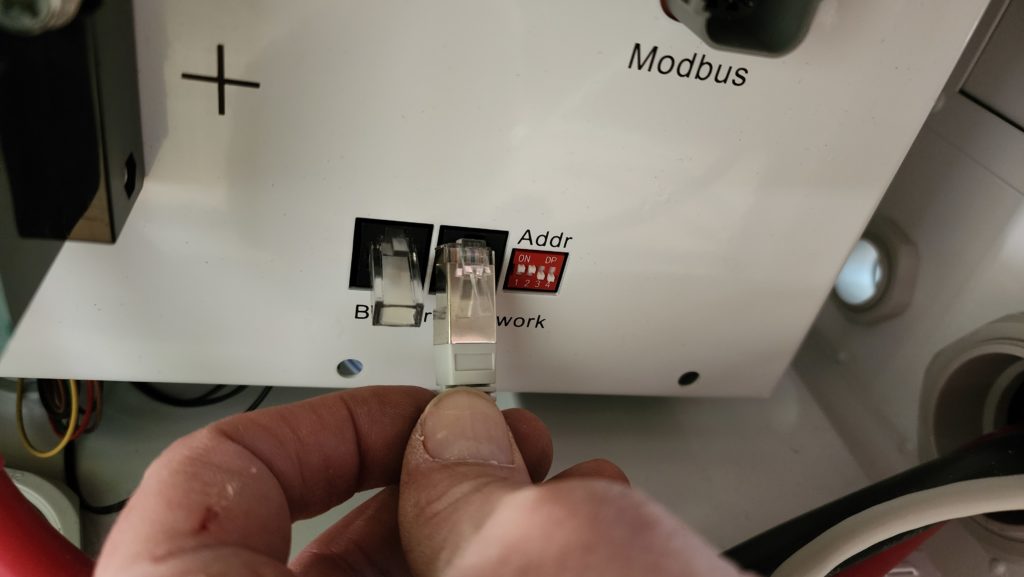
Um… the supplied connector doesn’t fit.
Whut?!
After a frantic email exchange with tech support, it is revealed that the newest battery module has a different connector and while it can talk to the older modules, a special bigger-to-smaller cable is required. All of $5 (plus s&h), but I don’t have it. I’m a bit miffed at my salesman at this point, having reminded him I have older units and asking specifically if there were compatibility issues. He said it was all good, the newer unit can talk to the older ones no problem. While that’s true, it’s also not true. They can’t talk unless they can be physically connected!
He owes me lunch for my trouble, right?
Cable bought, job done, all is well.
I was not able to locate a pre-made door that would fit my workshop-to-garage passageway that was heavily insulated and without windows. There are probably commercial/industrial doors out there that would have done the job, but they didn’t show up in my search and after a little while I decided it would be simply expeditious to just make one. There is one problem with my building a door, though: I make them just often enough to think I know how to do it and just infrequently enough that I never remember all the things in time to get it right the first time 😜.
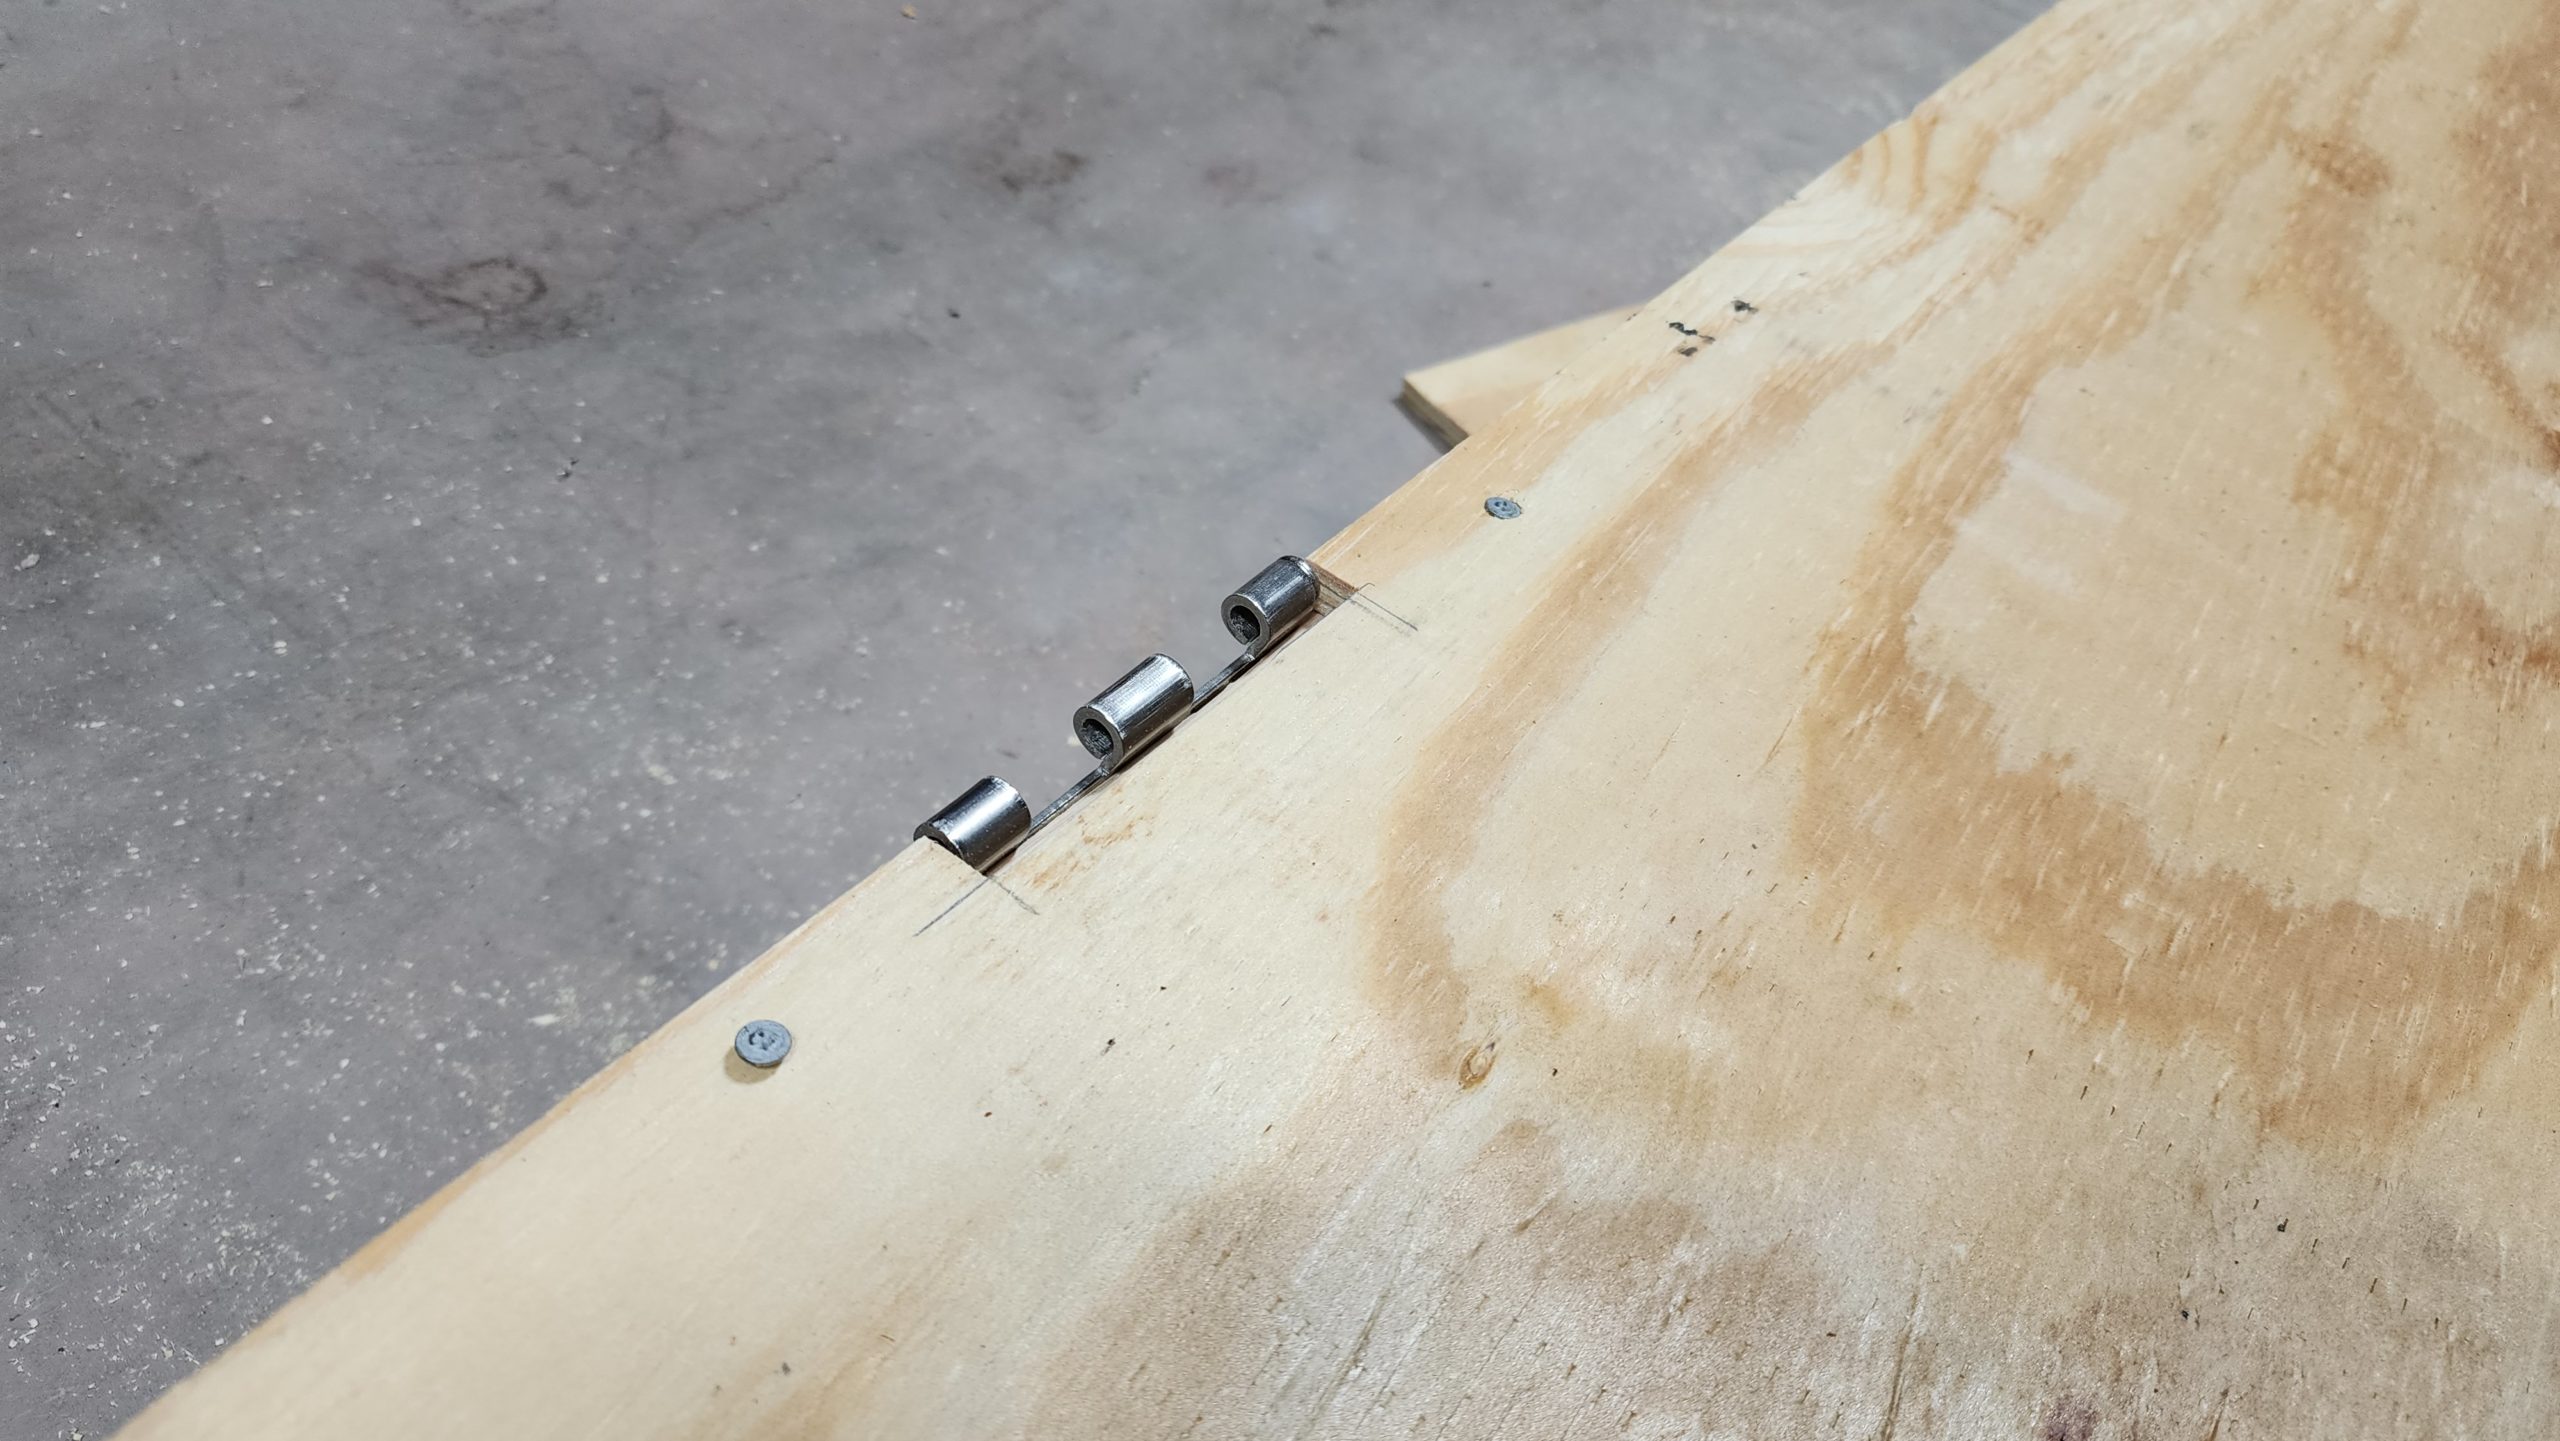
Thinking I was going to do this the smart way, I built the parts involving the hinges first:
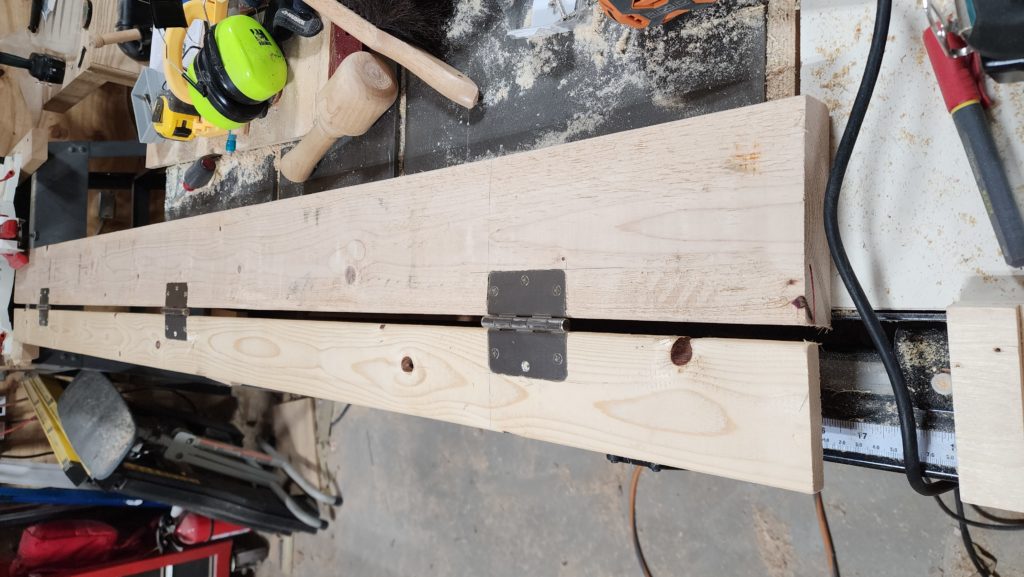
This way, I can be sure the hinge leaves are aligned and the action is smooth before I build the rest of the door. So far, so good.
Next, mount the hinged part to the doorway to get the wall part in the right place and ensure there’s clearance for the bottom of the door.
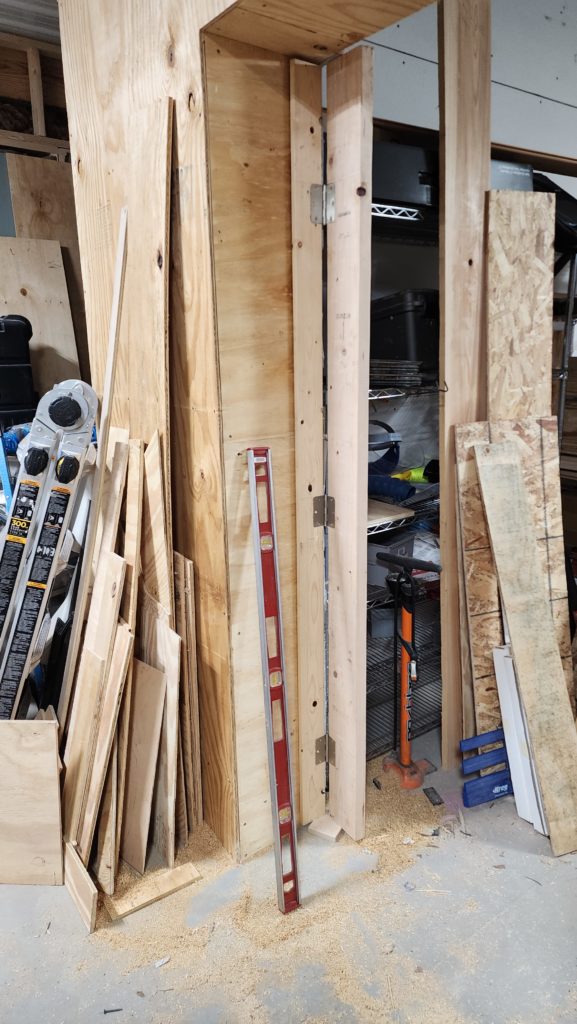
So far, so good. Next step, un-pin the hinges and take the door-part back to the bench and build the door around it, knowing it will mount nicely to the mating parts now secured to the doorway. This should be easy.
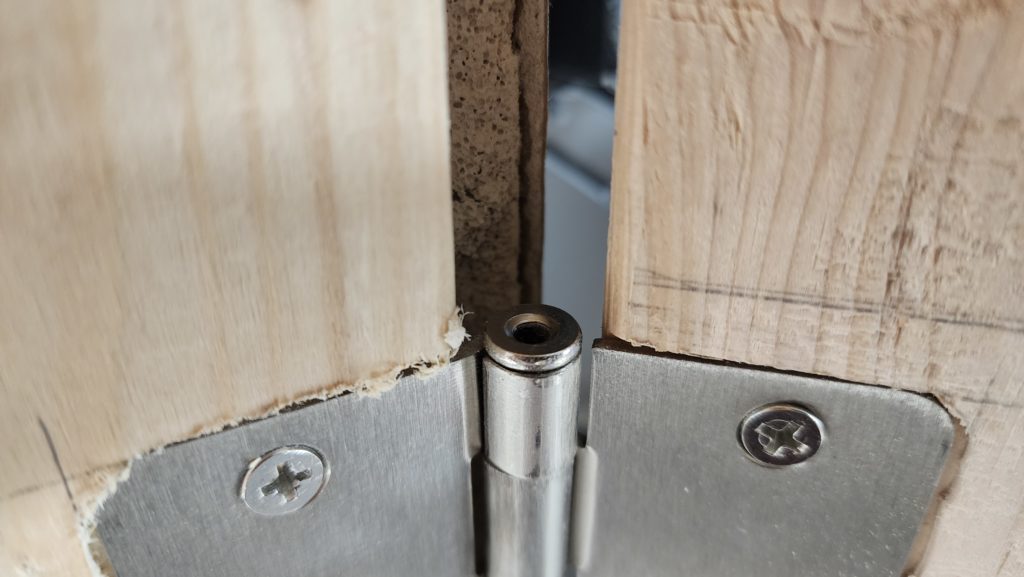
See that hole in the end of the hinge barrel? That’s the bottom of the hinge, where one might stick a nail to then use to push up the pin from the bottom. Except the hole is at the top, not the bottom. Crap. Okay, gotta invert the hinges. Fine. Not a big deal. Just a few screws. Good thing they’re symmetric. This is not a precision/show door, so I didn’t care that the edge of the mortise was a little fuzzy.
Hinges reversed, it’s now time to un-pin them and get on with the door-building job. However, it turns out the lowest hinge, while a decent distance from the floor, is still too close to the floor to have sufficient clearance to swing a hammer to hit an inserted nail to pop up the pin. Sure, you can hit the head of the pin obliquely with a junk screwdriver and try to pry it up that way, but this one fit pretty flush, for starters — no good purchase for the screwdriver tip — and there’s still not really decent room to swing a hammer to strike the end of the screwdriver for that bottom one anyhow. Hm. What to do?
I know! This bit of roughly Z-shaped steel, which ostensibly is used horizontally to pull flooring together, can also work vertically, with a slight modification.
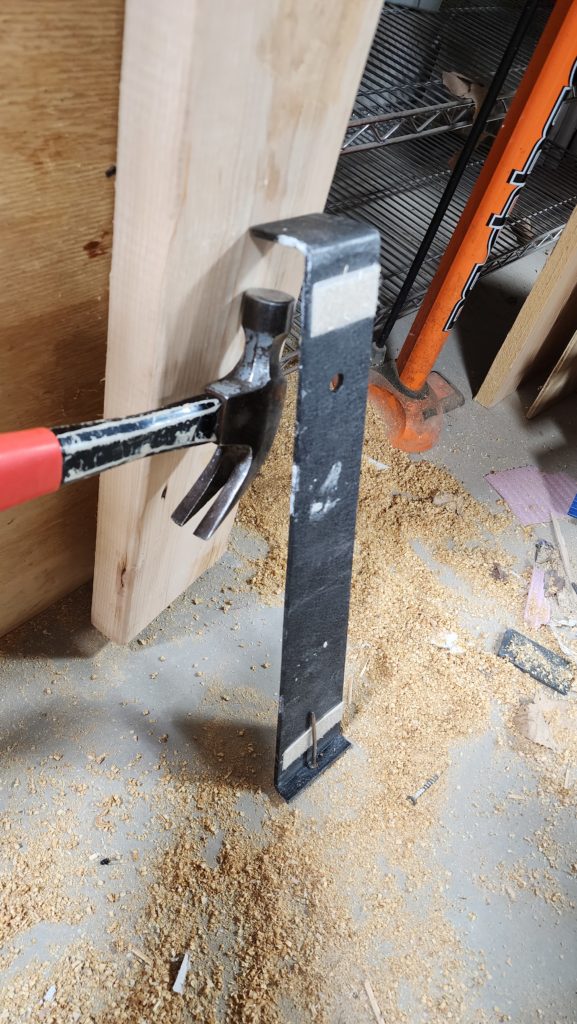
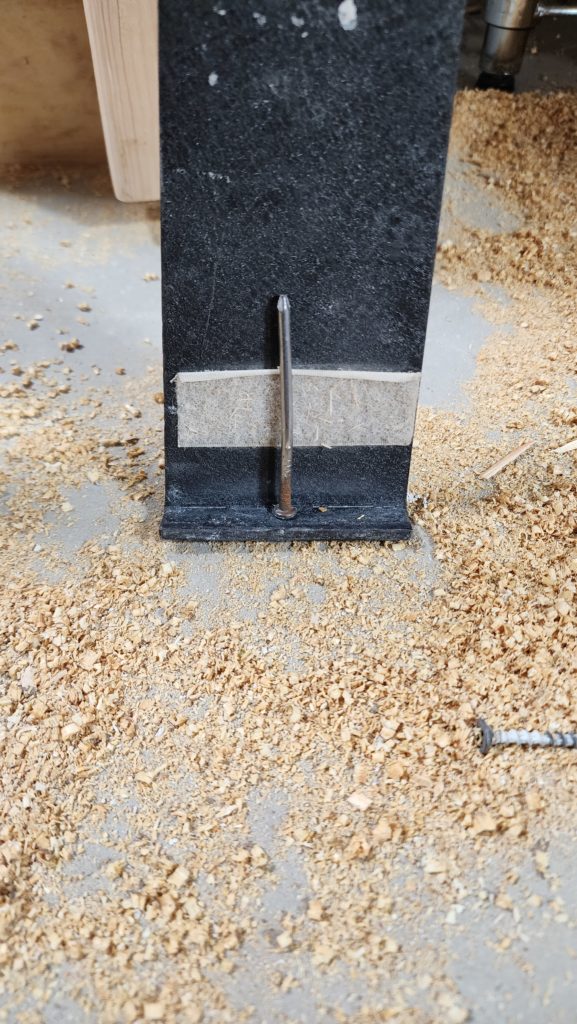
Posed here for illustrative purposes, note the hammer has some clearance for a decent swing. A stout nail is placed on the pulling lip of the Z-bar which is then positioned such that the nail enters the now up-facing hole in the tail of the hinge barrel, poking at the bottom of the hinge pin. Hold it all together carefully and strike the upper lip of the Z-bar with the hammer. The impact pulls the Z-bar upward, which in turn pulls the nail upward, which in turn encourages the hinge pin to rise. Who says you can’t use flooring tools for door work? 🙂
Now I build the door proper. Nothing interesting here – it’s basically a 2×6 insulated stud wall with 3/8″ plywood faces that happens to have hinges on one side. And I’ve already mortised and tested the hinges, so I know they’re perfectly aligned and the door will swing easily.
Except I forgot something. I so carefully laid out the hinge position to be correct to the face of the studs, forgetting that there’s another 3/8″ of plywood facing that I need to accommodate! The hinge got buried!
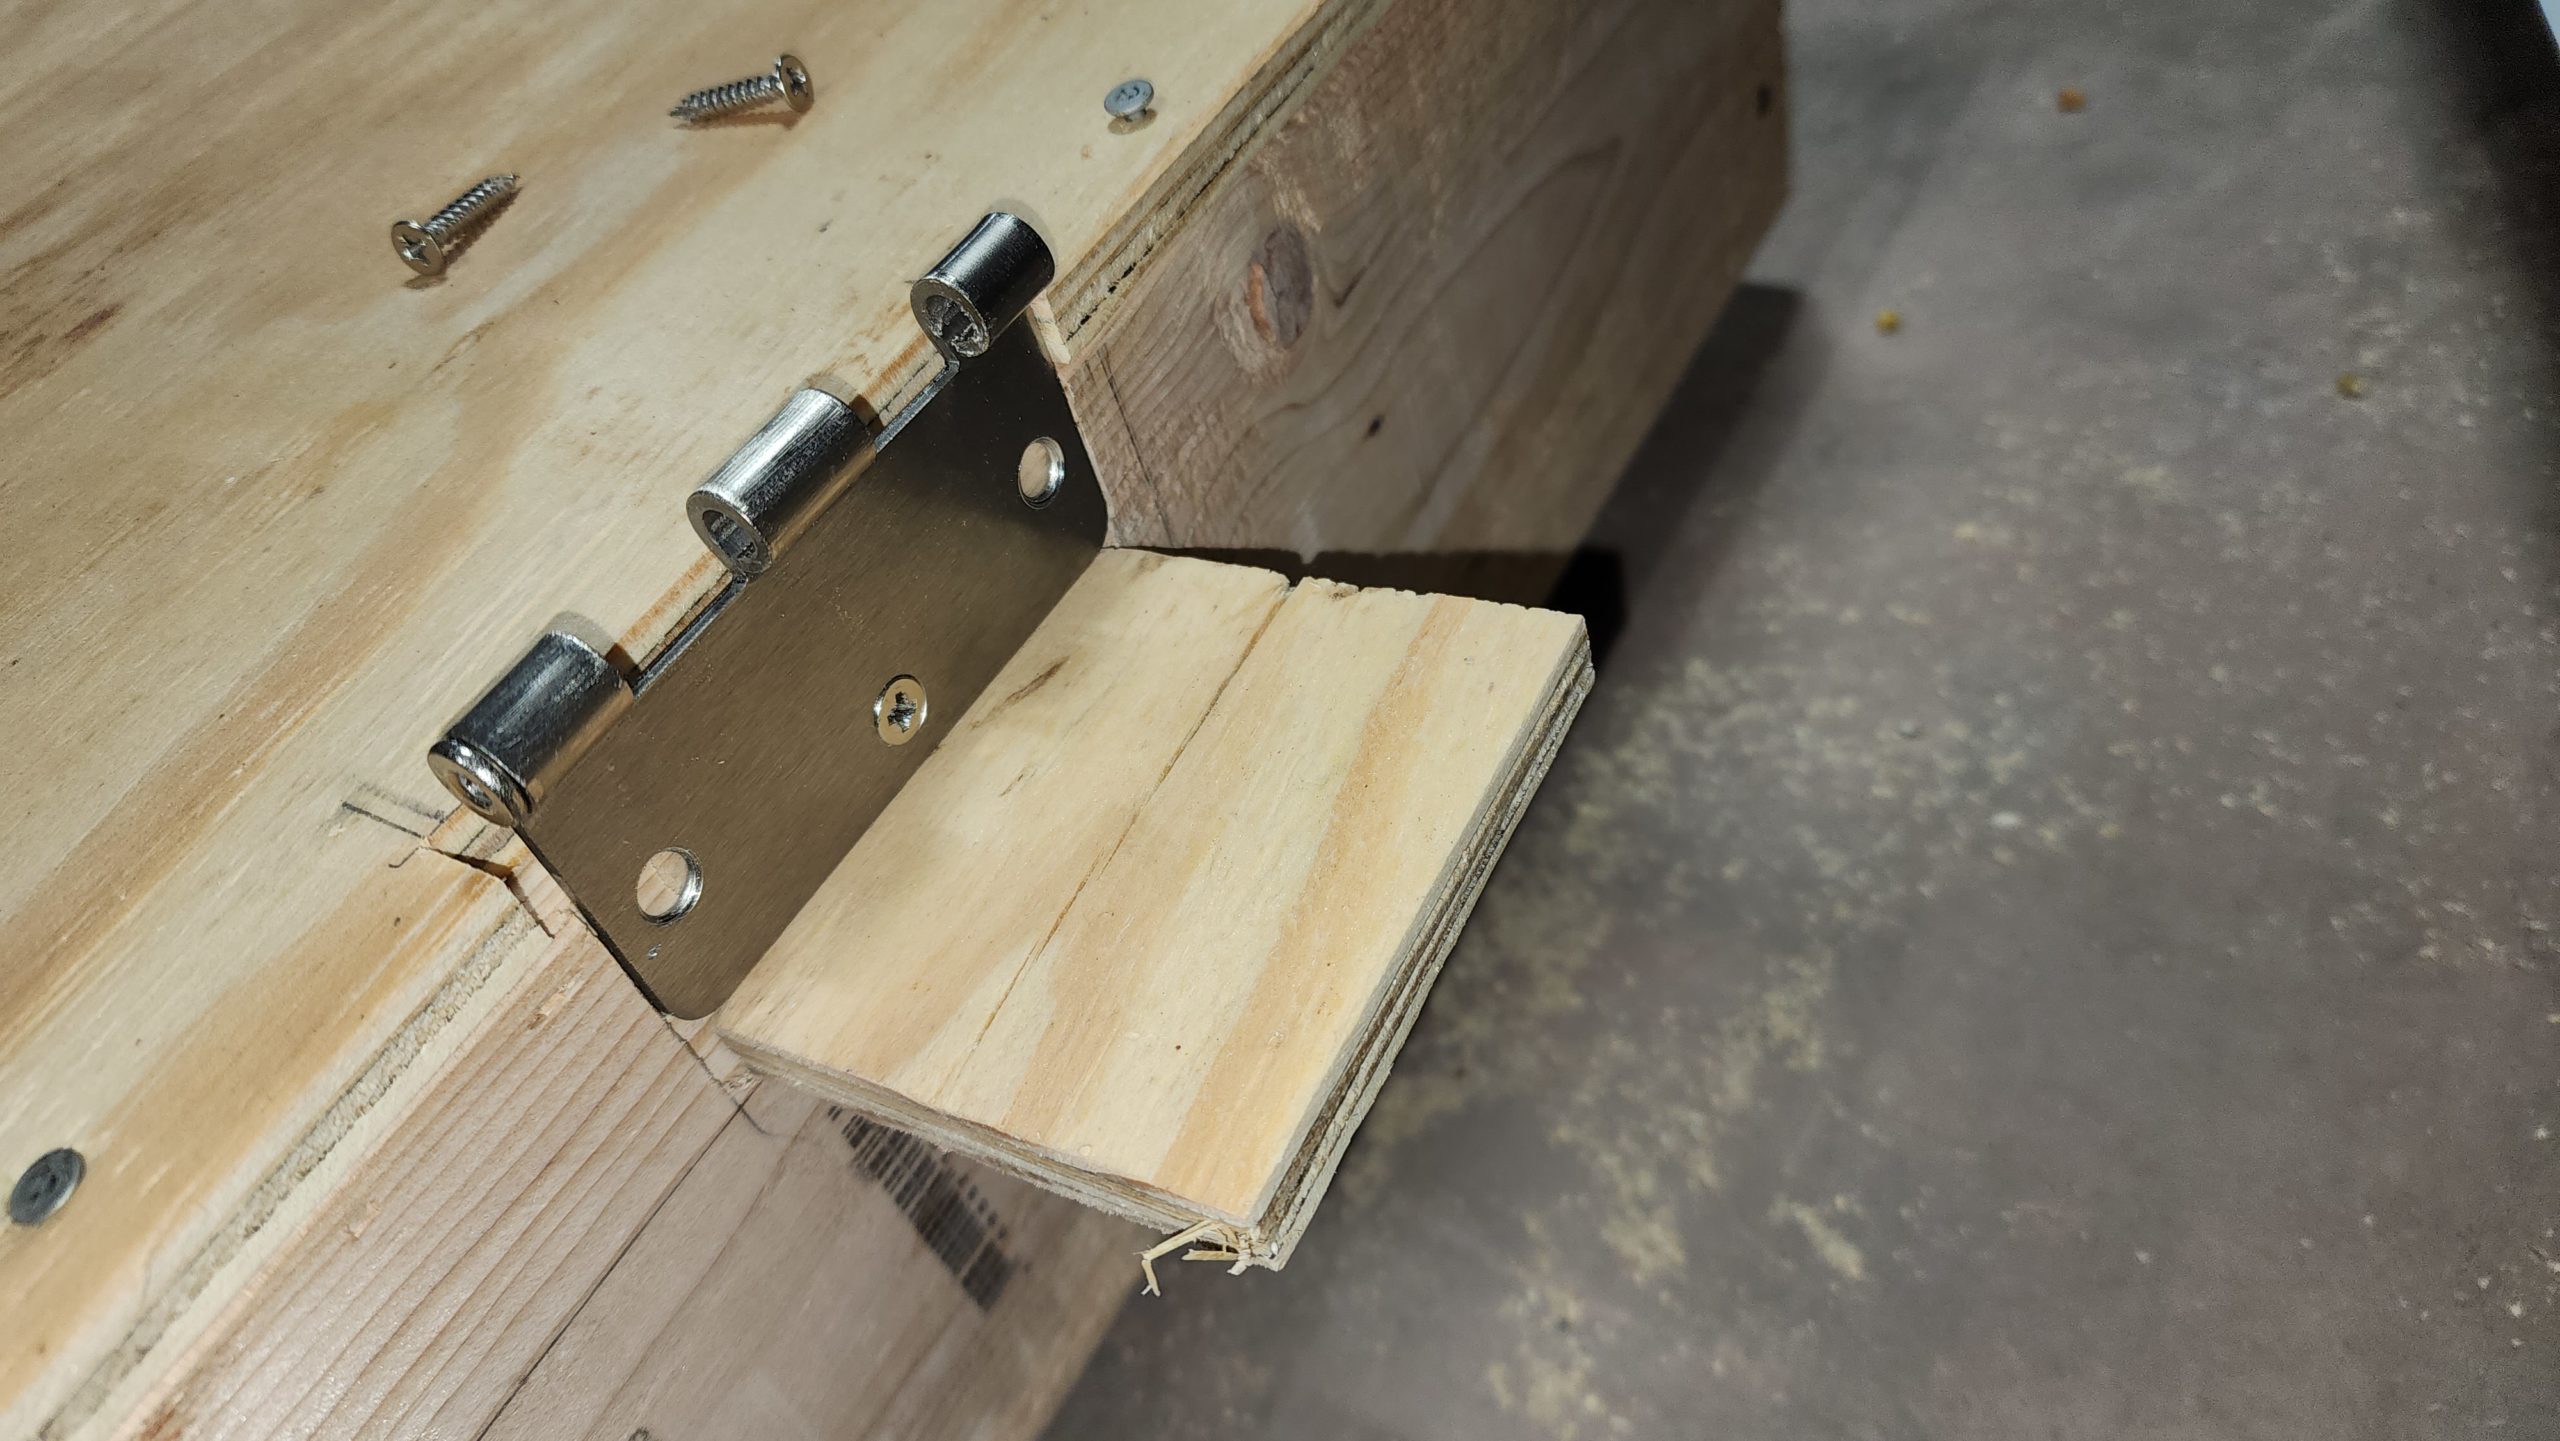
It wasn’t too much trouble to correct – I can use a scrap of that same plywood shoved into the mortise to provide the exact offset needed, then re-screw the hinge leaf into the door frame, 3x. Sigh.
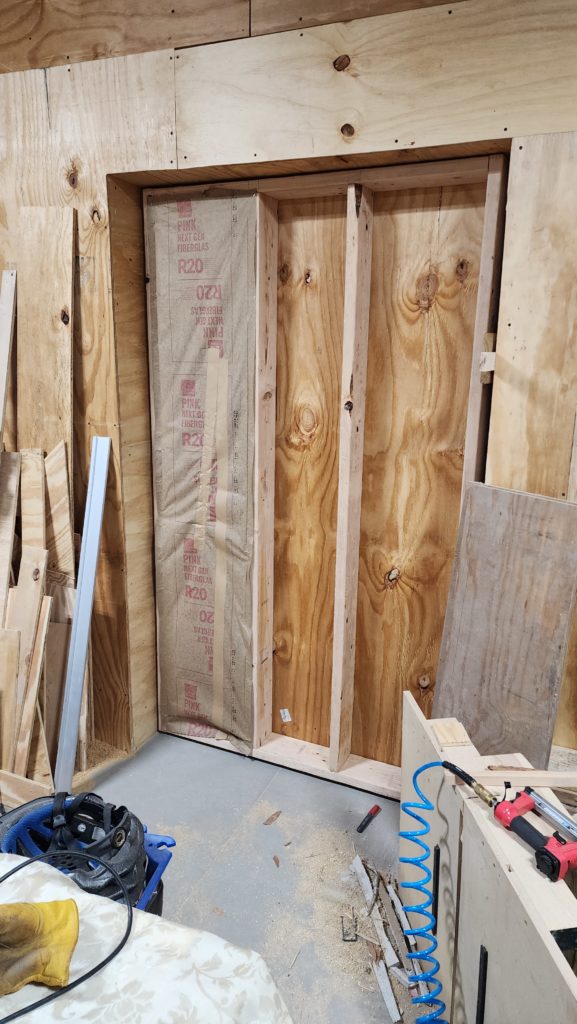
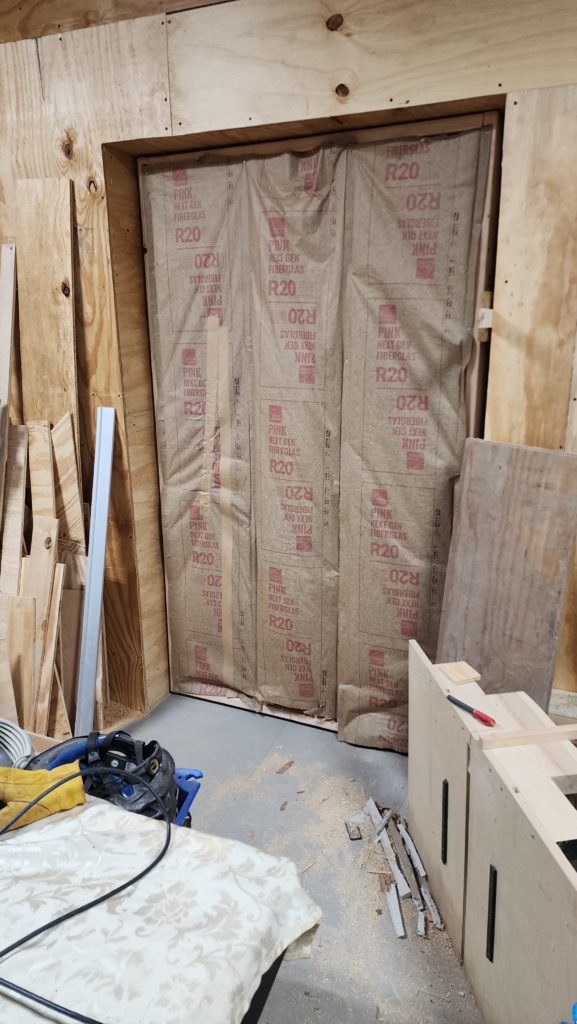
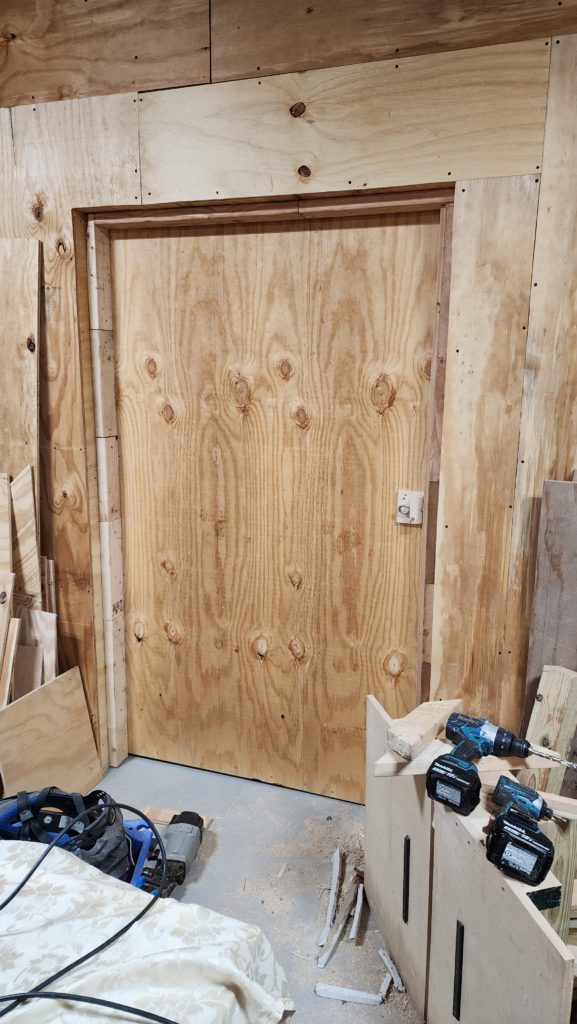
Building the rest of the door was as easy as it was supposed to be. The jamb I pieced together using scrap 2x4s — no reason it has to be pretty, this is a door between a workshop and a garage. It doesn’t have to be pretty nor sophisticated. It just needs to keep out the cold. And that it does. With the garage finally closed off from the shop, it’s much easier to keep the shop warm.
Why is there even such a door? It’s there to make moving machinery in and out of the shop easier — a 48″ door with no threshold — it’s just continuous concrete from the garage into the shop. That means a machine can be delivered to the garage and wheeled right into the shop without fuss. It also means that if I should choose to build a boat — something I’ve considered — I’ll have a way to get it out of the workshop!
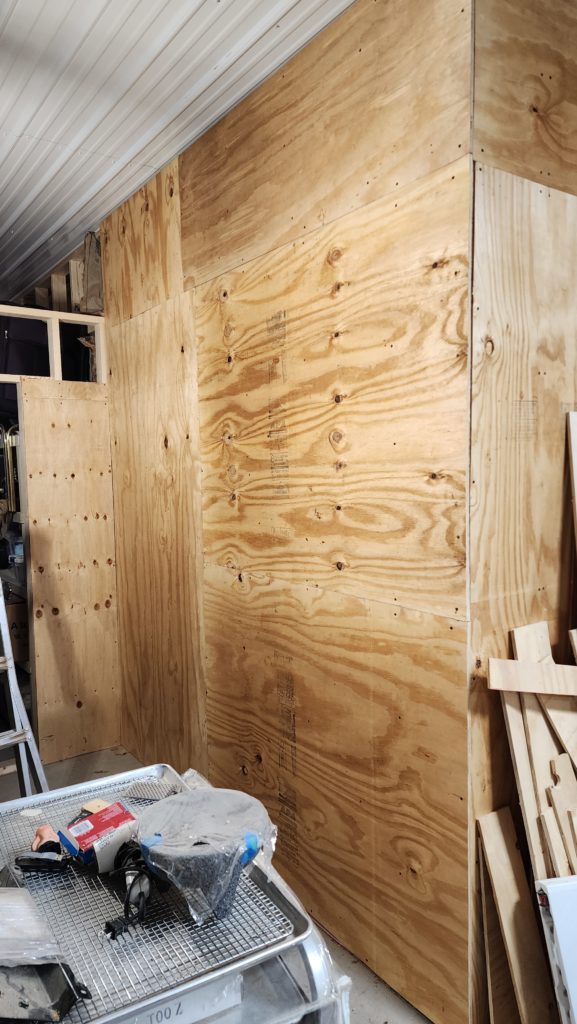
Meanwhile, a little more progress on the interior. Slow and steady. Now that the outdoor winter projects are done and the higher-priority indoor projects (stove & electrical upgrade, which provides more power for all the other indoor projects) is done, my attention finally returns to finishing the workshop interior.
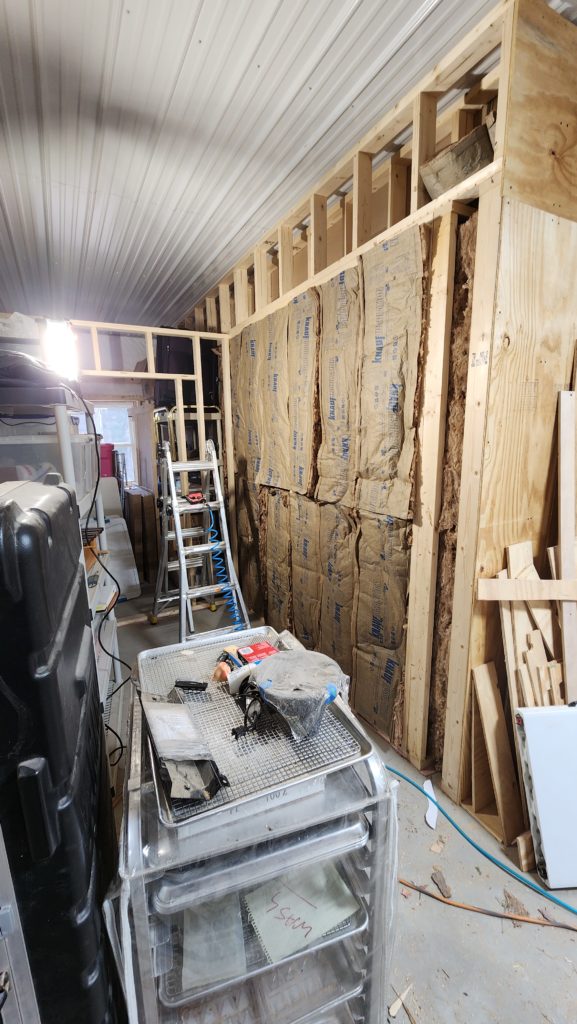
This doesn’t look like much but it represents yet another round of the big Parking Lot game I am continuously playing in the workshop as I shuffle things around to make room to build, one area at a time. This corridor will be wood storage, which will let me unbox a few big boxes of wood, making the main shop floor less cluttered. But not before I move everything on the LEFT wall to against the newly finished RIGHT wall so I can finish the left wall so I can finish the end wall so I can the move everything out of the tidy room so I can finish the tidy room (wall board, paint, drop ceiling — like the office). Then and only then will I be able to build the wood storage systems for the corridor. Before anything can be done… well… you know.
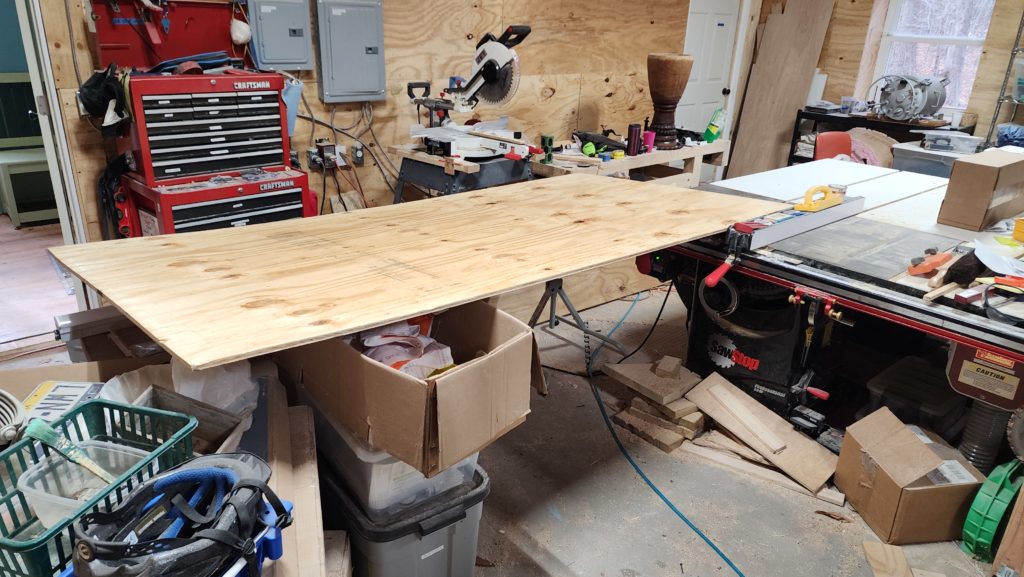
And when I have more room for things and fewer building materials crowding the workshop floor, I won’t have to do such madness at this, resting sheet goods on stacked boxes as I get ready to feed it into the table saw.
Also part of the master plan is to create a work station that accommodates the chop saw (shown above against the wall, center top), the drill press, the disc/belt sander, and has a dock where the grinder and scroll saw may be used, or a blank to cover the void when both are stowed, giving the chop saw maximum elbow room for long stock. The design for that is in progress. When done, it should have the overall effect of reducing the total foot print of all these tools while providing built-in workpiece support for the chop saw and hosting a handful of storage drawers/cabinets, as well.
It’s still too early to even show the sketch for that, but you may look forward to reading about that in the coming weeks.
Lastly, despite my attempts to efficiently dry the newly-milled boards, it seems they are wet enough to support what I believe to be some kind of fluffy fungal growth. Not all the boards, but many of them.

I really don’t know what to do about that and anyhow I have so much else that’s more pressing, I don’t want to get distracted by this. I also don’t want to un-stack and re-stack what’s probably 2000# of wood, just so I can treat the surfaces. I’m not so attached to this load of lumber that I will drop everything to intervene. I’m going to let whatever this is run its course and hope that it doesn’t destroy the wood. And if it does, it does. There will be more timber to mill next year and hopefully I’ll have an opportunity to get further educated about the air-drying process by then. For now, I’m just going to hope whatever this is doesn’t actually destroy the wood. I don’t care if it discolors it or if it consumes a small amount from the surfaces or edges. All that stuff gets machined away as part of the process of dressing the boards into flat, squared-off stock.