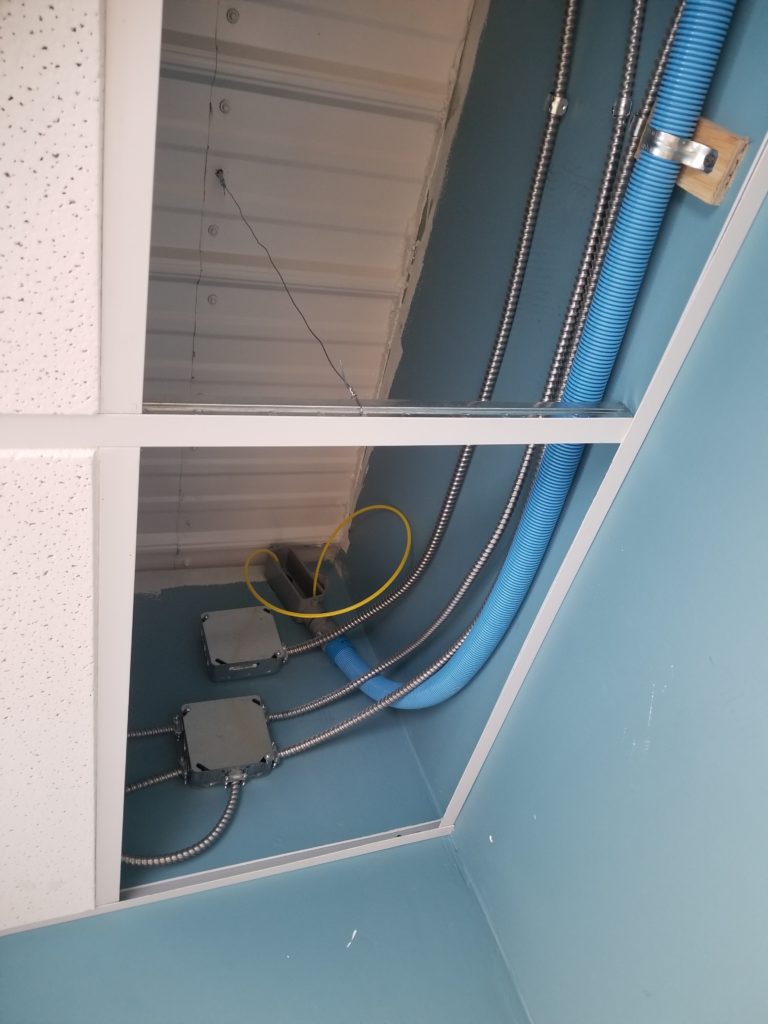
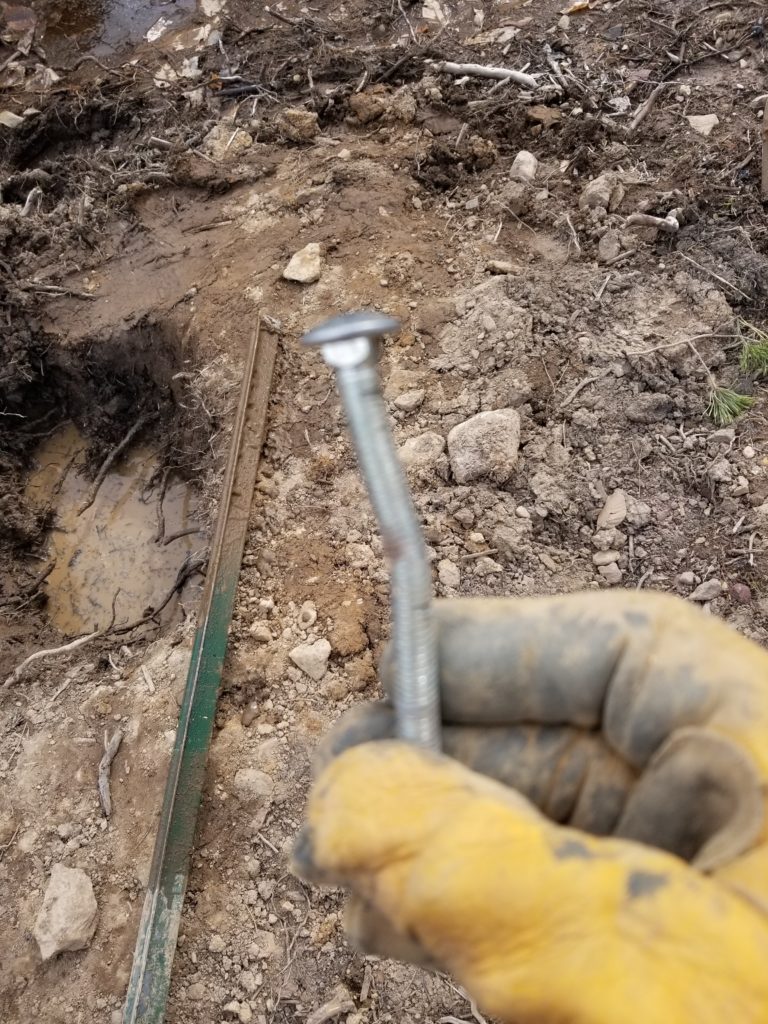
Last I wrote about machine power, I was in the process of installing the second, more capacious AC inverter* in hopes of it being able to start and run my table saw, which puts a super-heavy load on the power source when it spins up. The story picks up where I need to run four AWG 6 wires from the new inverter to the new load center. Those wires are too big for the metal conduit I have (and have tools for) and there’s no armored cable that comes in AWG 6 (biggest I’ve seen is AWG 10). Okay, then, time for my old friend blue flexi conduit and individual wires. To my surprise, it appears there are no pictures of pulling those wires — oops — I coulda sworn I took some. Oh, well, pulling wires is pulling wires. You’ve seen that before. I did have to get creative with routing the flexi conduit, though, since the right place to pass it through the wall to the workshop was also an especially inconvenient corner of the ceiling that already had a nexus of cables. The yellow filament is attached to the wire bundle at one end and travels the entire route . I pull the wires through in stages, like here, where I pull all the wire out, then shove it through the conduit body because pulling it end-to-end all at once can’t be done because of hard angles like this.
Now imagine you’re a 260-pound, 6’1″ human on a ladder, with their body constrained by the drop ceiling beams and the wall, trying to yank a bundle of heavy wires without losing your balance. Fun times!
There were a couple of unexpected bits of wiring to do besides the main stuff for DC supply and AC load. The new inverter* needs a data cable, too, to connect it to its web gateway device. Its what? It’s web gateway device. This isn’t so I can talk to my power system from afar. It’s so I can talk to it from a-near. The smaller inverter had a simple control panel. This bigger one appears to be a newer model as well as a more sophisticated device (besides being more powerful) and it wants a more sophisticated interface. In this case, a “web site” hosted by a widget that I can browse to to set things up and review telemetry and metrics.
*I still don’t know why it’s called an “inverter” — I looked it up and honestly didn’t understand the explanation… and I have 2/3 of an electrical engineering degree! Be that as it may, it’s the thing that takes DC from the battery and creates the AC sine wave wanted by all the machines and so much else.
Okay, then, time to hook up the inverter to the gateway. It has a connector that is physically identical to an Ethernet connector (RJ45 for the technical minded among you) but of course it’s not Ethernet, it’s Xanbus. Whatbus? Xanbus. Which appears to be a superset of CANbus, of which I have actually heard. More to the point, it’s not obvious whether the Xanbus will be happy on an Ethernet cable. I suspect it will, but there are particulars of how the wires are routed through the cable that introduce some esoteric nuance that I don’t want to fuss with. Okay, then, I’ll just wire my own cables. I can do that. It’s a nice break from those 4/0 monsters. These are AWG 24 or maybe 28 wires. So dainty! I have wired these kinds of cables before but I have no idea where my tools for that are — or maybe I borrowed them! — and anyhow, there’s a technology for this that I didn’t remember from before: you can just pass the wires right through the connector! The act of crimping on the connector also shears the wire ends. This is genius! One no longer has to get all 8 wires perfectly sized for the slight fan-out they experience on their way into the connector.
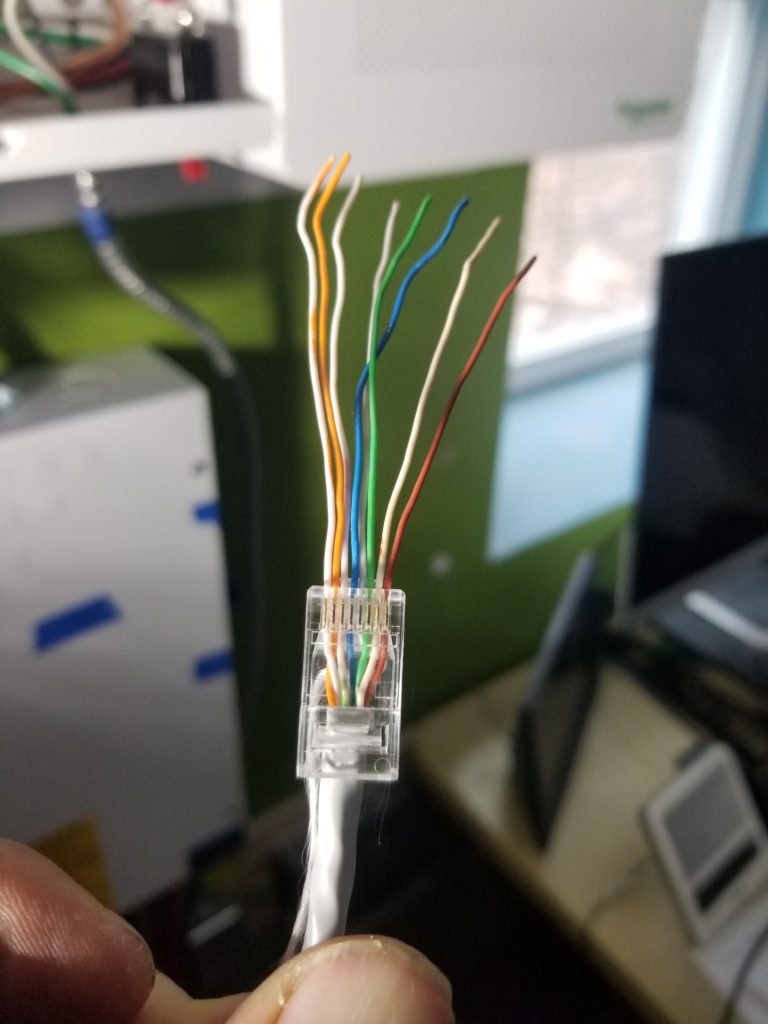
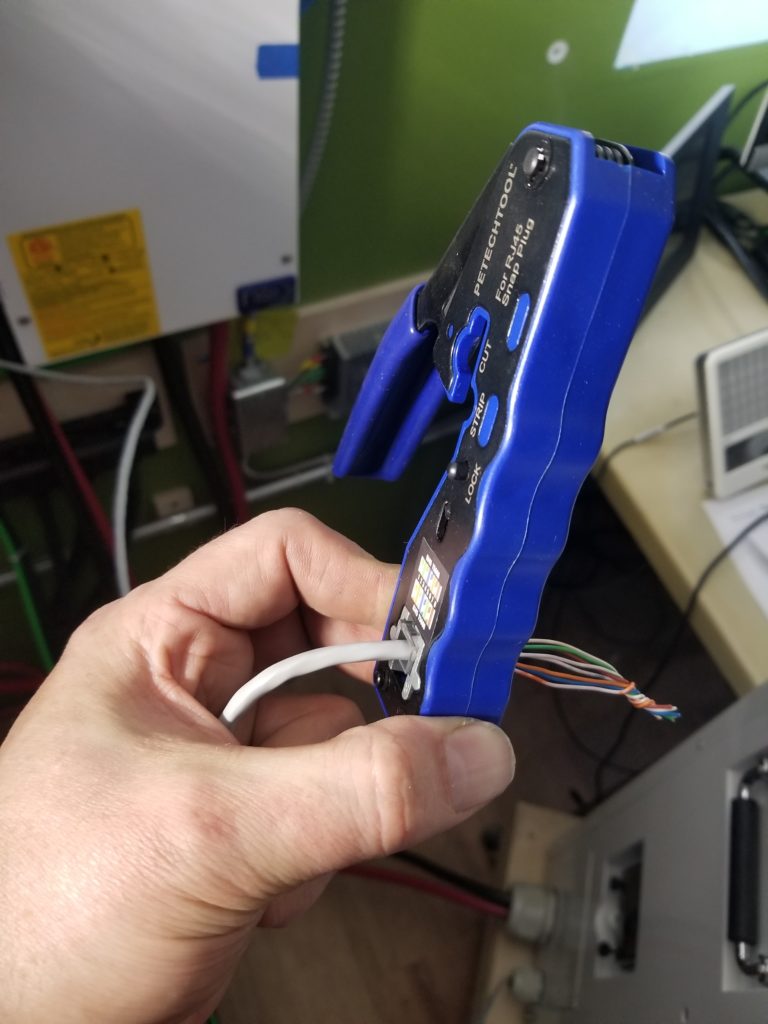
Just pass them through, bear down on the tool, and the excess wire is cut off, leaving a perfectly tidy end. Love it. So now I have tools for making network cables, as well as heavy battery cables. As well as coaxial cables (useful for cable internet if you’re not lucky enough to have fiber) which have no business here and I haven’t needed for 10 years. Today while I was working on something else I needed some standard 120V AC outlets – had ’em – and a 240V 15A plug (had that, too) – and some cover plates (had those, too). At this point, I have a moderately well-stocked electrical supply house over here, as it turns out. I sometimes joke that I have at least one (and probably two) of pretty much everything.
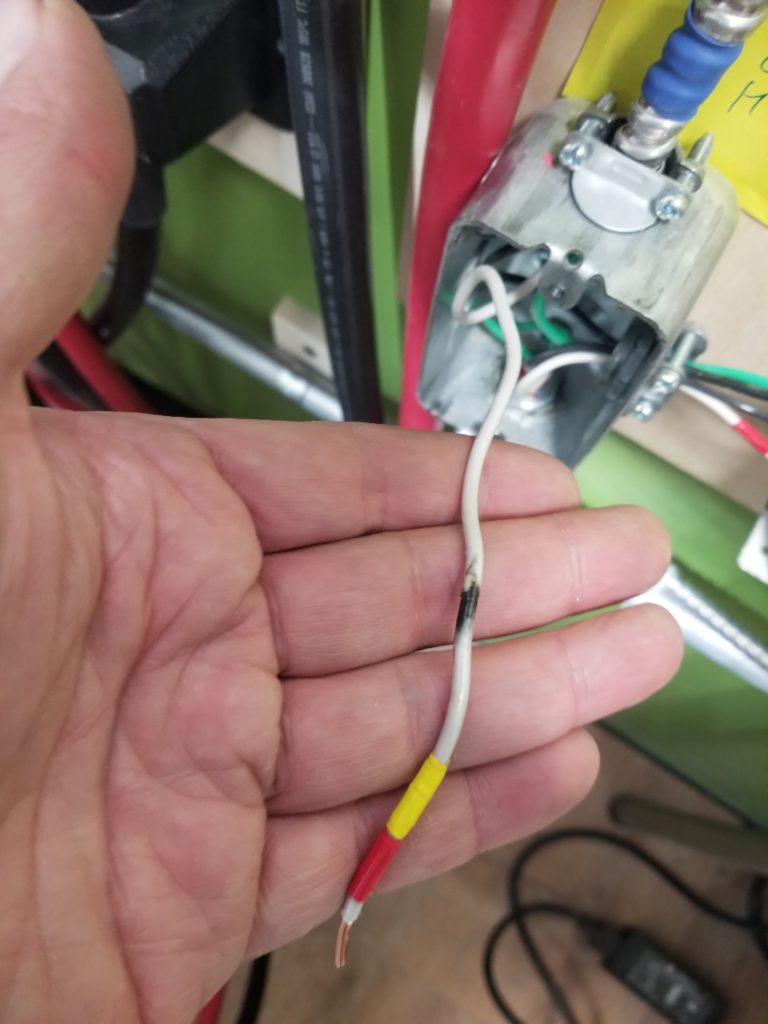
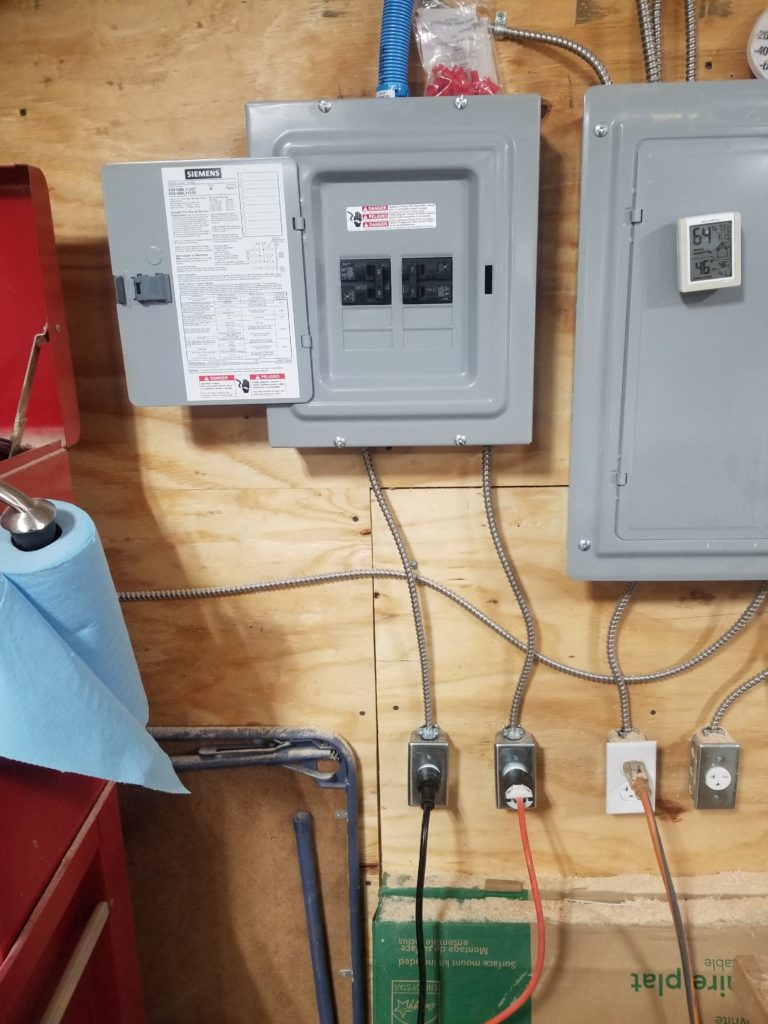
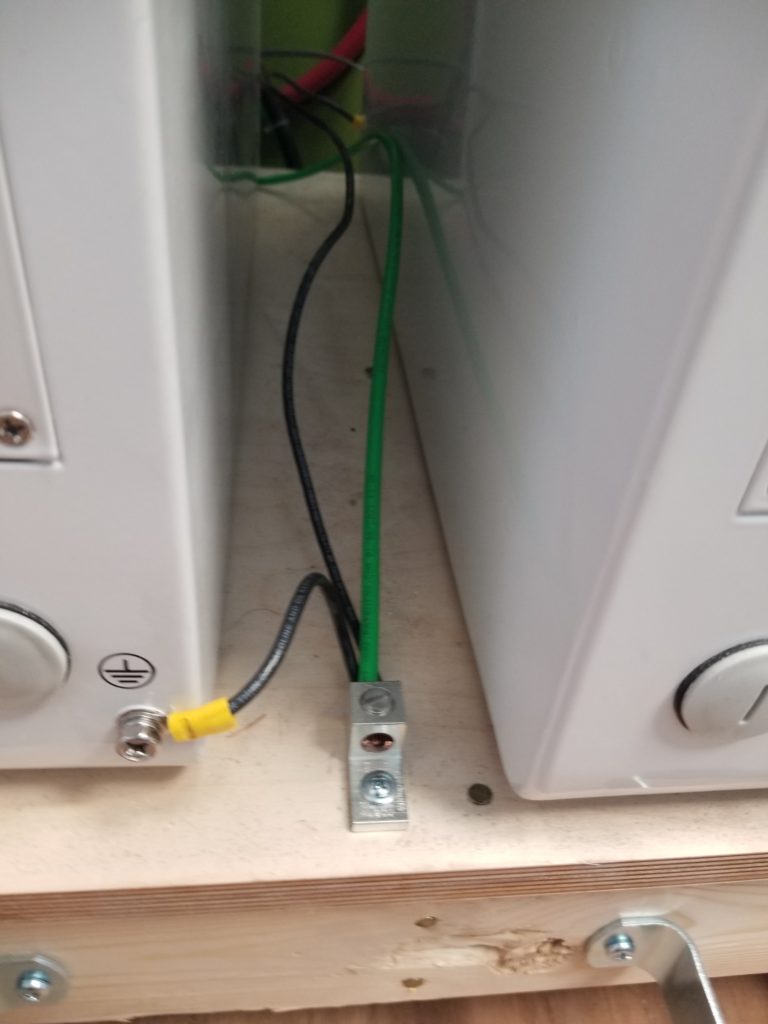
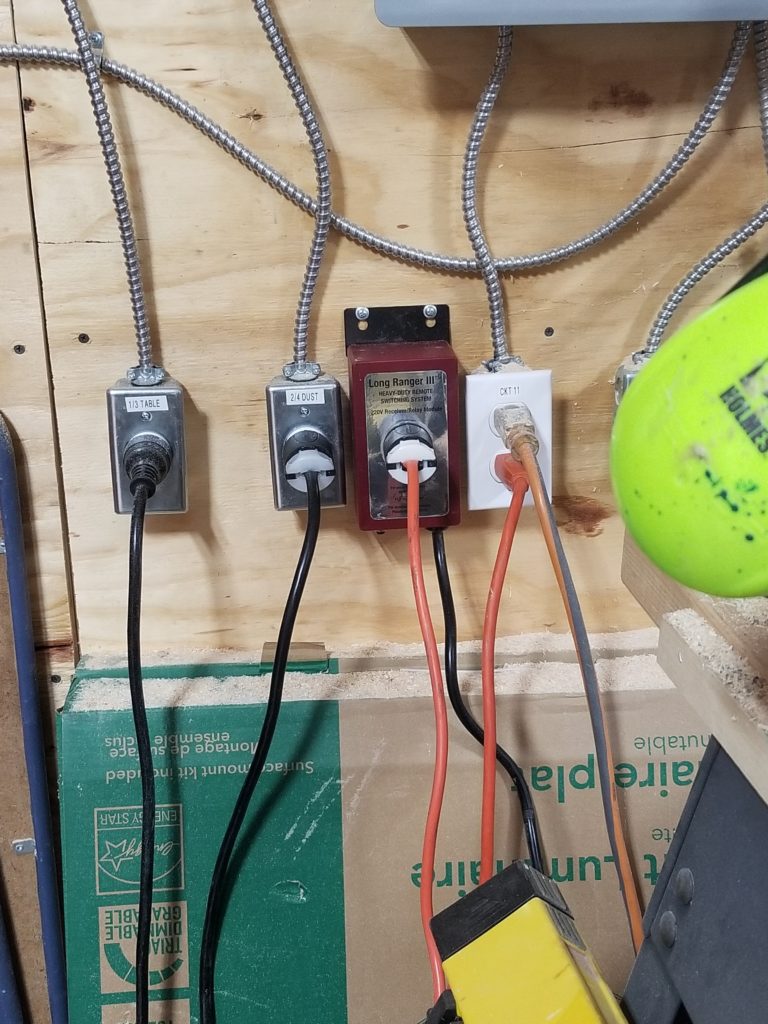
Data cable built, gateway device installed and connected. What’s next? Oh! I forgot to add a grounding wire from my copper stake (true ground) to the new inverter. Better do that. And the 250A breaker housing for the new inverter, too. Better do that. The easiest place to tie in is actually in the power center for the other inverter, where the ground line comes in. Okay, that. I bring the ground wire back to the nearest junction box and now I have a problem. I also want to ground the battery modules for extra safety, so now I want to join 4 wires (ground, module dolly, new inverter, breaker housing). But these are AWG 6 wires – pretty thick – too big for wire nuts and I don’t have a little bus bar for them. I bought these split-bolt connectors but it turns out they are too small for a 4-way junction of this size wire. The package came with two of them, though, so I got a little creative and turned a 4-way junction in to a pair of 3-way junctions.
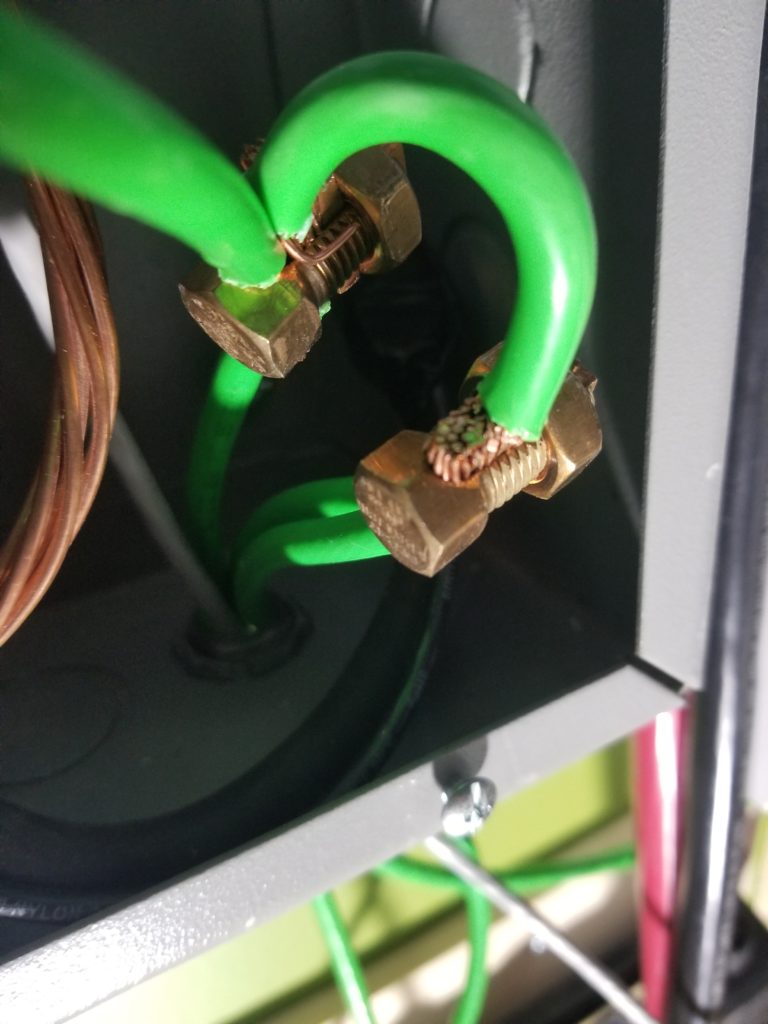
A little hokey, perhaps, but legit and effective and I didn’t have to make a two hour round trip to HD to return $5 worth of slightly too-small split bolts for $6 worth of slightly larger split bolts. That bare twist is actually the AWG 4 (or maybe it’s AWG 2) that goes to the copper stake. There was no good way to interrupt it here because there was not enough slack to cut it and do any shenanigans.
Although just now, looking at it, if I had larger split bolts, which are open at their end if you take off the nut, I could have actually just slid them over the copper twist and clamped the new ground wires directly to it rather than having to run a tap off the ground bus bar in the power center and bring that back down (green wire from above, left) and all this silliness. But no, I had slightly-too-small split bolts and this junction box is behind the battery dolly which because of how much space I needed to work on this required me to also move my desk out of the way so I could push the batteries further away. All this to say that coming back here to tidy it up is too much trouble. Alas, slightly larger split bolts would have made this so much simpler. But I had what I had and made it work. That’s how we do it out here in the middle of somewhere 🙂 Next time I’m setting up a solar power system, I’ll remember this and use bigger bolts. Of course, this whole problem arose largely because this system was built incrementally rather than all at once. That’s the way of things with this project – it’s the first time I’ve built anything like this, so there is learning and revising that happens. A lot. Just like the house, if I ever built another, I could do it in 1/3 the time, now what I know how it all comes together. Now’s a good time to say “Hey, that may be true, but look at this: YOUR FIRST TRY ACTUALLY WORKS PRETTY WELL”. Indeed, it does.
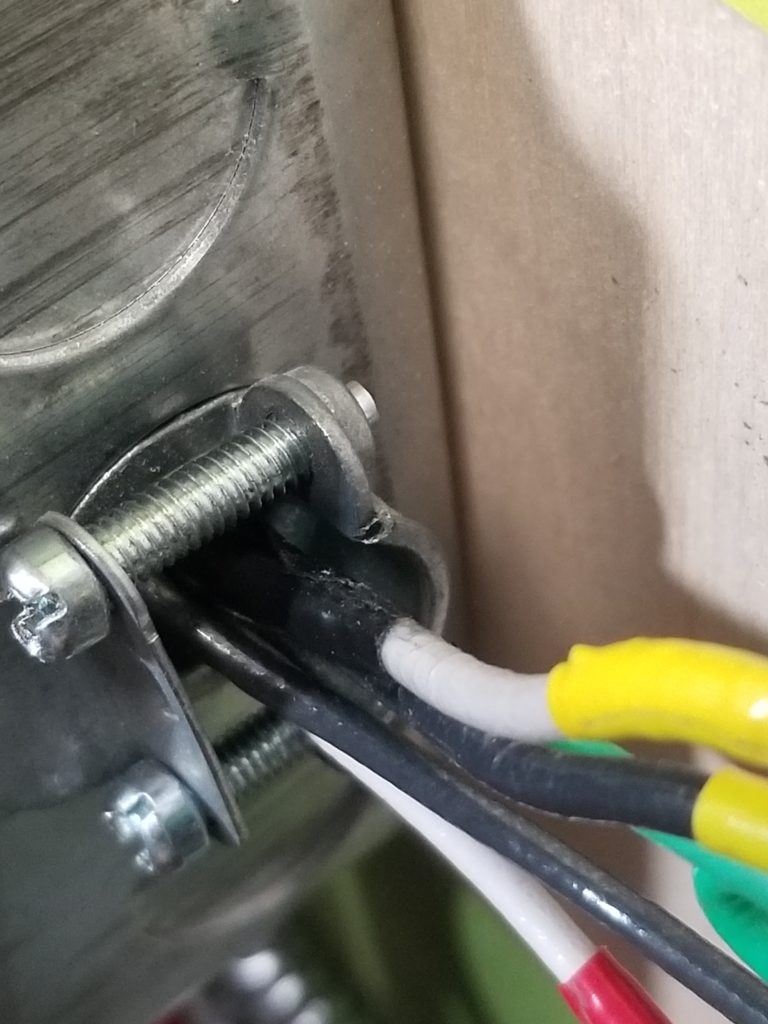
While I had the battery dolly out of the way, I noticed a loose cable clamp on my 12V DC subsystem (powers the propane heater in the office). I cinched up the clamp screws.
Okay, time to close the breakers on the battery modules and re-energize the system. I’m done working on the DC stuff and it’s time to tidy up the workspace and put my desk back in place.
Imagine my surprise when I closed the breakers that there was a blue flash! THIS IS NOT A GOOD THING. When working on electrical things that are not intentional arc generators (e.g., Jacob’s Ladder), blue flashes are bad. What happened? Well, the good news is the protective devices did the thing they are meant to do and nothing Very Bad happened. I did see this scorch mark on the battery tap that commes down to the 12VDC regulator. Ah! This wire had passed through the cable clamp (seen on the right of the junction box in this photo) I had tightened. I must have pinched something. But wires don’t usually mind being squozen a bit. Then I saw what happened.
If you look closely at the photos below, you’ll see a little burr on the right side of the cable clamp. That must have just pierced the insulation of the white wire and caused the arc. It would be a real pain to change out this clamp, having to move a moderate number of very stiff wires in close quarters, but it was easy to wrap the insulted wire in enough electrician’s tape to bolster it in defense of the burr. I also made a freestanding wad of tape and shoved it in there as additional protection (not shown).
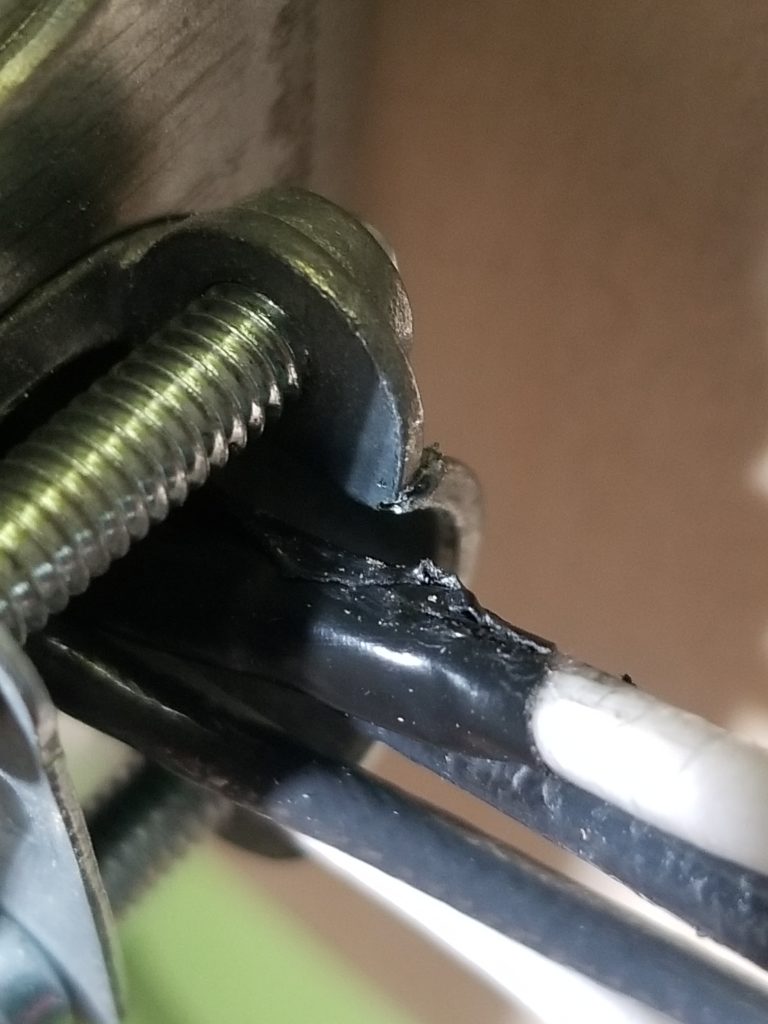
Sometimes I tighten the clamp housing to the junction box by twisting it while grabbing it with lineworker’s pliers. I must have made the burr that way. Good to know. I’ll be mindful of this as a potential problem.
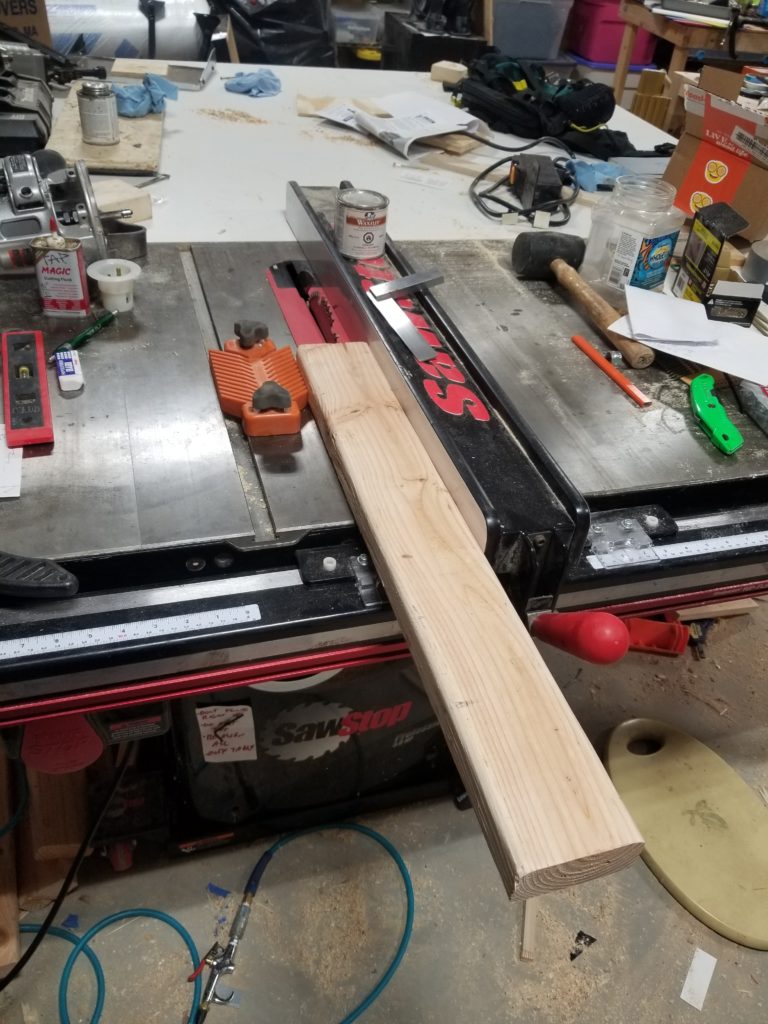
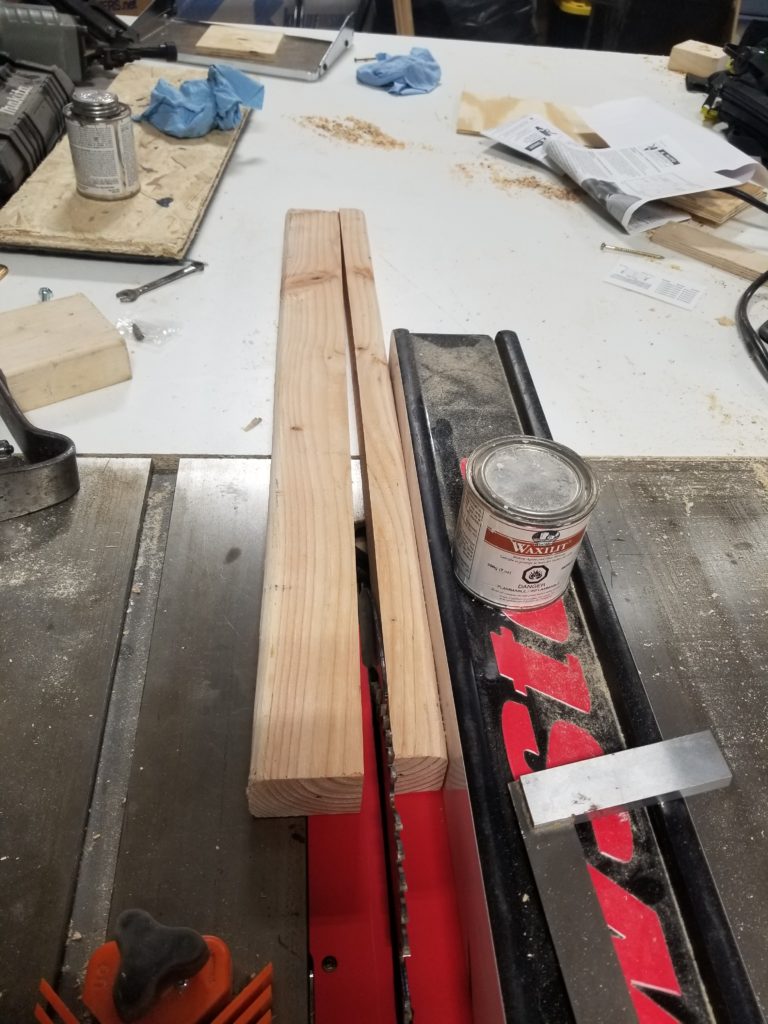
Okay, the wiring is done enough to do the big test: can I start and run the table saw off the new inverter? I’m sufficiently eager for the answer that I don’t even bother clearing off the table saw more than strictly necessary to do a good test: rip cutting a two foot section of 2×4.
YES! IT WORKS! HUZZAH!
It turns out that the table saw still sags the inverter the first time only. The sag is non-critical (nothing stops or throws a fault or anything) but I can tell the saw is a little unhappy about it. After that, the inverter is warmed up and ready and has no problem starting the saw. Best thing is to put some other load on the inverter first, to wake it up, then start the saw.
Next test is more critical. Now I know the inverter can start and run the saw. But can it start and run the saw AND the dust collector, another big motor? The saw has a 3HP motor and the dust machine’s is only 2HP (and starts more softly), but together, that’s a sizeable load.
Wire it up… give it a try…
To my not-quite surprise, the inverter can’t start the saw cleanly while the dust machine is already running, but the saw takes a heavy draw to start and it was close to the limit for the inverter when it was the only load. With the dust machine already running, the inverter doesn’t have the headroom to start the saw. However, the reverse is not true! If I start the saw first, let it spin up, then start the dust machine, no problem. And that, dear reader, is totally good enough. The saw’s nominal draw under load is 3HP, or about 2.3kW. Free running, it was about 0.9kW. The dust collector’s 2HP motor would draw up to 1.5kW. Together, that’s 4.4kW once they’re up and running. The inverter is rated for upwards of 6kW continuous load, so as long as the machines can start, it should be no problem to keep them going. It’s that starting draw that is the sinker and starting the saw first seems to be the answer.
So it is my great pleasure to announce that I officially have a fully solar-powered woodshop!
For fun, I went to the gateway device to see what it thought of my activity and found that it had this nifty graph of usage.

This graph covers the time I was cutting the 2×4 — not including the dust collector test, which was the next day. See that nearly 60A draw? At 53V, that’s about 3kW of load. Interesting – quite a bit more than the 2.3kW (3HP) specified on the motor. That said, the specification may be for delivered mechanical power in which case one must factor in the efficiency of the motor, as well. And then there’s the efficiency of the inverter, which is about 90%, I think. So start with 3kW, reduce to 90% to get the electric power delivered to the motor (2.7kW), divide nominal 2.3kW mechanical energy by that and you get a nominal motor efficiency of 85%, which actually is pretty good. Checking the math: 2.3kW delivered power / 0.85 (motor delivered/motor consumed) = 2.7kW consumed, / 0.90 (inverter delivered/inverter consumed) = 3kW consumed by inverter. Yep, it checks. That means for the system, it’s about 76% efficient. If the dust machine motor is similar, its 2HP (1.5kW) delivered power would consume 1.9kW from the battery. Just under 5kW for the pair. At 53V nominal for the batteries, that’s just over 94 Amps. And now you know why those battery cables are so big. If the inverter were running at its full load (6.8kW delivered), that’s 7.5kW consumed, or nearly 142 Amps at 53V. Big wires are totally warranted here! But why those massive 4/0 wires if it’s only 142 amps? Easy. The peak capacity of the inverter is actually 12kW (overload for up to 60s). That’s 250A at 53V when the efficiency is factored in. THAT is why the massive 4/0 wires. And the 250A breaker on the battery bus.
Now that the weather has warmed up a bit, it’s time to start spring cleaning around the outdoors, as well. The first order of that business is to collect the trees felled during homestead site work and stage them by the future home of the sawmill. Since I don’t have any power machinery that can move logs, this is to be a manual operation. Obviously, I will need some help. The help starts with the construction of this small but mighty dolly, with 12″ wheels rated for 400# each.
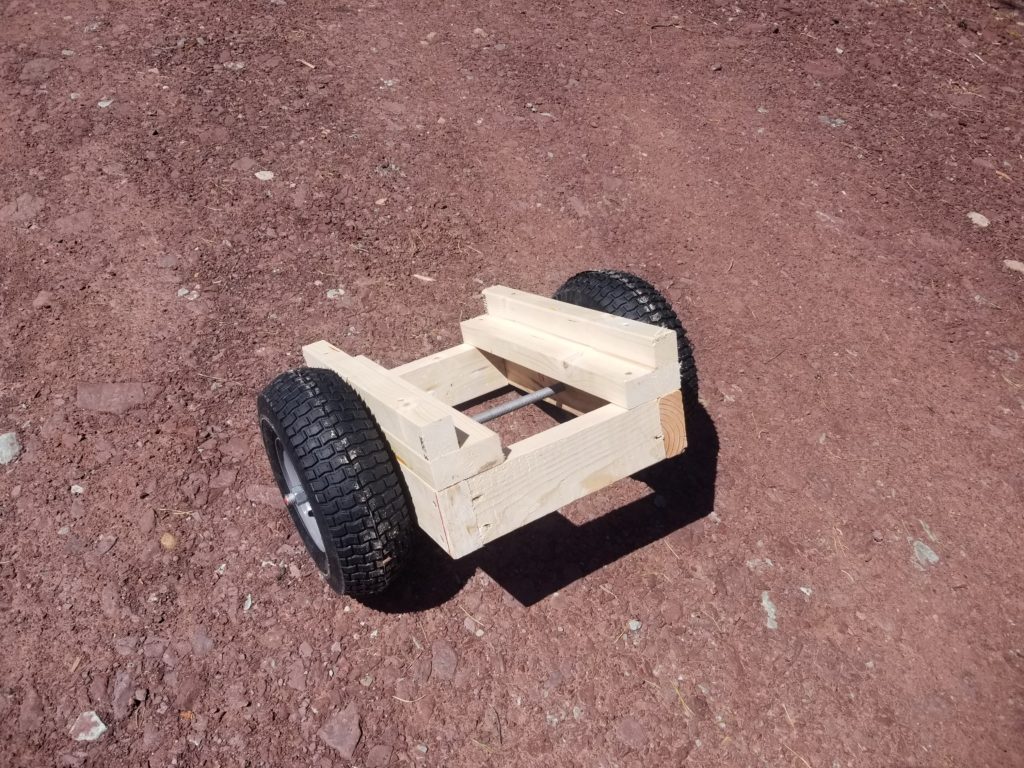
It is held together with 3″ construction screws and there’s a double thickness of wood at the 5/8″ thick steel axle (not seen, but it’s there). This little fella is up for some heavy work. The first question, though, is how am I going to get this 9ft x 16″diam log onto this dolly? That’s a hell of a lift.
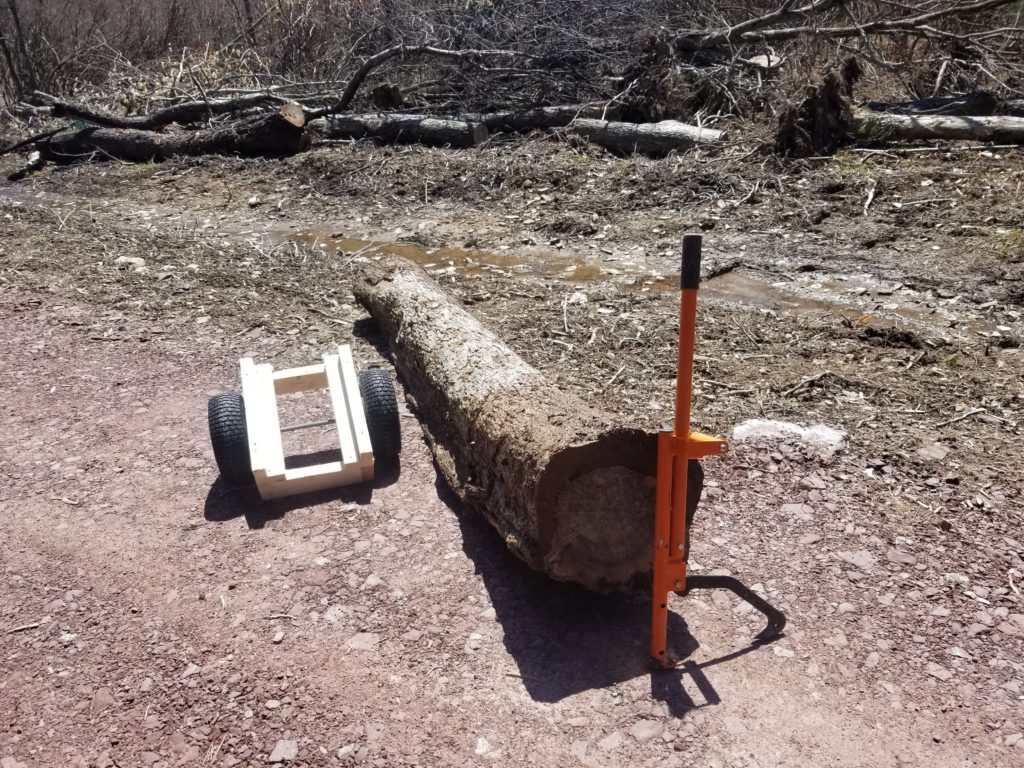
I have this big cant hook (I wondered why its called that and the answer isn’t that you use this tool when you can’t lift the log yourself, though it should be — evidently chunks of trees are called “cants” by lumberjacks) which has enough leverage to roll this beast, and is exactly how it got here, but lifting is another story. The photo below shows some of the collection of trees left by the site work guy, on the far side of the drainage channel, which in addition to being filled with mud, also represents about a one-foot rise up the bank I need to roll this log up to get it to flat, dry ground.

This guy has a trick up its sleeve, though. There’s an auxiliary foot I can attach which lets me combine the rolling action with a pivot such that the end of the log is raised somewhat. See photo, above. That’s great, but there’s not enough clearance for the dolly yet. Hm. What to do? I
know! I have this 12 Ton hydraulic jack! I’ll try that. I mean, if I had an engine hoist or some other lifting machine, I’d use it, but this is what I’ve got.
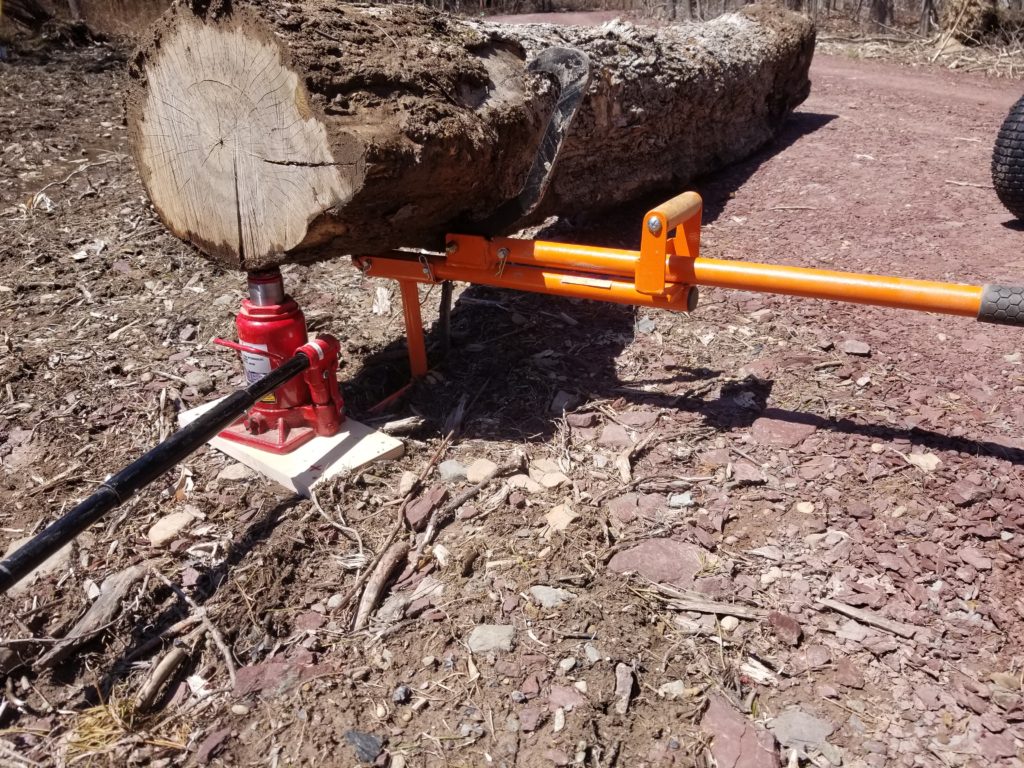
I try it. It doesn’t end well, but nobody gets hurt. And then I’m thinking, even if I do get this log on the dolly, no way can I control something this heavy. The smartest answer here is to apply my chainsaw to turn this 9ft log into two logs.
Okay, I did that, and raised the log again, but I still need to get it onto the dolly.
While still massive, this shorter log is within my ability to dead-lift if I use the back end as a pivot to bear some of the weight. How much weight? Well, these are still wet logs so taking a rough estimate of the length at 48 inches (this one is a bit longer, actually) and diameter of 16 inches (but not uniform, so altogether it’s an approximation), that’s a volume of 9,651 cubic inches, or 158,151cc. Taking the density of water, since this is still very much a water-logged log, that’s 158kg of water, or just under 350 pounds. Even if half the tree is wood fiber and not water, that’s still a really heavy log. But I can do it, and thanks to the power lifting class I took in phys ed so very long ago in high school, I can do it safely.

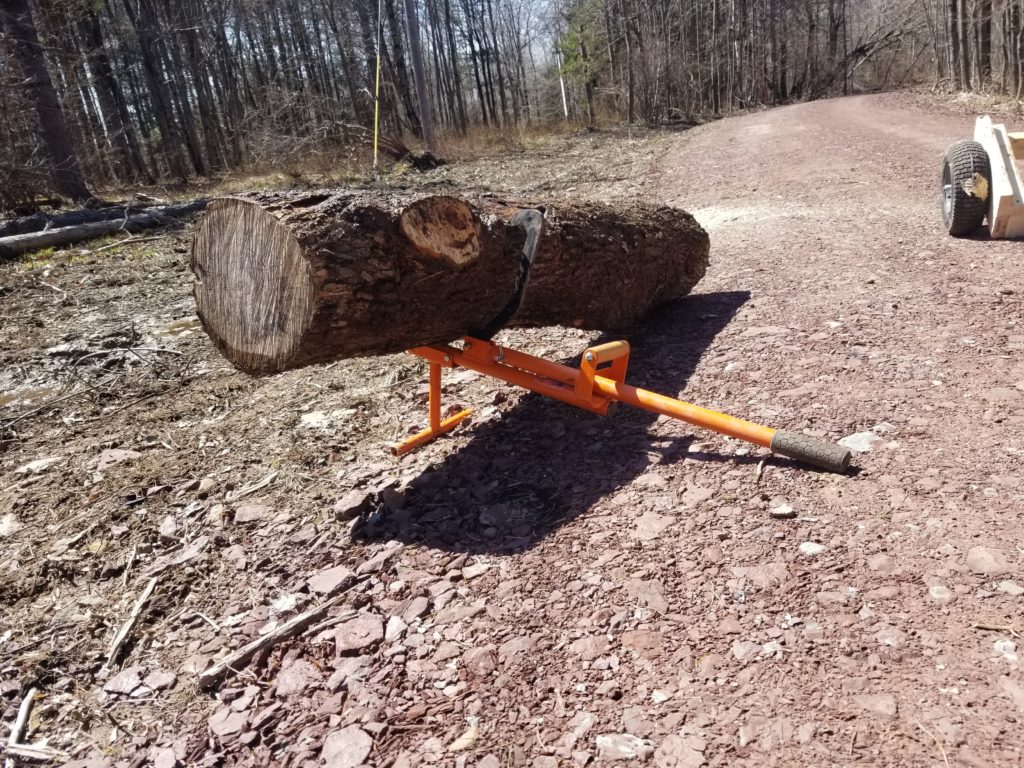
At this point you may be thinking: dude, you do not appear to be any closer to having the log on the dolly. And you would be wrong. I am actually very close to having the log on the dolly. The trick here is to position the dolly and then bring the log back down in a controlled fall. This is far superior to trying to lift the log high enough to position the dolly directly under it. That wouldn’t be insane if I had a helper, but I’m alone here and need both hands and a very centered stance to raise the log. No using some other limb to push the dolly into position or any such nonsense. Anything but two feet solidly on the ground and two hands solidly under the log is a recipe for disaster and pain at this level. So okay, one controlled fall it is.
And you know what? It worked just fine. Although not shown here, the addition of a ratchet strap to secure the log to the dolly – or, rather, the dolly to the log, really – made this battering ram decently maneuverable. When nearly balanced, it doesn’t take much effort to move, actually. Being slightly front-heavy made it better, so I could apply some balancing weight from behind and if I let go, it would dig in and stop itself.
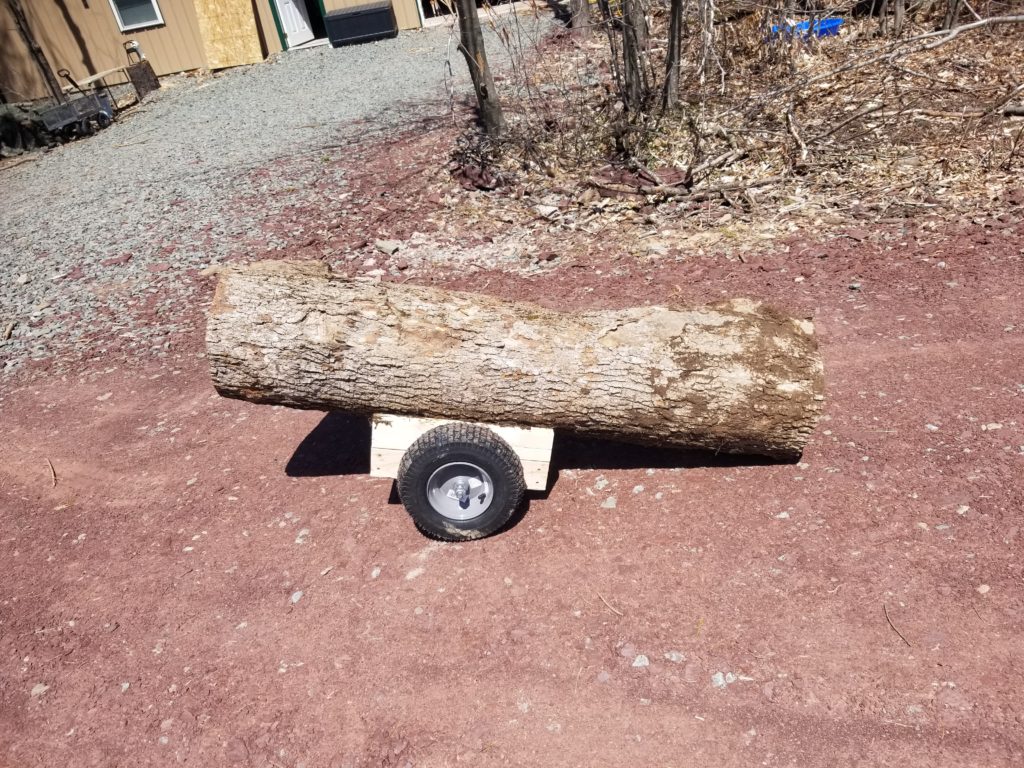
This little monster (still at an estimated 300# or more) traveled easily over the shale road but did have some trouble going over wild terrain en route to the mill site. I got this, and four of its siblings, close enough and then just did another lift followed by rolling with the cant hook to get them to their final positions.
You may have noticed that the ends of the logs were a little cracked. I did. I expected this, as they have been exposed for 9 months or more. The question is, how bad? I took a corner slice off one of the logs to inspect.


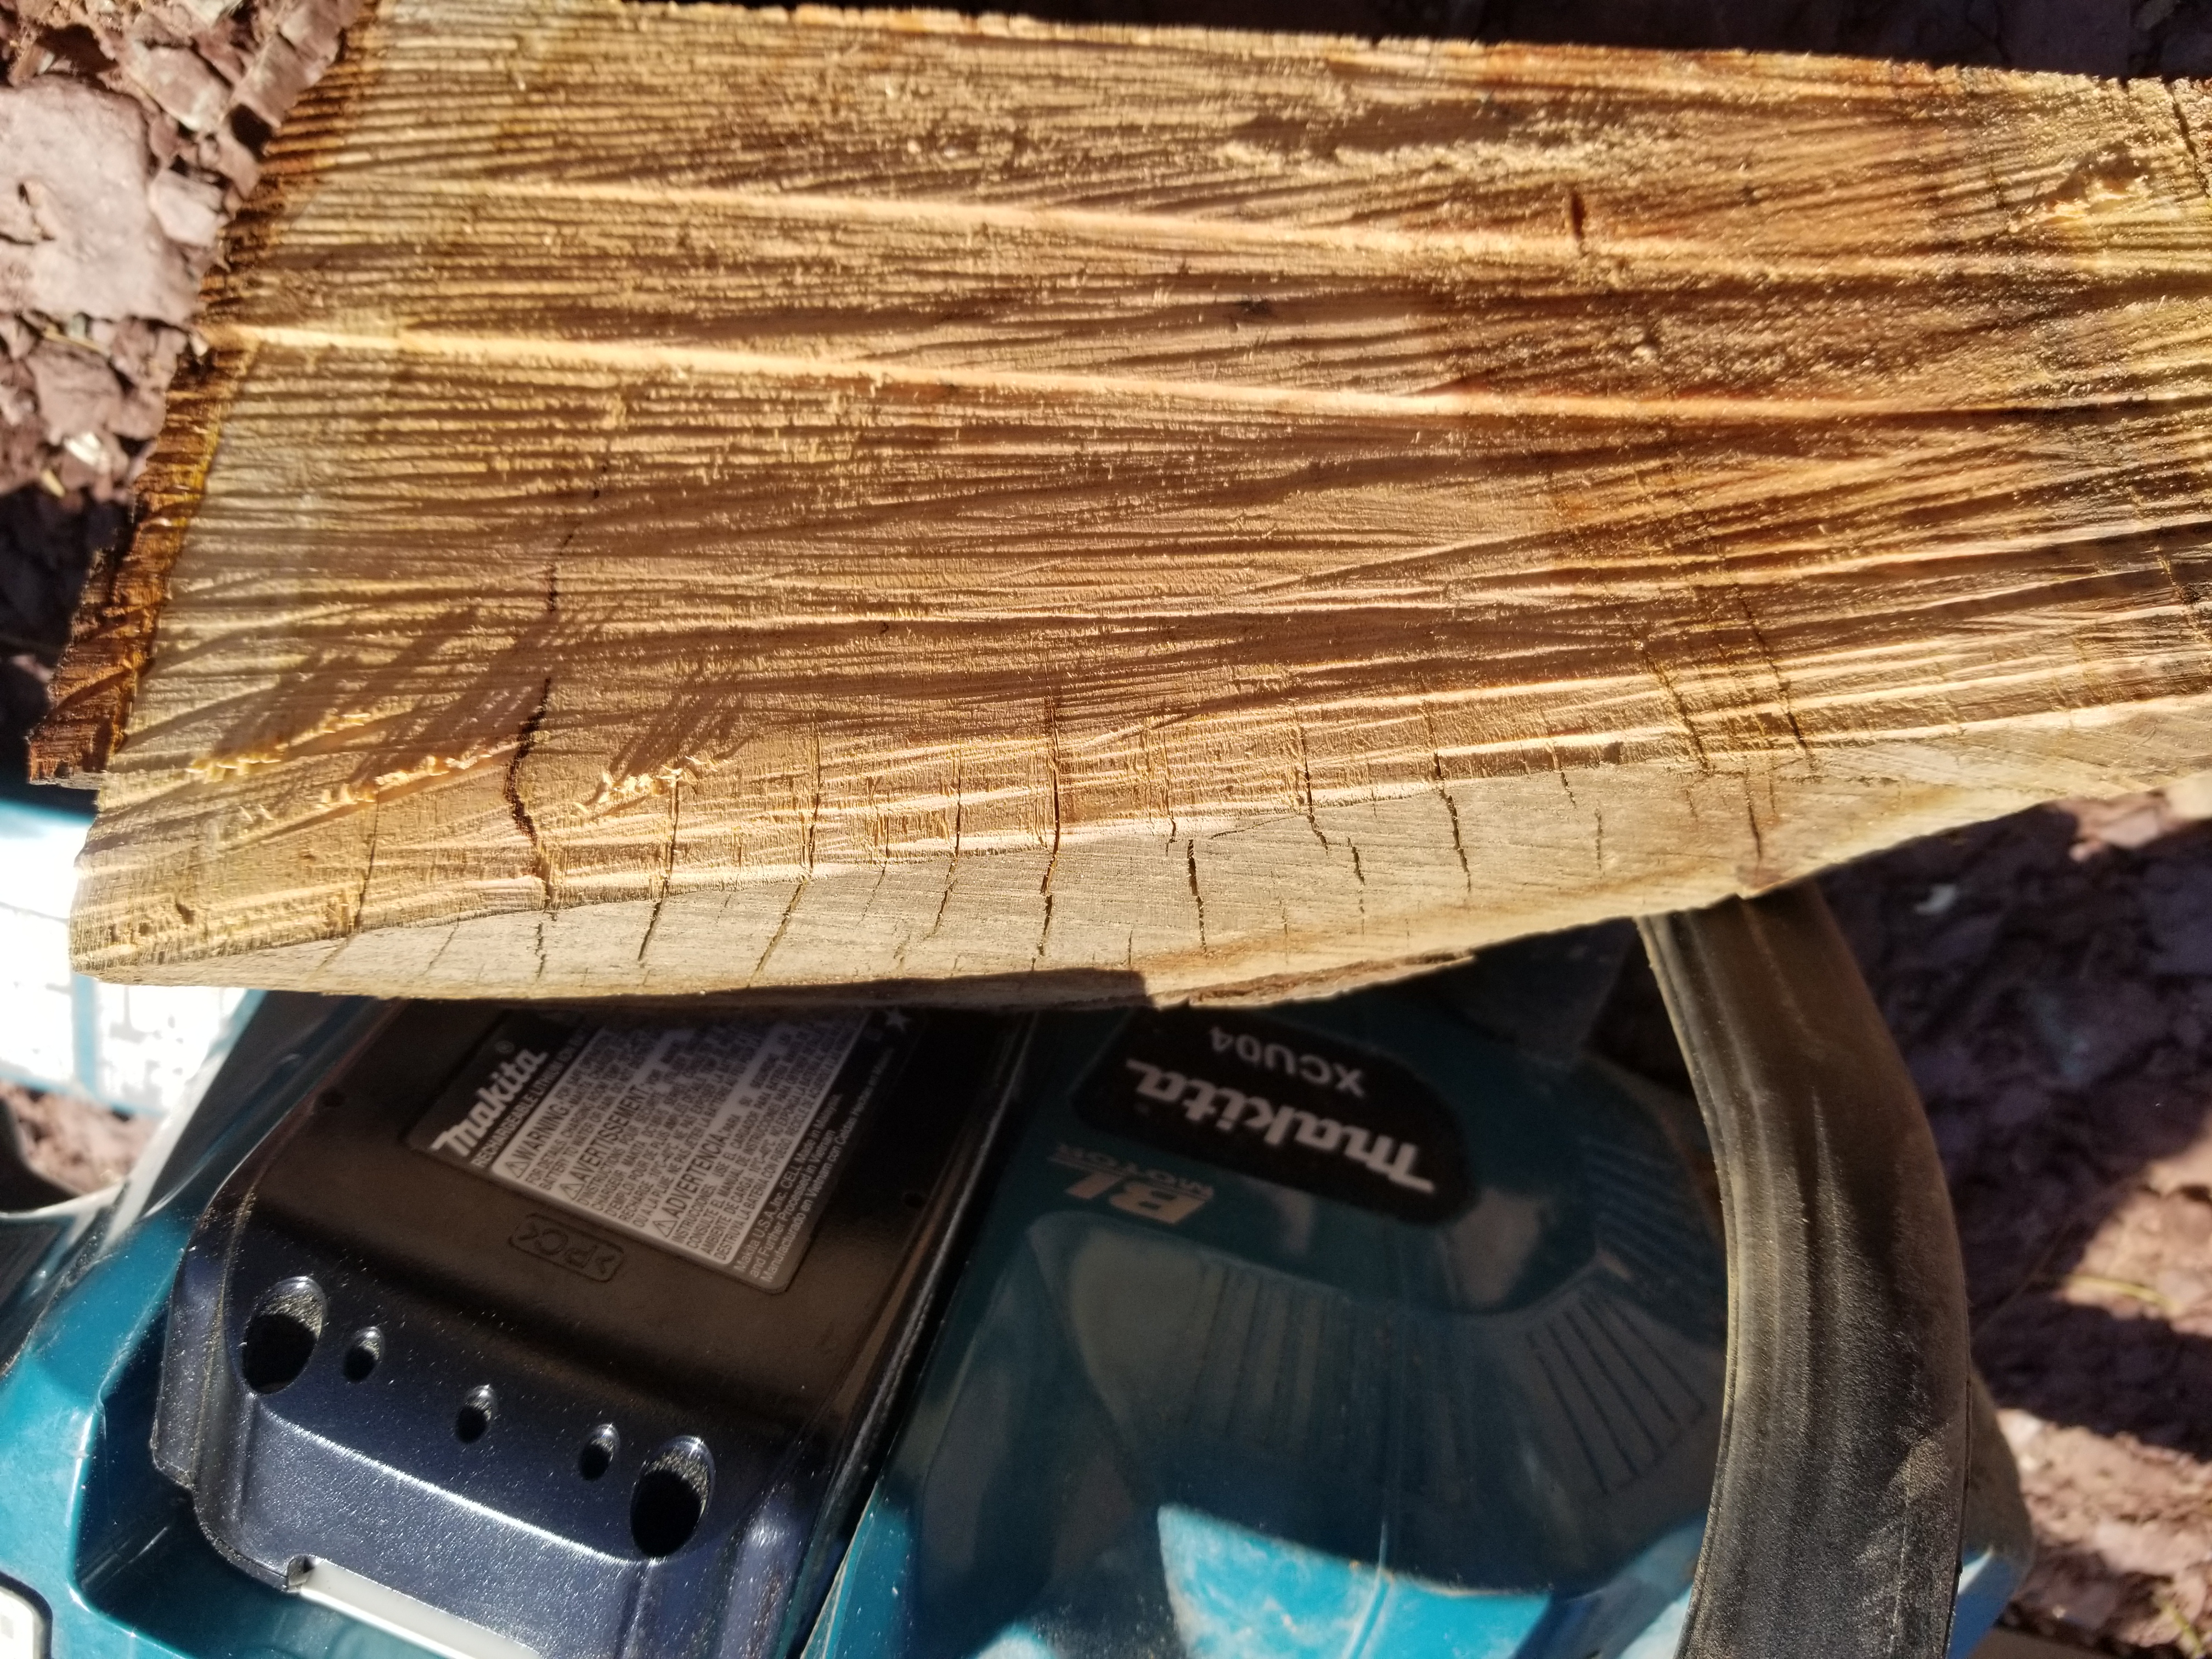
It turns out the cracks dont’t go particularly deep into the wood, which is good, but since it’s going to be a few months more before I have the sawmill and even then, I’ll want the boards to have their ends sealed so they dry through their faces rather than their ends — to slow the process as well as prevent exactly this kind of damage — it is high time to seal these logs. To do this, I bought some “oops” paint — that’s paint which failed to achieve the desired color and is sold at a deep discount as a one-off. Perfect for don’t-really-care-what-color projects like this. A gallon of exterior grade paint-and-primer for $9? Oh yes.

All together, five logs, each around 4-5ft long, ends sealed, are now waiting for the sawmill, which will be installed in the clearing just behind them, probably this autumn. There are more trees/logs to move, but my body says “this is enough super heavy lifting for the weekend, thanks”.

I’ll keep at it with some urgency. I want to get them cleared from that pile by the road as well as get them sealed to prevent further cracking of the ends.
Traipsing through the drainage channel, manhandling logs is not a tidy pursuit.

Remember the tadpoles? They’re growing nicely! And SO MANY.

I also noticed one of the two masses I believe to be spotted salamander eggs changed recently from opaque white to translucent with pearls.

I suspect that means they’ll hatch soon.
Speaking of the great outdoors, I’ve been trying to dig up the ground post for the sign that my plow guy accidentally bumped and bent, so I can cut off the bent parts and re-set the post properly upright. This, it turns out, is impressively difficult. The ground has compacted around the post and is holding it quite well. The fact that the post is 48″ long also contributes to how well the ground holds it. I have dug around it trying to free it, but to no meaningful avail. It hardly budges.
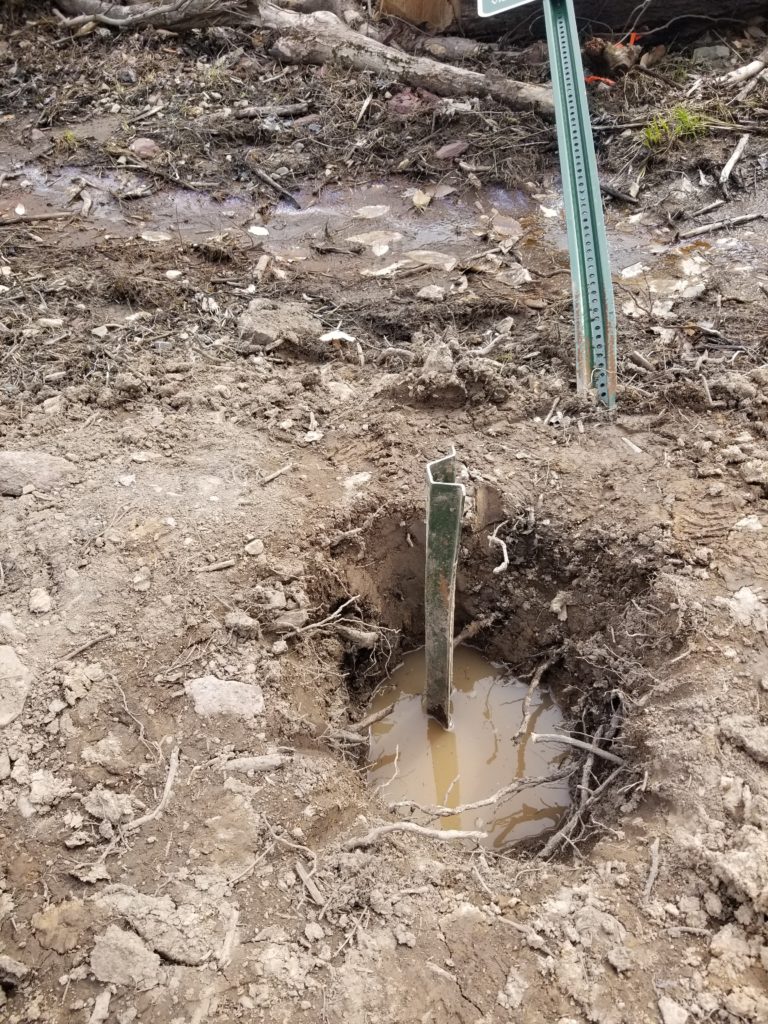
And that pool of water? It has not rained. That’s ground seepage after about two days. That’s also why I can’t have an ordinary septic system here – percolation runs backwards!
It was getting crazy trying to dig this out, especially with all the rocks in the soil and everything so tightly packed. Then I had an idea to get some leverage with an 8ft 2×4 and a carriage bolt.
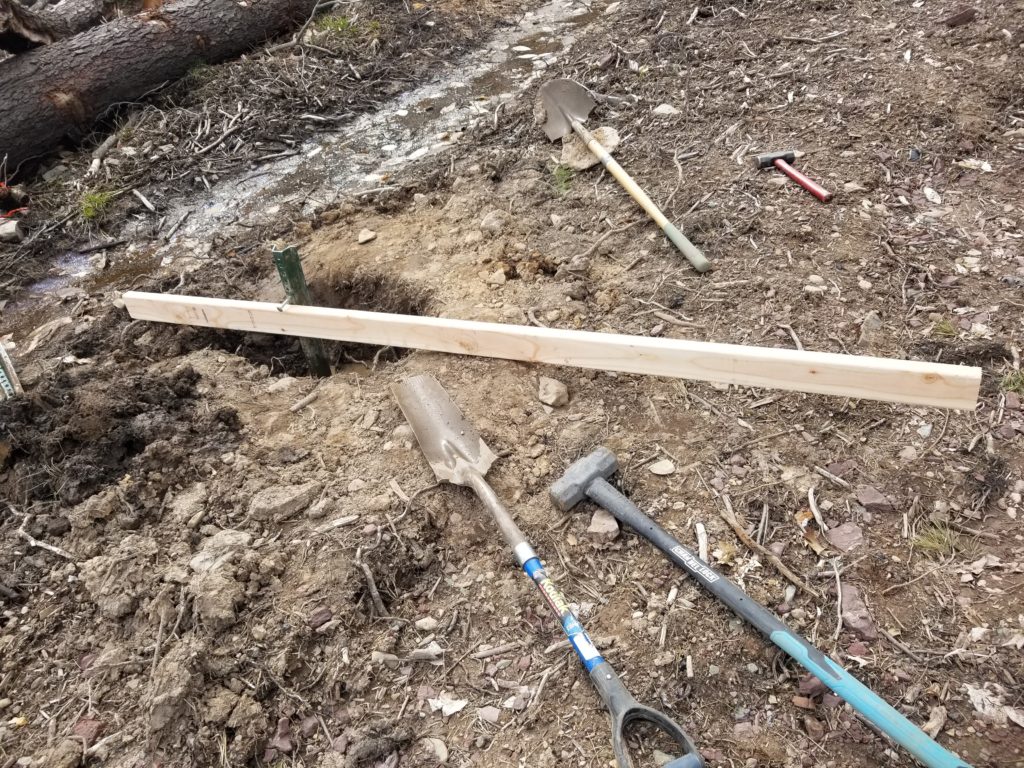
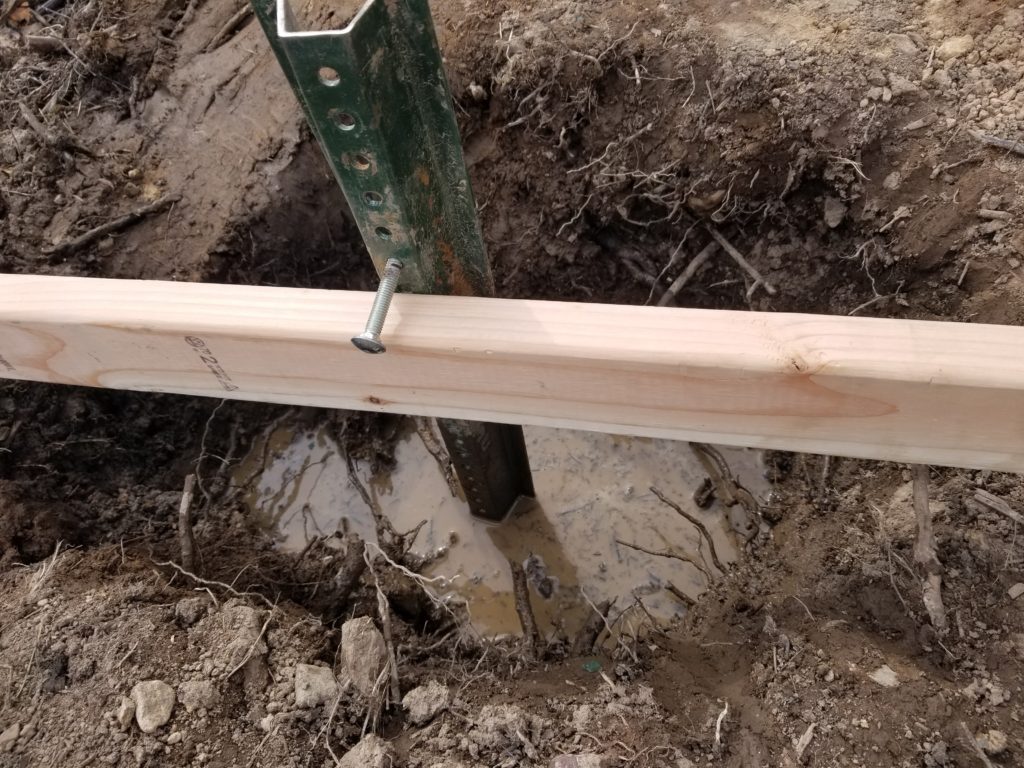
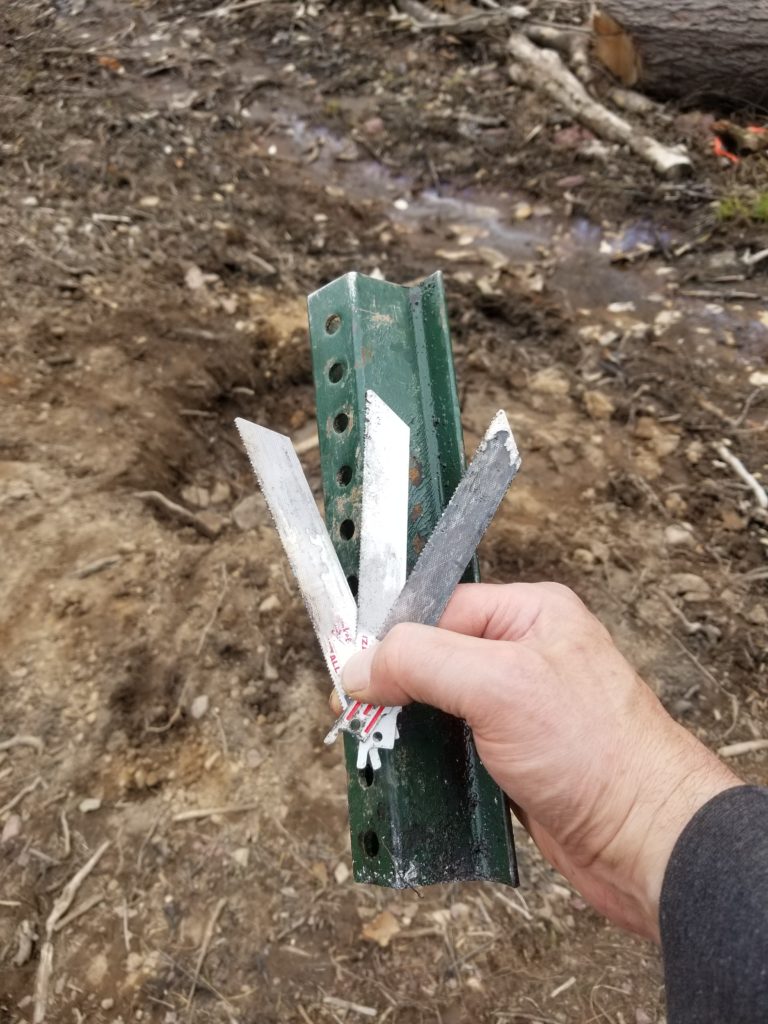
This was still a bunch of effort, but it got done. Next step: trim the bent bit off the post. There were casualties of both operations. The carriage bolt was trashed, as were three metal-cutting blades for my recipro saw. This signpost is really solid! And I even used cutting fluid.
One more casualty, actually. Remember that hole with the water? How long do you suppose it took before I stepped in it?

Wool socks kept me comfortable even with this insult, but the muck is also smelly and that stayed with me all afternoon.
But now my sign stands decently plumb and oriented once again. It’s not absolutely perfect, but as perfect as manually driving a post with an 8# sledge is gonna get.
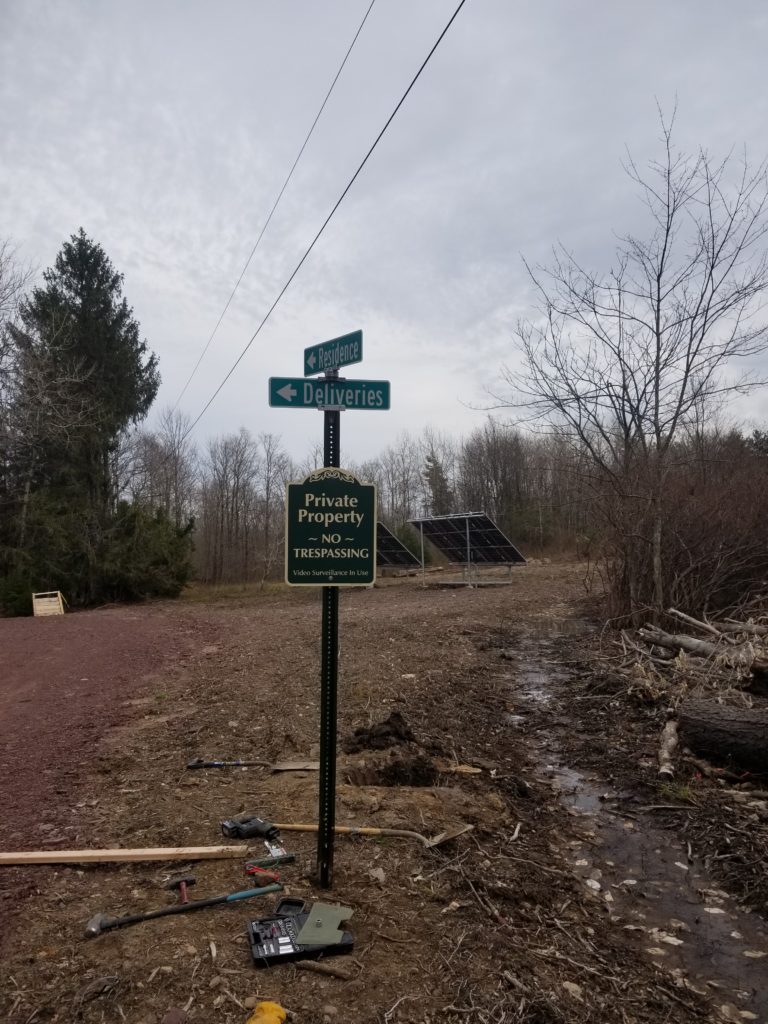
When weather, parts, tools, or other circumstances mean any given project must wait before proceeding, I will usually start another one to make efficient use of time. That results in a profusion of incomplete projects, though, which comes at the cost of there being a profusion of incomplete projects. Today’s goal was to finish as many incomplete projects as possible. That included the signpost, but also some work inside the W.O.G.
Remember that grounding wire for the batteries? It has to get to the batteries, too.
A minor thing, but something to finish!
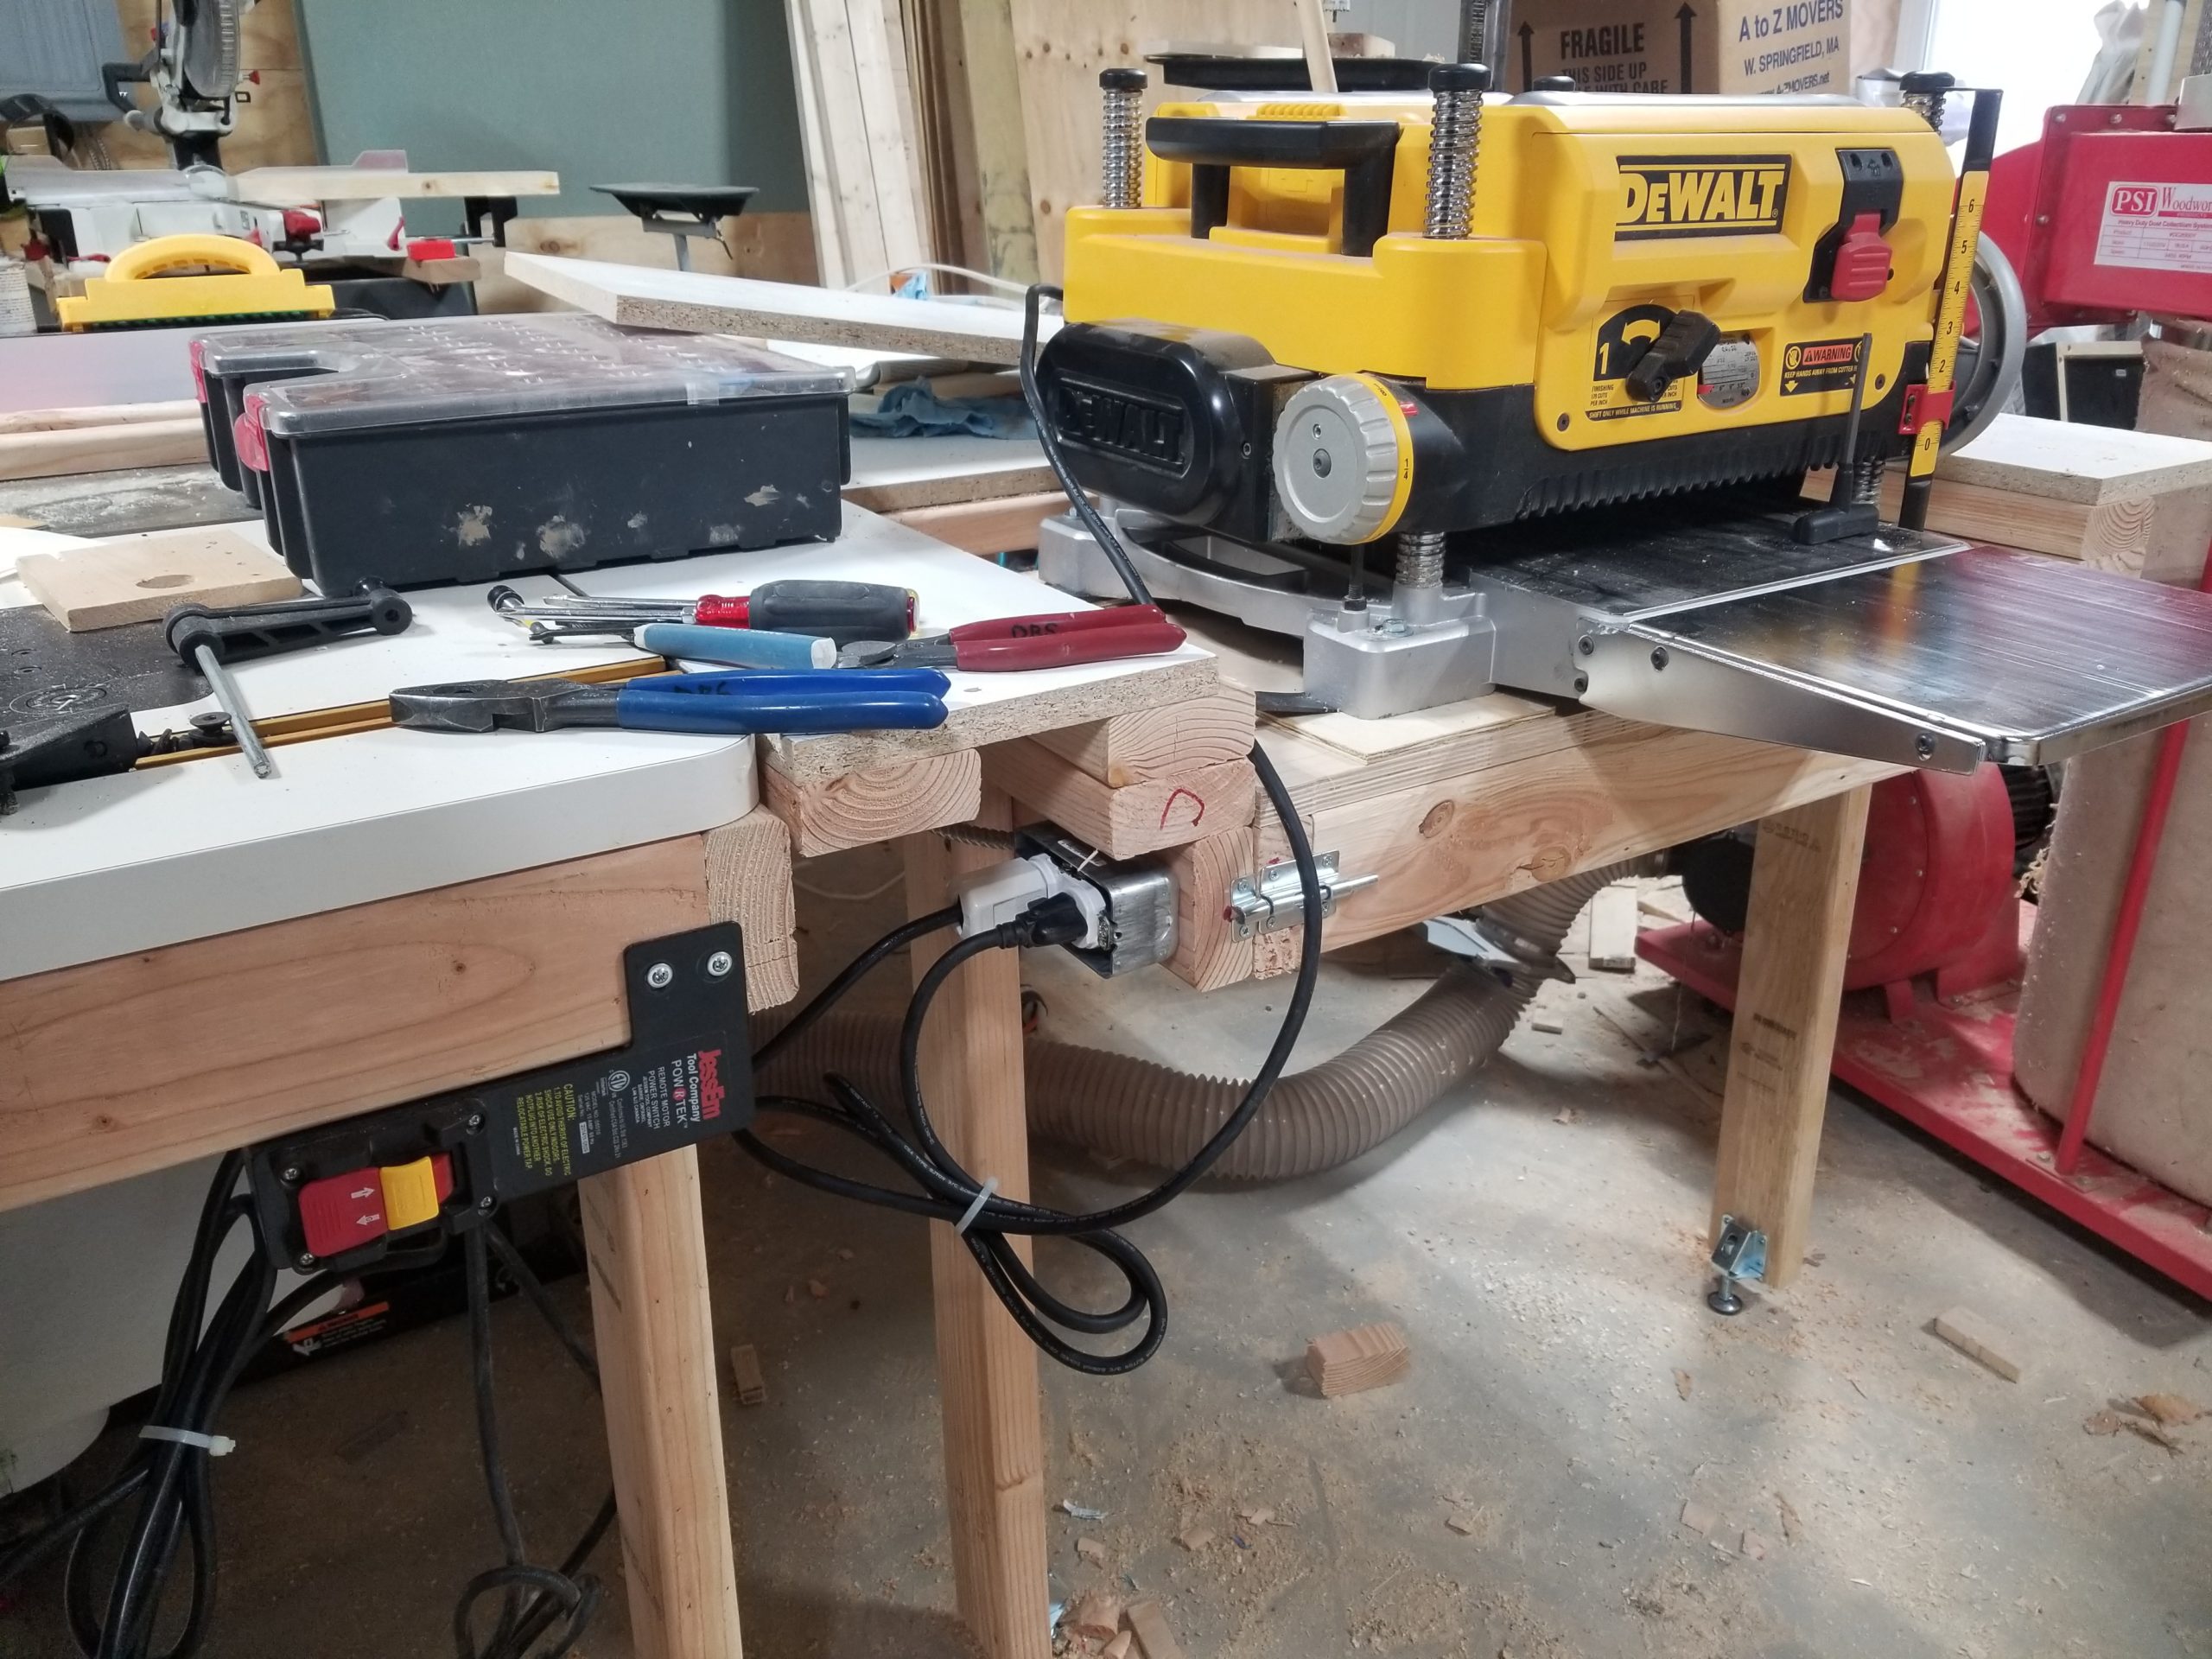
Also to finish, hanging the remote control for the dust collector (red box).
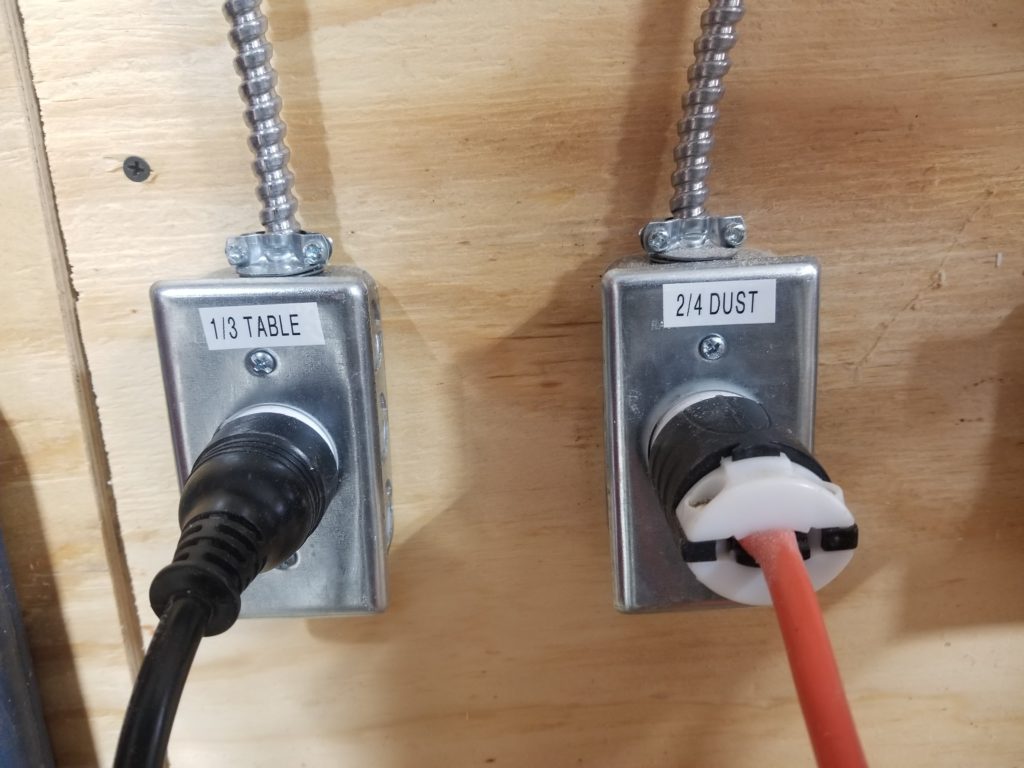
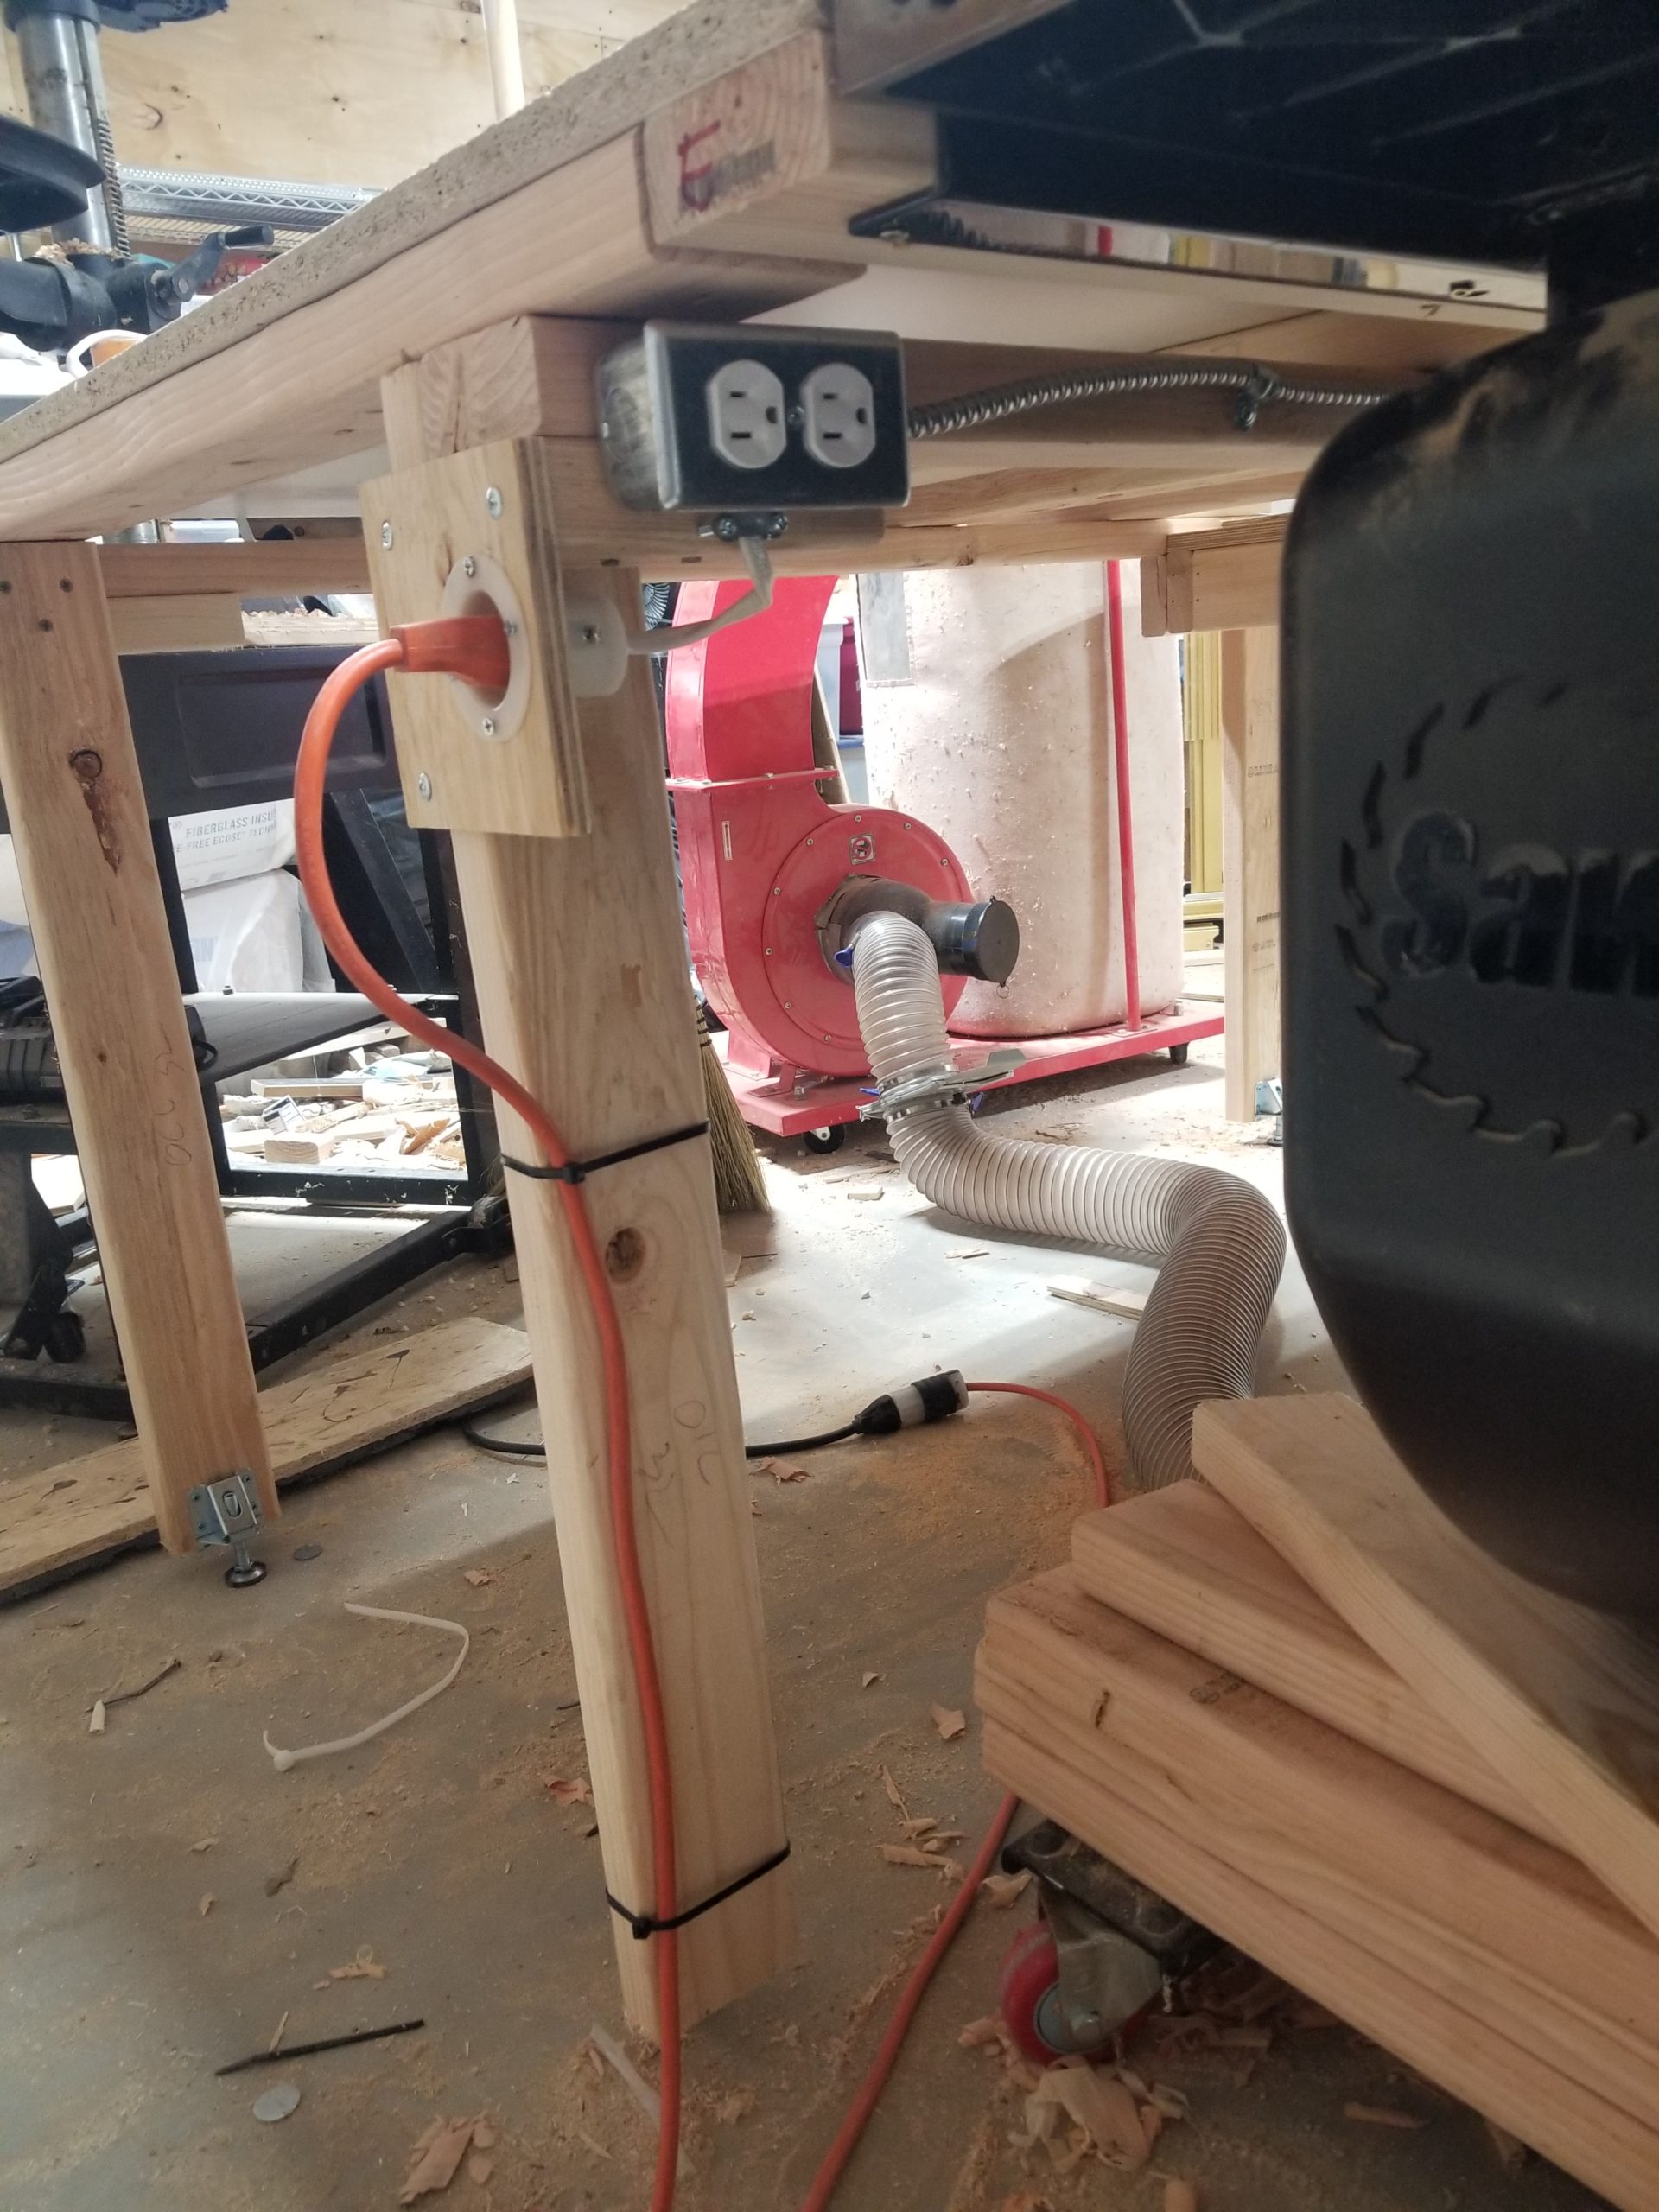
And running a power line to the combi-table so I can plug in the router and planer easily.
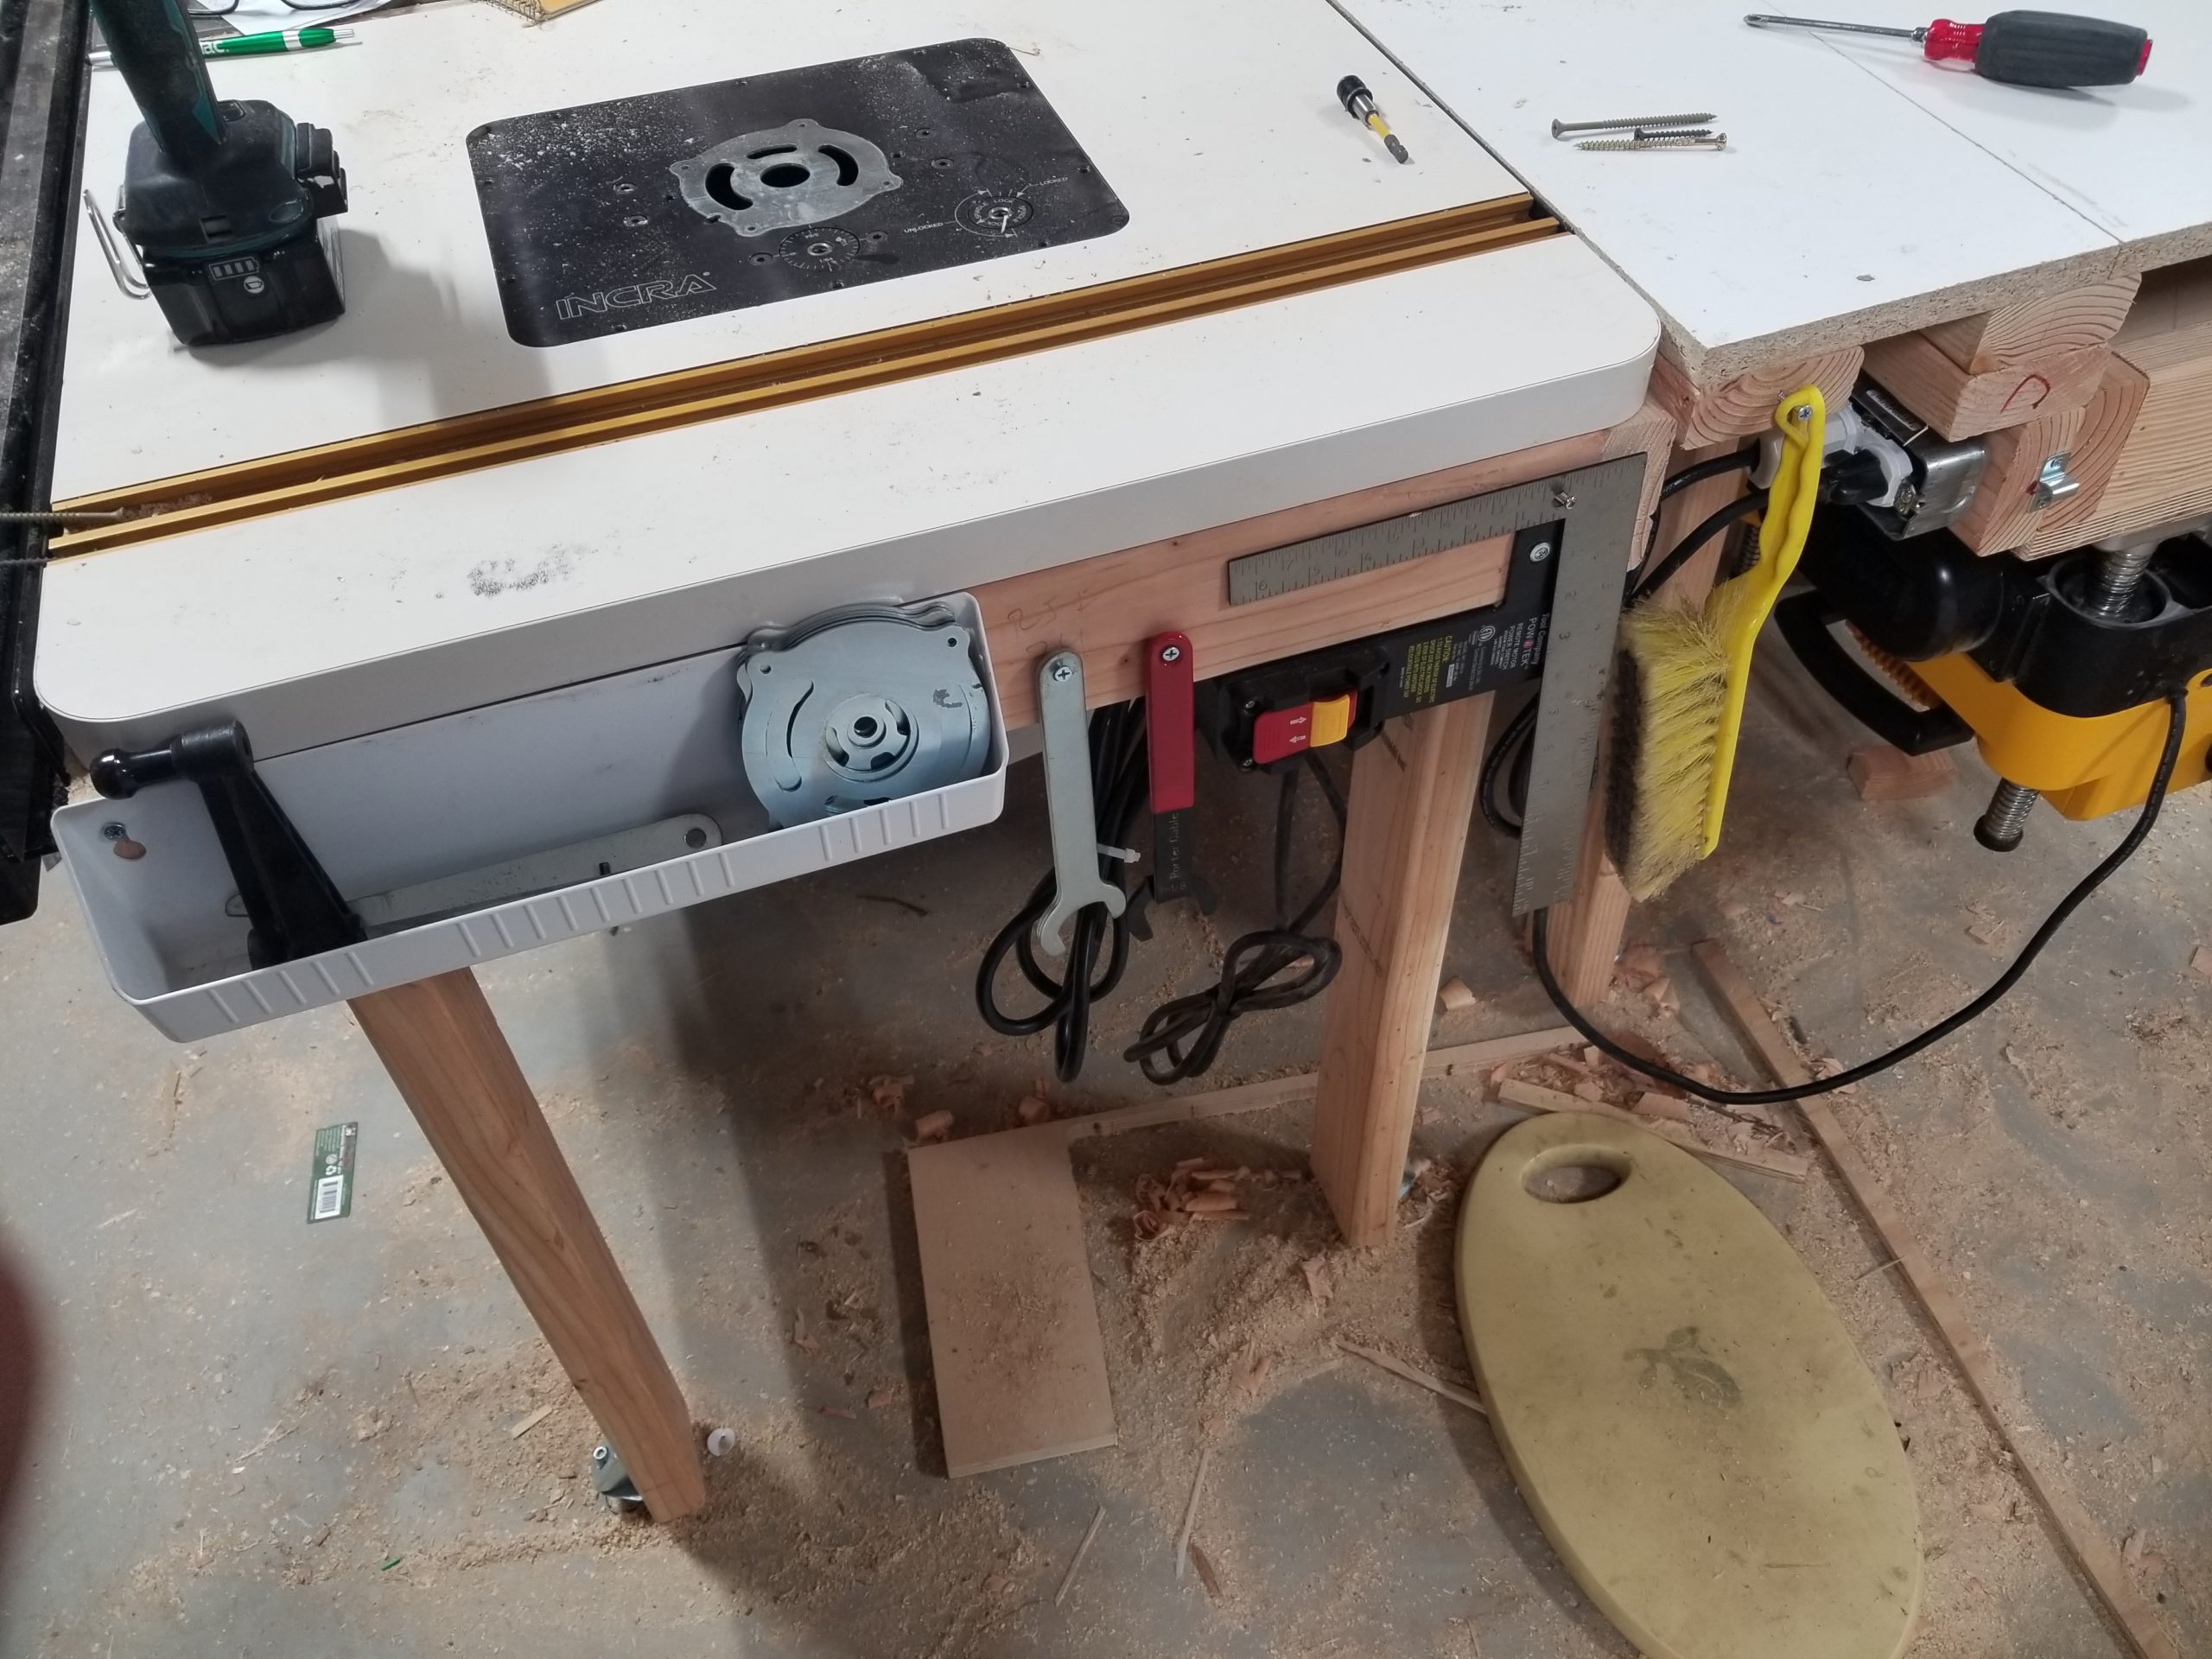
Also needed in the combi-table, extensions of the miter slots to anything that uses them may be pushed through to the outfeed table. Without the table, whatever was in the slots just exits into thin air. But with the table, there needs to be a void to accept any miter slot accessories as they transit the blade.
It starts with a straight edge and the router, carefully aligned to the existing slot.
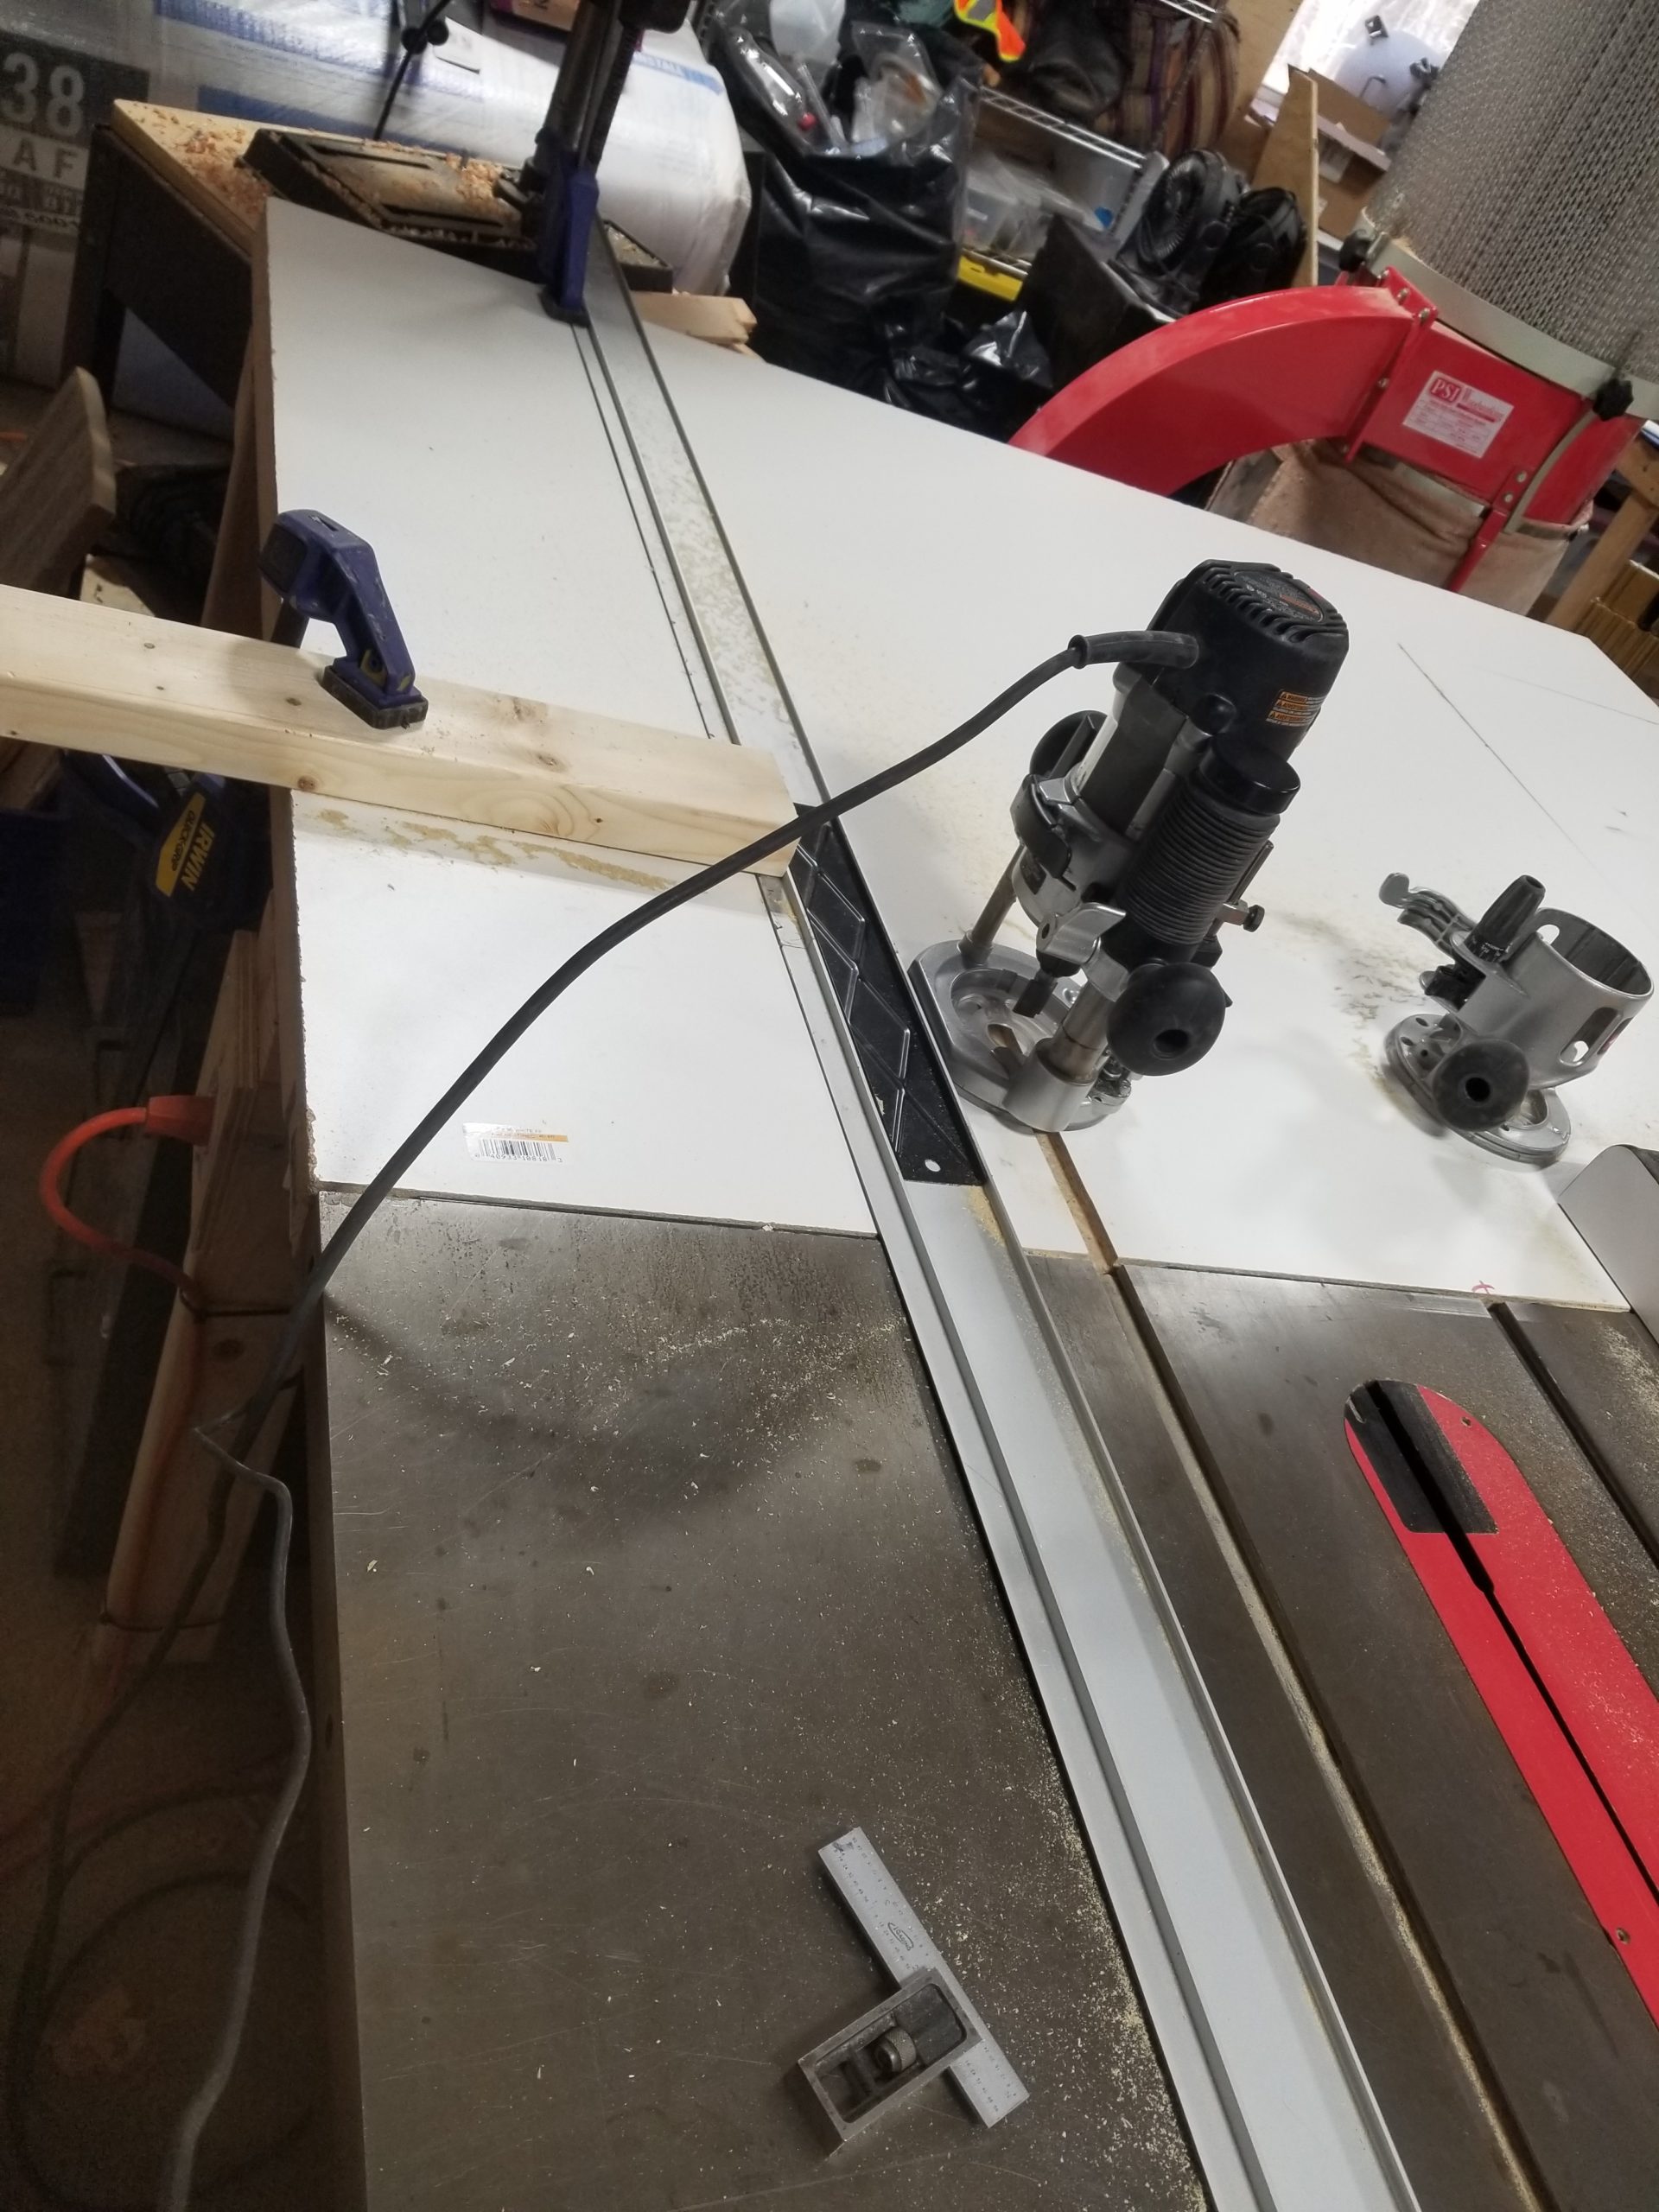
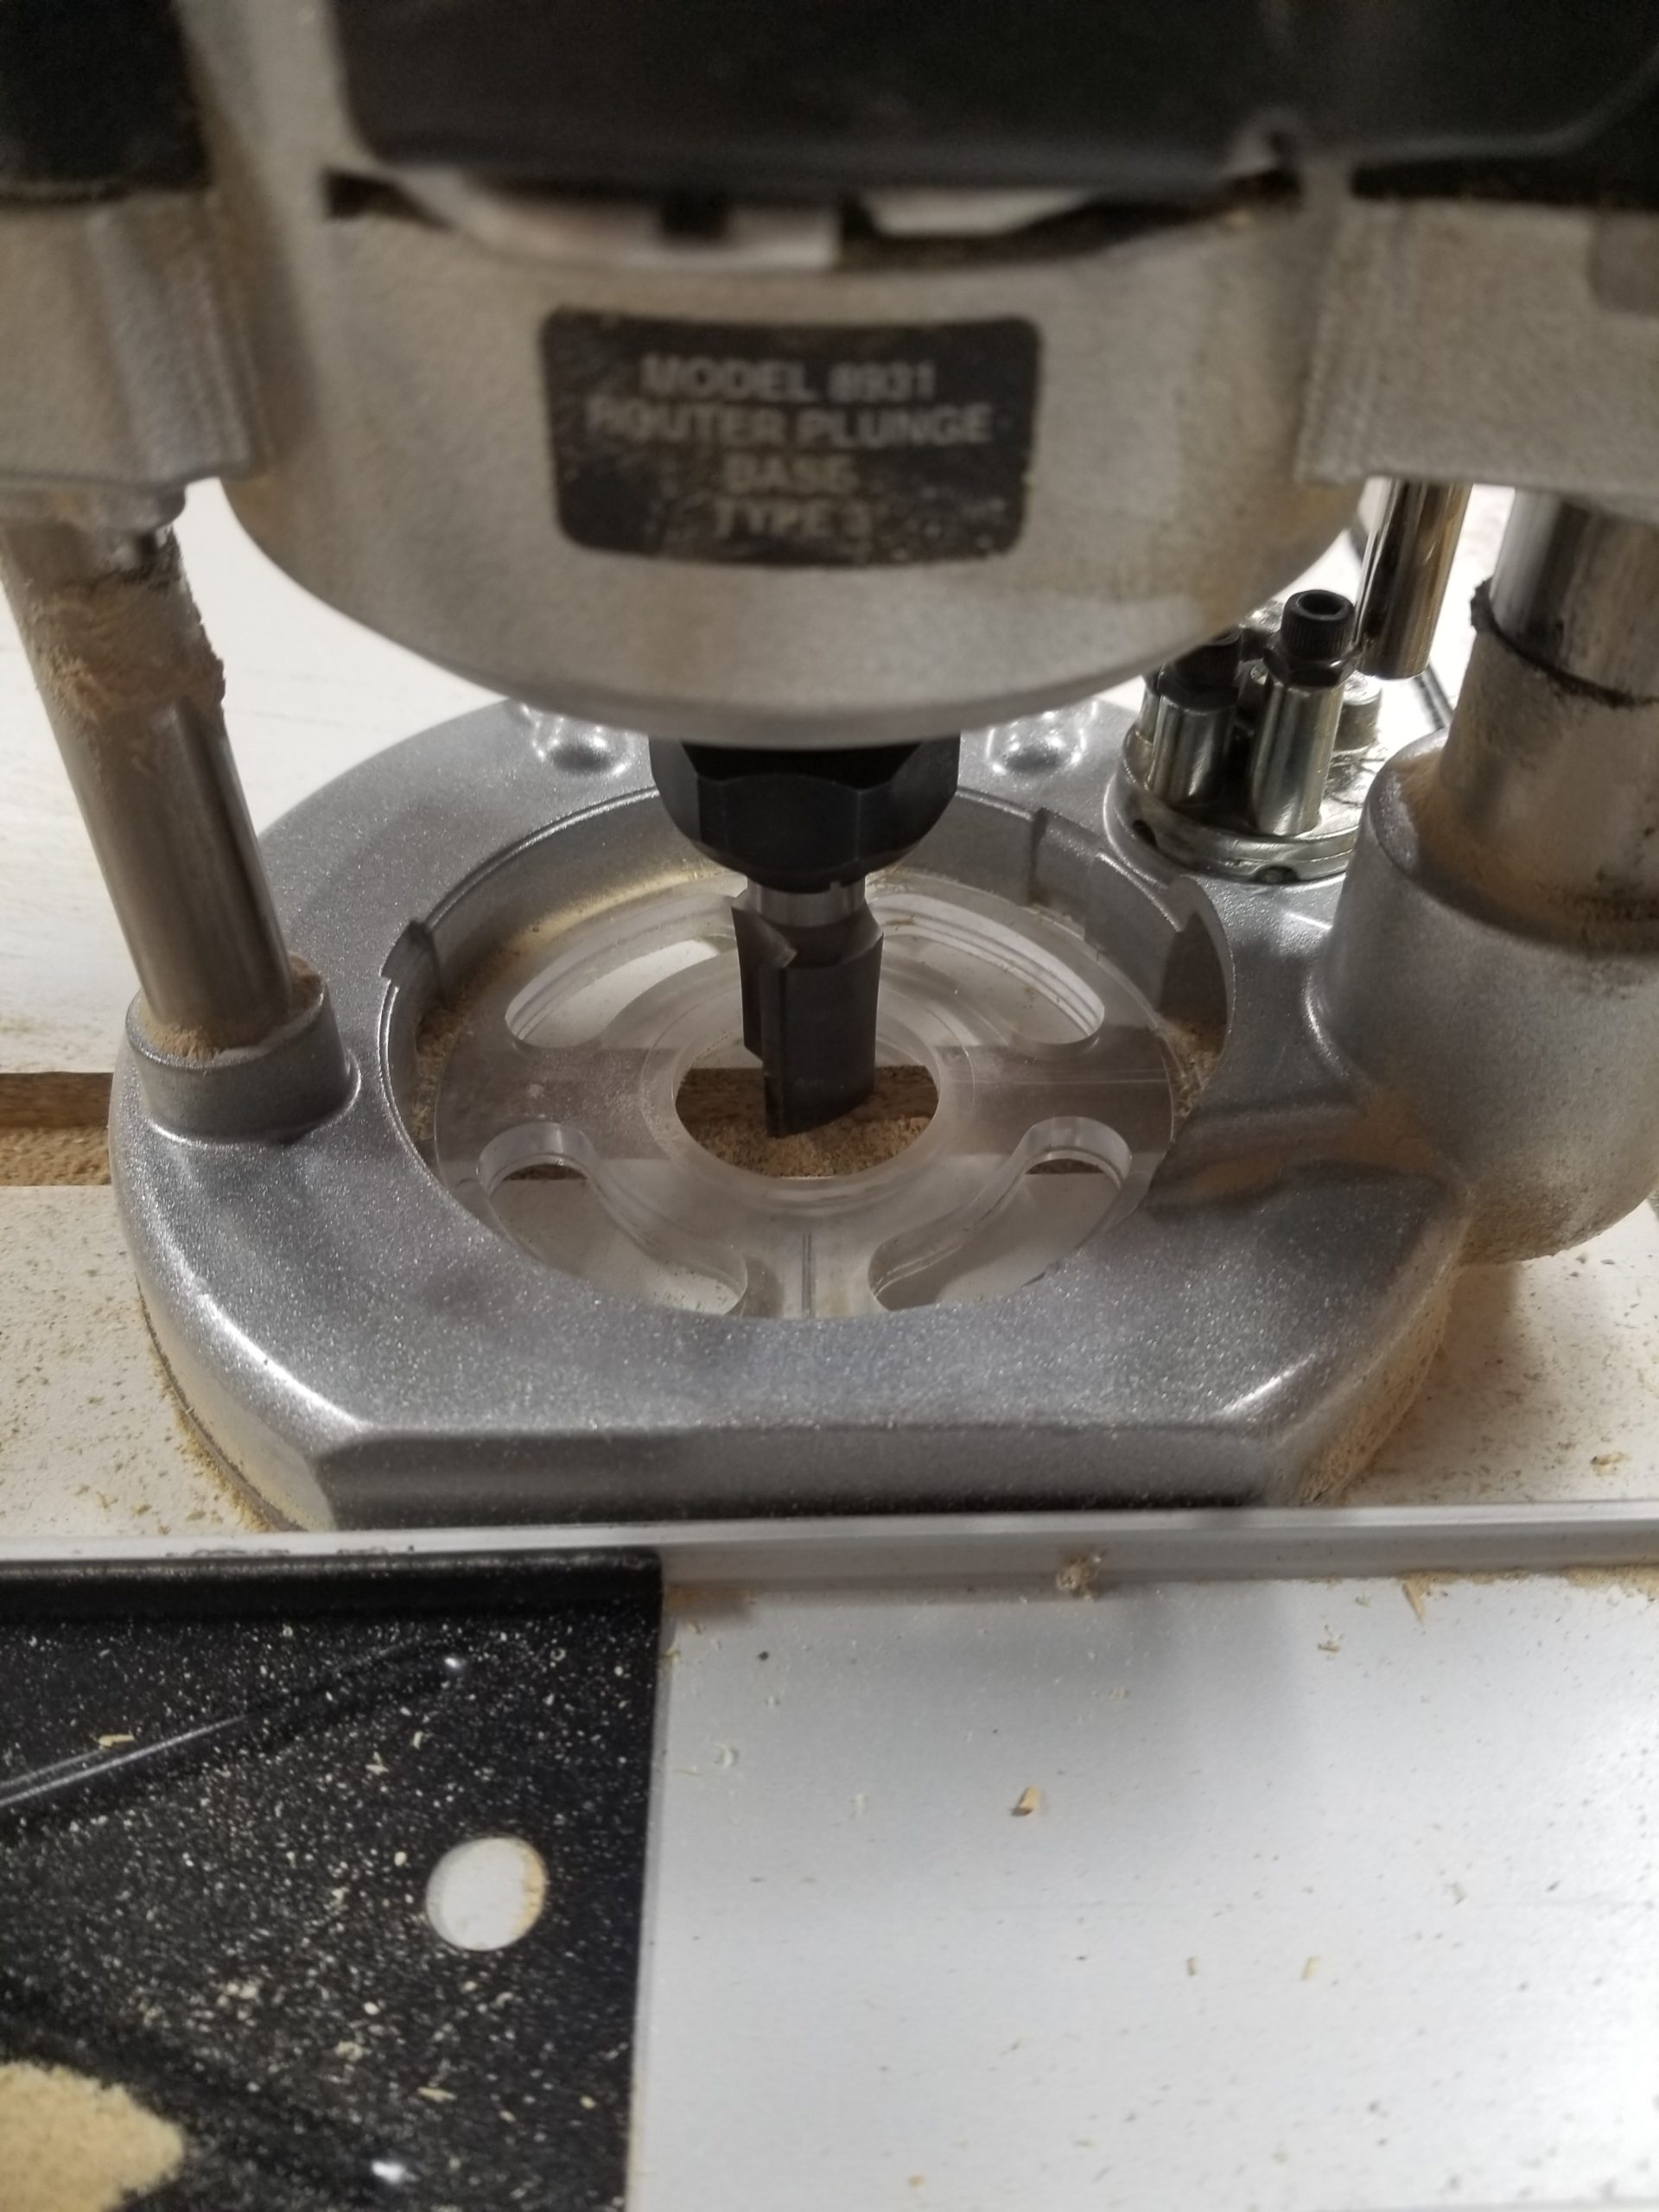

The problem is, when using the plunge base with the flat edge against the guide, if one is not really careful, and even if one is, it’s easy to accidentally rotate the machine such that the flat pivots away from the guide, moving the cutter bit off course! This is an aesthetic disaster but if caught soon enough is not a functional one. The miter bar is long enough that it will span any such defects and stay true.
Still, a disappointment in terms of appearance, even if it remains totally functional.
Lesson learned: use the ROUND edge of the base against the guide so even rotating the router body won’t change the position of the bit with respect to the guide. Using the flat seemed so rational at first, but no, it’s not a good idea here. Indeed, I’m wondering if there’s a good use for the flat at all. There are one or two cases it might be better, but really, using the round side makes so much more sense now.
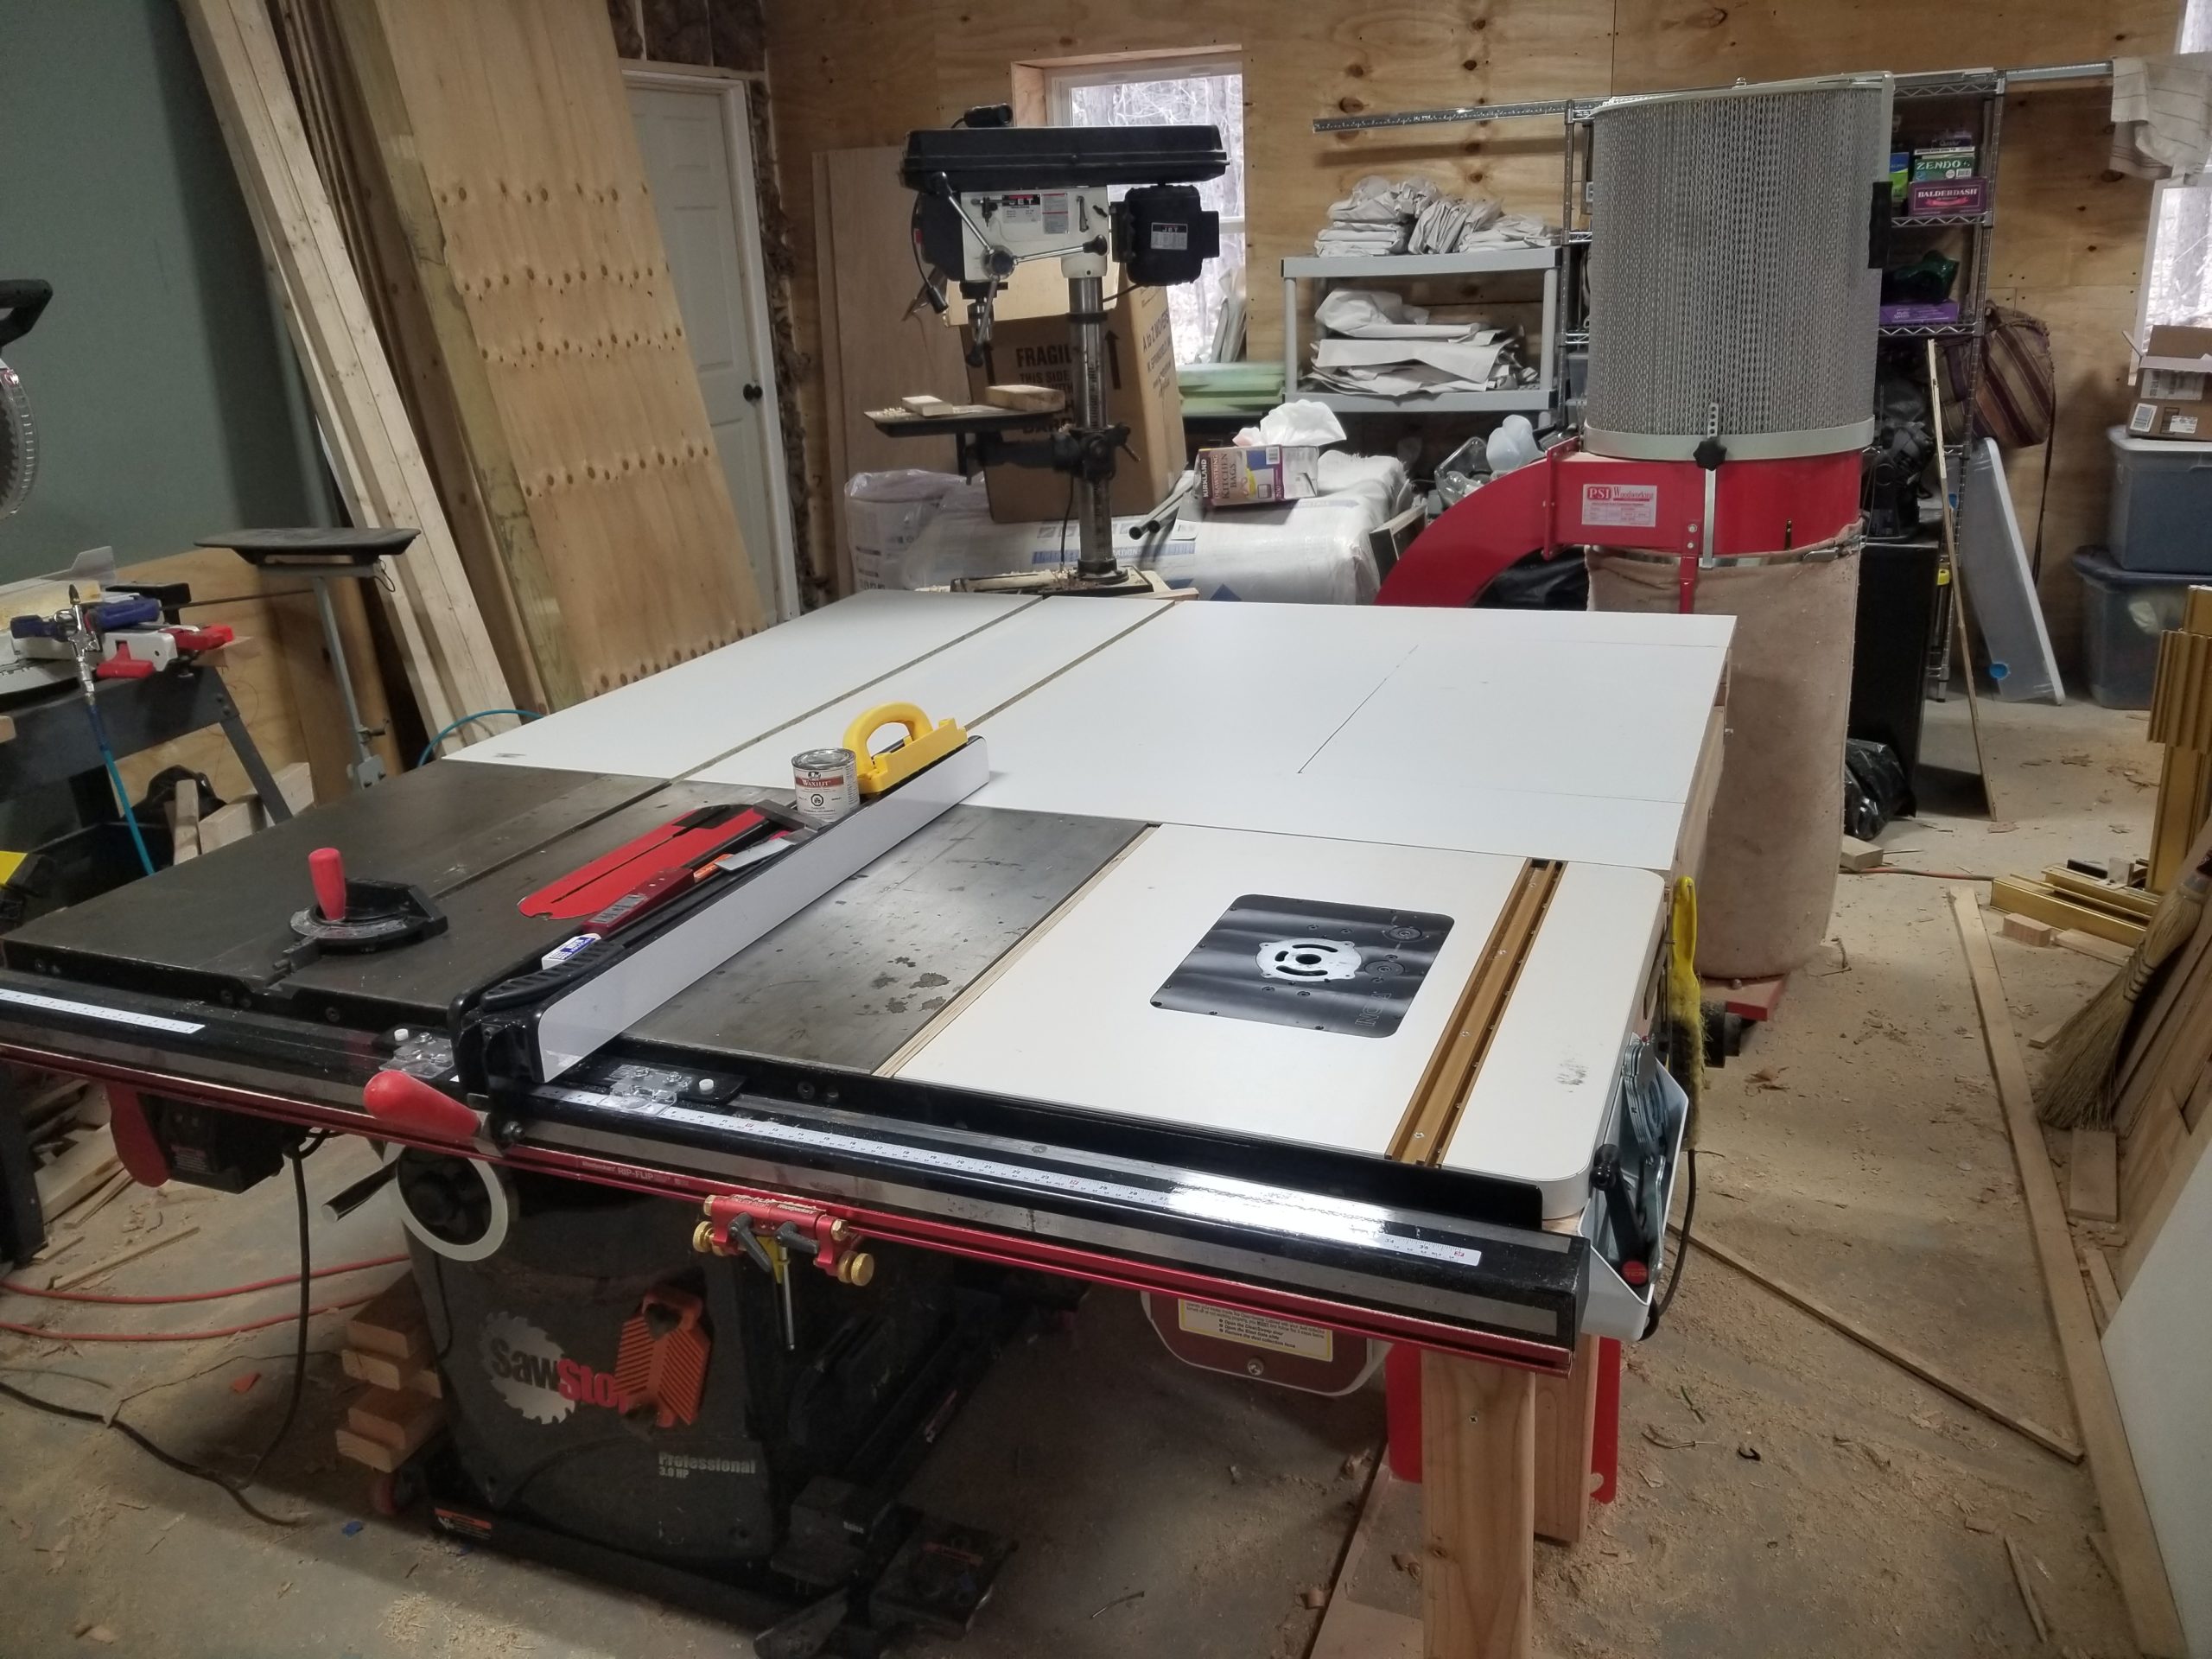
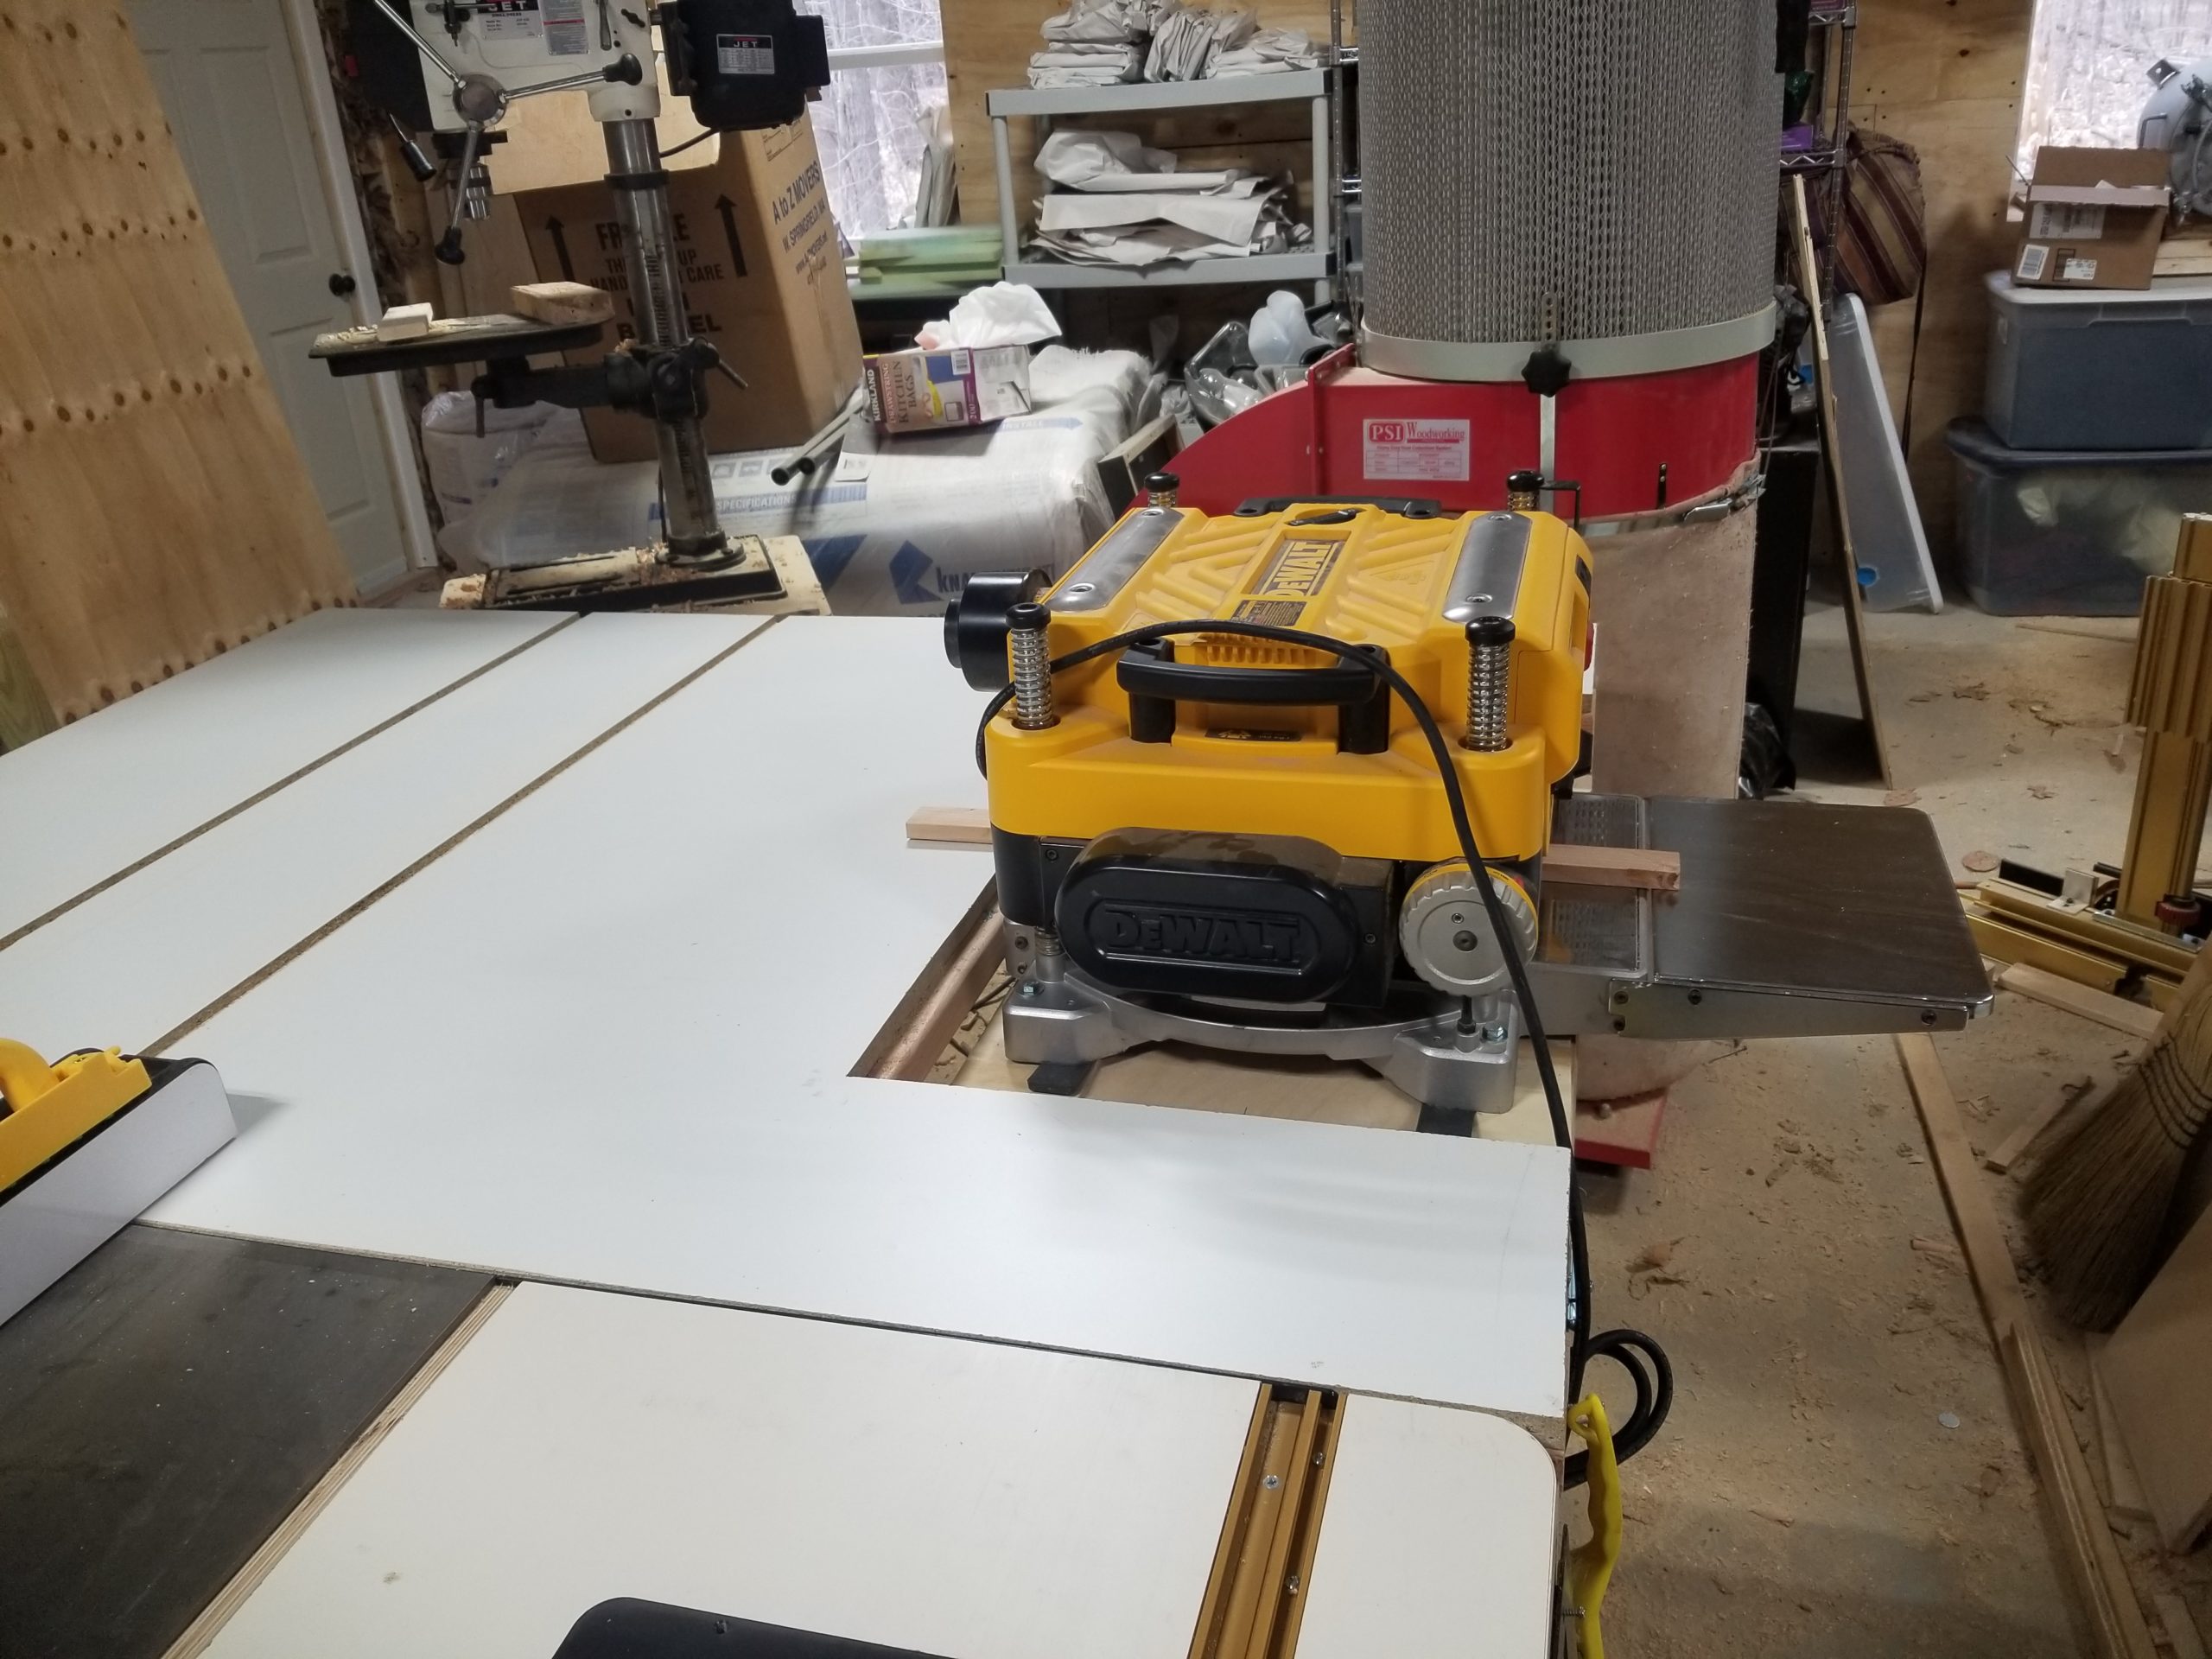
Combi table done, as well as showing the drill press and dust machine have moved into the workshop from storage.
And THAT is enough for today!