Remember that bus bar board? Yeah, I decided it was worth the trouble to re-do it side-by-side rather than top/bottom. The thing is, the wall anchors are already in place for the other (more narrow) configuration. Not really a problem, but I sure know better than to just measure them and drill in the new board. It’s always better to transfer the locations of things using the things themselves. Measuring gives you at least two additional chances to get things wrong – reading the measurement imprecisely at first and reading/marking imprecisely as you transfer. Got a hole pattern to transfer? Make a template from it and use that. Or, if the thing itself can be a template, just drill through it. And so it was.
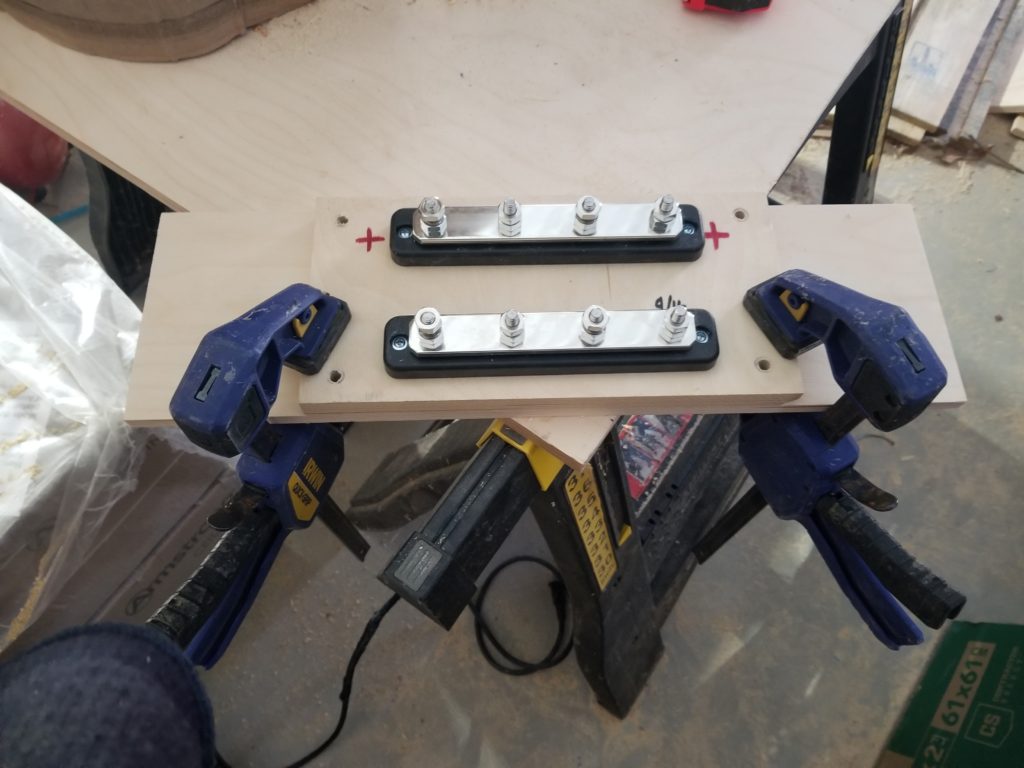
Drill through to transfer holes exactly 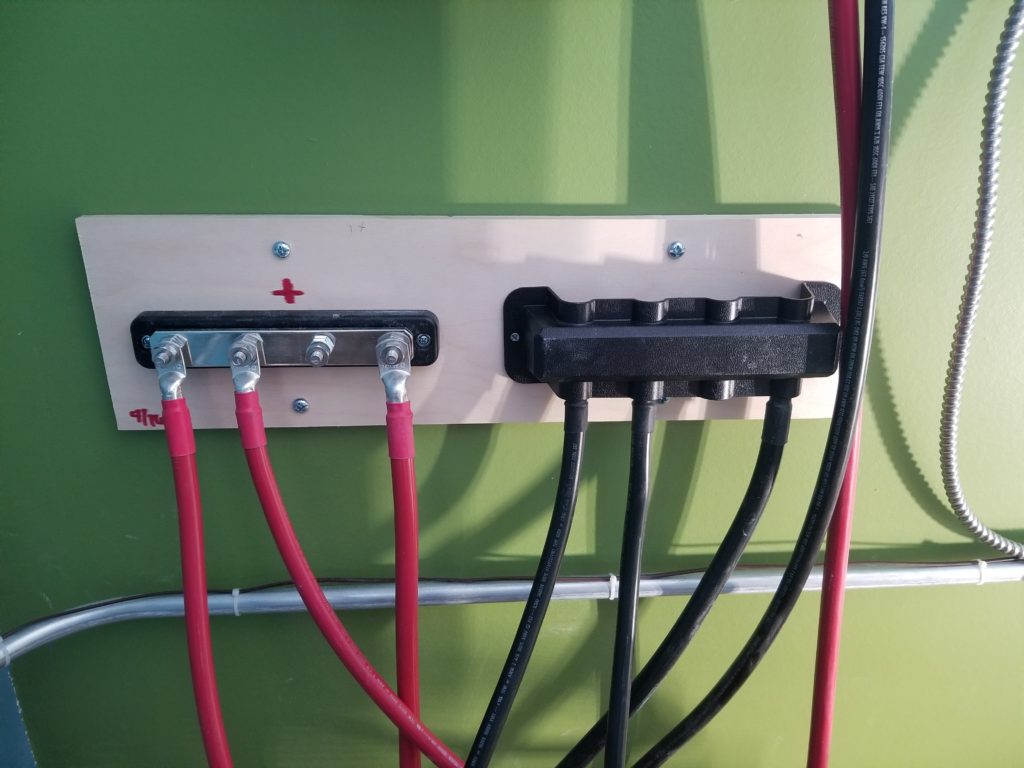
Now with room for covers
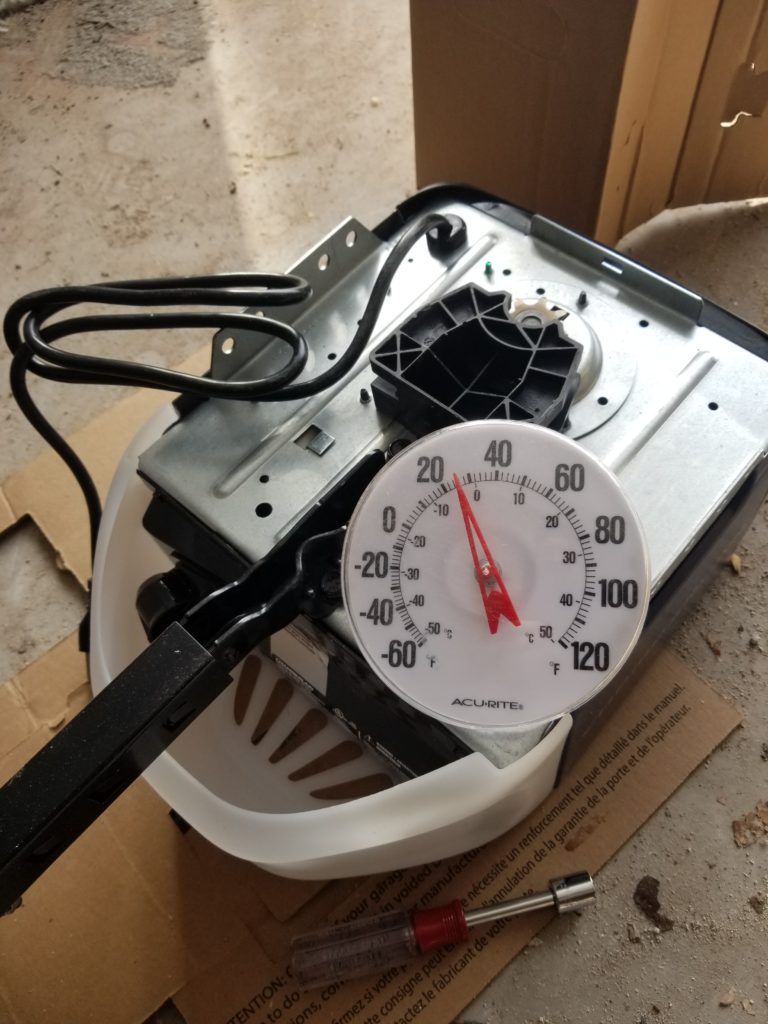
And with that, it was time to power-on the system and check things out.
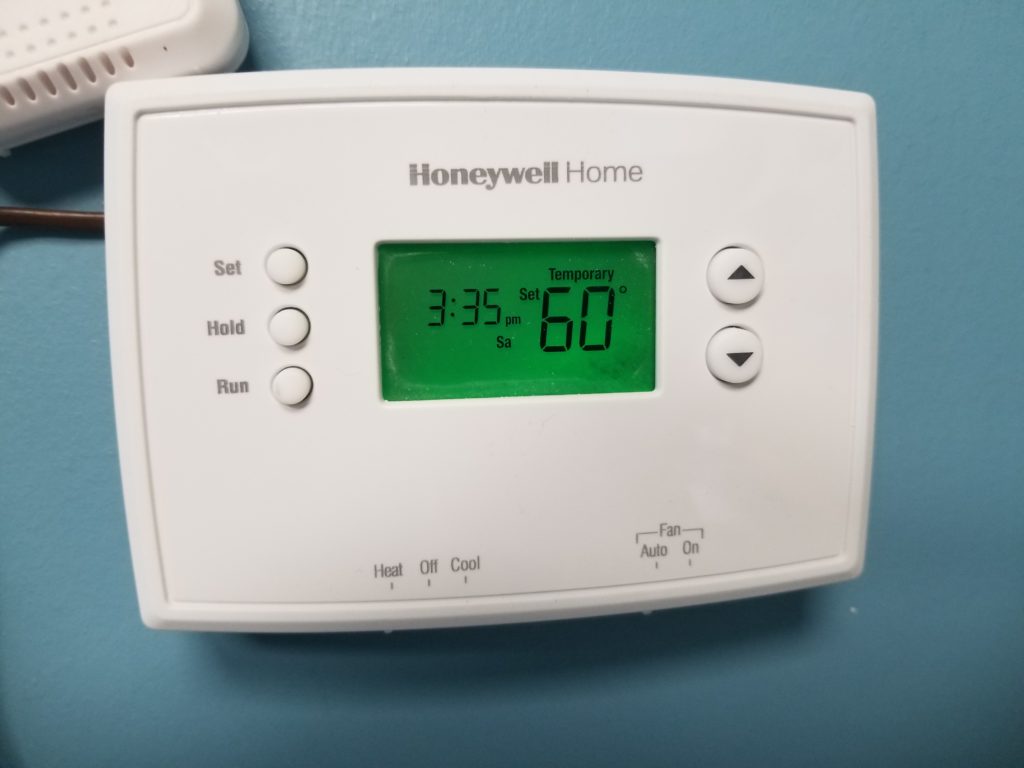
Let me explain the significance of this photo. First, the wall is bright. This is because the lights are on! Second, it’s 60 degrees in there because the heater is working, too! I am pleased to report that the entire power system came up perfectly on the first try. All outlets wired correctly. All switches did their jobs properly. All lights illuminated. 12V DC subsystem (for heater) working perfectly.
I was even able to charge about 4kWh into the battery system the following day, which considering there were some significant clouds for some of the day is really pretty good. Unfortunately, one of my two battery modules doesn’t seem to want to function! It starts up okay but then goes into some kind of self-protective sleep that I don’t understand. I have contacted the help center for assistance.
Even at half capacity, I have enough capacity to run the office quite easily. The larger capacity is needed for the workshop, which can be energy hungry when in use. I don’t even have the lights installed yet, though, so that’s not of great concern to me immediately. I do very much like having the W.O.G. on solar power, though. For one, it means I can keep the outside door closed (previously it had to be open enough to pass power cords from the generator), which is good for keeping out the cold. Secondly, not needing the generator means it is much quieter and more peaceful doing work over there. And, of course, I’m not burning 5 gallons of gasoline a day, either.
I did visit the cellular carrier in hopes of transferring my service to my native LTE/WiFi mesh network router which, importantly, has provision for using an external antenna for improved performance in marginal locations like mine. As I feared, the associate at the store was clueless and offered no help. I did come prepared though and I knew what she needed to do (associate my new hardware’s IMEI with the SIM card and my account) but she didn’t quite know how to make that happen. It didn’t matter, because the person who did know how to make that happen also knew that I couldn’t have my 100GB plan except using their deficient hardware. Even after I bought the hardware — why would they care what hardware I actually used, they already had my money… but no, they were having none of that. Worse yet, about half an hour after I left, that same hotspot I bought from them now showed “no service”! I had no confidence in that store, so I went to another one since I was heading into town anyhow. They gave me a new SIM card though they couldn’t explain why the old one wasn’t okay. Service was fine for a couple of hours, then it went “no service” again! Two resets and much fussing about later, it seems to be stable. However, I am officially done with this nonsense. Two bars of 5G service is almost good enough, but most of the time it’s 1 bar of 4G service and too often it’s zero. No bueno. Time to just let go of this whole cellular plan (and eat the losses of equipment bought) and go for a wire. The satellite service I was looking at doesn’t have coverage here yet and I’m not waiting.
I reached out to a local ISP and was surprised to find they actually had fiber in the area. Yes, these exact boonies! I could get data speeds up to 1Gbps if I wanted to pay for it. Nice! I opted for a 100Mbps service, which will still be plenty (and 10x faster than the cellular’s best day, of which there are precious few). And if it isn’t plenty, I can always increase my service speed. The glass is happy to give me however many bits per second I care to pay for. What’s most amazing is this sequence of events: I sent an email first thing in the morning asking about service. By mid-morning, a very friendly rep had made contact, took my particulars, and said they’d have to send a technician out to survey the area since there wasn’t a line to my property yet. By 2pm that same day, I see this out my window:
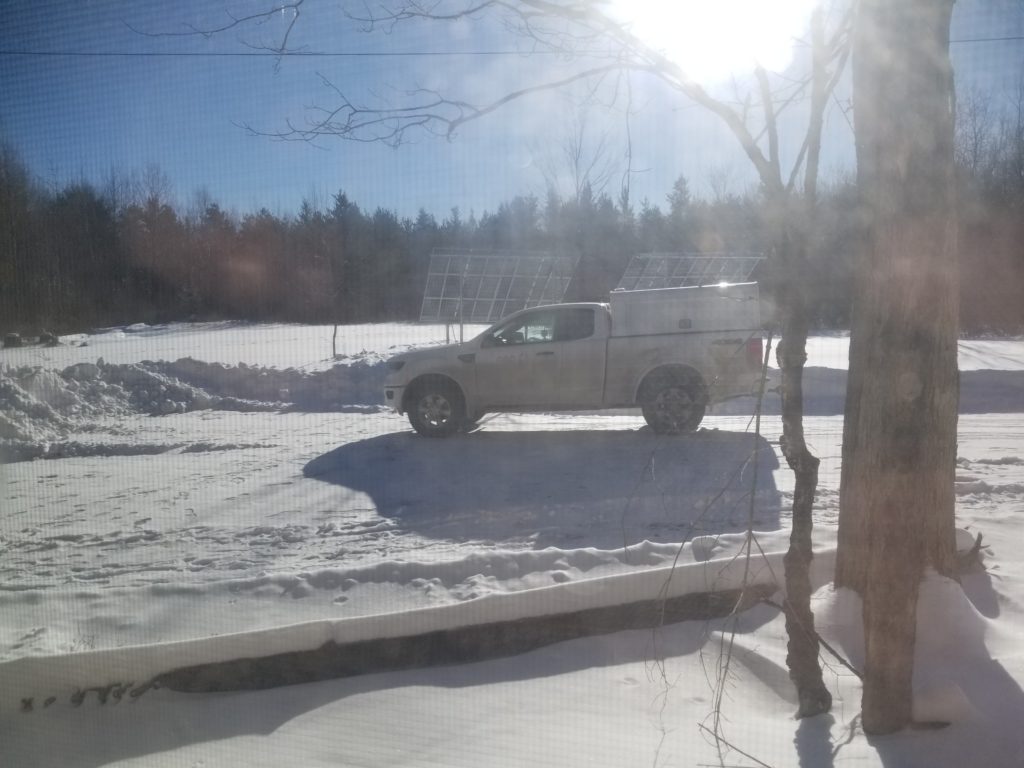
Yep! Technician is here, surveying the site, thinking about how he wants to run the line given existing poles and the lay of the land. Not six hours after I heard from the service rep, they were already making it happen. Not next month. Not next week. SAME DAY. I was seriously impressed. I have also learned that their office is only 12 miles from here so perhaps my fears of being out of range of prompt assistance in the event of a downed line or something was unjustified. They’ve certainly proven themselves responsive! And the tech was definitely someone with a technical clue, not some random subcontractor who didn’t really know what he was doing. He was friendly, too. This bodes well. After looking over the site, he called me a couple of hours later with an update and said they were going to start work running the line the following week (he was here on a Friday). Wow. This is some seriously awesome customer service. Their prices are a little high, but for this kind of service, I’ll gladly pay. So worth it. My friend the land owner has an account with them, too, and said his experiences have been similarly efficient and courteous. Excellent. I seem to have lucked out!
Meanwhile, the replacement propane regulators arrived. I was lucky that there were relatively mild (~30F) temps shortly after the first one arrived, so plumbing that one in wasn’t too much trouble. The second one, though, arrived a few days later when it was only 15F and falling. Still, I didn’t want to be using propane regulators that were the subject of a safety recall for one moment longer than strictly necessary, so I did the work in sub-freezing temps. I did not enjoy that.

For the W.O.G. Inside the Tank Hut 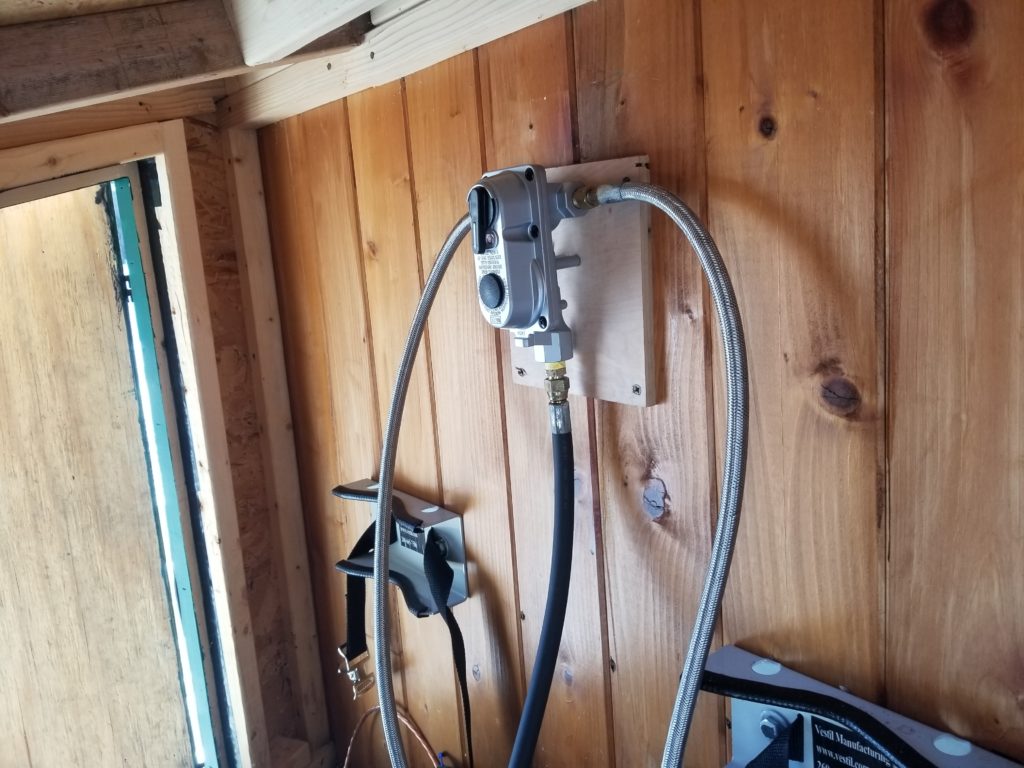
Inside the Propane Porch of the HomeBox
Before I could actually power-on the power system in the W.O.G., after building a new bus bar board and hooking up the second battery module and getting all the other things just so, I had to warm them all up. The battery modules don’t want to operate below freezing and it’s definitely been below freezing! One last run of the generator to run the electric heater in the office, with that little fan blowing across it to as efficiently as possible get the heat off the radiator and into the air by the battery modules.
But my fan was siezed!
I can hardly blame it. The poor thing has been subject to rather a lot of drywall compound dust and finally just couldn’t take it any more. Here’s a tip for you following along at home: most of these little personal fans are easily disassembled. Once the cover is off, the fan blade assembly can usually be just carefully pulled off the shaft — typically it’s just a friction fit. Once the blades are out of the way, a couple of screws are all that stand between you and cleaning out any dust or debris that made its way into the motor (which are typically these open-frame AC motors as shown). A few drops of machine oil where the shafts bear on whatever it is they bear on and now the motor should spin freely. Re-attach whatever you may have detached, press the blade assembly back onto the shaft, button it all up, and presto, new fan!
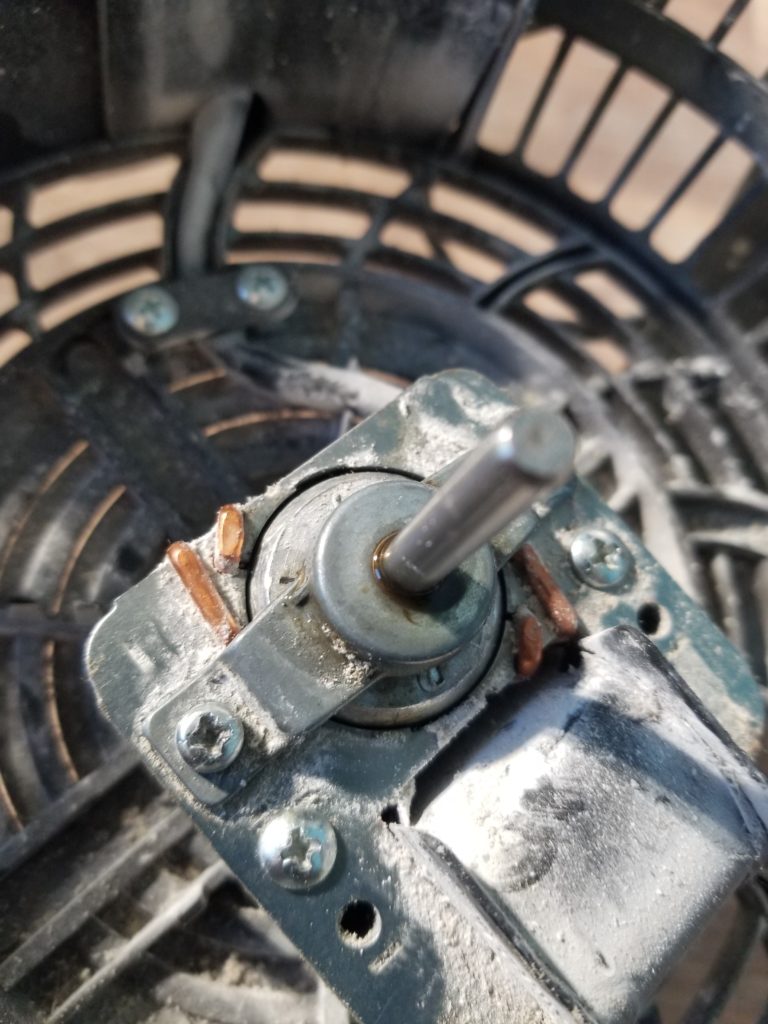
I only bothered to clean the rotor and the bearings, which also got some oil — there’s still plenty of dust elsewhere on the motor, but none of that is actually in the way of the motor functioning. It will, however, get blown into the air when the newly not-seized fan blades start to spin at full speed again, so there’s that.
My point is that these things are actually pretty easy to restore to function if they get bogged down by dust, hair, whatever. Your $20 fan isn’t trash if it’s seized. Spend 10 minutes with a screw driver and a paper towel or a brush to wipe away gunk, add a few drops of general purpose oil (like that famous 3-in-1 stuff everybody has in a closet somewhere) where parts move, and your fan will be nearly good as new.
While the batteries were getting warm, I spent some time in the workshop area making progress on the insulation job there. It never ceases to amaze me how compressed these are in their package.
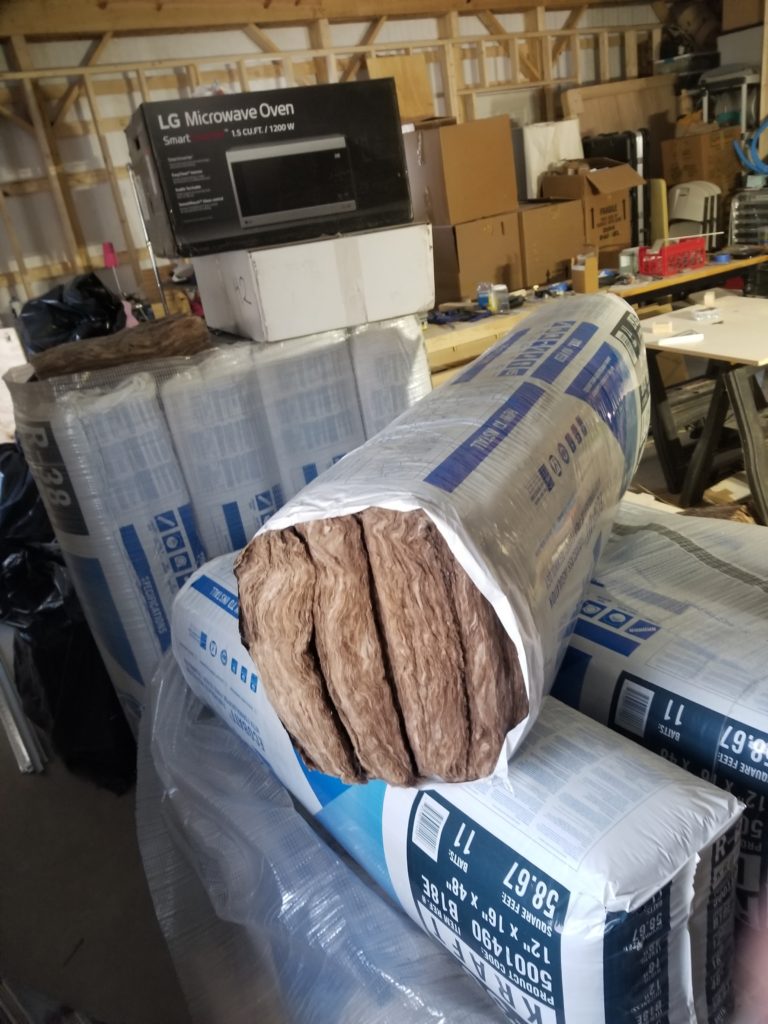
There are actually 11 units in here 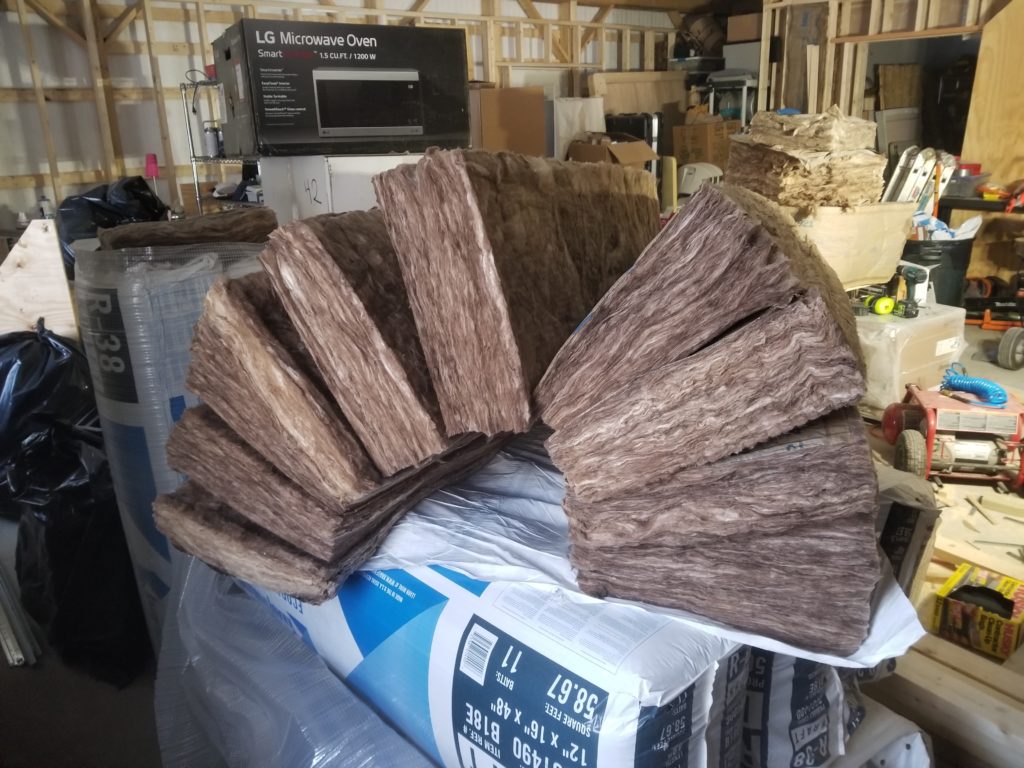
5 seconds after slicing the overwrap
It’s hard to see all 11 individually in the picture at right – some of them are stuck together and not all of them have expanded the same amount in that shot. In truth, these fluff up even more – to 12″ thick – once they’ve been given some elbow room. Here, they’re about 5″ thick as they continue to expand.
Now that the W.O.G. has power, and the office has heat and light, the next priority is… electric garage door opener! I mean, sure, I live in a 162sf house in the woods and all that, but I’m not uncivilized.
Assembling the opener wasn’t too much trouble but when I got to this illustration, I had to stop for a minute.
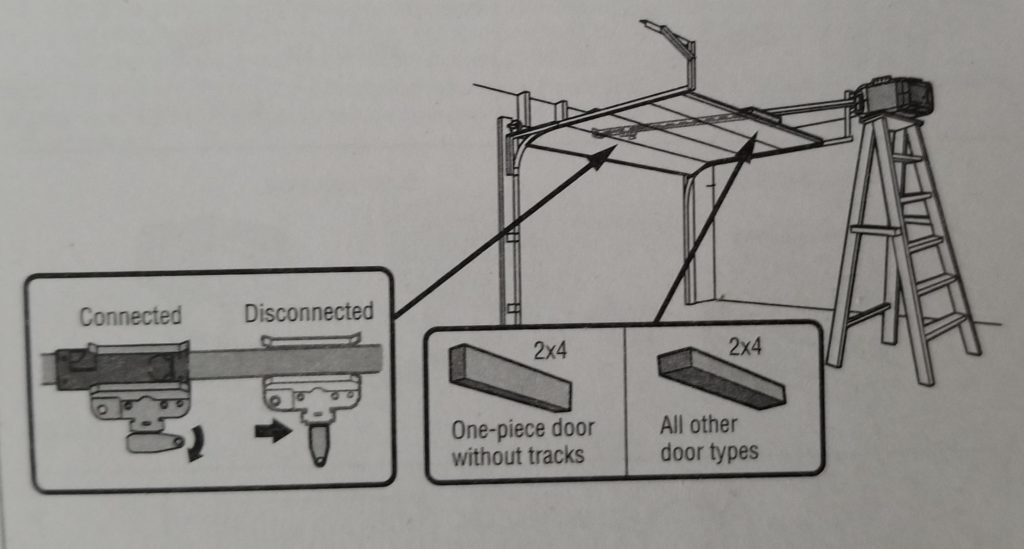
They want me to put the opener on top of a tall ladder so I can set the height of the rigging for the opener to be optimal with respect to the door’s open position. The thing is, I don’t have an A-frame ladder that tall. Not even kinda.
The only way I was going to be able to lift that opener into position would be to hoist it to some anchors that don’t yet exist. Okay, then, I’ll just install the beginnings of the mounting brackets and use rope or something to raise the motor body and set the height that way. A bit of trouble, but it should work. Then I had a much better idea. The instructions here basically establish a height that’s 1.5″ above the open door. I already know the height of the open door, so I just compute the 1.5″ interval from there and go directly to build the mounting brackets.
The thing is, in this post-frame & truss building, there’s not much structure to the interior ceiling at all. There’s some sheet metal that’s definitely not strong enough to mount anything to and there are the roof truss bottoms, but those are 4ft apart and as it turns out, running perpendicular to where they’d be most useful to me.
Time to get creative. The first thing I need to do is actually raise the motor body to the ceiling to ensure it’s square to the door and to mark the ceiling so I know where the supports need to be. Computing it seems likely to fail, given the height (10ft from the floor) and distance to the reference (about 8ft). A slight angle error translates to a significant position error at those distances.
Okay, then, I want to raise the motor to the ceiling to get an approximate position, then install enough bracketry to hold the motor there for real, with some room for fine tuning of position if needs be. And because the roof trusses are 4ft apart, I also need my mounting brackets to span at least two of them for strength and stability.
Question 1 – how the heck am I going to get that motor up there?

Answer – support the motor on a scaffold so when I move that other ladder nearby, I can reach down and collect the motor while still standing on the ladder, then raise it up to the ceiling with one hand and quickly make some marks with a sharpie using the other. I can’t actually rest the motor on the floor because the torsion spring assembly is in the way. A piece of plywood across the horizontal ladder keeps the motor from falling through and a couple of clamps at the edge keep it from moving side-to-side unexpectedly, should I accidentally knock it.
This worked. I then installed the steel brackets shown, mounted the motor directly to them, saw that it was slightly out of square, moved the hanging parts to the right about an inch, and it was good.
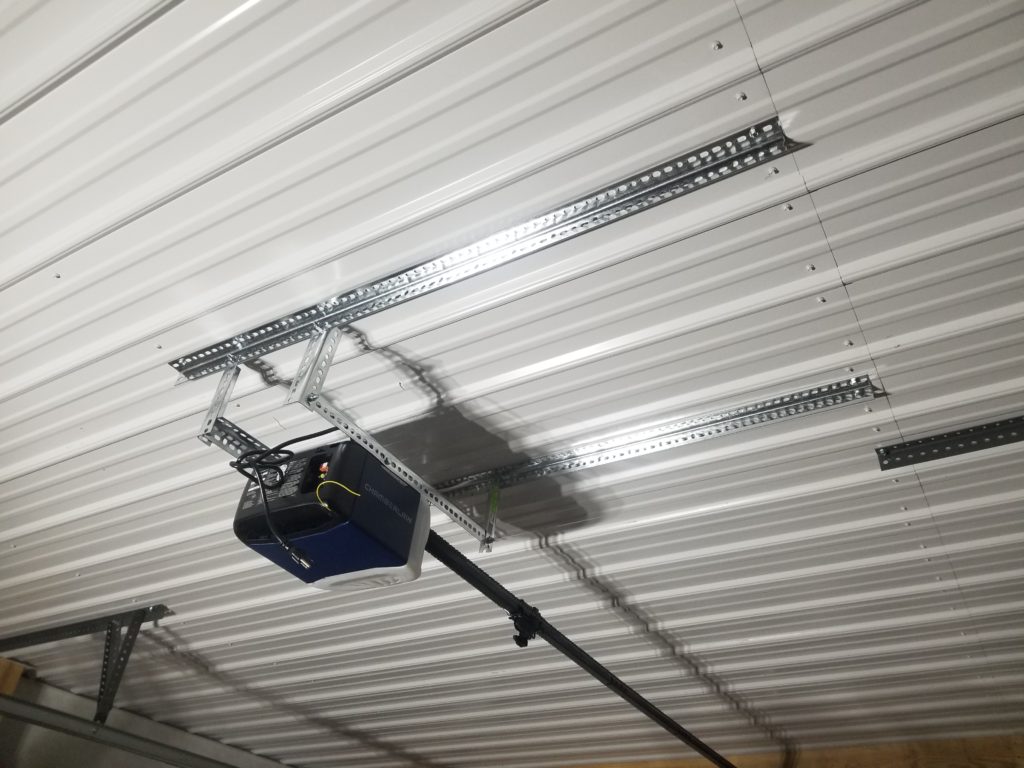
You can see the little white screw heads for the ceiling panels. Those indicate where the roof truss bottoms are. In order to keep the motor from just flopping over, I had to extend the bracket across two trusses. The guy who installed the door itself had to do the same thing for his supports. When I install lighting in the workshop, I’m going to have to do this exact same thing with spanning the trusses.
Anyway, I got it done. There’s no need for triangular bracing because the track is fastened to the far wall – the only forces seen by the motor body are a very slight torque imposed by the drive sprocket but mostly it’s just hanging weight. The assembly shown will bear both of those forces quite sufficiently.
I have not done the wiring yet (power, sensors, button) — that is for another day. Doing even this much took longer than it might because of the usual complications of working solo (having only two hands), as well as having to exchange the bracket material I bought for heavier stock because what I had wasn’t strong enough to span the distance between the trusses and bear any weight without sagging. And it was chilly, so there were warm-up breaks.
I just gotta shout out to my favorite tool brand again. This poor impact driver lived up to its name in ways it wasn’t supposed to today. It fell from the ladder once – about 8ft to a concrete floor – and survived just fine. I was really impressed. I know what those little rubber details on the body are all about now. They’re bumpers!
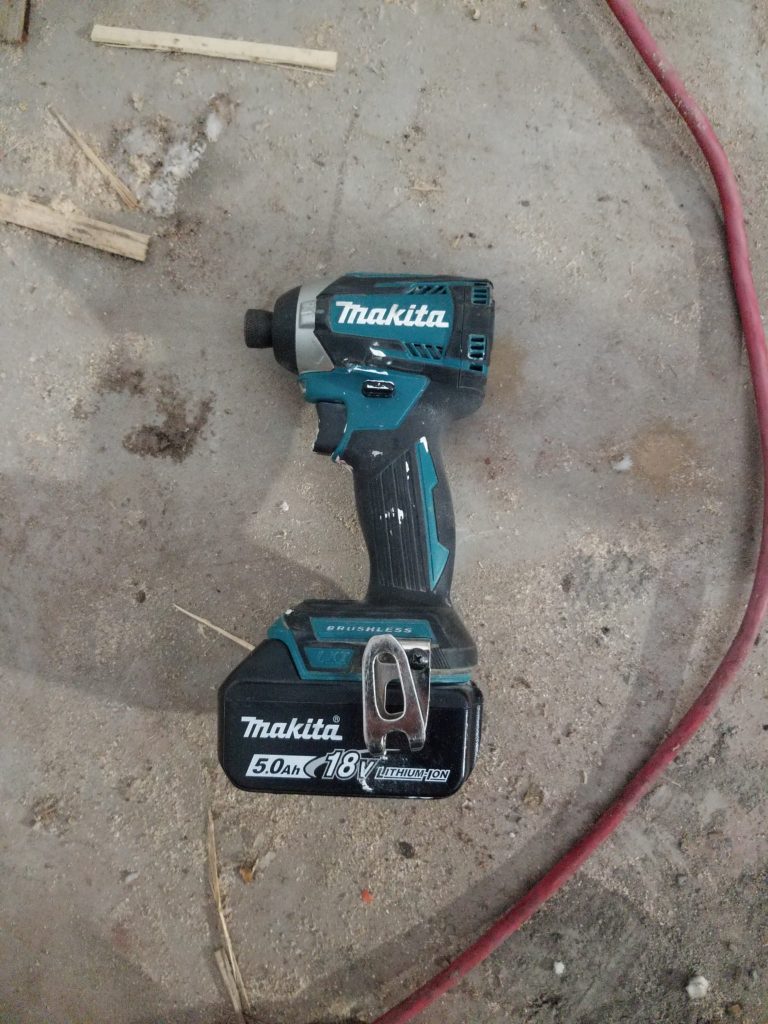
This guy fell to the concrete twice, actually, but the second time from only 4 ft. Even so, such abuse would not be tolerated by lesser equipment. I love love love my Makita tools. Worth every penny. Every time.
If it had landed directly on the battery pack, it probably would not have survived, since that doesn’t have the same protection as the tool body, but still, staying attached and intact after such falls… pro quality. No question. I love my Makita tools. I keep buying more (recently, a work light & a compact reciprocating saw which performed admirably cutting that angle stock I used to mount the door opener).
In other, non-construction news, I’ve been going to the breakfast buffet at the local mini hotel nearly every sunday since I got here. I’ve struck up conversations with some of the other townsfolk there on occasion, and have developed a rapport with whom I believe to be the head of the waitstaff. Today she asked me my name and told me hers. I guess I’m really a regular now! It’s nice, actually.
I’m really starting to feel settled in now. Things that have been in progress a long time (W.O.G., especially office/power/heat) are resolving. People are starting to know me here. I like it.