I’m back after six days away — visiting in a big house with 8 other people — and the contrast between that and my tiny homestead is pretty stark. All the more so given that I’m still largely in boxes and the W.O.G. is still under construction inside. Spending a week in finished, roomy, suburban, automatically climate-controlled house was very nice but also gives me a bit of whiplash as I return to my tiny homestead in the woods and start a fire in my stove to warm up.
I was a little worried that the snowy/gray weather would mean I’d return to a critical solar battery situation, but no. The battery monitor said it was still mostly full. That actually makes sense – the only things that use power when I’m away are the blower motor for the propane furnace (40W or so) and the fridge, but since the inside of the fridge is 38 – 40F or so and the house was only 55F while I was away (just enough to keep the plants alive – I hope; they’re in the loft and I haven’t actually checked on them yet), that’s not a lot of work for a stays-closed fridge to do to keep its inside cool. That worked out much better than I expected.
Lemme catch you up on what’s going on around here.
For starters, I found some cracks in the W.O.G.’s floor. This did not delight me. They seem minor and relative few, but I did pay for a complete and intact floor, not a cracked one. This pic was taken before my stuff arrived and since then, stuff is currently covering all the cracks so I can’t inspect them to see if they’ve grown, new ones have developed, or it was just a one-time thing as the slab cured.
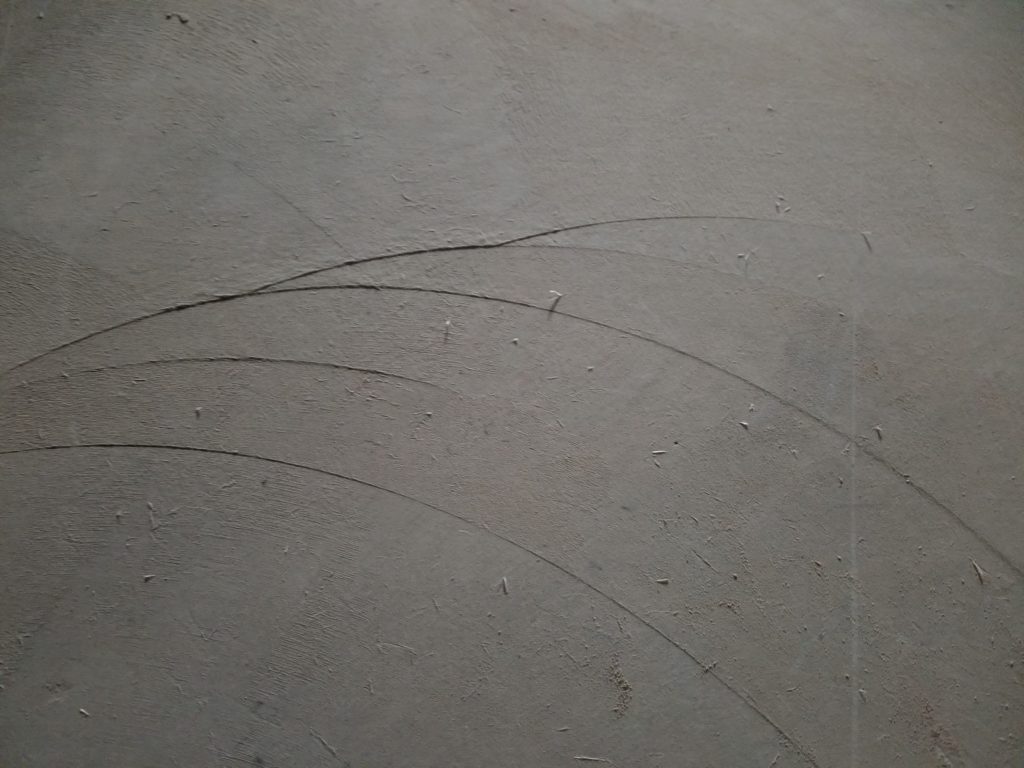
Eventually, I’ll be able to re-inspect, but not soon.
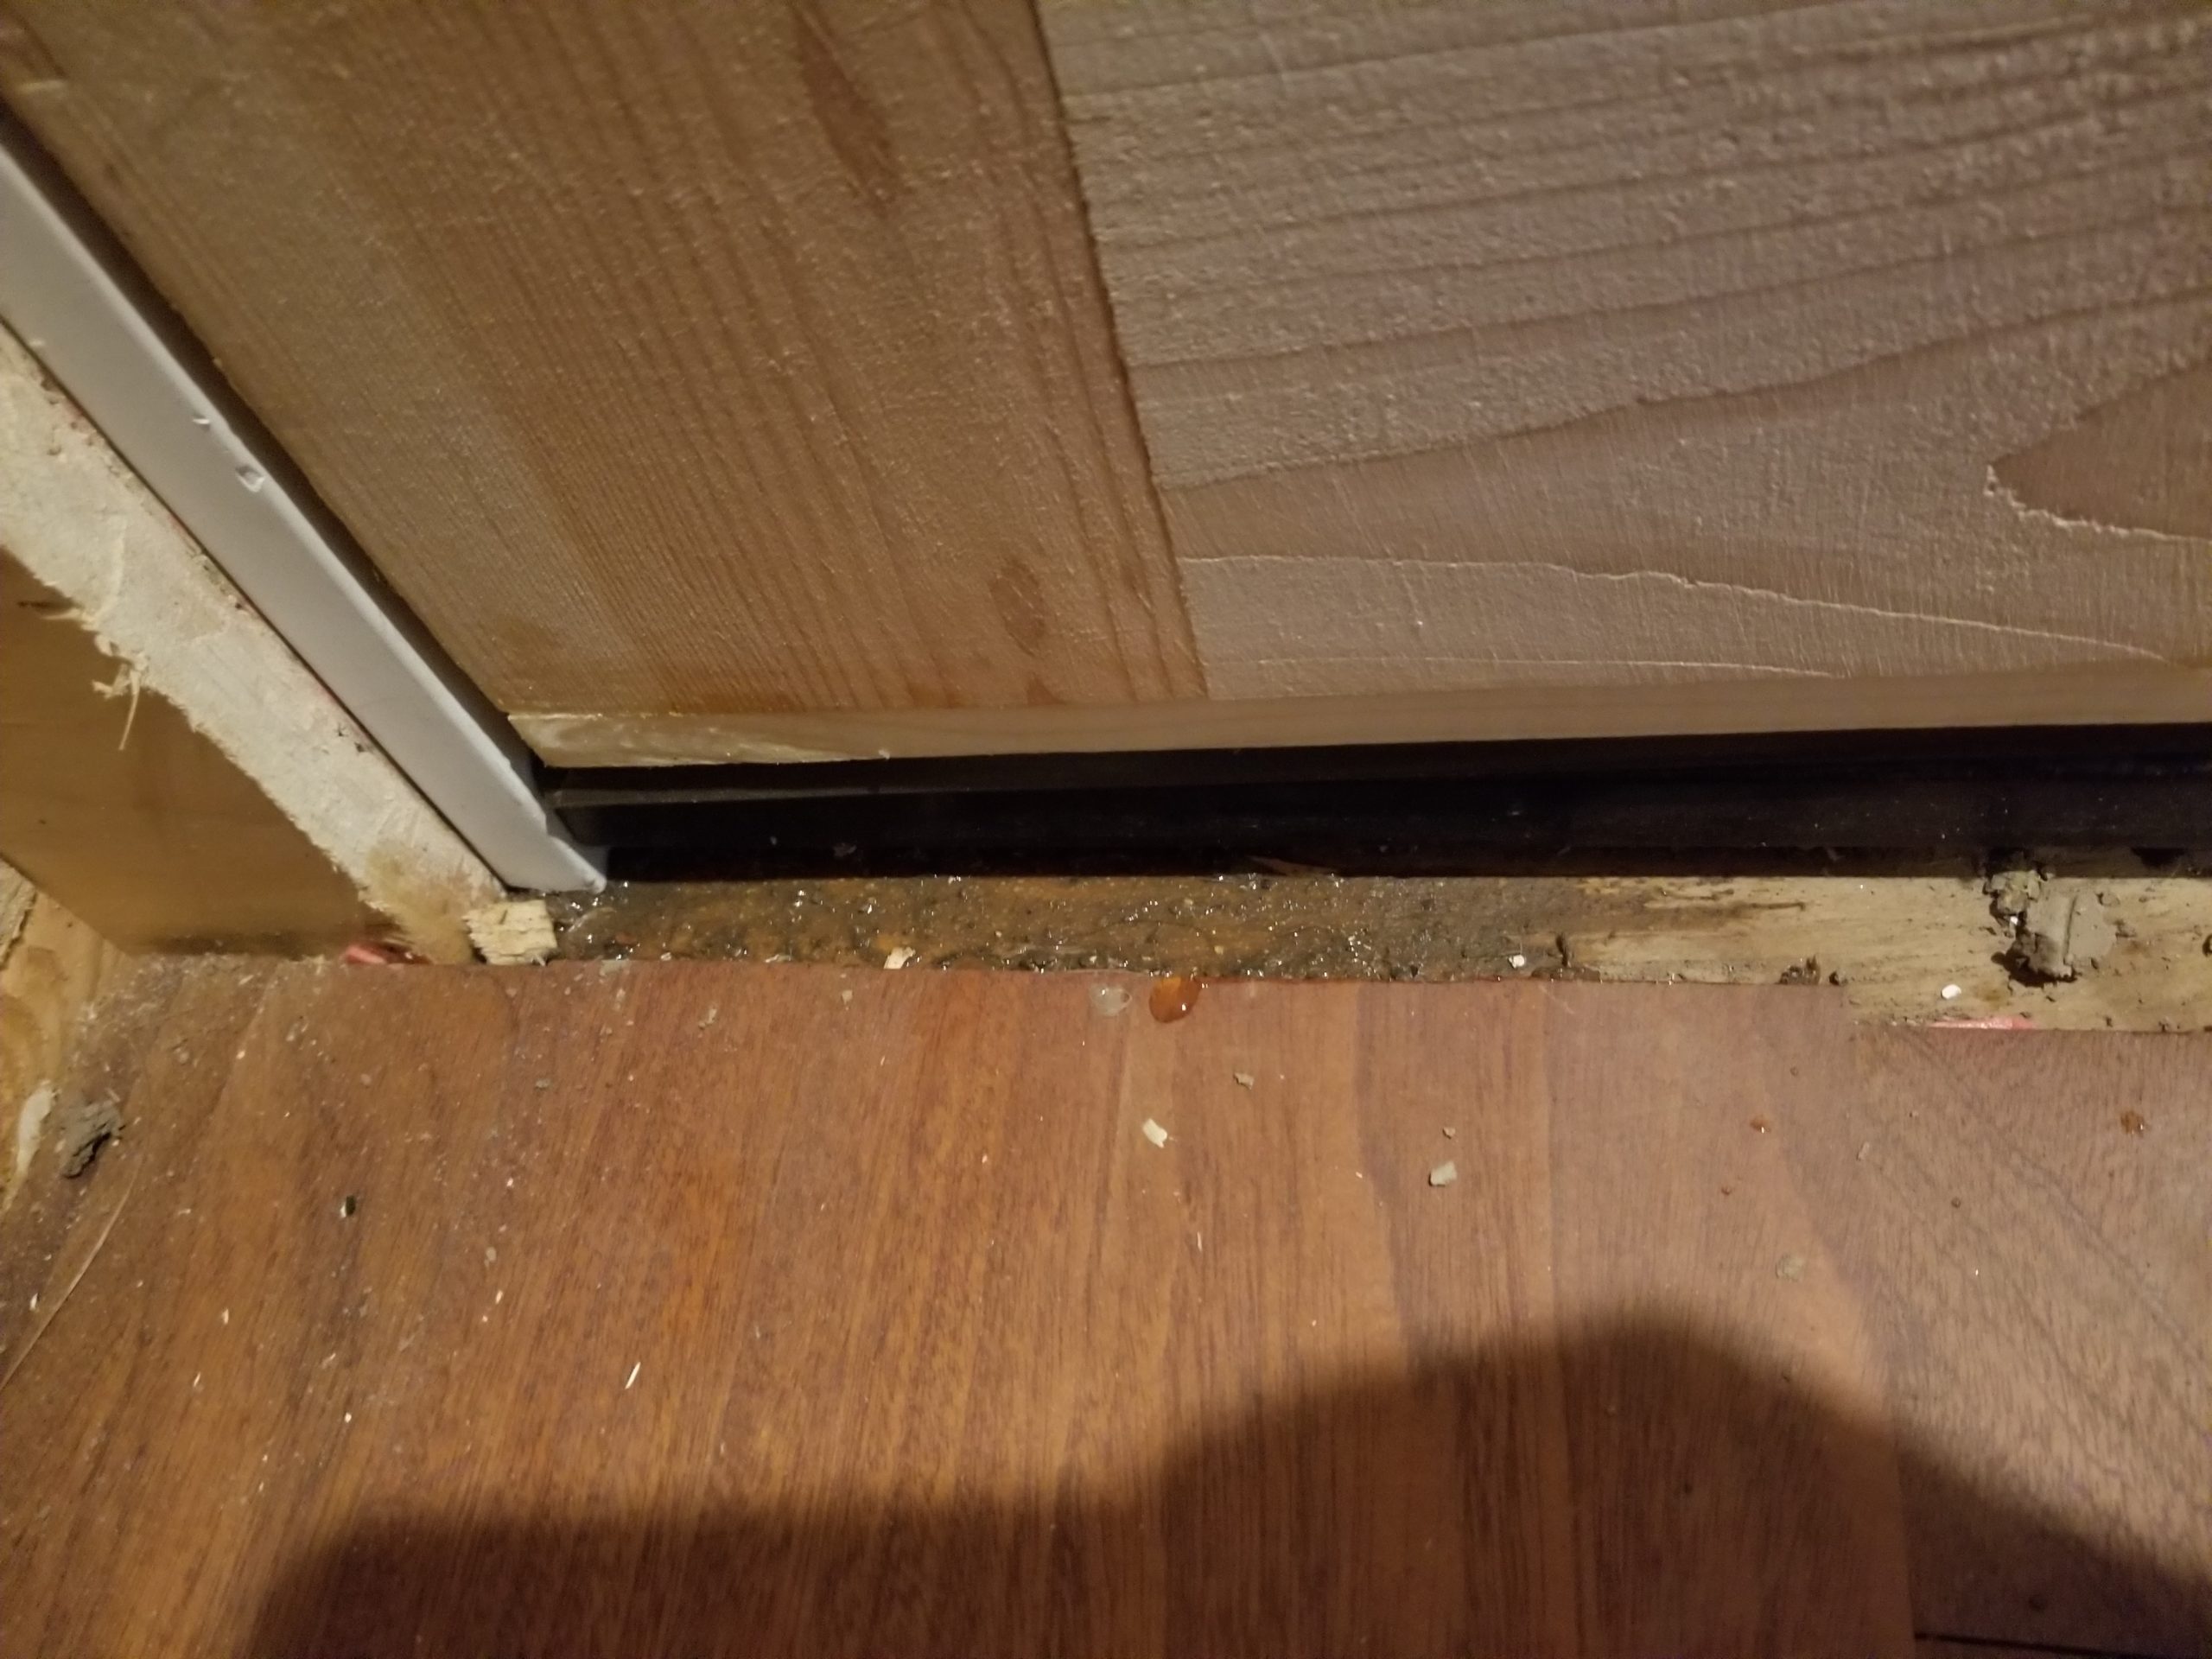
The threshold for the house door seems to have some water problems, too. I’m not entirely sure how this happens, since it appears to be properly sloped. For sure the door sweep I put under the door was clearly the wrong kind of thing for that kind of place, as it has crumbled a bit and that is letting some water in. Also, there’s a plastic cap on the top of the threshold which I think has tipped back (sloping toward the house interior) because there’s no floor behind/under it to push it up. This has the net effect of drawing in what the door sweep fails to repel.
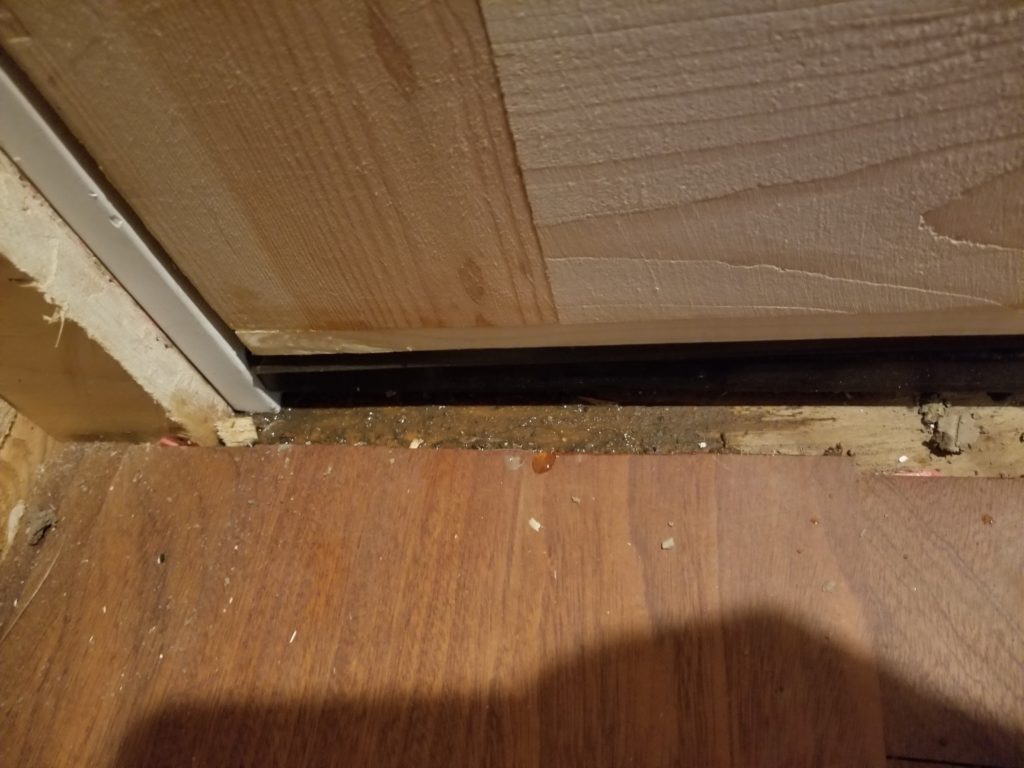
Wet between floor and threshold 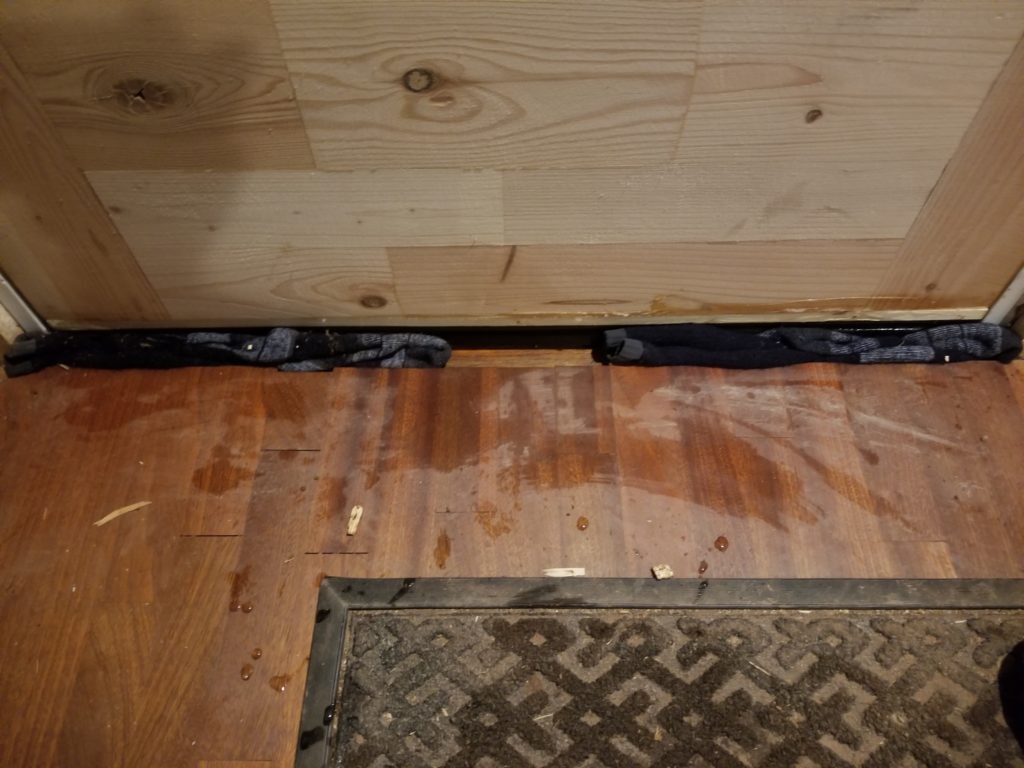
Emergency water absorbers: socks!

As soon as the workshop is the slightest bit operational, I can fabricate the necessary material to shim up the threshold cap and for that matter fill the gap between the floor and the threshold (really, this is the same job), and that should help. The trick for now is to do what I can to prevent mold from growing under the floor due to water ingress in the interim. The “good” news is that it’s now entering into winter here, so not to much with rain – and snow doesn’t flow – so I have some reprieve.
In other news of repair, the Bednette table/bridge became loose. This surprised me and I thought the problem was the lifting column had been damaged somehow. The good news with that is the column is fine and the only problem was that some screws needed to be tightened. The bad news is that to even access those screws, which hold the column’s top plate to its internals, I had to remove the table top from the column. This meant working overhead, on my back, under the Bednette at arm’s length (my favorite). All the more extra fun because some of those screw heads stripped out during installation and were therefore impossible to unscrew.

Unscrew the plate from the wood 
Four big screws (first by blue tape) to tighten
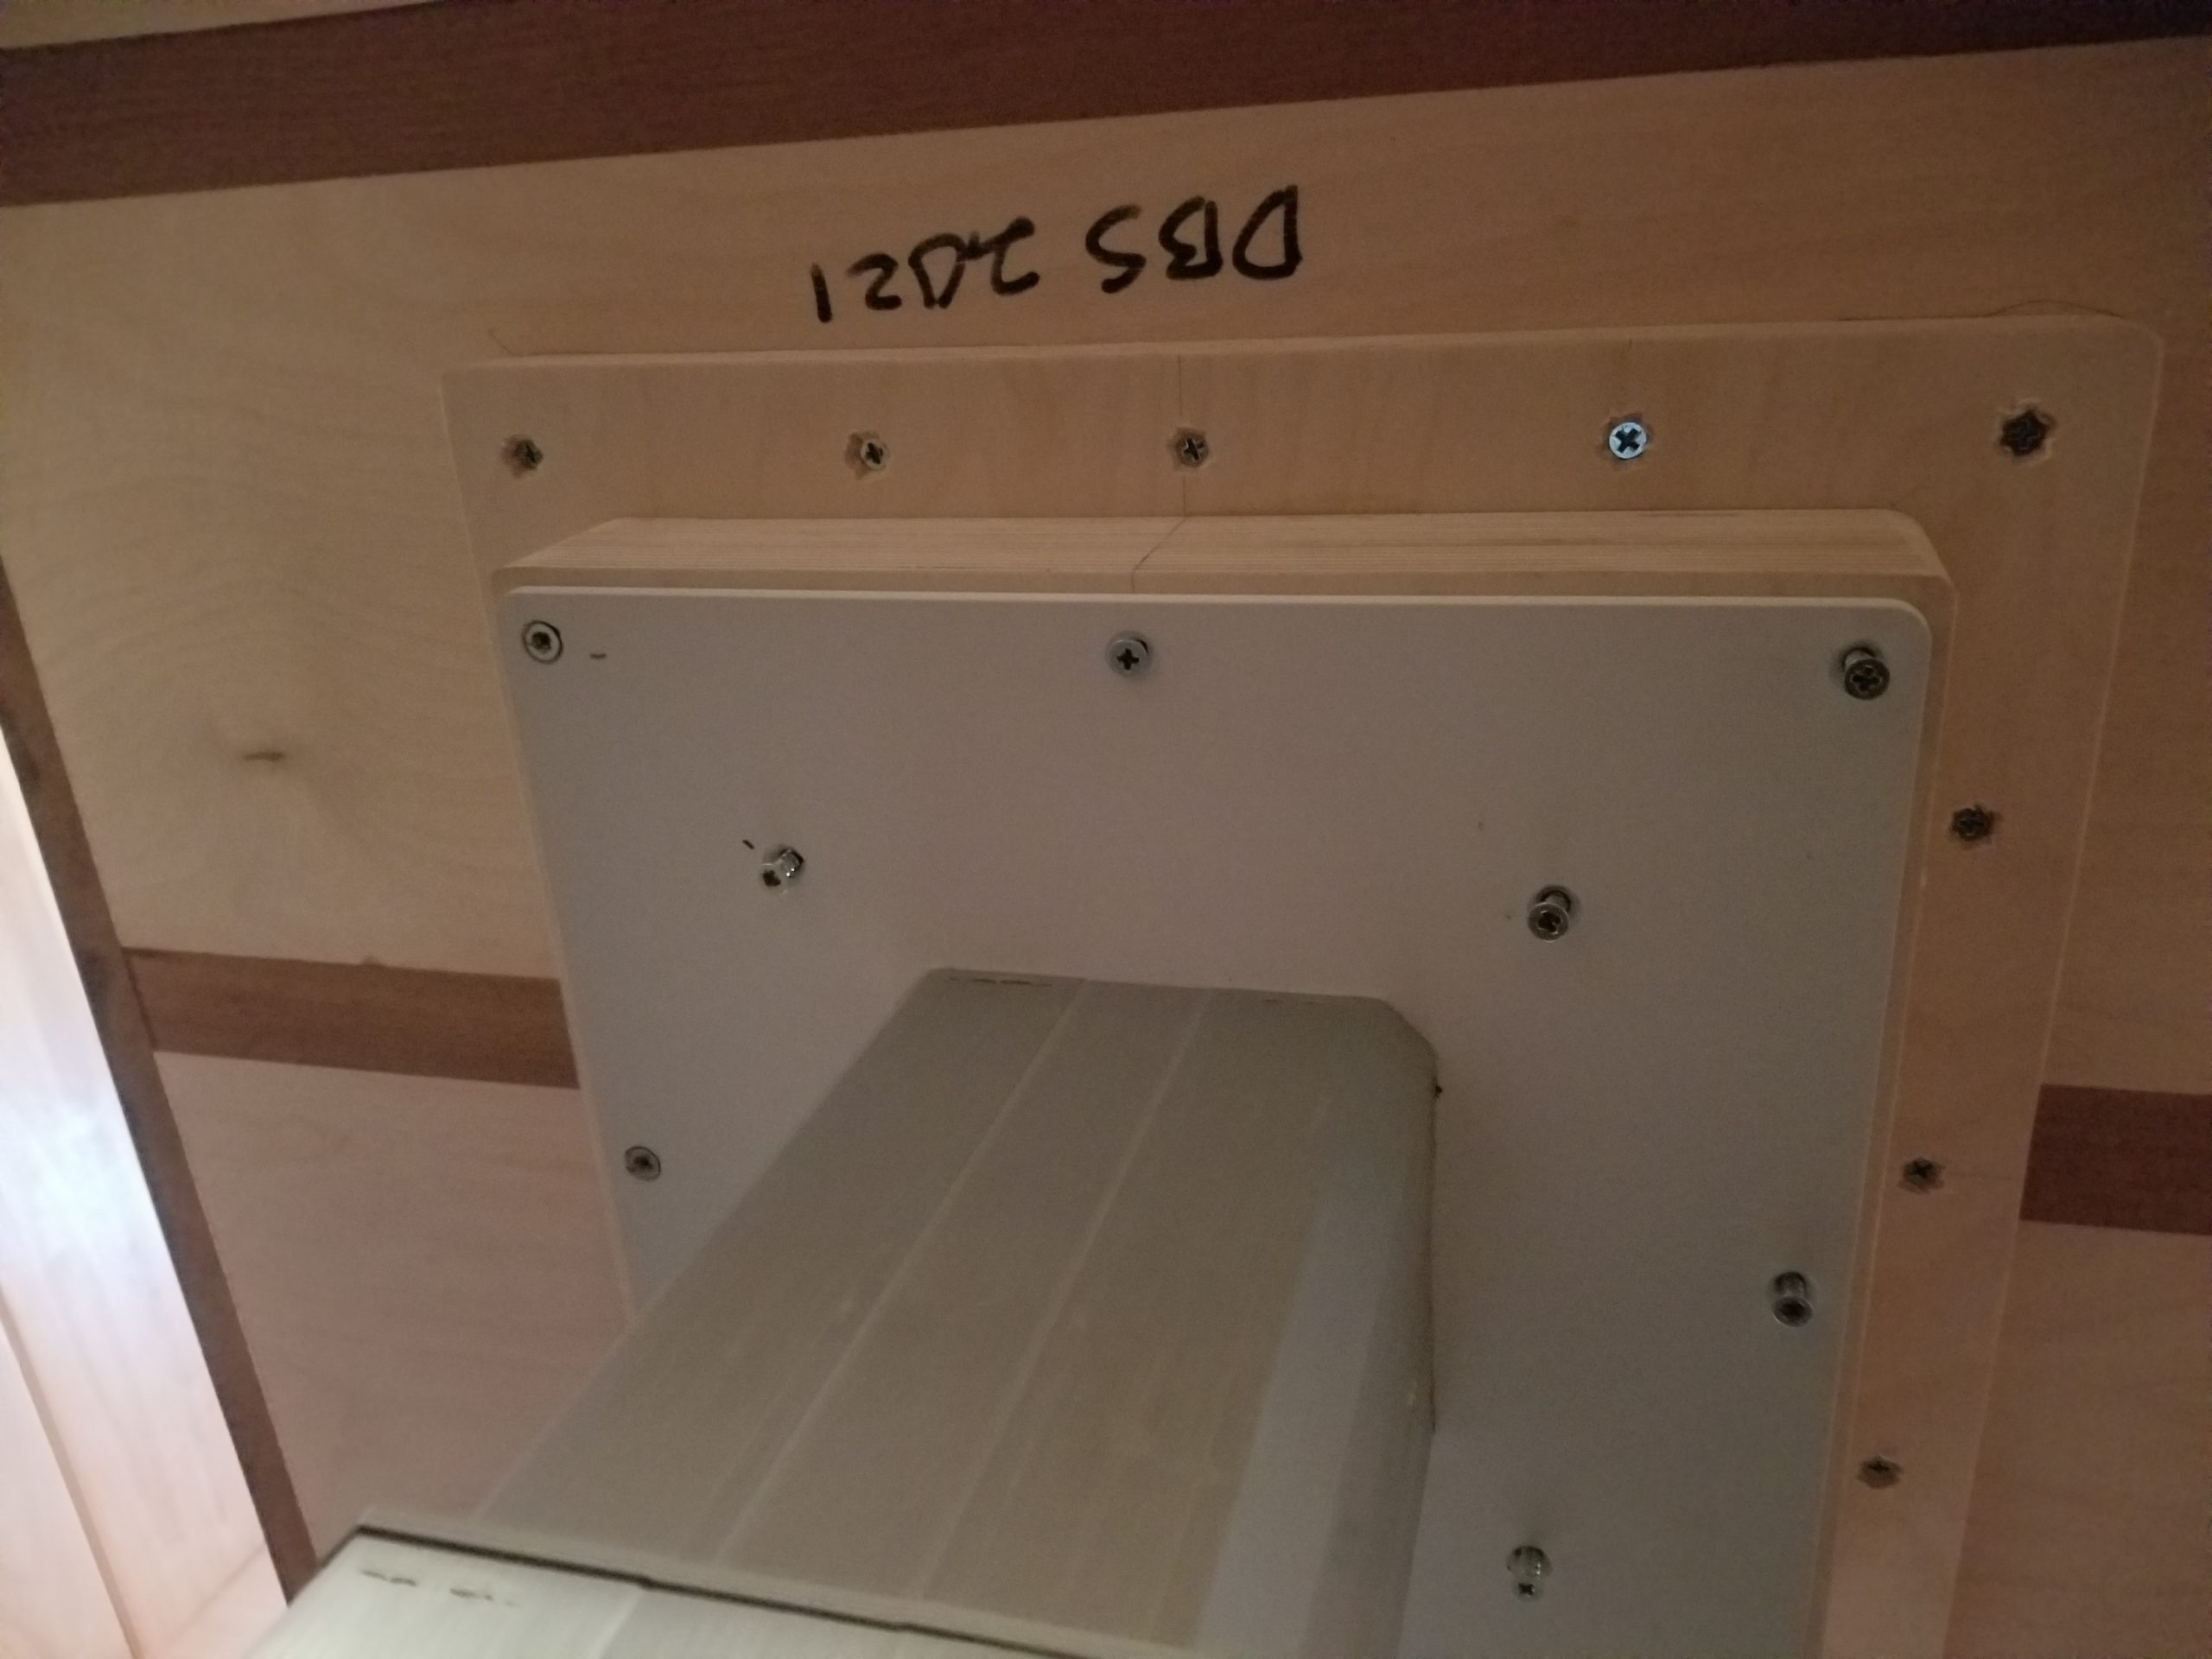
Thus, I had to slice a couple of them off with my friend Multi Max (he’s so dreamy), which was also messy and awkward since that slicing had to happen between the metal plate and the wood. Once I had access to the screws to tighten, I did two things to make this less likely to be a problem in the future. First, I used LocTite blue on the screws so they’d stay tight (I’m not convinced the LT was still good, though, since I used some elsewhere and it didn’t seem to set… but then, that was outdoors and it’s cold, so maybe that was it) and I replaced all the cheapo Philips head screws with star-drive (Torx) screws which are far, far more resistant to having their heads strip out. Star drive screws are great.
I’ve also been harvesting local wood for the stove. This is time-consuming and labor-intensive, but quite satisfying and happens to also be great exercise. I do need to get on this more aggressively, though, since winter is here and it won’t take much snow or frozen ground before it’s much, much harder to harvest. I got started with some deadfall I found near the house – a nice way to get started with this and find my rhythm. Of course, the logs have to be small enough to fit in my wee stove. Glove shown in the pic at left for scale.

My hands are big, but also these logs are small 
That awkward space below the stairs

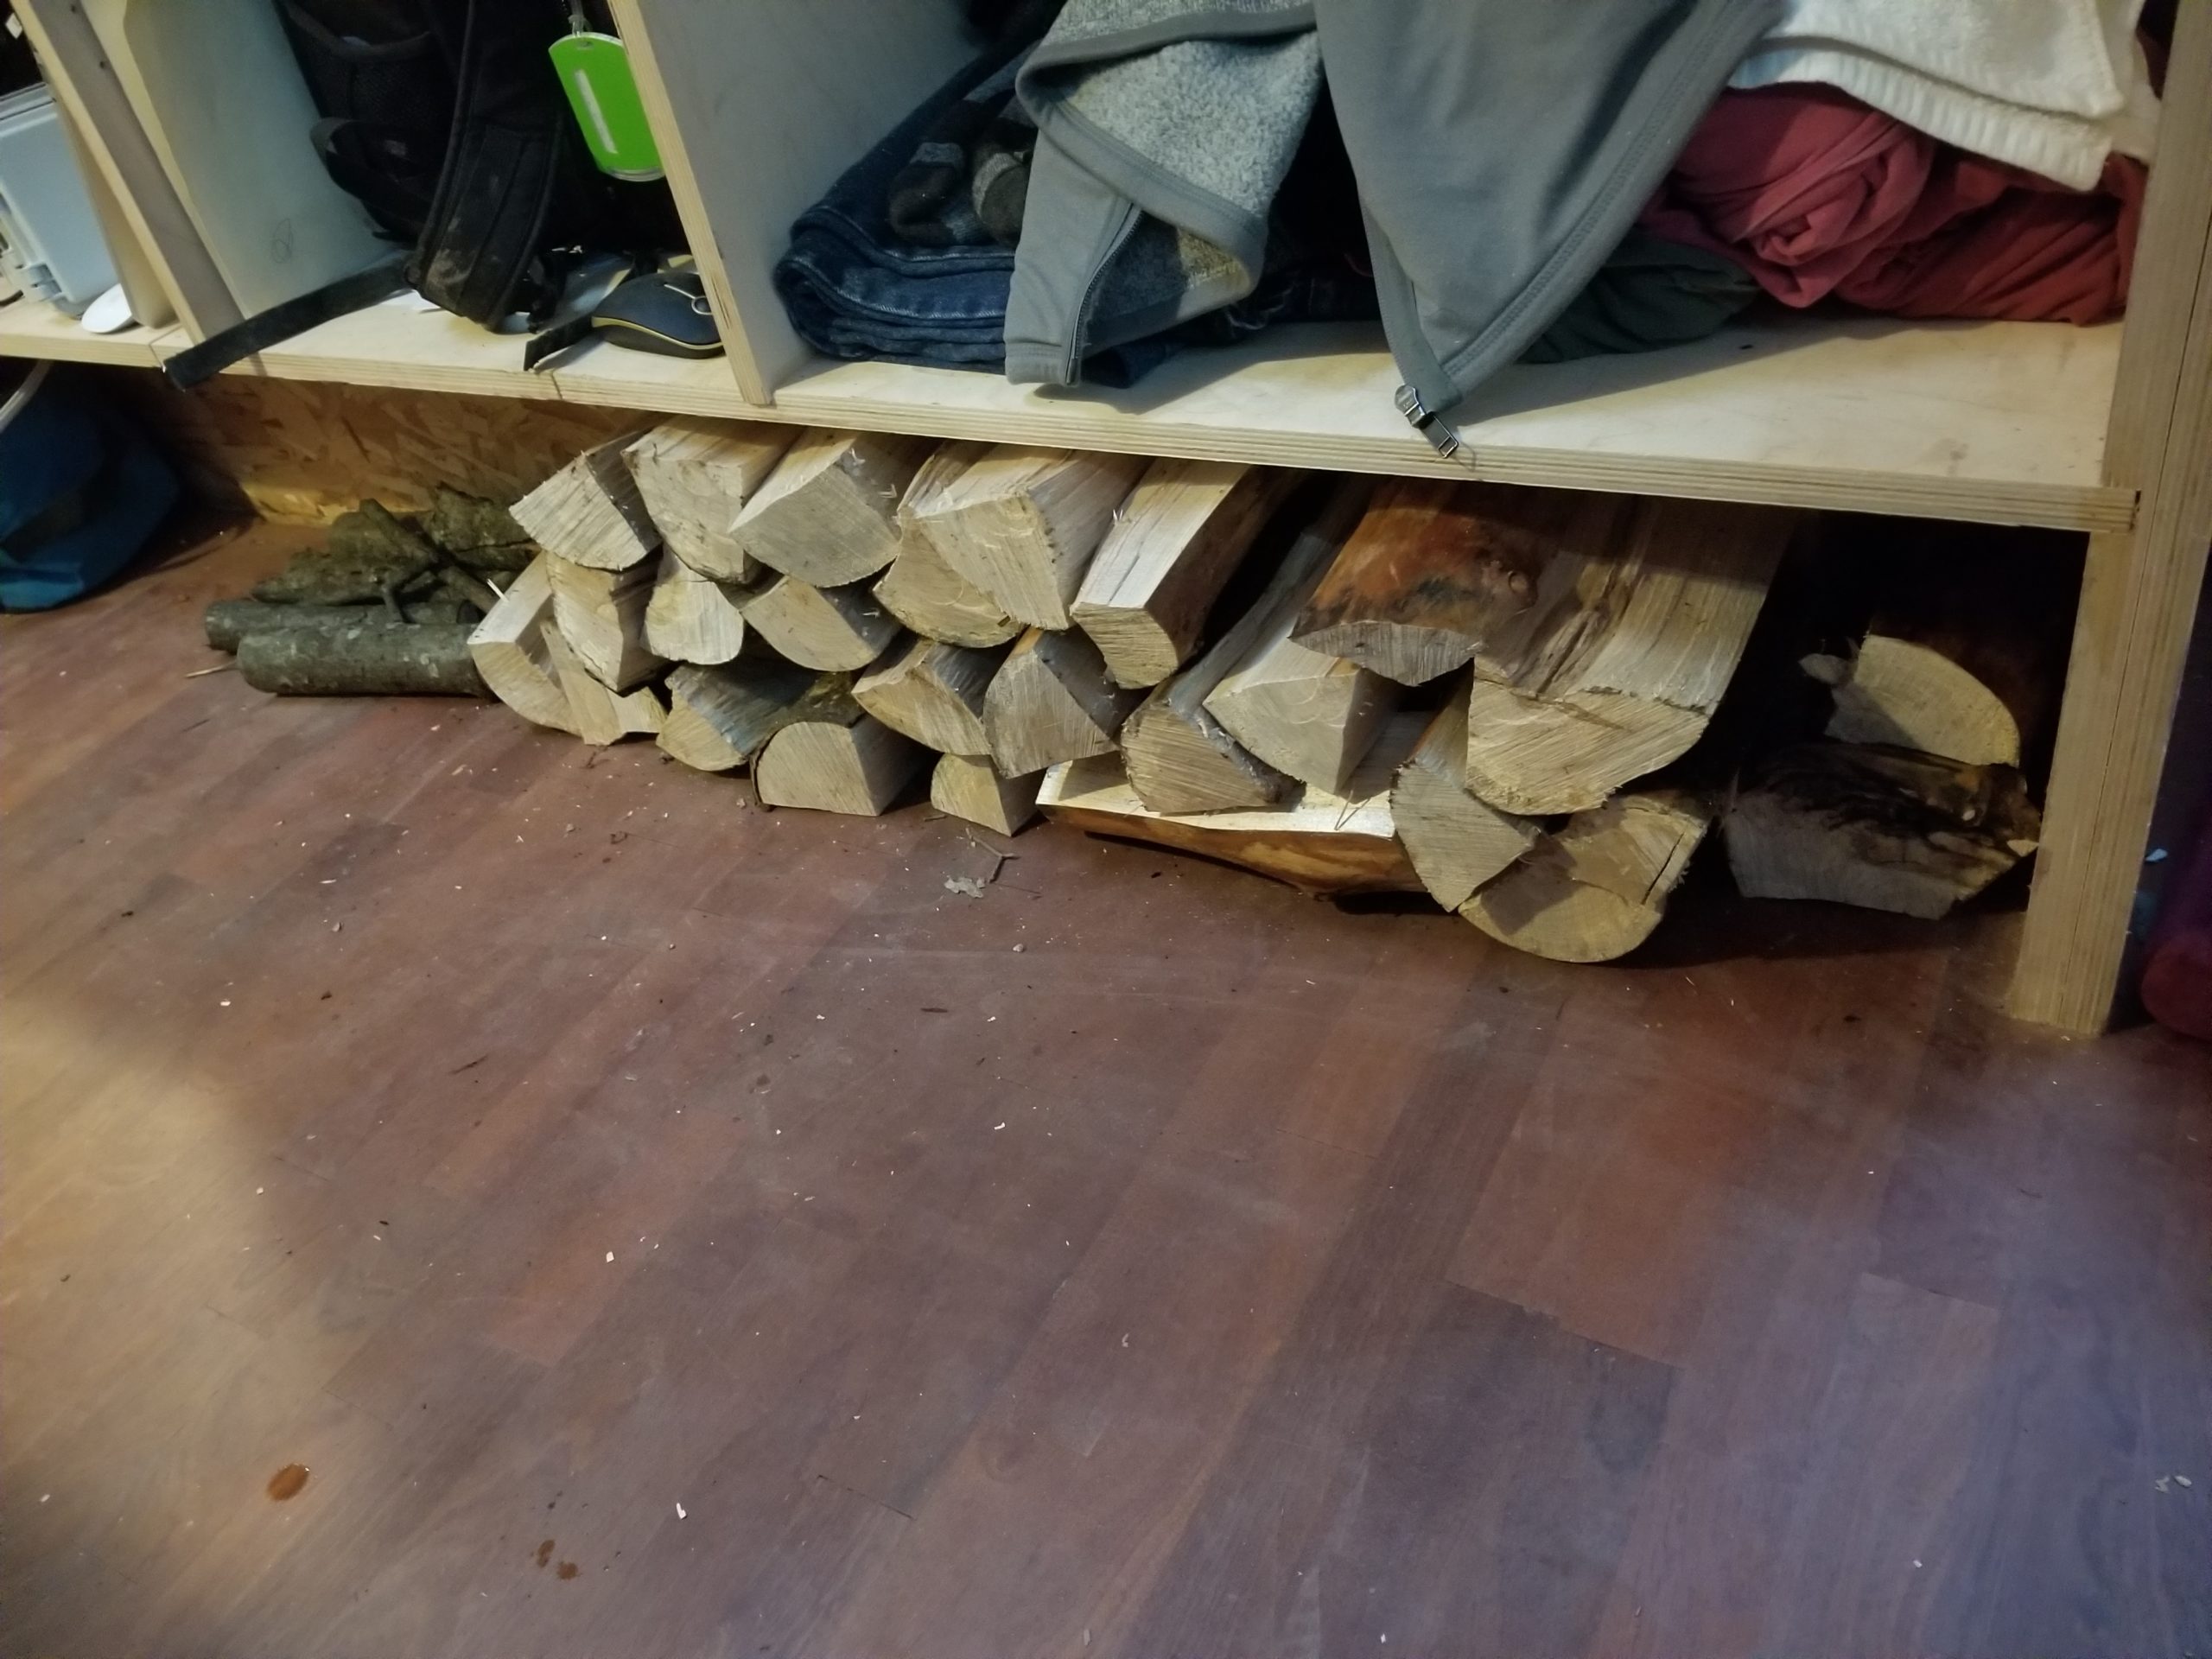
I also found a use for that odd space below the tansu stairs. It’s only like 6″ deep and about 7″ tall – not much can be done with that kind of space (I was thinking some tiny tip-out bins maybe) but it turns out the little logs for the stove fit under there pretty well and that puts them in convenient position for use, as well. They stick out a little but not enough to be in the way. A few evenings’ worth of wood fits under there.
Wanna know how to totally freak out a tiny house owner? Take the wrapper from a perfectly innocent little stack of crackers…
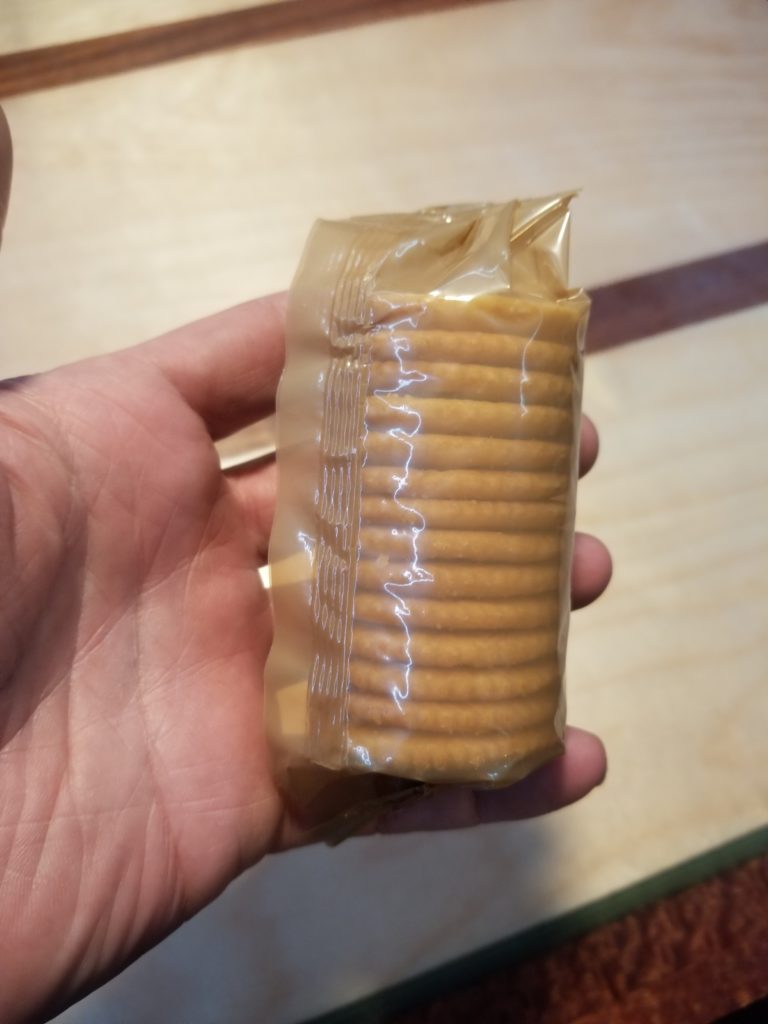
…and toss it in the wood stove. It turns out whatever that wrapper is made from, it smells rather a lot like burning electrical apparatus when on fire. Worse yet, the stove fan and natural convection takes the hot, stinky air and brings it right up to the utility loft where all the electrical equipment is. I dashed up the ladder and sniffed everything, totally unable to ascertain a source (because it wasn’t actually originating up there!) but it had burned off quickly enough that I couldn’t smell it coming from the stove, either. There was just a bolus of acrid that made its way to the loft and then slowly dissipated. But not before freaking me out something fierce for a few minutes, before I concluded it had to be the wrapper and furthermore that no electrical devices were about to catch fire. Whee!
Back at the W.O.G., the priority has been to install and leak-check the gas line so I can get on with boarding up the office, mount the power center, and get the W.O.G. heated and electrified already. I had to wait for some parts (the little hoses that go from the regulator to the propane tanks themselves) to do this test… until I realized I could borrow the hoses from the house for the test, so then I went about getting a head start on plumbing in the regulator so I could test the line.
Step 1, form a bit of copper tubing from the inlet to the regulator. Two important tools are required for this: the flare tool to shape the copper tubing ends and a bending form to get the tubing to go from perpendicular to the wall to parallel to it.
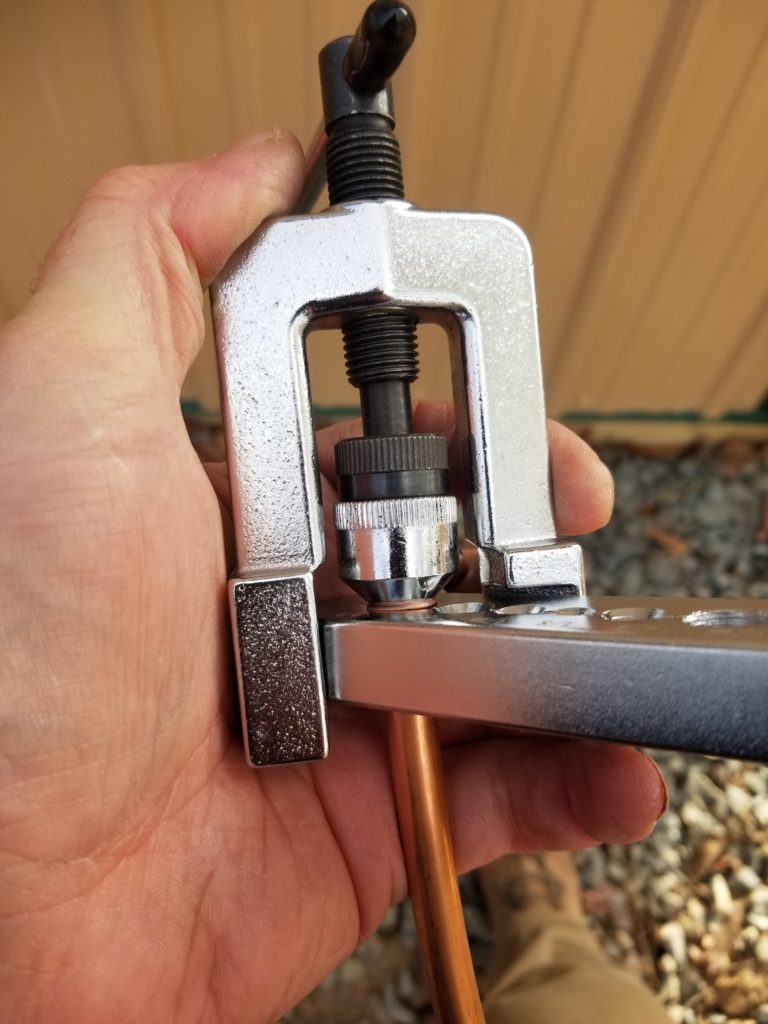
Flare tool to shape tubing… 
…into this 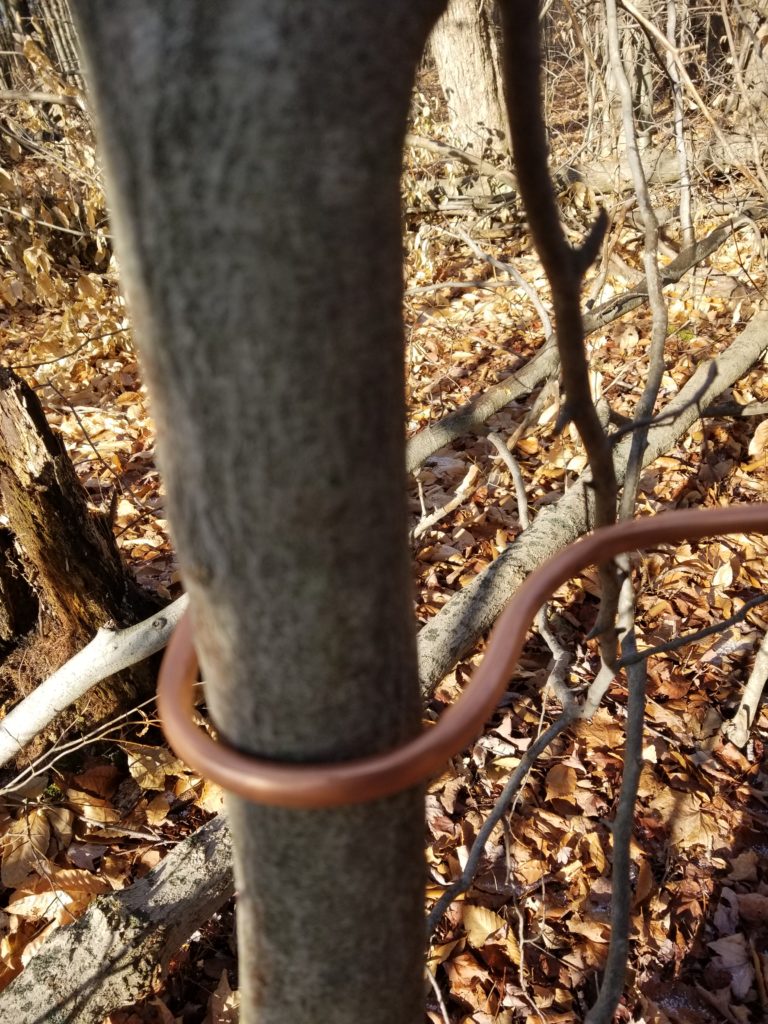
And a young tree helps me bend it
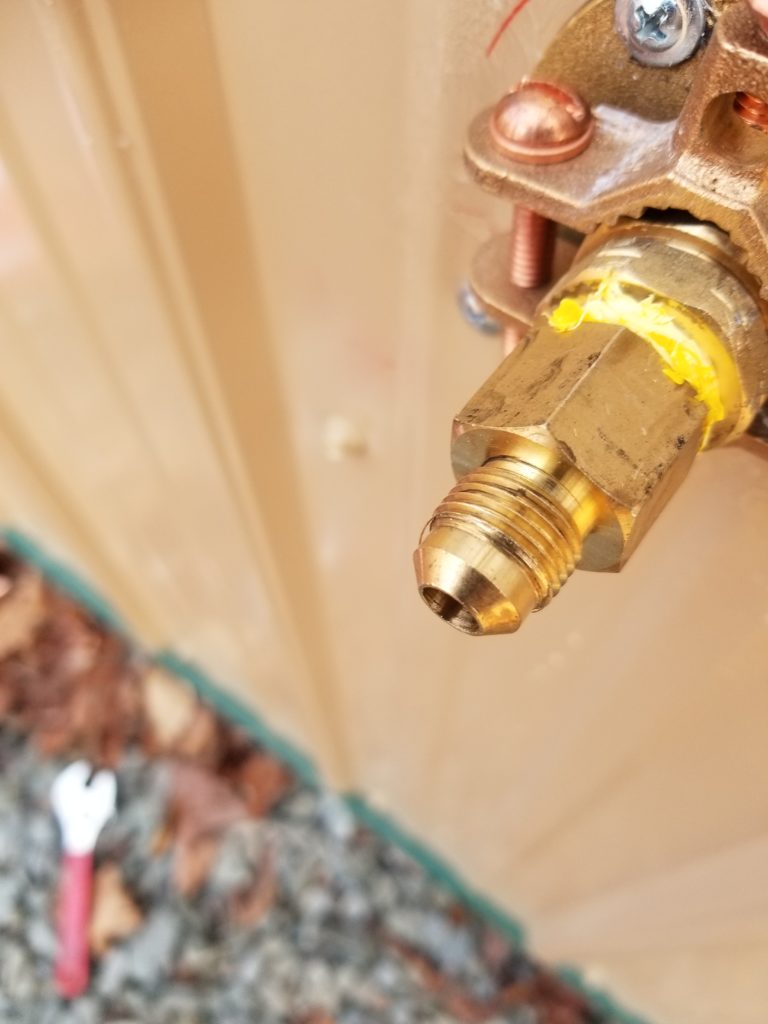
The flared end mates with this fitting 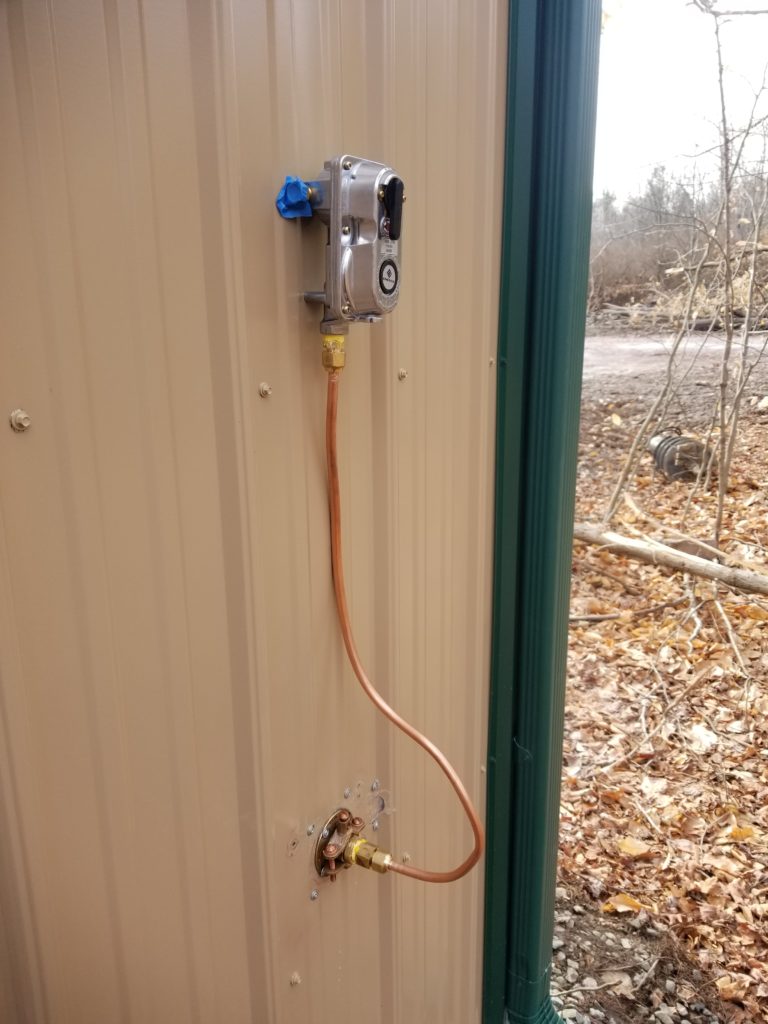
And now all connected
Re-did it with an elbow.
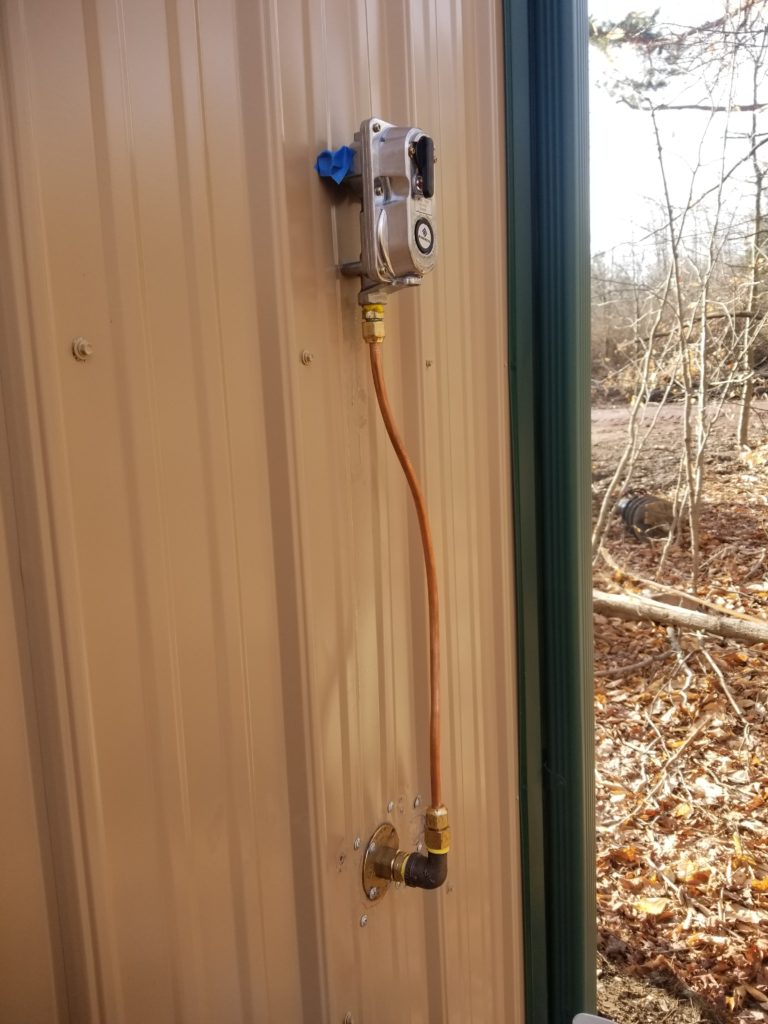
That’s much better in terms of the copper tubing not being in the way of walking around the building. However, I realized another critical thing: the hoses I ordered that go between the tanks and the regulator/auto-switch (they attach where the blue tape is in this picture) are way too short to reach from the tank outlets to the regulator! Either I need to raise the tanks up (at about 30# of steel plus 40# of propane when full) a few feet, making them especially awkward to change, or I need to lower the regulator a bunch. Since I’m going to shelter the area a little bit, there’s no motivation for the regulator to be high (previously thinking it would be taller than snow drifts). I re-did it a third time. Photo to follow.
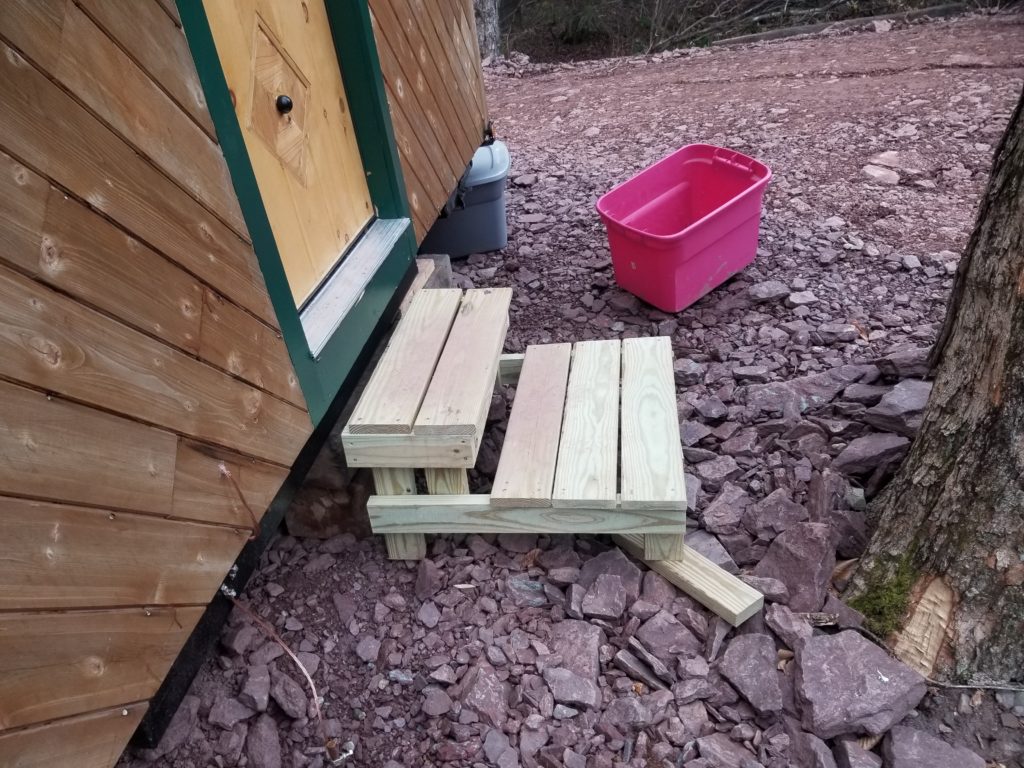
Speaking of re-doing, those little steps I made for the house were just a little too small and therefore a bit unstable. No bueno for winter! The lower step is now considerably larger and the wider stance makes the whole thing much more stable, as well. Even this is temporary til spring or summer, though, when I’ll do something a bit more permanent and perhaps add some kind of little roof or something over it.
I have been insulating the W.O.G., in particular the office partition. So far, I’ve got the lower 8′ done of that whole area. It looks about like this, all around (taken before I stapled the wings of the kraft facing to the studs).
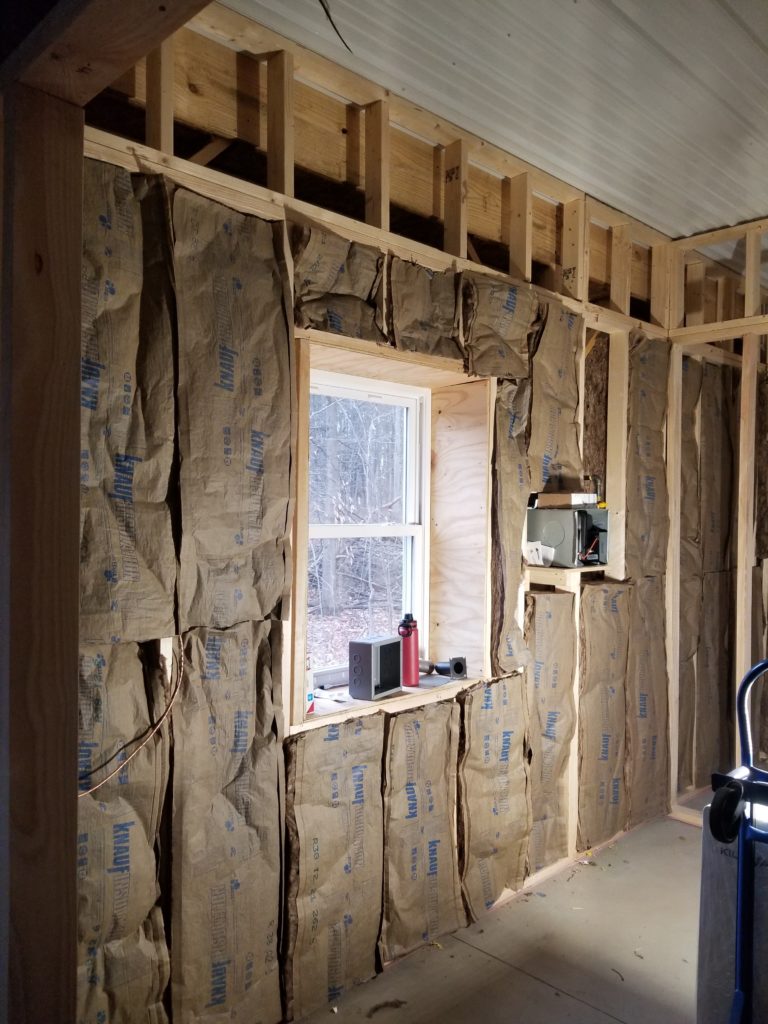
If you look at the dressing around the window, you’ll notice that’s a thick wall. Yup, it is. 12″. That’s R-38 insulation I’ve got going on there, too. The only thing between the inside and the outside of this building is a thin metal shell. That’s not exactly going to keep the heat in. Hence the insulation. Why so thick? Well, it gets mighty cold up here, I’m told, and anyway, I’d like to not have to use a lot of energy to keep the place comfortable. This is especially relevant for the office partition where the power center is, too, since it has to stay above freezing no matter what. I’ve got a propane RV furnace very similar (75% the heat output rating) to the one in the Tiny House to do that job. If I’m going to burn dinosaur ghosts to heat a space, the very least I can do is insulate it aggressively so I don’t burn a lot of dinosaur ghosts to do it.
Speaking of heaters… I noticed the one in the Tiny House was also heating the wall and cabinetry next to it and actually making the top of the fridge quite hot. Delivering heat directly to the fridge seems counter productive and I certainly don’t want to roast the wall, even if it can take it. I had some of that heat shield sheet metal left over and miraculously was able to find it without digging too deeply in the workshop boxes. I made a simple L shape to deflect the heat away from the things I didn’t want hot.
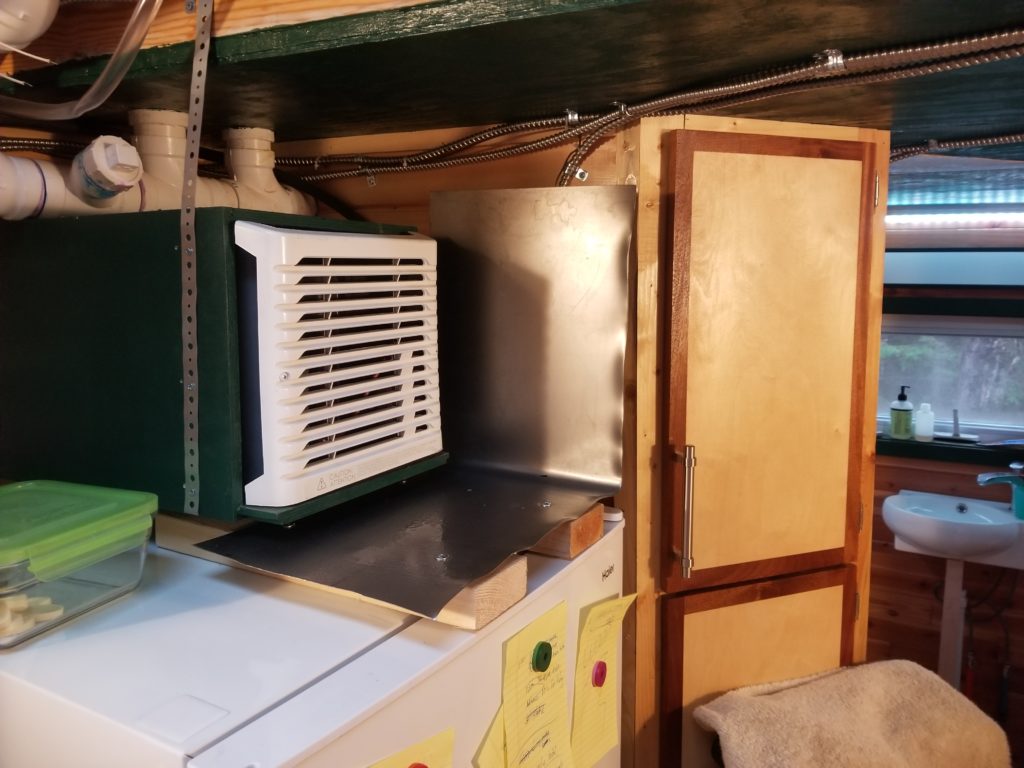
It’s not particularly elegant but it gets the job done today and lets me keep my focus on other more pressing matters. I may well return to this and make something prettier or otherwise less clunky, but for now, at least, the fridge is now cold like it should be and the wall/cabinetry are protected from the direct blast from the furnace and that’s what I need.
The furnace in the W.O.G. office area is mounted in a recessed shelf in the wall rather than getting its own little sleeve. I don’t mind if the naked front of the furnace protrudes into the room a bit. Maybe if I care later I’ll dress it up, but right now my priority is getting the space closed up and warm so I can paint it and get on with installing the power center so I can stop needing the generator for everything that happens in there. I have these perfectly good solar panels just waiting to serve!

I bought a little pneumatic wide-crown stapler to make the job of stapling the wings on the insulation batts to the studs easier. I’ve used manual staplers for this and it’s always a bother. This cute little thing looks like it’s my framing nailer’s baby. It is, in fact, kind of adorable.
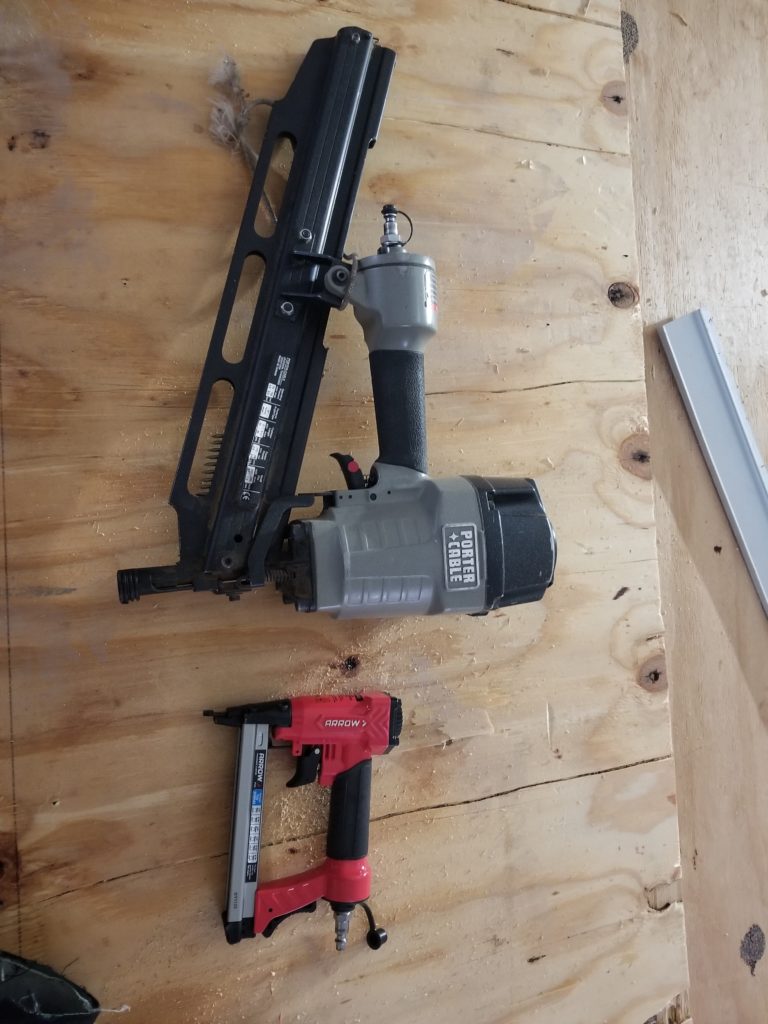
As long as I’m showing off my tools, let me just add this: that PC nail gun I’ve had and used for 20 years and it still works like a champ. I highly recommend. The only thing I’ve had to replace over the course of its life so far is the little plastic foot that goes at the end of the nose where the gun touches the work piece. And I’ve only replaced it once – at year 18 or so.
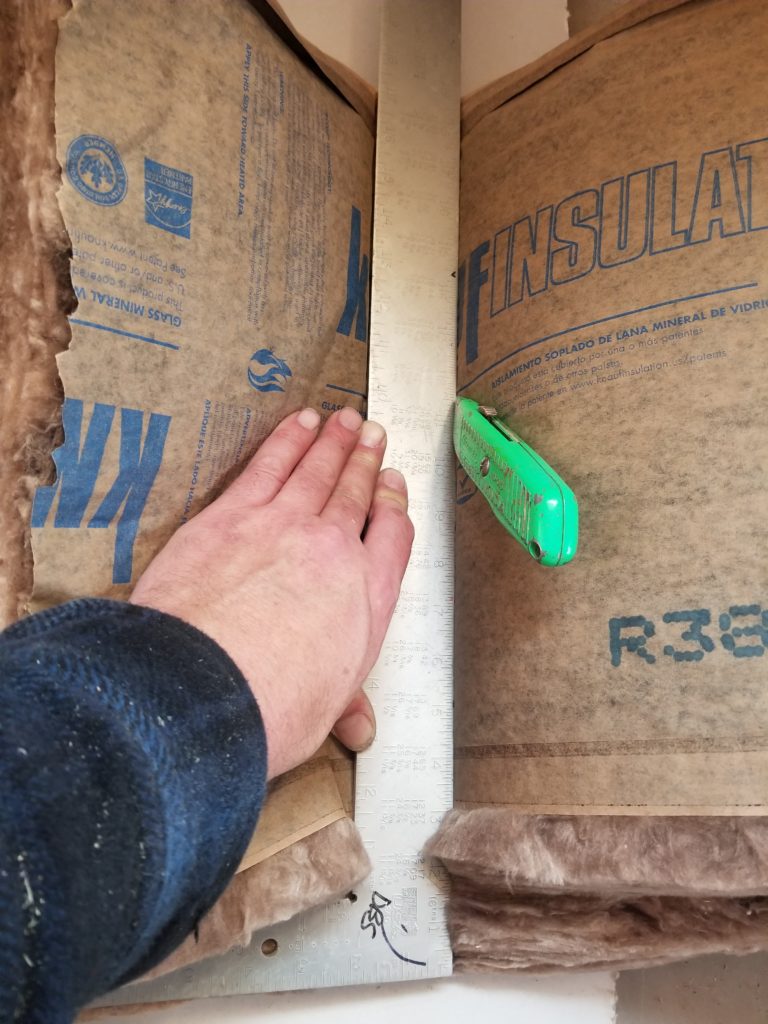
There are two ways to cut fiberglass insulation – with some scissors you don’t care about, or with a utility knife. The scissors do a decent job of compressing the fibers to the point of being cuttable for R-13 (for 2×4 walls) and probably for R-19 (2×6 walls) but I don’t think it’s even worth trying on this foot-thick stuff. Using the utility knife has its own challenges but I found a technique that works pretty well: use a straight edge to compress the insulation tightly, then draw the knife across it a few times. This worked pretty well.
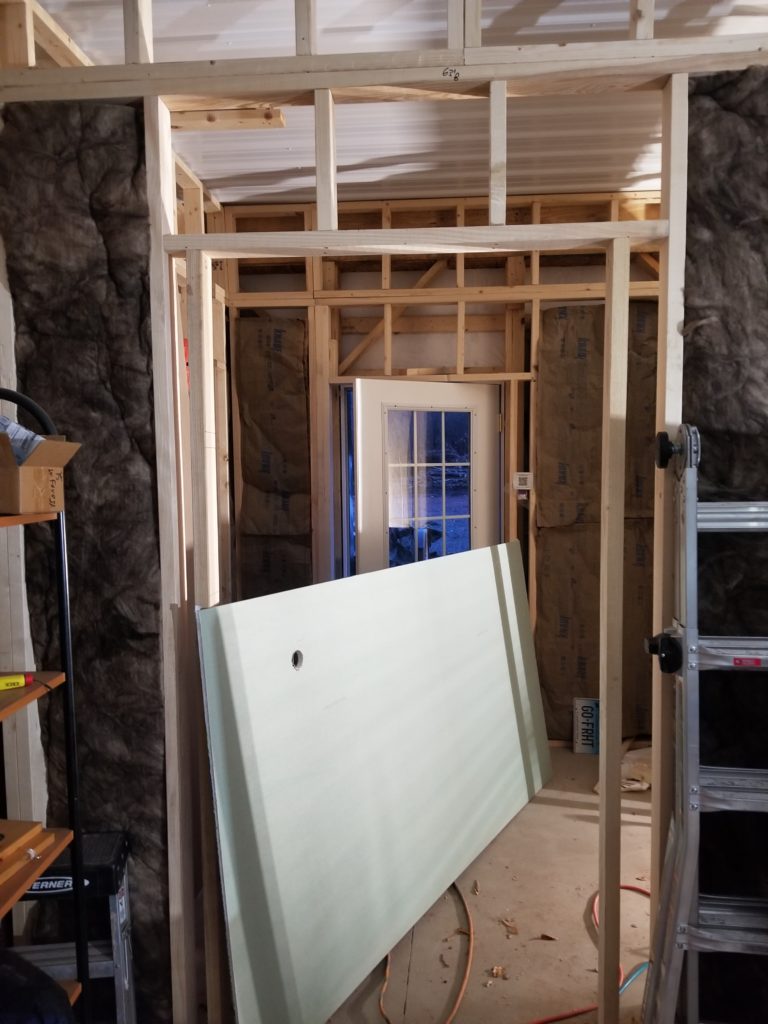
I decided that once the lower course of insulation was one, I was going to install that much of the wallboard, too. This is for a few reasons. First, it helps to get a sense of forward motion on the project, which is always nice. Second, it solidifies the walls which protects the insulation and makes it possible to prop a ladder against them or otherwise count on them as walls. Third, it keeps the sawdust from the shop floor out of the insulation. Lastly, it gives me somewhere to put the wallboard, which I’ve already bought.
That wallboard is a little awkward in this space, even though it’s not a tiny house. It’s still pretty cozy, making maneuvers a bit challenging. Behold, one sheet in the mud room, pretty much dominating the space.
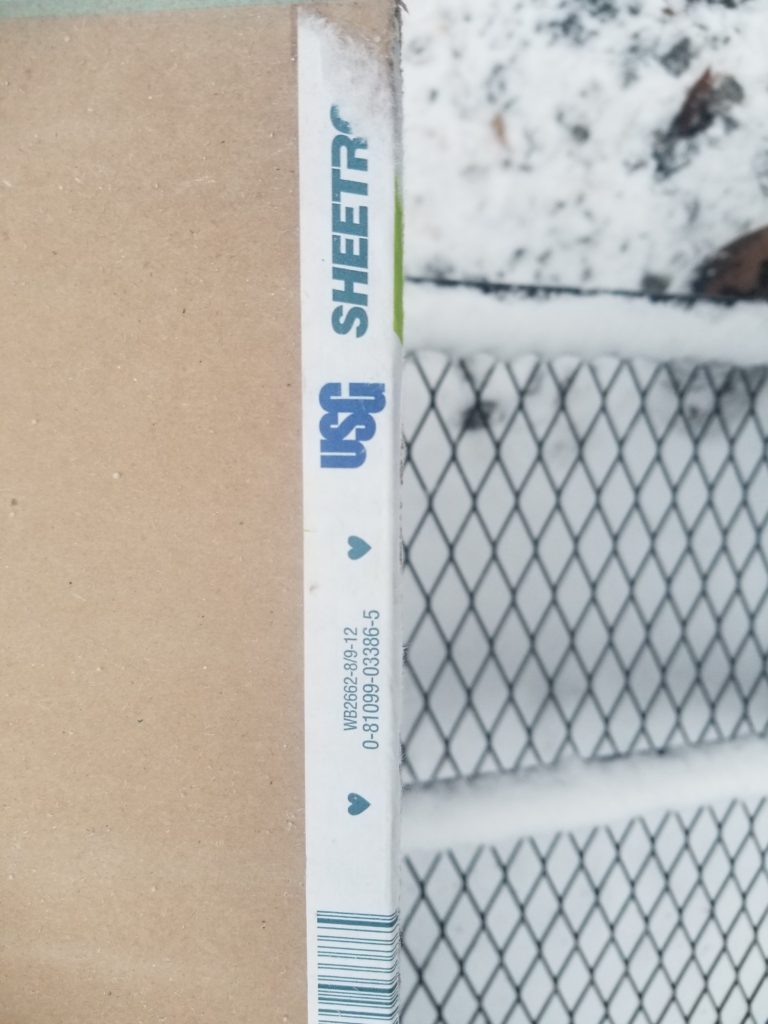
And lastly… what’s this? A little love from U.S.G. on the drywall label? That was unexpected.