I was just about to start work on the Bednette table when I realized that with the table absent, it would be much easier to work on the room electric, so I took a diversion and did that.
It starts with some LED strip lights at the top of the walls. These will give decent ambient lighting and are good for mood lighting, too, given their decently addressable color space. They may not quite cut it for task lighting, but there’s time to deal with that anon.
Two of the three sides of the lighting plan are the same length. The light strip for the tail of the trailer needed to be a little longer. Okay, no problem, just cut it longer. I tell you I measured this twice (and cut it once) and yet somehow I would up with considerably more light strip than space to put it.
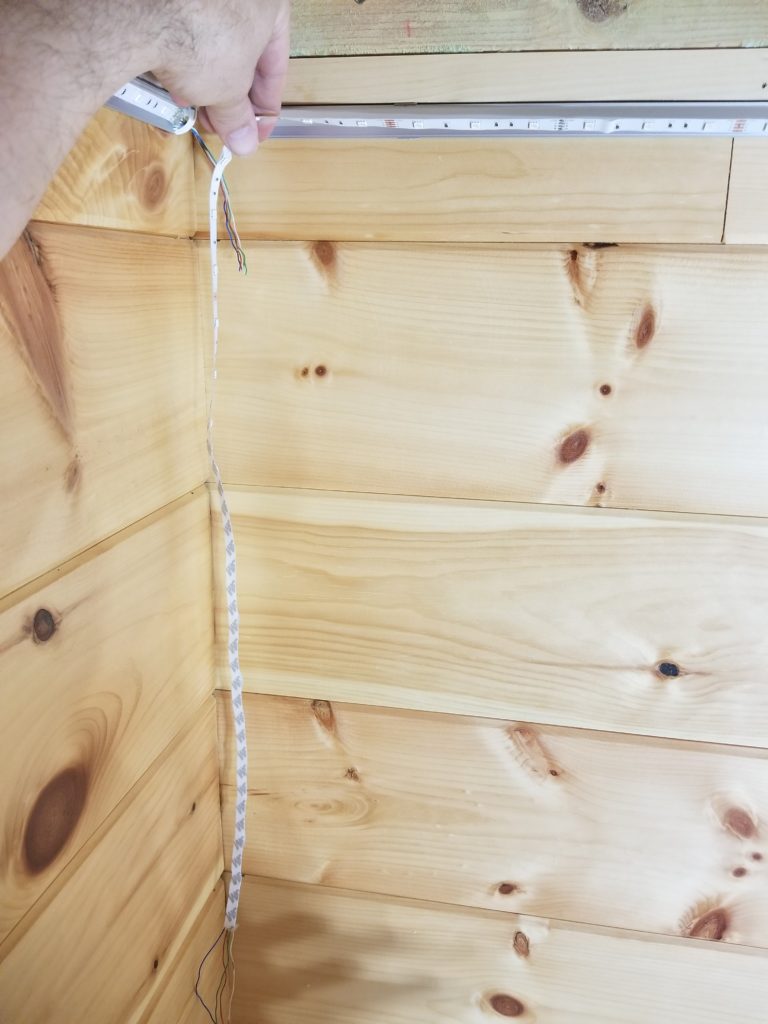
No problem, just cut it shorter, right? Right. Except each section of light strip needs wires soldered on to tiny little pads to then connect to the adjacent strip with wires soldered on to the tiny little pads there. No problem, just solder on new wires after cutting, right? Right. Except I didn’t discover the strip was too long (I mean, I measured twice, it should have been right, right?) until I got close to the end of installing it — and installing it means using double-face tape to adhere it to the diffuser channels already mounted to the wall. There was no getting this strip light down without either a huge amount of fuss and even so, probably some damage to something. Crap. How am I going to solder on wires to something this small, without being able to take it back to my workbench?
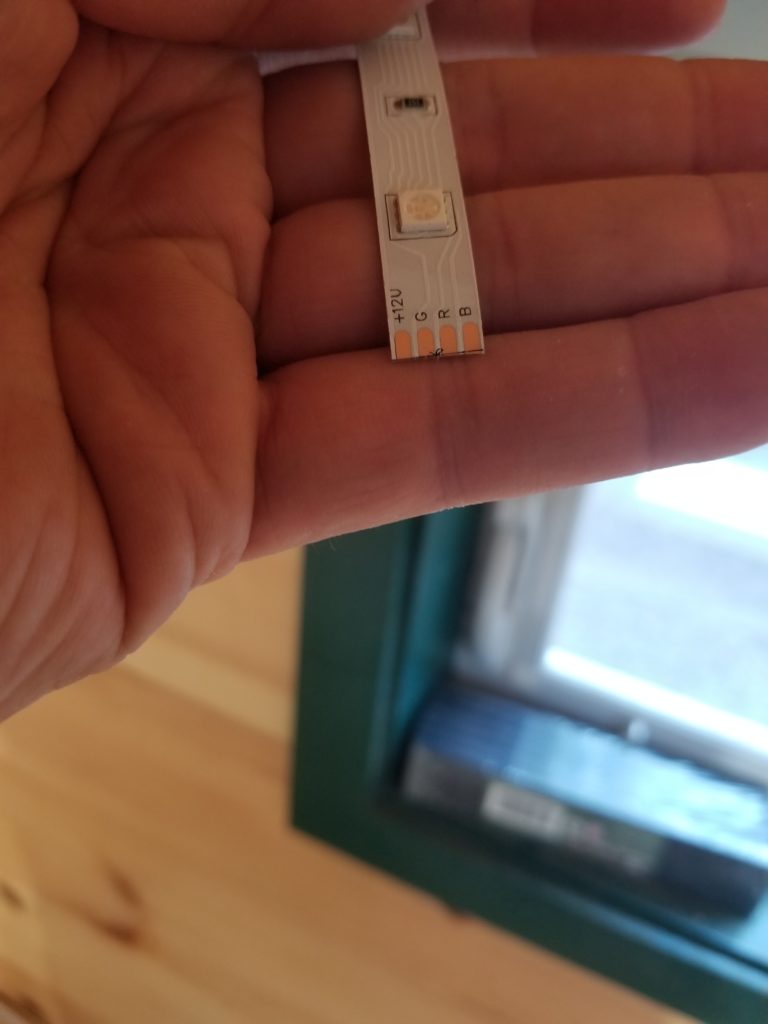
Kinda tiny, eh? The only good news is that those copper pads will encourage any solder that contacts them to stay just on those pads — they attract it. I hope that’s enough, because the only remotely practical solution to this problem was going to be to solder these wires vertically, since the only solid surface in the area I could use as a workbench was the wall of the house!
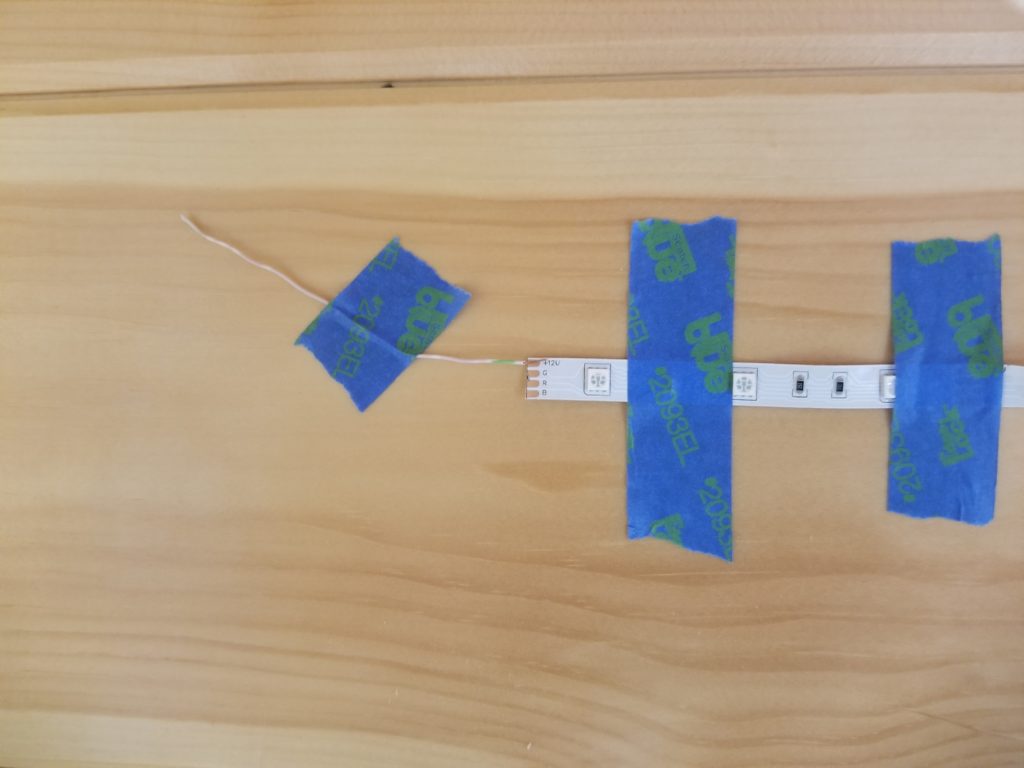
Okay, then, our friend painter’s tape to rescue! I was actually able to make the tape hold the LED light strip and the little wire I wanted to solder to it stable enough to do the job. It wasn’t fun, exactly, but the copper pad did its job of attracting the solder and the fact that I was working perpendicular to the ideal orientation turned out to be only inconvenient, not impossible. Each new wire got its own tape and eventually, it was done.
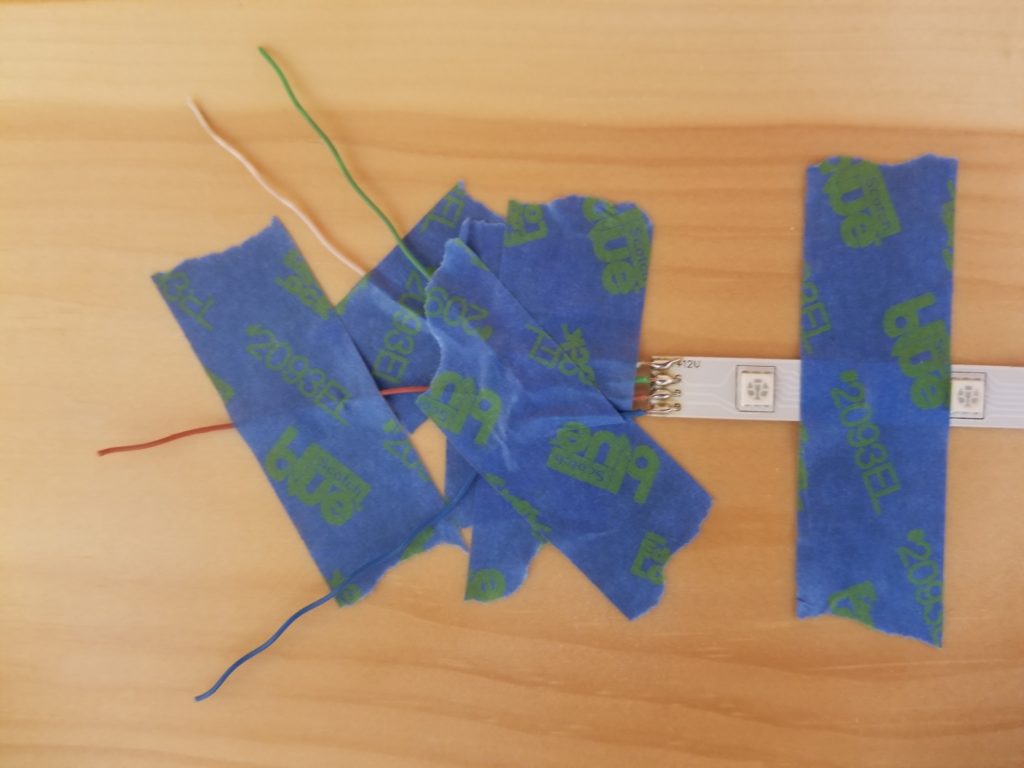
Those little solder blobs may look like the touch, but they do not actually touch, and that’s what matters. I added a little bit of hot glue to pot them in place and keep them from ever touching, for good measure.
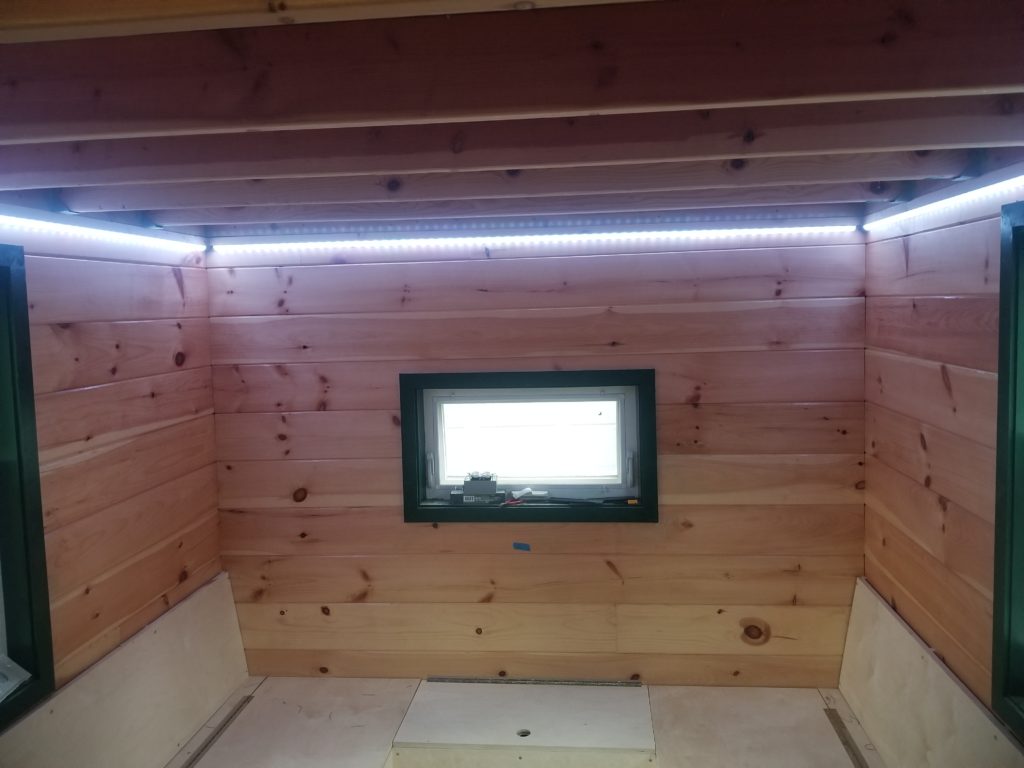
And then there was light! It’s bright enough for ambient lighting or night time, but not quite bright enough for easy reading. That’s okay – some task lighting over the table will take care of that. Or a book light. Speaking of over-the-table, a friend asked if I planned to install a ceiling fan in the HomeBox. I thought she was kinda crazy for even asking that, given the low ceilings, but then I realized that right here over the table might actually be a perfect place for one! Once the table is in place, nobody will ever walk between the benches, so no chance of hitting one’s head on a lower-than-usual ceiling fan body. What about the blades? Well, for all but the very most compact ceiling fan, it seems likely that the blades will invade the people space, since the table is only like 32″ across. However, even getting in and out of the booth benches, since getting around/under the table is part of that maneuver, I suspect even a 40 or perhaps 50″ fan wouldn’t actually hit anybody’s head since one must already be folded into approximate seating position to even begin to get into the booth benches. That means plenty of headroom. So as long as the fan doesn’t reach into the room, past the end of the table, it’s probably safe to have one. The Bednette itself is 60″ deep, so in theory any fan with less than a 60″ wingspan could be safely installed. More like 50-something for a bit of margin, but yeah, this isn’t actually crazy.
What about power? They don’t use much, actually… and I’d be using it in the summer only, when the days are longer (more light = more power) anyway. The power system is sized for the darkest, coldest, shortest days — on the other side of the calendar, there should be plenty more power to be had. Certainly enough to run a ceiling fan at night for comfort. It would be prudent to make a quick mock-up of any unit I choose to install, though, just to confirm the seating maneuver clearance thing.
It occurred to me that it would be nice to have an outlet accessible from being seated at the table, for a laptop charger, say, or if using the table for food prep, a place to plug in the Kitchen Aid stand mixer or egg beater or whatever. Okay, easy enough. I mount it and start to run the wire…
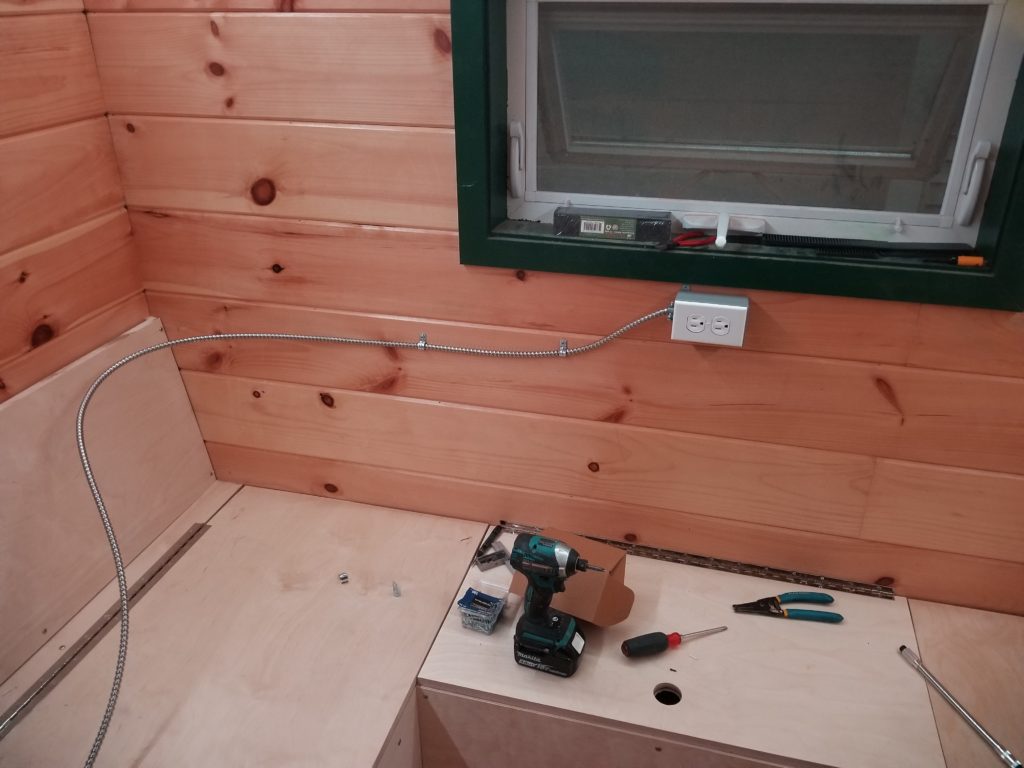
And realize that the cable is just a bit thicker than the gap between the top of the Bednette bench and the window trim, so that’s not going to run neatly, and anyway, it also crosses right where someone might be leaning if they wanted to sit crosswise in the bench to recline. Nah, that’s not such a good plan. What about just below the table, then? Not too bad to reach down to plug something in and I could run the wire through the bench cabinets. Yeah, that’ll be fine. Let’s do that.
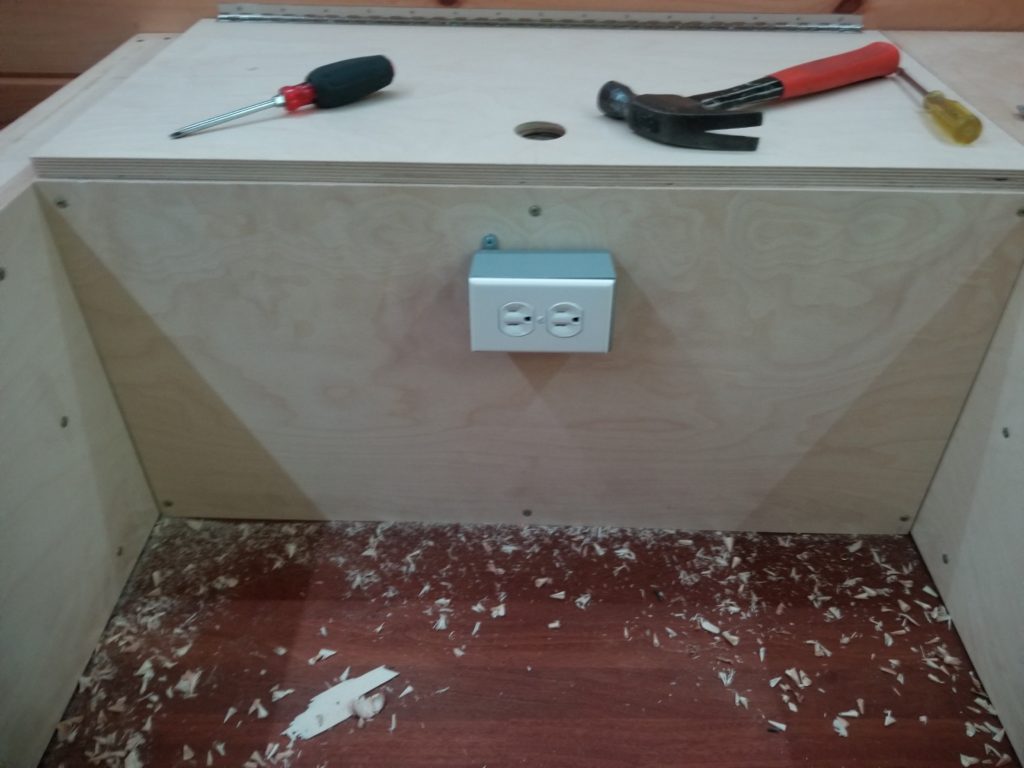
Easy enough. But then a test sit shows that despite being all the way off to one side, it really is kinda close to my knees if I’m seated at the far end of the bench, closest to the wall. No bueno. I mean, if something’s plugged in, it’s plugged in, but if it’s not, I don’t want the outlet box to be in the way. So why is this a surface-mount outlet box anyway? Well, all the other outlets in the house are because they have to be, but this one is actually on a cabinet. There’s no reason I couldn’t actually do an in-wall box here. Duh. Fortunately, the in-wall box takes a bigger footprint than the clearance for the wire for the surface-mount box…
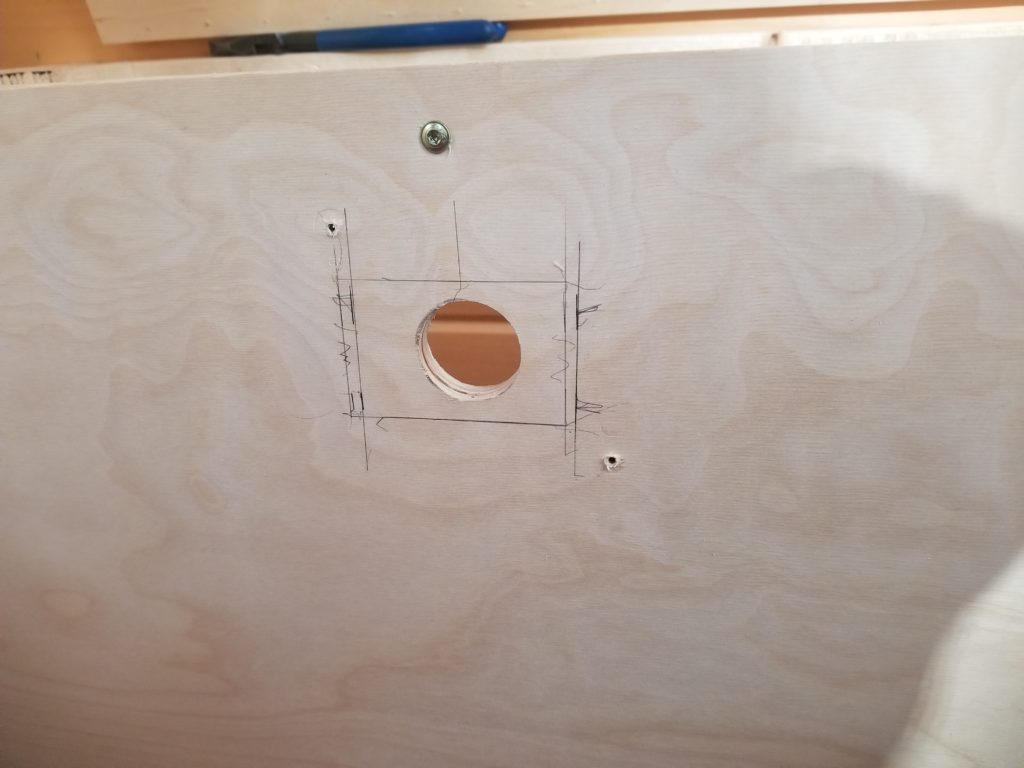
And, for that matter, the cover plate is even big enough to hide the previous mounting holes. Third time’s a charm?
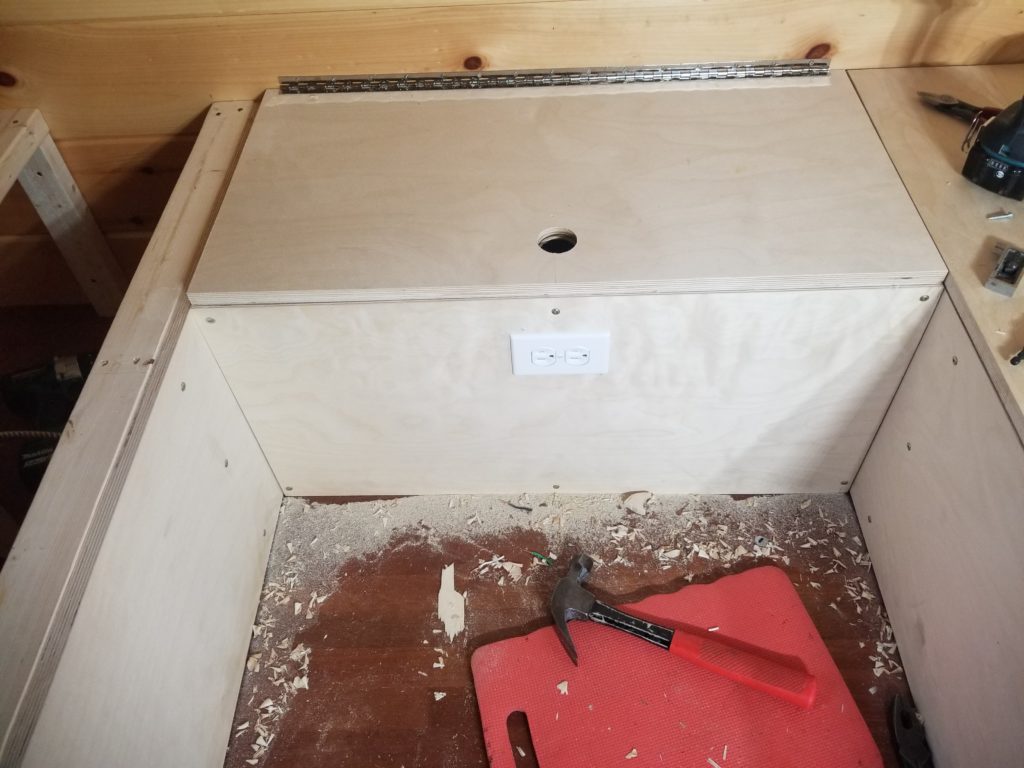
This is “way finding” — building without a plan 🙂 Sometimes things just go where I think they should go. Other times, a few tries are necessary to find the right answer.
Speaking of which, a new vanity light I installed in the bathroom seems to be… well… um… a bit brighter than the sun.
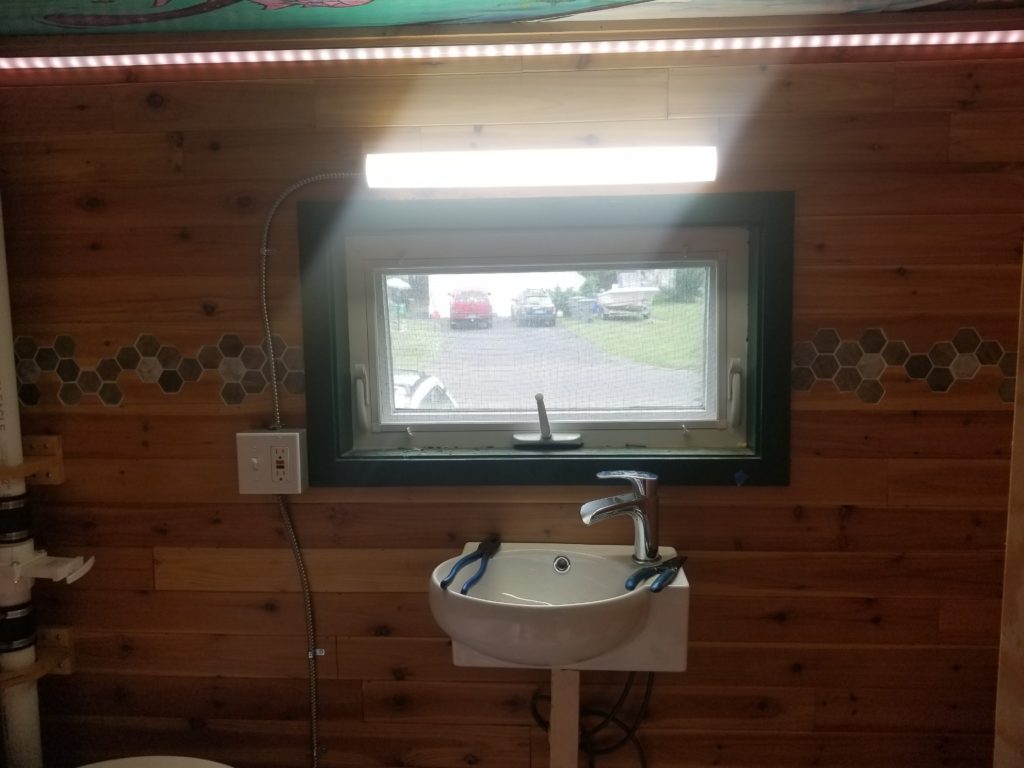
I tried pretty hard to convince myself that it being blindingly bright was somehow not actually a problem, but it’s actually a problem. I’m not worried about having spent like $20 on a fixture I won’t use here (I’ll surely find a use for it somewhere and if not, $20 lost won’t be a huge tragedy), but no matter how much I like bright lights (and I do like them much), one in this face-forward position is just too much. I did find another fixture that appears to be both less bright and more diffuse. I’ll install that one soon. I really didn’t expect this one to be quite as crazy bright as it turned out to be!
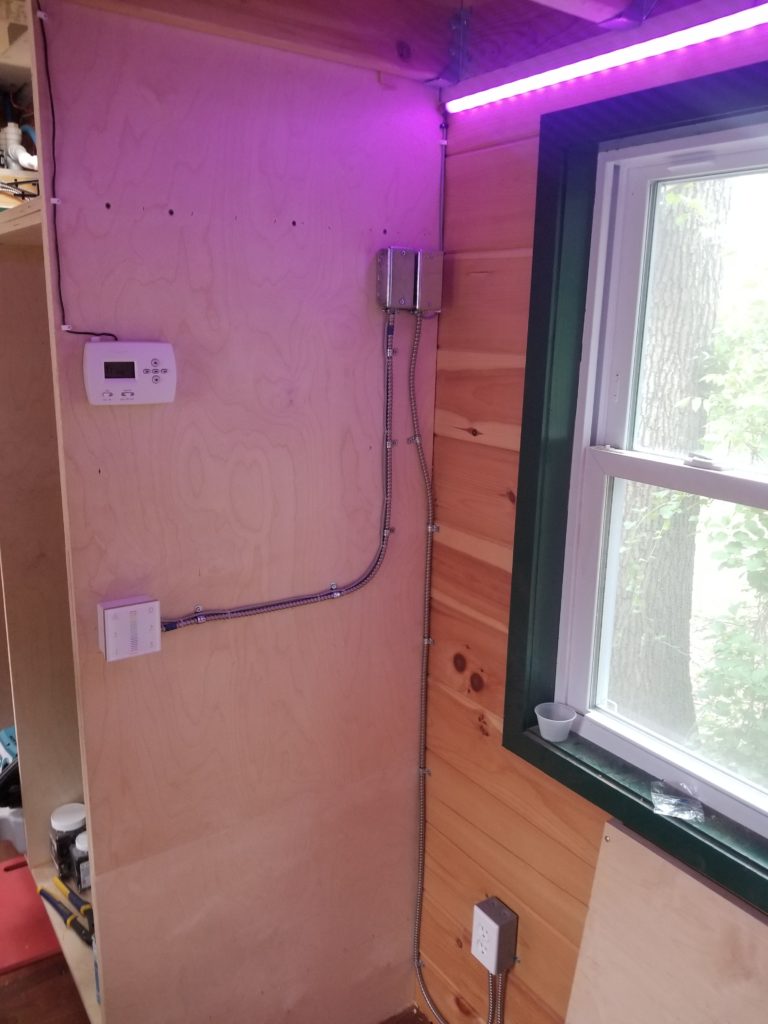
In other electrical news, I’ve now also wired in the thermostat (left), the lighting controller (below it), and a handy outlet for the Bednette table’s lifting column. I had originally thought I was going to put some large format art on this surface, but it turns out other things had to go there. I do have room for smaller things, maybe I’ll put up some sheet steel and some magnetic poetry pieces there. Or photographs. Or some knick-knack shelves. We’ll see.
On the other side of that wall is the stairway to the Cozy Loft. The only place I could think of to fit a microwave oven was in this last compartment under the stairs. It’s 28 inches deep – plenty deep – and about 19″ wide, enough for a decent sized microwave. Hence the unusual location for an AC outlet. You’d be surprised: most microwave ovens are wider than you think they are! There aren’t many that will fit in 19″ of width. Well, not many that aren’t those dinky office/bedroom ones that have no cooking power to speak of. I’m a bit bummed that there’s going to be a fair bit of volume wasted behind the microwave, but I also can’t think of any sane way to access it without making a lot of other things a lot more stupid or inconvenient (or both). That’s what I get for way-finding sometimes. That, in conjunction with wanting all the modern conveniences (a microwave, a queen sized bed, a king sized tub…) in a tiny house makes for some difficult and occasionally sub-optimal choices.
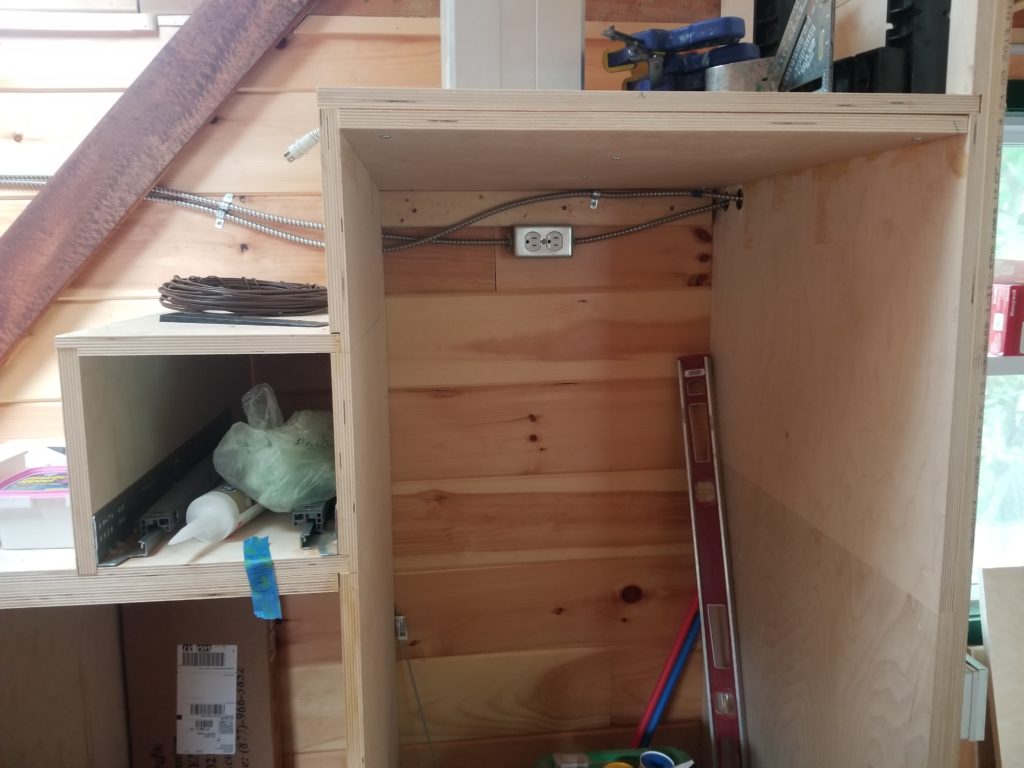
I’ll fit a shelf in here when I choose a microwave – no sense putting in a shelf without knowing how tall the thing that goes on it will be!
The last little bit of electrical report today is for the thermostat. I installed the furnace some time ago but hadn’t installed a thermostat for it because I wasn’t quite sure where it was going to go. I chose a place and ran the wire. Thermostat wire is moderately thin, though, and my stash of quick-disconnect wire connectors doesn’t accommodate wires that skinny. So, to make it work, I soldered on a couple of inches of thicker wire first. It’s a little silly, perhaps, but quite effective and didn’t cost me anything.
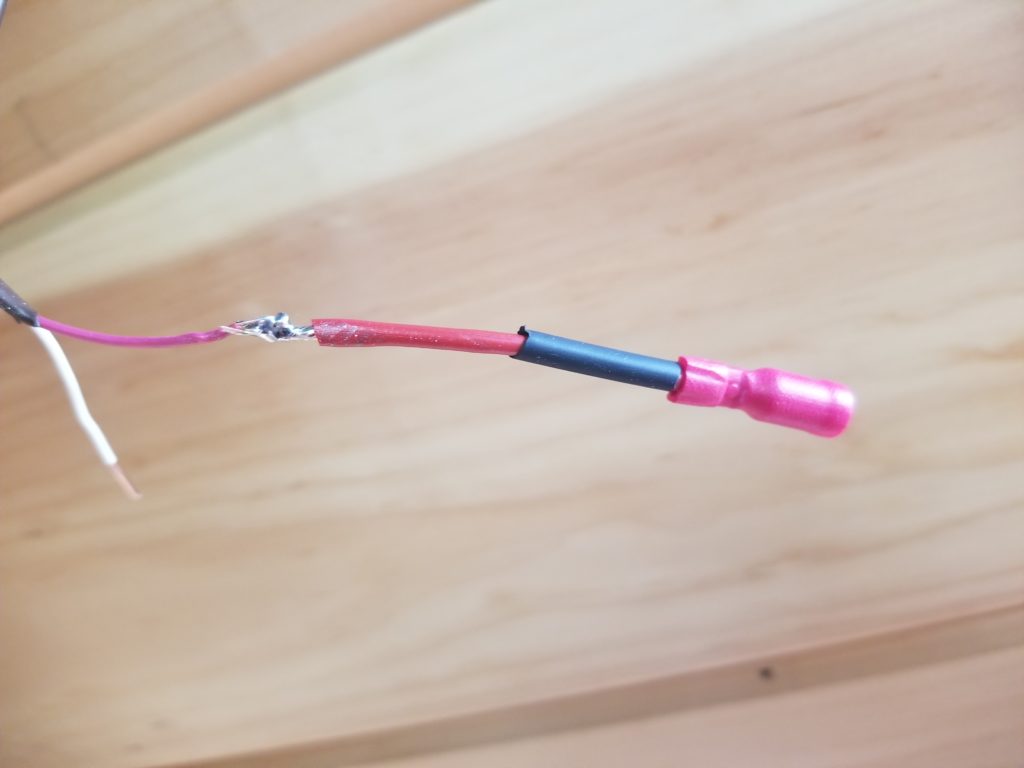
The black sleeve is heat-shrink tubing which has since been slid back to cover the solder joints and heat-shrunk to stay in place.
Why, you might ask, would I want to use quick-disconnect fittings on what is ostensibly a permanently installed appliance? The answer is simple enough: no such thing as an appliance that doesn’t need service from time to time. Having all the electrics be quick-disconnect means I don’t have to fuss when the time comes. The gas line isn’t quick-disconnect, technically, but it’s just a few seconds with a wrench to undo the feed hose. Close enough. The point is that all these connections come off easy when I want them to and will go right back without anything new having to be done.
And that’s a good thing, too, because it appears that the fan bearing in my furnace is busted! Yeah, that brand new unit I had so much trouble obtaining and installing. After all that, it appears to be slightly defective. Since I’m not technically a licensed installer, that makes getting warranty service a bit more troublesome. It’s probably easier to just replace the part myself. It does appear that I can get it without too much trouble, but I’m not delighted that the retail price of said part is $100. Again, $100 is a drop in the bucket considering the price of the whole project, surely, but it does really grind my gears that this thing isn’t perfect out of the box. If you told me before I installed it that I could pay $600 for a furnace or $700 to be sure it was perfect, I bet I’d choose to prepay for perfection. As it is, I have to un-seal the intake/exhaust manifold, un-screw it from the side of the house, pull it gently off the back of the unit, then remove the unit from inside the house, plug up the hole in the wall temporarily to keep the weather & wildlife out, verify the part, order the part, wait for the part, install the part, test the part, put it all back together, scrape off bits of old sealant, reinstall the unit, re-apply sealant on the outside, re-seat the intake/exhaust manifold, re-screw it in, hope the screw holes in the wood siding aren’t stripped, deal with them if they are, and then, then, I should have what I should have had in the first place: a quiet furnace that fits and works.
Did I tell you I bought a new chainsaw? I did. An electric one, actually. A 16″ Makita. It runs on a pair of the 18V battery packs I’m already using for a number of other tools, so it fits nicely in the collection. Why did I buy a chainsaw? Well, you might have heard: I’m going to be living in the forest. Forests are made out of trees. Trees sometimes fall or need to be felled. In either case, if a tree is down, or even a part of a tree is down, and that bit of tree is blocking anything important, it’s gonna be there a long time unless someone can cut it up and haul it away. That’s not a big deal so much here in civilization — there are tree services to be called — but out in yonder boonies, it stands to reason that it would be harder to get anyone promptly. And anyway, being able to do basic forest maintenance on my own seems like a good idea in addition to being able to free my 440ft driveway from any encroaching arboreal detritus without having to call anyone. So I bought yon chainsaw, as well as a pair of saw-arresting chaps, saw-arresting gloves, and a forestry helmet (with integrated hearing protection and a face shield). I am now nicely equipped and protected. Good thing, too… because even before I move to the forest, this happened during a recent storm:
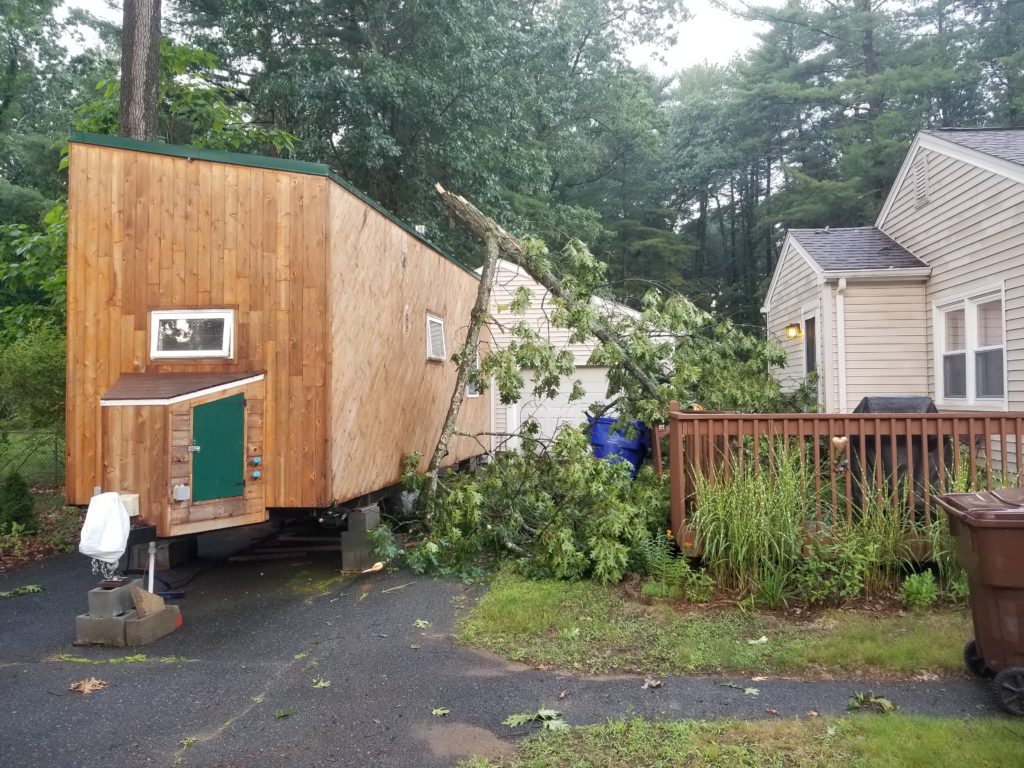
Miraculously, despite being hundreds of pounds of heavy, wet wood, it managed to fall between both the tiny house and the conventional house, not hitting any glass or destroying anything important. The recycling bin (blue, background) was well and truly run-through as if it had been in a jousting tournament. Not a big deal – ask the town for a new lid. The branch did apparently hit the HomeBox on its way down, but had the courtesy to miss both skylights, the stovepipe, and all the window glass. I did hit the trailing edge of the roof, however, causing some of my “standing seam” metal roof to lie down instead and it wrinkled the drip edge somewhat.
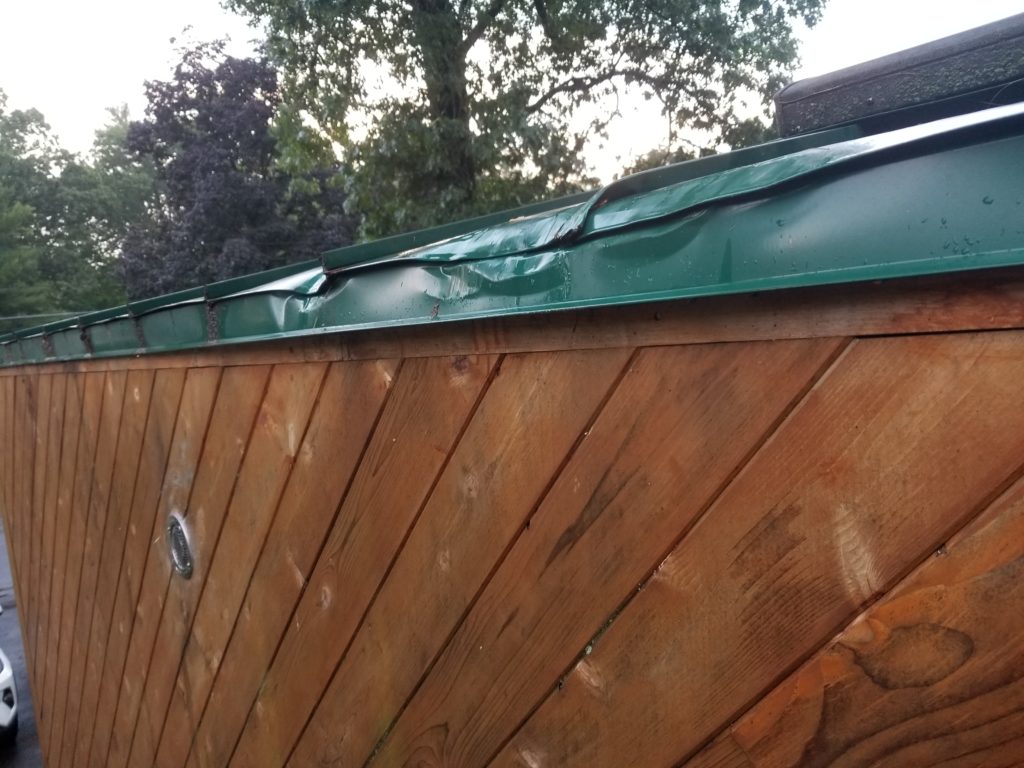
This picture was taken shortly after the branch fell, from the highest I could safely get on an A-frame ladder with that branch still there. As far as I can tell from here, just the square edge got smooshed a bit and maybe one layer of the OSB on the roof deck got dented. The roof itself seems to be structurally sound, if cosmetically squished. I went after the branch with my new saw and bright orange PPE and now it’s gone.
I will take this opportunity to once again sing the praises of Makita power tools. I love them so. They never disappoint and this electric chainsaw (XCU04) was no exception. I was using it intermittently for about 45 minutes, maybe at 1/3 on and 2/3 off, by time. Cutting through heavy, wet oak. It had plenty of power to get the job done and after all that cutting, it was only showing the battery bank as down by 1 bar (25% nominal). I was impressed. I get similar performance from my drill, driver, and jigsaw, too – they just run and run and run on a single battery and they’re all solidly built. Good stuff. I highly recommend. This has been an unpaid endorsement — all these tools I bought retail.
It was a bit challenging to safely get that “widowmaker” down to the ground without hitting the window or myself, since it was balanced on three points, but I got it done. There’s a scratch down the siding where it slid down, but other than that, no casualties. I will more closely inspect the roof when it’s dry (there’s been a lot of rain here lately) and safe to use the ladder in extension, rather than A-frame, mode, so I can get all the way up there for a close look. I suspect it’s structurally sound and if it is, I’m not going to try to fix it. The roof panels interlock and have concealed fasteners. It would actually be a real pain to try to replace just part of the roof. If the roof is still doing its roof thing, I’m rather inclined to let it be. I mean, we’ve all got some mileage on us, not every part we were born with looks like and is working as well as it did years ago. No reason my beautifully imperfect little house has to be any different than its owner 🙂
The last item to report today is that I’ve been working on the Bednette table itself. It’ll be made from cabinet plywood panels but with Sapele accents, tying it nicely in to the wood tone color scheme of the house. There will be fourc such panels as shown here, and there will be a border all around it, as hinted-at by the long piece on the right.
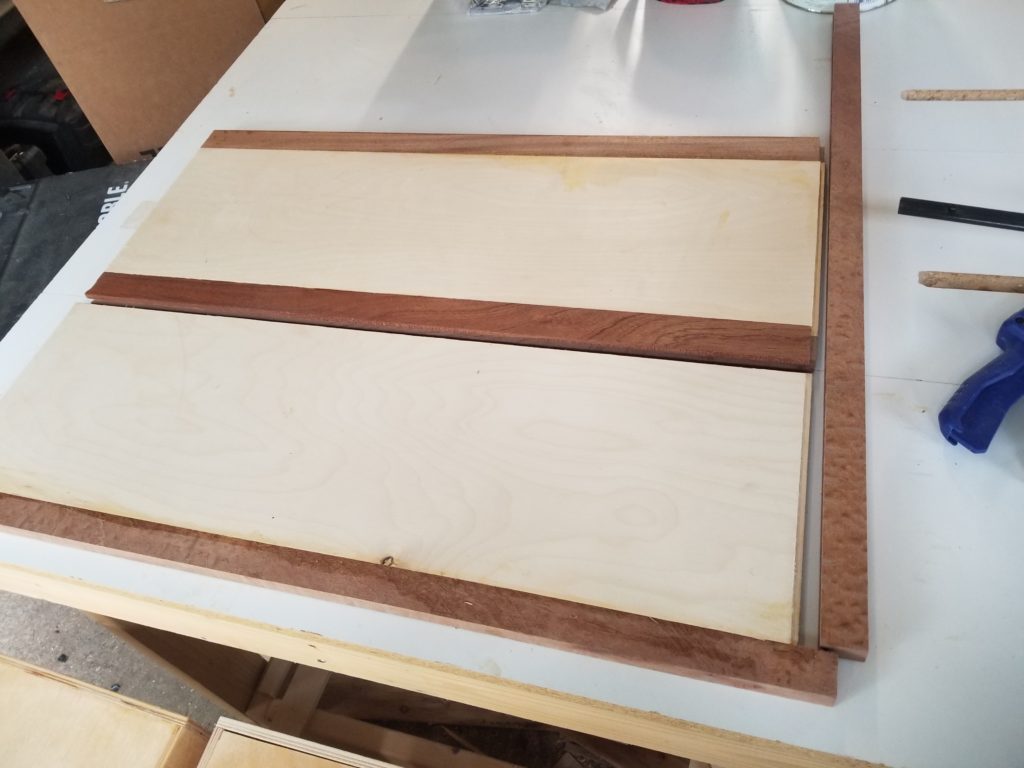
This is left-over flooring material, for the most part, though you may notice the outer frame parts have a more complex figure to them. That’s the rest of that fancy board I used for the stairway railing. There was just enough of it to go around the table. The horizontal runs between the panels have a simpler figure and are surplus floor boards. When it’s all done and sanded down, I’ll use bar-top epoxy to make a nice, glossy, durable surface.