Spring is here! Or close enough, anyhow. The cold weather has let up and construction season is open! Priority is getting the kitchen done, including all the utility hookups, so I can cross a few things off the list. Before I can work on the kitchen, though, I need to finish the installation of the wood stove. Its exact placement and accommodation affect how the kitchen base cabinets will go, so the wood stove goes first.
Before the wood stove goes in, what it goes under it has to go under it. And that’s where this weekend’s work was focused.
You might recognize these tiles as the same variety that are inlaid as accents in the T.H.R.O.N.E. Room.
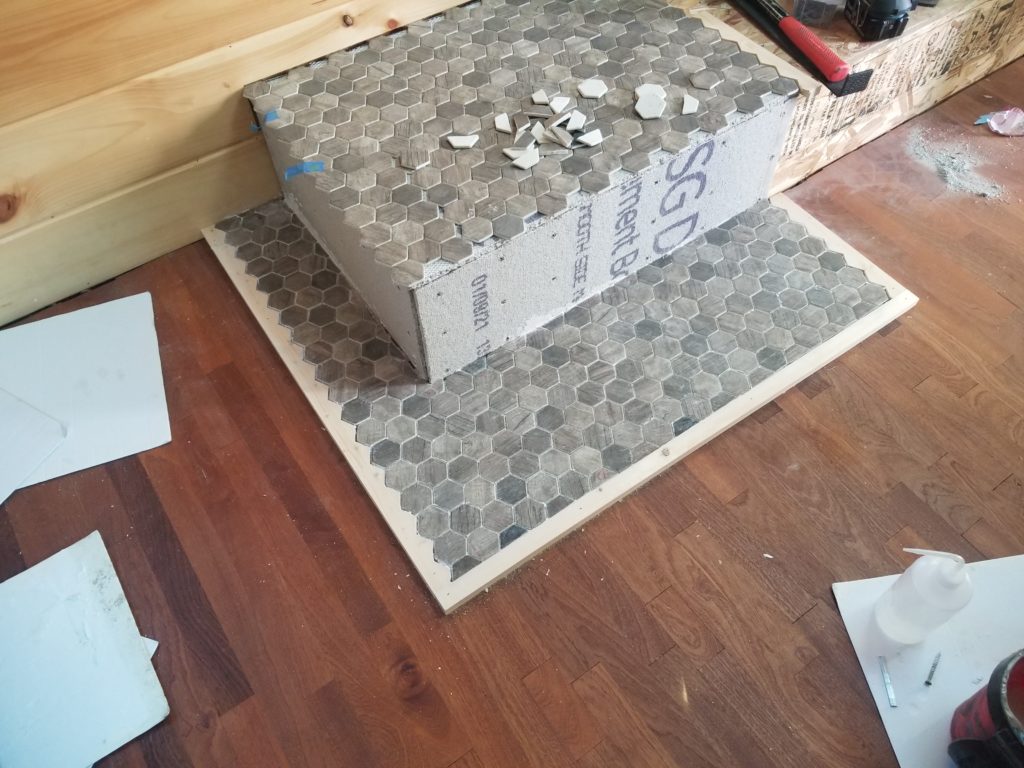
After some thought about exactly which way the stove will face — the flue is already in place, so the only choices to make now are rotational and, I suppose, precisely at what altitude the stove will be installed. Originally, the thought was to angle the stove so it could be viewed more readily from the BeDeLiA, but now that the Murphy bed concept is happening, that changes the BeDeLiA layout a bit and it no longer makes sense to angle the stove. Having it square to the wall is easier for everything, anyhow, and I think is better aesthetics.
The stove itself sits atop a wood storage hutch, so there’s little concern for heat below. Still, it won’t be cold and there’s always a chance that something flaming or smoldering will fall out when the stove door is open for tending, so it’s appropriate to have something fireproof for such a thing to land on. There’s no chance that anything would exit the side of the stove, but not having the hearth wrap around just didn’t look right, so there it is.
As you can see, I decided to do a sawtooth pattern on the trim rather than have to cut even more tiles. As it was, I still had to cut a lot of them, but with the sawtooth edge, that’s so many tiles I can leave whole. I think it makes a nice detail, too. On the front edge, it wouldn’t be sawteeth, it would be half-hexagons if I did the same thing and I thought that would look weird – points here, half-hexes there – but be that as it may, this is what I decided so this is how it is 🙂
Because there will need to be a lot of fussing to get the vertical faces done, I elected to wait to do them until the lower deck’s cement had cured so all that fussing wouldn’t disturb them.
There was more to this trim than you might think. For starters, it needs to have a recess to accommodate the tile’s backer board where the trim reaches over the board into the triangular spaces between the tiles. Pay no attention to the triangular cuts on the other side of this board. That was my first thought for the trim before I realized it needed the recess! I thought about trying to cut the recess after, but was concerned that there might be process/machining issues so I decided to just re-do it on the other side of the board.
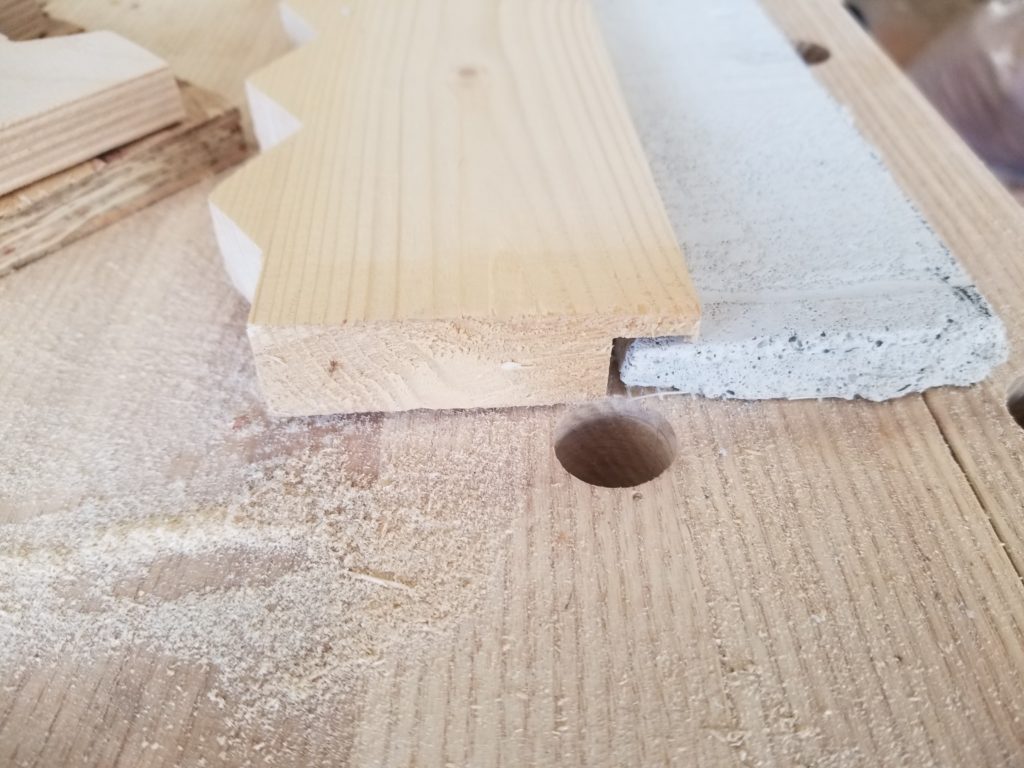
After that recess was cut, I traced the triangles and cut them with a jigsaw. Here’s a quick test against a scrap of backer board to see how the overlap works.
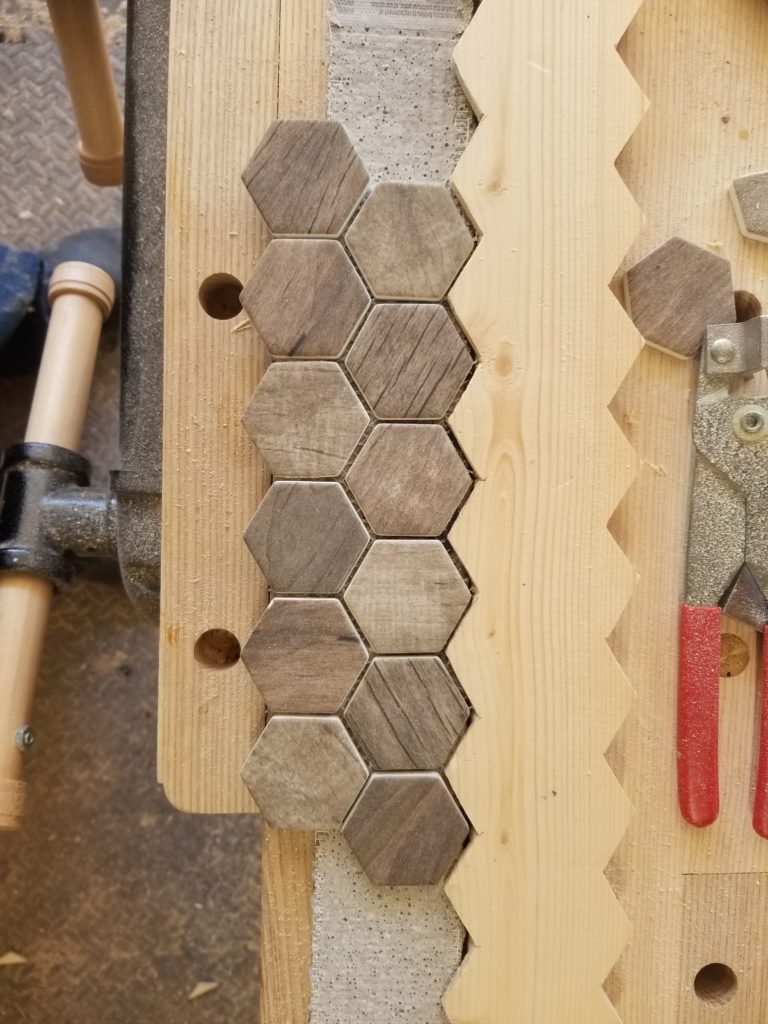
Despite the sawtooth edge, there were still plenty of tiles to cut. The thing is, all I have is this little score-and-snap tool for that (actually, 2/3 of it is showing in the photo, above). The tiles are so small, it’s hard to hold them still, get a straight edge aligned, and run the scoring wheel along it. There’s just no room for fingers and tools.
Then I had an idea. If I quick cut a hex recess in a scrap of plywood…
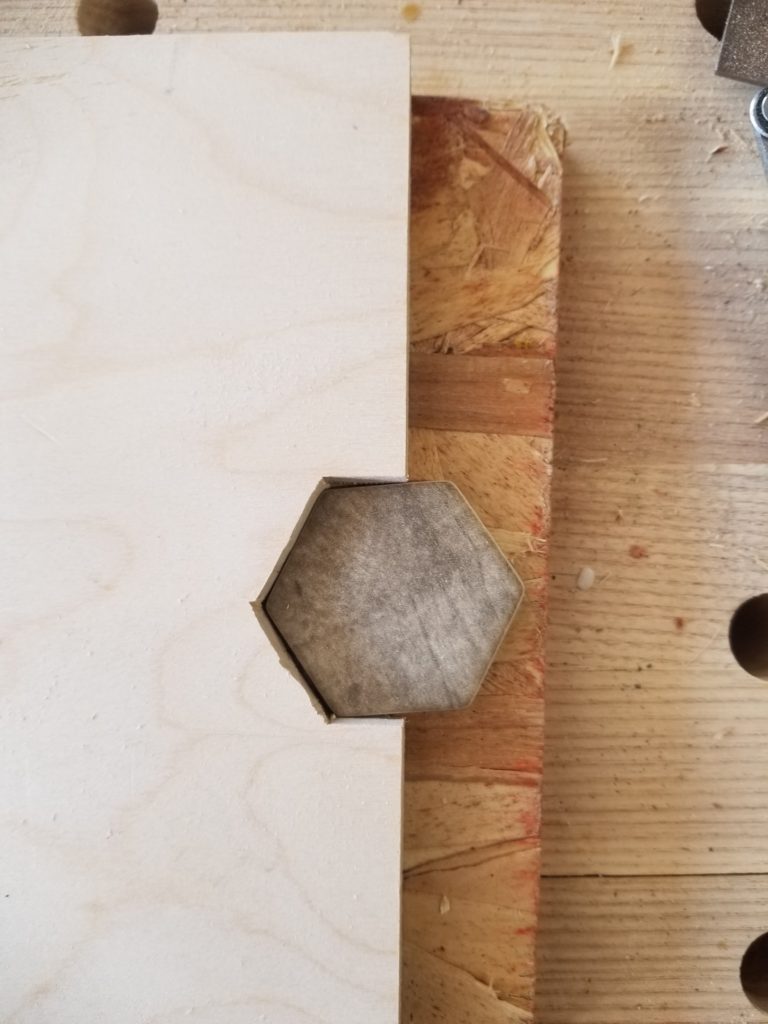
Then use another scrap of wood as the straight edge, the recess will mostly hold the tile in place, plus just one finger from me to keep it tucked in there, and the second scrap will act as a guide fence for the tool. Simple, easy, and I can set the position of that guide anywhere I want. For the most part, that wound up being exactly half a tile, but in some cases, not, and it was no problem at all to adjust it as needed. A holdfast (the big black thumb shown below) keeps the whole stack together and prevents it from sliding. I just draw the scoring tool along that overhanging plywood, which aligns it exactly so with the tile, which won’t move because it’s tucked in pretty well and (not shown) my finger is pushing it down for extra stay-put goodness.
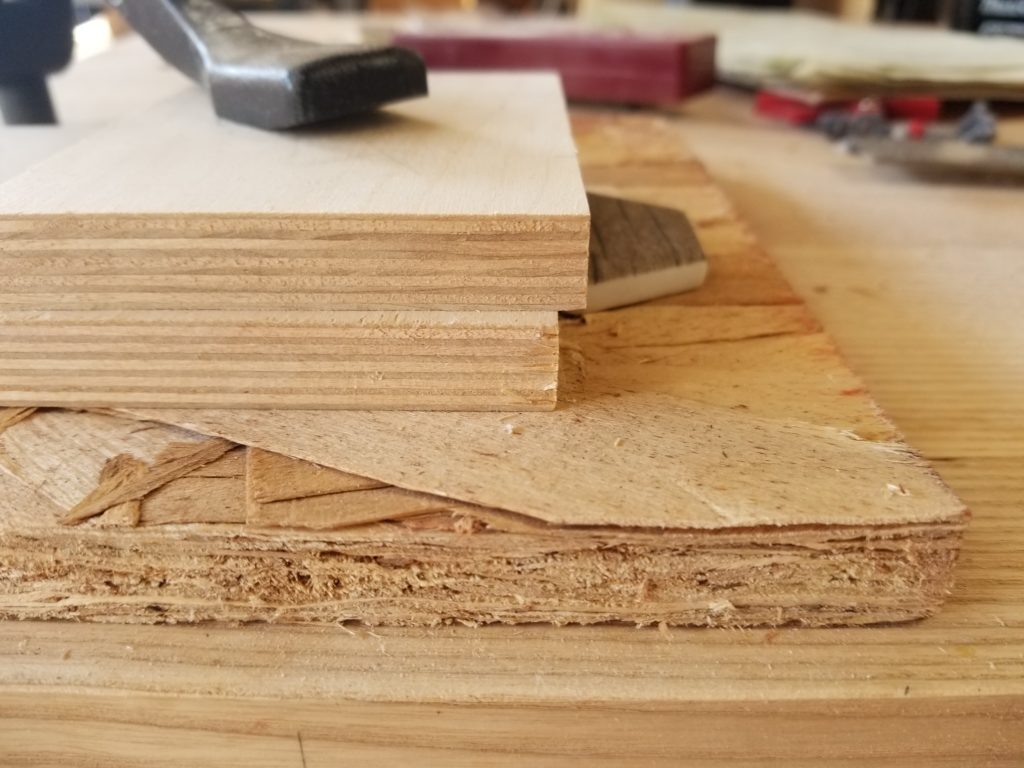
Not exactly rocket surgery, for sure, but an effective solution to “how the heck do I hold this tiny thing while trying to score it on a straight line?”. I wound up making two recesses, one positioned to accept the point of the hex and one to accept the flat, simply because some cuts went this way and some cuts went that.
Some thinking, some fussing, some stumbling about trying to figure out how to cut these little tiles (carbide jigsaw blade = fail; carbide hand saw = fail; abrasive wheel in dremel = fail; super duper abrasive wheel in dremel = fail), and finally, a bunch of cutting, a few tries to figure out the trim, and then it was done. There was still a fair bit of weekend left in the weekend after getting this far, but I needed to let the cement cure before continuing the hearth. I spent the rest of the day making sawdust and shavings for something that isn’t a house.