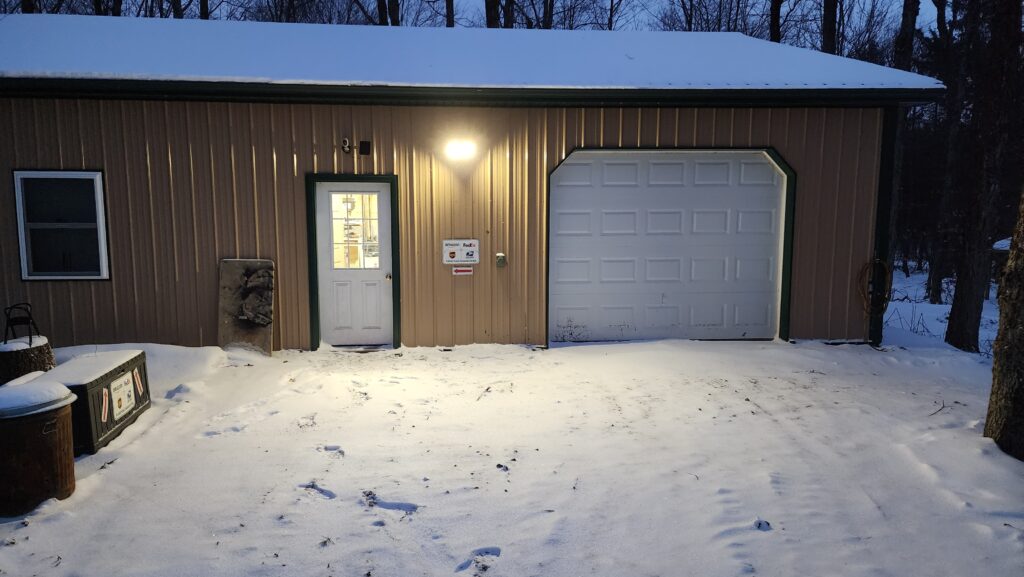
Finishing those outdoor flood lights was “fun” in the cold, but I’m sure my late-day delivery drivers appreciate it and, honestly, I like how it lights the way between the house and the workshop, so I’m glad I put them in. Of course there were some challenges besides the cold (which itself is not to be underestimated when one has high-dexterity work to do).
First, let me remind you this fixture is about 9ft off the ground.
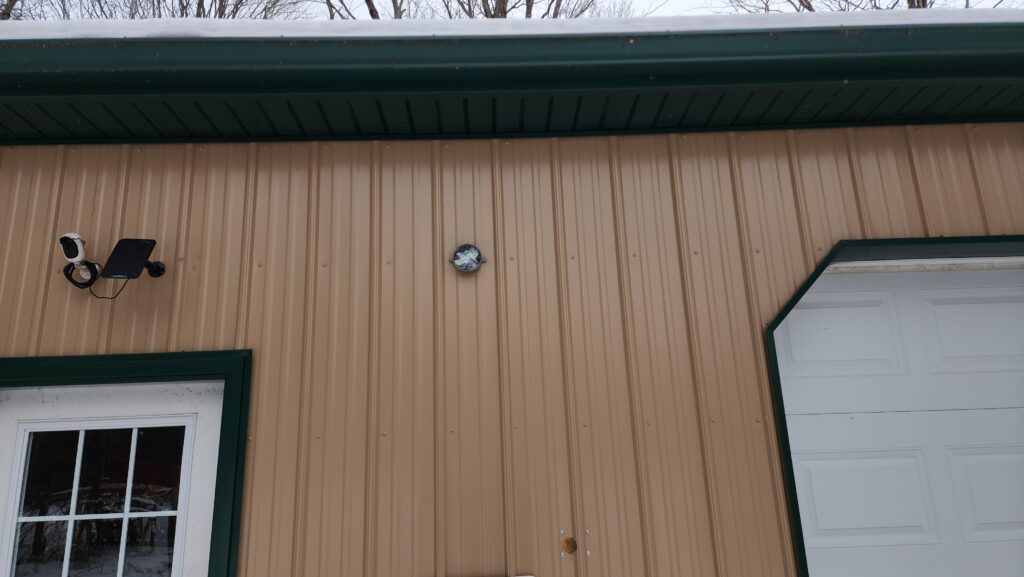
When it came time to install the fixture, I noticed there was no accommodation for actually holding it in place while wiring it. I could have hung it off the first wire, but that definitely could have compromised the junction and that’s no bueno. The solution I came up with was to hang it off some wire, but not the very flexible fixture wires — some heavy gauge solid wire scrap (white). This took the strain off while I fastened the fixture wires.

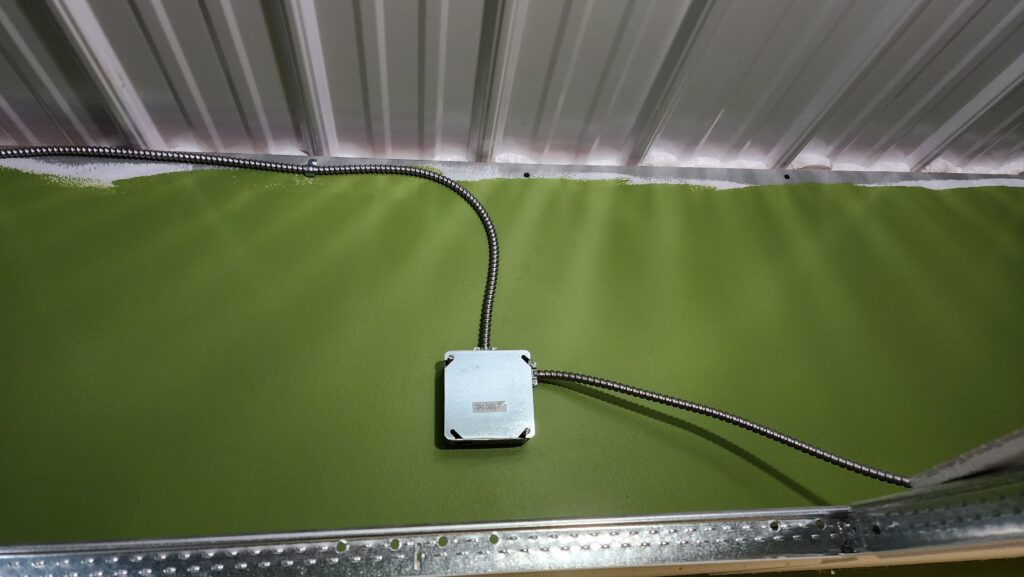
That, of course, is only half the job. The other half is getting the interior wires tied in to an appropriate circuit. Starting with an entry point 9 ft above the floor. Picking up where we left off last time, with the cable coming through inside the wall, next stop was a new junction box (10ft above the floor – that’s it, right by the ceiling).
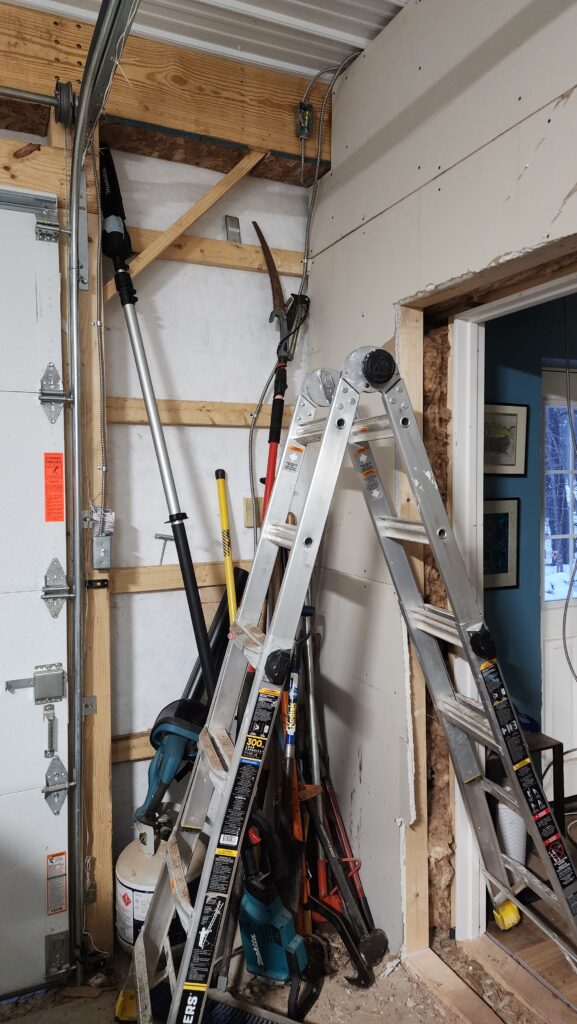
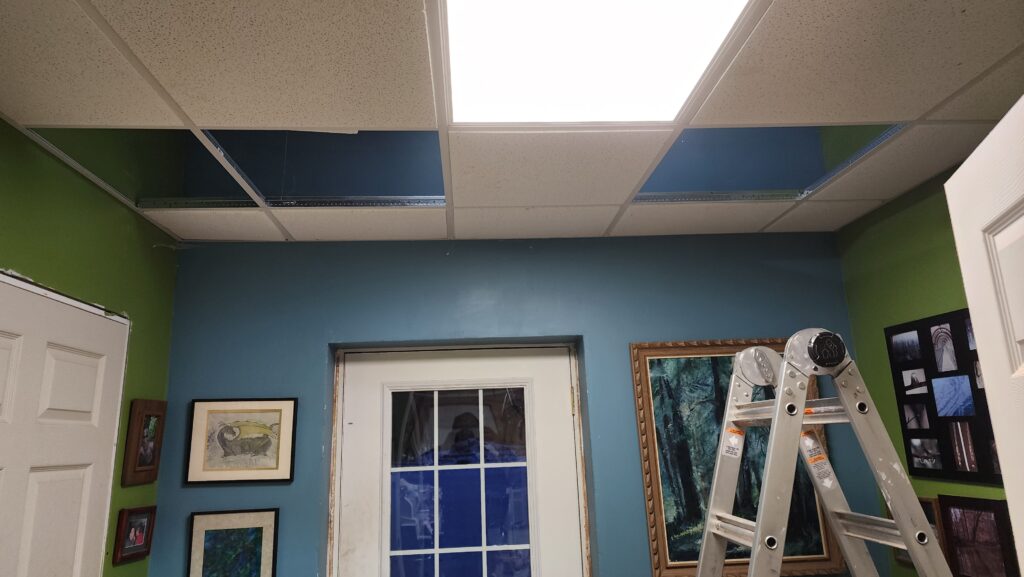
And then snaking wire relatively easily above the suspended ceiling in the mud room.
Whereupon I came across a little blessing I left in there, some long time ago.
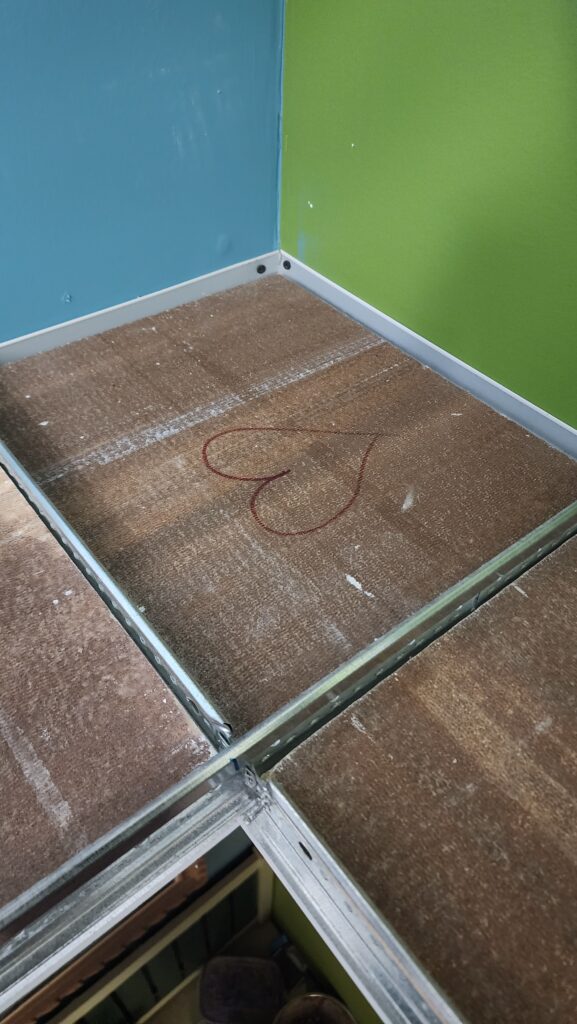
I never remember where I’ve left those and it always gives me a smile when I find one, years later. This is a view from above of the suspended ceiling tiles.
Tie in to an existing lighting junction box…
And presto, lights!
Happily, that whole process, while unforgiving in the cold, went relatively easily. Every now and then something does.
Evidently, this winter is one that features much repair. There was the (second) flue repair featured in the last post. And then there was this.
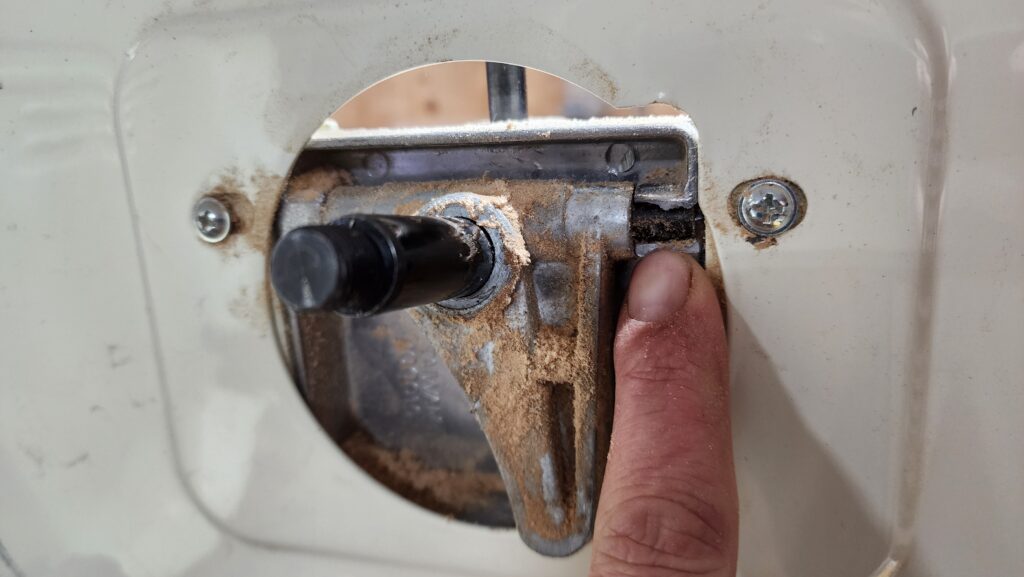
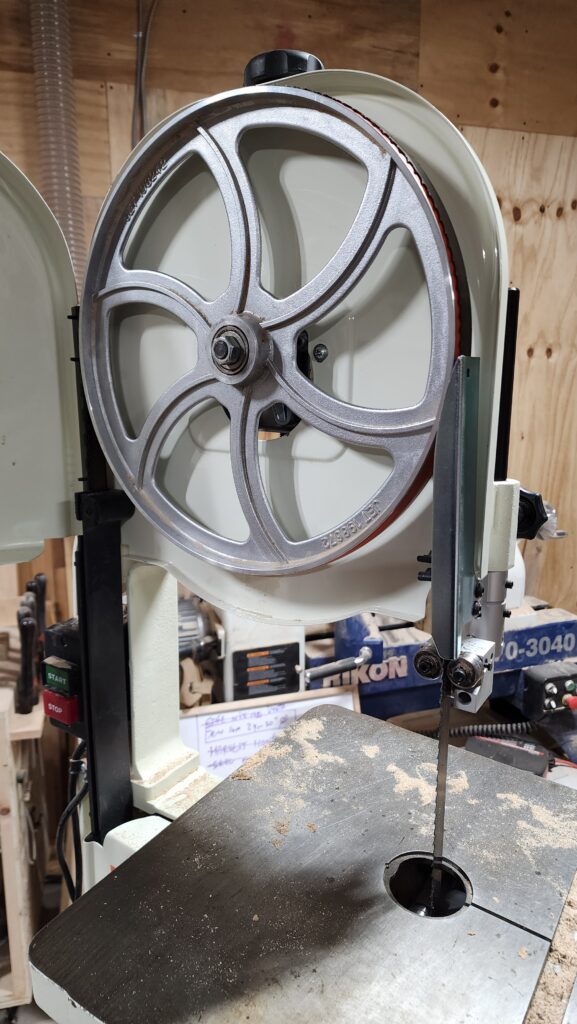
See that bit of black I’m pointing at? That’s an internal axle that is supposed to be completely concealed by some cast aluminum that has rather unceremoniously broken off, allowing that axle to wobble a bunch. Okay, so what even is this axle? Well, it’s an integral part of the upper bearing system of my #2 bandsaw. That bandsaw is the one I keep in the garage and use to cut my firewood into thirds so it fits in my woodstove. This machine is about 20y old, but it turns out I can actually get an aftermarket replacement for this assembly. I have to wait over a week for it, during which I still need to cut firewood.
Thankfully, my #1 bandsaw can do that, even though I like to keep it very tidy for precision work (which firewood definitely is not). One or two loads of firewood won’t beat it up too bad, though, and needs must, as they say.

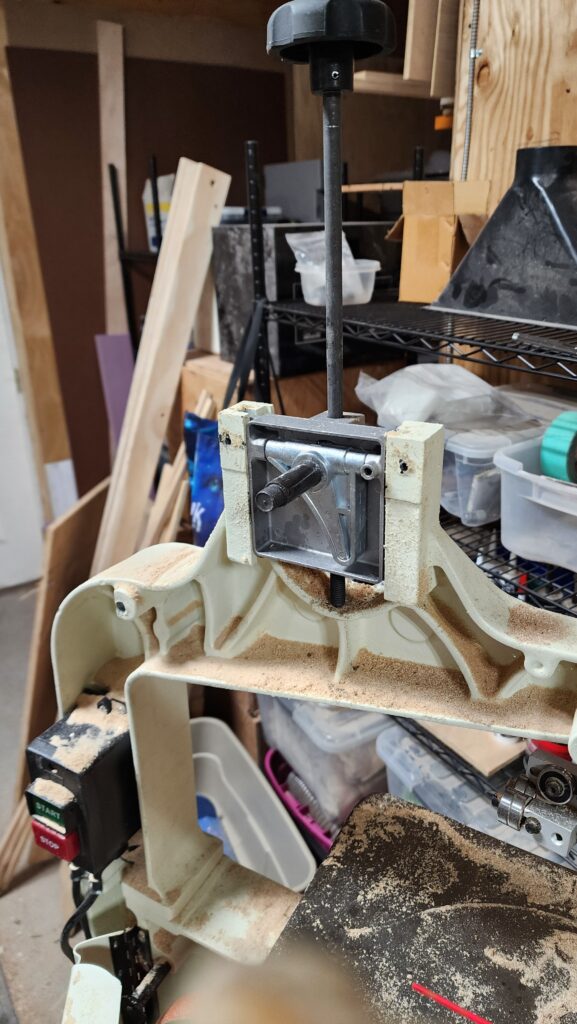
New assembly (and new “tires” for the blade wheels, as long as I’m in there maintaining my 20 year old machine). Happily, it fits right in.
The wheel takes some wax and some hammer blows to get set back on the axle, but it goes back together okay with a little violence.
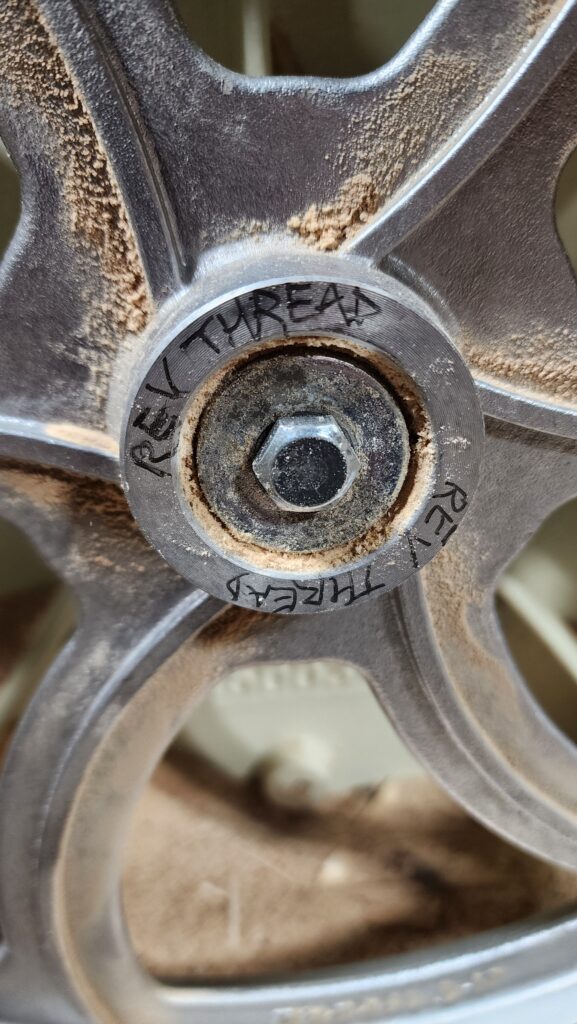
And as long as I’m at it, this seems like a good time to leave a note for future-me that there’s something special about the bolt that holds the wheel on, in case I ever have to service it again.
And happily, with that, the saw is back together and ready to run. I go to put the old blade back on and discover I just can’t get it aligned right. What? Did I mess up re-assembly of the saw? Turns out no; what happened is when the bearing broke, it took the saw so badly out of alignment that it deformed the blade! Take a look at it, resting on the machined-flat surface of my table saw.
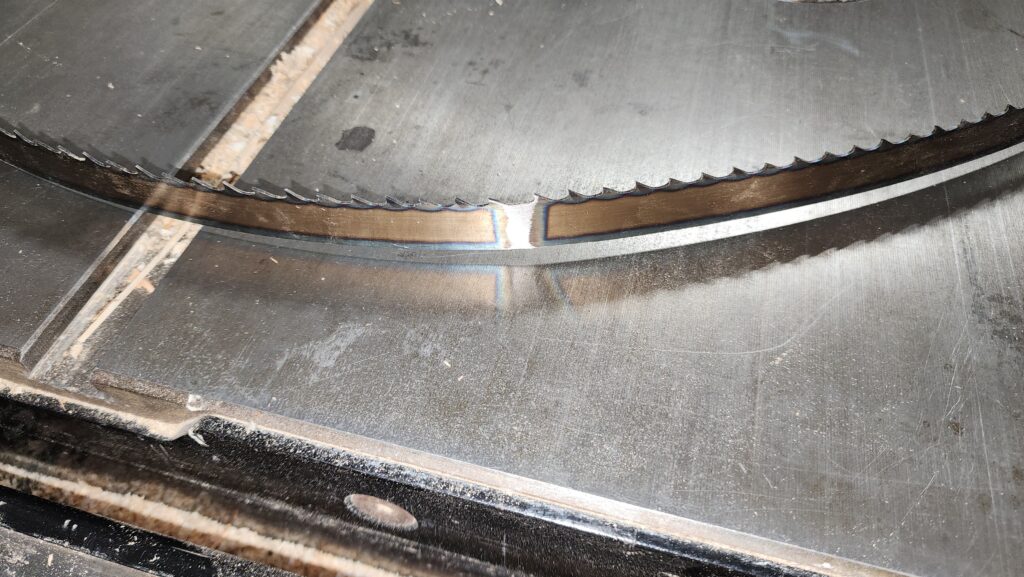
See that gap between the welded spot and the surface? Yeah, the rest of the blade is sitting flush to the surface. This rise represents a serious deflection. The blade is trash. I just wish I’d noticed that a week ago when I ordered the replacement bearing assembly, so I didn’t have to wait another week for delivery of a new blade. But so it was. I ordered two.
And finally, I’m back to cutting firewood.
But that’s not at all the last of the things that needed repair.
The handle for the woodstove in the house also had an issue. Take a look at this series of photos. Can you tell what’s wrong with these pictures?
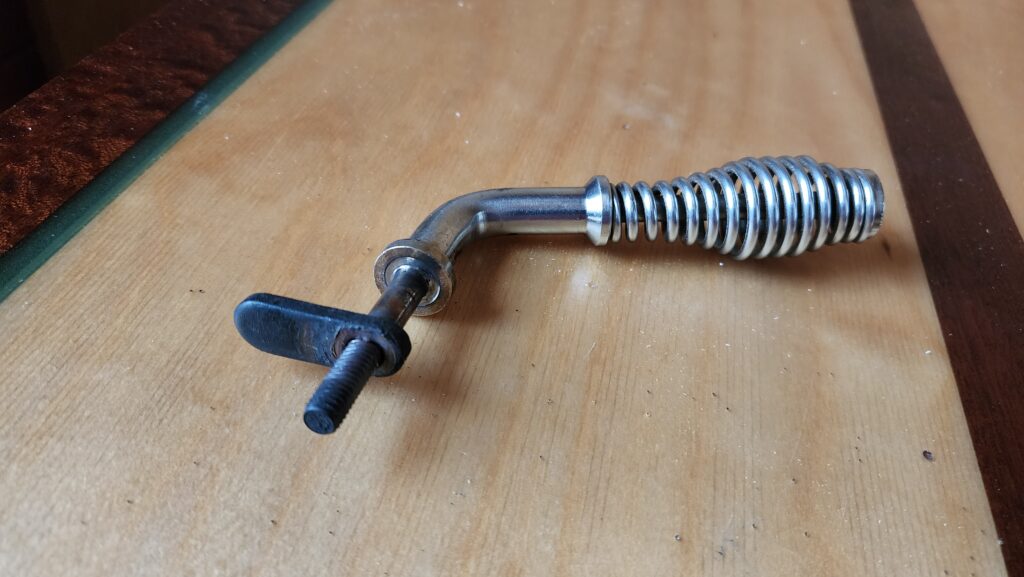
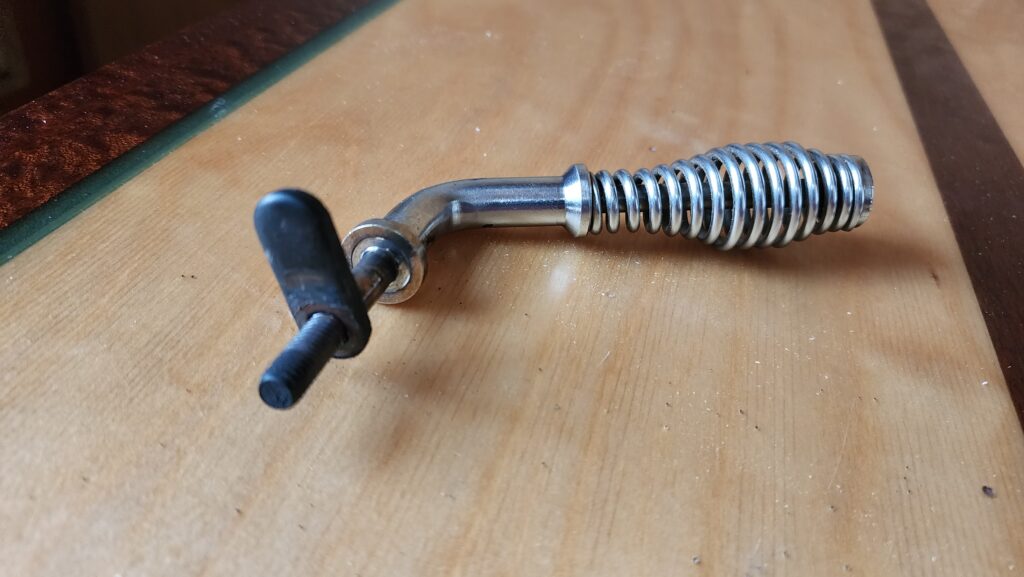
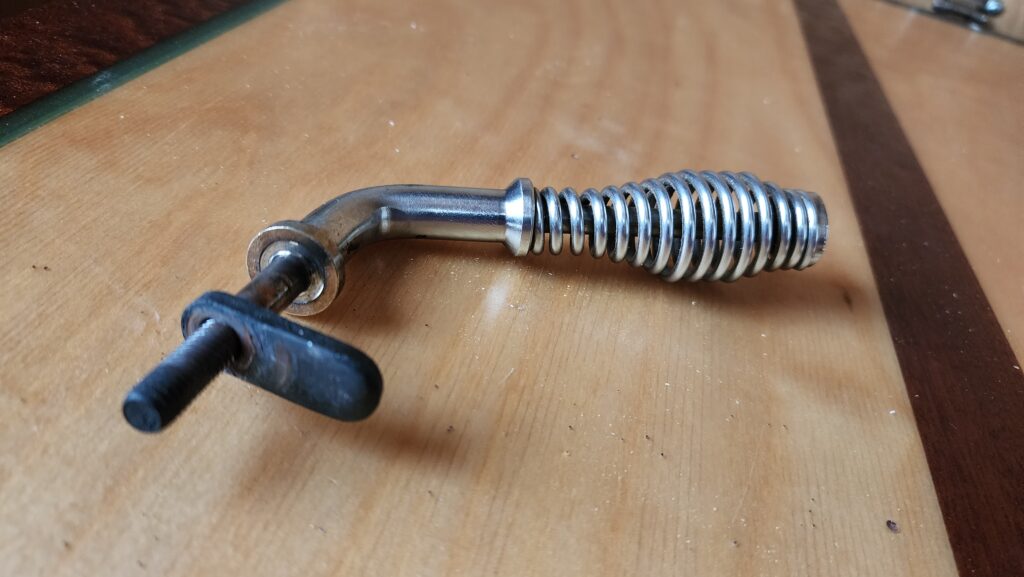
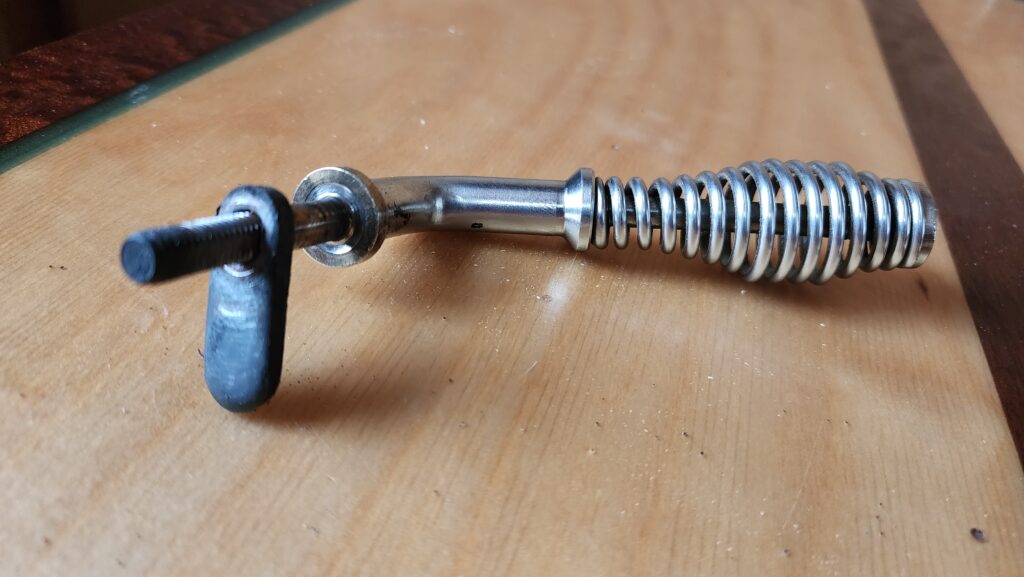
I’ll give you a hint. See that black tab? See how it’s in 4 different positions relative to the coil part of the handle? That tab is what actually holds the door shut.
But if it’s free to move relative to the handle, then moving the handle doesn’t necessarily move the tab and thus the door may or may not latch/unlatch as desired. That, obviously, is a pretty big problem for a door that’s meant to keep a fire in a box.
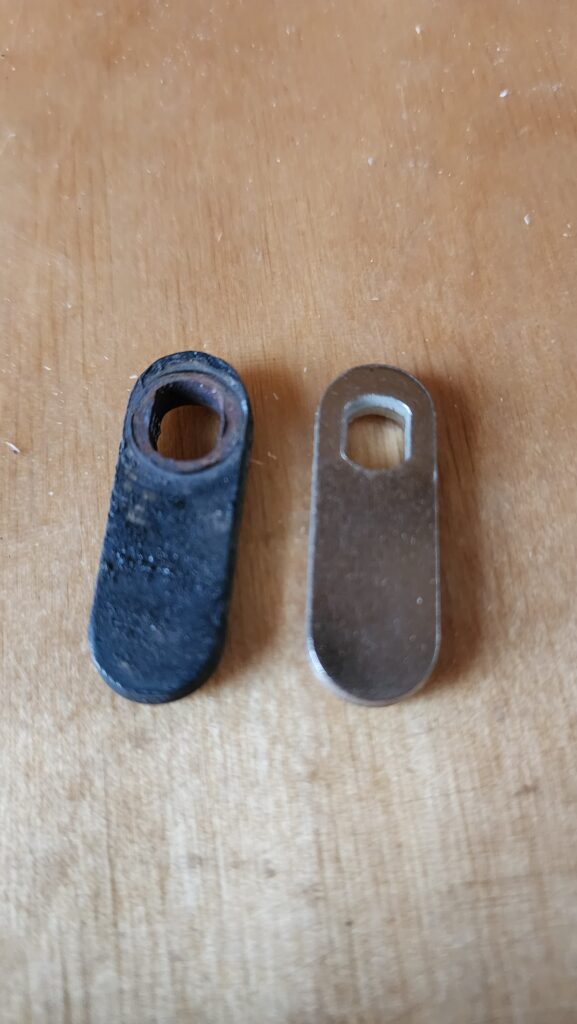
This is the new handle – note the flat on the threaded part and how the tab has matching features so it stays locked in position.

Yeah, the old handle couldn’t do that. I’m not entirely sure just exactly how it happened, but the oval hole in the tab got worn out just enough to slip by the flats.
An easy fix – just swap out the new for the old – but also just another thing that broke. And it wasn’t the last.
An error in judgement I made in 2017 finally became critical. The middle of the bathroom floor isn’t supported well but inconveniently happens to be the most heavily traveled part. The vinyl planking has begun to crack because what’s under it is also weak. Left un-mitigated, there would be a hole in the floor soon… a hole which, if stepped in, would admit that foot into the space below the floor and quite possibly to the outdoors, which isn’t very far from the floor system. And it would be ugly and painful because the last part of the floor system is some thin sheet metal on the underside of the trailer chassis. It might even grab that foot and prevent it from being pulled back into the house. Yeah, like I said, it would be bad.
January is not the season to repair the floor, since it also requires tearing out most of the stuff in the bathroom. Indeed, I have it in mind to do some remodeling in there anyhow. So I’ll save it all for the spring when the weather is nice and I can put stuff outside while I work and not have it freeze / collect snow and ice, etc. But the floor is soft today and needs something to keep me from falling through it today. So for now, just some plywood screwed down to the stronger parts of the floor. That will be enough to keep safe for a while, though it’s ugly.
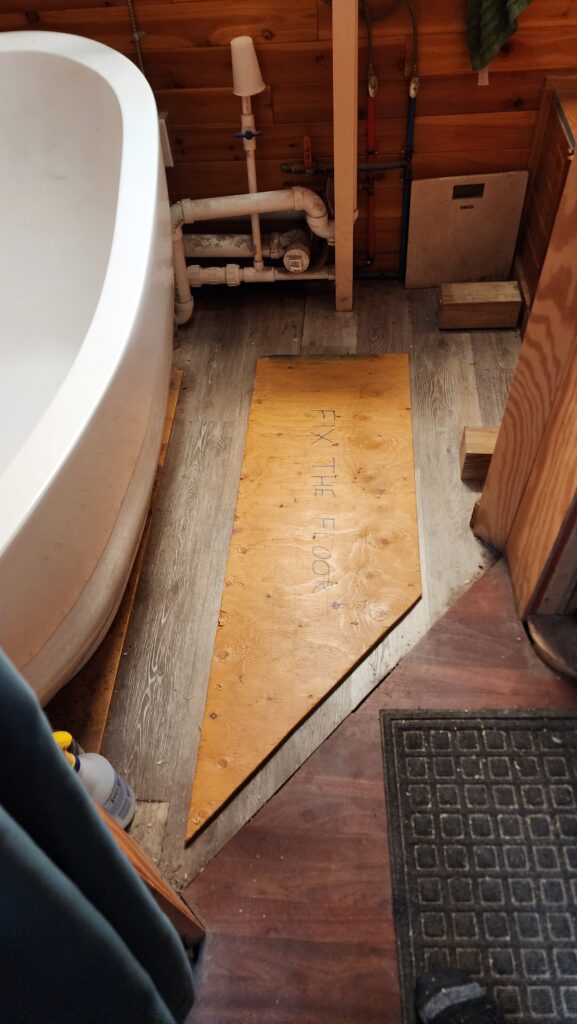
What was that bit of poor judgement from 2017, you ask? It’s this. See the arrow? There is something in the subfloor between the plywood sheets down the middle, but it’s got no tensile strength to speak of. That’s no problem for the hardwood floor that’s laid down through most of the house, but the bathroom floor is just vinyl planking over this plywood. And that spot down the middle offers very little support.
… and now with repeated flexing, the planking is cracked and the filler strip between the plywood sheets is likely compromised as well. And the edges of the plywood sheets are not particularly well supported, either. Those lines drawn across the picture are where the chassis supports are. So that middle zone is really quite weak. Bad judgement, like I said.
The ultimate solution is to simply put another course of plywood over it, perpendicular, and screw it down well to what’s there, to provide a nice, stiff subfloor for the bathroom. But that means taking out the tub and I wanted to re-do the toilet bench, too, so, yeah, a big project for the spring time. For now, a bit of a patch to keep it safe until then.
I also noticed something a little alarming outside. Evidently, the concrete blocks that hold up the house have tipped a little. Just a little. But enough to concern me. A little. I think what’s happened is the ground has compressed a bit beneath them. The line with the arrow head is parallel to the blocks. The line without the arrow is approximately vertical.
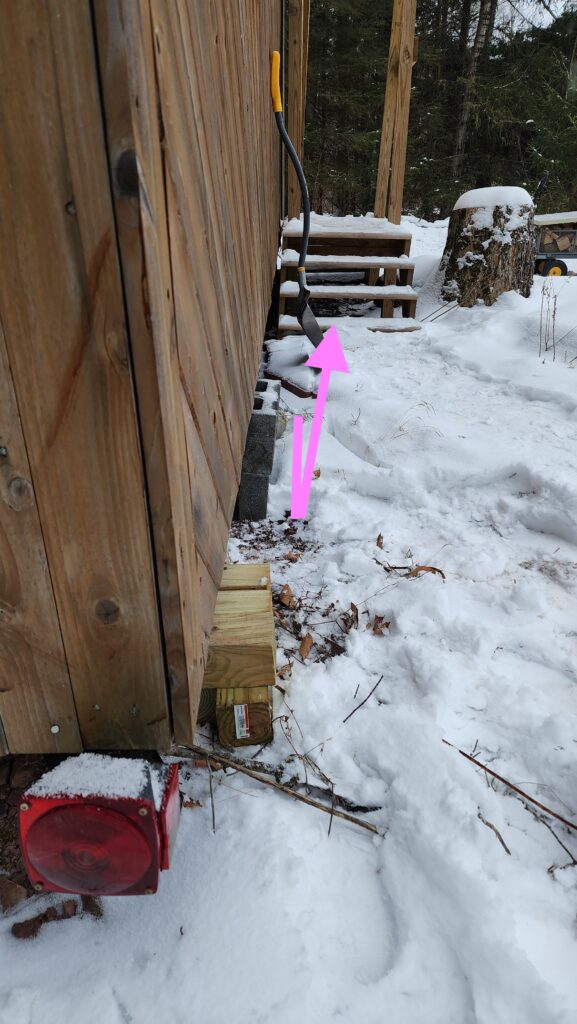
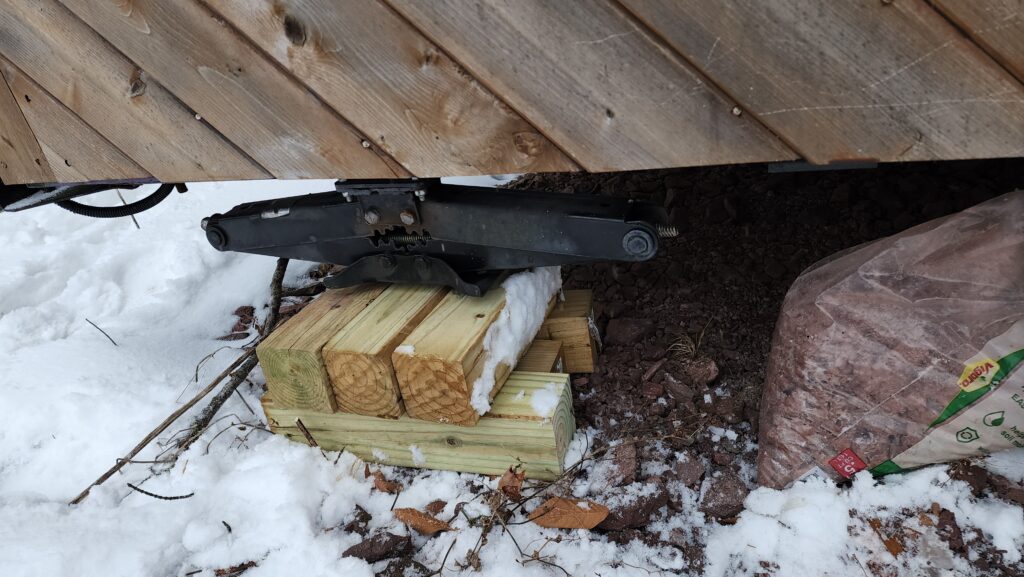
When the weather’s nice, I’ll jack up the house and re-set those concrete blocks. For now, though, for peace of mind, I installed some cribbing of 4x4s (just past the tail light) that would catch the house if the concrete blocks failed.
I would have just extended that stabilizer jack, but it turn out that jack is also broken… to be replaced in the spring.
Plenty to do when the weather gets nice!
Speaking of nice weather – or rather, that it will be a while until there is nice weather – it turns out that even cold-treated diesel fuel can freeze! I’m relatively new to the stewardship of diesel engines. My tractor (bought 1.5y ago) has one. Recently on a cold day, it would start but couldn’t keep going. I finally determined the issue was a frozen fuel filter. See pink slush in the bottom and top middle of the capsule, left photo.
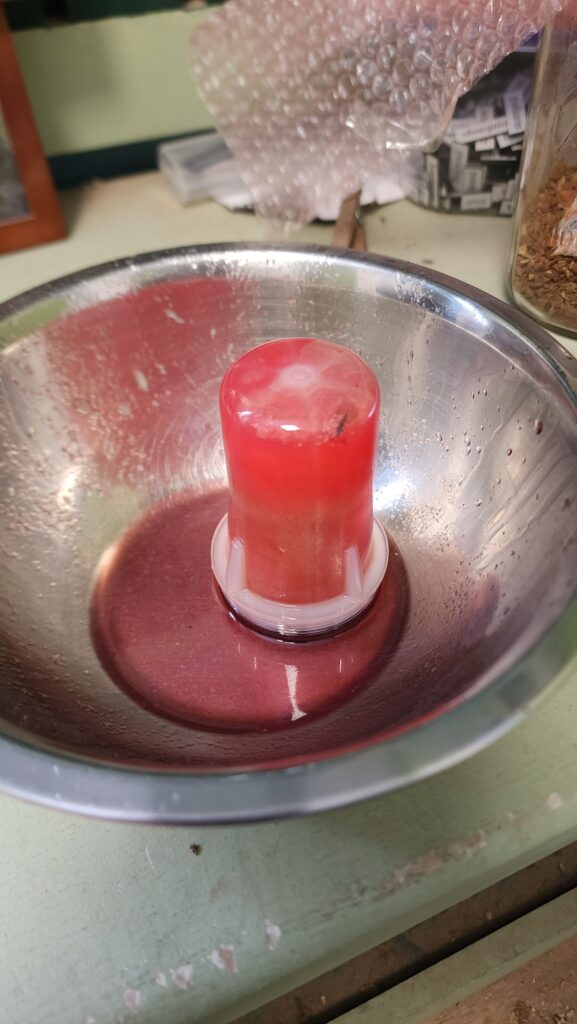
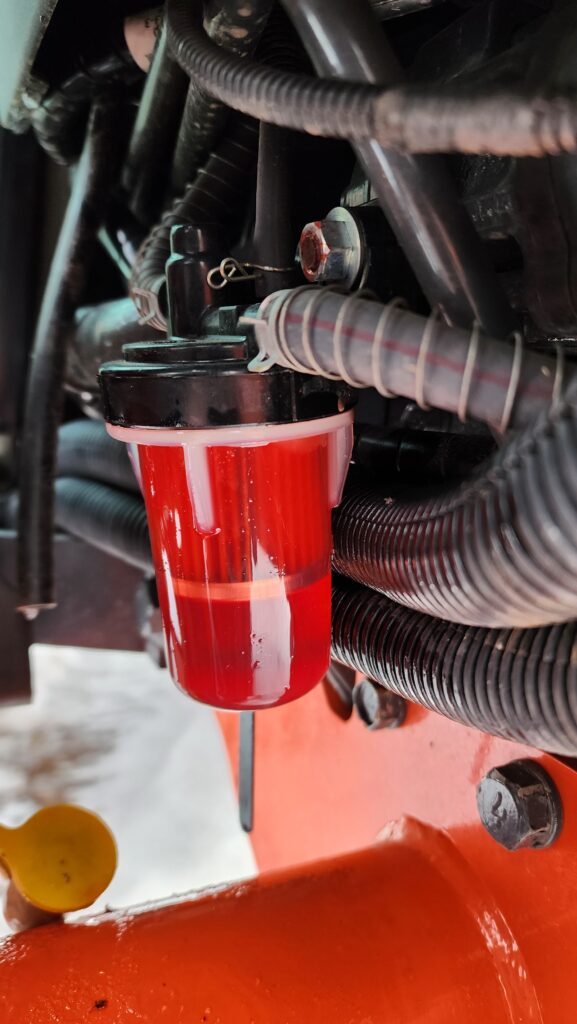
But how to warm up a capsule full of highly flammable fuel? Not exactly safe to use a heat gun here. Ultimately, since it fit in my hand well enough, I just used my body heat to warm it up enough to shake out the slush. Once refilled with new, treated fuel, things looked a lot better (right photo).
Lessons learned: there can be more moisture in your diesel fuel than the treatment can mitigate! And I’ve also learned that moisture can be admitted in the air that comes in behind the fuel in the tank, too. Come to think of it, the tank fuel had some ice crystals and the walls of the tank had some, too. Conventional wisdom, now that I know it, is to keep a diesel tank topped off in winter, so there’s no room for moist air to enter. . . and any moisture that does enter, encounters treated fuel which can bind the water. If there’s a lot of air and a little fuel, that doesn’t work so well. Duly noted! Now I’ll top off my tank from my reserves every time.
There was still one problem after finding and fixing this issue, though. I’d pretty well drained the starter battery with repeated attempts to get the machine going! There is a solution to that, but I had to go buy one…
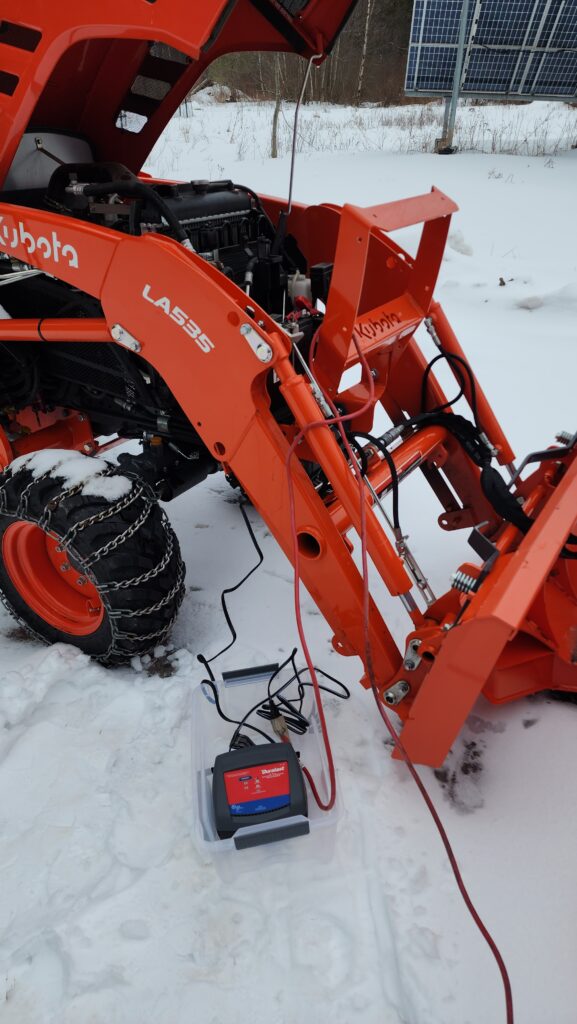
Good thing I had a 100-ft extension cord.
This wasn’t the last of this winter’s woes, though. Seems like there’s been an above-average number of issues, doesn’t it? Maybe yes, maybe no – but one thing is certain: winter out here is harsh.
By some combination of adverse conditions, a rather thick coating of ice has accumulated on the house. For the most part, I don’t really care about that… until the ice forms a dam and forces water to leak into the house. That I do care about. And it happened.
Getting onto the roof in winter is a non-starter. Nothing to hold, super slippery.
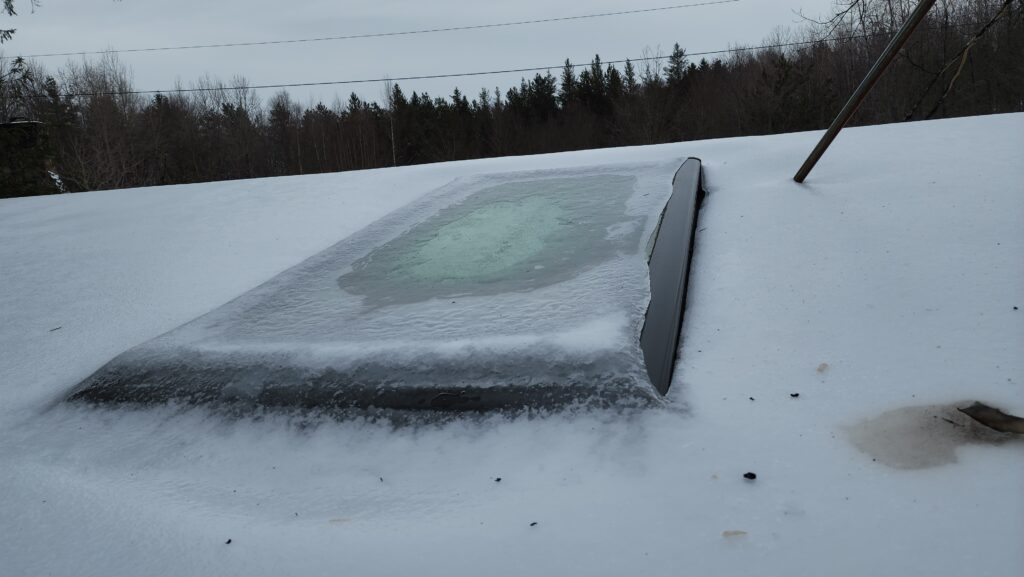
I did go up the ladder to see what the matter was and saw that considerable ice had accumulated under the trim skirt around the skylight. I think that ice was once snow and expanded as it froze, forcing open the gasket around the sky light or possibly something worse. In any case, the ice around the skylight had to go or I was going to keep getting water inside.
While not lovely weather to work in, I got lucky in that besides being a little rainy one day, it was also enough above freezing for a while that the ice got significantly weaker and thus responded well to my hammer-and-flatbar attack. Note that this is happening at ladder top, so I must be very cautious about using two hands to fight the ice, lest I lose my balance.
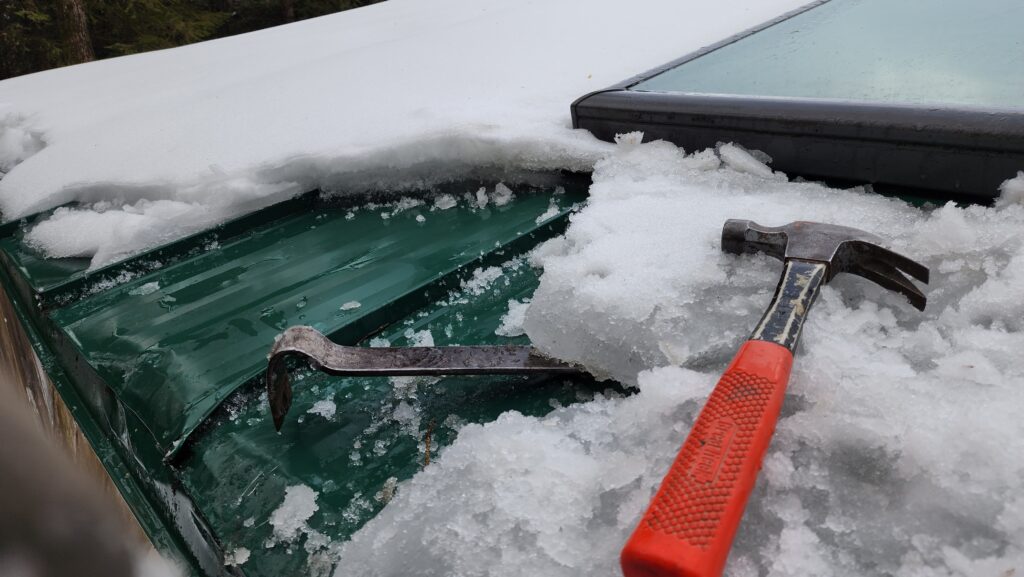
That bent over bit of the eave is actually unrelated to this particular insult. That happened years ago during construction, when a fair bit of tree fell on the house. Fortunately, the only damage was the eave got squashed a bit. The roof was still sound, if badly dented.
If that ice looks thick to you, that’s because it is! Here’s a chunk I broke off…
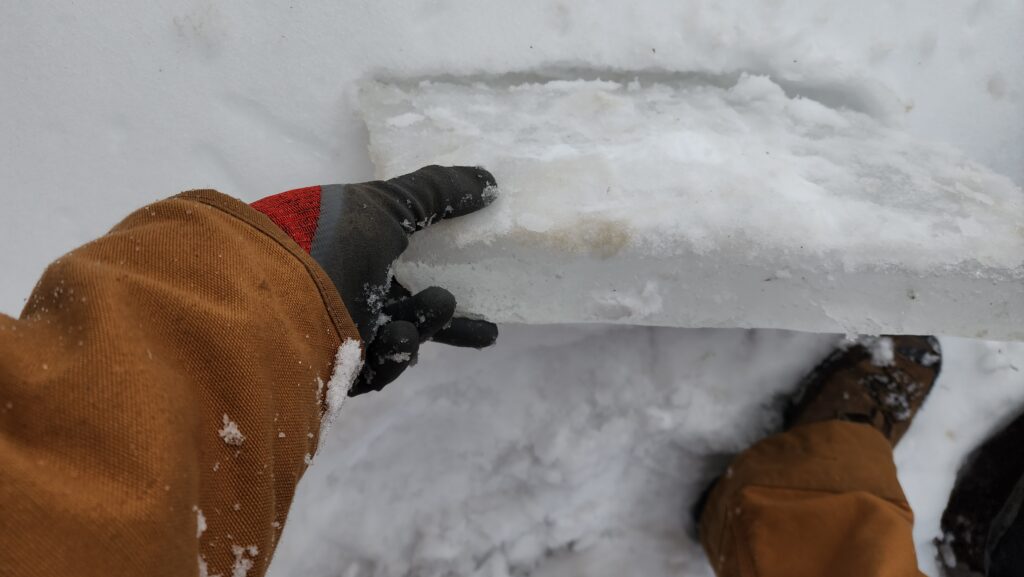
How thick is thick? This thick.
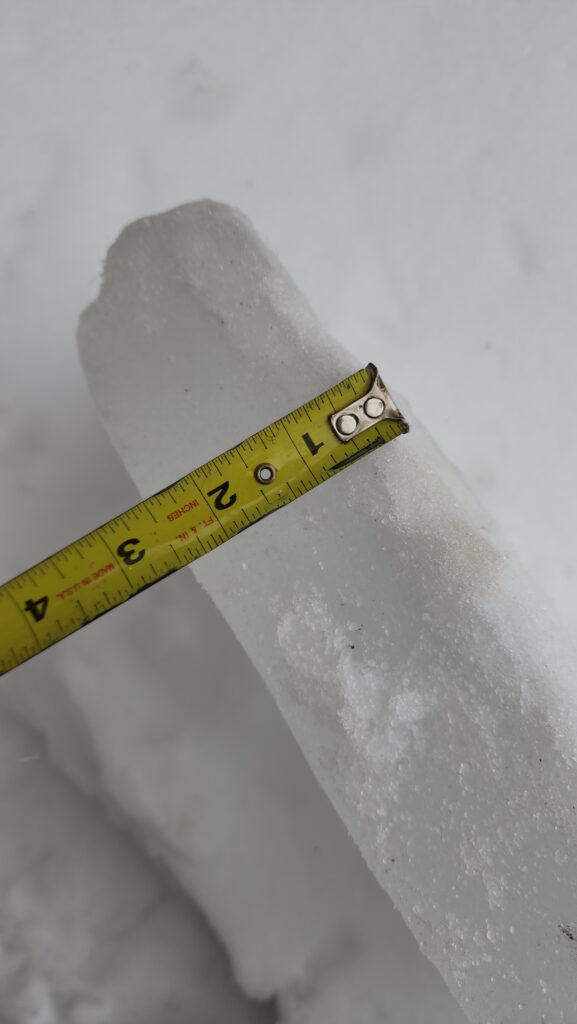
These pieces of ice are so heavy that I also had to be concerned that breaking them free from the roof glacier might mean they’d come sliding down at me and knock me off the ladder, 9ft to the rocky, snowy, icy ground below. Some maneuvers were necessary to encourage them to slide away from me. And I had to move the ladder on occasion just so I could get out of the way of an ice block that insisted on a particular route to the ground.
I did ultimately get it done. You can see the trim skirt I’m talking about here pretty clearly.
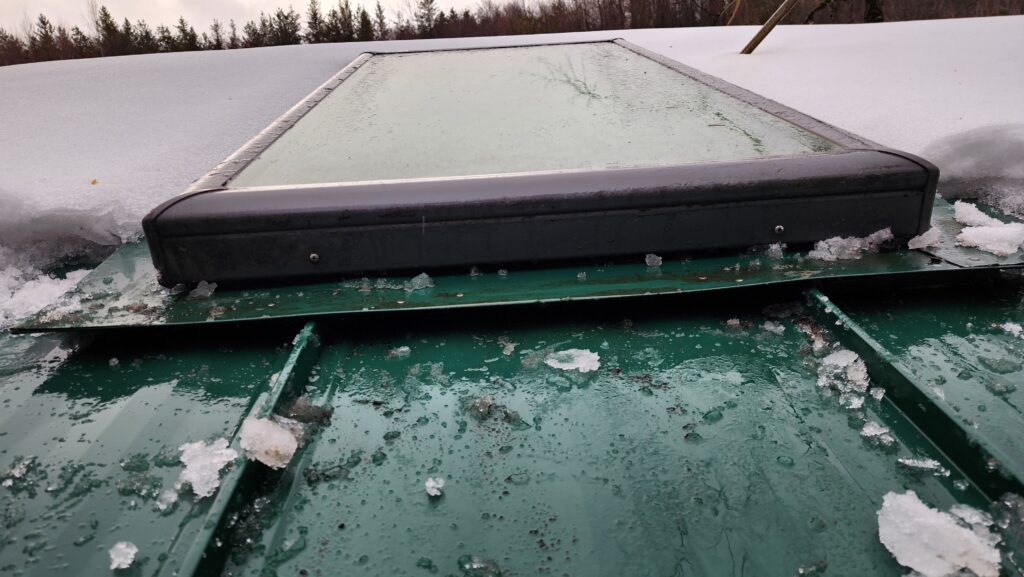
Ice had backed up under it as well as filled the sides. I’m thinking in the spring maybe I can stuff some foam pipe insulation under and around there so snow doesn’t accumulate. If no snow, then the snow can’t melt and re-freeze into ice.
However, the fundamental problem remains: some ice forms a dam at the low end of the roof, retaining fallen snow and allowing that snow to also turn into ice if conditions favor it. Any subsequent melting has nowhere to go because of the ice and that, plus the expansion of the ice as it freezes, work together to open routes into the roof and fill them with water. So instead of meltwater running off the roof, it comes in because the end of the roof is blocked and the ice has wedged itself in inconvenient places.
I think that filling the space under the trim will keep out snow. But will it prevent ice from growing into there like a developing glacier as meltwater comes from above and gets stopped by the dam below? Hm. Not so sure about that.
Next you’re going to ask me: what about heating cable on the eave? Well, I certainly couldn’t leave it on all the time – no way I have the energy budget for that. I’m on solar power, remember, and winter isn’t great for sunshine. I could have it set up for on-demand use. I’m not convinced it would be effective before depleting my batteries, though. Indeed, if it drew down my batteries by half, that’s still a big deal when they days are short and gray. That’s what the batteries are supposed to cover. Using half their charge (or more) on the roof means that much less ability to make it through gray days with normal usage.
And then there’s the other important bit: roof heating cable is not meant for use on metal roofs, which happens to be the kind I have. This makes sense – the roof will sink the heat rather than allowing it to concentrate around the cable and actually melt the ice. So ixnay on the oof-ray eating-hay able-cay.
The roof is a relatively shallow pitch and the reach from the ground (the house is on a mound that falls off away from the house) does not favor a roof rake. There’s just no way to reach the roof from the ground without being like 30 feet away with an insanely long and flexible pole.
The ladder and flatbar technique works fine, but isn’t exactly automatic nor is it safe.
More contemplation is necessary.
But hey, I got to use my new thermal winter work suit!
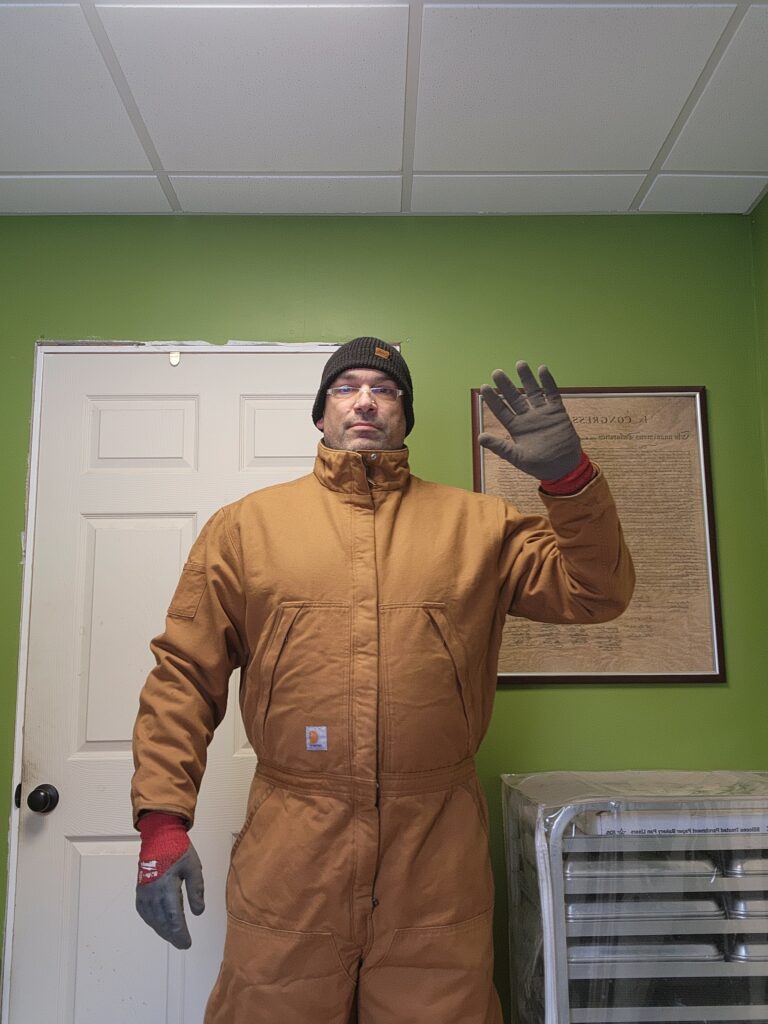
This thing is actually pretty great. I got it for $49 at a discount store I just went into because I was waiting for someone at a shopping center and needed to kill some time. They had exactly two of these and one just happened to be in my size. Bargain score!
And lastly, some very sad news.
Ignore the square features – those are the sensors getting a little uppity.
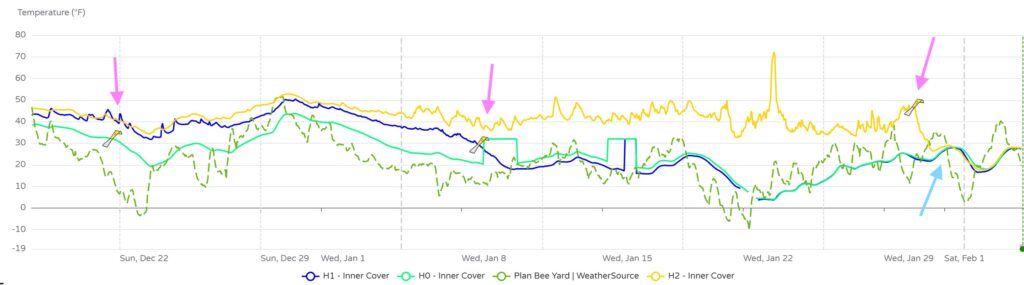
The dark green dashed line is the outside weather. The solid lines are the internal temperatures of my beehives.
See where at each pink arrow, the temperature falls off and begins to track the average outside temperature? Yeah, that’s when the colony was no longer able to maintain temperature inside and died. It looks like my weakest hive (H0/light green) gave up their ghosts at about 20F. My middle hive (H1/dark blue) held on til about 10F. The strongest ones (H2/yellow) did great even down below zero, but couldn’t keep on much longer after that, even though the outside temp wasn’t too bad.
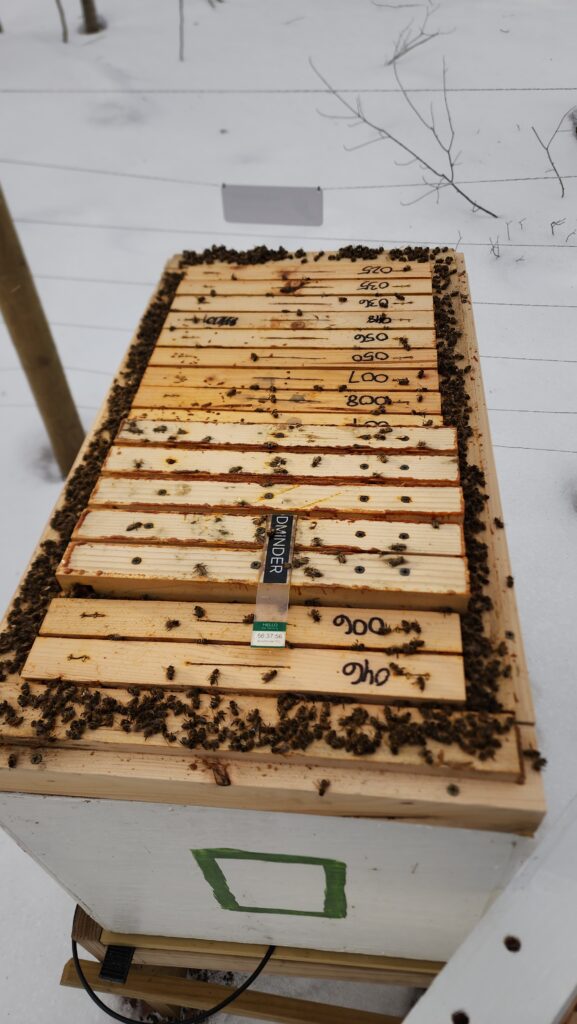
I inspected the hives to attempt to determine cause of death. They had plenty of honey. There was no evidence of excessive moisture. I even used a microscope to inspect a few dead bees for evidence of deformities or external parasites.

Besides a couple of tiny water droplets and a dramatic tongue-out death pose, everything looked normal to me, top and bottom. No damage, no defects. Just dead.
And the worst part is, I think it was my fault. While I did install 1.5″ EPS/XPS foam in the floor and walls of the hives, I did not insulate the roof. The design of the roof is such that insulation would have prevented ventilation and I was concerned it would get too wet in the hive without airflow. This is a valid concern – bees breathe out just like humans do and can just as well steam up their homes.
However, without roof insulation, the hives were too hard to keep warm. Just a half inch of plywood between the inside and the harsh winter outside. I’m so sorry, my little bee friends.
I saw they tried their best to keep the heat in by fouling the vent screen with propolis.

I also saw that a lot of dead bees were found at the highest part of the hive – rather than clustered on the comb – presumably there to keep warm because heat rose, even though it readily also departed through the lid.
And the very saddest part was the collection of dead bees at the bottom inside.
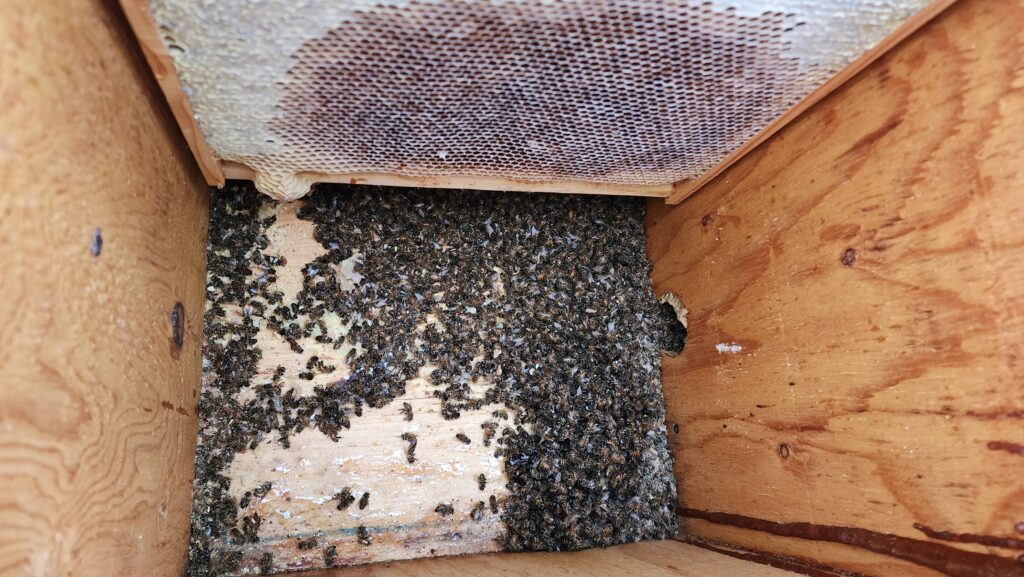
Bees will ordinarily put out their dead. It was so cold they couldn’t even do that. The snow in this photo wasn’t there when I opened it. My gloved hands had snow on them when I opened the hive.
Lesson – tragically – learned.
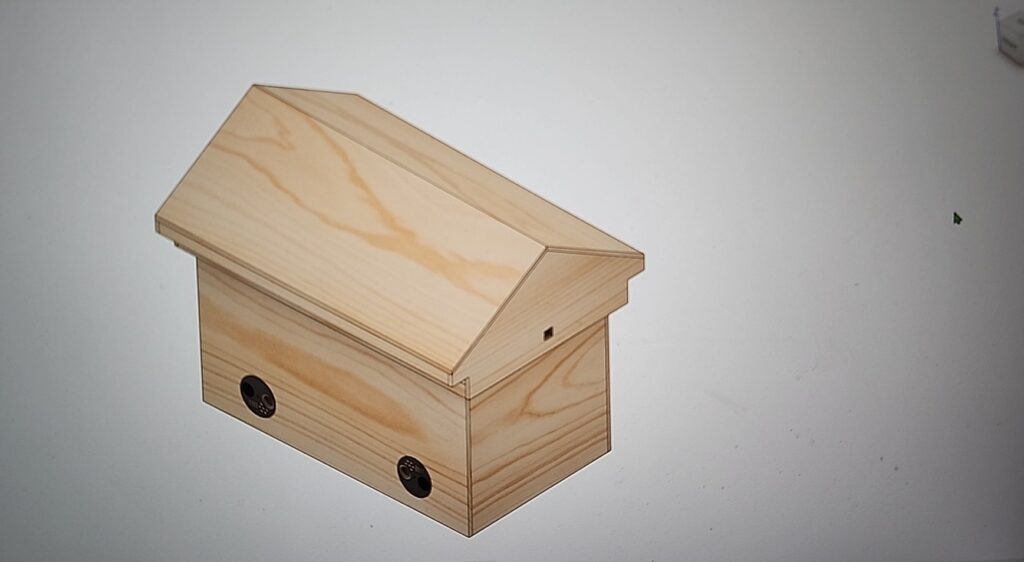
I have since re-designed the hives. This time with 2x the insulation in the floor and walls… and I figured out how to insulate the roof while still allowing for ventilation. I also have two new starter colonies on order for late April delivery, to start again. The good news for them is that I have all this perfectly good honeycomb to give them, much of which has honey and other resources already in it. This will give them a huge head start getting established in their new homes even while Nature is just getting started with fresh food supplies.
So here’s what I’m thinking…
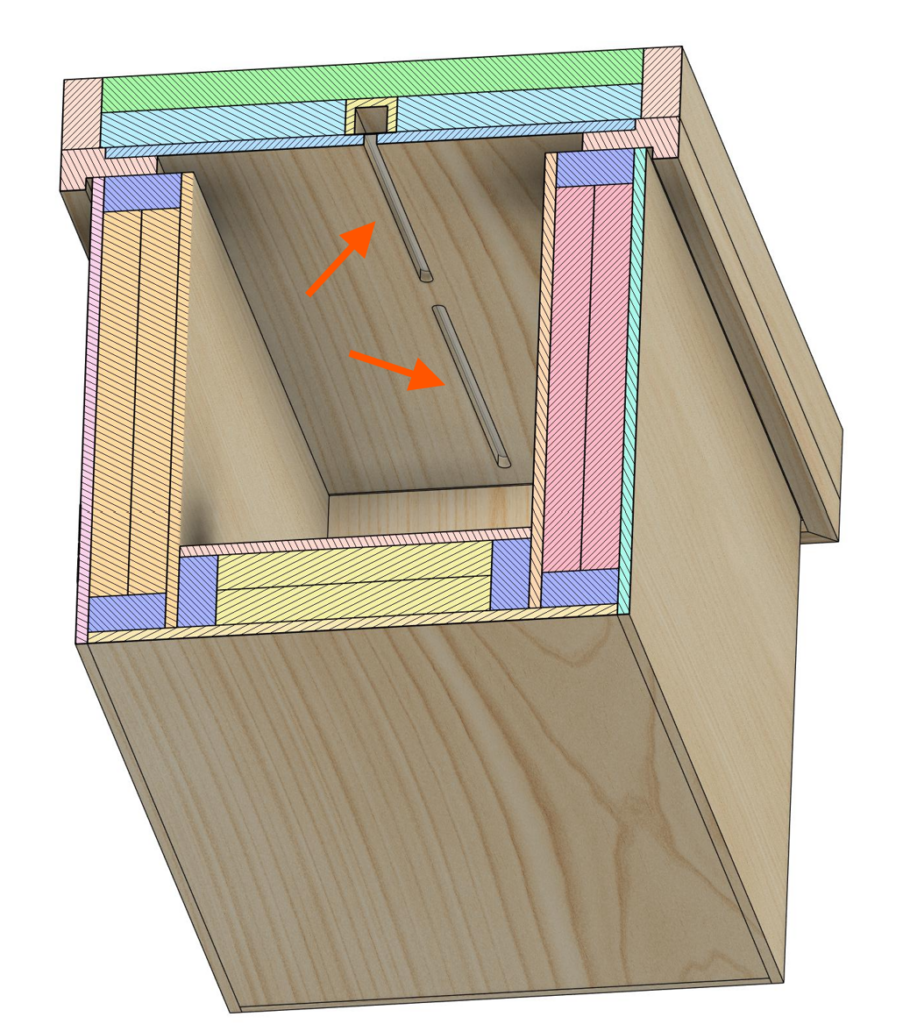
Warm moist air from the hive flows upward through these slots. Note that a lot of heat is retained close to the frame tops except right there in the middle.

In this section rendering with the frames shown, you can see there is a square tunnel above those slots in the inner lid. This collects and guides the exhaust air to vents on the sides of the hive. Note that the attic is nevertheless insulated with two courses of foam. Except for right at the vent tunnel, where there is a single course. The dead air in the attic also helps retain heat, to a lesser extent.
Lastly, the square vents on the gable ends of the roof provide a route for exhausting warm/moist air.
Now, won’t that also let out heat in the winter, even though there’s a great deal of insulation everywhere? Yes and no. It shouldn’t be a “great deal” of heat, given how it’s constructed, but it will be some. My plan is to add one more feature, not shown in these renderings, that will allow me to cover these vents a variable amount. In winter, I’ll close them mostly. In summer, they’ll be wide open. I can use the humidity sensors inside to tell me if I (they) have a moisture problem that warrants opening the vent more.
And in the event that there is condensation, it should only be right along that central tunnel feature, so if things get bad and it rains in the hive, it won’t rain everywhere and the bees should be able to avoid it. Not ideal, of course, but I think overall it will work out.
Ask me in a year.
One thing’s for sure: I’d grown rather attached to and invested in my bees and their death was a very sad day. And it’s not just about the honey/mead. I really just liked having them around, watching what they were up to, being impressed by their productivity, being fascinated by their natural cycles. I’m not done with them just yet!