Don’t worry, most of them aren’t dead! But some of them are. That’s just how it goes – they are born, they live, the die. And the older ones going into the winter will die during the winter. That’s just natural. I have plenty of evidence from my sensors that the hives are alive – temperature and humidity regulation is good and the weight is slowly trending down (as the bees eat their winter honey). All good.
But also, there are some dead bees because they reach the end of their lives whenever they do. The colony likes to keep tidy – any bees who die in the hive are rather unceremoniously (actually, what do I know — maybe they do have a ceremony) dropped outside the front door. In the warm months, bees will die wherever they are and if they die in the hive, it will be hard to see the dead bodies on the ground. But in winter, with snow, it’s pretty obvious when some dead have accumulated.
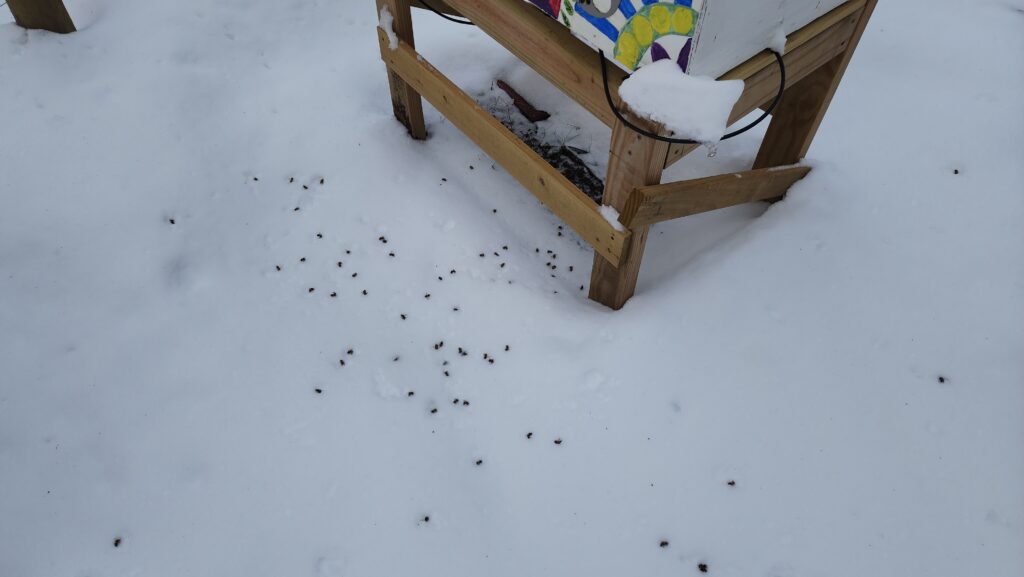
It’s a little alarming at first, but in point of fact it’s perfectly normal. Just in winter all the death happens inside the hive (rather than out in the world) and when the dead are dumped out on the snow, it’s very easy to see.
Aside from that, the colonies are hunkered down nicely for the season.
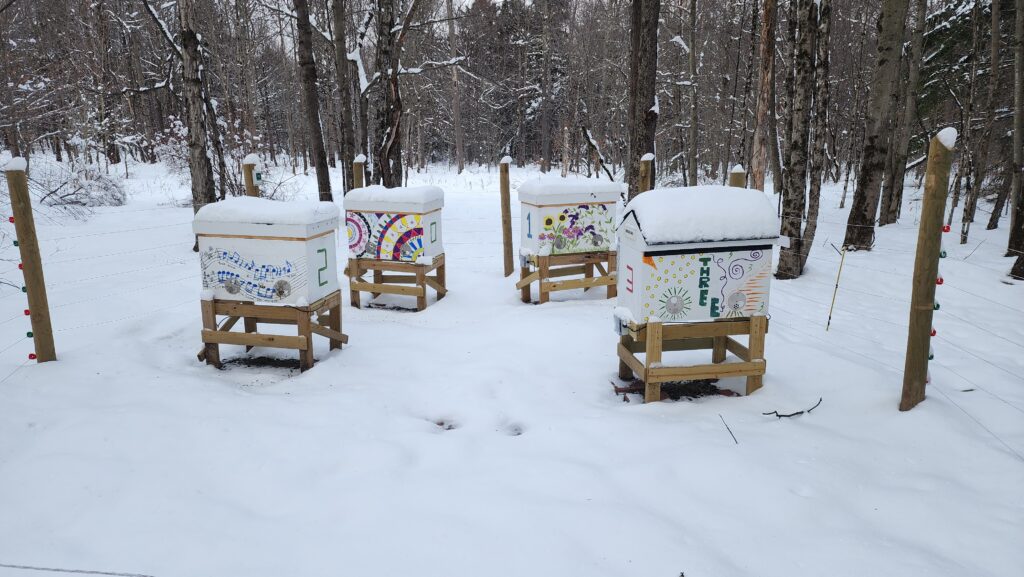
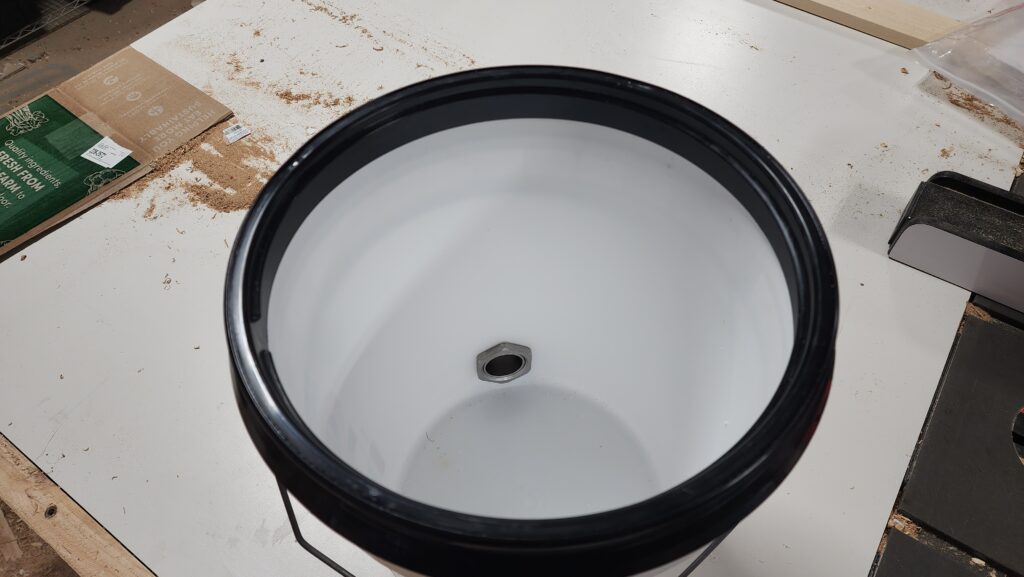
Speaking of bees – honey! I got these nice valves to add to my honey buckets to make it easy to draw some off, but it turns out it was really difficult to secure the valves because the 50mm nuts on the back were impossible to tighten well with a wrench due to the curvature of the buckets themselves blocking any rotation of a wrench.
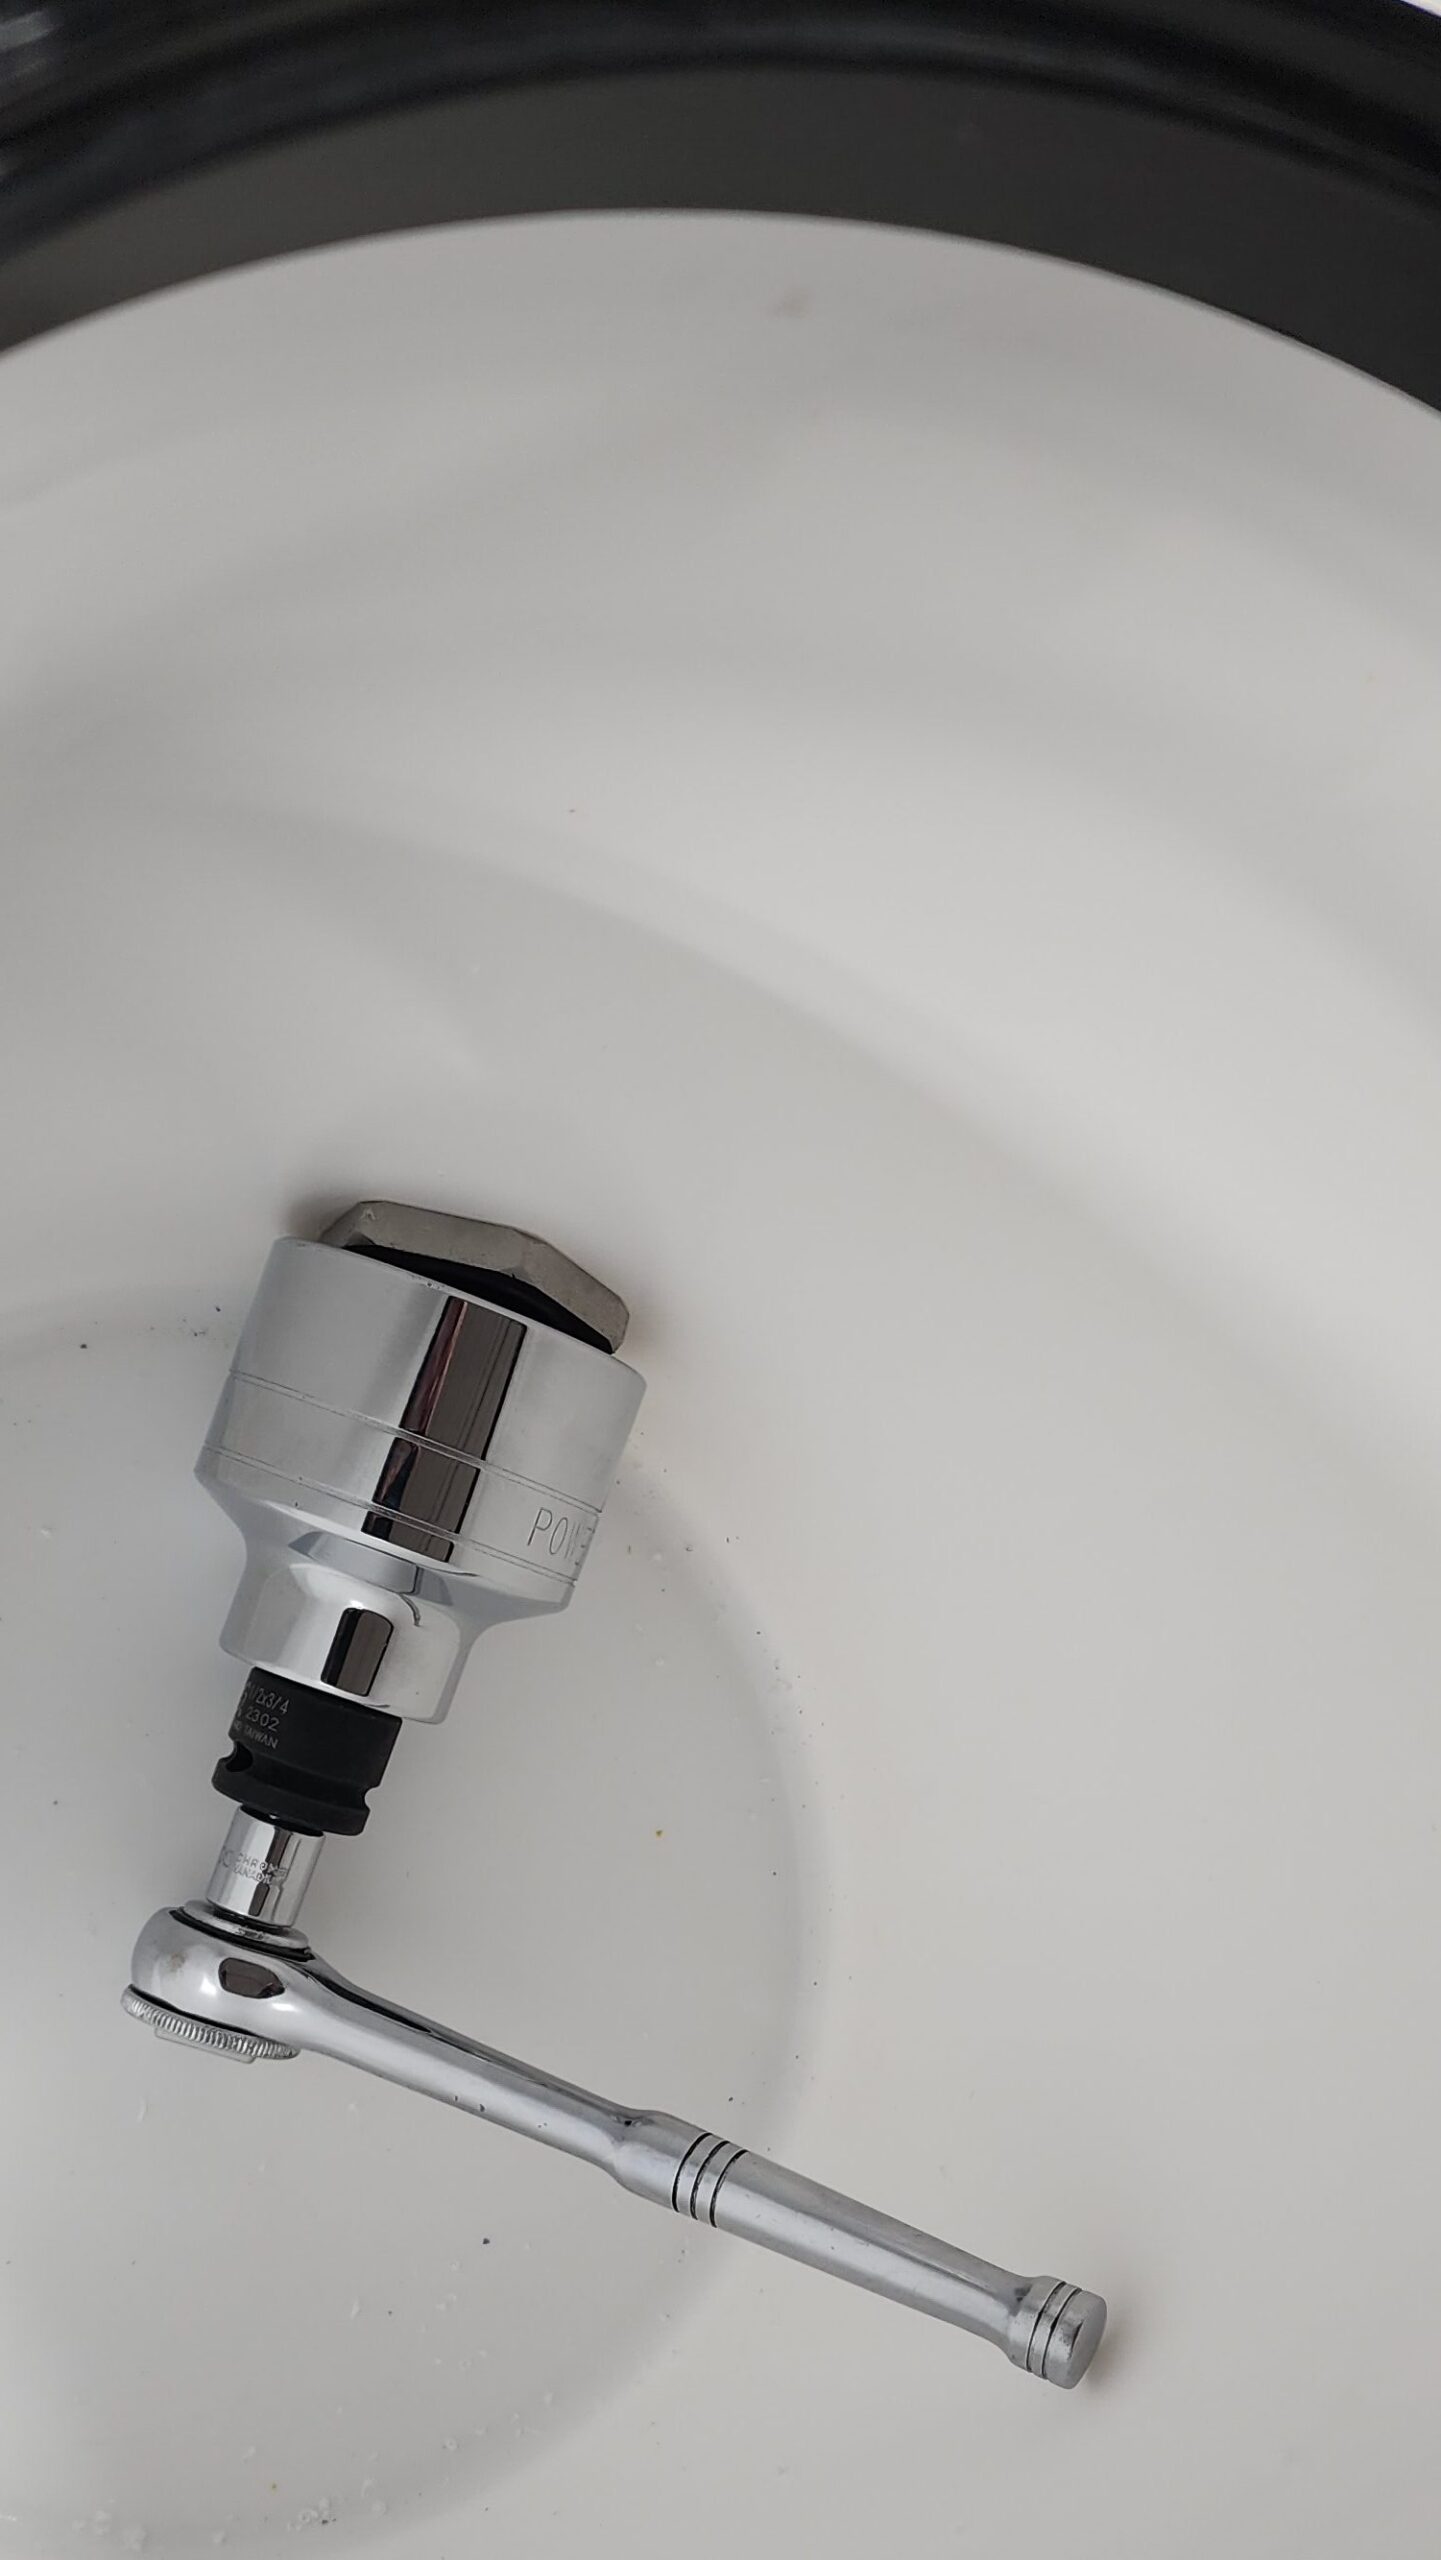
The solution was simple enough, but it does look kinda comical to have such a massive socket, which you might otherwise expect to be tightening nuts on heavy machinery, being driven by my very modest ratchet tool.
And also speaking of bees, I saw this remarkably elegant honey display at a fancy hotel in Panama City. Want fresh honey at your breakfast buffet? Hard to imagine getting it much fresher than this…

Wait – whut? – Panama City? Yeah, Panama City, and other places in country. A nice tropical diversion as winter settled in heavily at home.
Sadly, upon my return, there were some things that required some immediate attention. First, a leak in the skylight. In the photo below, it’s hard to see the water, but you can see the bright discoloration at the bottom and possibly a few droplets hanging from the green trim. And some mold growing in the corner.
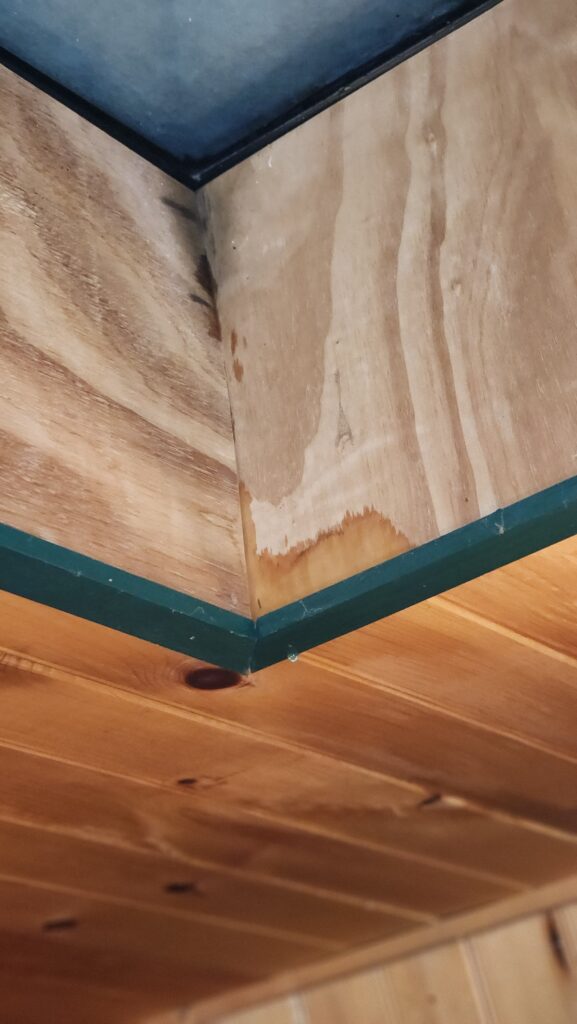
I think what happened is that because the house was cold while I was away, more snow collected around the skylight on the roof than might have been possible if the house were warm. Namely, there wasn’t enough house heat escaping around the skylight to melt the snow there as it accumulated. I actually think an ice dam formed between the roof and the bottom lip of the skylight, forcing it upward slightly, opening a gap in the gasket. When I got home and warmed the house back up, that ice dam and/or snow around it began to melt and the meltwater came through the gap. This went on for about a day, until the ice dam was sufficiently melted to relieve the upward pressure and the gap closed on its own, keeping the outside outside. This is all speculation – I didn’t go up on the roof (in winter, with the ground and the roof full of snow and ice) to investigate. However, there was a heavy rain later and no water ingress, so I’m pretty confident there was a temporary ice-powered lift of the skylight that melted away once the house was at normal occupied temperature for a day.
Lesson learned – leaving the house at low heat for an extended period can actually cause trouble when the full heat is restored. I’ve always considered the homestead to be a bit brittle in winter… but each winter I find out new ways this manifests. There were good reasons to take the trip when we did — but also good reasons not to have an extended absence in the winter!
Remember the flue on the workshop? The one for which I built this snow front breaker so roof snow slides wouldn’t knock down the flue? Well, snow didn’t do it this time, but I think a dead branch falling did. That explains the heavy dent on the top left of the second to last section. Snow definitely didn’t get that high and there was a guilty-looking branch on the ground nearby.
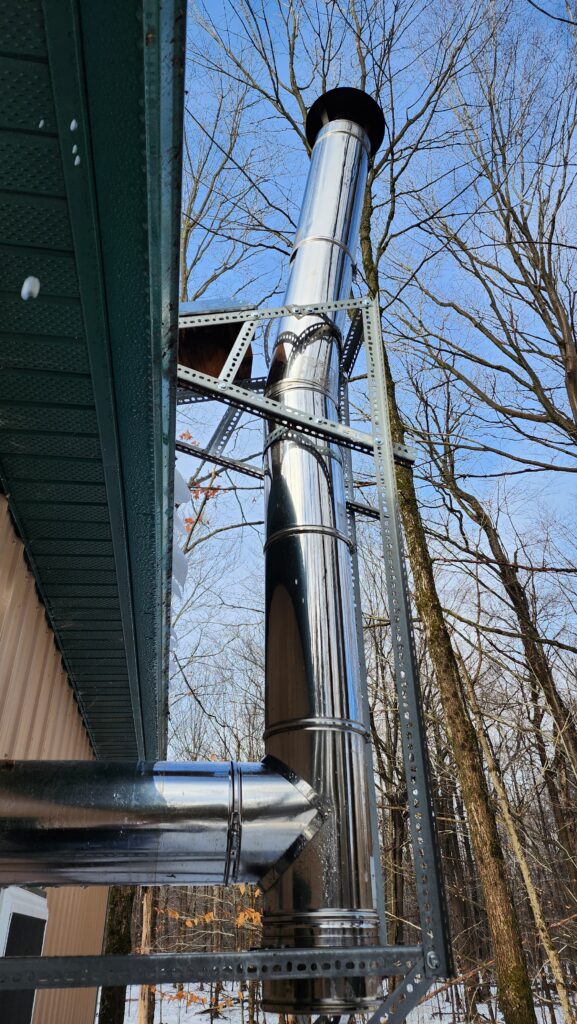
The locking features at the bottom of the impacted section were destroyed to the point that I could not just right it and re-attach. It had to be replaced. In winter. Fortunately, I’d left the service platform in place, so there was somewhere to set the ladder. Without it, there’s just a slope of rocks – not exactly solid footing for ladder work.
Still, there’s not a lot of room for error up on a ladder in winter, so it was important to do this as safely as I could think to do.
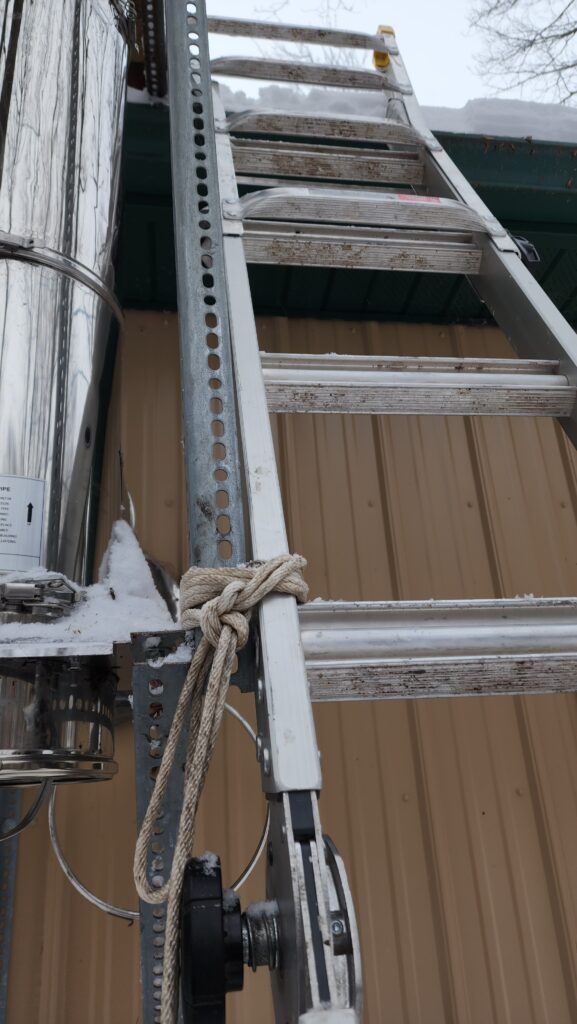
For starters, I tied the ladder to the snow breaker support cage. This would prevent it from tipping to the side, which it would otherwise be quite motivated to do as I maneuvered heavy flue sections (these are insulated, double-wall modules that weigh a fair bit each) highup.
The bottom of the ladder was secured by the end stop on the service platform.
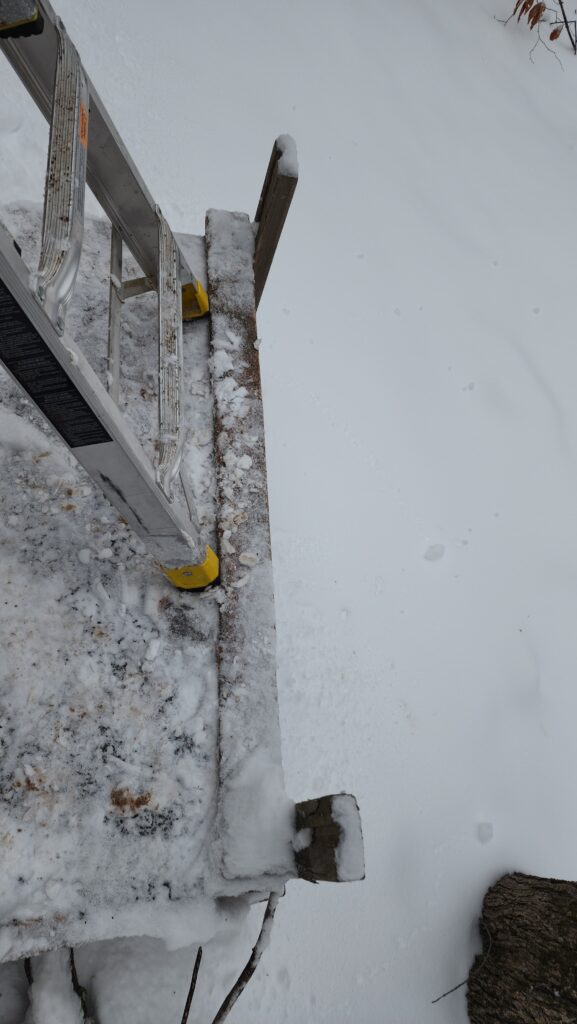
And that’s what it looked like after I cleared as much snow and ice from the platform as I could.
The next trick was going to be getting the new section in place and then putting the cap back on. It would be too heavy to move all of this together as a single unit. However, it turns out that the top end of the ladder was a perfect place to park the last segment and chimney cap!
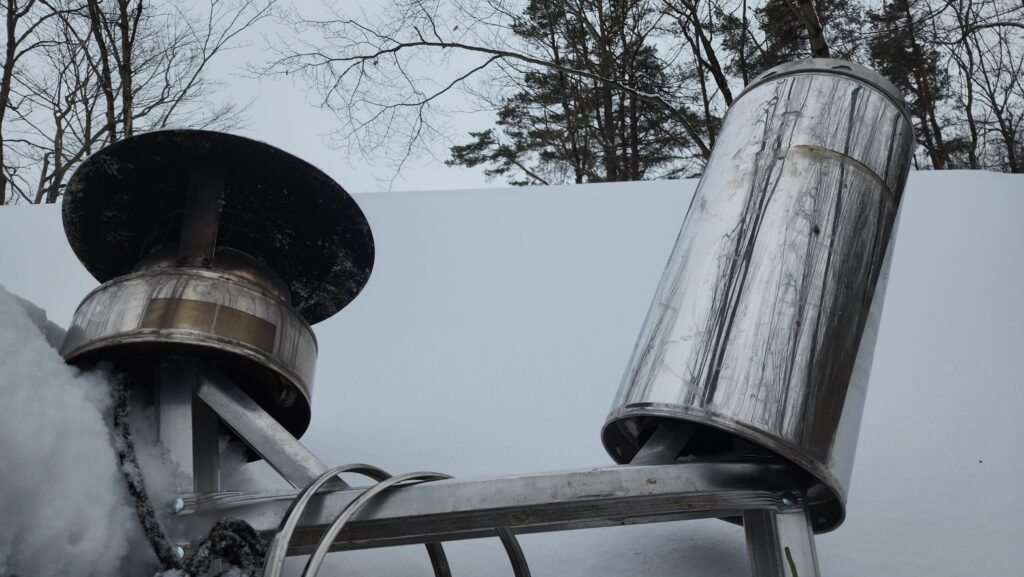
… which I would install to the new section once the new section was lifted in place. Or nearly.
But how to get that 4-ft long, 10″ diam, smooth cylinder up 12 feet in the air, safely, without trying to carry it up the ladder? I had an idea. Put a rope through it with a cross bar, then just hoist the whole thing up a little at a time, using the cage frame as a belay.
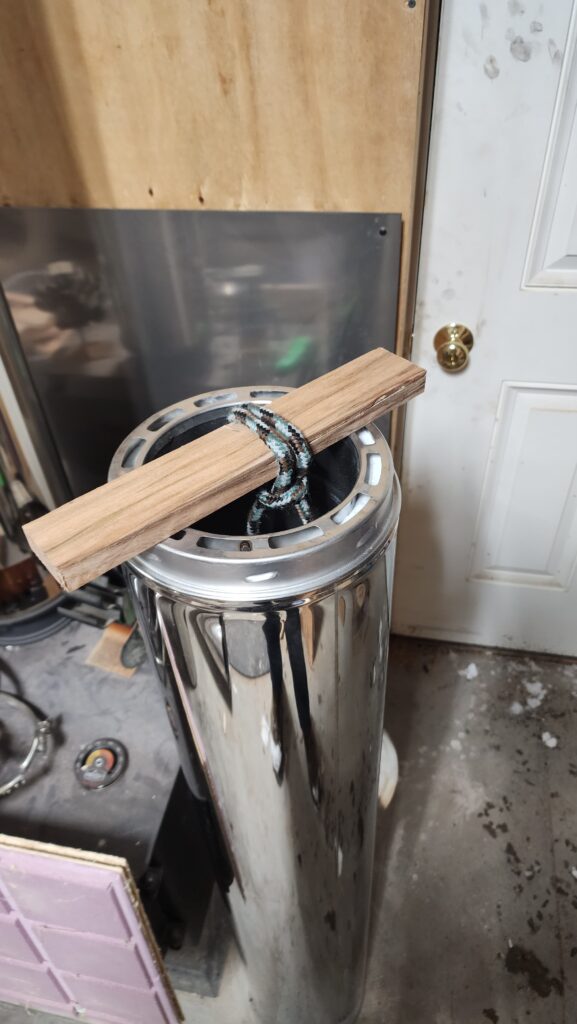
This let me pull the section up a little at a time, then tie it off to rest if fatigue set in. This worked well. Once the bottom of the hoisted piece was even with the horizontal section of the flue below, I set the bottom of the piece on that horizontal section, jamming it against the building wall. That relieved the weight and gave me a chance to position it through the upper part of the cage. It was precarious, though, and did fall one time. Thankfully, it was no damaged in the fall (onto soft snow) and all I had to do was re-execute the hoist maneuver again and just be more careful the second time not to dislodge the section as it bore on the curved surface of the horizontal flue section. Carefully, then, I installed the top flue section to the new part (still balanced on the horizontal part), and the chimney cap.
With the top section now fully assembled, it couldn’t be lifted further with the rope because the whole thing was now longer and the top (where the rope exited) was out of reach. At this point, it was non-slip gloves and a bit of a jerk-and-catch motion to heave the whole thing upwards a few inches at a time until it was in position to mate with the lower flue parts. A bit harrowing, but I got it done the first time. Twist and lock and done!
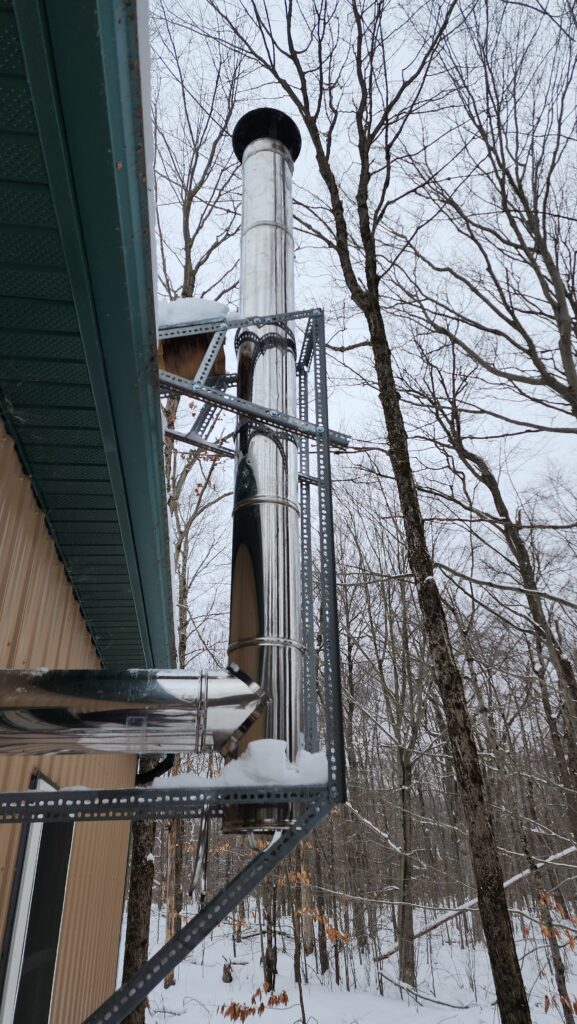
The extremely astute observer may notice that the former flue had two 24″ sections passing through the reinforced part of the cage. The new flue has a single 48″ section there. This eliminates a joint just below where the snow front breaker does its business. I’m hoping that this change makes it easier for the cage to secure the flue stack, since the stack is now monolithic through the important part of the cage. There are two straps that hold the flue steady in the cage, one each at the top and bottom of the triangular frame. Before, the lower strap secured one flue section and the upper strap secured another section, leaving the joint between them responsible for keeping them together. Now, there is a single section through the cage, with both straps on it and no joint between. This has to be much stronger.
Speaking of snow… sometimes the snow front on the workshop roof is positively menacing…
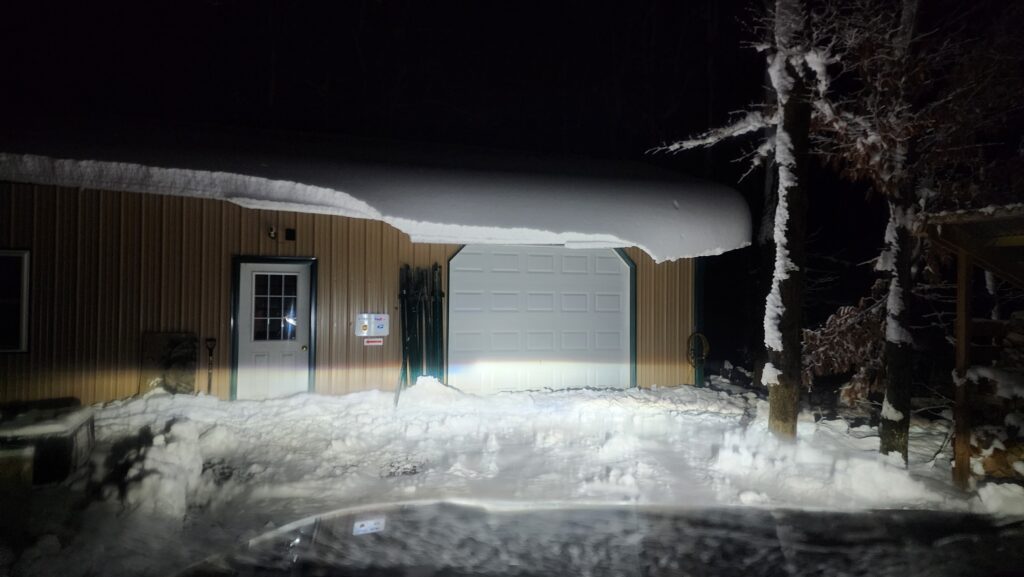
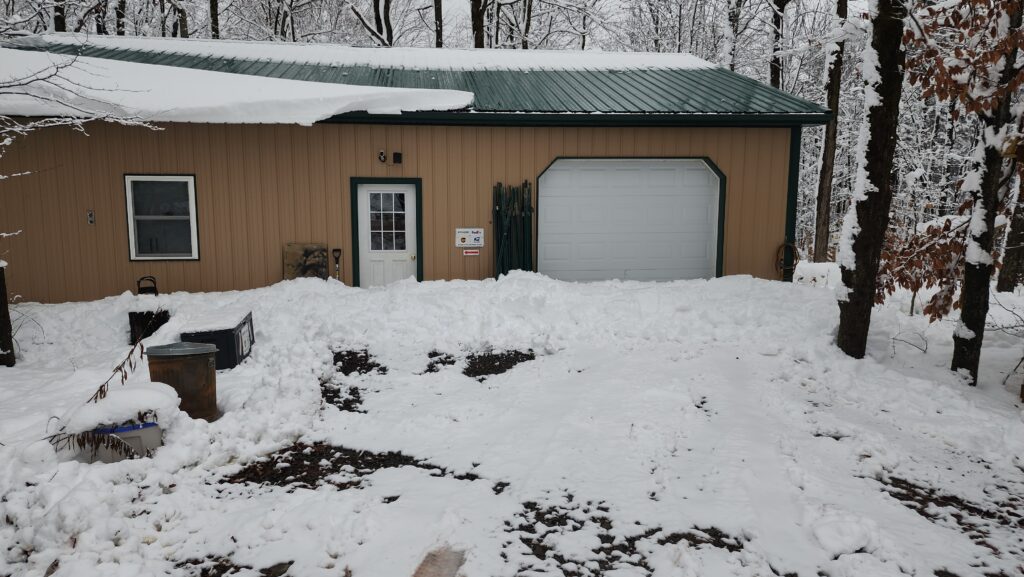
When I got home that night, I did NOT enter the garage. I was afraid that the vibration of the door opener would cause the heavy snow to slide off the roof and possibly damage my car. Or bury it. The face of the roof is 18 ft long. That’s a lot of snow behind that snowverang! And anyway, I wasn’t going to shovel that minor mountain already on the ground with that overhang above me. Not a chance in deepest, darkest heck.
Some time later, the snowverhang fell and then it was safe to remove the snow from the ground.
And because it’s winter, that also means it’s my birthday. And because it’s my birthday, sometimes that means I get a new machine for the wood shop 🙂
In this case, that was an industrial grade planer. Also known as nearly 600# of motor freight.
It’s tricky to deliver motor freight here. A full tractor-trailer is very difficult to back down my road, though it can be done in nice weather. When it’s snowy, not so much. A shorter “straight truck” is usually what I ask for when making the delivery appointment. These have a much better time backing in, though it’s still challenging. But the real challenge begins once they put the freight on the ground. It’s impossible to drive a pallet jack over the snow and ice and even if there were no snow and ice, what’s under that is just medium sized stones, which are just as good as stalling a pallet jack as the snow and ice. So I need another way to move hundreds of pounds.
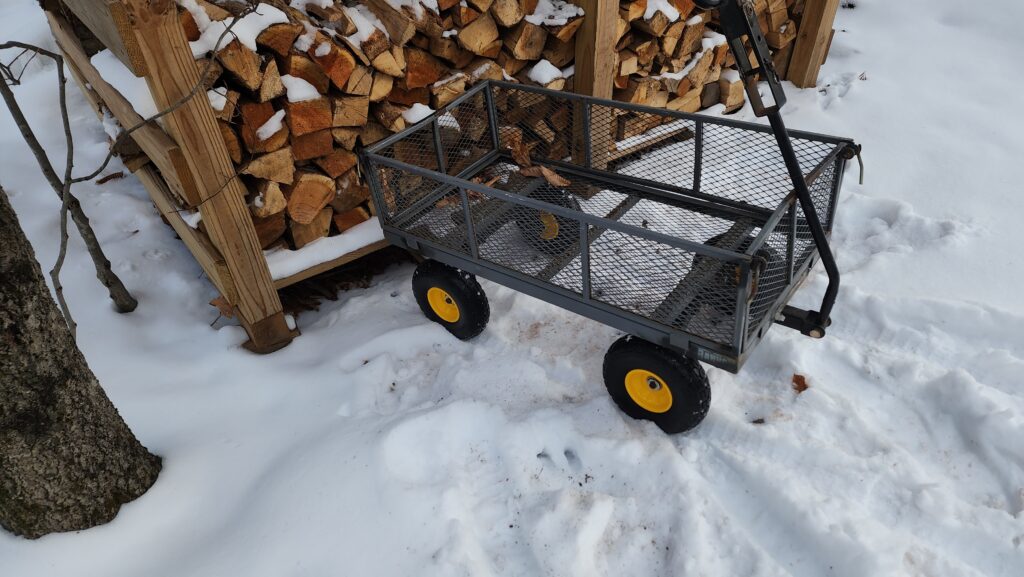
I have another way. I have a heavy duty garden cart that is rated for 800#. It’s received motor freight right off the lift gate many times. This new machine, though, was unlike everything else that’s ever been on this cart. The machine is narrow and tall, with the heaviest part at the top, so it really wants to tip over.

So I have the driver land the crate on my little cart and that’s a bit precarious, but we get it done.
With his help steadying the load and pushing a bit, I pull like mad on the cart handle and we get the thing to the garage, where there’s a significant step up from the ground level to the concrete floor level. I’m sure the cart can’t take the step with the heavy load, so I grab some plywood to use as a makeshift ramp. It’s still going to require some momentum to just ram the thing up and over. So we do that. And it works – the crated machine is now in the garage. And one of the tires on the cart has blown out at the side wall.
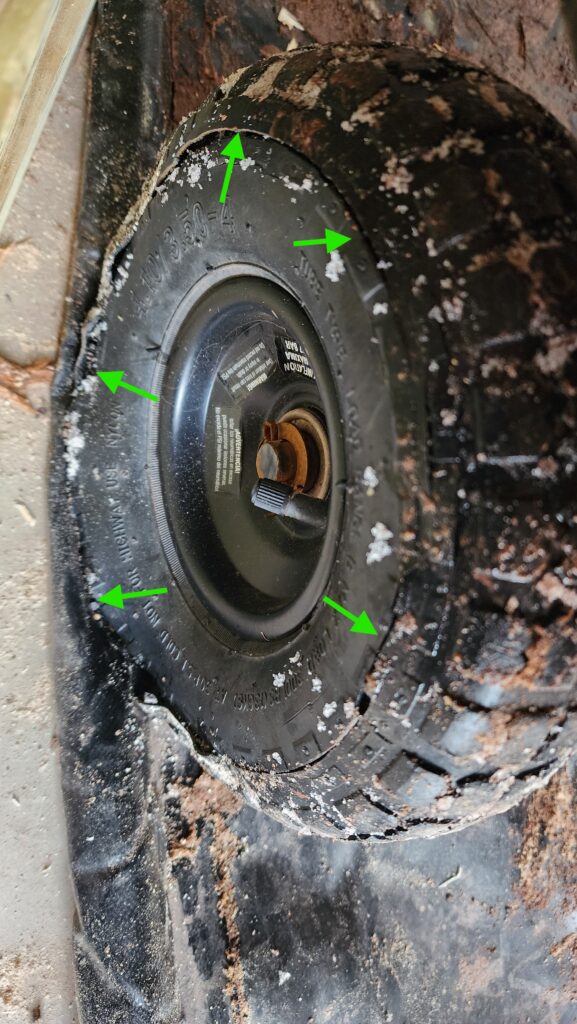
See that radial crack at the green arrows? That used to be solid. But at least the thing is out of the weather. But now the real challenge begins: how to get this thing off the cart? Every other time I’ve had a heavy load on the cart, I’d just tip the cart back and slide the load carefully off the back. That works for wide loads, but this tall load would definitely fall over if I tried that. And falling over is bad for precision machinery. If I had a gantry hoist, that would do it nicely. But I don’t. I’ve actually considered buying one from time to time, but every time I do, I think to myself, “but that was the last big machine I am going to buy, so there’s no point buying the hoist now”. That’s happened at least twice now. Maybe I should stop thinking I’m done…
But today there was no hoist.
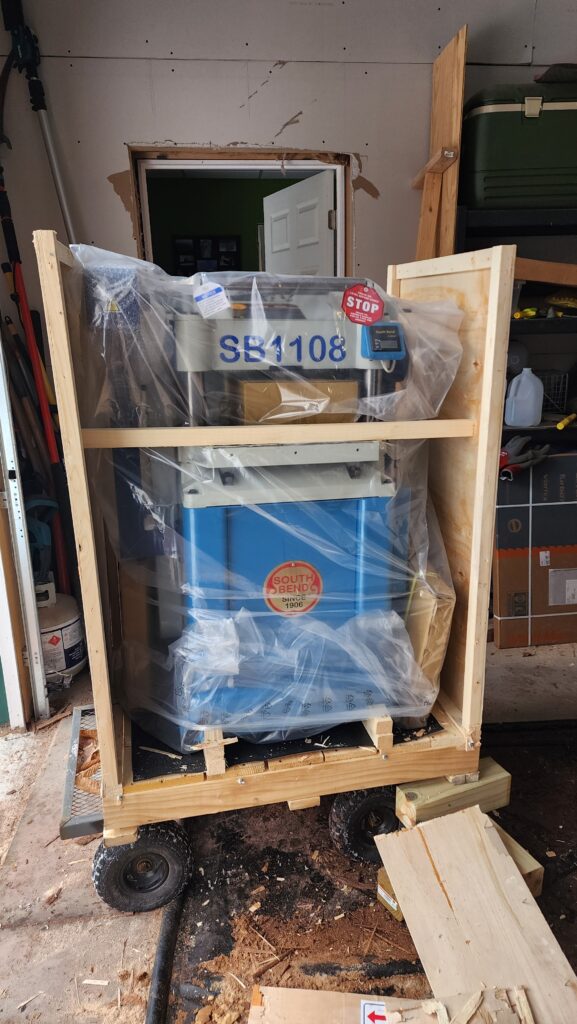
If I had two strong helpers, they could steady the load as we worked to slide it gently off the cart. But this thing weighs nearly 600# in the crate, so it’s definitely a big deal to control even the slightest bit of tipping and sliding. And I didn’t have two strong helpers. It was just me. And no hoist.
Well, the first thing was to get as much of the crate away from the machine as possible (make it lighter and easier to control) and then get the cart out of there. The cart can tip and slide (has wheels, even if one of them is blown out) — I definitely don’t want to involve it in the landing of this machine.
Okay, then. Step one, slide some 2x4s under the machine and then jack it up carefully onto blocks so I can get the cart out of there.
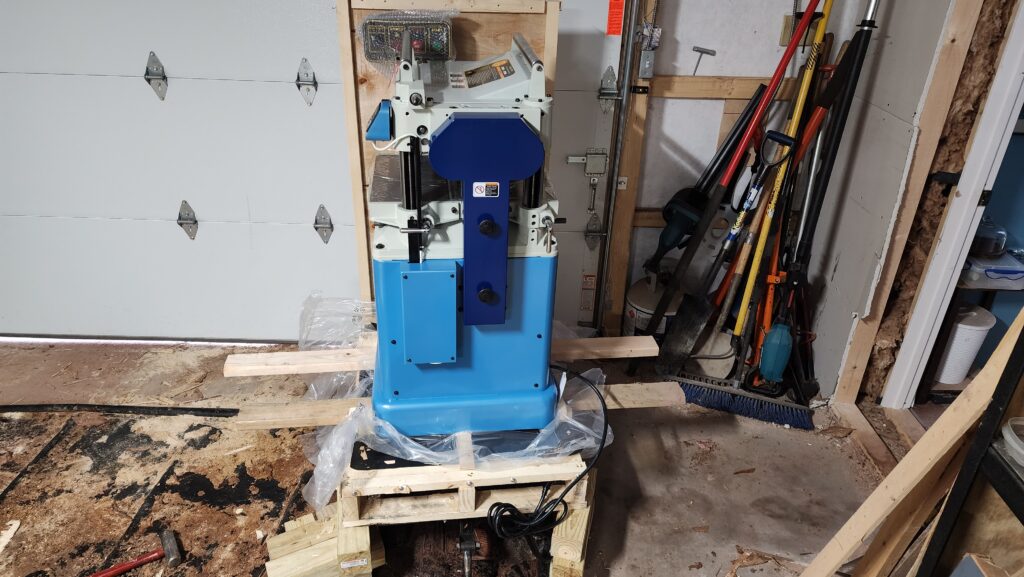
Bottle jack to the rescue!
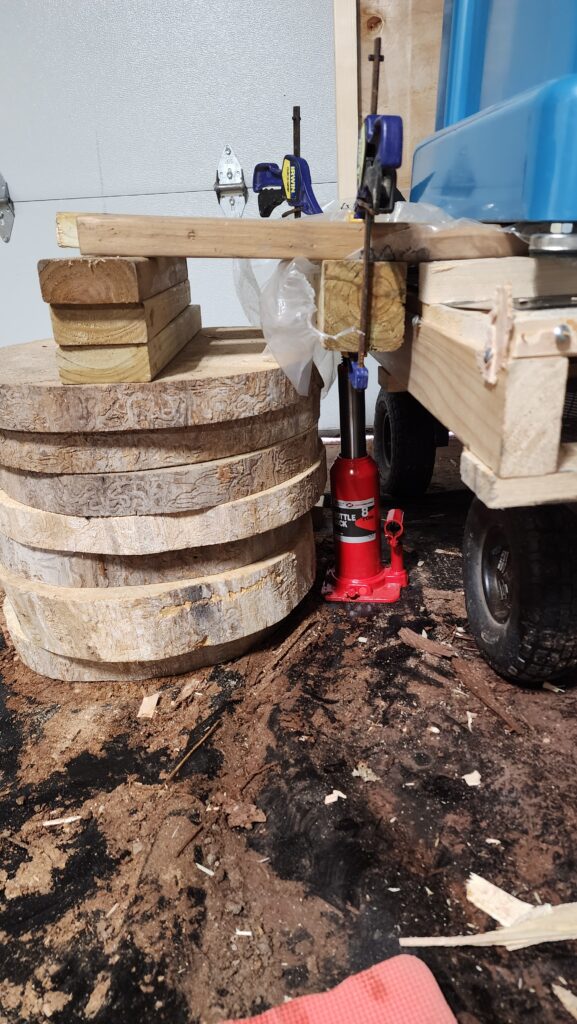
Do that carefully on both sides, then slide out the gimpy cart.
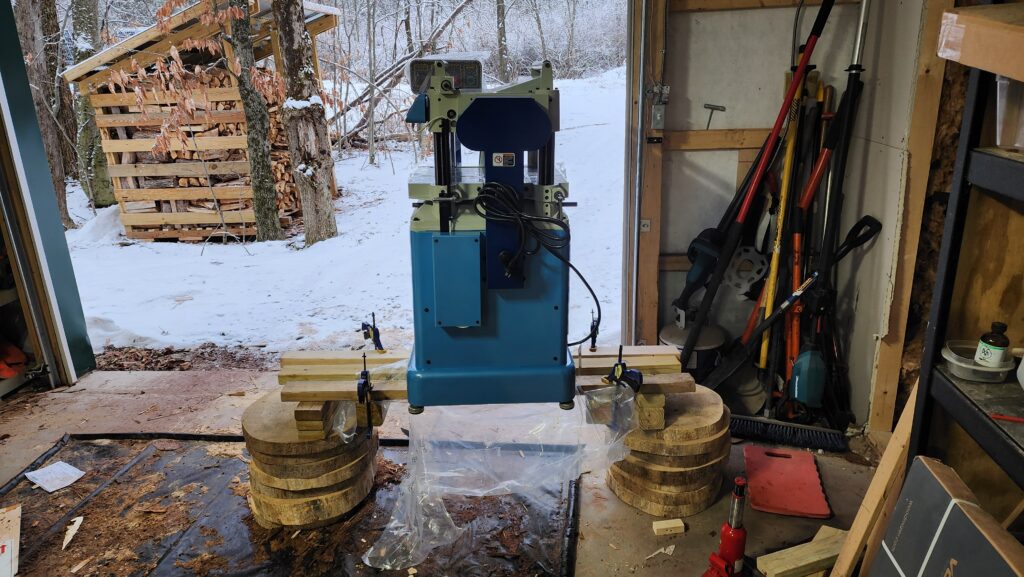
Great, now I have a 500# machine 18″ in the air, balanced precariously on three 2x4s. I do not want it to stay this way for long. But how to lower it down gently?
Well, the first phase involved the bottle jack holding up each side in turn, as I removed some of the support blocks, then lowered the whole rig onto the remaining blocks. Doing this definitely had the machine lean left and right as I went. I was careful not to do too much at a time, so it stayed relatively safe.
After a few cycles of this, the bottle jack was too big to fit under the system, but it still had quite a bit further to go. The scissor jack for my car was able to take over for a few more cycles.
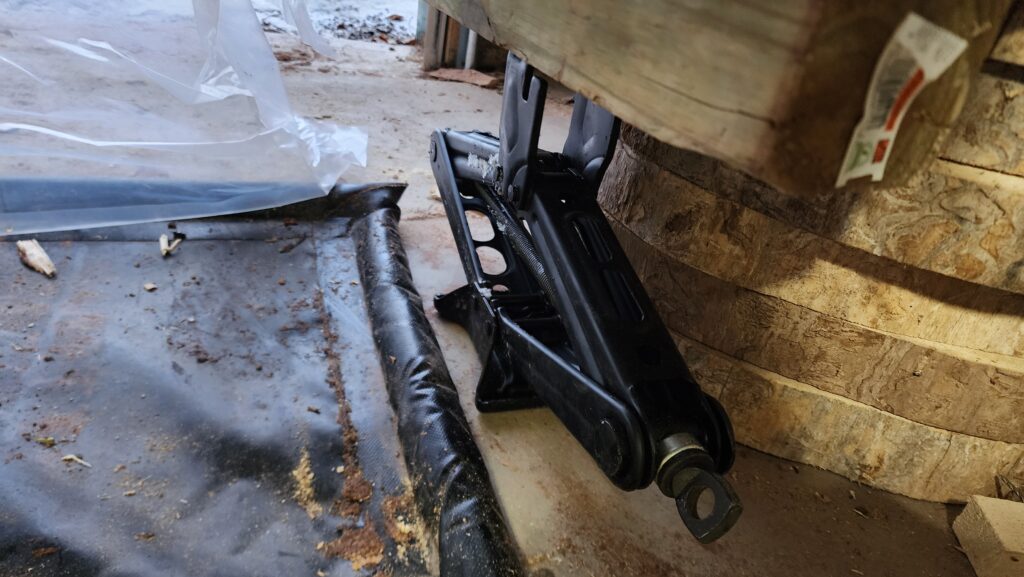
But after a bit, even that was too tall to keep going. The whole thing was quite a bit closer to the ground, but still too far.
Next up, heavy duty clamps that also work as spreaders. These were good for another one or two cycles only, before they, too, were too big to fit in the gap between the 2x4s and the floor. Note that in order to lift one side by the 2x4s, I needed another piece to span them that the jack would be lifting. You can see the end of a 4×4 I used for this in all the jack photos. The photo below was posed (without a 4×4) after the spreader span was exhausted.
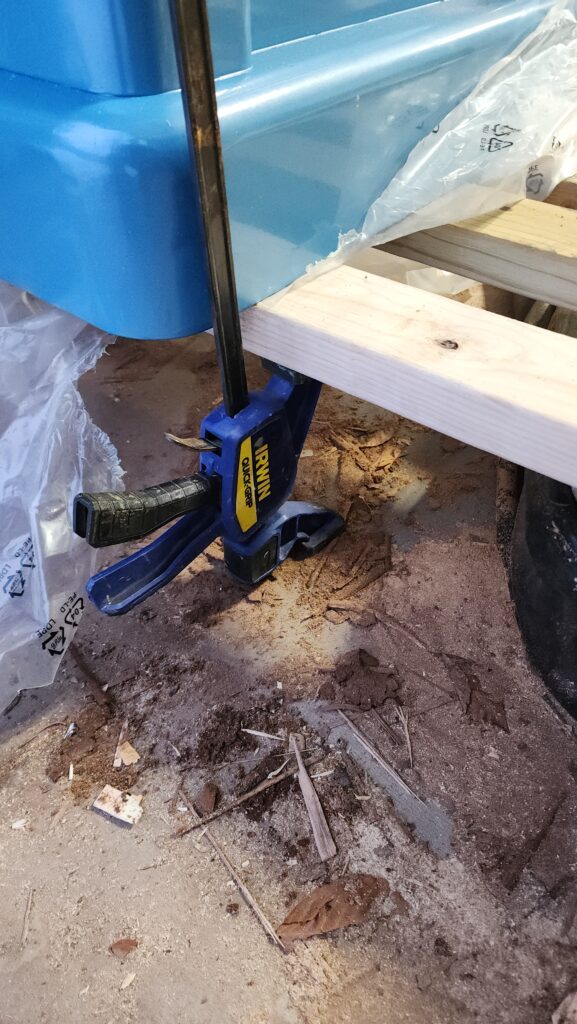
Now at the height shown below, there was no room for a 4×4 and any kind of lifting device. Time for a very precarious game of Jenga.
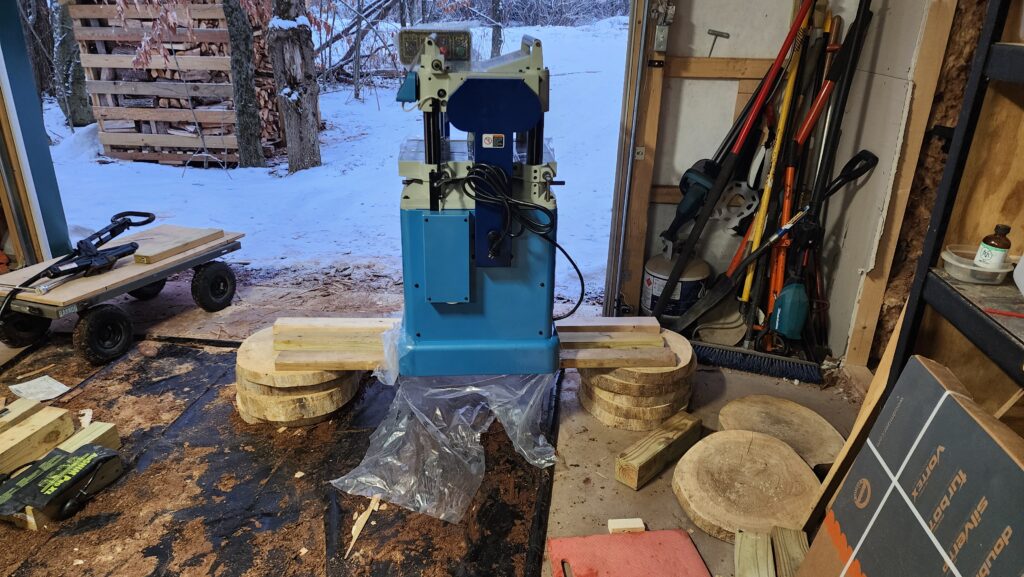
Really? Yeah, really. Using a 4# hammer, I “carefully” knocked out the supports, one level at a time, while using my other hand to steady the machine. A stack of blocks underneath would catch it if it went too far, probably.
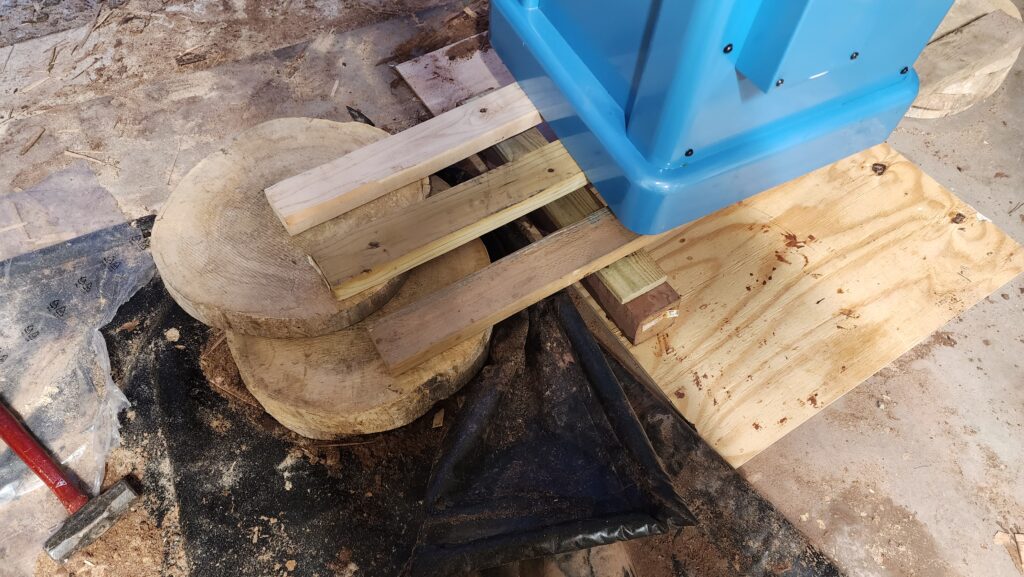
One support round knocked out per side. Then again. Until finally it was almost at the ground. The final landing did involve some tipping. I rocked the machine back, kicked out one of the 2x4s, then somehow managed to land an edge on the ground.
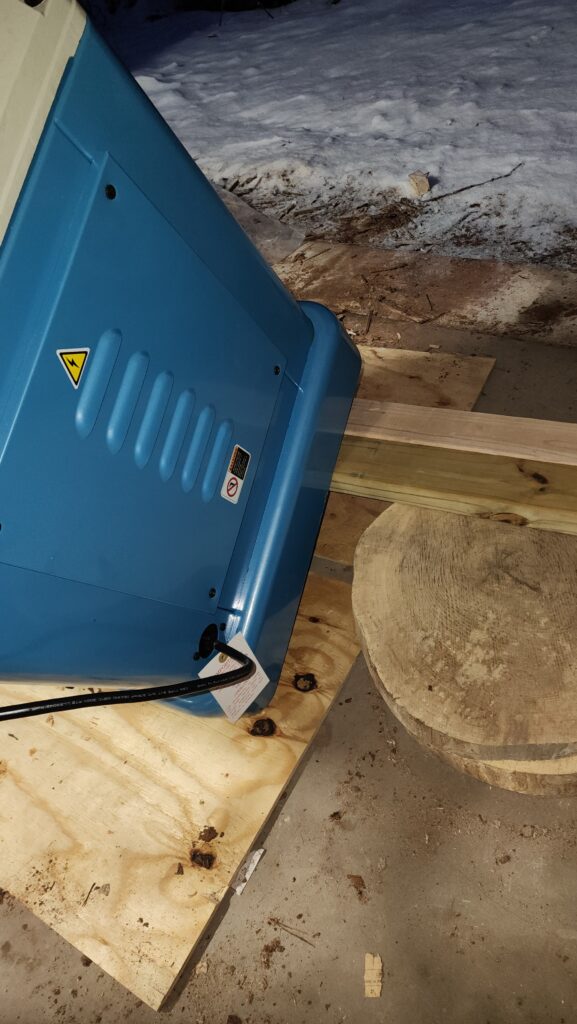
Which I could then use as a pivot to tip it just a little further, kick out the back 2x4s and now the machine was landed on the plywood. Great! Safe and sound on the ground.
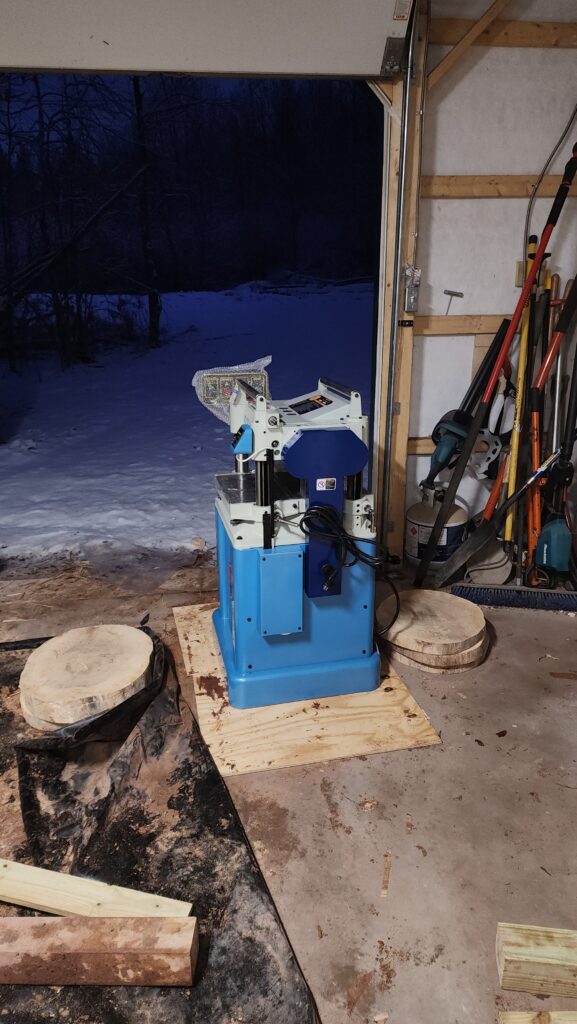
Except now this 500# machine is sitting in my garage, not in place in the workshop. It is no longer precariously balanced on 2x4s in mid air, but it definitely has some traveling yet to do! How?
Well, I thought of that already. I bought a roller dolly base for it. The trick is now getting the roller dolly under this machine. Fortunately, the dolly design is such that it can be fit around a machine already on the ground, as long as one can tip it a bit, which I certainly could.
With a pry bar, some blocks, some 2x4s and pivots, I get the frame of the dolly around the base of the machine.
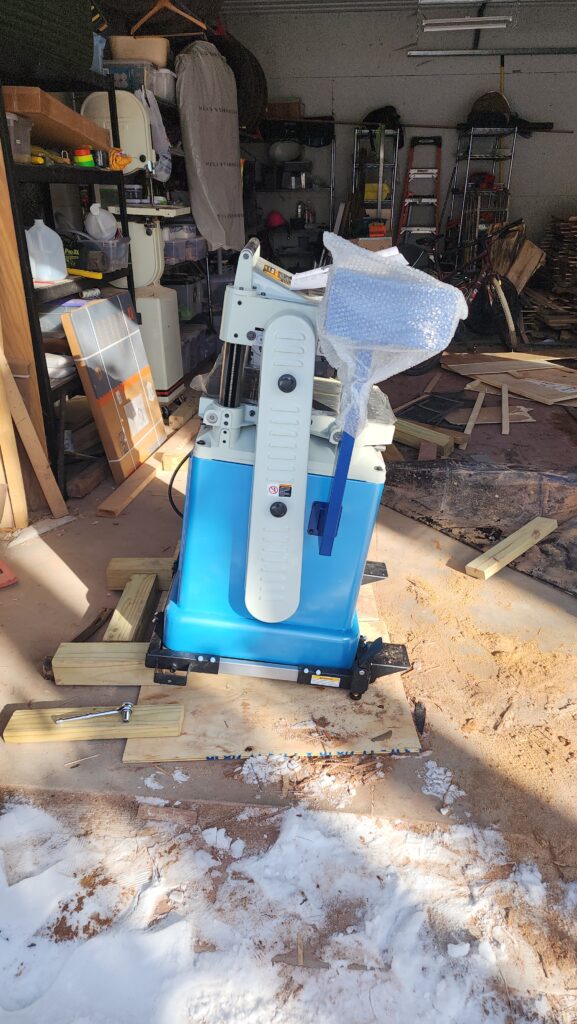
I still need to install the wheels to the dolly. That’s when things get fun, since obviously tipping the whole rig when it’s got wheels is going to send it rolling!
Well, not if I put a tall enough block in the back, which I do. But then I need to lift up the front kind of a lot to get a suitably tall block under there, to provide clearance to install the wheels. This is what I came up with: a see-saw to lever up the whole machine, which I would have to steady with my hands when it was up on its hind quarters. While it is up, with my right foot on the lever holding the whole thing in the air, and with my two hands keeping the machine from falling, somehow my left foot had to just kick the 4×4 under the dolly frame so I could release the lever, rest the frame high on the 4×4, giving me enough clearance below such that I could install the wheels.
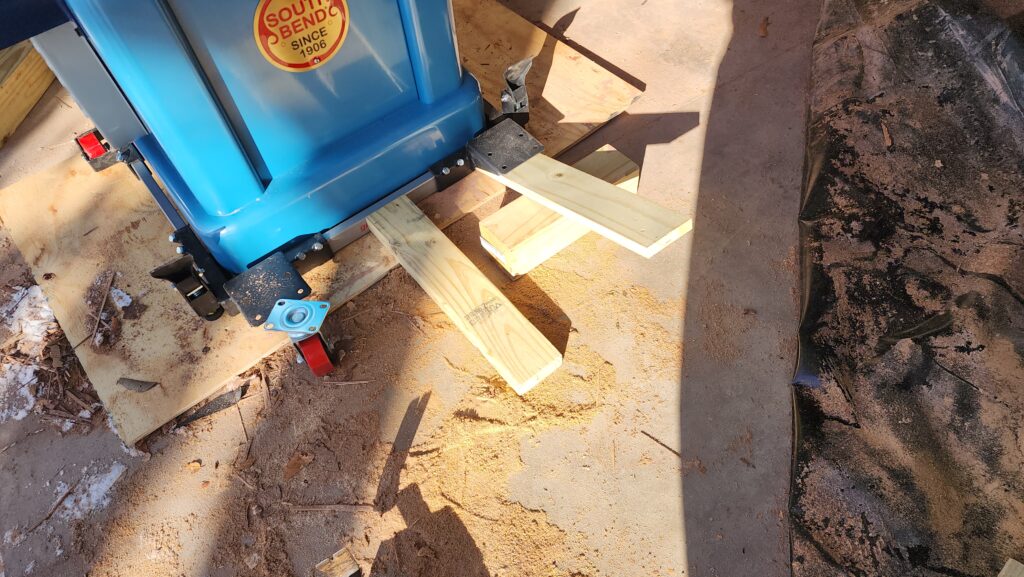
So how, exactly, do I do this? There was definitely some hopping and balancing involved. And possibly some magic. But it got done and nothing fell and nobody got hurt.
What turned out to be a few hours start to finish, the machine was safely landed from the cart and then the roller dolly was built around it. Now it’s easy to move.
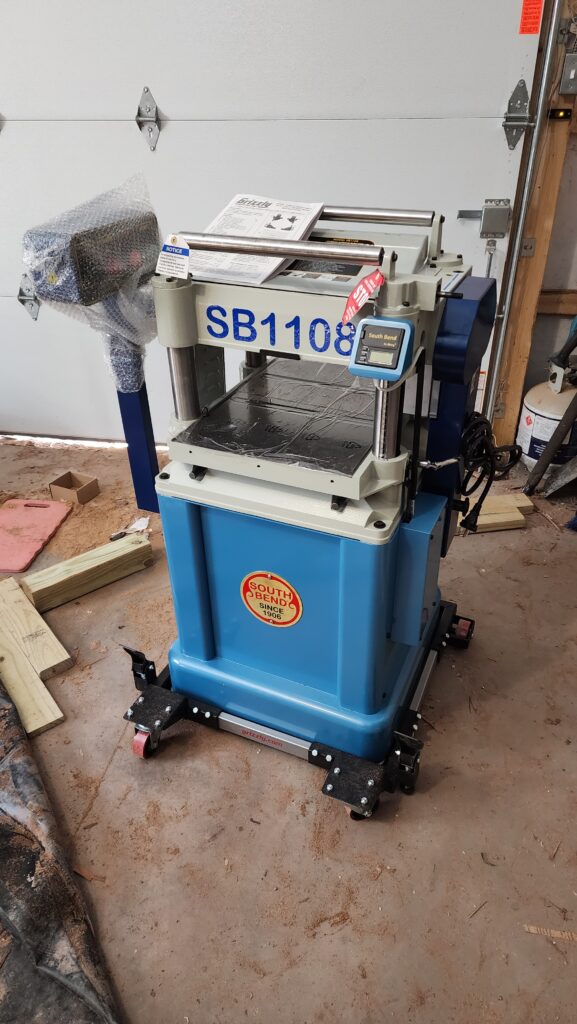
From here, it just rolls into the shop.
But don’t forget that poor blown out wagon wheel. I bought some new (non-pneumatic) ones and now my trusty, beat-up, old cart has stylish new wheels.
One other thing about winter in the north country. It gets dark early here. Early as in sometimes it’s dark before my friendly UPS and FedEx drivers actually get here. And there are no outside lights, so they’re delivering in the dark. I get a lot of deliveries because I live far from things and thus do nearly all my shopping online. I decided to do my drivers a favor and install a motion-activated outdoor light by the parcel box.
This starts with this three-part hole in the side of the workshop.
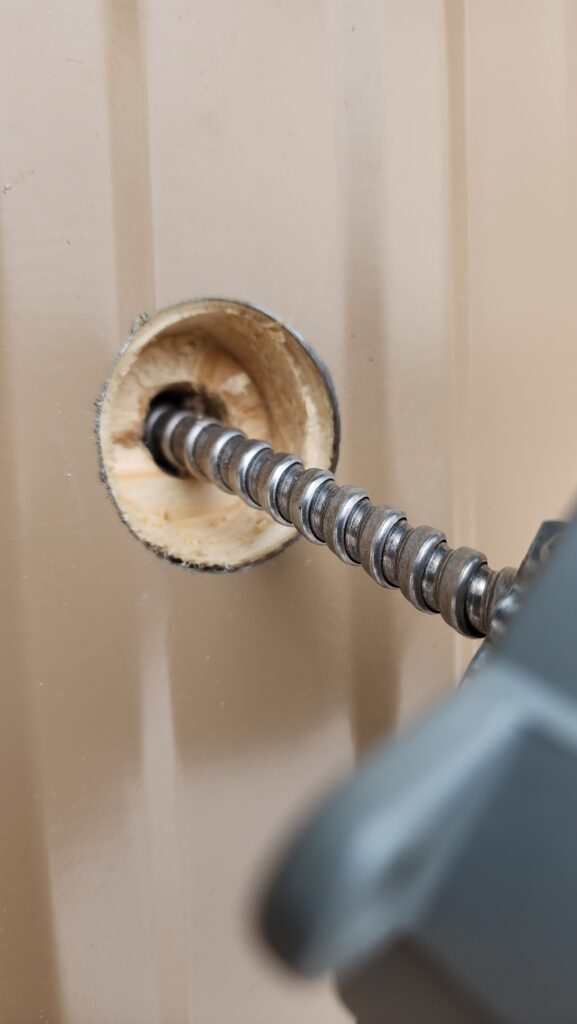
Three parts? Yeah, first, a hole saw to cut through the metal siding. Then a spade bit to dig out a recess, then a regular twist drill to make way for the cable. Why the recess? It’s for this cable clamp and screws.
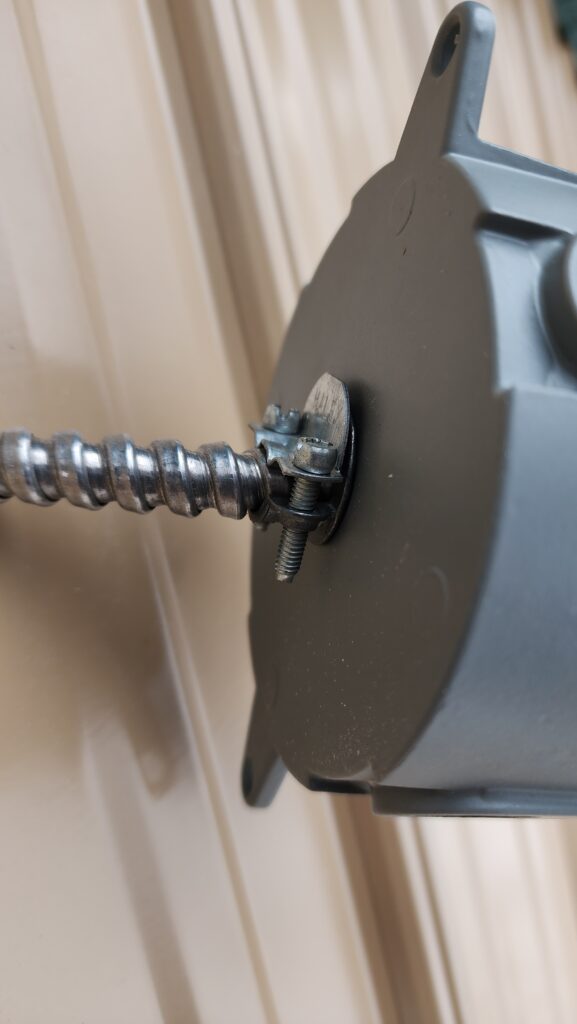
After drilling the hole but before the photos above, I went into the garage to see where, exactly, the other side of the hole turned out to be. I couldn’t find it!
Then I realized I had managed to land this hole edgewise into a stud wall. Of course I did. Fortunately, there was a convenient section of wallboard I could just unscrew to gain access. See the spot of light at the end? That’s the hole.
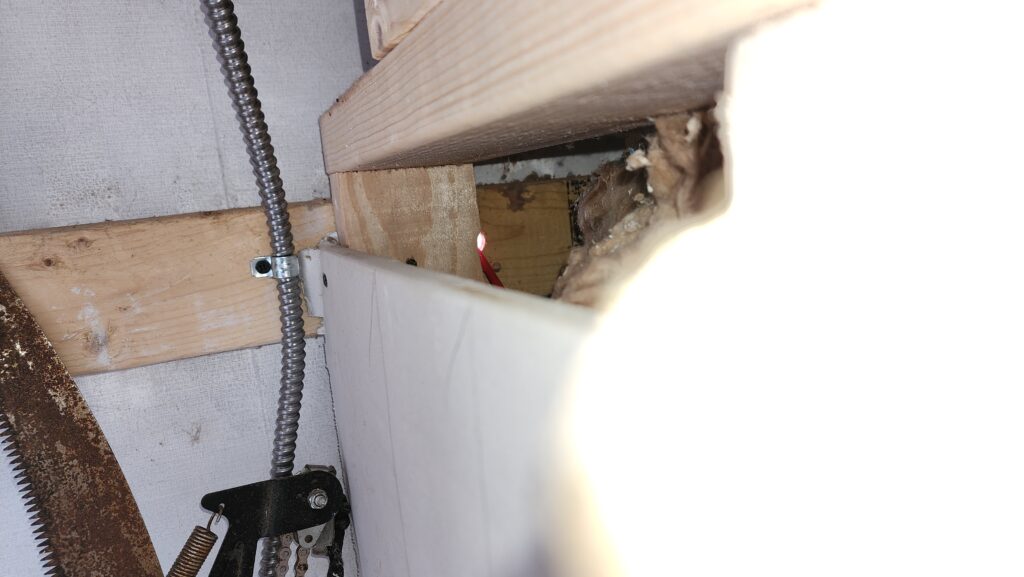
But it wasn’t altogether obvious at first, since I was at a different angle than this extremely oblique one. I didn’t see the hole at all from a more direct frontal vantage point. No problem! Time to enlist the help of a bright red drinking straw!
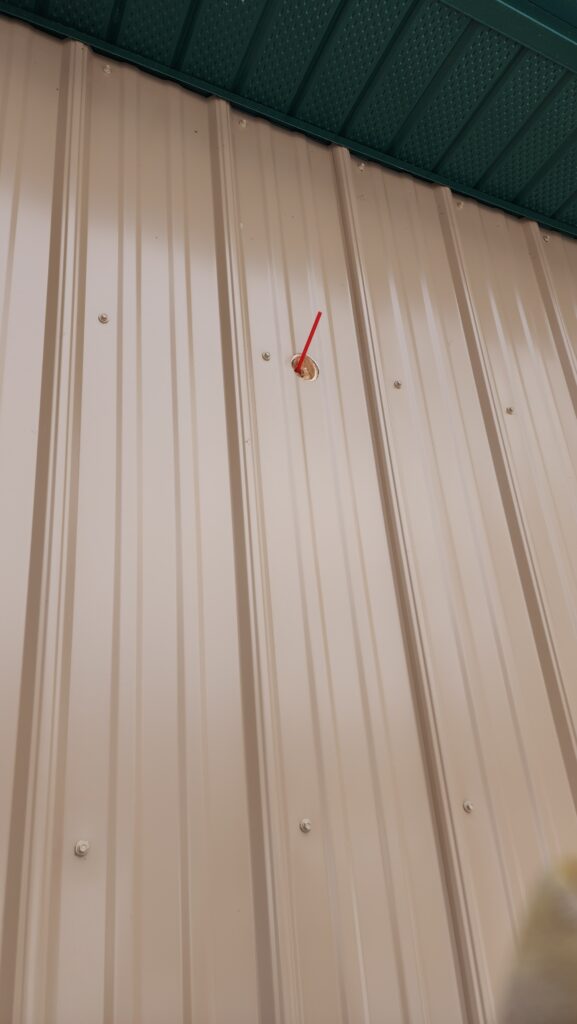
which was visible from the front of the wall. At that point, I located the hole, pushed the insulation aside, and took that sidelong photo before threading the cable through the hole, mounting the box to the outside wall, and sealing the thing up with silicone.
I’ll finish installing the light fixture outside and the wiring inside another day. It was getting cold and dark.
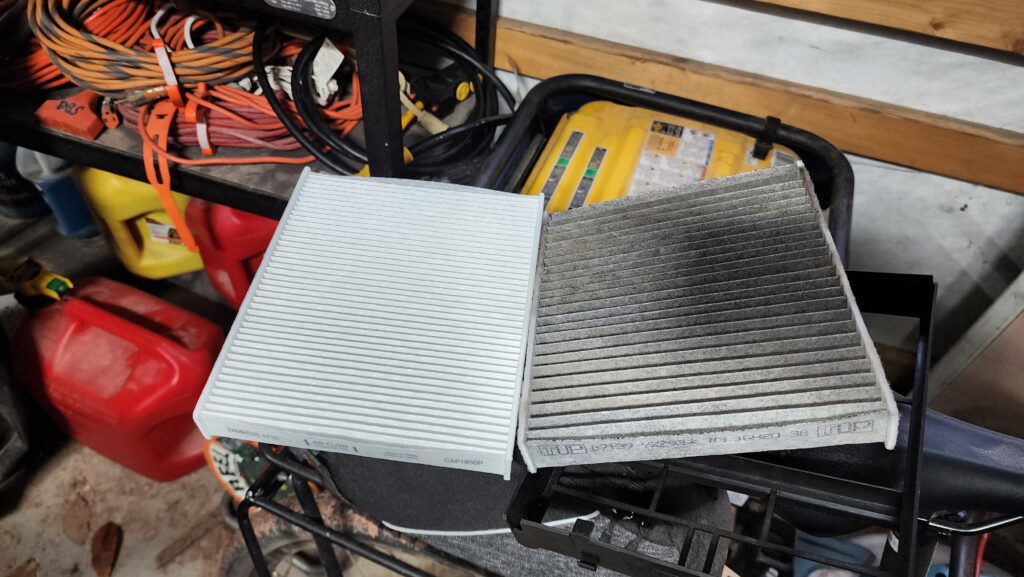
For today’s very random photos, I present two for your consideration. First, a reminder that it is vital to change the cabin air filter on your car frequently! This was maybe a year’s worth of dirt. . . and mold . . . and mouse poop. New filter on the left, for comparison.
And who says toilet paper can’t be fun? The folks at Who Gives A Crap had a fun mix-n-match idea for their winter season wrappings.
