It’s that time of year again – winter prep!
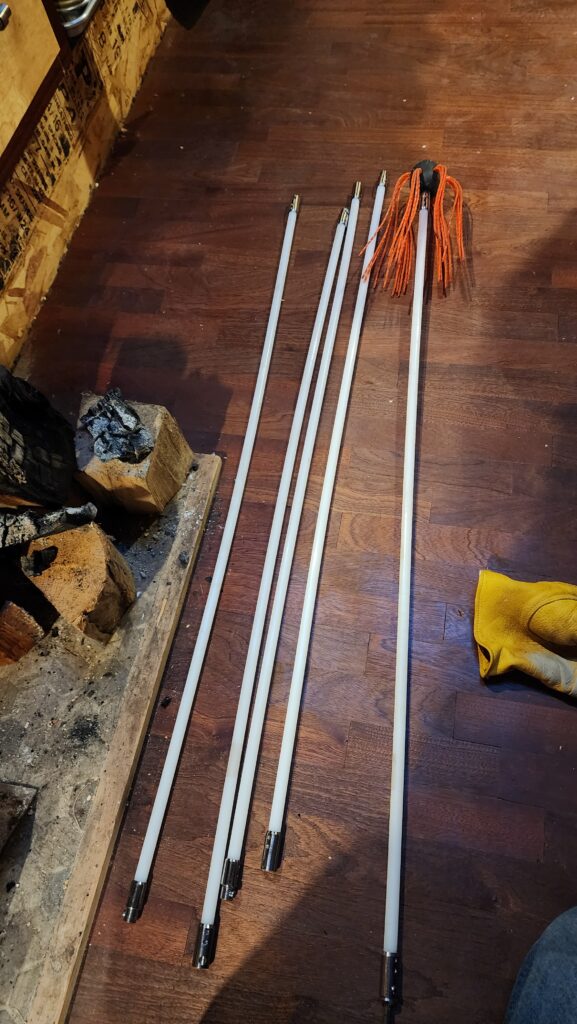
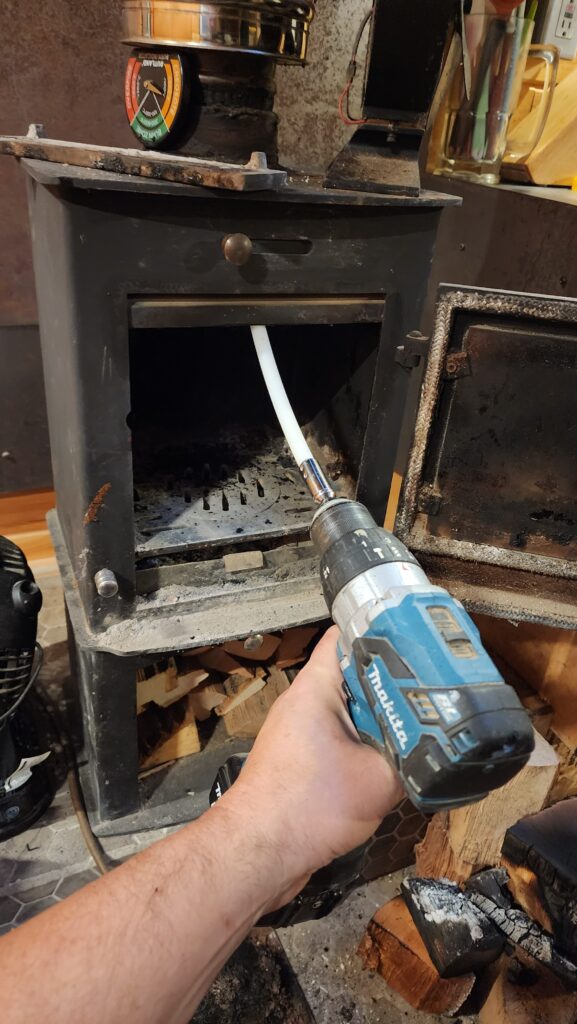
It starts with cleaning the flues for the wood stoves (one each, house and workshop), ahead of the season’s first fires. I love this easy do-it-yourself flue cleaning tool. Just send the orange sputnik look-alike up the flue on these fiberglass rods that connect together, attach the end to a drill and make it spin as you slowly bring the brush down (and remove segments of pole as needed). It does a great job and is really easy. And doesn’t cost me a house call every season.
This year, there’s one more thing on my winter list than there was last year: Bob. Who is Bob? Bob is my tractor. He needs some maintenance and it’s time to put on his snow chains… before it’s so cold my hands freeze trying to put them on.
Besides filling a bunch of small jars with honey to share my first harvest with family and friends, I also set 16# aside to brew a batch of mead, as well! It started out quite frothy, as the yeast was going positively bonkers with all that beautiful honey. The heater helps keep this little room (which is actually my office bathroom, alias “Executive Washroom”) nice and toasty to encourage the yeasties.
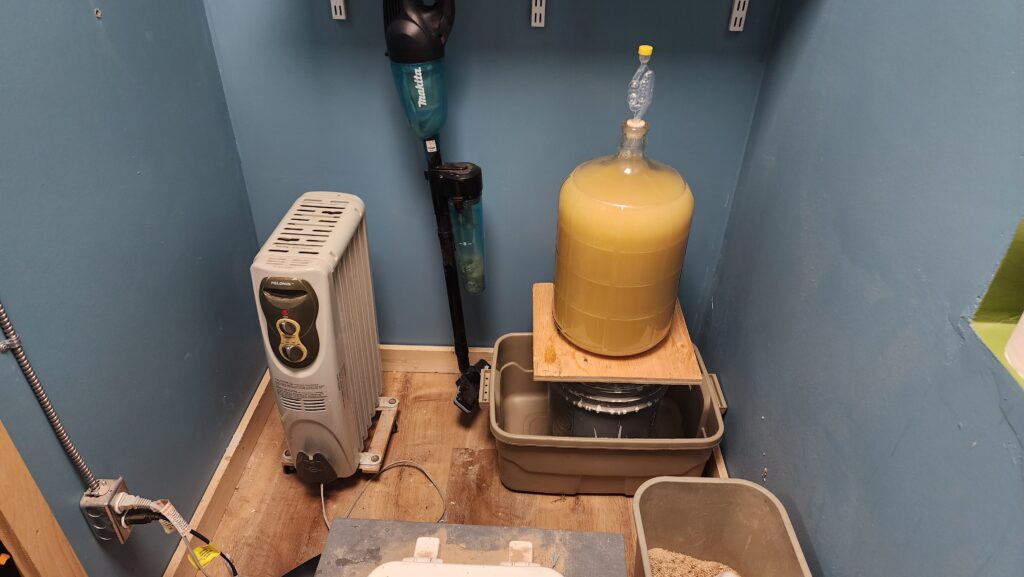
After a while, it settled down a bunch and began to clarify some.
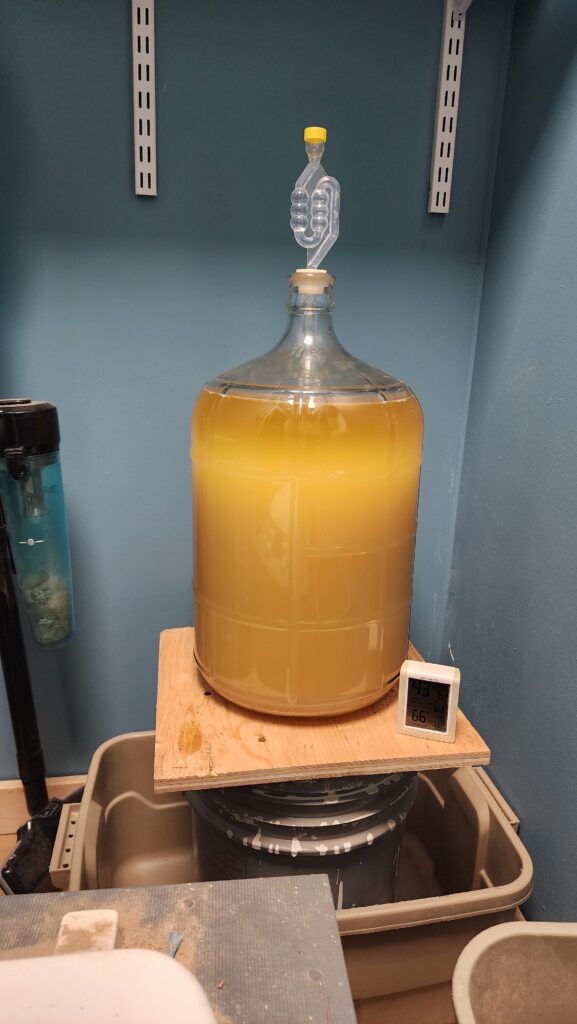
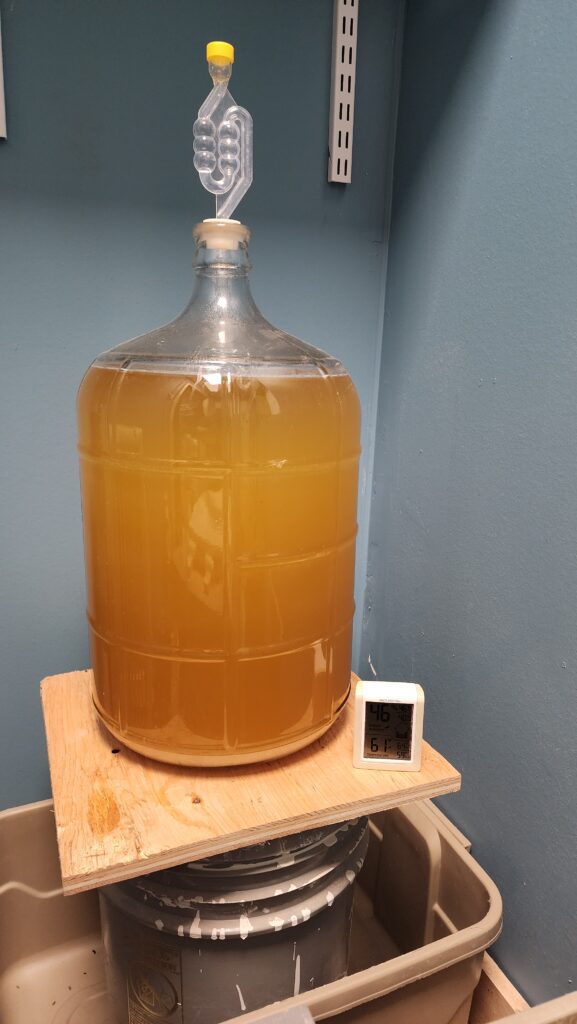
As of this writing, about 6 weeks after the batch was started, there is very little fermentation happening, but it hasn’t given up just yet. Though the recipe said it made a sweet wine, when I tasted it weeks ago, it was already pretty dry! And to think that the yeast just kept eating the sugar after that, I’m sure what’s in this carboy is going to be far drier than I like.
There are three things that will stop fermentation, as I have come to understand it (I’m new at this).
- pH goes out of range for survival of the yeast.
- Alcohol concentration is too high for the yeast (they die of alcohol poisoning).
- The yeast eat all the available sugar.
I did have a very low (acidic) pH after the first week, so I added some buffer, which brough the yeast back to high activity.
As for #2 and #3 – hard to say how that’s going at this point.
Realizing this batch was going to be much drier than I wanted, I did some research and learned that it is common to let the fermentation go as it goes and when it is totally done (yeast are dead), add some more honey to adjust the sweetness to taste. This seems like a fine plan, but I have a bit of a problem. I don’t have any more of my own honey and I certainly don’t want to use commercial honey in what was an otherwise 100% from-here brew. Hm. What to do?
Well, here’s the thing. It turns out that I harvested early. How do I know? Because the hives took on quite a lot of material afterward. Like a lot a lot. They were not at all done at that point. Two months later, all three hives were over 100# heavier than they were at season start, most of that being honey! I figured they needed about 50# to make it through the winter. So I did a second harvest such that Zero had about 70# on board after, One had 120#, and Two, my over-achievers, still had about 150# on board. This harvest yielded surprisingly much honey. And again, this is in addition to the 26# or so I harvested in September.
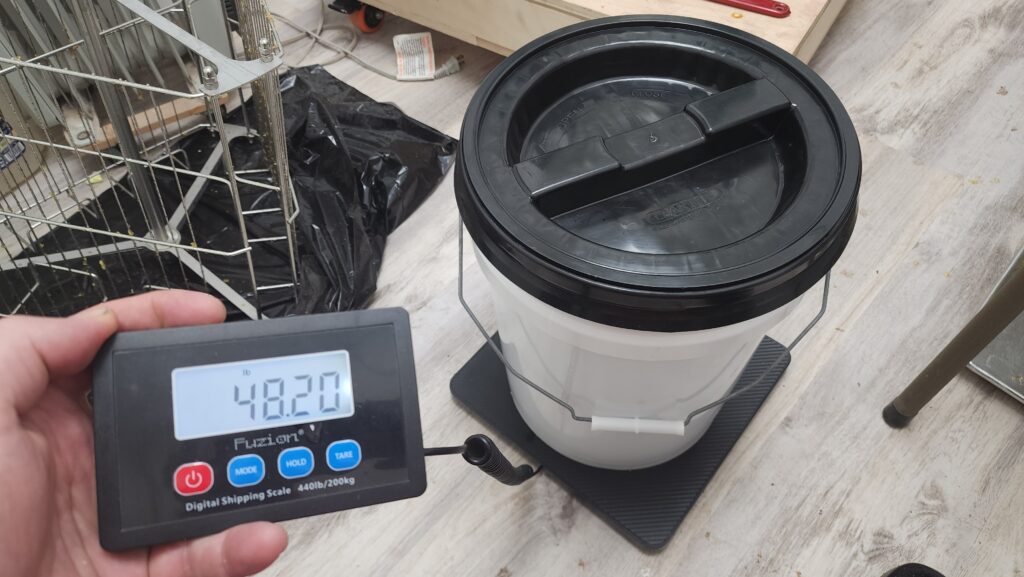
This bucket weighs about 2.2 pounds with the lid. So yeah, that’s 46 pounds of harvest. Or about 70 in all, counting the early harvest. From my three first-year hives. Who have between 70-150# in reserve after this. Amazing! I can’t wait to see how productive they are next year, starting with a full complement of honeycomb (rather than having to build it before they can use it).
This amount of honey didn’t quite fill the 5 gallon bucket, but it made a good show of it. Getting honey out of such a bucket is a big messy business, though. So I upgraded my buckets with honey valves.
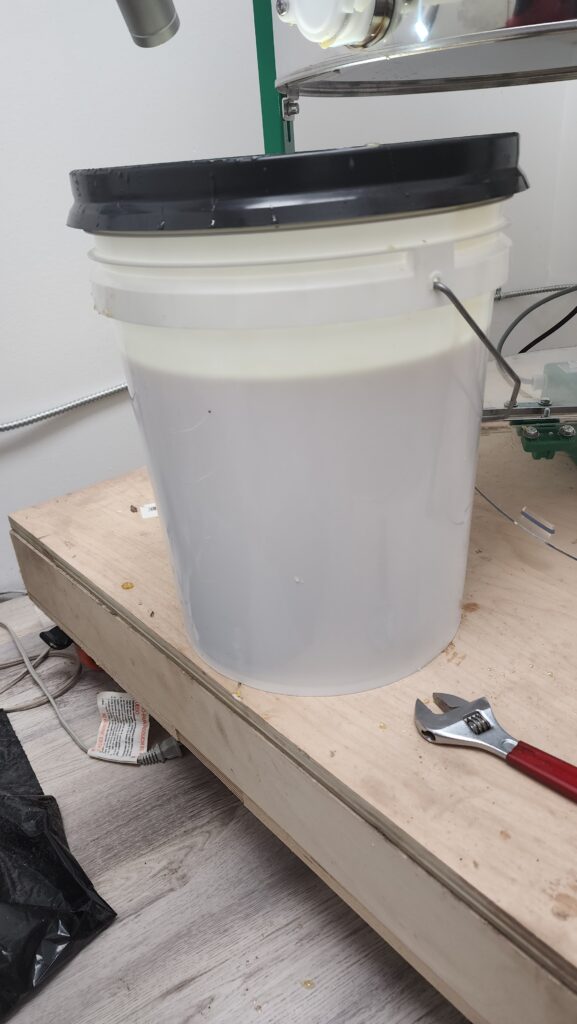
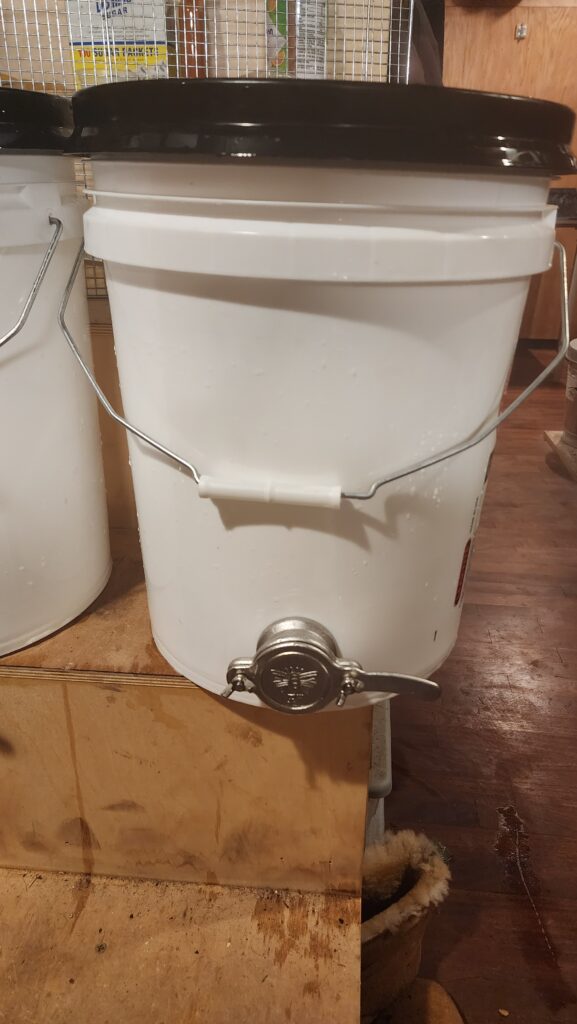
The slowest part of the honey harvesting process is filtering the honey. Even in a warm room (honey flows better when warm), it took hours to get all the honey through the sieve. I have since learned there is a far faster way of doing this. It turns out that if simply left alone, the wax bits will float to the top of a volume of honey.
See this container of wax cappings that separated all by itself over the course of a day or two. Clean honey at the bottom, wax flakes at the top. There is some wax stuck to the interior sides, which makes the bottom honey volume look less clean than it actually is.
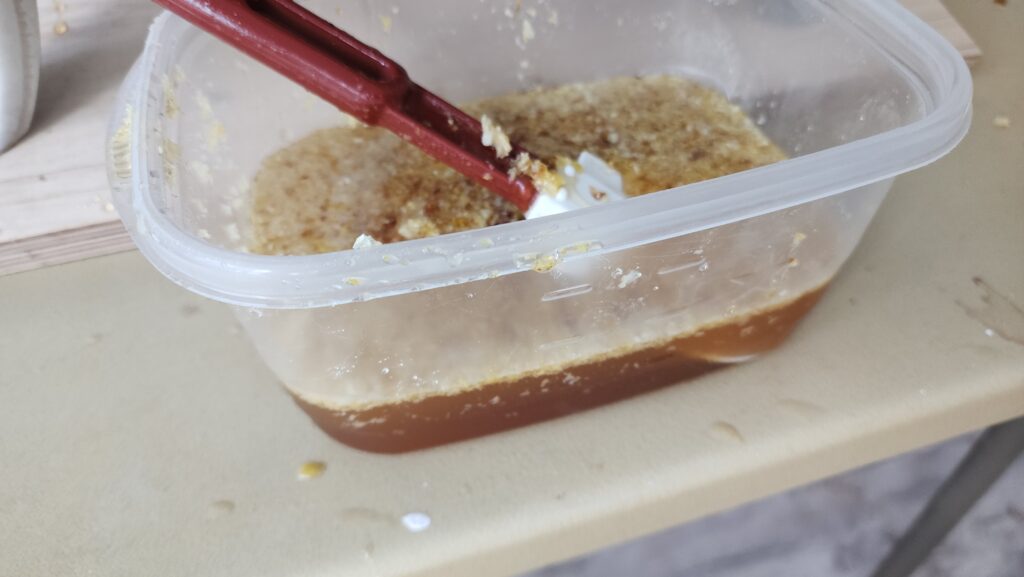
If one has a bucket with a bottom tap, say, then nearly all the honey will be free of debris until the end, and then you can filter just that last bit, instead of putting the whole batch through. That will speed things up considerably. Also, if I wanted to filter all of it, letting the wax rise first means the filter sieve won’t clog with wax until the end, so although slow, it will still be quite a bit faster doing it that way.
Okay, then, so now I have another big pile of honey! I could now use some of this to sweeten my surely-will-be-dry batch… or… I could let that batch be what it will be and do a second batch with a lot more honey, hoping to kill off the yeast with its own alcohol before it consumes all the sugar. That’s what I am going to do. Some people like dry wine – they can have my first batch. I am looking for something sweet, so I’ll try a second batch with 25% more honey.
I also have this spiffy new vessel for fermentation that I’m eager to try out!
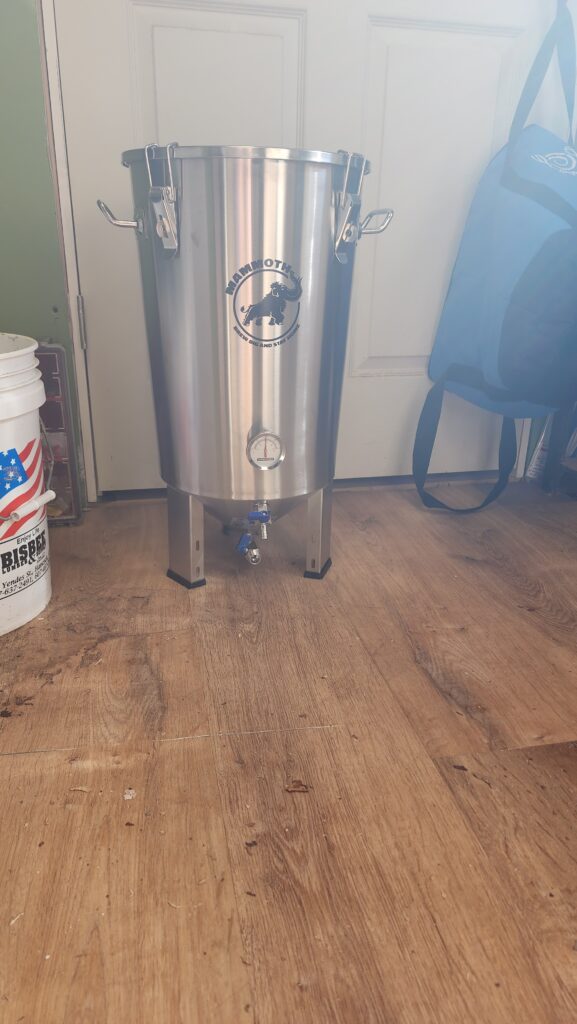
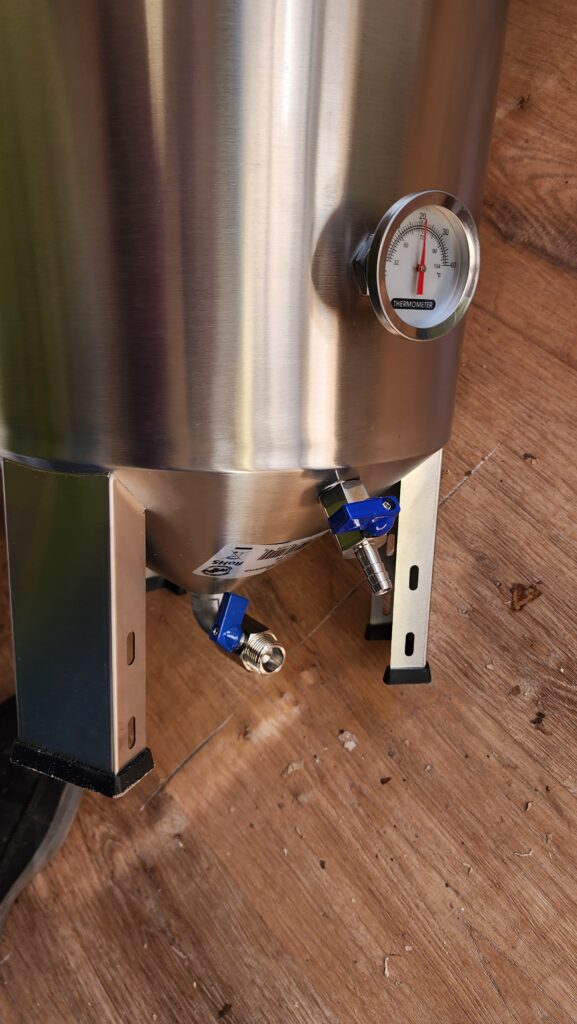
With the wide top (contrast with the narrow neck of the glass carboy), managing early fermentation’s foamy madness is easier (less chance of eruption), one can add pouches of herbs or fruit for flavor (and remove them) without negotiating the narrow neck of the glass, and, lastly, with the conical bottom and lower drain tap, removing sediment can be done in-situ, without having to siphon off to another vessel. The large lid also makes access for sampling/testing much easier.
I’ll transfer to glass after the initial fermentation frenzy settles down, so I can watch the brew closely during its final stage, to be absolutely sure fermentation has stopped before proceeding with the bottling process. Too soon -> bottle goes boom!
And speaking of process improvements, I had no idea that so much honey would be sticking to the wax cappings until I saw the honey separate out from it. Easily a couple of pounds! That’s definitely worth recovering. So I got one of these:
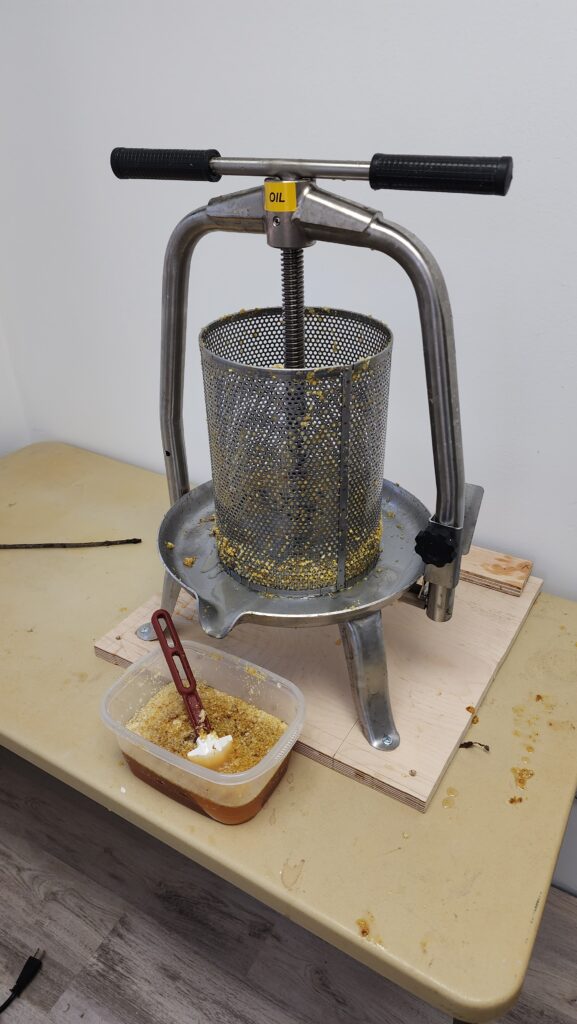
This is a honey/fruit press. The wax cappings are fed into the top and squeezed down to liberate most of the honey (making the wax easier to refine later). Pay no attention to the container with wax and honey in it – that’s material that hasn’t been processed yet, even though it appear to be in the catch position for the press.
After pressing, the wax is still sticky, but most of the honey has been recovered. This still isn’t enough wax to bother refining it, but after next year’s harvest, there should be enough to justify the messy process of refining the wax such that it could be used for candles or other things.
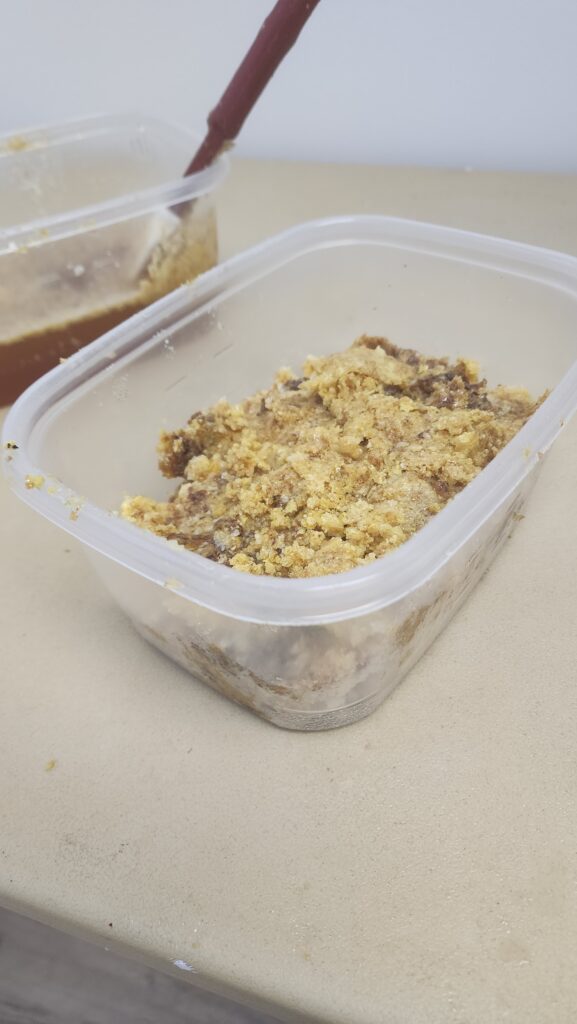
That was both Booze and Ooze, in case you missed it 🙂
There is more ooze to discuss!
For starters, it was time to change the oil and transmission/hydraulic fluid in the tractor. This turned out to be far more effort than you’d think, but not for obvious reasons.
Start with this invisible dipstick.
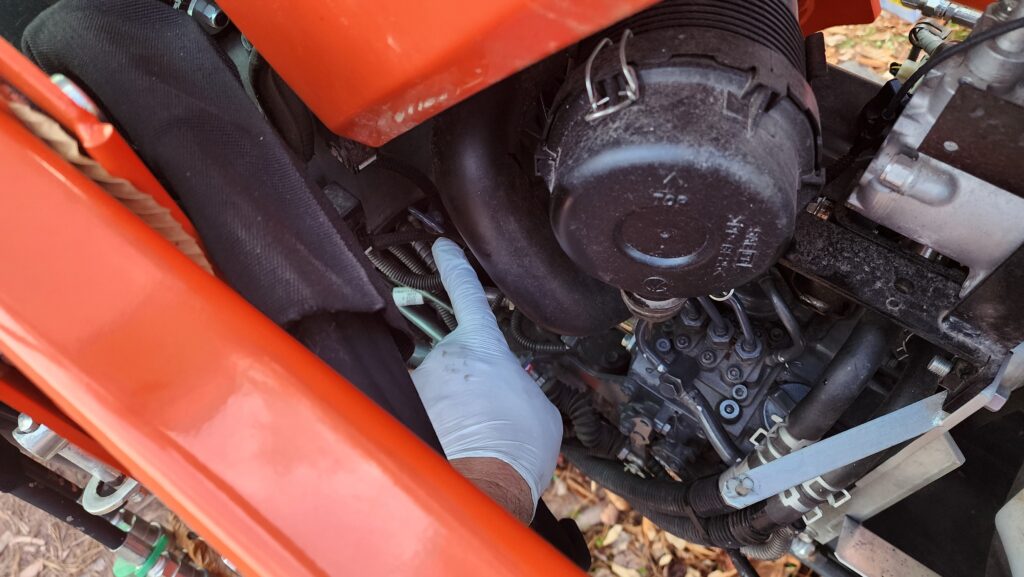
Even with my pointing to it, can you even see it?
What you’re actually looking at a is a black metal loop, seen edge-on, located in a difficult corner of the engine compartment. I won’t tell you how long it took me to find it, even with drawings in the manual telling me where to look. The drawings were very close-up – enough to recognize that you were in the right place when you were, but not enough context to help you get there!
Then there’s this nearly-impossible oil fill cap.

I could only remove it with two fingers – one from each hand, approaching from opposite sides. Really, Kubota? Really? We don’t all have tiny Japanese hands! There was another oil fill cap that was much easier to reach, but this is the one the manual said to use. I’ll ask the guys in the service dept at the dealer about that next time.
In keeping with the remarkably inconvenient placement of things, this and this:
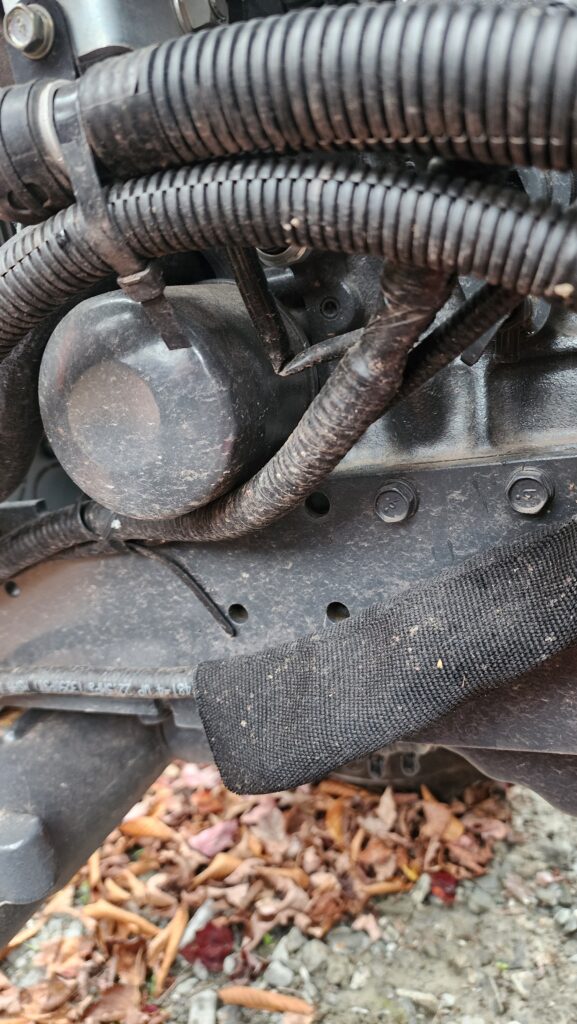
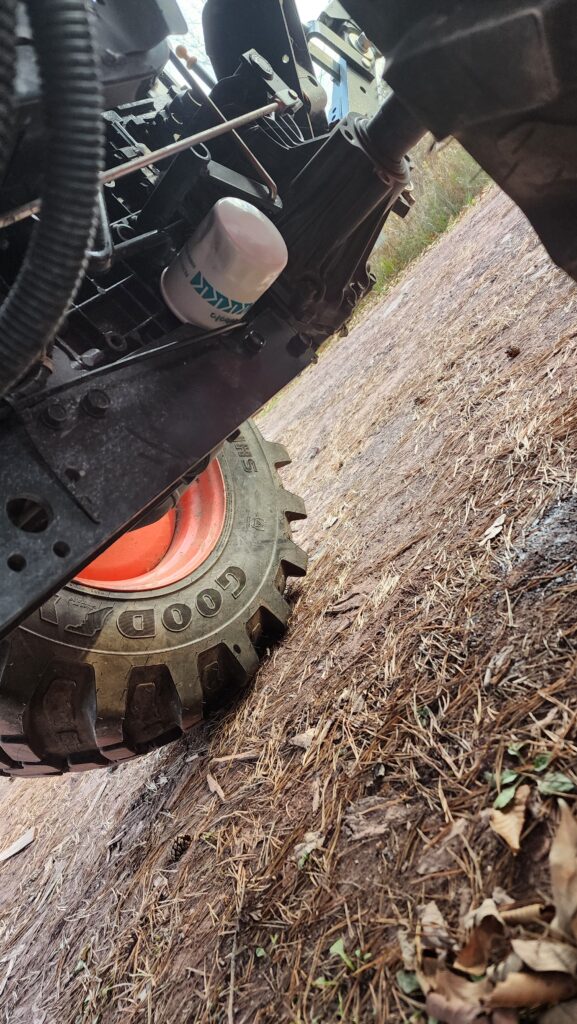
The one on the left – how exactly am I supposed to get a filter wrench on that? Oh, and notice it is totally flat black? No markings at all to identify it or tell me what to replace it with. The manual was decent at helping me locate the filters, so I knew which was which that way, but in my hand, the thing didn’t give me any clues. The replacement filters were all bright white and clearly marked with their part numbers (see right), so I know they know how to do that. Why not let the factory-installed filters also have clear markings? The world may never know.
That other filter in the back (right photo) was extra fun. As soon as it is removed, transmission fluid starts to come out, with significant flow. Try fitting the new filter while this is happening, without getting the filter so oily it becomes impossible to screw on! I managed to get this done and only lose about a gallon of fluid (there were 4-5 in there). I did buy extra fluid ahead of this process, knowing that this would be necessary, but still, once again: Really, Kubota?
The machine itself works like a champ. No complaints there. But they definitely did not design this thing to be easy to service.
And hey, speaking of Bob, I built this little caddy to help keep the implements tidy, rather than having them strewn about the grounds. I like how it looks, but it turns out it’s pretty hard to pick them up this way. Maybe it’s me. I’ve always struggled getting the implements on and off the loader arms. It would probably be easier if there were flat, level land around here, but there really isn’t! That makes grabbing stuff a lot harder.
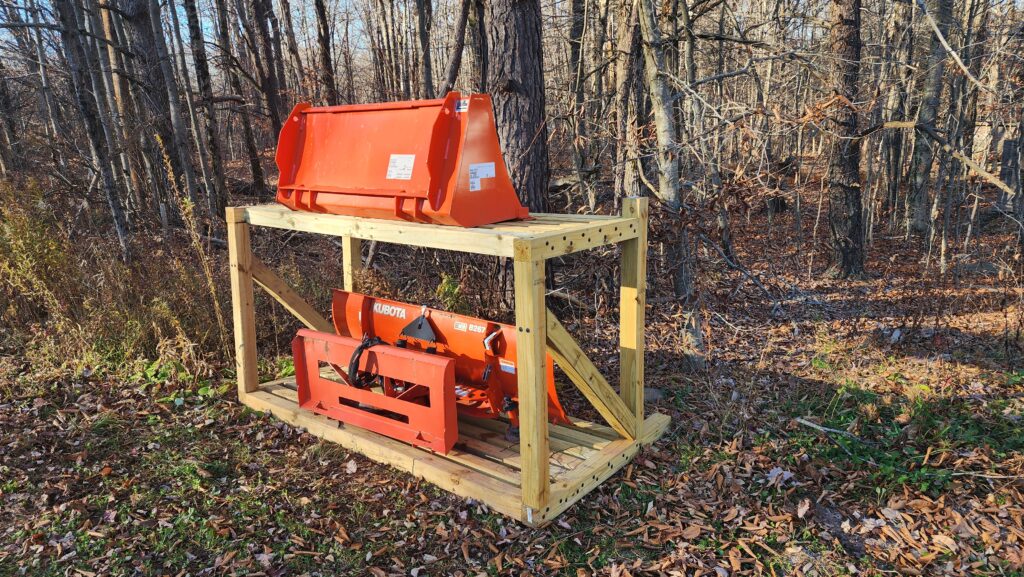
I tried to level the caddy, but the land isn’t level around it, so even if the caddy is perfect, the tractor’s approach isn’t. Le sigh. There may be a better way, but I haven’t found it yet. It’s possible there’s a flatter stretch of land where I could move all this to that would give me a level approach, but there are only certain places I’d want to put this thing — namely places it would not be unsightly or in the way.
Speaking of storage – and in this case outdoor storage – I built a new compost pen. This time, I built it to last and be re-used. The prior two were intended to be re-used, but proved to be inadequately built to survive years outdoors. This dual-bay unit is built for the ages. And it has latching doors, so the finished compost is easier to access.
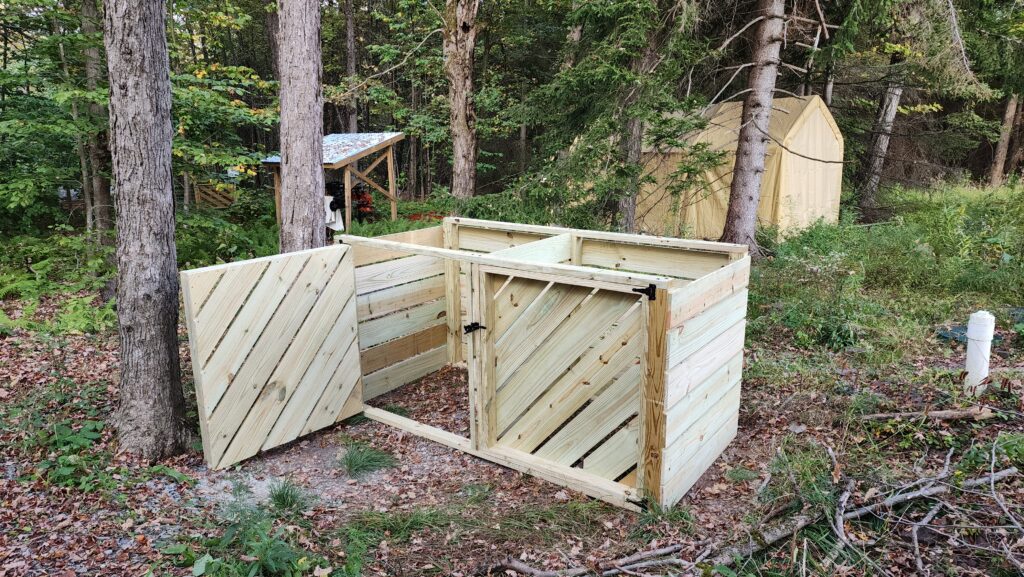
Each 4x4x4 bay is enough to serve me for about a year and a half. Which is perfect, because that’s how long I’m supposed to leave it after the last deposit, before drawing compost from it. Why so long? Because there’s human waste in there, too. Gotta let that shit mellow.
Also speaking of storage, I had this idea that I could outfit some of my under-stair space for double-duty as a pan rack for when I do candy work. So I got some aluminum angle and started to install it…
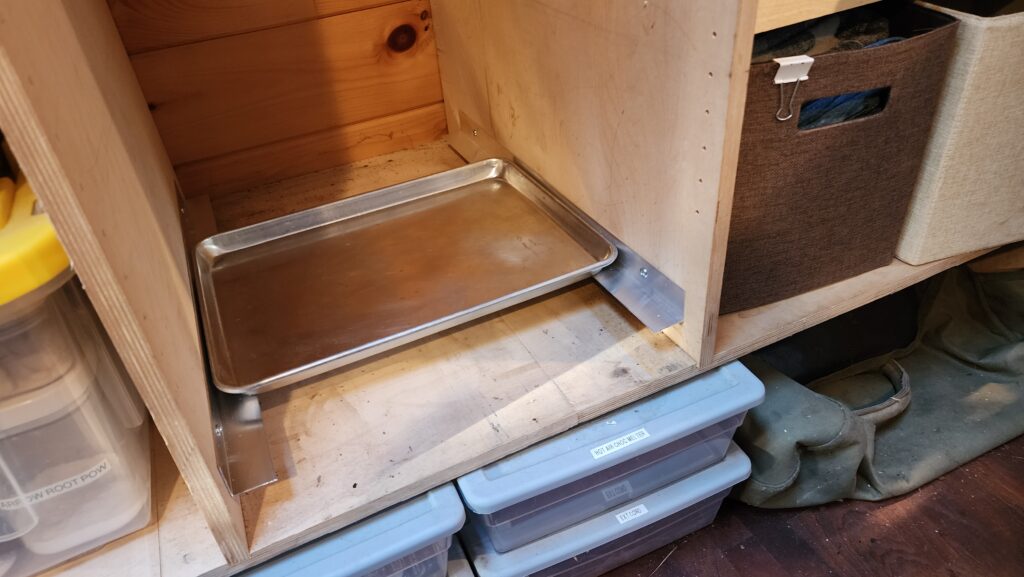
It started so well… and then I checked the fit against the tubs that normally live there.
… only to discover that the ribs on the tubs protrude just enough to hang up on the aluminum angles to the point that this is just untenable. Feh!
Then T had this brilliant idea. I never use my stove/oven. I do all my cooking using a portable induction plate. I don’t bake here. The oven’s regulation sucks anyway, so baking rarely comes out well when I’ve tried it. She suggested a toaster oven for those rare times I need a little oven (e.g., frozen pizza, a few fresh cookies, etc) and that I simply remove the gas stove/oven and use that space for a pan rack. The next question was what to put at the top, where the stove used to be, and where counter top should be. But I’m out of the laminate for the counter top and I don’t remember the exact style number, if it’s even still available 5 years later. Then it occurred to me that I could just tile the top! Instant trivet, which is great, and compatible for use as a generic countertop as needed, as well. Perfect. This is a project for another time, but it’s definitely on the list.
Speaking of storage, I have this wonderful new slab-flattening mill that fits to my table saw + outfeed table. It needs a home when not deployed. This is tricky, since it has this nifty belt drive that pretty much ties all the moving parts together into a large, unwieldy, and heavy assembly.
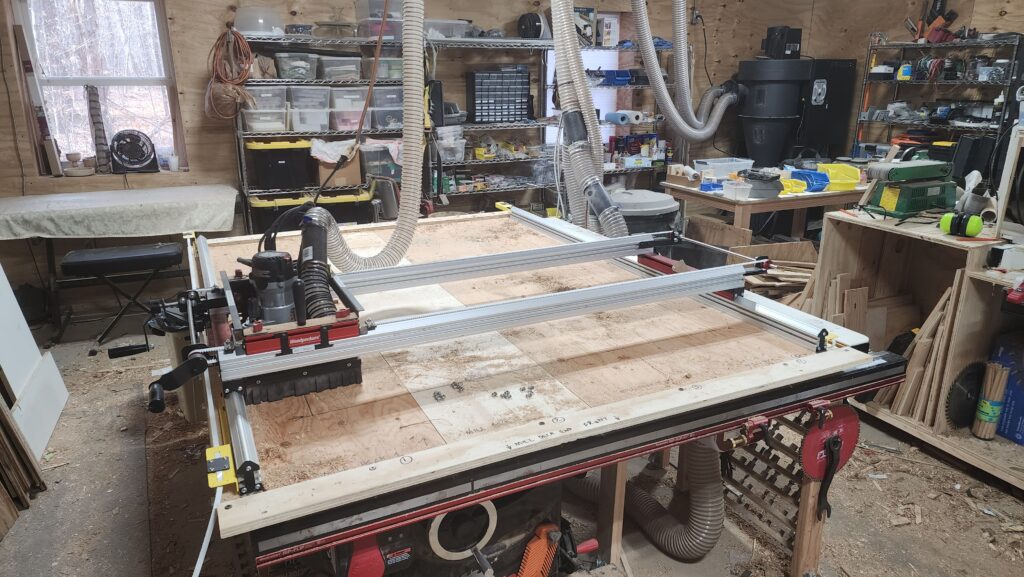
The two long side rails are tied to the cross-rail carriage and the router sub-carriage (red) is furthermore tied to the cross rails. Hm. Many problems to solve.
First, there’s the cross-rail drive. It moves along the side rails by virtue of a ribbed belt and a sprocket. Removing the belt from the sprocket is just about impossible without a lot of disassembly. Removing the belt from the side rail anchors (yellow, one seen foreground left) is easy, but then keeping the now-loose belt tight to the drive sprocket so it doesn’t get out of sync becomes the problem to solve.
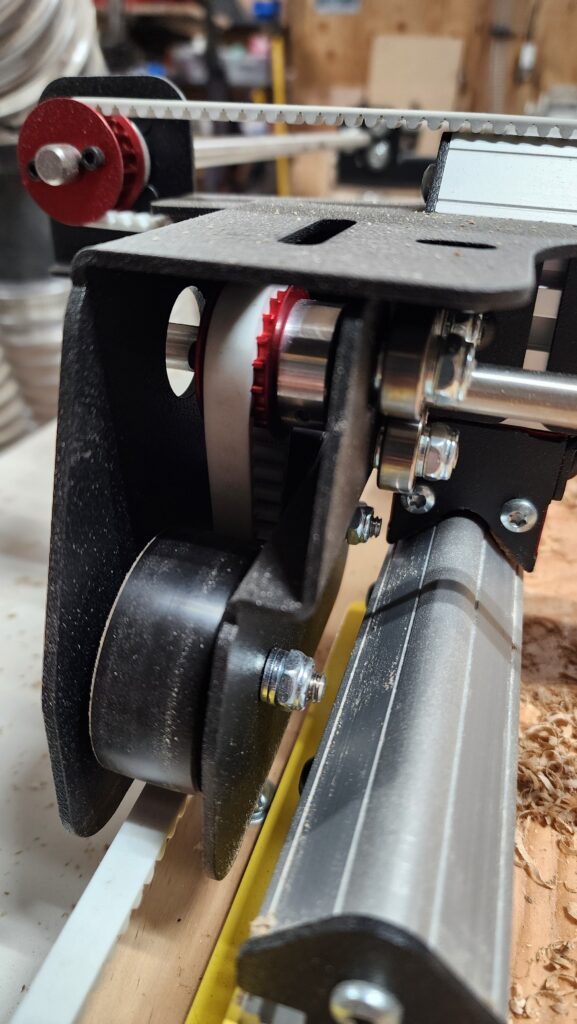
As soon as tension on the white belt (enters the scene from lower left, goes under idler wheel, then over red sprocket and exits below another idler wheel in the background) slacks when I disconnect it from the anchor points, the chances of it skipping over the sprocket are very high. This was the easiest problem to solve. Just shove something in there to keep the belt tight to the sprocket so the alignment is preserved. Some ordinary window/door construction shims did the trick nicely.
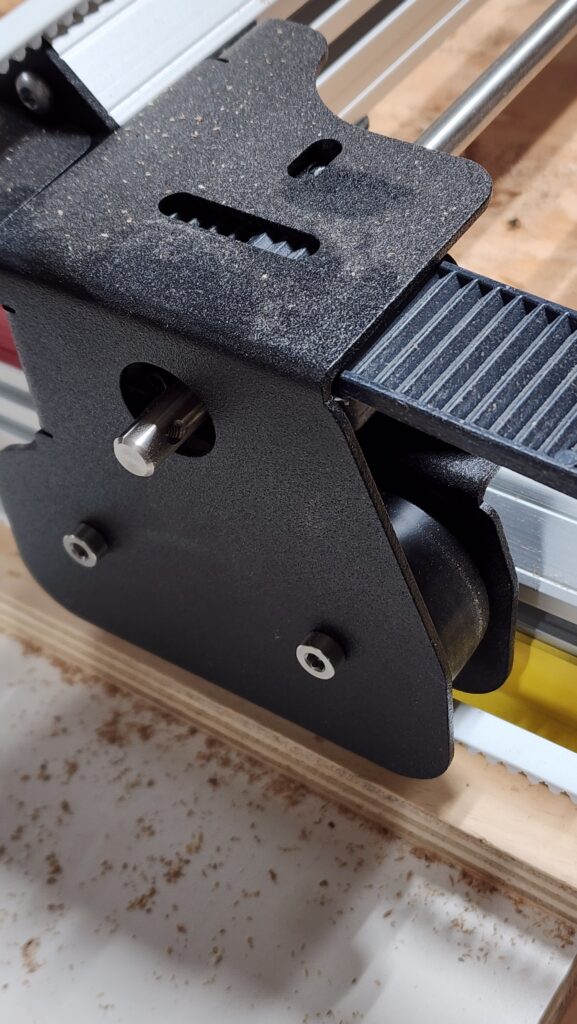
Now to remove the anchors for the belt, freeing the cross-bar carriage from the side rails.
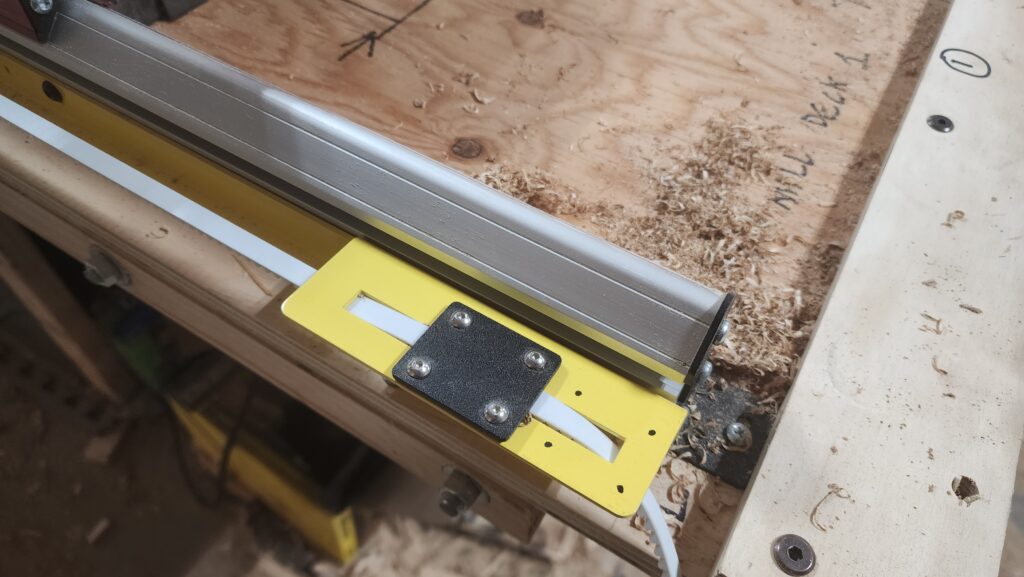
Originally, the belt mated with some ribbed features in the yellow plate and was held down by the black plate. This works just fine but those tiny screws are hard to install and easy to lose. I didn’t want to have to attach/detach them every time I wanted to stow the mill. Then I had an idea that kept the functionality of the plate + screws but eliminated the screws entirely. A toggle clamp to hold the black plate when desired and to release it easily when the time comes. No screws to lose!
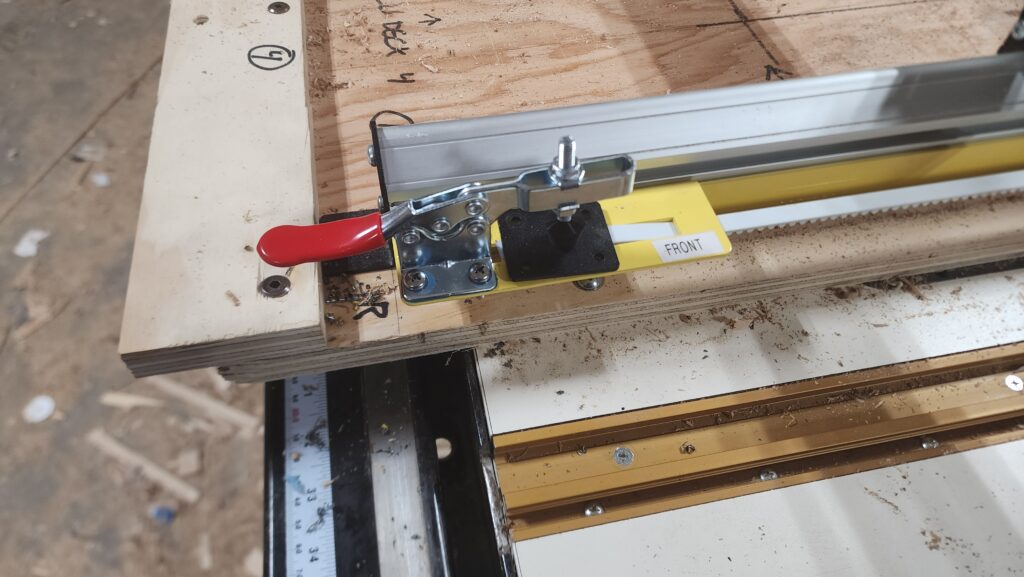
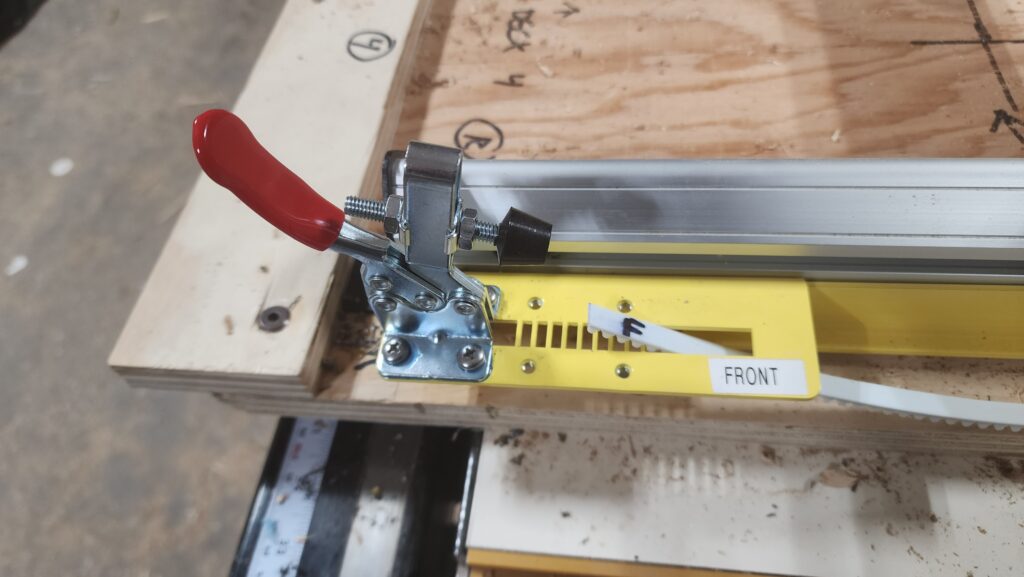
Okay! The cross-rail carriage is now free of the side rails and the belt + sprocket alignment is assured by the shims. Time to find a place to store the rails and carriage. The sub-carriage will also fall right off the cross-rails unless it stays horizontal… so I had to disconnect the guides that lock the sub-carriage to the cross-rails. That wasn’t too bad. At least those are big screws.
And now the whole array mounts nicely to the wall, thus:
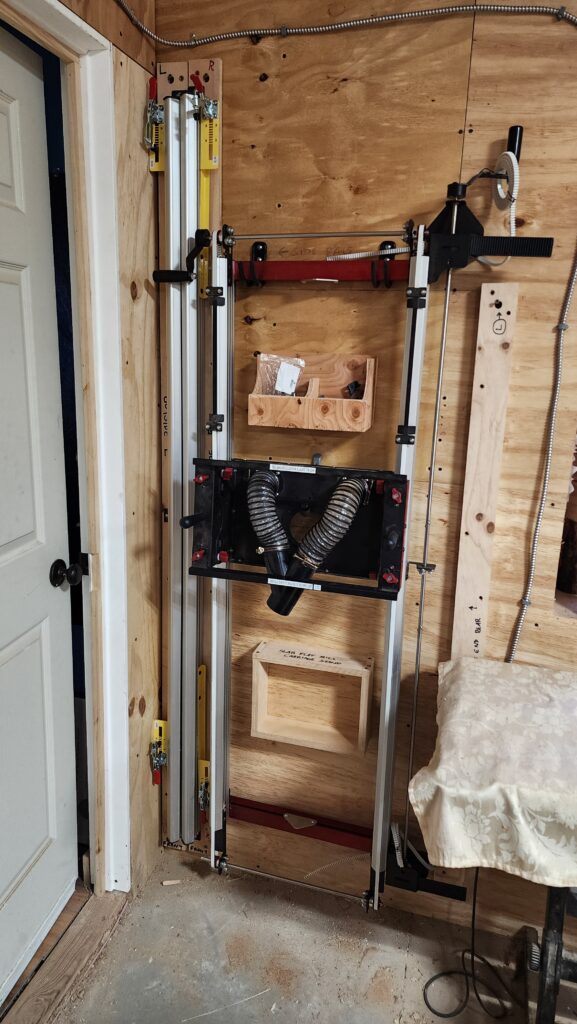
The sub-carriage (black with hoses) is actually hanging on a hook, even though it looks like it’s still attached to the cross-rail carriage. It’s not. That takes care of the side rails, the cross-rail carriage, and the sub-carriage. And, for that matter, a little tote box where hardware can be stored and a rectangular frame that the sub-carriage can sit on, to protect its dust-collection fringe. So far, so good. However, there’s still four pieces of plywood that make up the mill deck. I need the deck because it’s sacrificial – I can screw stuff down to it without making any holes in the underlying table. This is important, because that table is meant to provide an easy-slide surface for material being cut by the table saw that lives there. A zillion holes from various hold-downs used to secure slabs being milled would be deleterious to that function. Hence the plywood deck. But now that deck needs somewhere to live that’s out of the way and will keep it nice and flat.
Fortunately, it doesn’t have to be convenient. The mill will be brought out and deployed when needed, but that’s not going to be often. So some effort to store/deploy is perfectly acceptable. Good thing, because the only place I could find for the plywood was 8ft in the air.
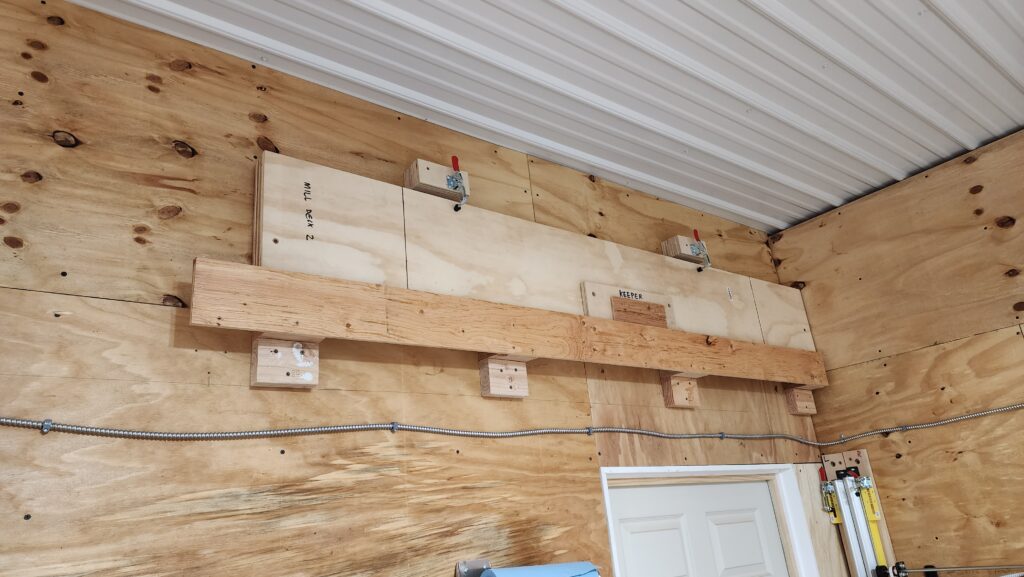
A couple of toggle clamps at the top hold it tight to the wall to help keep them flat. That block at the middle snugs the lower end to the wall. There was a tendency to bow in the middle, so that’s where the block goes to counter it. I do need a ladder to get the wood in and out of this storage area, but that’s okay. The individual pieces aren’t so heavy that it’s any more dangerous than other ladder work.
There was one bit of completion in the workshop that was done just before the first honey harvest that I neglected to share. A door for the tidy room! This finally allows the room to fulfill its mission of being a dust-free zone. It also, conveniently, isolates the space such that I can, for example, put a space heater in there to warm up the honey to make it flow more readily, without having to warm the entire workshop.
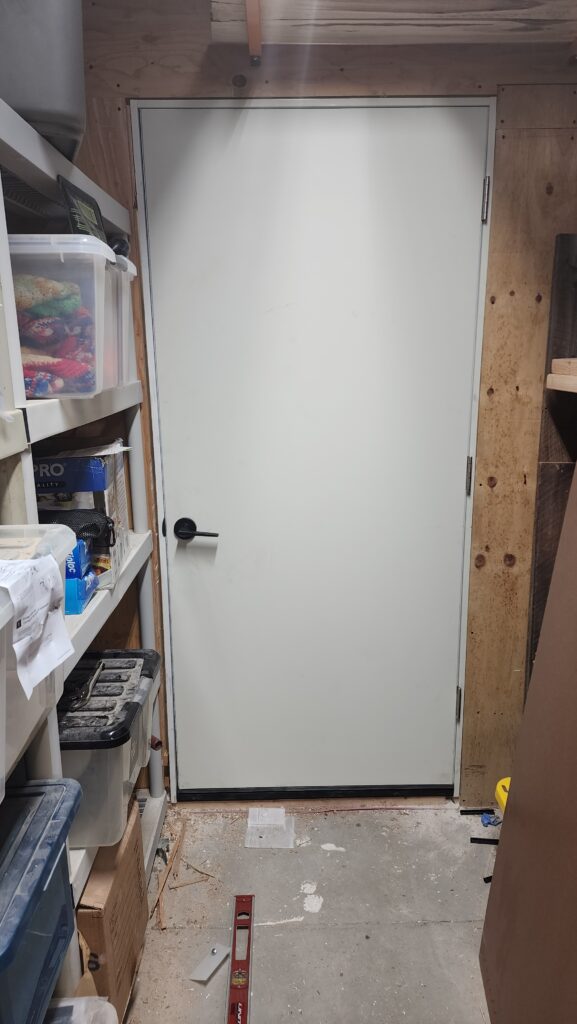
It’s an incredibly boring door, but it being there makes other, important things possible. It’s an exterior-grade door, so it seals decently and is insulated, unlike interior passage doors. I plan to replace some other doors in the workshop with this model, for better dust control and, hopefully, also mouse control.
On the inside, I did actually trim it out.
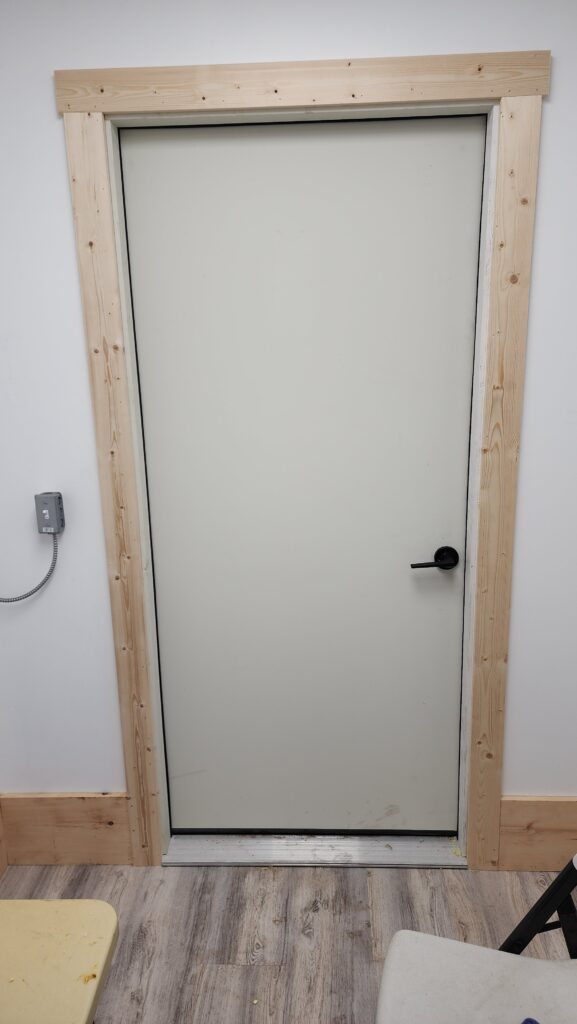
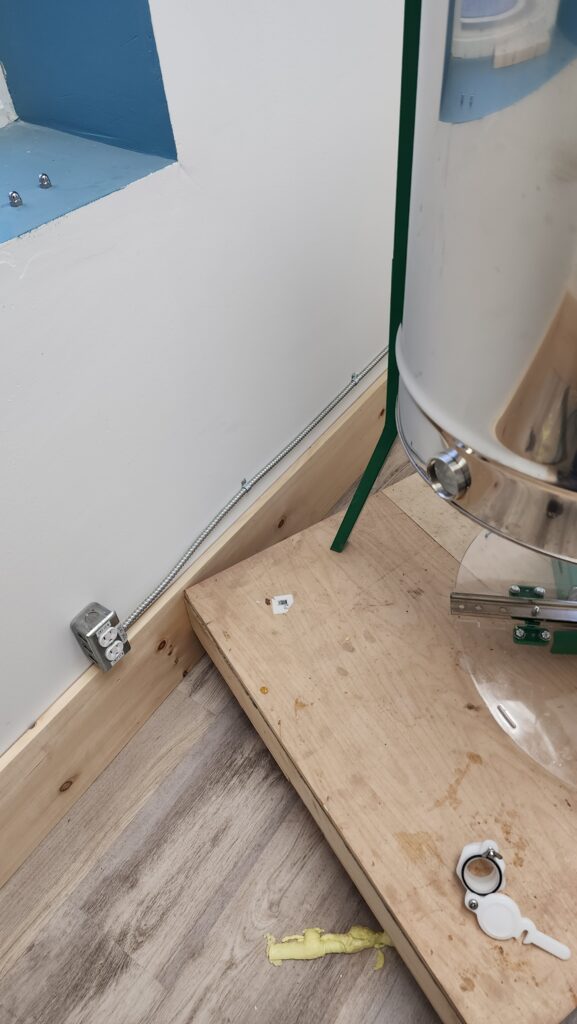
And if you’re wondering about that particularly tall base trim, there’s a good reason for it. The dolly that supports the honey extraction centrifuge is very heavy (the base is over 300#) and so it has plenty of momentum any time it moves, even a little. If it happens to crash into the wall, it makes a bit of a divot because the walls in this room are drywall, not plywood like elsewhere in the shop.
The tall base trim is there to take the impact.
And, lastly, I leave you with an autumn leaf and a fun restroom sign I saw, just because.

