I always knew that this HomeBox project was going to be a perpetual work-in-progress. In this way, it is no different than the rest of my life to-date. Anyone who’s known me for any length of time has observed that I am always adjusting myself and my environment in an effort to converge on a good and happy fit. There really is no such thing as “arriving” per se – though there certainly are plateaus. Much of the time there is a steady evolution and refinement of all the things, as I learn from mistakes and discover optimizations and so forth.
The first chapter in today’s story comes from the utility loft. Besides the shuffling of some of the loft’s contents, can you spot the difference in the loft itself? I apologize for not taking both pictures from exactly the same angle, which makes it a bit less obvious… but once I tell you, you’ll see it.
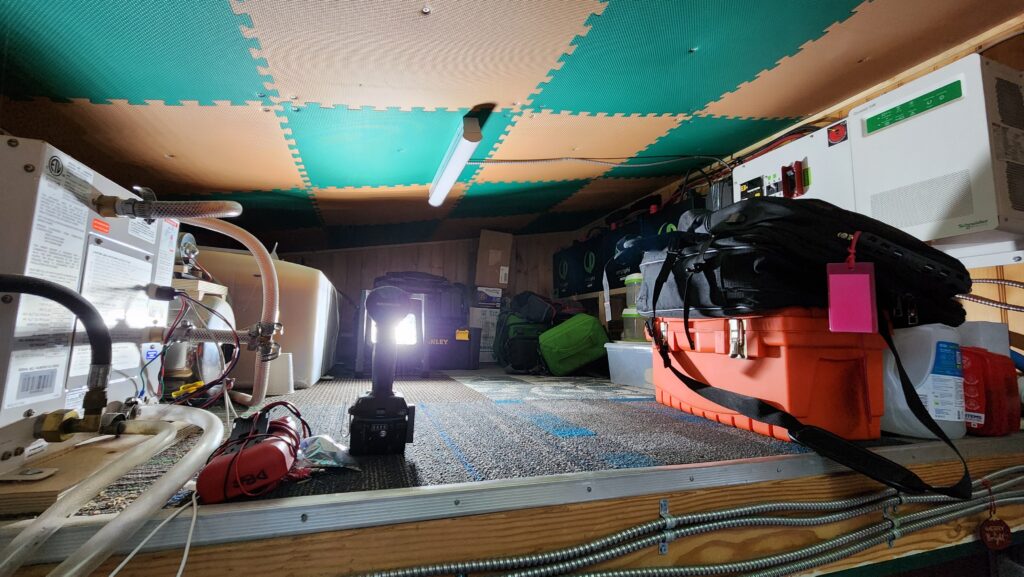
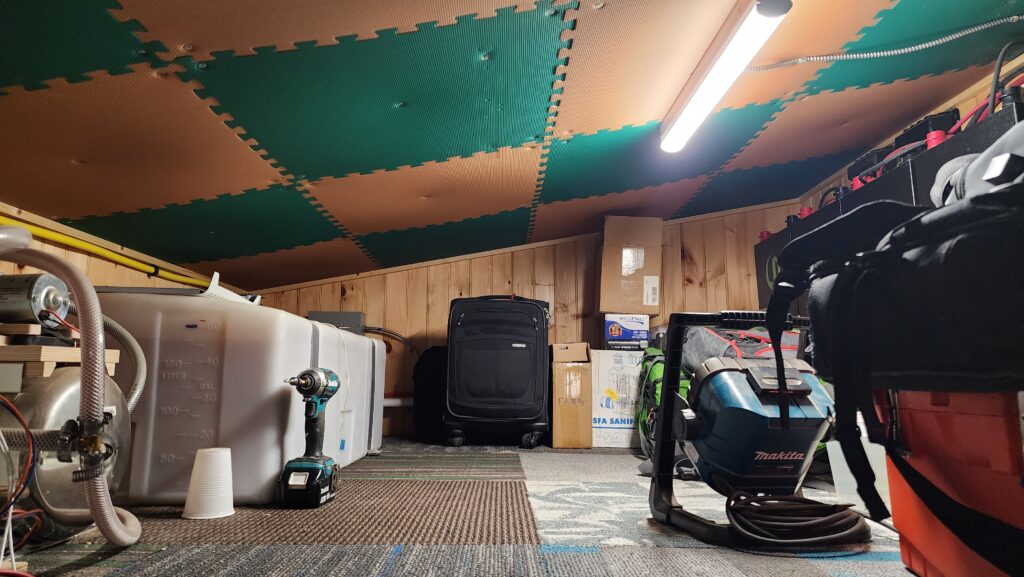
It’s the light fixture on the ceiling. It’s on a green tile first, then on a tan tile, about 2ft to the right. What difference does 24 inches make? Well, it’s the difference between always hitting my head on the fixture and not. The loft is more accurately described as a crawlspace and the only place where a ladder safely standing on the floor can reach the loft is exactly where I’m standing when I took these pictures. Namely, directly along the line of that second column of tiles. Where the light fixture used to be. That fixture consumed precious inches of headroom and, more importantly, quite effectively defeated the purpose of the foam tiles I attached to the ceiling: a soft thing to cushion my noodle if I forget how low the clearance is. The light fixture was no good at that. Not one tiny bit. So now it’s 24″ to the right, just as good at illuminating the space, and I don’t bash my head on it. An easy adjustment, but an important one.
While I was up there, it was time to change out the sediment filter. I was assured 3y ago that the well would settle out and I’d stop getting sediment in my water. I disagree with that prediction.
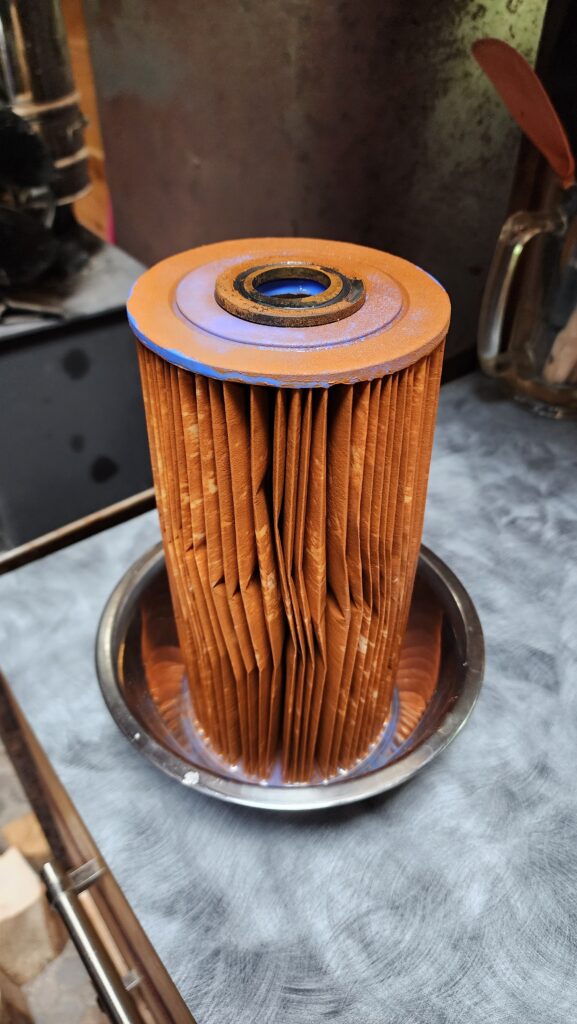
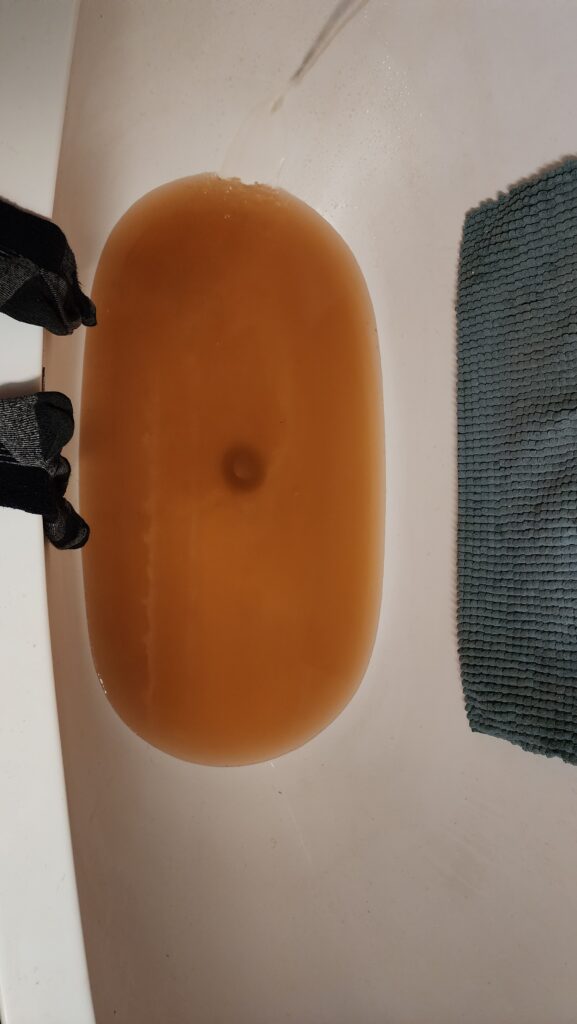
On the left – sediment filter that used to be white. On the right, some sediment-laden water from after I cleaned the freshwater holding tank (which got a fair bit of sediment in it before I installed the filter).
Recall I have this ~250 gallon rainwater storage tank that I use to re-hydrate the frog habitat in the spring if the sun dries it out while the froglets are still developing? I need to hook up a pump – and power the pump – to get that water from the tank to the habitat. This was always a bother, since there was no convenient spot to plug in the pump. It was always a long extension cord to that was usually in the way. Time to make that better, too. Mount an outdoor outlet by the tank. The hard part is that these walls are 12″ thick, so getting inside and outside holes aligned is a little tricky.
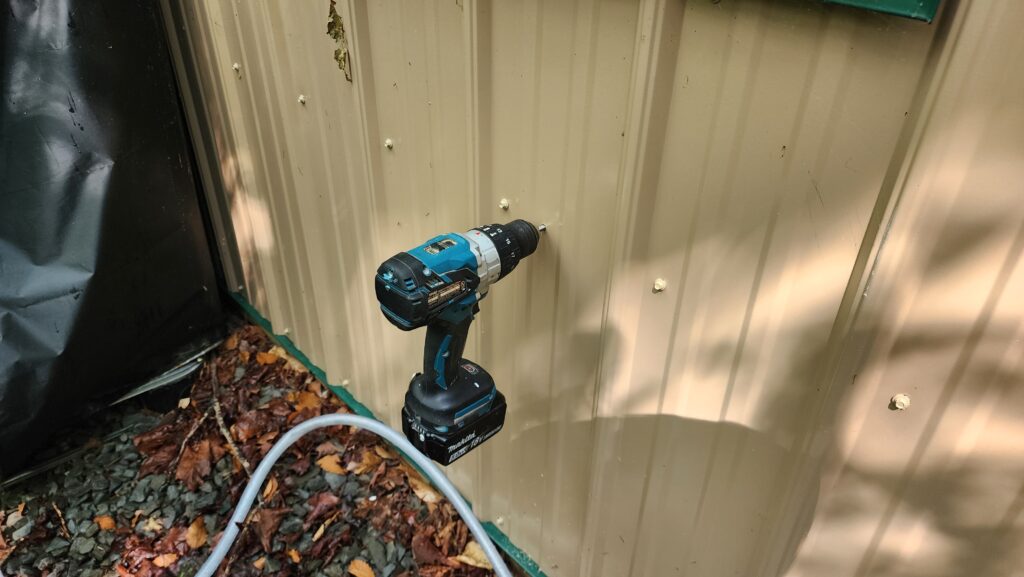
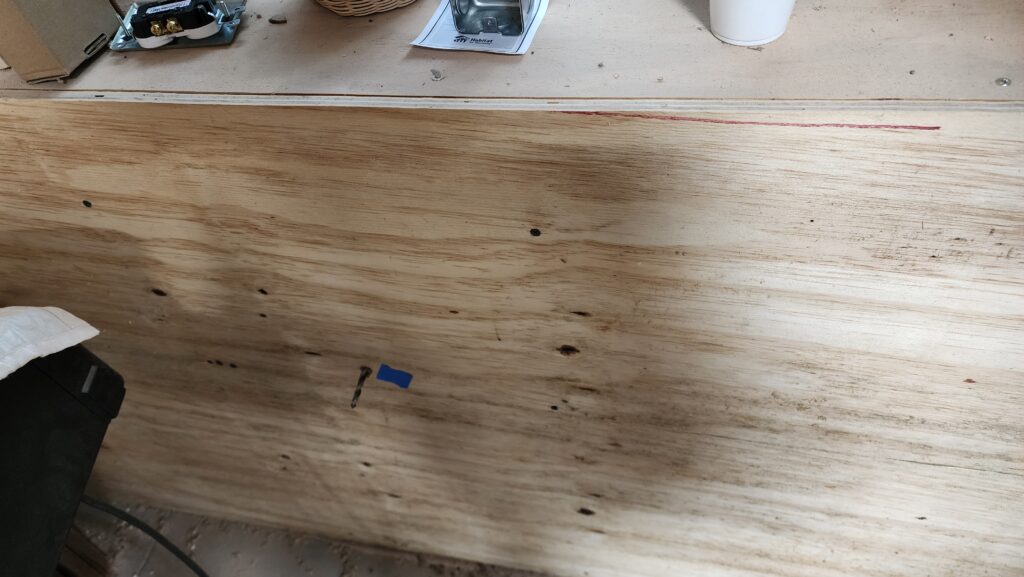
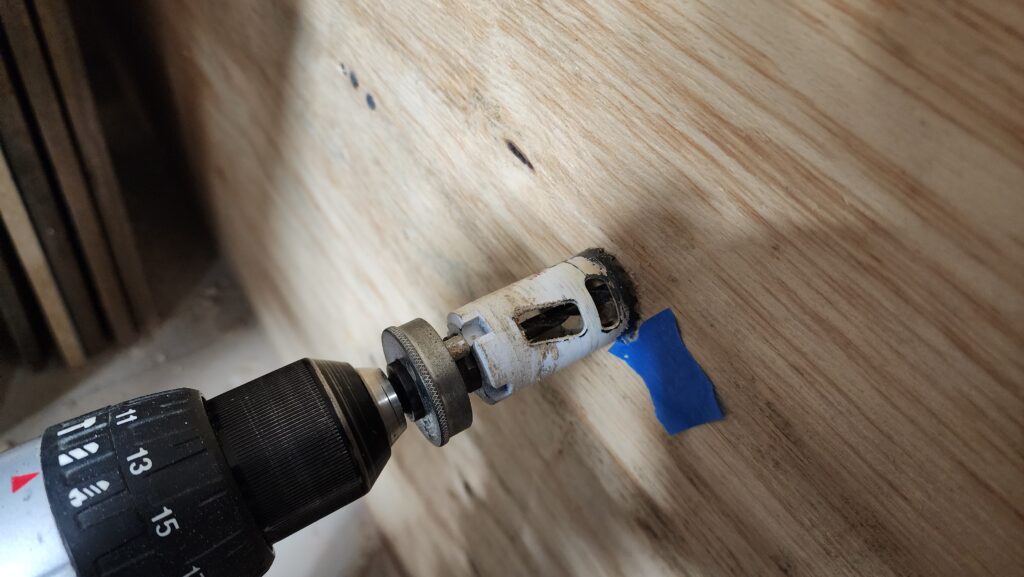
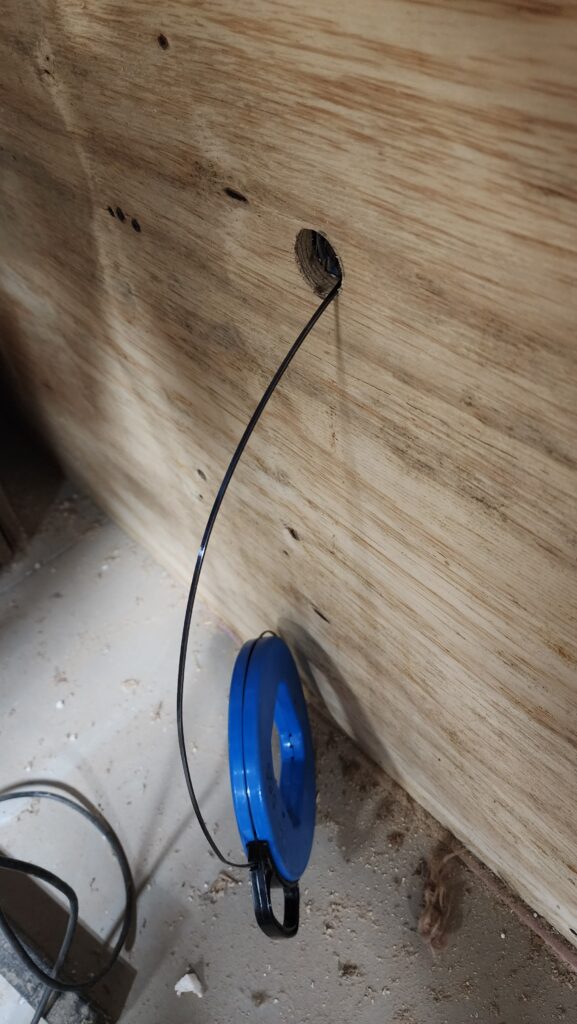
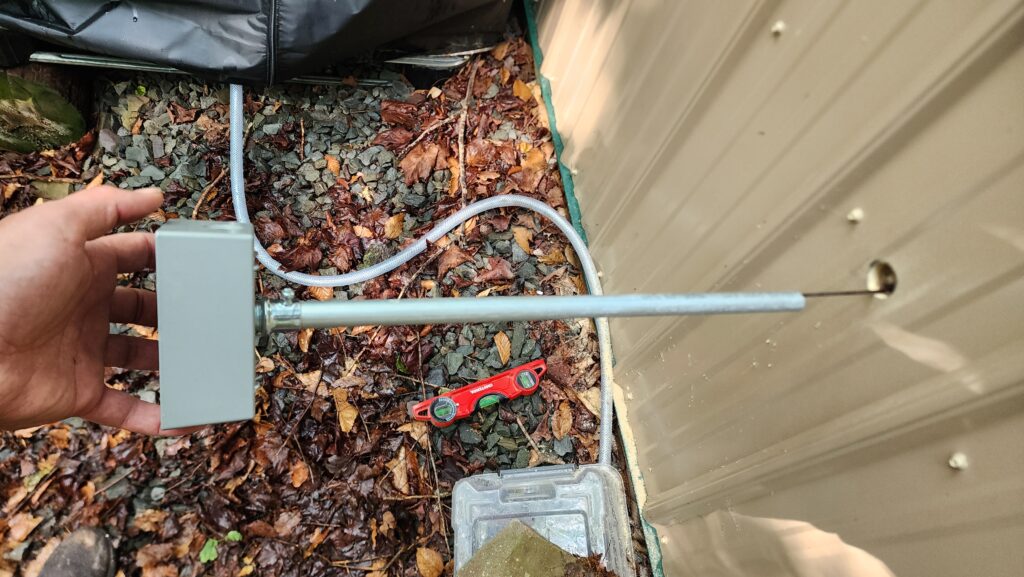
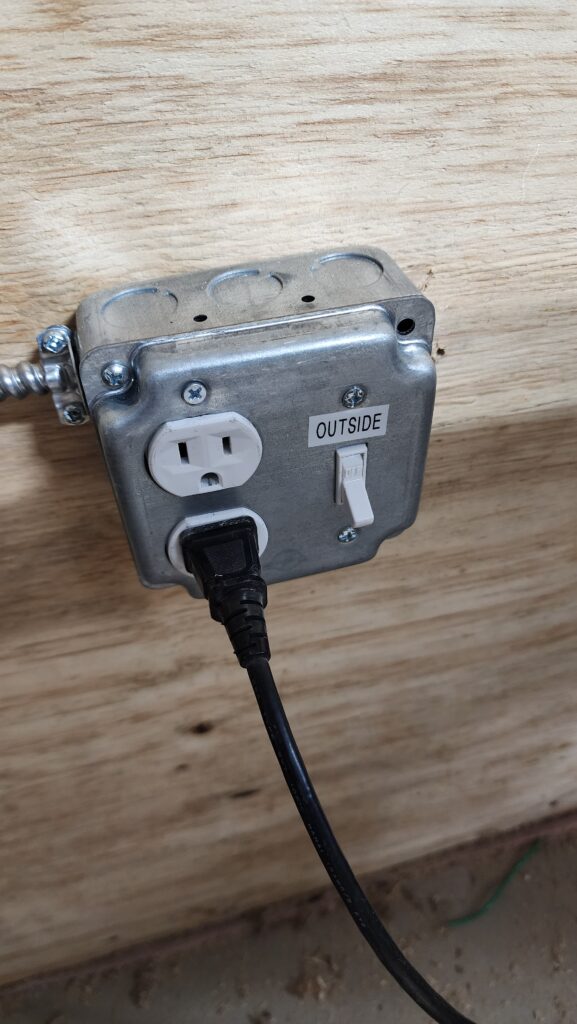
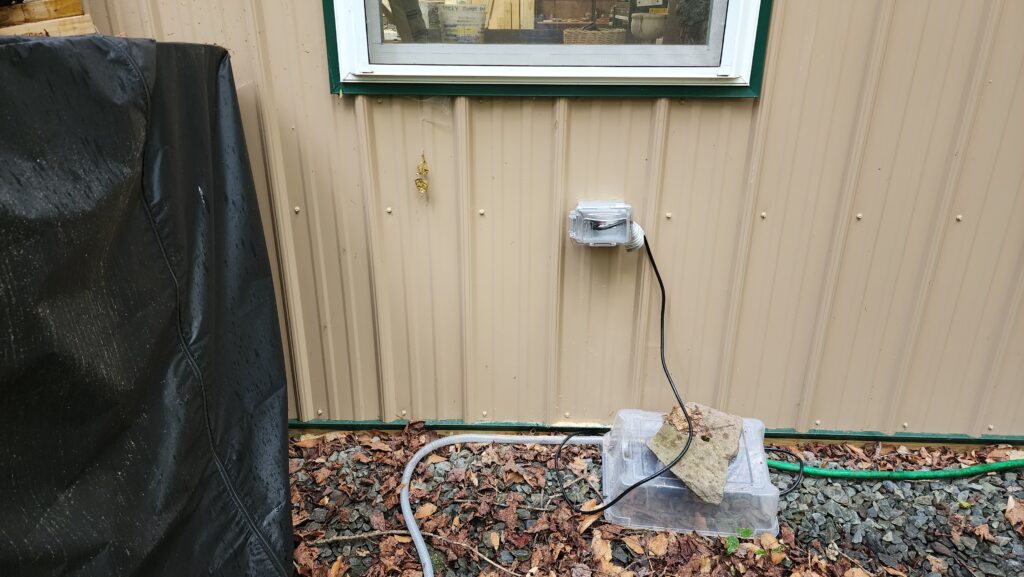
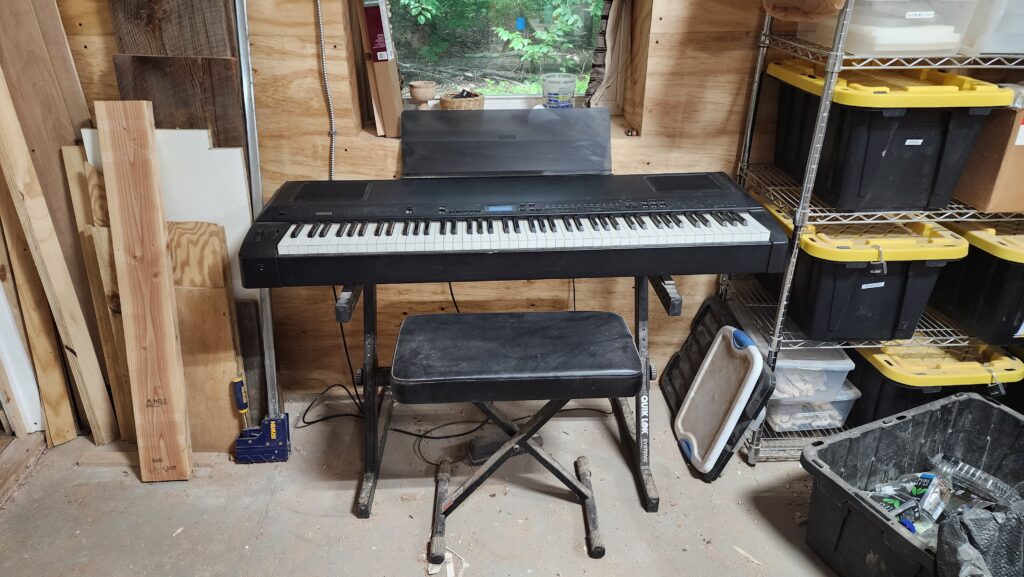
Now when I want to run water to the frog habitat, all I have to do is turn on the switch from inside and presto, flow! This bit of wiring also happened to be convenient to where my electric piano has been living (without power, sadly), so now it, too, has power without an inconvenient extension cord, as well. Progress. Sometimes it comes slow, but it comes.
There’s lots of bee news!
My beehives have temperature/humidity sensors inside, which communicate to the outside via radio (Bluetooth). Radio waves won’t go through metal. My beehives have metal roofs.
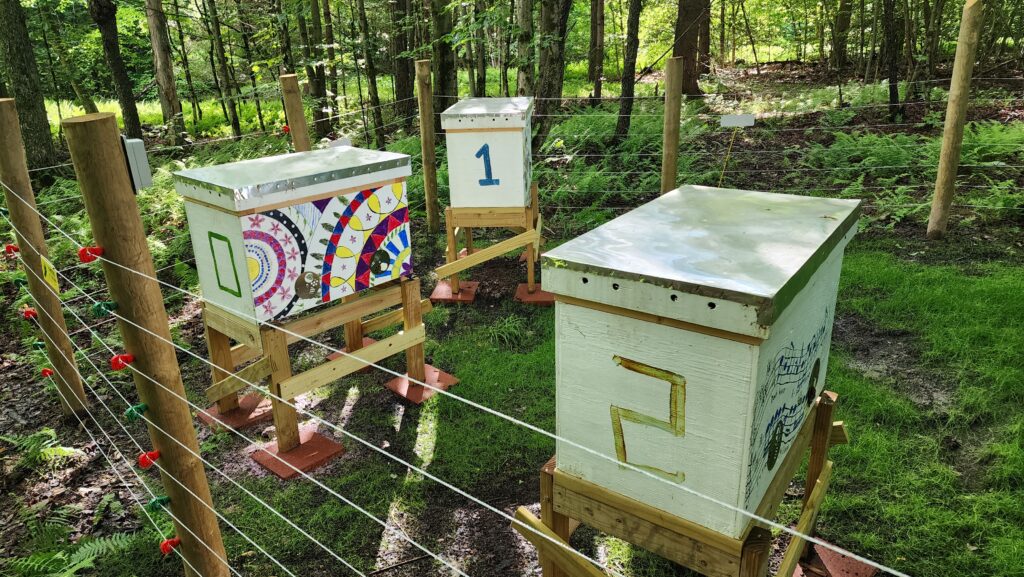
This isn’t a problem, exactly, because radio will go through wood and beeswax just fine. The signal can get out by going sideways instead of up. That was working fine for a while, but then the hives started to fill up with nectar and then honey. Radio doesn’t go through water very well at all. And definitely not the relatively high frequencies used for Bluetooth (submarines use an ultra-low frequency that does get through water okay). So now the nectar/honey situation PLUS the metal roof was making it impossible to get the sensor signal out. There wasn’t anything I could do about the wet stuff in the hive, but I could swap out the roofs for ones without sheet metal. The metal is there for longevity, but it’s not absolutely essential — and it’s easy to build a new lid of one rots or swap out for a temporary one while I re-paint one that may have had too much exposure to the weather.
Okay, then, a new batch of lids — without metal — is what I need. And I made them. And when I went to swap them for the old lids, I was surprised to find there were a lot of bees in the lid! And by a lot, I mean
a lot a lot.
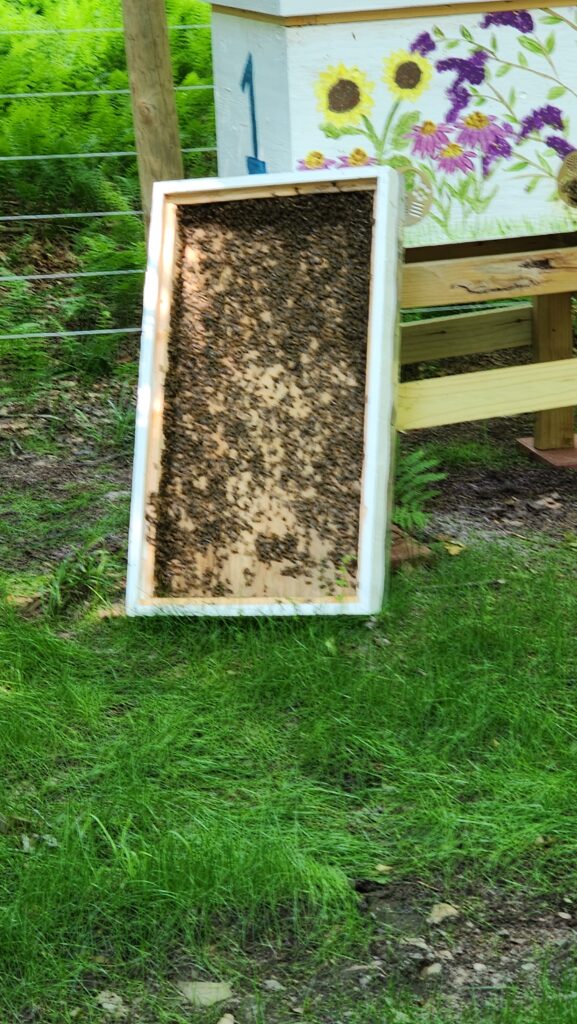
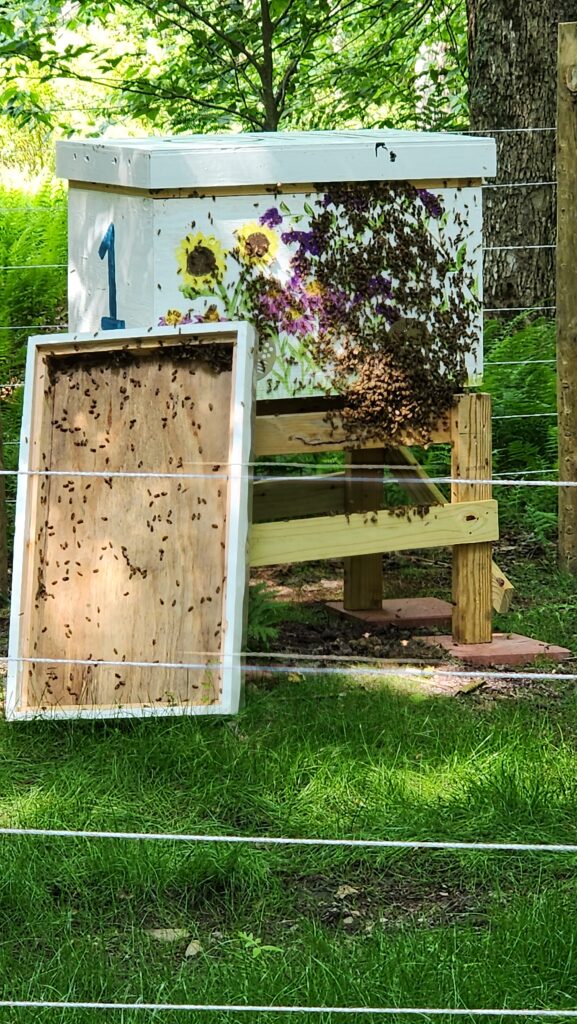
After I removed the metal clad lid, I just left it by the hive (now with the only-painted lid), so the bees could easily make their way back home. Which they did, over the course of an hour or two. Quite the traffic jam at the entrance, but they worked it out.
What were the bees doing in the lid, you ask? I don’t know for sure, but my best guess is they were up there working some airflow to help reduce the nectar into honey, which they do by evaporating it, which they do by moving air past the honeycomb cells full of nectar. These lid bees were the upper exhaust fan.
I also have Bluetooth scales installed under each hive. This gives me a view into their honey-making productivity, and other events, too, as it turns out (more on that shortly). These particular scales were designed for Langstroth (stack of small boxes) hives, not my Layens (large horizontal) hive. They were meant to be installed on the front of the hive, with a pivot on the back. In this way, since the internal frames are perpendicular to the axis of the scale, the scale basically holds up one end of all the frames, with the pivot holding up the other end. As such, the computer system that collects data from the scale simply doubles the weight reading and reports that as the hive weight. It’s decently accurate.
This works great if you can put the scale in the front (or the back) of the hive. The thing is, the scale is about 14″ wide and my hives are nearly 36″ wide. I did not fancy balancing the hive on the scale this way, so I installed the scale at the short end of the hive, which is about 17″ wide, seating nicely on the scale. This works just fine but because the scale is now parallel to the frames, it does not hold up one end of each of them. Some frames are near the scale, some are far from the scale, each with a different leverage, distorting the reported weight unless all the frames are equally filled, which is definitely never the case. The scale will still tell me gains and losses, but it won’t be accurate and gains/losses near the scale will appear larger than gains/losses at the other end of the hive, which are mostly supported by the far end, not the scale.
My rep at the scale company said he thought there was a way to use two scales on one hive, where the computer system would simply combine the two measurements rather than doubling the measurement obtained from one scale. This was the perfect solution to my problem – accurate readings and minimal fuss. Just install a second scale on each hive. On each hive that is full of active bees and weighs between 150-200#. Lifting up that hive to get a scale under the far end is a 75-100# lift and remember they’re full of bees, who might not appreciate the disturbance. And then there’s the question of how to install the scale and lower the hive back onto it gently. Some ingenuity was required. Fortunately, I had some in stock.
Step 1. Slide a board under the hive near the end to lift. Fortunately, the existing scale raised the hive 1.5″ off the stand, so this was easy to do.
Step 2. Slide a pair of air shims between the board and the hive. These are heavy duty air bladders with pump bulbs attached. Give the bulb a squeeze and the bladder inflates a little, forcing whatever it is between, apart.
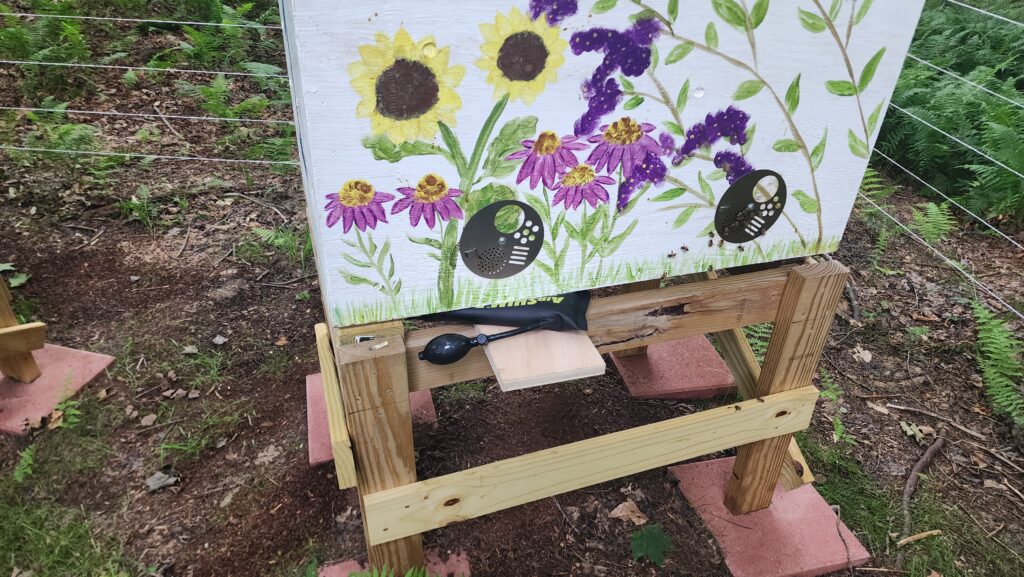
Give these guys a couple of pumps, and the non-scale end is lifted enough to remove the old pivot block. The thing is, the scale I want to put there is twice as wide as the available surface, so I had to do a little minor carpentry on the spot, as well.
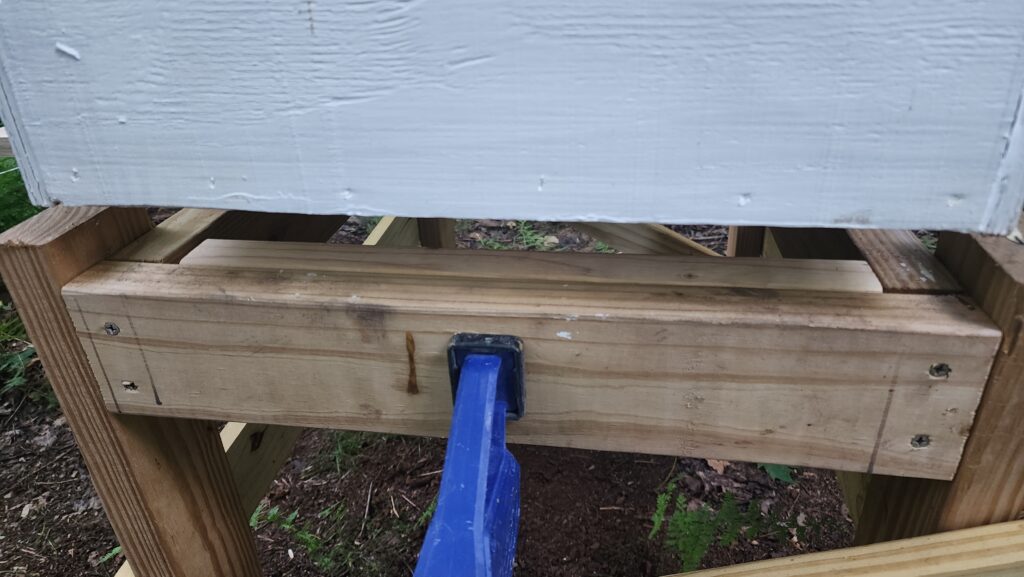
Step 3. Clamp a block behind the frame, then screw it in place. Now there’s enough support surface for a second scale here.
Step 4. Install scale.
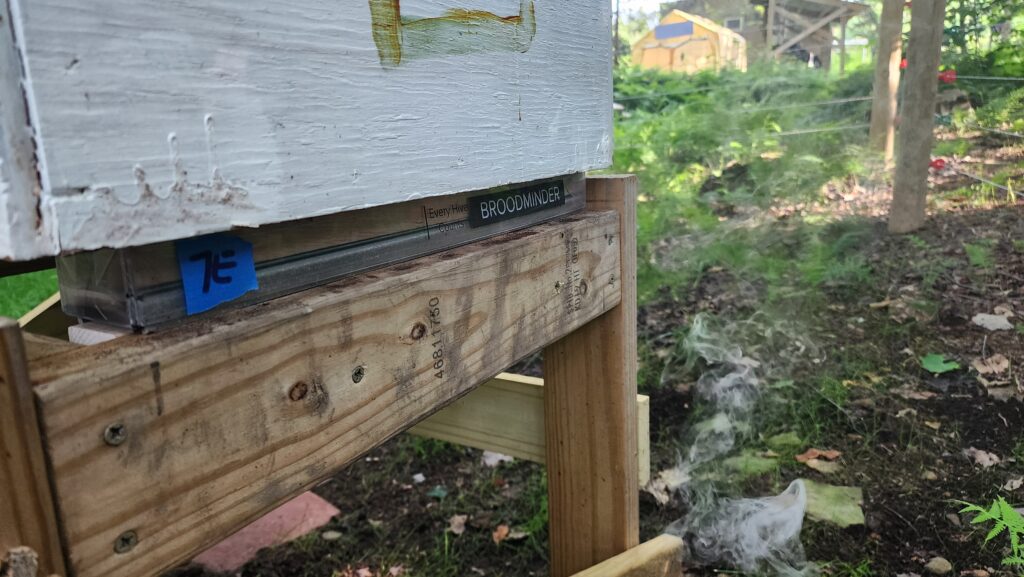
Step 5. Gently deflate the air shims, remove them and the board. The bees didn’t seem to get upset at all by this, presumably because all the motions were small and gentle.
Success! New scales in place and happy bees. Perfect. I left the apiary and went to my laptop to assign the scales to their hives and configure the data system for dual scale mode.
But here’s the thing. I couldn’t figure out how to configure it for dual scale mode. So I sent a note to my contact at the sensor/scale place and he did a little digging. It turns out dual scale mode was a feature that was very recently discontinued. Ooops. He accepted my return of the scales without even a restocking fee (since it was his error to suggest doing it this way), which while some of us will say “of course, that was exactly the right thing to do”, we also know that good customer service is hard to come by and we sadly cannot expect that vendors will do the right thing when we need them to. The people at BroodMinder have been quite accommodating and helpful throughout the process (this story isn’t over yet!) and I would recommend them and their products without reservation. Anybody can oops. The measure of a person/company is how they make it right. And they made it right, with grace, and without any fussing from me. Also, their data viewing site and analytics/alerts are really cool. If you have bees and are even the slightest bit nerdy, you want this system.
Okay, then, I need a different solution to my scale problem. I want to measure weight across the whole hive, not just at one end. BroodMinder makes a DIY kit that puts sensors in each corner, giving as accurate a measurement of total weight as can be had, including spatial (left/right and front/back) distribution. Their partially-assembled kit was too small for my hives (they are more Langstroth-centric), so I got the pre-programmed circuit board only and designed my own load cell brackets for a mounting configuration that better suited my hives.
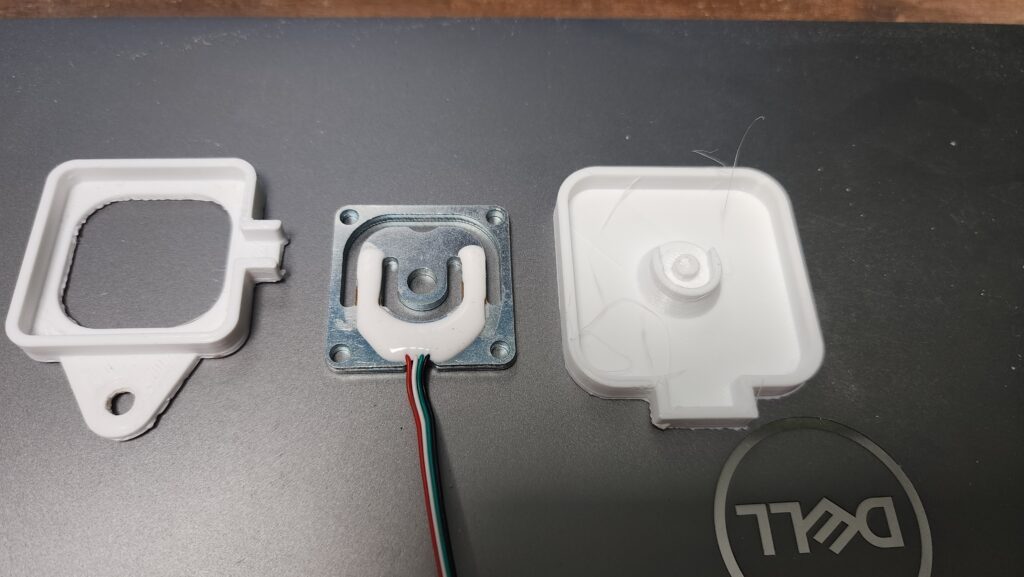
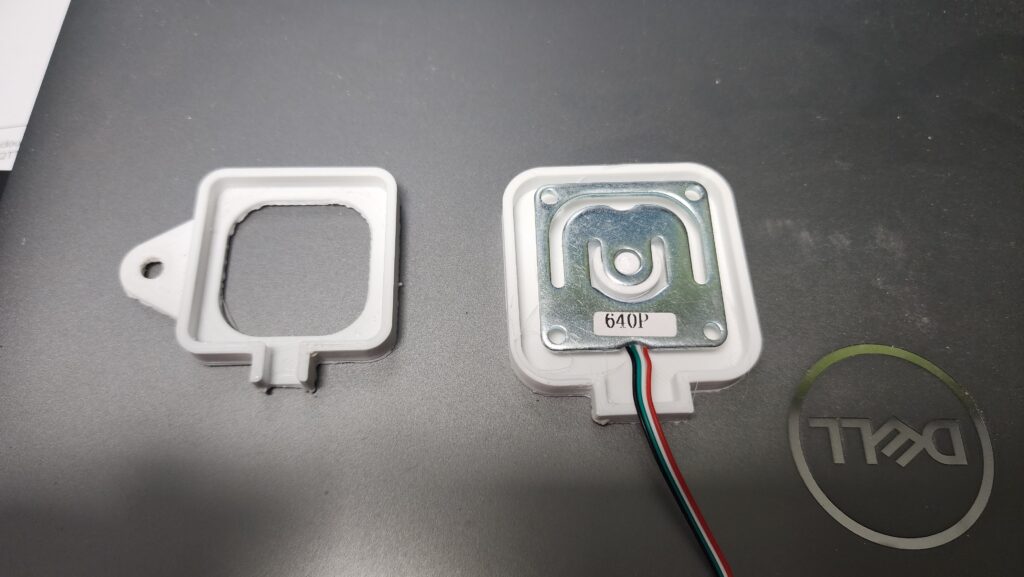
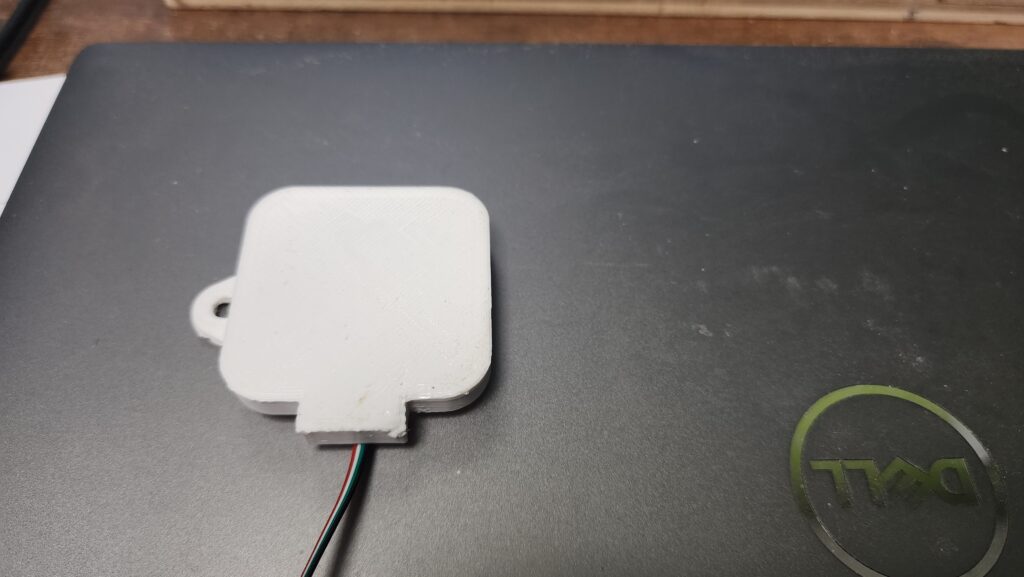
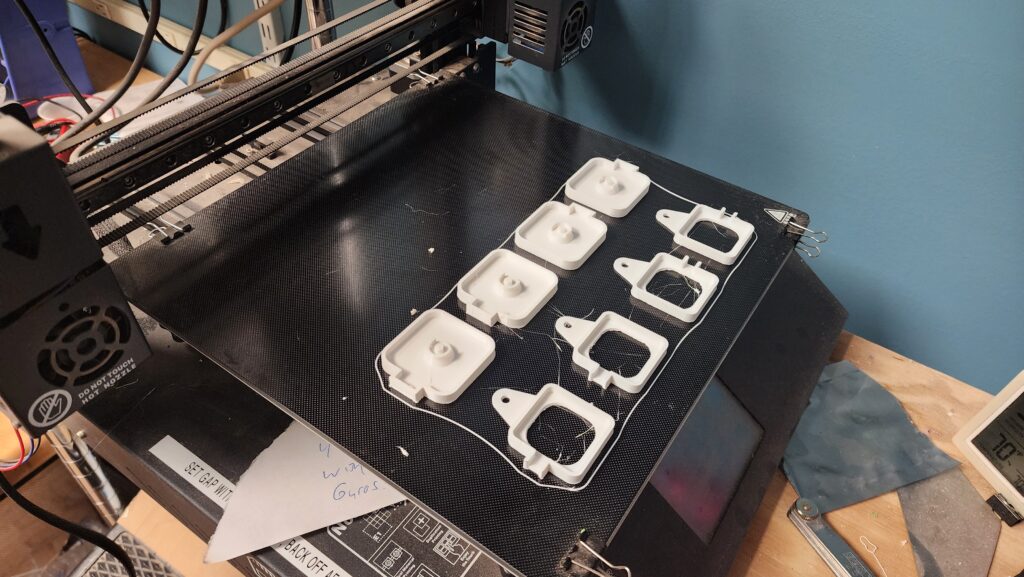
I still need to be able to install these four sensors (and the control box with the circuit board and batteries) under a 200# hive. To do this, I thought I’d go the same route with the air shims as I did before, installing two sensors at one end at a time. For sanity, I mounted the pairs of sensors to thin boards, so I could just slip the board assembly under the hive where the previous bar-shaped scale had been.
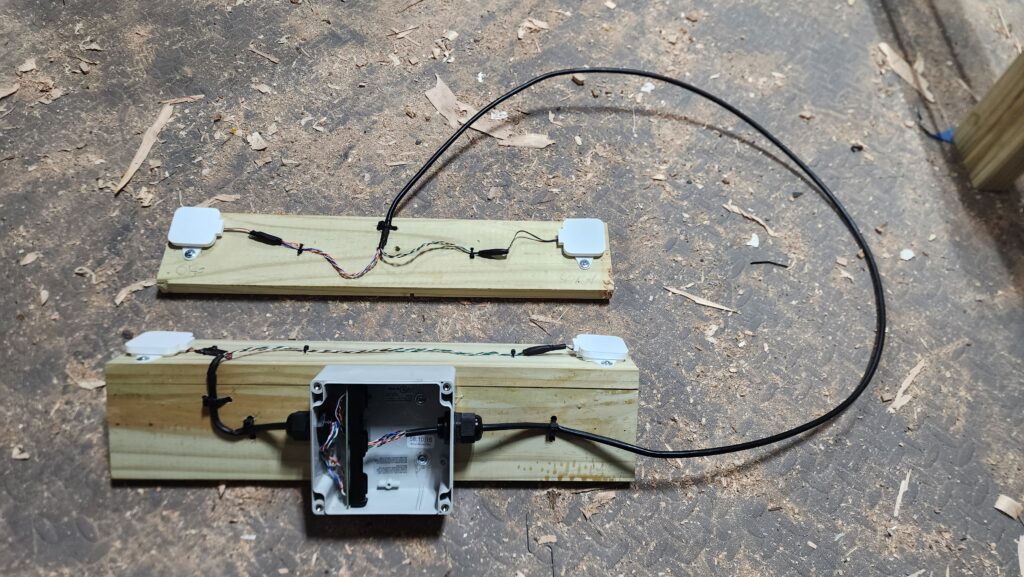
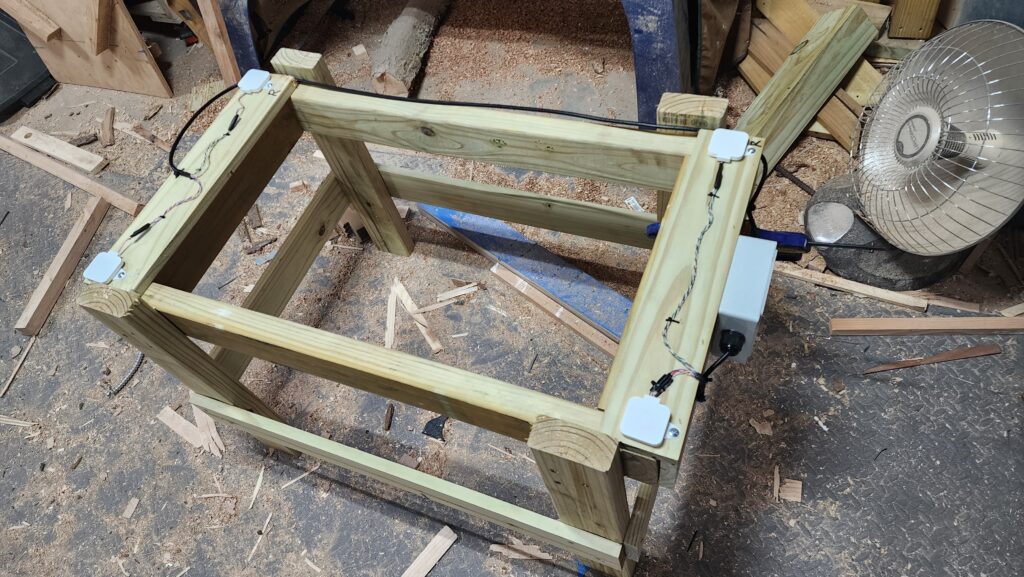
This worked well. The last step was to calibrate the scale. This took the form of moving a heavy mass around a platform spanning the sensors and taking readings. I used a 40# kettlebell for this. The hives can be as heavy as 200# or even more, though, so as a final test, I just sat on it! The sensors are rated for over 100# each, so four of them can easily take my 255# self.
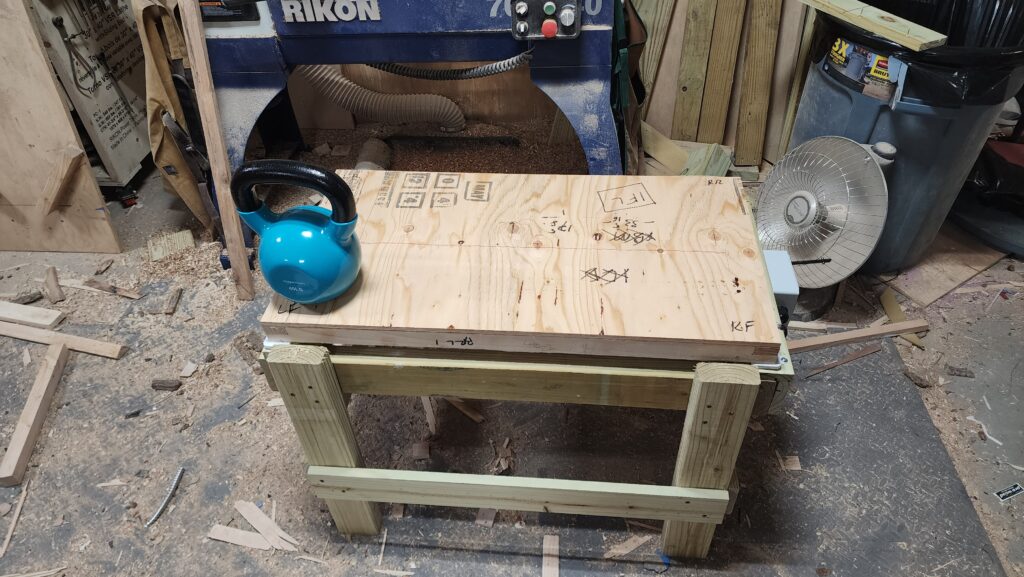
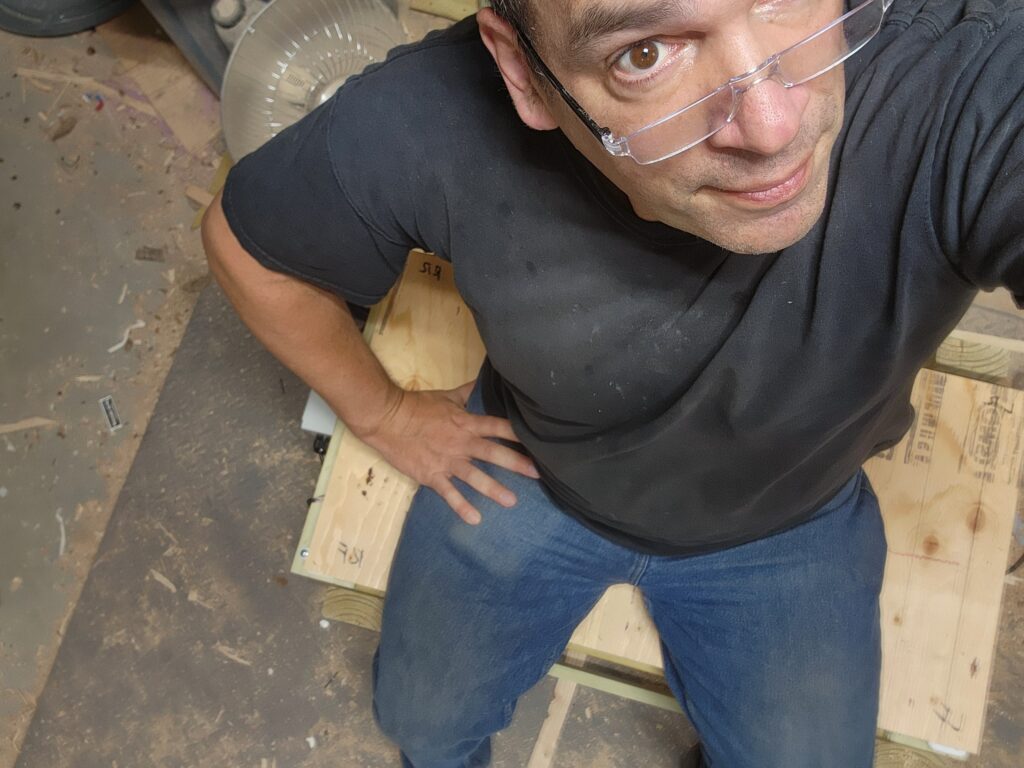
So… did it work? Indeed it did! Below is a screen shot from the data system showing 265#. That’s 255# of me and 10# of platform (which was correct).

Excellent. But here’s the other thing. I actually only built one scale. I have three hives. I wanted to be sure the scale build was going to work out before investing in 3 sets of parts and the time to construct them all. And I learned some things building the one anyhow, so the next ones I make will be better. But first, some weather testing of this scale out in the yard.
Which hive to put it under?
Trick question! None of them! I have built a fourth hive, with a new interior architecture to make it easier to build, and a peaked, shingled roof so I get good weather performance without having to use sheet metal or continuously repair/replace painted-only lids. This design has a hinge on the roof so it doesn’t need to be removed for inspections or harvest – I can just tip it back. Seems like a good idea, right? I thought so. Except this 3ft wide x 18″ deep x 115# box is now even harder to lift and maneuver to get it down to the yard, since it has a hinged roof. Oops. Hm. How can I lift this thing safely? If only it had handles. But there was no good place to put handles. On the sides would be the obvious place, but that makes for a wider grip than even I can safely manage. Any other orientation just didn’t make sense.
And then I had an idea… ratchet straps!
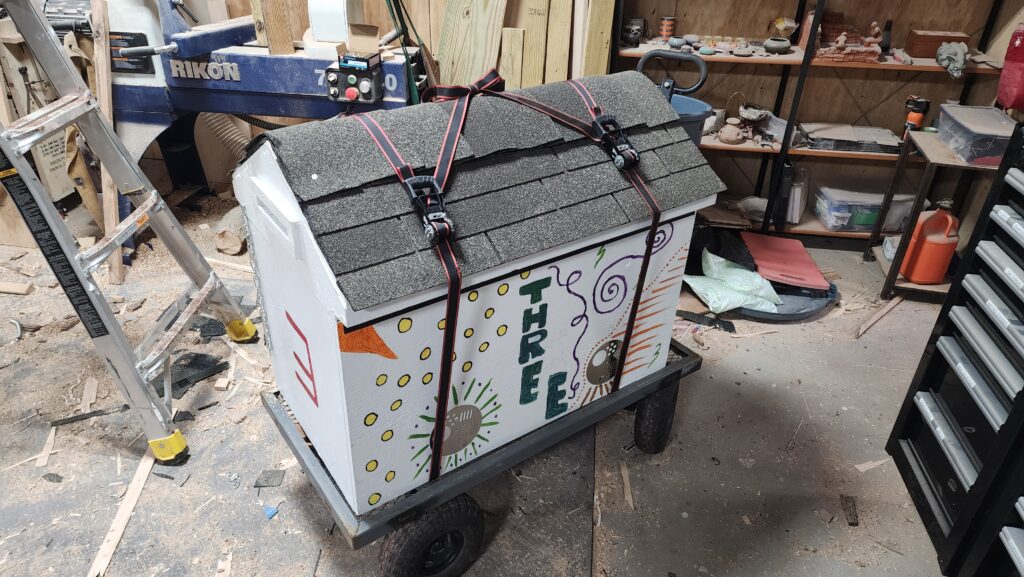
The straps keep the lid from coming open and, conveniently, give me something I can grab and lift by. It wasn’t exactly ergonomic, but it was enough to get the hive onto my cart and from the cart onto the stand, which had been placed in the yard.
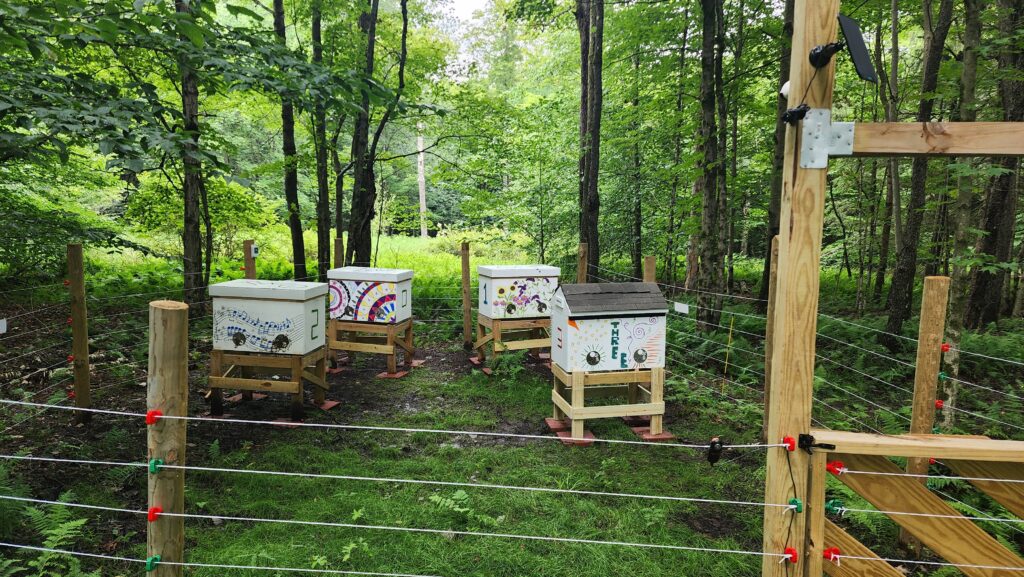
Hive Three is empty now. I had hoped to build it before any of the other hives swarmed (I had a feeling the overachievers in Hive Two were going to swarm), but alas, that’s not how it worked out. I will do an “artificial swarm” next spring if the bees seem up for it, expanding into Hive Three. That’s a story for another day.
By now, you may have realized that I have just implied there was a swarm before Hive Three was ready to house them. And you would be correct! I never saw the swarm, but my sensors did.
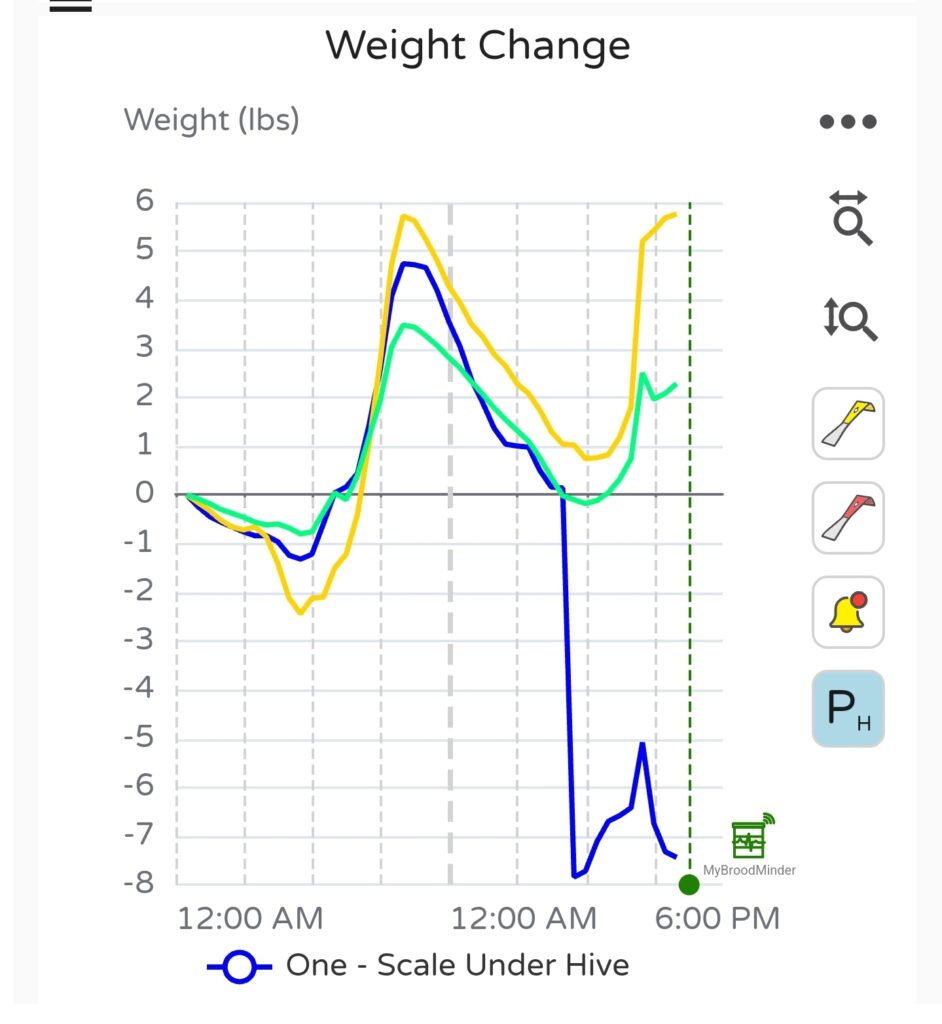
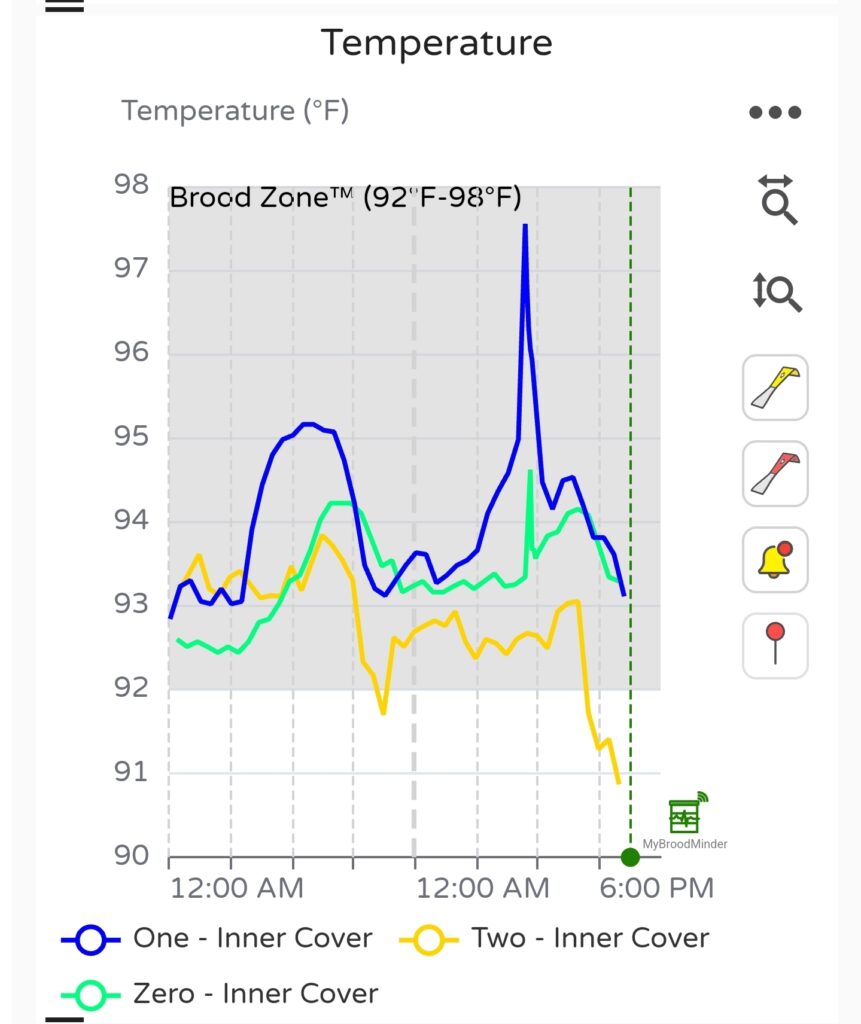
The abrupt loss of 8 pounds was the clue. This was about 2# of bees (which is a lot of bees), each laden with as much honey as they can carry so they have some food for their journey and to use while they set up housekeeping elsewhere. The temperature plot also shows a spike at departure time. No doubt this was the hive-wide signal to depart. I also noticed a bit of a temperature hump the night before — this no doubt was the bees busy packing up honey for their flight the next morning. I don’t mind that they swarmed – it’s their way of propagating – but it does mean that hive was not in honey production mode for a while since they were getting ready to leave, translating to less honey available for their human to harvest. However, as a steward first, and farmer second, I am happy that the bees felt so good about being here that they wanted to reproduce. I’m just sorry I didn’t see the swarm and had no place to house them if I did, so that I might keep those bees, too.
I noticed Hive Zero (green trace) also had a little hump and a little spike that same day, but there was no corresponding loss of weight, so I don’t know if they swarmed or just got a little agitated and followed their next door neighbor’s behavior without following through to the end.
There are things a beekeeper can do to prevent swarming, but I am not especially inclined to do those things. Swarming is how bee colonies reproduce and populate new places. Anything that helps new bees get established (especially out here in farm country) seems like something I should support, not prevent, given the perilous state of honeybees these days. It does mean less honey to harvest, but I’m okay with that, as long as there’s still some for me 🙂 Hive One swarmed in early July.
It turns out that Hive Zero (yeah, the one with the slow start) swarmed for real 5 weeks later, in the second week of August. It’s pretty late in the season to start a new colony, but best wishes, Zero expeditionary force!
I’m still expecting one more “honeyflow” – when there is a big collection of nectar – before the season closes in a month or so. The late summer flowers, such as Goldenrod and Queen Anne’s Lace are in full swing now, though it’s been poor weather for the last few days, so not great for nectar production. It’s also possible the bees are done with bulk collection at this point. Hard to say and I’m new at this anyhow 🙂
However, it’s pretty clear that Hive Two has at least 30 pounds of excess honey that I may harvest! For that, I’ll need a centrifugal extractor.
Here it is, a stainless steel drum with a spinning basket inside that is sized to hold honeycomb frames and a motor on top.
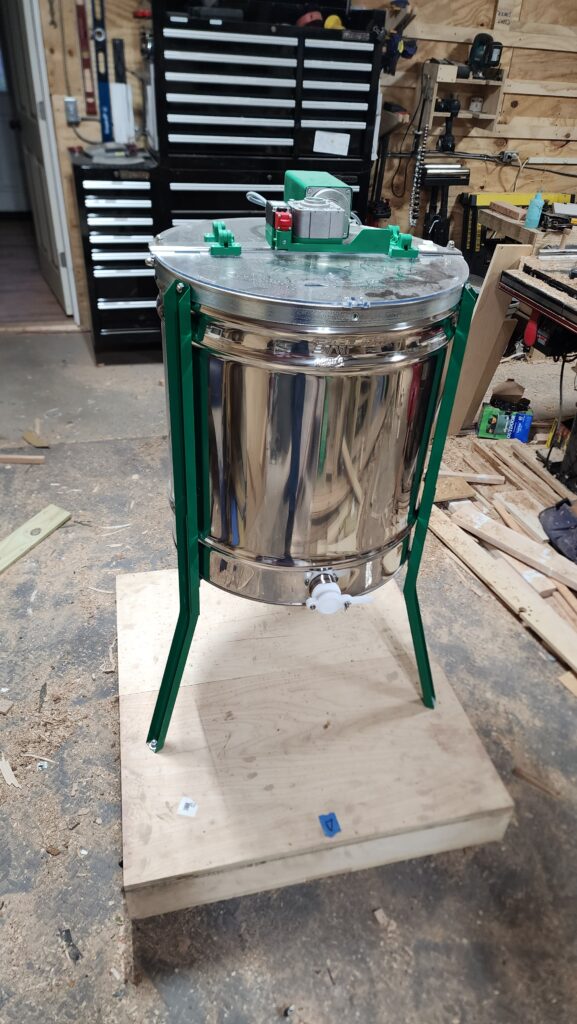
Okay, but what is this platform it sits on, you ask? A fine question! Any kind of spinning equipment is going to shake and shimmy if it’s not perfectly balanced. The extractor has bolt holes at the bottom of the legs (green) where it is quite obviously intended to be secured to the floor. However, the place I want to do the honey extraction is not the place I want to always have a honey extractor stored. What to do? I could put it on wheels, sure, but what about the shake and shimmy problem that the floor anchorage is supposed to mitigate?
Good question. My good answer was to make a box on wheels and fill it with concrete. This extractor dolly (without the extractor) weighs in at about 350 pounds. That should be pretty effective inertia against shake and shimmy.

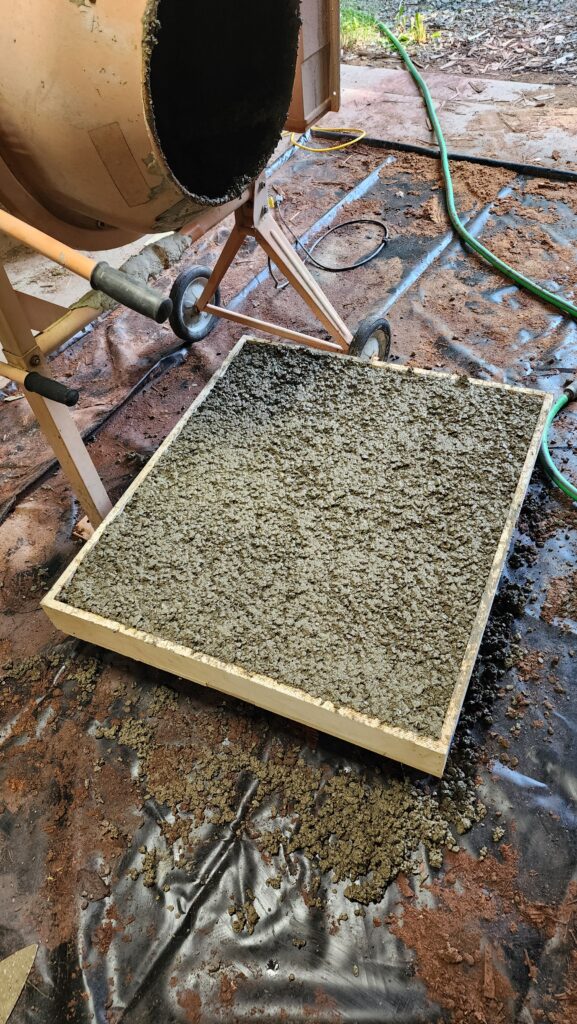
I used some scrap plywood for the box (mostly recovered from the prior Bednette project, when I converted to the Murphy bed) which had some screw holes and other defects in it. Nothing that would hurt the concrete, but possibly allow some of it to leak before it cured. Hence the blue tape.
Originally, I planned to make the base 36×36″, which was a natural size given the footprint of the extractor, but then — just in time! — I realized that it would not fit through my doorways at that size! So I made it 36×32. And even so, the platform just makes it through the doorway. These are 36″ nominal doors, but remember there’s also the jamb and part of the hinge edge of the door occluding some of the opening. I could have maybe made it 33 wide and still gotten through, but 32 was clearly the right answer.
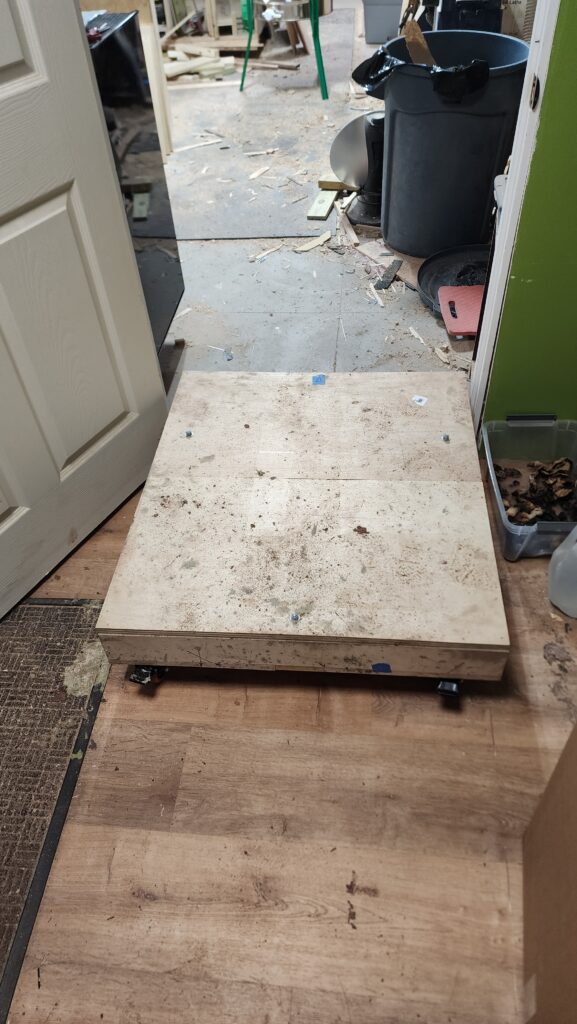
I used my favorite 1000-pound lockable casters for this. It rolls nice and smooth, like butta.
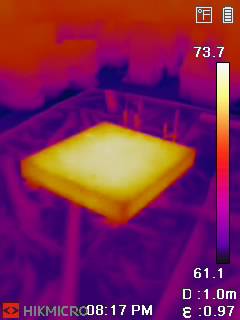
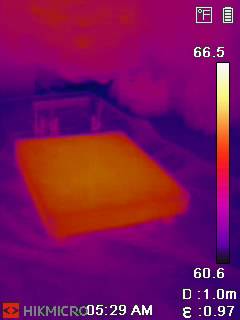
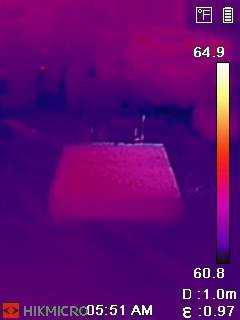
Curious about the curing process of the concrete, I spied it with my thermal camera and was not disappointed. These pics were taken 1, 3, and 5 days into curing.
And now for the somewhat random nature photos part of the program…
We start with this sweet fawn…

And a few choice portraits of my friend the Red Eft.


This misty day was perfect for spiderwebs, too.


And this daisy caught my attention when I realized what I was looking at.

See that dense golden material at the center? That’s pollen that my bees haven’t yet harvested for their own use. This flower is fairly picked over already.
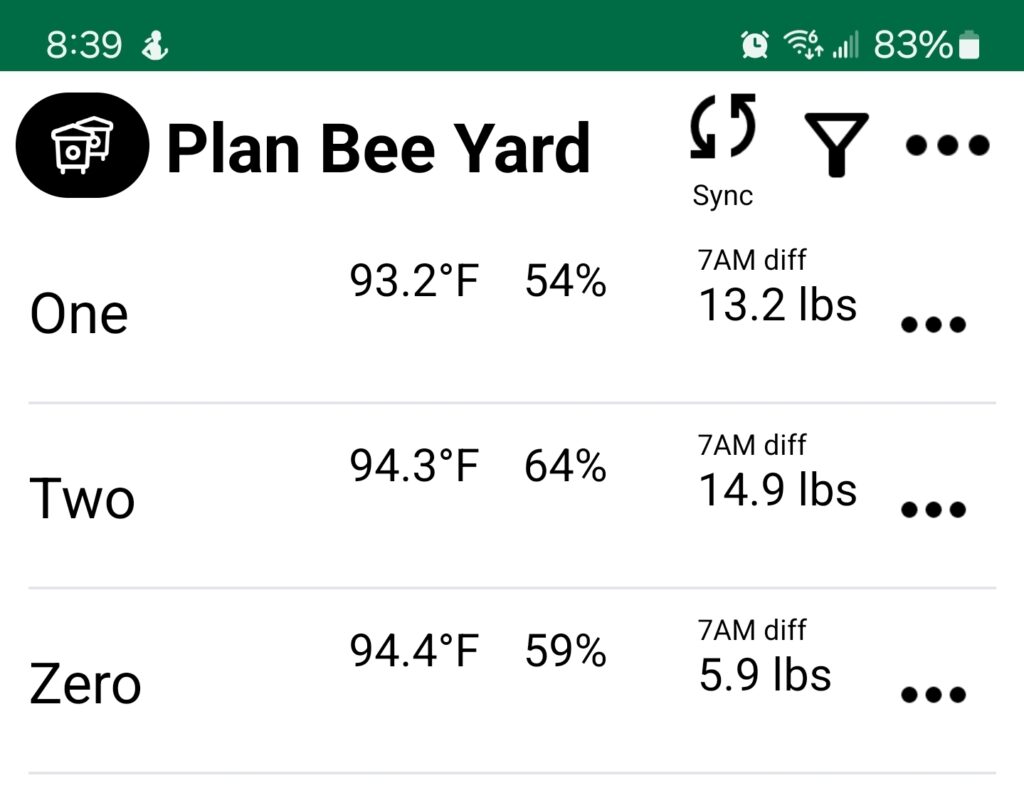
And one last note – a screen shot from my bee monitor app. I just want you to see that Hive Two had one amazing day where they brought in nearly 15 pounds of material. One tiny bee-load at a time. Astounding.
