You remember the not-so-long-ago upgrade to the murphy bed, right? Well, I was never delighted with how the table attached and stowed in that configuration. It worked okay, but the table would often squeak as it moved a little on the mounting cleat and the whole thing required a maneuver by which the whole table was flipped around to get it stowed or deployed. Not ideal.
There were two problems using hinges, the obvious choice for the table. First, to have the table at the right height when hinged-out, it would have to fold up such that the perfectly placed bed pull-down handles would be hidden by the table. Second, all the hinges I could find that would accommodate the range of motion I needed would require a hinge leaf attached on the top surface of the table. That means that loads on the table would apply a significant tensile (pull-out) force on those screws, quite likely tearing the table away from the hinge at a Very Inconvenient Time, dumping the contents of the table to the floor (at least). No bueno!
Then I found some offset cabinet hinges that I could attach beneath the table and that had a stepped leaf such that the table was actually cradled by the hinge leaf, the screws necessary just to keep it in place, not to bear the load of the table. Perfect! Well, close to perfect – I’m no in love with the resulting aesthetic, but I am quite fond of now having the table simply fold up and fold down, without having to fly it through the air, supporting its whole weight during positioning maneuvers.
As you have surely come to expect, the simple-sounding line item “mount table with offset hinges” turned out to be a bit of a production.
It started here. The old stowage mechanism was a couple of hooks at the bottom, a hasp at the top to secure it. There was a French cleat system that mated one edge of the table (seen bottom right) to the bed cabinet (hidden by the table in both shots). You can just barely see the black hooks near the floor, under the table, on the bed cabinet in the left photo.
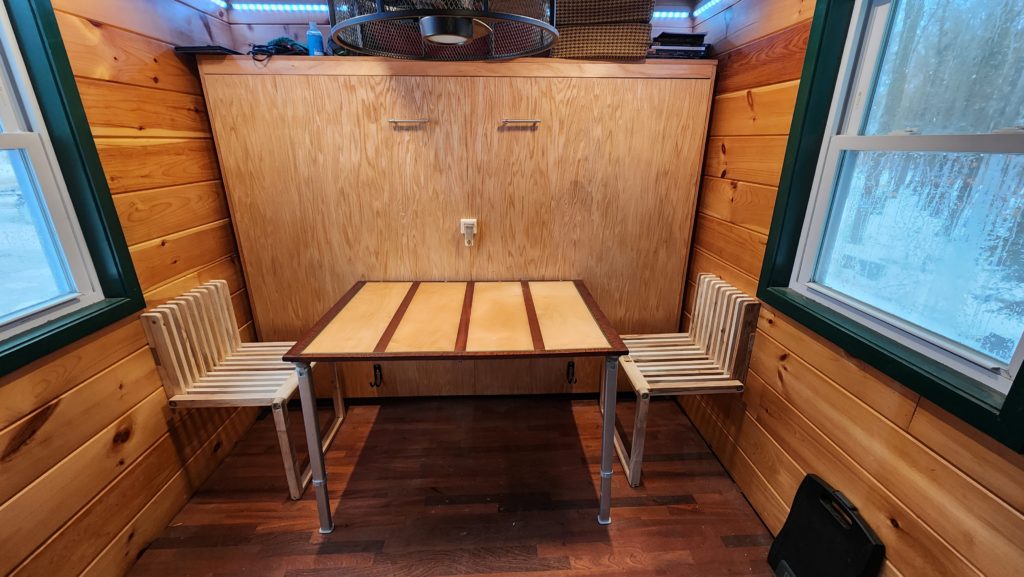
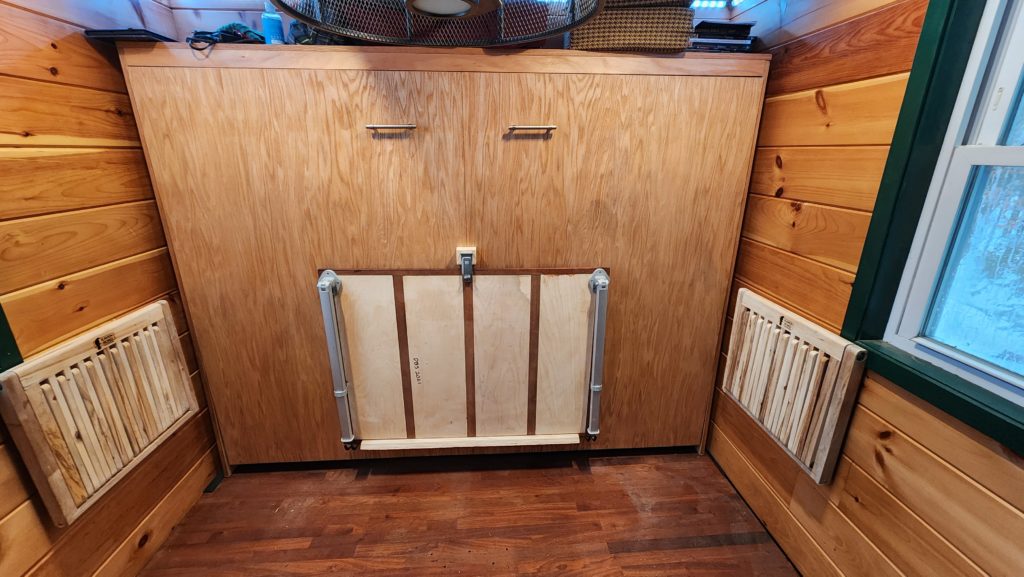
So the first problem was that to have the table fold up, which it had to in order to be able to deploy right-side up with a hinge mount, the table had to be mounted higher than the existing pull handles would allow. They need to move. Just moving them higher makes pulling them quite awkward. They need to move elsewhere. But first, they need to be removed from their current location.
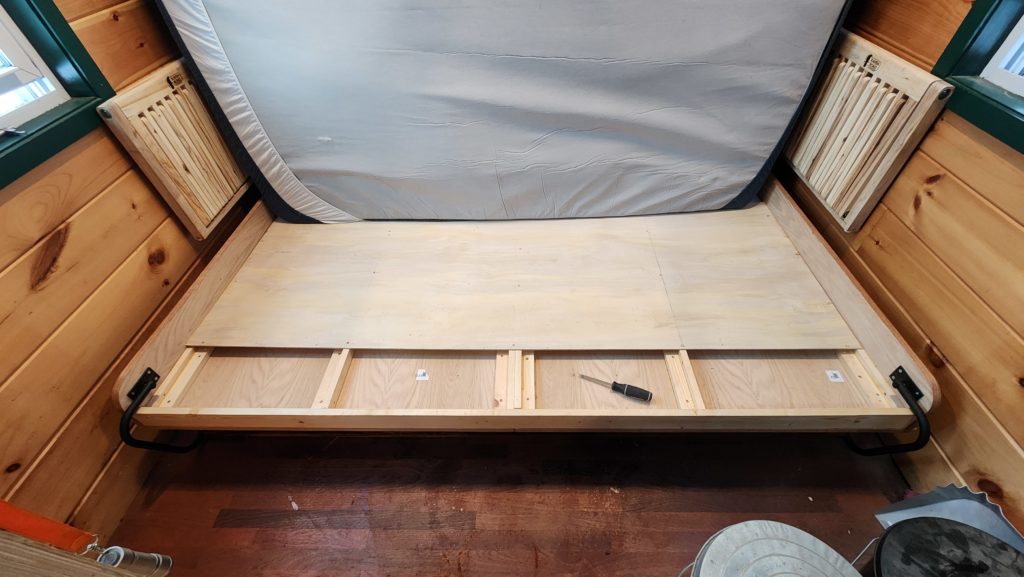
This required gaining access to the back of the front of the bed cabinet, which required moving the mattress out of the way as well as a section of mattress deck plywood. The thing is, the whole bed is spring loaded rather aggressively, to aid in raising and lowering the mattress. That’s great when the mattress is laid down. When it’s not counter-balanced by the mattress, the pull-down part wants to close (pull up) with great force. I did a little thinking and realized that if I stood the mattress on end, I could concentrate its weight in one spot (rather than it being evenly distributed across the deck), meaning I could apply that whole weight to balance the springs if I could locate it far enough away from the pivot point that there was adequate leverage. It worked. That’s good, because having to anchor the bed against the springs would have been a real bother. The screwdriver is pointing at the screws which mount the pull-down handles. I remove both handles and re-assemble the bed deck.
Next, I need to prepare the table top with the hinges. Since this is going to be a built-in-place kind of thing, rather than having all the parts fully under my control in the workshop, I realize that the best path will be to mount the hinges to the table, then copy the mounting hole locations to the bed cabinet, pre-drill, and finally mount the table using the pre-drilled holes. Seems simple enough, right?
Hinges attached to the table first. Then I find a scrap of plywood and carefully place the table against it as if the table were stowed. I then mark the locations of all the hinge mounting holes. The plan is to use this plywood as a true template representing where those hinges really are, so I can be assured that copies of those mounting holes applied to the bed cabinet will match the table perfectly.
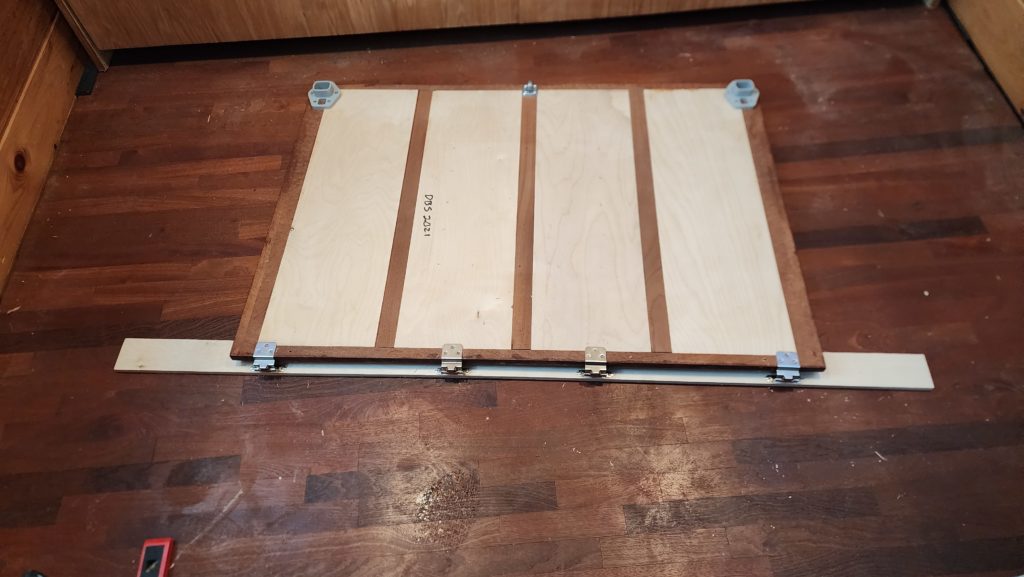
After marking the holes on the plywood, I trill them through. Then I mount the plywood temporarily to the bed cabinet and use it as a drill template to pre-drill the mounting holes on the cabinet. This turns out to be more difficult than it had any right to be, but I get it done. It would have been much easier with a helper — someone to support the plywood while I worked to get it positioned and level, then pressing it against the cabinet to adhere it with double-face tape. As it was, supporting, positioning, and maintaining level all at once took both of my hands, with nothing left to commit the plywood to the cabinet. I got it done, but it took a few tries to get it sufficiently level.
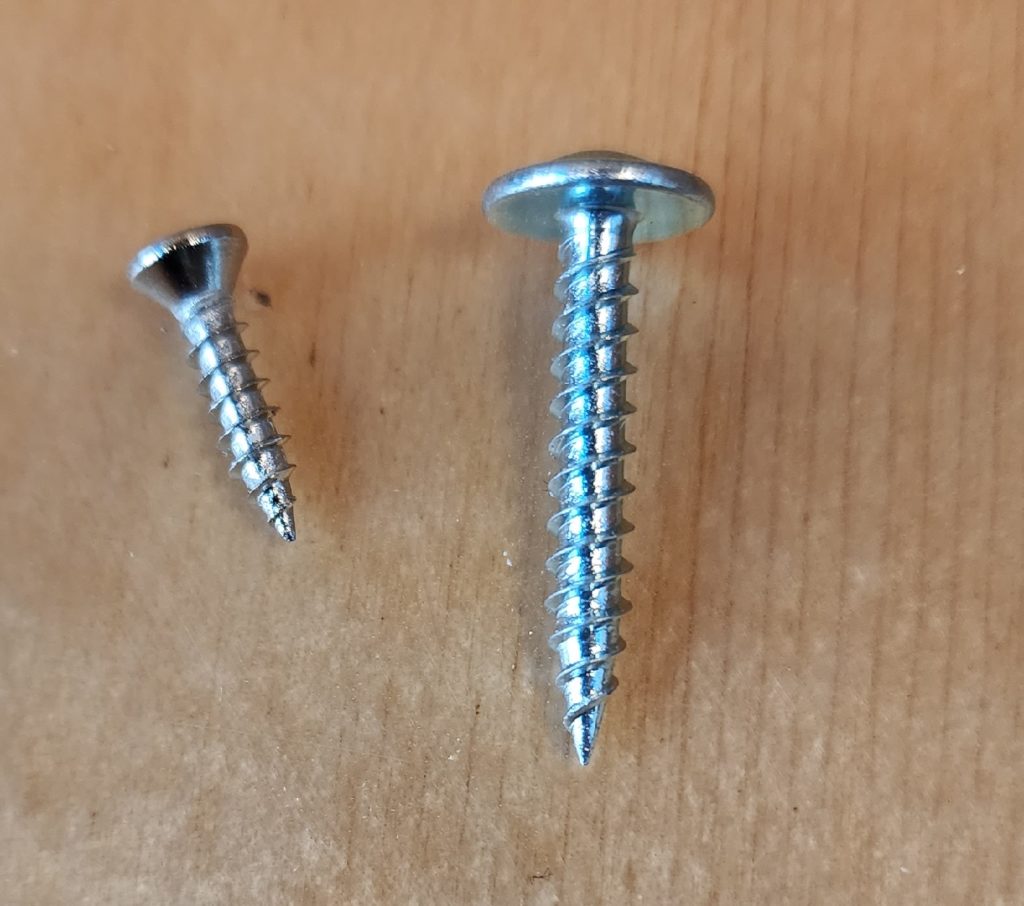
Time to screw the hinges to the cabinet. The screws that came with the hinges, though, were meant only to bear the weight of a cabinet door, not a loaded table. The one thing I have in particular abundance here is a variety of screws. I was prepared. No shopping required.
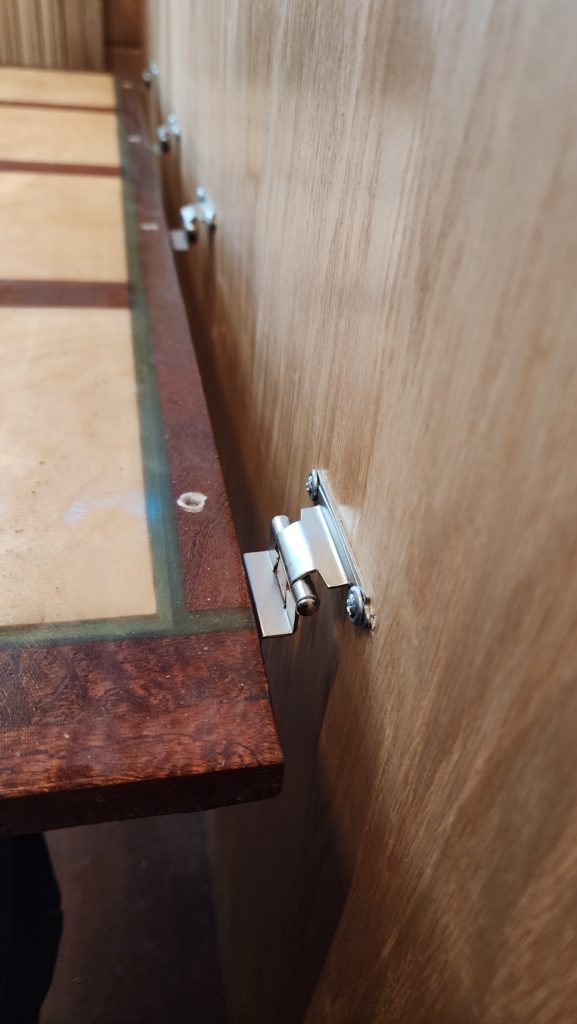
Hinges mounted to bed cabinet. Those empty holes in the table top were where the screws for the French cleat used to be. The whole house bears the scars of incrementally figuring out the best solution for any given problem. Mostly these take the form of vacated screw holes.
So where do the pull-down handles go? Well, actually, they are attached to the table now! Here is the table, in stowed position, showing the handles and the slide bolts that latch it in the stowed position.
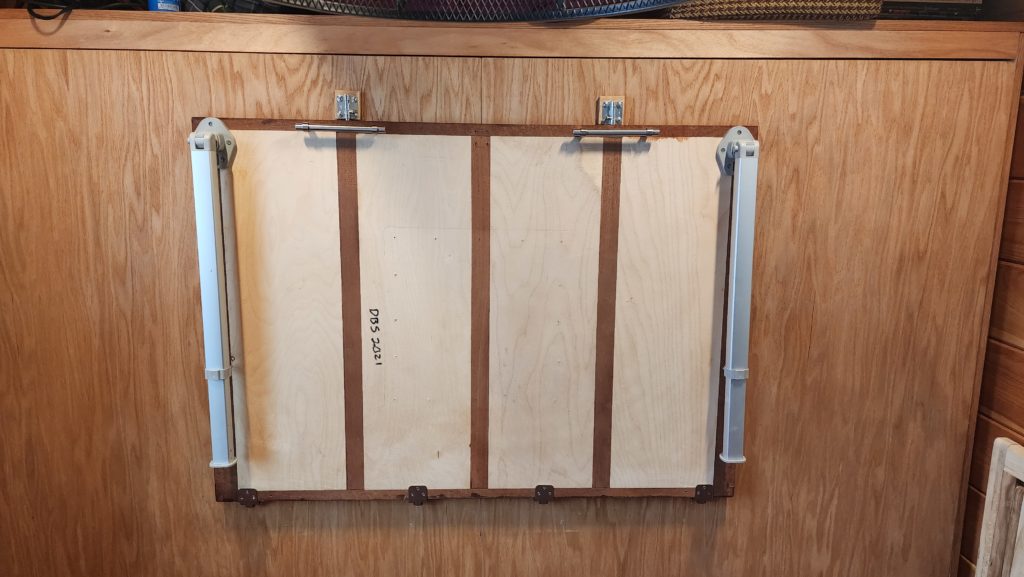
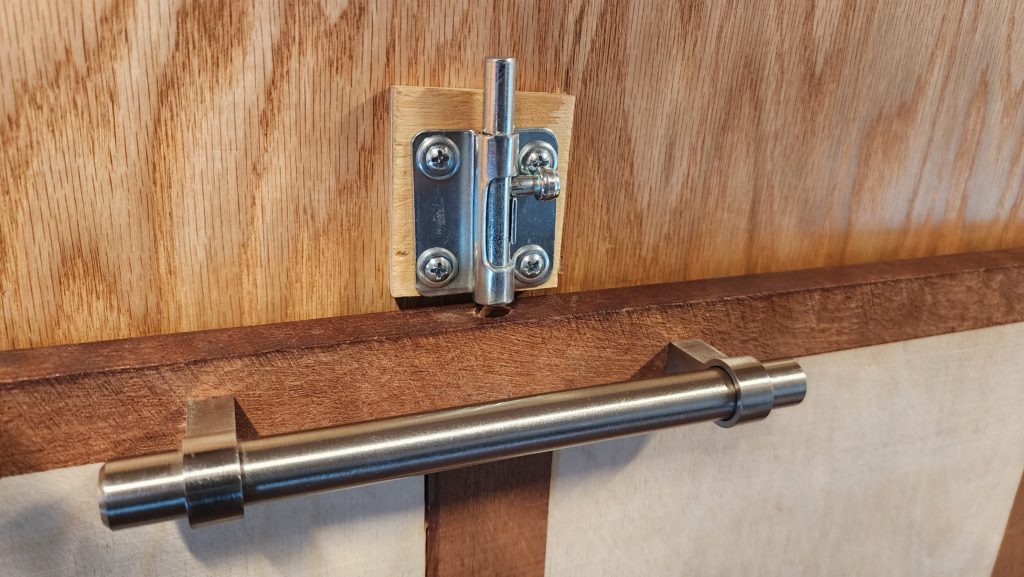
The handles wind up being almost exactly where they used to be, relative to the front of the cabinet. They are slim enough that they do not interfere with people legs, if anyone is sitting on the long edge of the table. The body of the slide bolt engages a hole in the side of the table, keeping it securely in place.
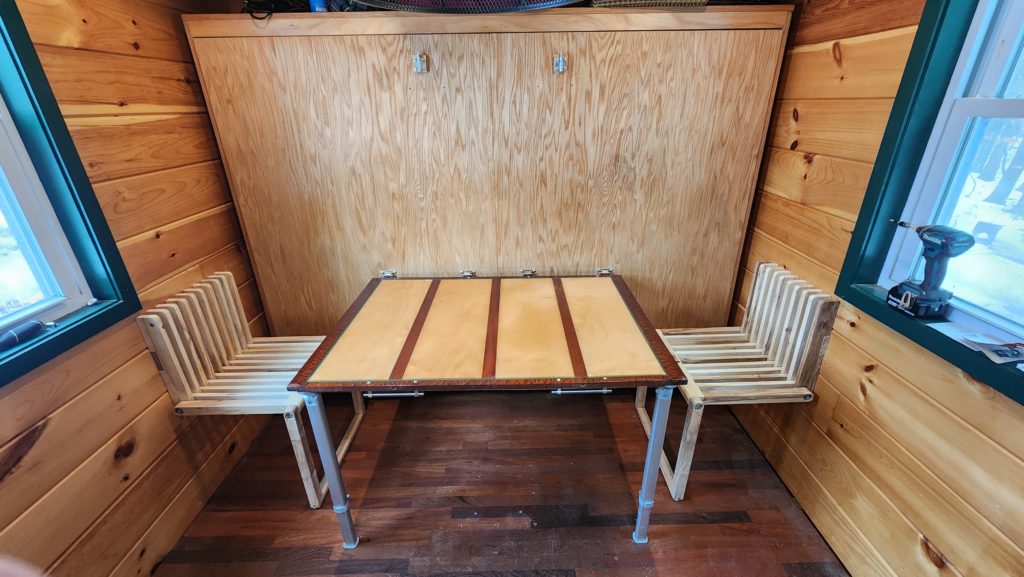
You can see the handles now on the underside of the table. Even thick-legged people don’t hit them, so sure, it’s a little odd, but it’s not a problem. The hasp is gone from the cabinet, cleaning up the aesthetics on there a bit, too.
But the best parts are that the table is now completely secured to the cabinet front, doesn’t slide, doesn’t squeak, and is far easier to stow and deploy than before.
Goodbye hooks, hasp, and French cleats.
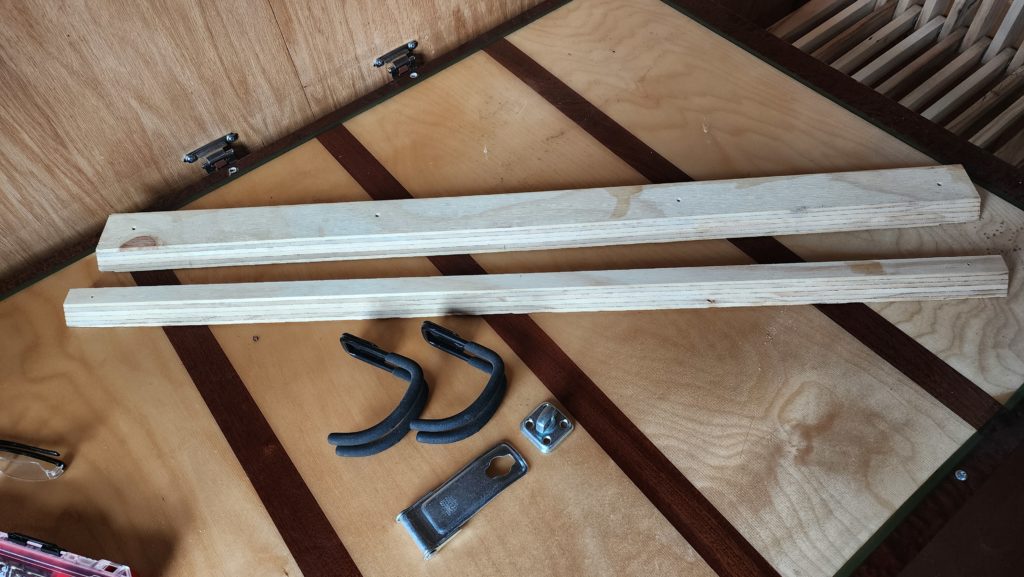
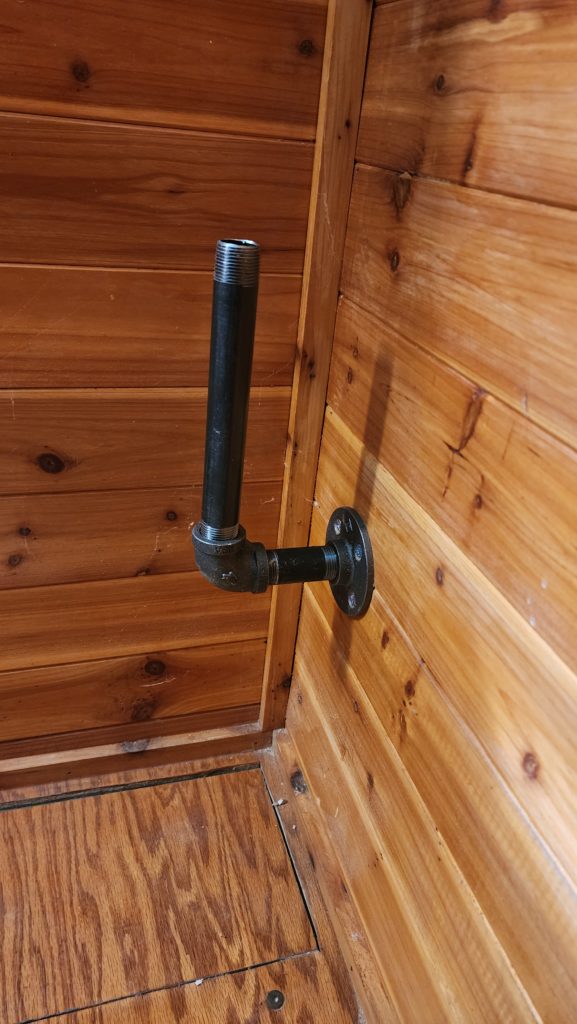
I did some minor plumbing work in the bathroom recently, too. First, some steel pipe solved the problem of the spare TP being in the way of accessing the side cabinet next to the T.H.R.O.N.E.
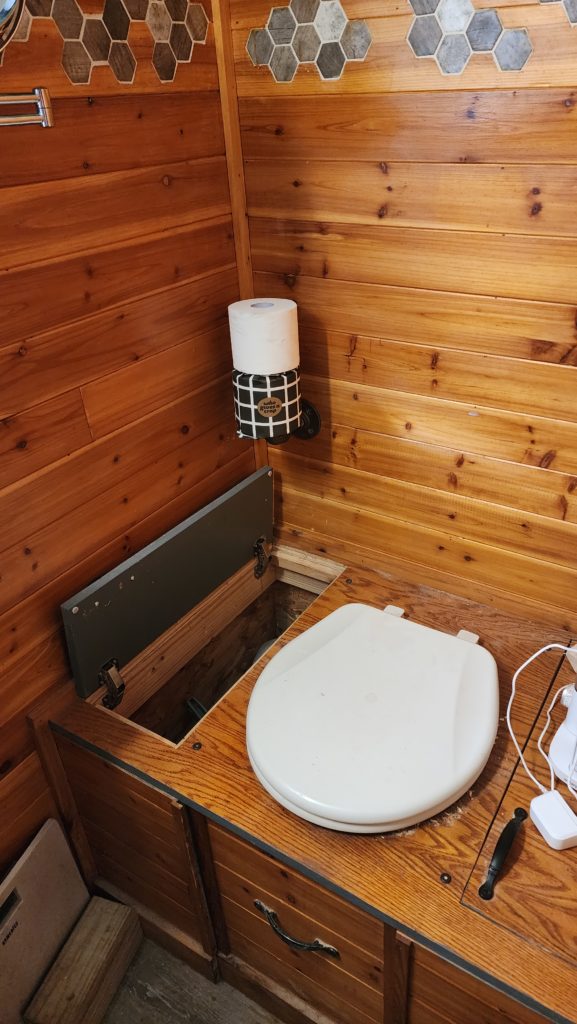
And the gray water dump valve handle broke, so that needed to be replaced. See those black rubber couplers? I put those in during construction, thinking ahead that one day it was likely I’d need to replace (or at least remove and clean) the valve. Yay for past me! Replacing the valve was therefore super easy.
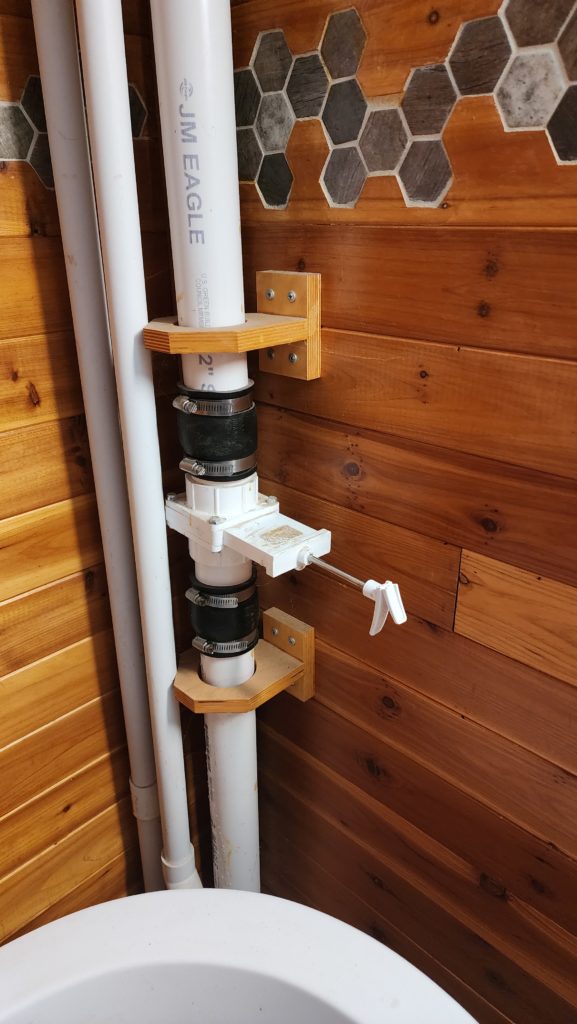
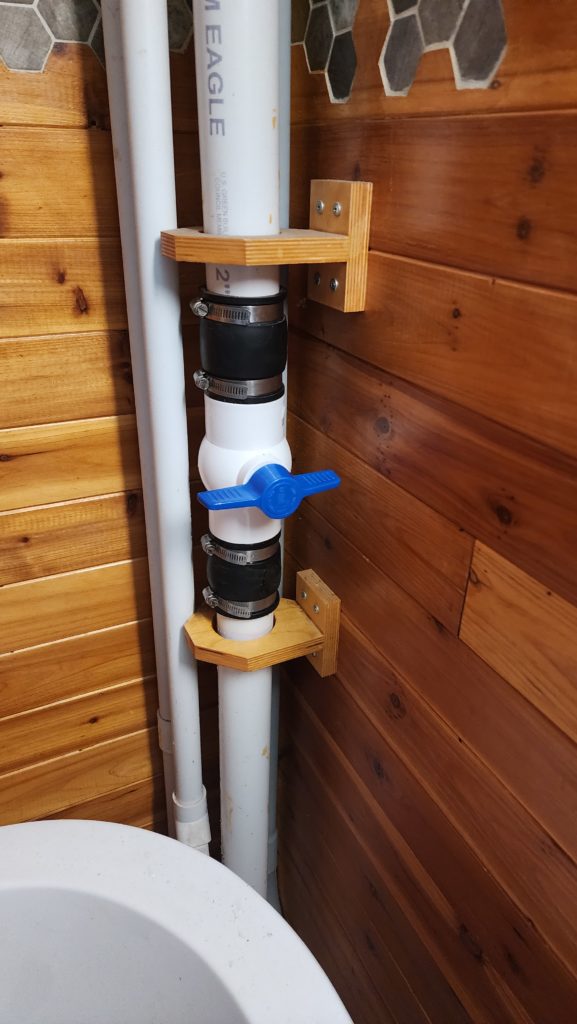
…and I found a nice ball valve that’s easier to use than the gate valve that it replaced, too. I think it looks nicer, as well.
As Shel Silverstein would say, now there’s a light in the attic!
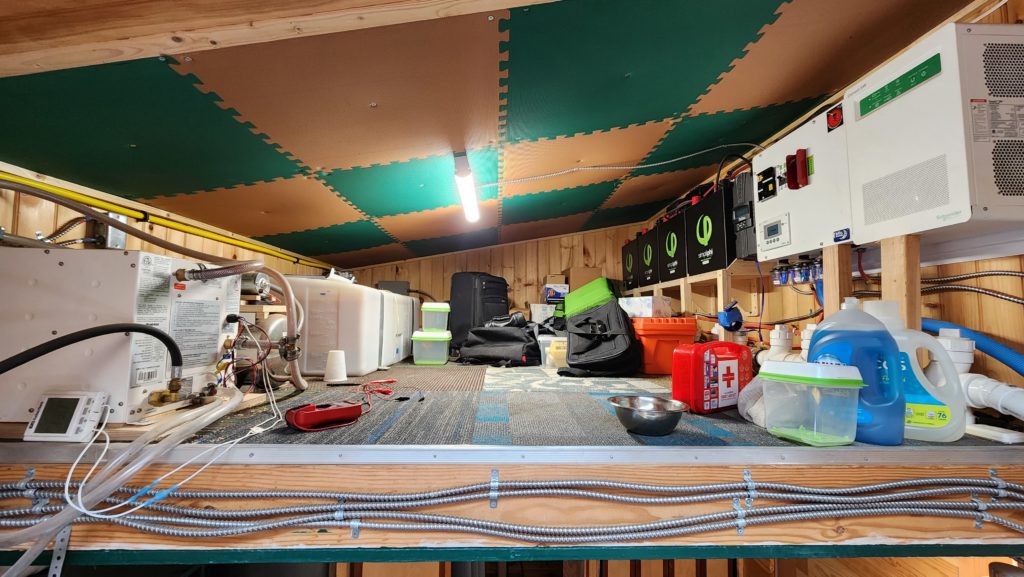
What a huge difference that makes for doing anything up there. At first, I didn’t really expect I’d need to access that space very often, so needing flashlight or a portable work light felt acceptable. While it’s true that I do not access that space very often, having a dedicated light in there makes those infrequent trips considerably more convenient.
I plan to move the fixture one square to the right, though. It turns out that when I enter and exit this space, it’s right along the line where the fixture is and I routinely bump it. No problem – I’ll just shorten that wire by 2ft and re-attach the fixture closer to the power center. And in so doing, create three more of those scars I was talking about just a little bit ago. And so it goes. This is my first tiny house build – not everything is obvious with respect to what’s the best way to do it. Changes happen.
Heck, even in the conventional houses I’ve lived in, I was always re-arranging things, sometimes adding or subtracting walls and doors, so the house continued to accommodate my needs as they arose and changed.
When I powered on that light for the first time, though, the electrical system complained mightily. Whut? I’ve been doing electric quite successfully and without incident for decades. What could I possibly have gotten wrong on such a simple installation as a switch and a light fixture? Turns out the culprit was this:
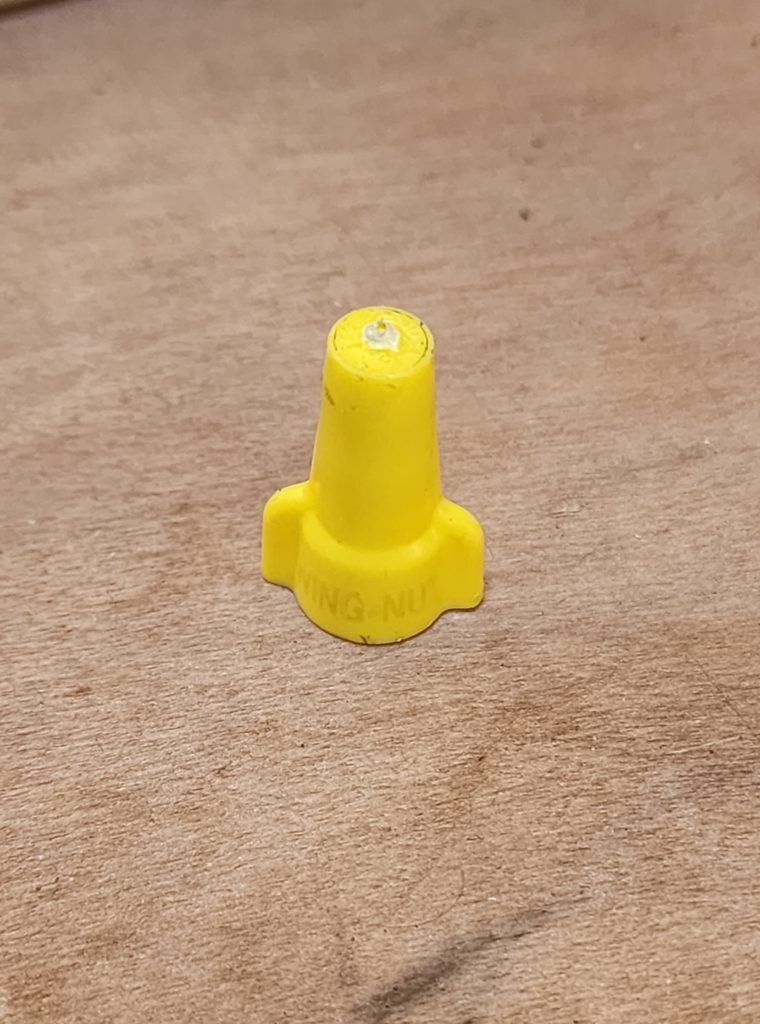
Looks like a completely ordinary winged wire nut, right?
Well, it is. Except for that white bit at the top.
That’s a hole.
I tightened the nut so tight that the wires actually poked through the roof, which I did not notice.
The metal housing of the switch box against which this wire nut (and the protruding wire tip) pressed noticed, though, creating a dead short between the supply lines and ground. Oops.
It was easily repaired and no harm was done — various protective devices did their job and there was no fire, smoke, sparks, or other hazards.
One of the three battery modules in the workshop got a firmware update on Dec 29 last year. Why just one? Well, it turns out the three units are all slightly different ages/versions, so their innards are a little different, one to the next. It was the very newest one that got the update. The older ones (about a year older than the newest), have never been updated, as far as I can tell. Anyhow, after the update, the unit promptly began to malfunction! The three had been running harmoniously for quite some time before that.
I’ve been in contact with tech support for three weeks trying to get this resolved, to no avail so far. I have written a sternly worded letter (an actual paper one!) to the vendor with threats of legal action (they hobbled an expensive bit of my equipment with their update) if they don’t make it right promptly. I will abstain from naming names and telling the whole story just yet – but if they fail me after the letter arrives as well, I will indeed see about what legal remedies might be available to me. I’m pretty sure that telling a true account of things in a public place (like this right here) can’t possibly be construed as defamation/libel, but I’d definitely want to be certain of that before making a loud noise about this in public since what I’ve got to say is pretty deleterious to their reputation.
Opposite the battery malfunctioning, two other things are functioning well!
The heat-recovery ventilator, whose job it is to remove moisture from the air in the house, is definitely getting that done. Not only does my hygrometer tell me the humidity is moderate inside, but this photo tells me there was moisture in here before, that’s since been sent outside.
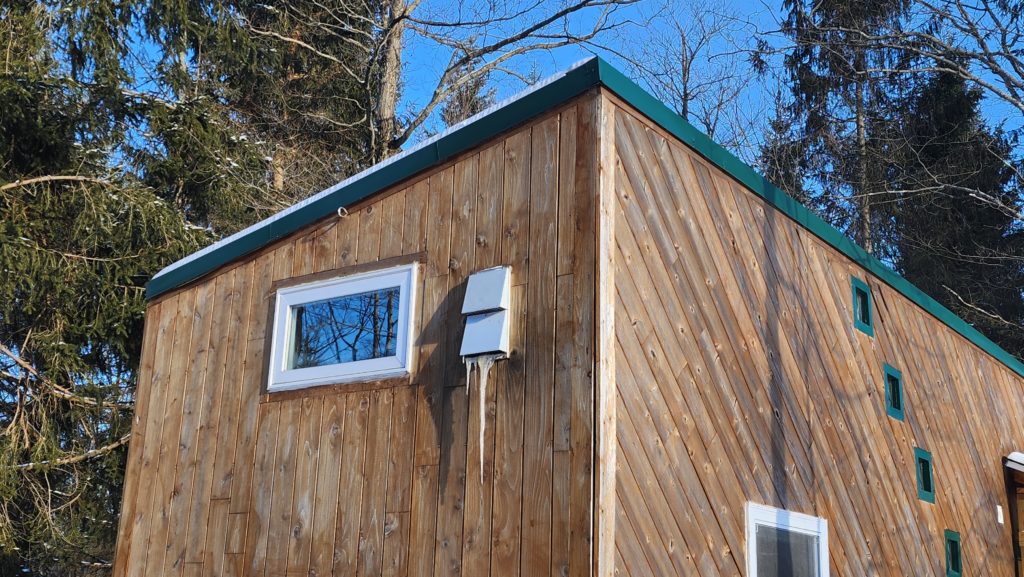
Yeah, that’s an icicle over a foot long hanging from the HRV exhaust vent. Moisture? Yep, there was some!
Also, you may recall the snow breaker I built last year to protect the workshop flue from snow fronts coming down the roof. There wasn’t much snowfall after I installed it, so I didn’t get to see it in action, except once while snow was actually moving, and that was from a poor vantage point so I couldn’t really confirm what was going on. Recently, there was a snow front that got arrested by a cold snap, giving me the opportunity to take a picture of a static scene that was nevertheless indicative of dynamic activity.
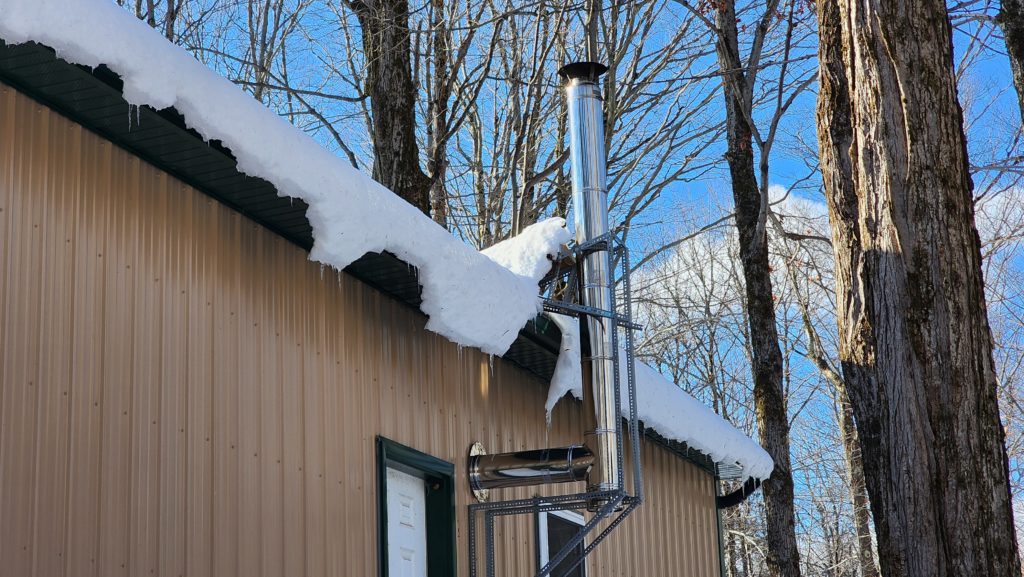
You can see the snow front riding up the snow breaker, shoved to the sides such that it must go around the flue, rather than push against it. Also, you can see the big gap in the “snowverhang” below the breaker, proving that the snow has been displaced. I am very pleased. I will be even more pleased as it proves itself through the rest of the winter, but this is an excellent bit of evidence showing it working exactly as designed.
Now, right-thinking people install their flues on the gable ends of their buildings, not the eaves, so there are no snow fronts to contend with in the first place. But I wanted the stove where I wanted the stove and that necessitated this placement. And the snow breaker.
And in other very random news, I finally figured out a way to use that strange space under the cabinets built into the stairs. I located a particular storage tub that fits perfectly under there! Obviously a bit inconvenient for everyday access, but for infrequently-used things, this is perfect. It makes good use of a weird bit of volume in the house that was otherwise difficult to utilize.
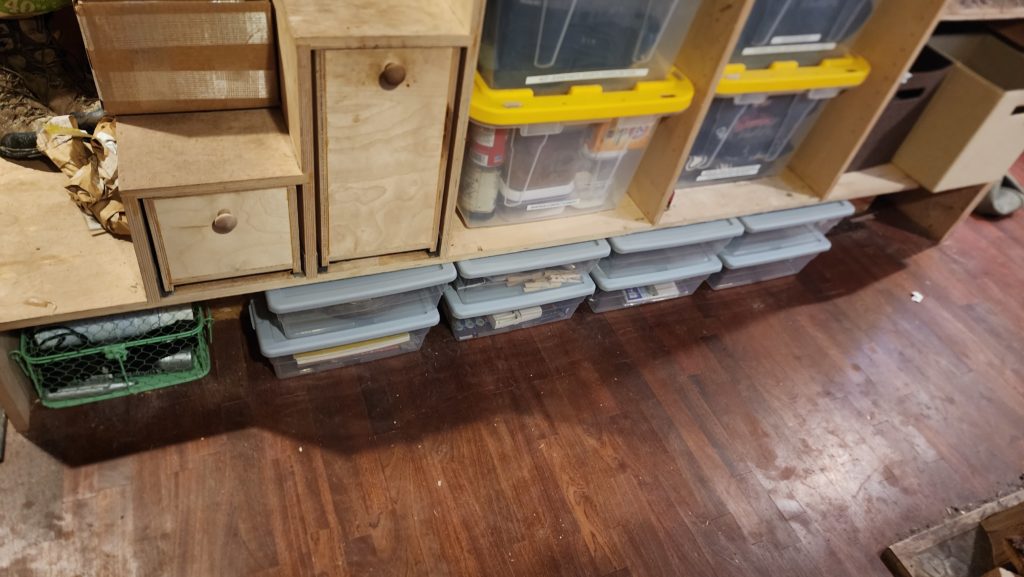
I will eventually make false fronts for those drawers and tidy up this whole scene — it’s on my list — but it’s not at the top of my list.