The “bednette” (convertible bed/dinette) seemed like a good idea at the time.
But it wasn’t.
The seat-cushions-turned-mattress was never comfortable and despite nearly two years of attempting to acclimate to it, the truth of the matter remains: it was uncomfortable and inconvenient to transform the dining space into the bed space. And the cushions didn’t stay put, either.
I had originally planned on a Murphy bed for that space, which obviously lets me have a legit mattress which is good, but in such a case there’s no casual lounge space — a feature the bednette met, to some extent, with its benches. After nearly two years of bad sleep, I decided better sleep was far more important than the casual lounging function, which the bednette didn’t do well anyhow. Conveniently, I actually already had the Murphy bed kit (I bought it prior to the revised thinking which led to the bednette and decided to keep it, just in case I changed my mind, like I just did).
Building a queen sized Murphy bed is a non-trivial task. Installing it in a tiny house that’s only a few inches wider than the assembled bed, moreso!
The main part of the bed is slightly bigger than my table saw + outfeed support, but I could make it work. I’m definitely glad it wasn’t any bigger, or just the act of fabrication would have been prohibitive.
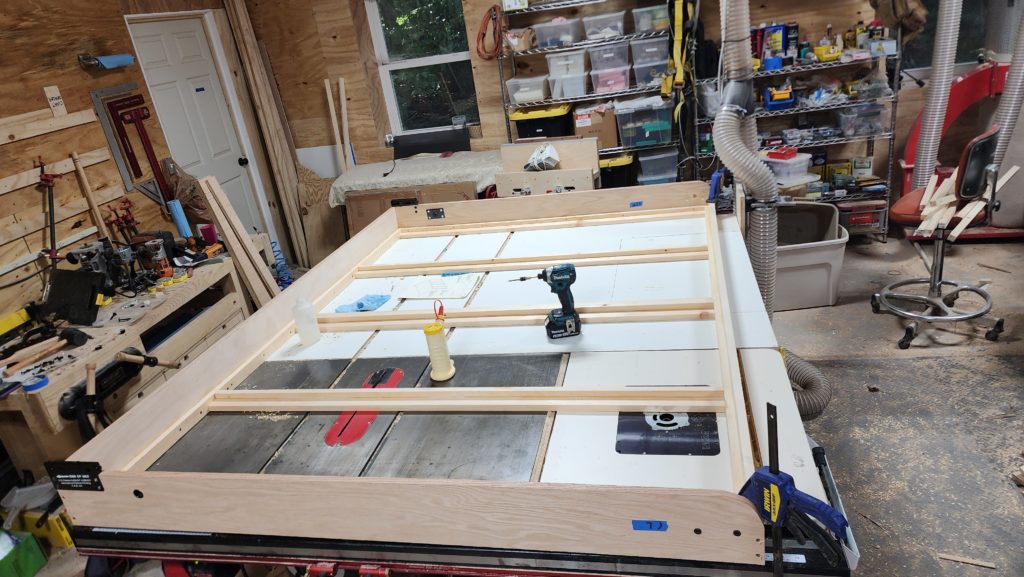
Another challenging bit of assembly was placing this frame on top of the two sheets of plywood that would become the interior face of the bed cabinet.
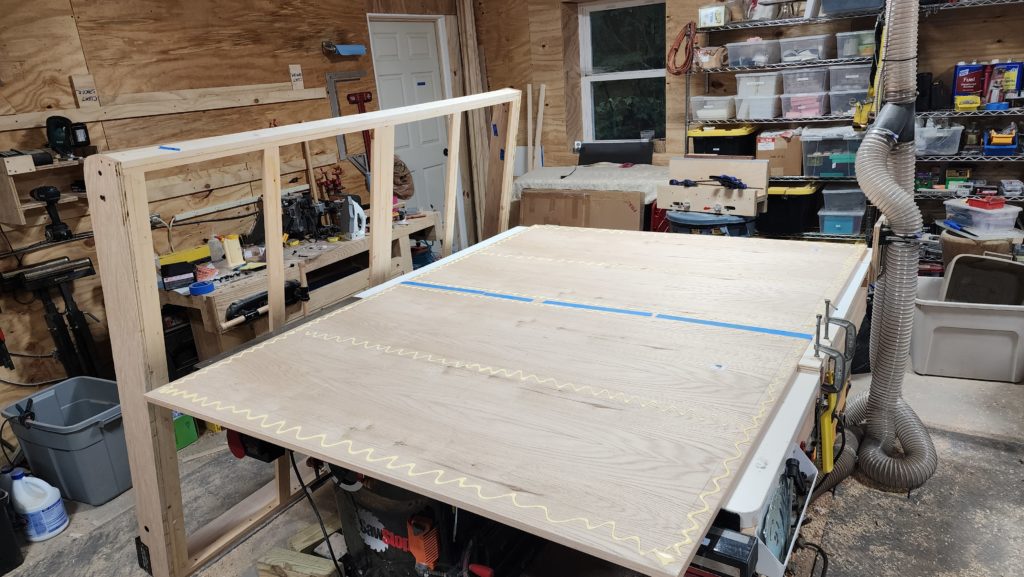
How exactly am I going to land this frame (standing, left) on the plywood (flat, with glue squiggles) without smearing the glue all around, and without a helper? Well, for starters, I taped (blue) the plywood panels together to keep them aligned to each other. I clamped a block at the edge of the table to keep them from moving. And lastly, I put a temporary block in place (shown in next pic) that would let me basically drop the frame approximately in place, above the glue, and let me fine tune the position before landing it on the glue. This worked nicely.
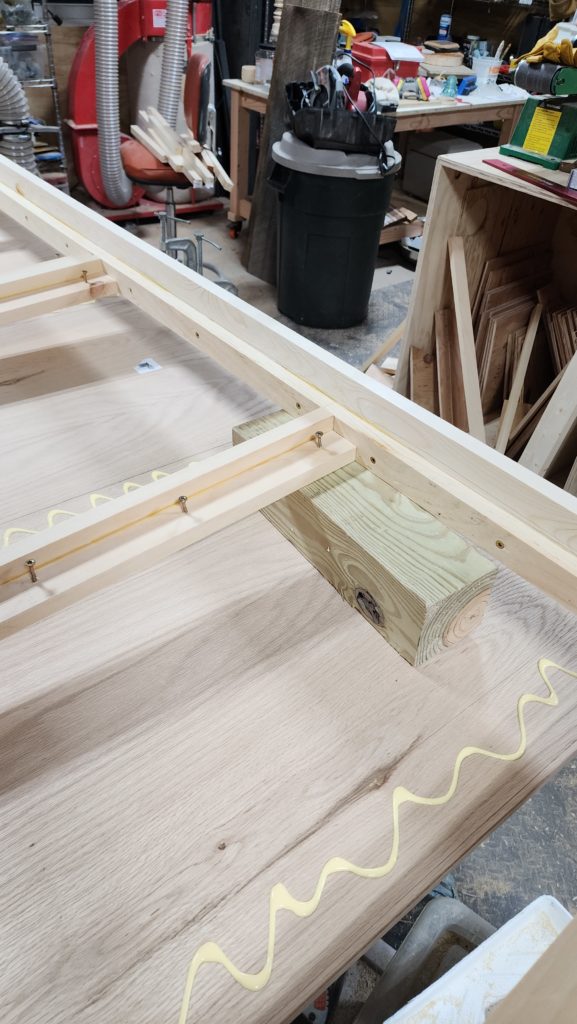
I also pre-loaded all the screws that were part of this assembly step, so I wouldn’t have to fuss while working against the fast-setting glue’s working time.
Then there was the question of getting this assembly off the table for the next steps, without scraping the underside on the cast-iron edge of the table saw, where I’d been working. Some skids got that done. Working on large projects solo often requires some critical thinking/creativity.
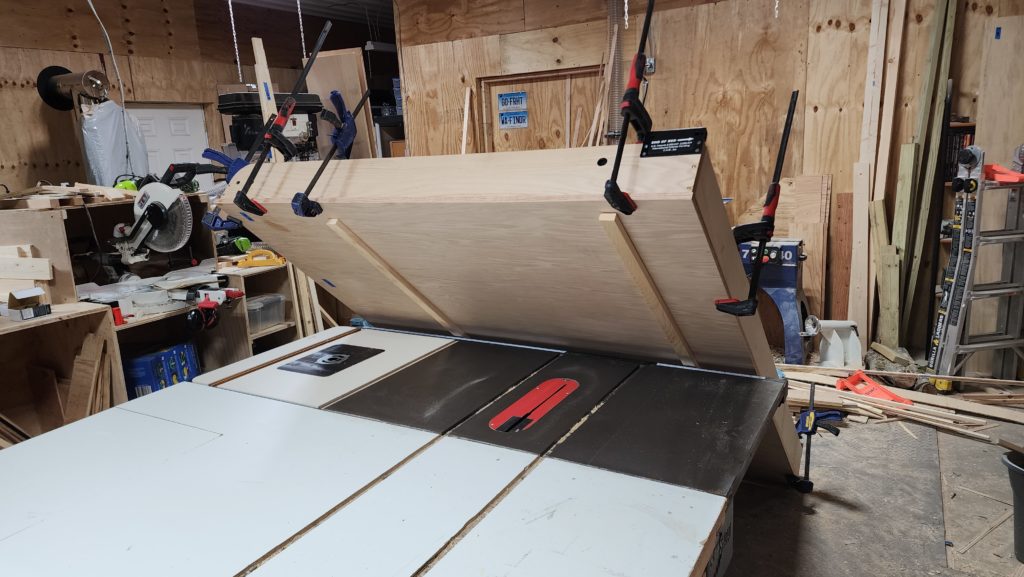
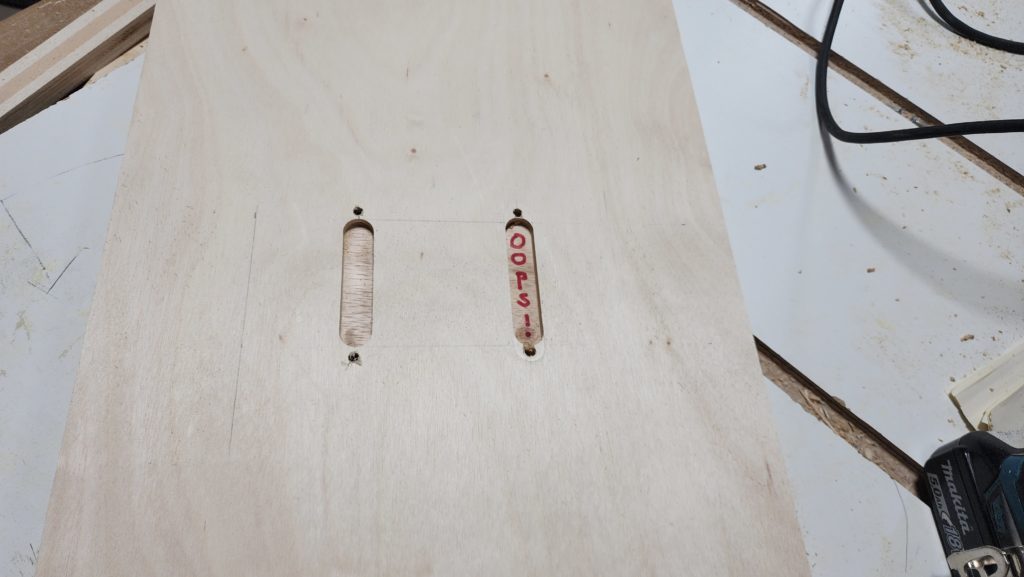
And sometimes, one sets up a perfectly executed router mortise… only to realize the left and right ones are mirror image and one accidentally used the wrong reference for one of them. It was a large part and re-making it wasn’t practical (I don’t remember if I actually had a large enough scrap of plywood to re-do it) — so I decided to acknowledge and embrace the error rather than try to hide it. I could have put some effort into cutting a careful plug to fit this mortise and maybe capped those holes, too, but really, they’re only visible when the bed is down (shortly before and after I will be sleeping and not studying the cabinet) and perfection has long ago been abandoned on the HomeBox. It’s perfectly imperfect!
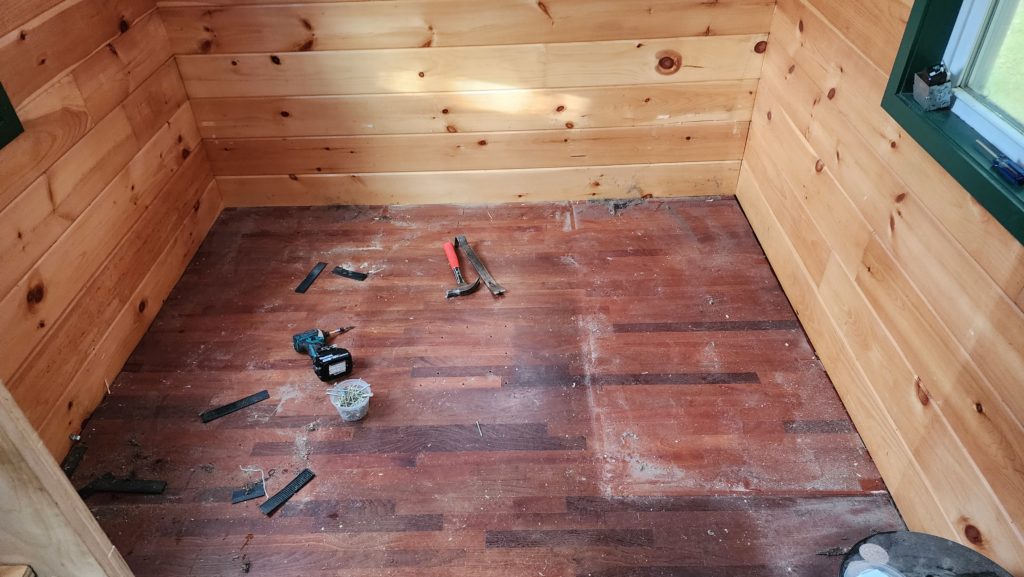
As much of the bed that could be built ahead of installation was done. Next up: remove the bednette.
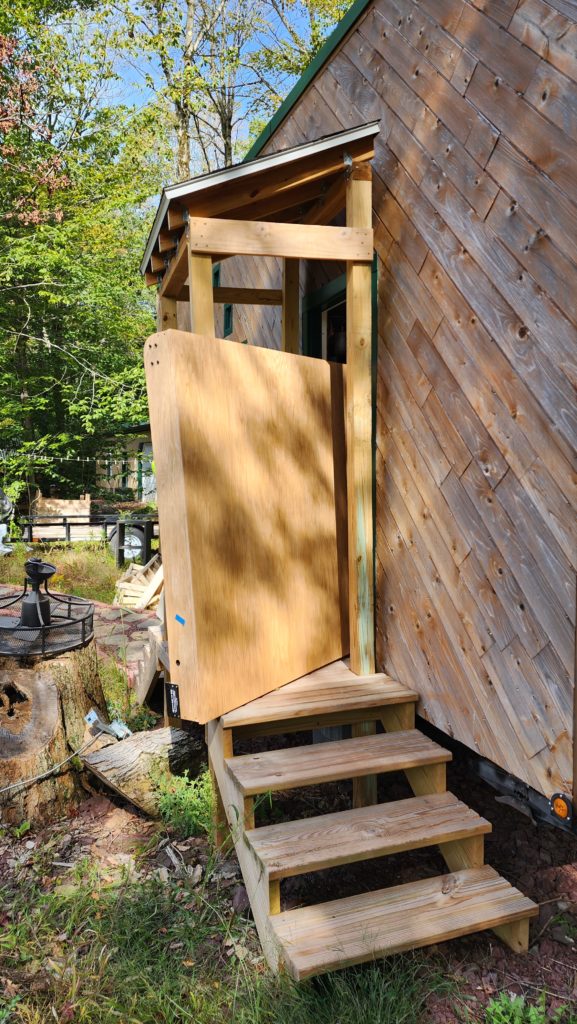
and then the tricky bit – getting the large, heavy, and rigid Murphy bed into the house for final assembly.
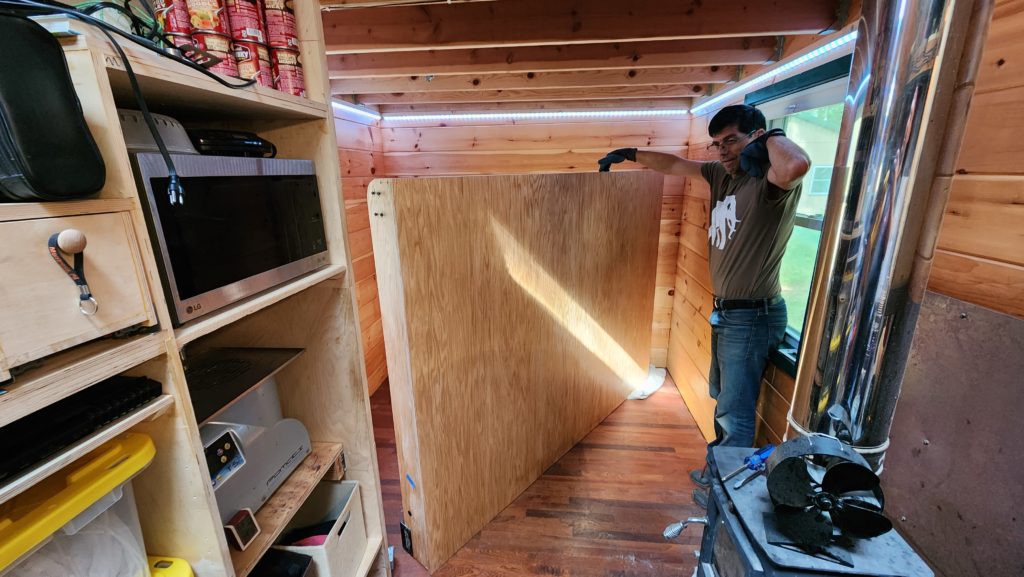
It turns out to just barely get in the door and has just enough clearance to make the turn down the hall toward the BeDiLiA.
Not a ton of clearance, as you can see from this shot, as my helper (every now and then I have one available) steadies the bed frame so I can take the picture. That’s a folded towel under the far corner. They make great sliders for furniture, in case you didn’t know.
Now to assemble the cabinet frame around the bed, in place. You might be wondering just exactly how much room is there for that? This much:
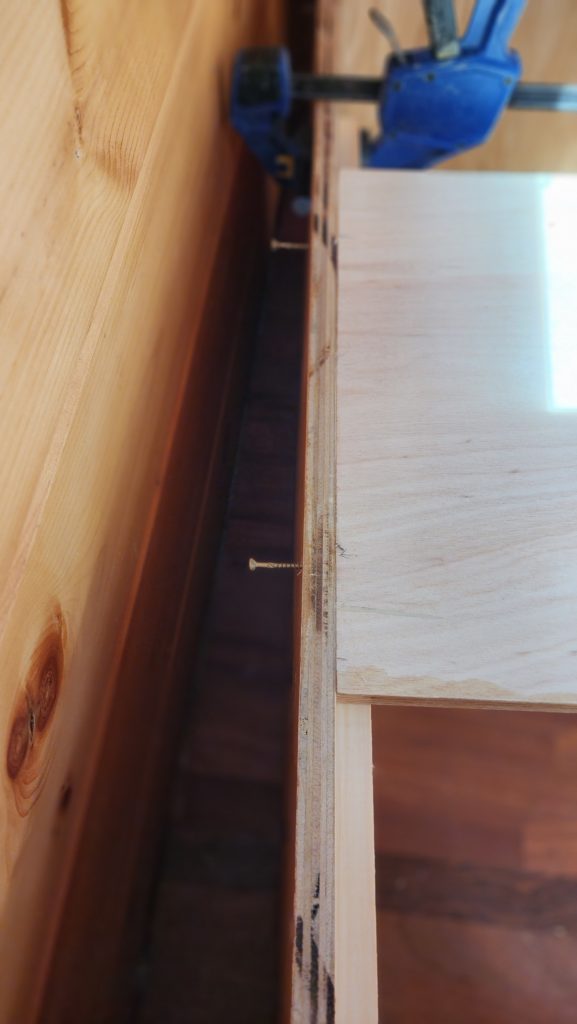
Plenty of room to drive some screws, if you have the right tool for that.
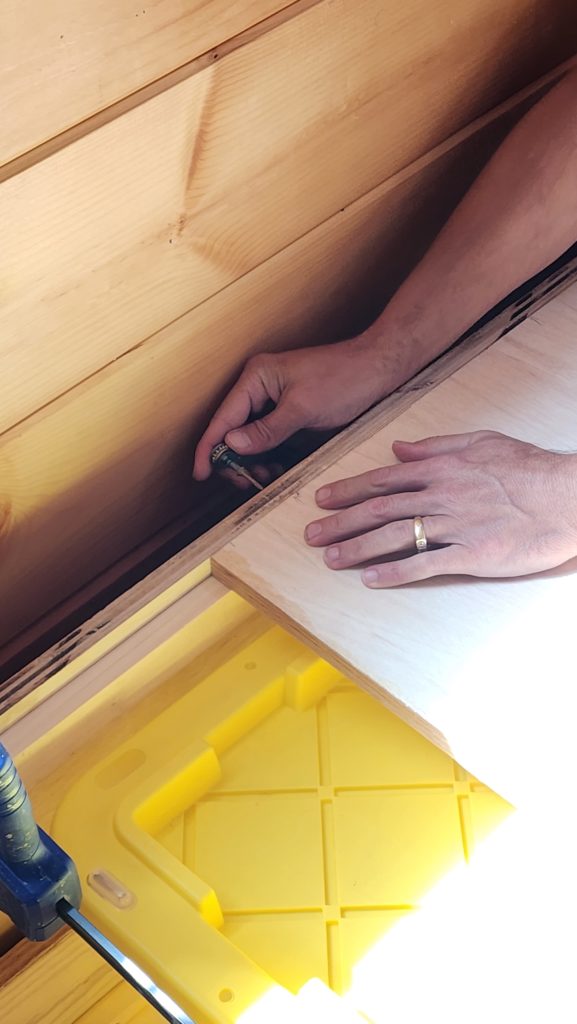
How much clearance, really? A little over 3 inches in total, if we shove the bed to one side or the other to get that clearance where we need it.
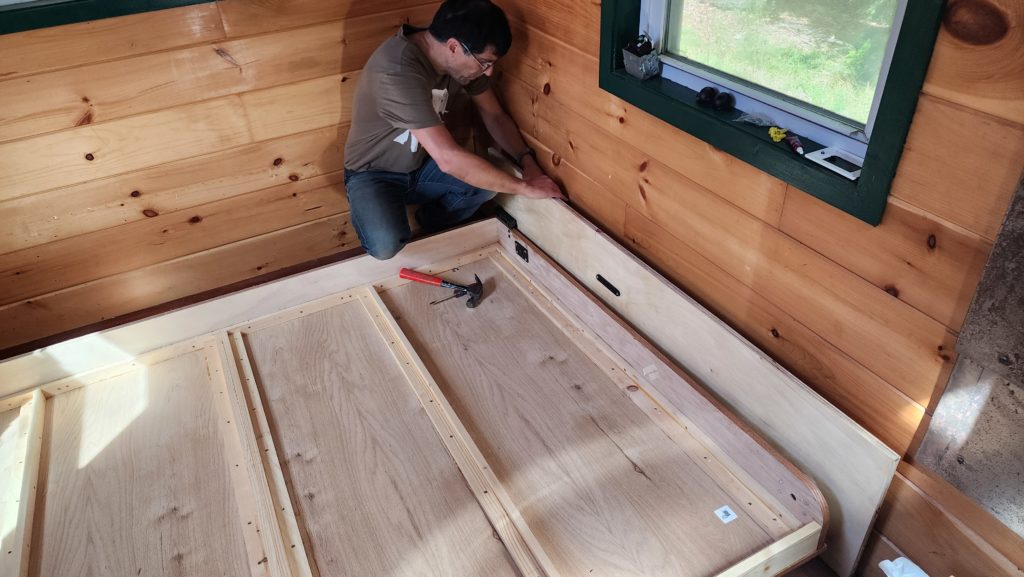
We got it done!
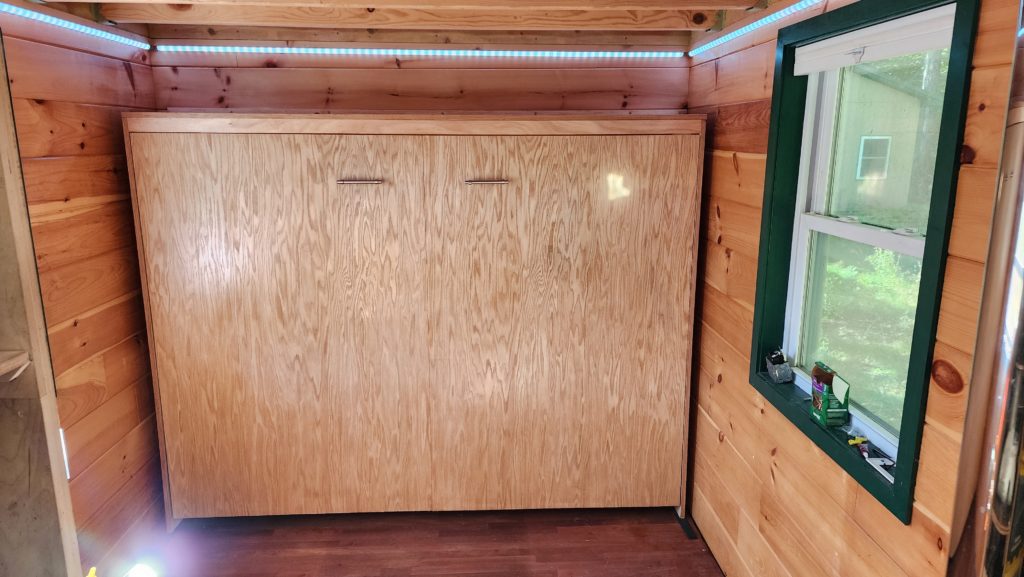
But what I don’t have is the mattress…
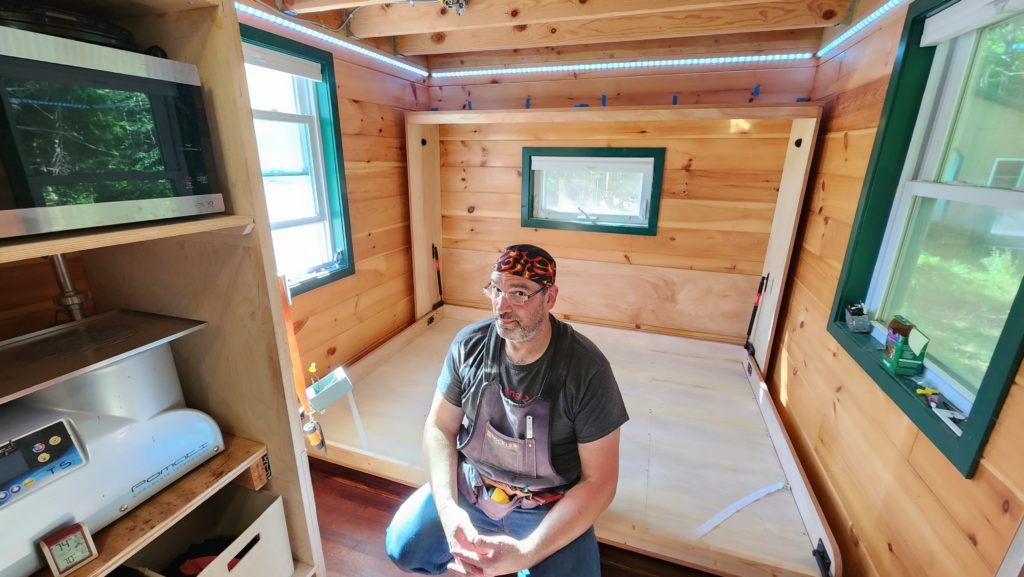
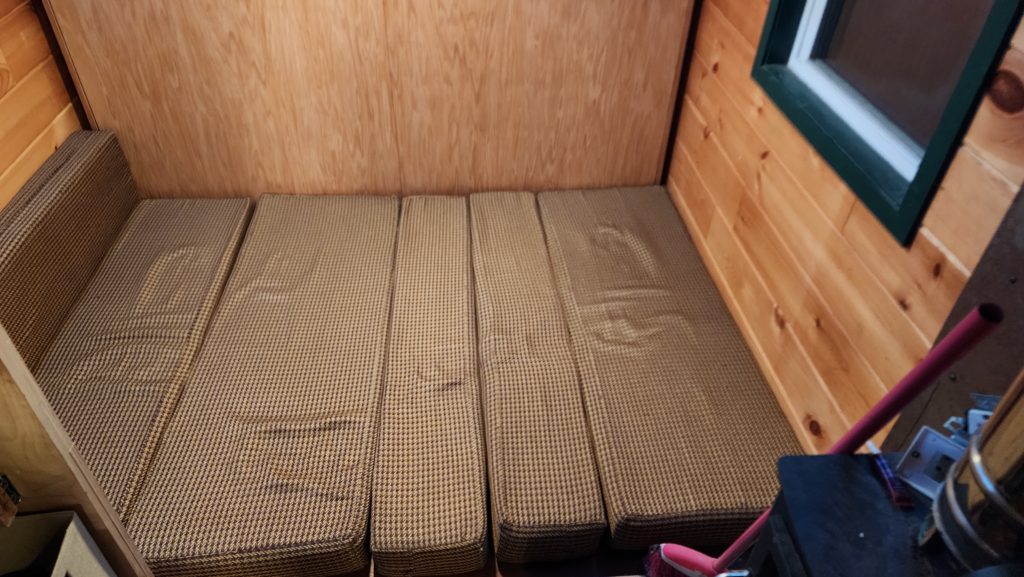
Due to my remote location, what would ordinarily be next-day delivery was next-week delivery. However, today was the day I had help available, so I was going to avail myself of the help, mattress or no. As it turned out, I was going to be away on business for a week, so I only had to solve the problem of where to sleep for one night. I can’t just sleep on the bed deck here, because it’s spring-loaded expecting 80# of mattress. If I get up without a mattress there, it would slam shut if I didn’t stop it. So for one night, I closed it gently and made one final use of those old cushions, on the floor this time.
Before the mattress came, though, I was curious about that ceiling fan. There was a decent chance I’d have to fashion some carriage to let me move the fan out of the way when deploying/stowing the bed. I had some ideas, but now that the bed structure was in place, I could fold it out and evaluate the potential interference.
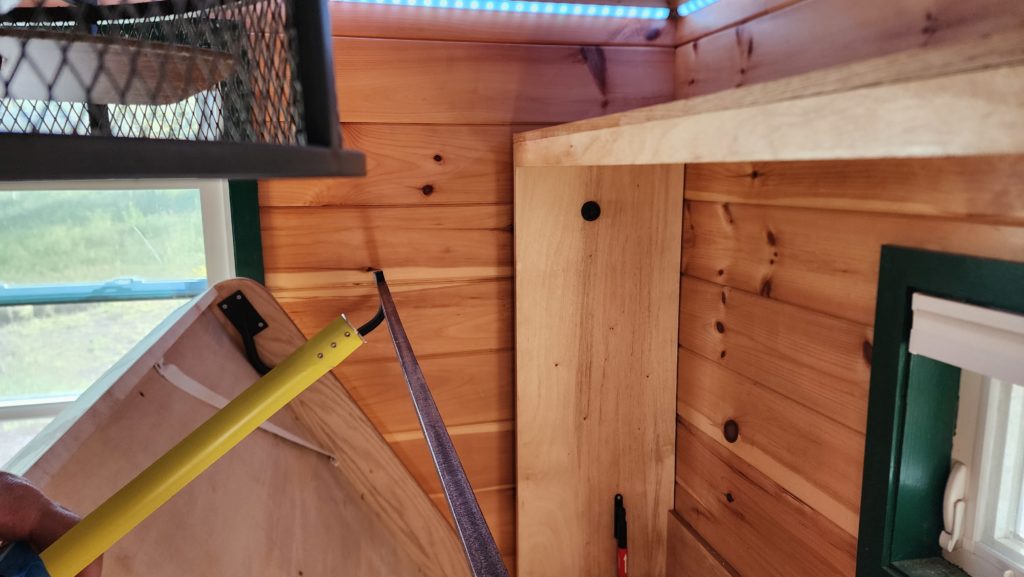
I got lucky! That tape measure (yellow) is extended the exact thickness of the mattress that’s on order. The bed deck is in the position that puts the mattress closest to the fan — and there’s still a couple of inches of clearance! Hooray! Every once in a while things luck out and this was one of those times.
The mattress arrived on time, after my business trip, and is so, so nice…
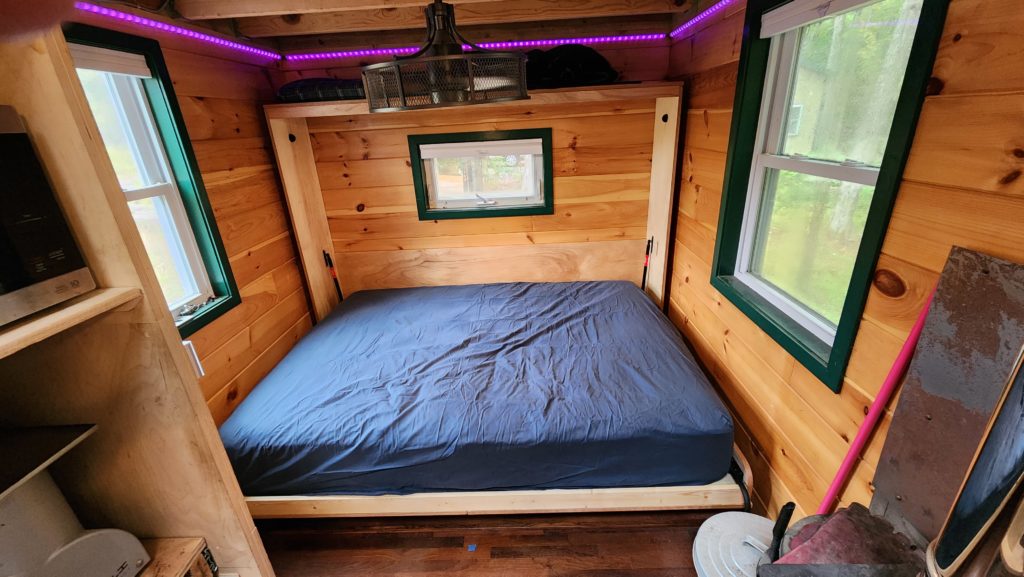
The bed is decently balanced and many times more comfortable than the cushions were. There are some problems created that need to be solved. Seating and a table, for example.
I have a plan for the seating – some fold-up wall-mounted chairs like this:
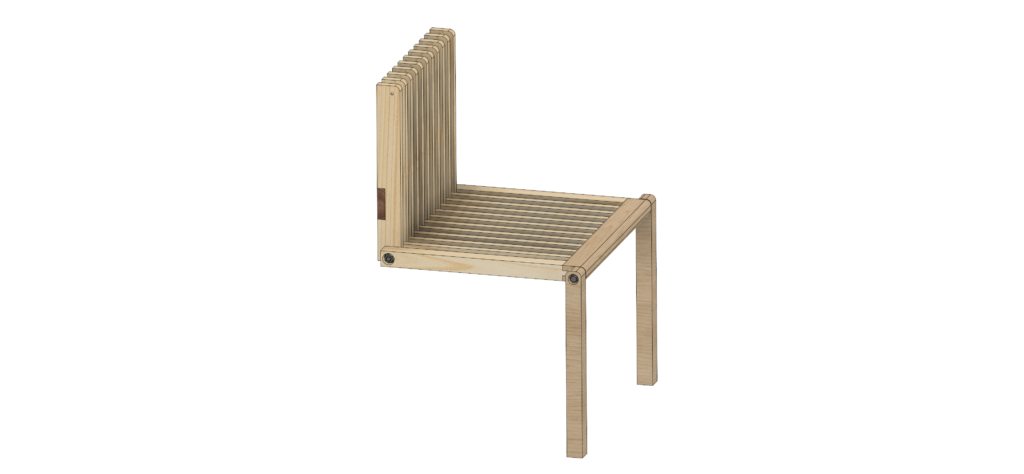
There’s only 2.5 inches from the walls to the pull-down part of the bed. This chair folds up to 2.25 inches thick against the wall. How did I find a chair that fits so well? I didn’t. I saw this idea online and made my own plans for it, sized to meet my needs 🙂 I am in process actually building these, which have proven to be a little more challenging than I expected to make them look nice. But then, most of what I’ve made in the last few years has been more like construction and less like furniture, so I’m out of practice with furniture-level techniques and finesse. Working on the chairs is definitely bringing that back!
As for the table, I have a perfectly good table from before, it just needs a new way to stand. Hang a cleat on the front of the bed cabinet (which is the bottom of the bed)…
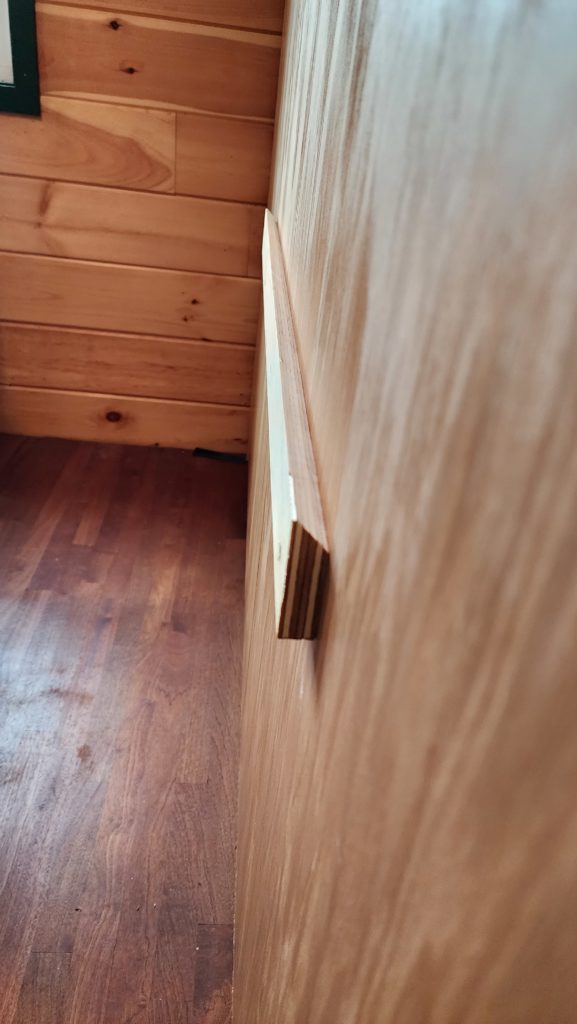
… and some fold-down legs (so it can be stowed)…
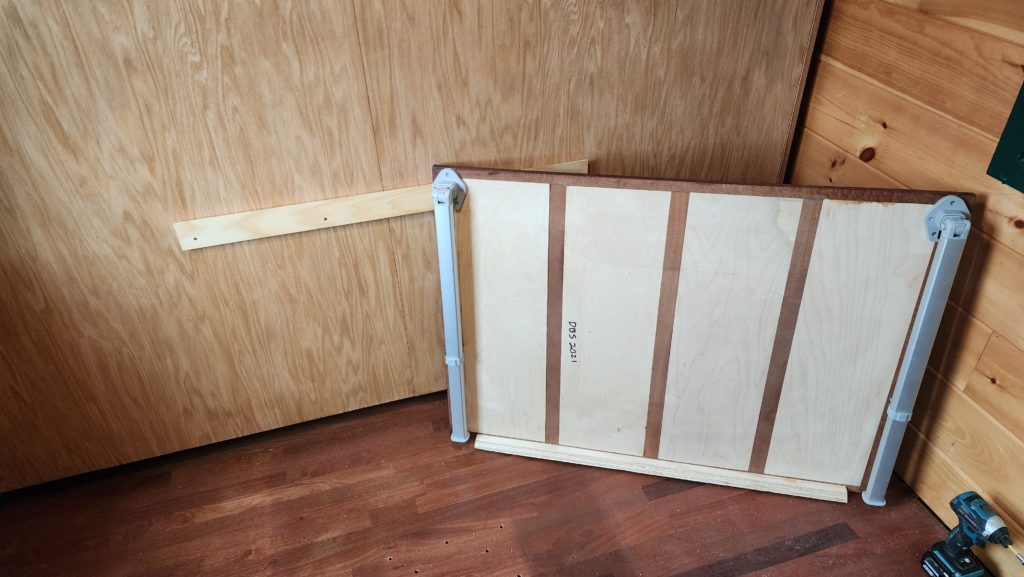
And now I have a table again.
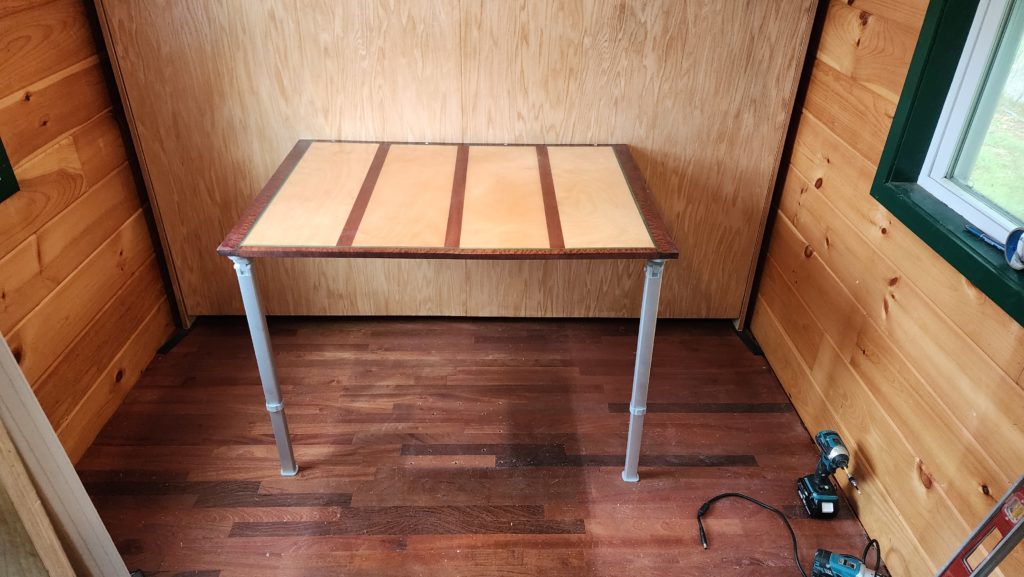
I am using commercial folding chairs for now, until the wall-mounted ones are ready.
You might rightly ask why not just put the table on a hinge? The answer is the table is too wide and would have to be hung too high to achieve floor clearance when folded, making it a bad seating height when open. What about a hinge that folds UP? It would interfere with the handles and the handles have to be where they are for proper leverage against the very powerful gas springs that control the bed motion. I could in theory put handles on the back of the table so when it’s folded up, the handles are in the right place to pull down the bed . . . but that introduces obstructions to legs beneath the table (where the handles would be when the table was out). Lots of ideas. None of them practical, so no hinges.
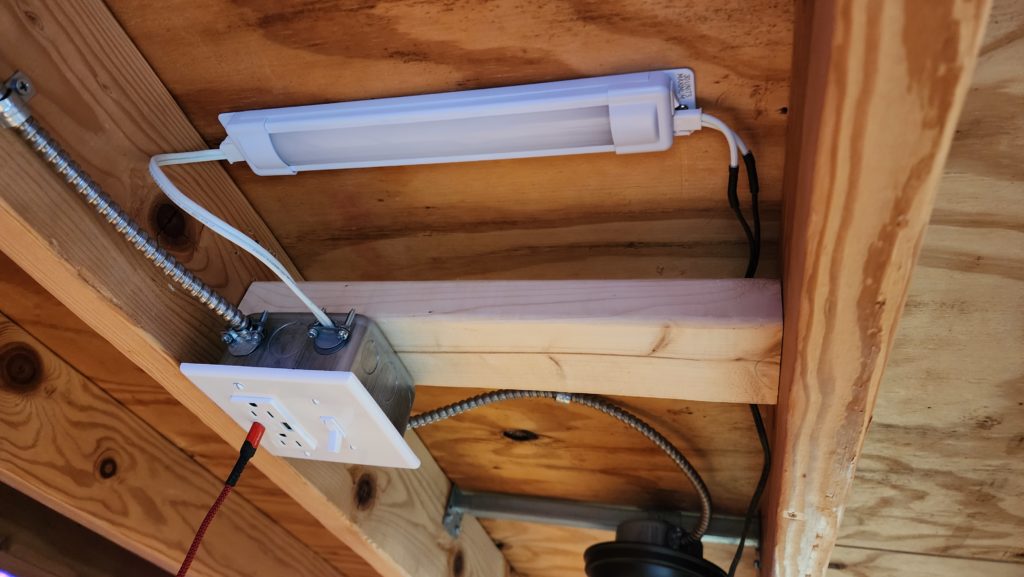
The table position is a little different than it was before, though, and my reading lights aren’t in the right place any more. The illumination on the table just from the ceiling fan isn’t enough… so I moved them.
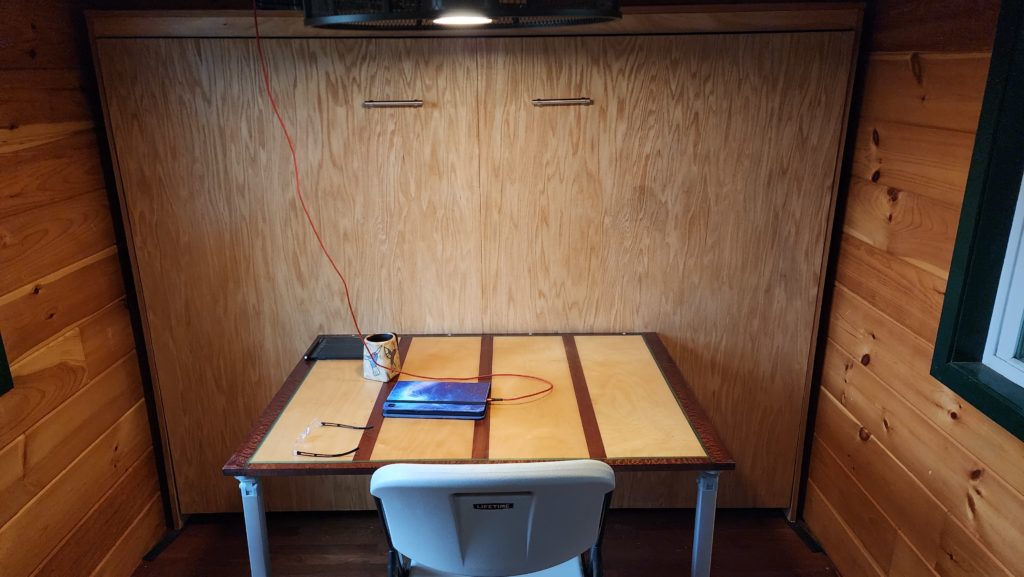
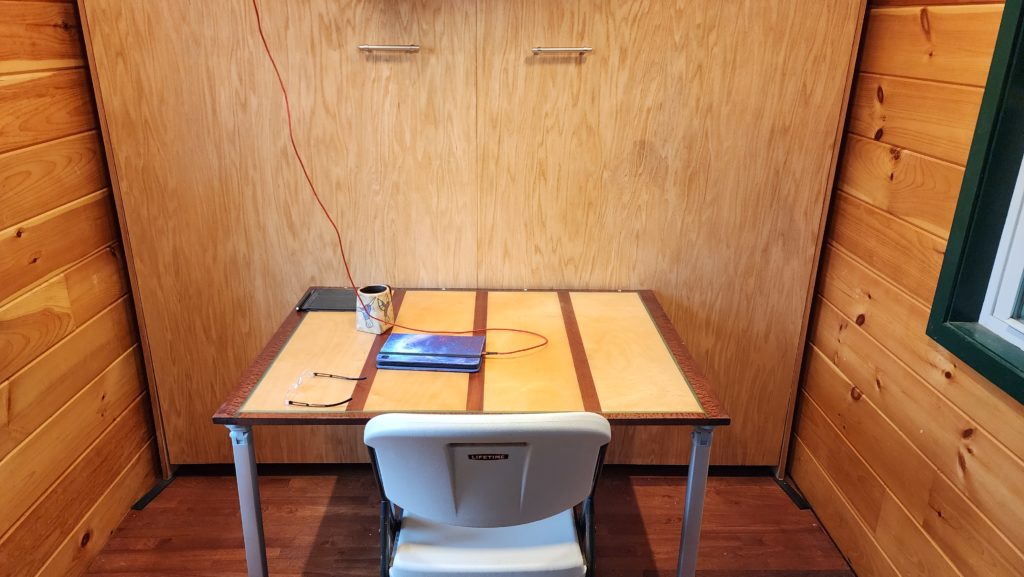
But of course now the lights were further apart than the supplied chaining connector could reach, so I had to insert some of my own wire (black) between the special plug ends. It’s always something…
Meet Bob.

Bob is a Kubota LX2610HSDC, tricked out with a front loader, a grabby thing, and a snow blade.
The grabby thing helps considerably with safely and tirelessly moving tree parts around.
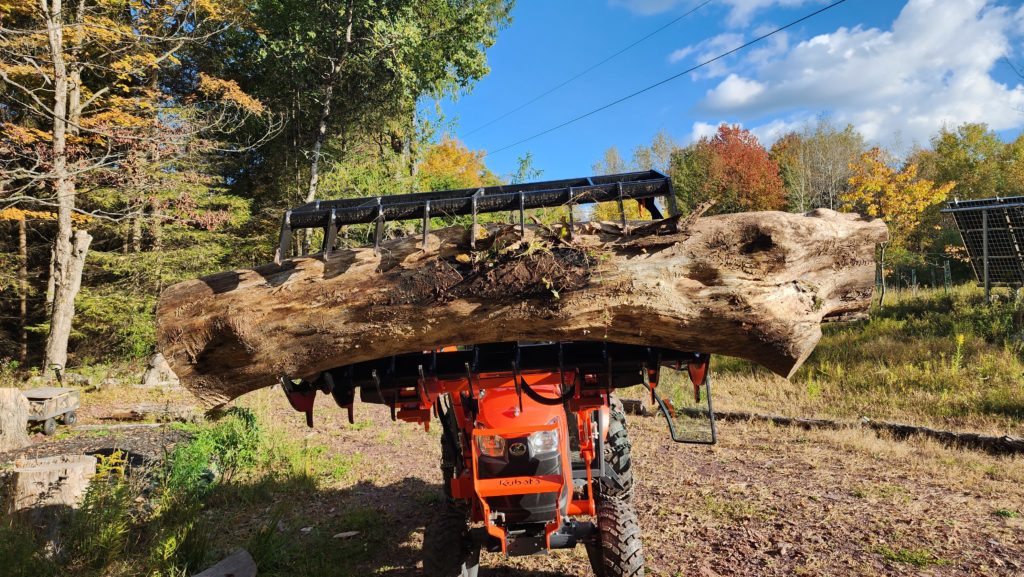

Making delivery of logs to the sawmill a breeze.

Bob has two primary missions: moving logs around thusly, and snow management. The snow plow blade (and tire chains) are the obvious bit for snow management. The loader is going to be useful for that, too, when it comes to the mountain of snow the roof dumps in front of the workshop.
His first job, though, was turning this pile of stone into a road that makes the side bay in the garage — always meant for some land-management vehicle — accesible.
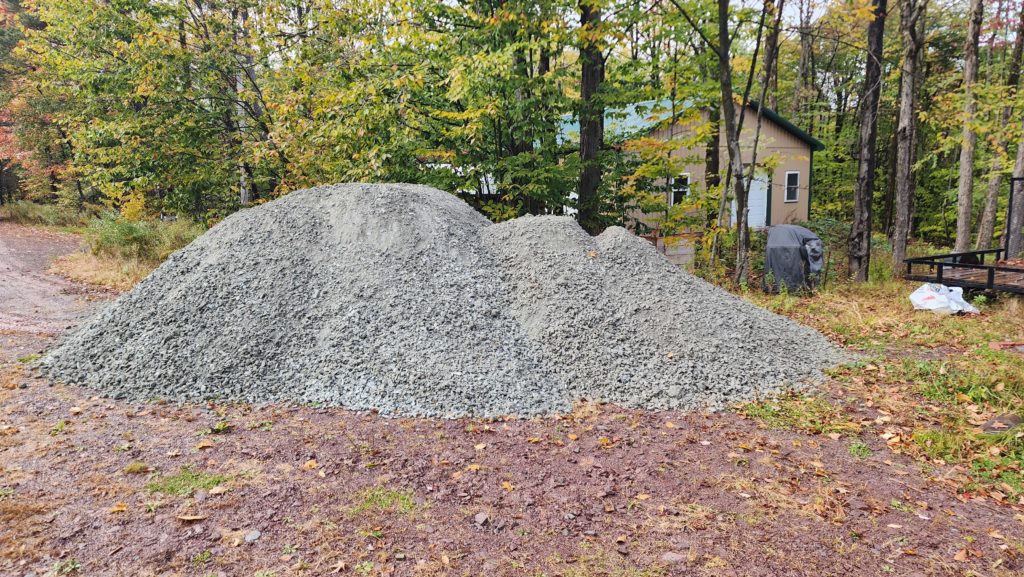
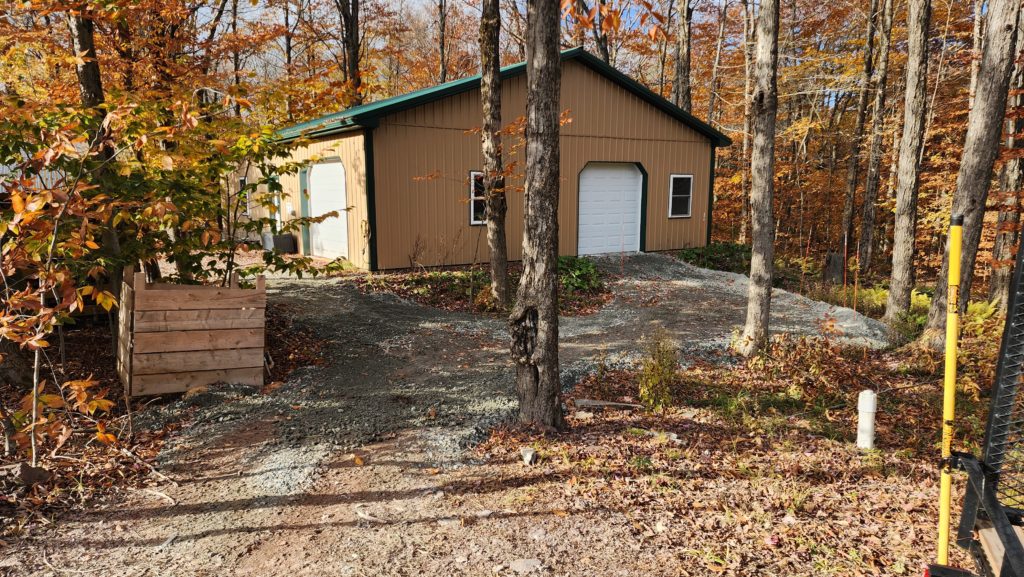
It’s hard to see in the picture, but there’s a fair bit of slope down from that side door and it was very uneven — too much so to safely drive over. Now it’s nicely filled in with stone. I’ve test-driven it and while it’s navigable in good weather, I am concerned it will be very difficult to safely plow my way out of the garage. At this point, I’m thinking that Bob may well live outside for the winter so that he can get right to it for snow management when the time comes. In the summer, when the sun is brighter and the days are longer (lots more UV and heat to attack non-metallic parts), is when Bob will live in the garage. For sure I’m not ready to put him in the garage now — there’s a big pile of last year’s wood harvest and several tall shelving units in the way and I won’t be able to deal with that for some time yet.
Hey, remember about a year ago, I milled some logs into boards? Well, after a year of sitting quietly in the garage, they’re now dry enough to use. I’m actually using some of this lumber for those wall-mounted chairs I’m building.
So here’s the thing. When you start with milled boards that have sat for a year, they of course have their natural “live” edges. Some will split a little or a lot. Or otherwise warp as they dry. Sometimes a little fungus grows in the first few weeks while they’re still wet. All-in-all, the boards are pretty raw and a long way from how they need to be for successful woodworking.
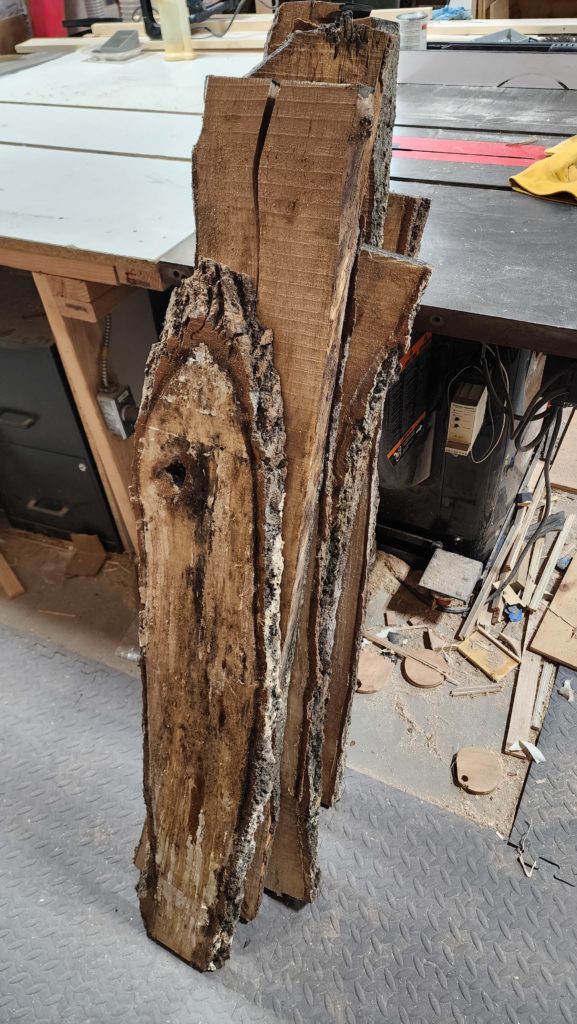
In order to get there from here, the very first thing that needs to happen is I need to put a straight edge on the board so it can be handled by machines safely. I tried a couple of techniques but ultimately settled on this:
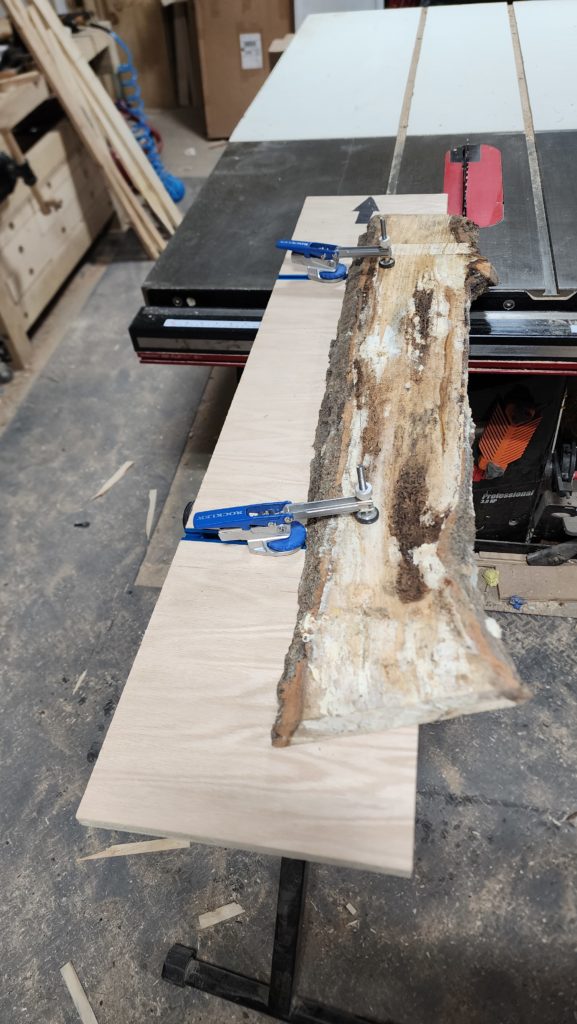
The plywood has a runner underneath it that keeps it locked to the miter slot on the table saw. The face clamps hold the raw board in place so I can drive the whole thing through the table saw and get an edge. I am planning to make an improved one of these, with the edge right at the saw blade so I can use that edge to gauge where the board will be cut. Also, I’ll make the whole thing wider and longer, to accommodate larger boards.
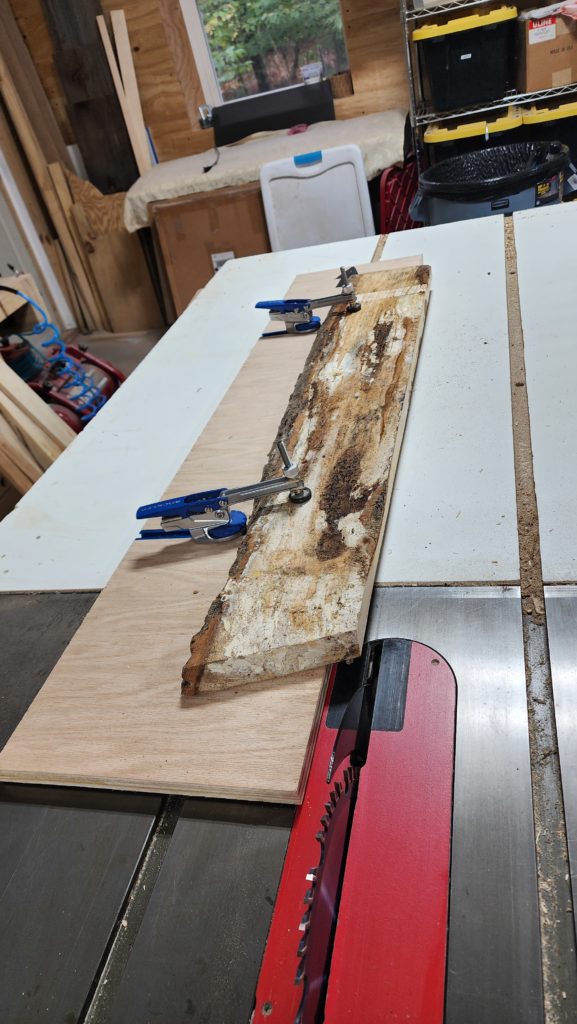
And that’s the start of everything. This isn’t the final edge at all, but it does trim off most of the wavy bits and thus makes it much easier to handle and run through the remainder of the process. The next stage is to pass it through the thickness planer a little bit to begin to flatten the face. I do have a jointer-planer but the deck is only about 5.5″ wide and that’s just too narrow for most of these. The thickness planer can take a little more than 12″ wide, which is perfect. Take the board through that a few times and all the surface grime is also removed, dressing the board to a still-rough but more refined state. Here’s my very first batch:
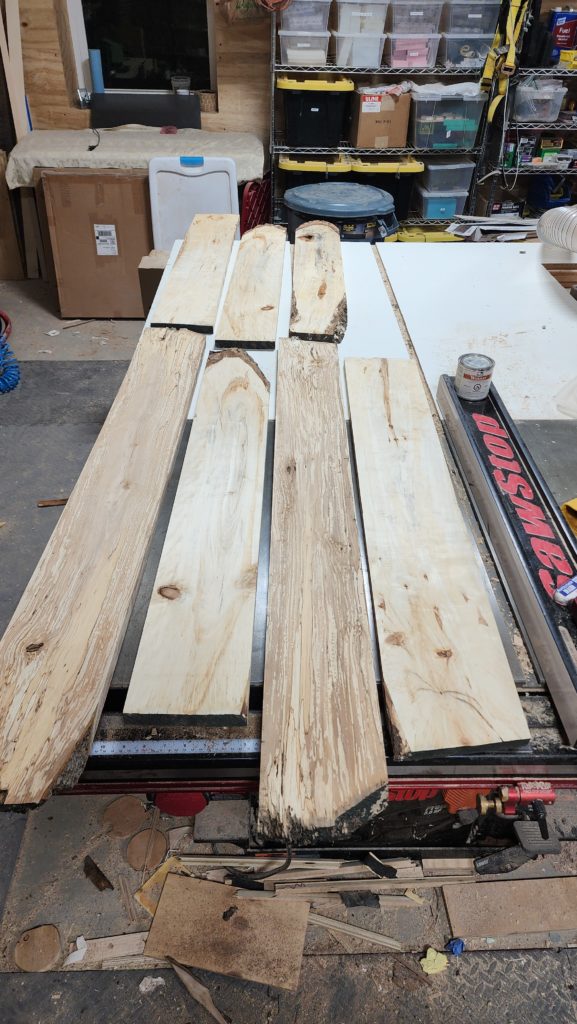
Starting to look less like timber and more like lumber, eh? As you can see, some of the boards have a great deal of action going on in the grain. These logs sat out for about a year before I had the opportunity to mill them (the wait largely being due to not having the mill on site yet!), so they got attacked by fungus and such. I hit that sweet spot where the fungus changed the color of the wood but hadn’t been at work long enough to compromise the strength of it. I have set aside the more interesting boards for special projects. I don’t mind some variation/imperfection for ordinary projects, but the really intensely figured ones should get featured, I think.
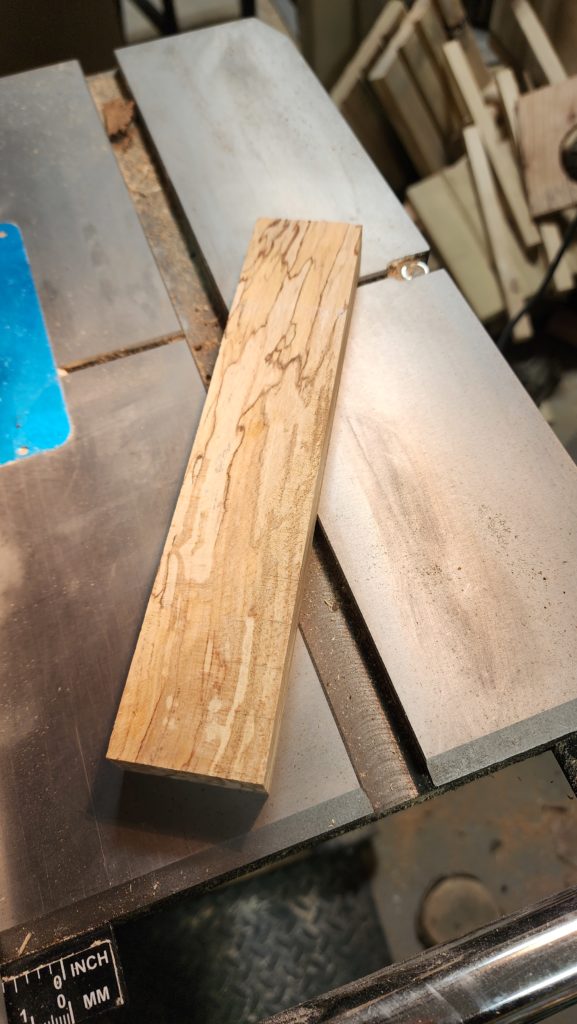
For example, this block right here. It’s clearly special. I took it to the bandsaw and managed to get four slices from it.
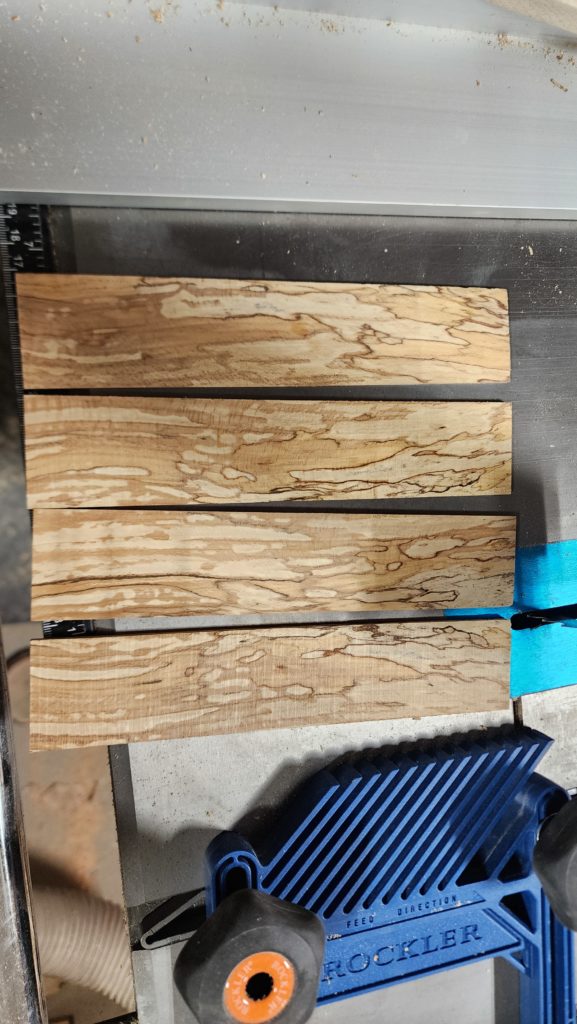
What to do with those? Well, step 1 was to put them together into a panel, paying some attention to the layout.
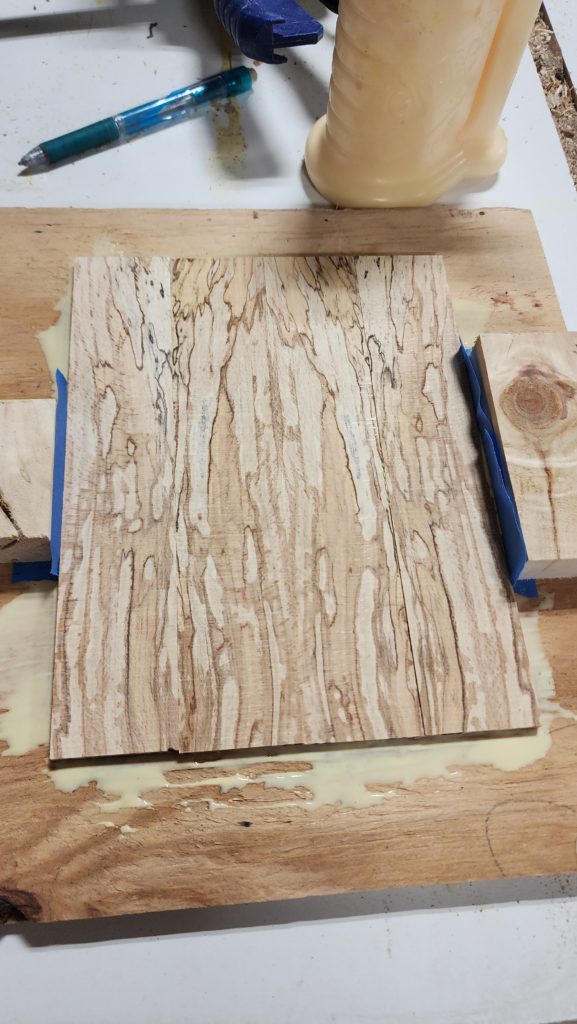
Pretty snazzy, right? The slices are only about 1/8″ thick, so I glued them down to some 1/2″ plywood for strength. What happens next? I’m not sure, actually, but I’m thinking this would make a nice lid for a special box. I’ll get back to that later. There are a number of striking boards in my stack, if I remember correctly. It will be fun to re-discover them and find suitable projects for them.
I have it in mind to do more with the cabinet spaces under my stairs, but it’s just not been a priority. Still, there was much wasted volume in my haphazard use of those spaces and volume is a terrible thing to waste in my tiny home! I happened to find some storage tubs that fit these spaces perfectly and with them, get a lot more utilization of volume, at the expense of more effort to access (have to shuffle tubs to get to their contents). One day, there will be pull-outs here that combine the best of drawers (access) and tubs (volume) but until then, at least I can use the whole space.
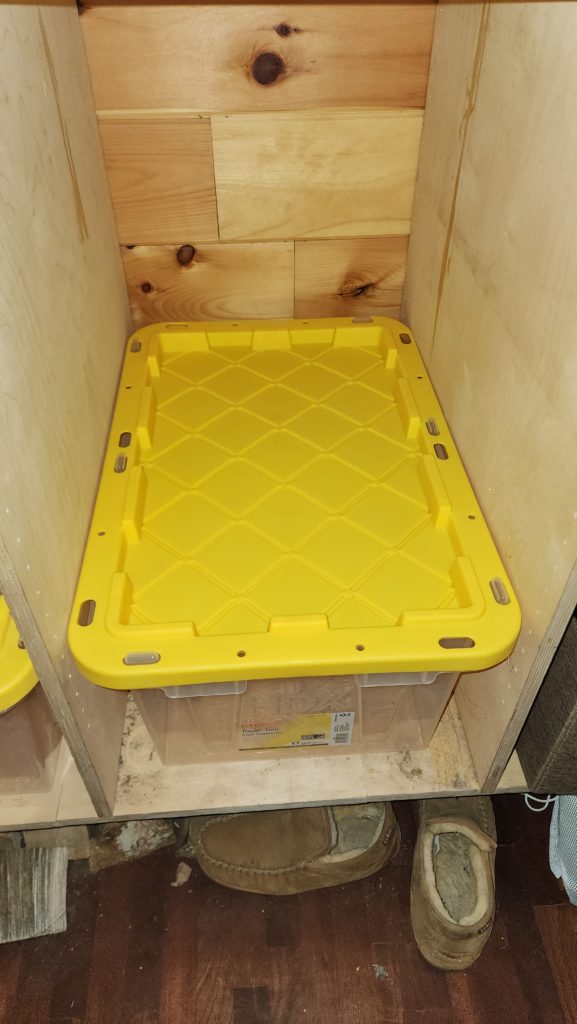

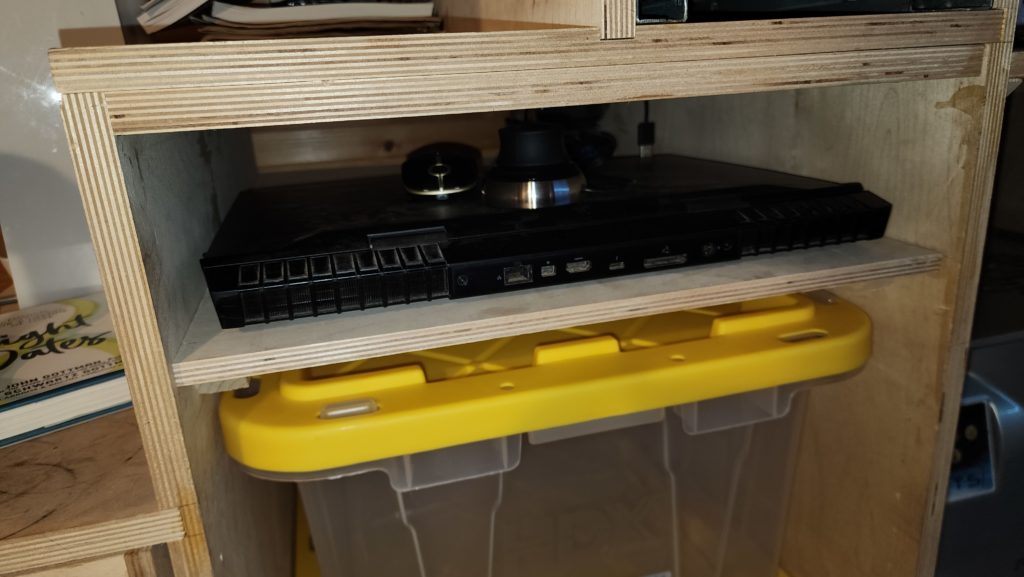
“But wait!” I hear you say. “You didn’t use that space above the 3-stack!”. Oh, yes I did. Just not in that picture! It’s just perfect for my laptop.
And what about my bees? Wasn’t I trying to attract local wild honeybees to my new hives this year?
Yep. That was the plan. They did not take up residence, however, despite the free, posh accommodations on offer. I can’t say I’m surprised. I didn’t see many honeybees out and about inn the wildflower field. Only a few colonies of bees might be looking for a new home at any given time. Of those, some tiny fraction might fly within range of my scent lures. But if you start with a tiny number of bees in the first place, a fraction-of-a-fraction of those is essentially zero. None of the few bees I saw this summer were looking for housing. The paucity of honeybees is all the more reason to introduce some new colonies here, though! I will buy some farm-raised, winter-hardy bees in the spring to start my apiary.
It turns out my electric fence didn’t survive the summer anyhow. The wire and fiberglass poles did fine, but the tie-out lines necessary in the corners appear to have gotten yanked by passing deer, of which there are many who are often bounding along apace. The yanking of the tie-outs both collapsed some of the fence and destroyed some of the clips that hold the electrified rope. This is clearly not a durable solution. But even “pound-in” fence posts don’t go into this soil because of how rocky* it is. Remember digging for the trees? Seriously hard labor I have no interest in duplicating. If only there were a way to dig proper post holes easily, to set proper fence posts that don’t need rope tie-outs.
(*Bullwinkle was nowhere to be found — moose tend to live in even colder climates).
Such as this tractor attachment?

All I’d need to use such a thing is a tractor…
Hey, wait! I have one of those now! How about that. I’ll rent or buy one of these after spring thaw and re-make that apiary fence the right way.

This is a photo of my burn barrel, a couple of days after I burned a load of cardboard and then stirred up the ash a little. This here is your friendly reminder that fires last longer than you probably think they do and you should never, ever, ever, put ashes in anything that isn’t sturdy and metal because they may well still be harboring some fire.
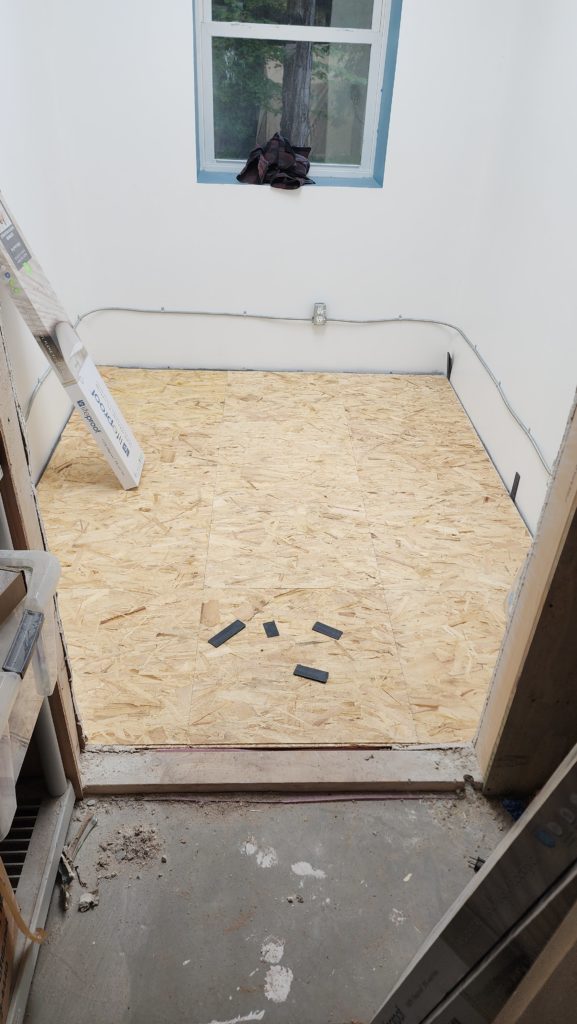
And lastly, there’s been some completion in the Tidy Room, too. Now it has a proper floor, complete with insulating subfloor panels.
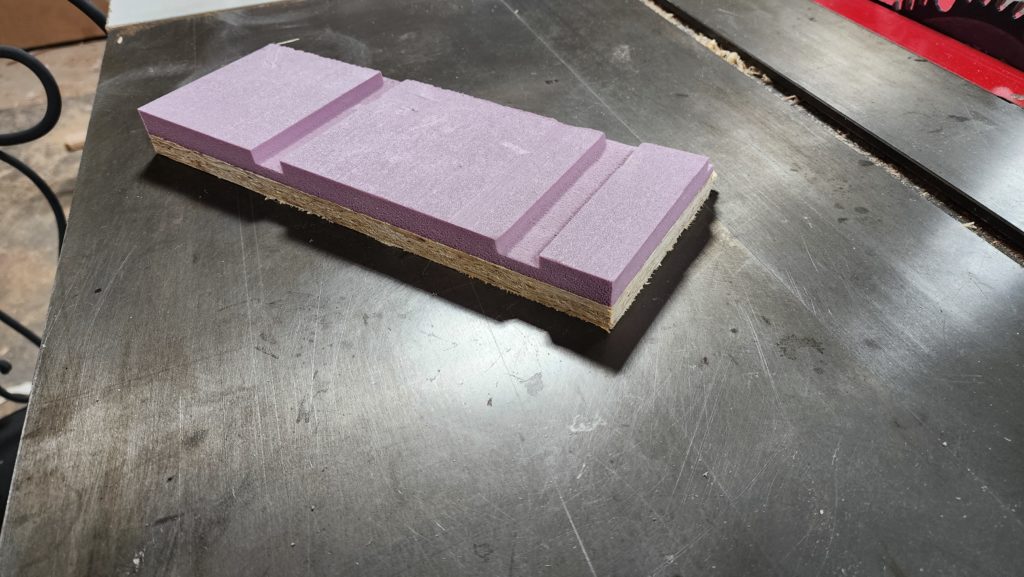
And some interlocking vinyl plank flooring on top to dress it up nice. The vinyl resists water and is more durable than the OSB face of the insulating subfloor panels. Looks better, too. Oh, and window shades, too, so I can use this room as a guest room, which has already happened.
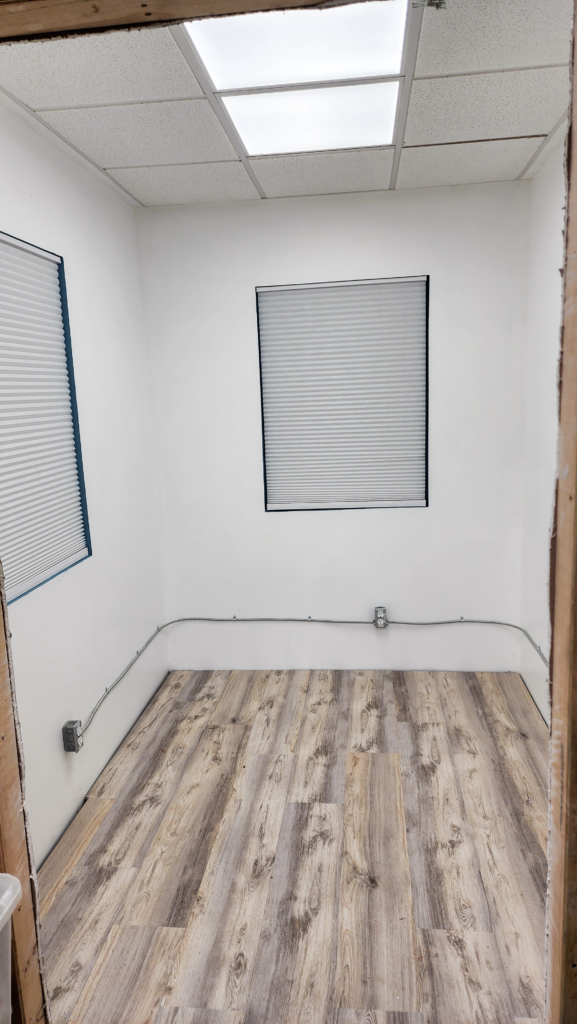
There is a reason the room is so bright and white — it’s that way to make inspection of paint and finishes easier to do, as this is to be the painting and finishing room.