One of my major goals for the winter is to get the workshop fully operational. I’m getting close!
The tool island needed a dust shroud for the chop saw – which needed a fitting for the dust hose – which of course meant it was time to spend a few minutes with CAD and my 3D printer to make one! It sure is handy being able to just fabricate stuff at exactly the right size and shape I need.
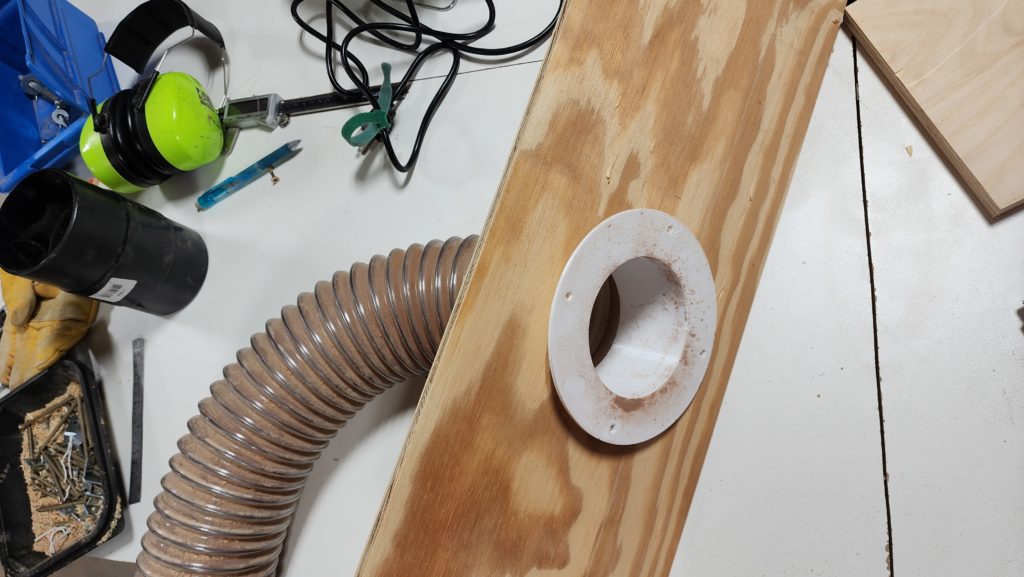
Like this dust director fitting that looks like a perfectly ordinary 1-1/2″ elbow on my chop saw but actually it’s a 1-3/8″ elbow, which is something you can’t just get at the plumbing aisle of your local home center.
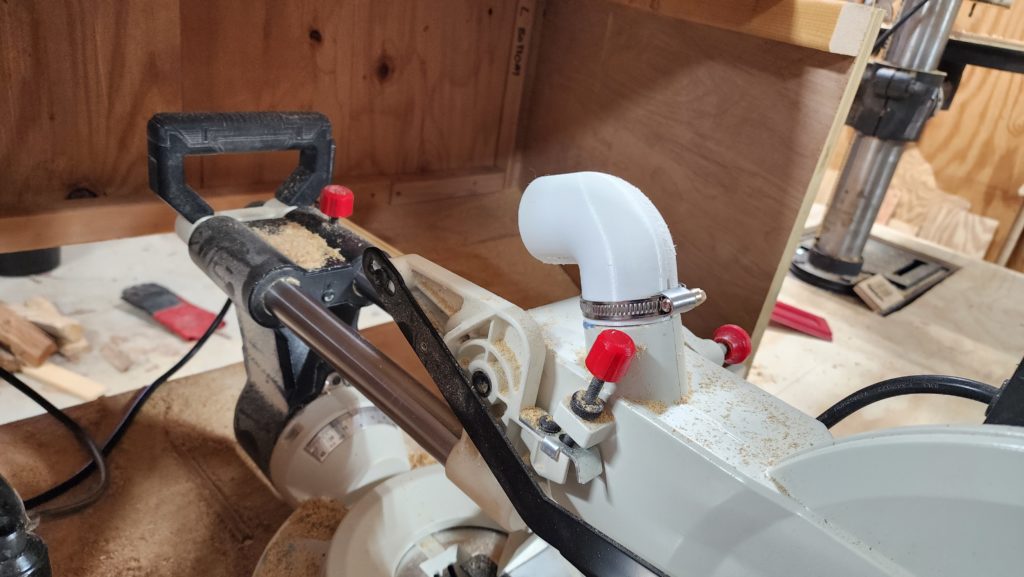
But you CAN get them off your 3D printer 🙂
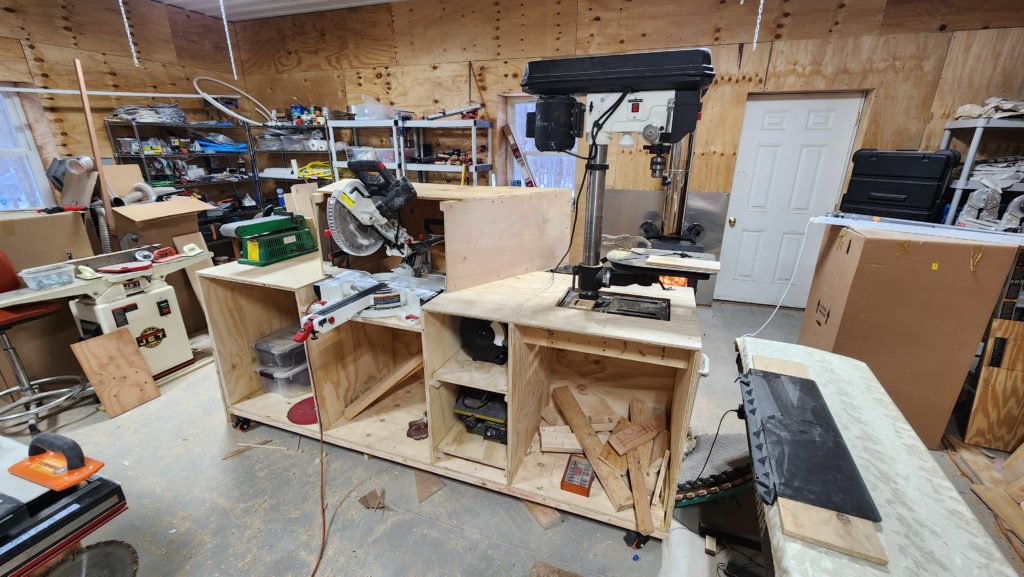
Now with dust catchment hood and docks for the grinder & scrollsaw. . . . and substantially less debris on the floor, too, for that matter!
Speaking of dust catchment and the floor, the next big thing was getting my dust collector connected to all the things — and getting those vacuum hoses off the floor. Maybe it looks a little silly to go up and over and down like this, but it make a big difference in safety, not having to step over the hoses on the floor.
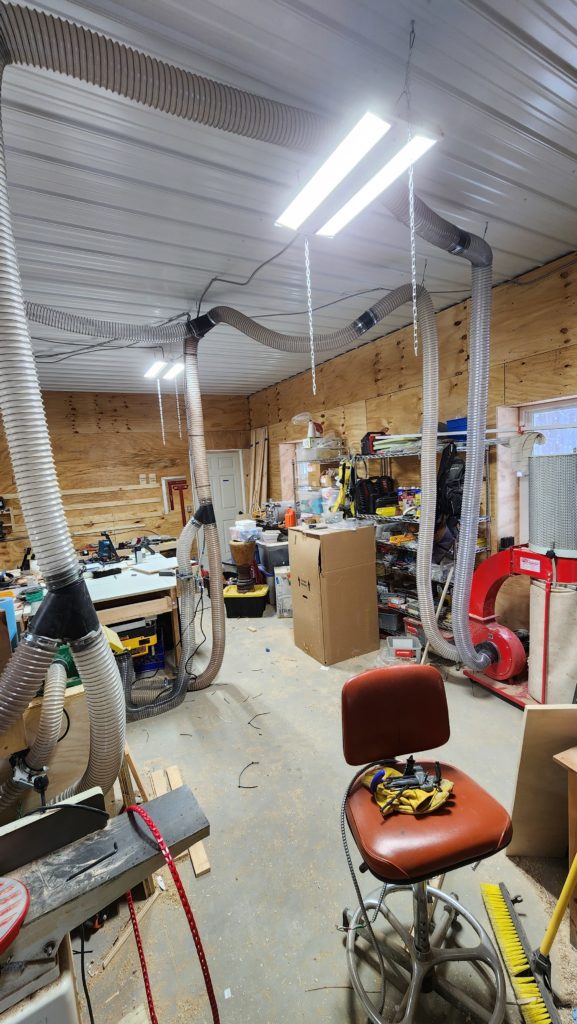
The hoses are now plumbed up to nearly all the things. One major branch to Tool Island, with tributaries from the jointer (white cabinet) and band saw (black tower). If it looks like the jointer is kinda close to everything, it is, but it is lower than the bandsaw deck and it operates horizontally (front to back of frame as shown) so feeding things to it won’t actually interfere with anything else. This is the perfect spot for it.
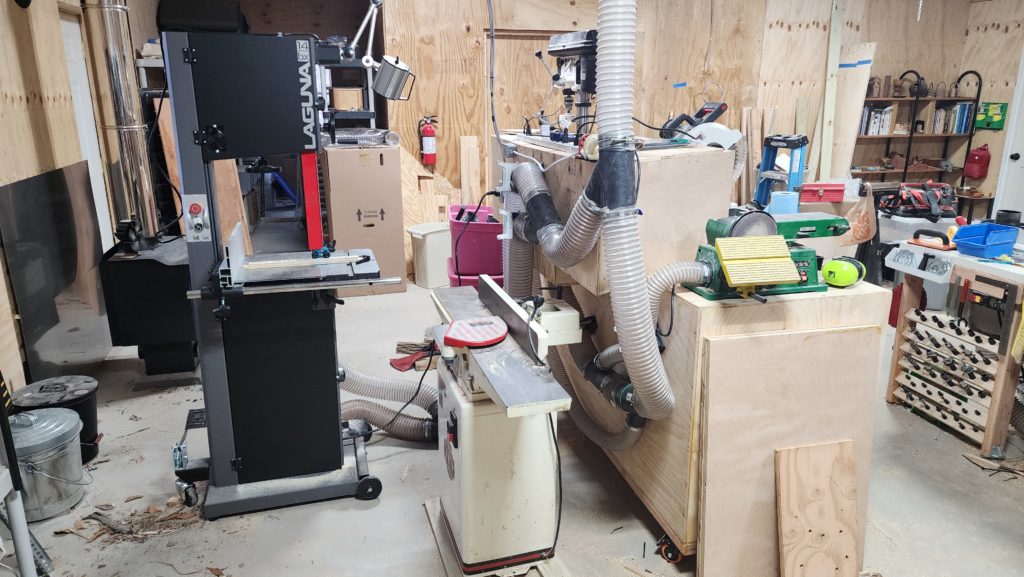
Yes, there’s a lot going on back there. Every branch has its own gate (silver things with ears) so vacuum can be concentrated at the machine in use.

The other major branch goes to the combination table, featuring table saw (background, currently covered with clutter), router (under the blue bin), and planer (upside down?!). So how does this make any sense at all?
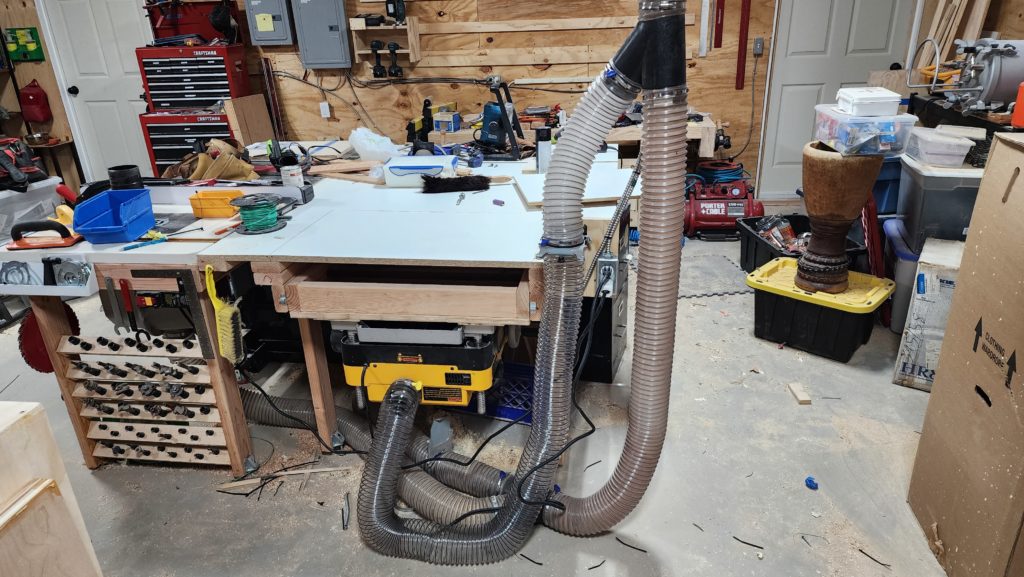
Well, after this phot was taken, the clutter was removed so the table saw and router are now in full service. The planer (yellow) lives under there because the upper surface is normally used to support material leaving the router or the table saw. But when it’s time for planing, a panel comes out and the planer flips up…
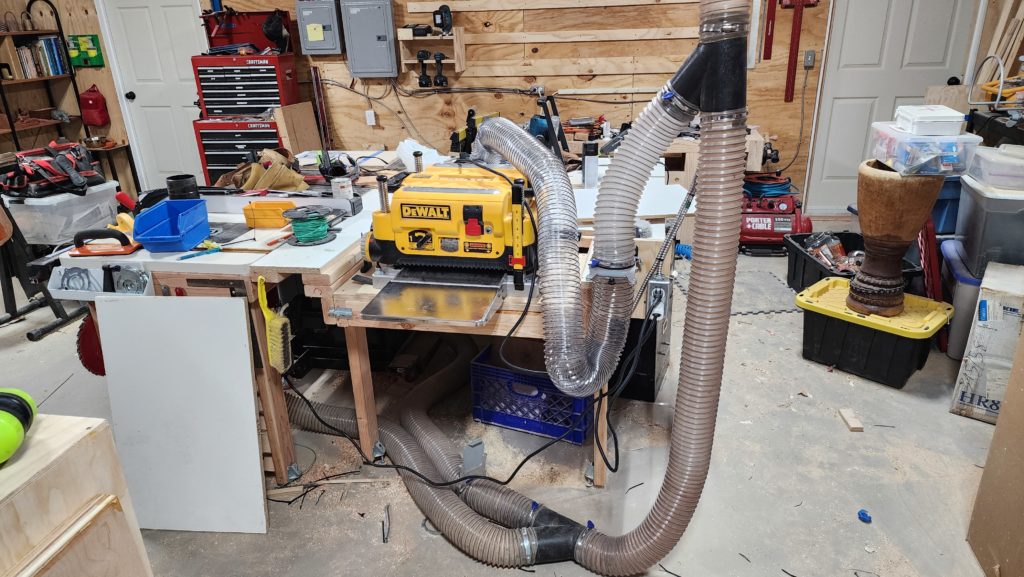
…and presto! The dust vacuum hose and power plug are already where they need to be. Just open the vacuum gate and plane away! The big white table (background) will catch the stock leaving the planer, just like it does for the table saw.
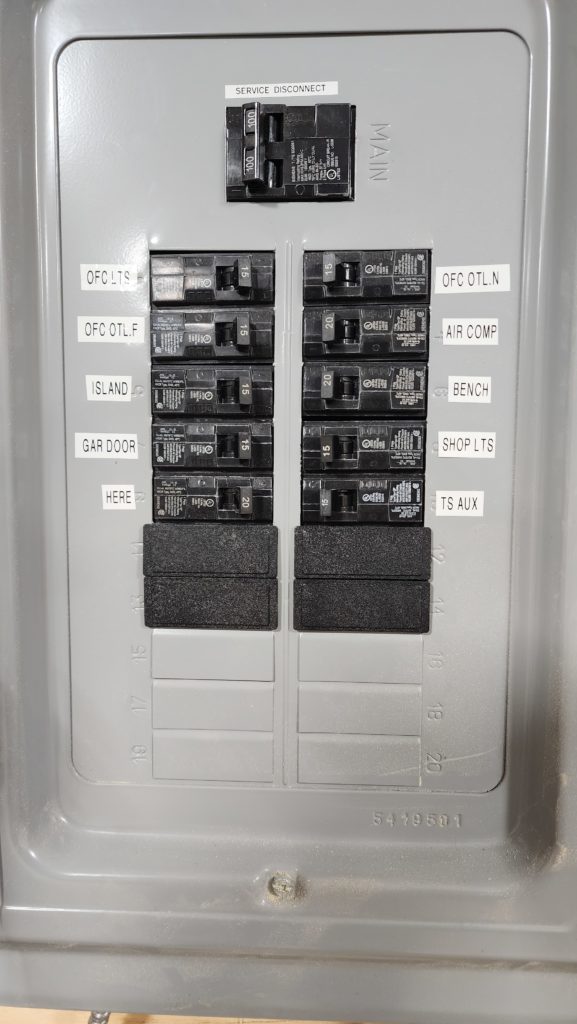
Along with the vacuum hose routing, now that tools have found the final (for now?) placement in the shop, it was also time to run some power. Seems I didn’t actually take any pictures of that, but take my word for it – now there is a fair bit of fan-out of power distribution run along the ceiling. And don’t you wish whoever wired your house cared enough to clearly label all the circuits?
I’ve installed a French Cleat wall mount system by the workbench, too, which I have begun to fit out with clamp racks and a nice dock for my drill, driver, jigsaw, and charger. There’s plenty of room for more stuff which will be whatever it needs to be… which will simply be revealed as needs arise.
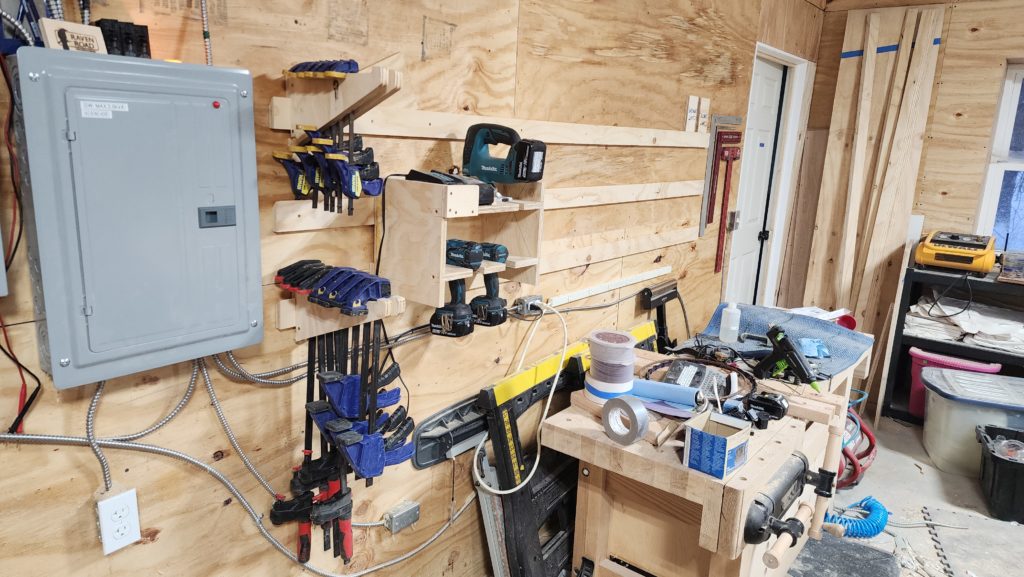
The bench now has a power strip on the wall below the cleats, the air compressor (red, hiding under the bench at the rear) has its own circuit, and some frequently-used squares (mostly red, by the door) have a handy home now, too. All these little bits of finishing are starting to come together and turn this well-lit disaster area into a legitimately useful woodshop. There’s still some more work to go, but it’s coming together quickly now that most of the junk is gone and work/tool stations are becoming established. Much of the clutter seen in this photos has since been removed, though that is still in-progress.
Hey, as long as we’re talking about the workshop, just a few of my readers know what machines I own and perhaps some of them noticed the bandsaw is new. Yep. Indeed it is. What was fun was getting it from outside to inside! It arrived like this:
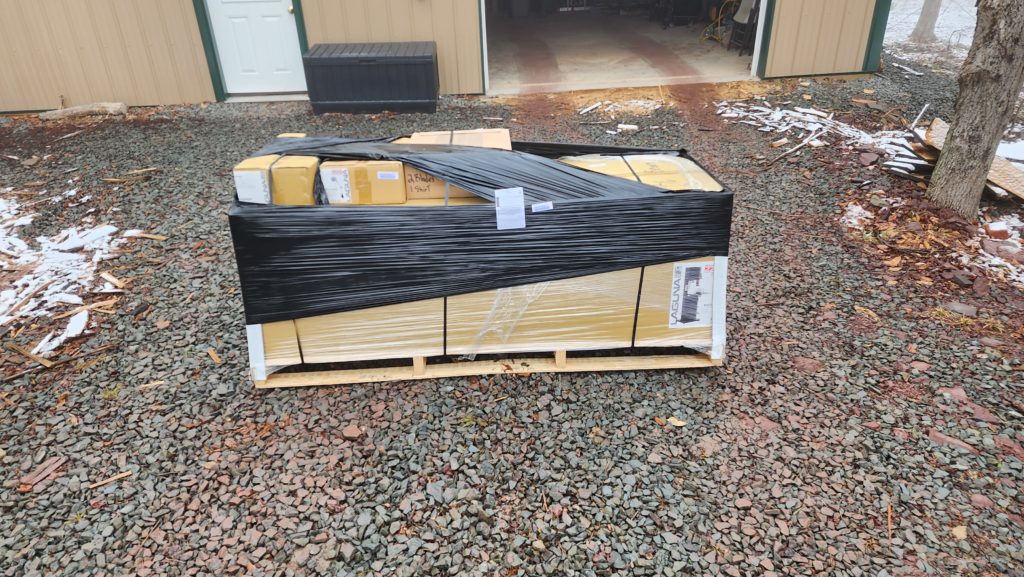
A shipping weight of around 250 pounds or so. Now, how to get it safely inside, by myself? Well, I have this heavy duty wagon that would do the trick just fine, but how would I get the pallet onto the wagon? The battery crates were small enough I could brute force them onto the wagon but this is just too bulky for that. Then I realized the bundle was decently tall and the wagon deck is fairly low, so maybe I could roll the whole thing onto the wagon? Actually, YES! With a spare 2×4 as a big lever, this worked quite well.
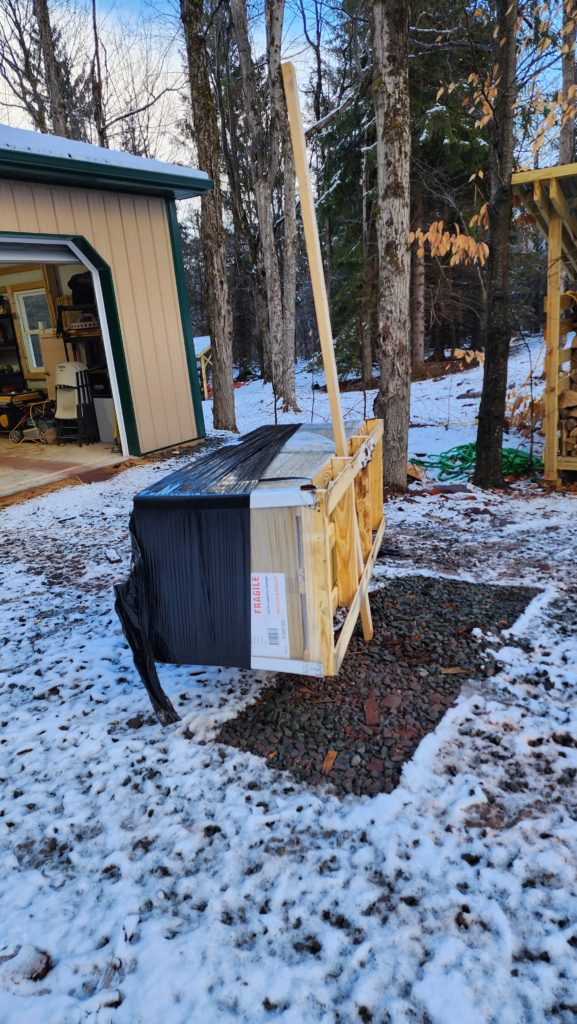
You can’t see the wagon underneath, but if you look closely, you can see the package is actually about 8″ off the ground. The wagon has wide, pneumatic tires that ride easily over the stone approach to the garage. Unlike, say, a little wheel-dolly or hand truck or similar, which might have otherwise seemed like reasonable choices for this job.
And remember that door between the main shop floor and the garage? This is what it’s for! Machinery doesn’t move well through people-sized doors with thresholds. It does, however, roll nicely through a wide open 48″ threshold-less door.
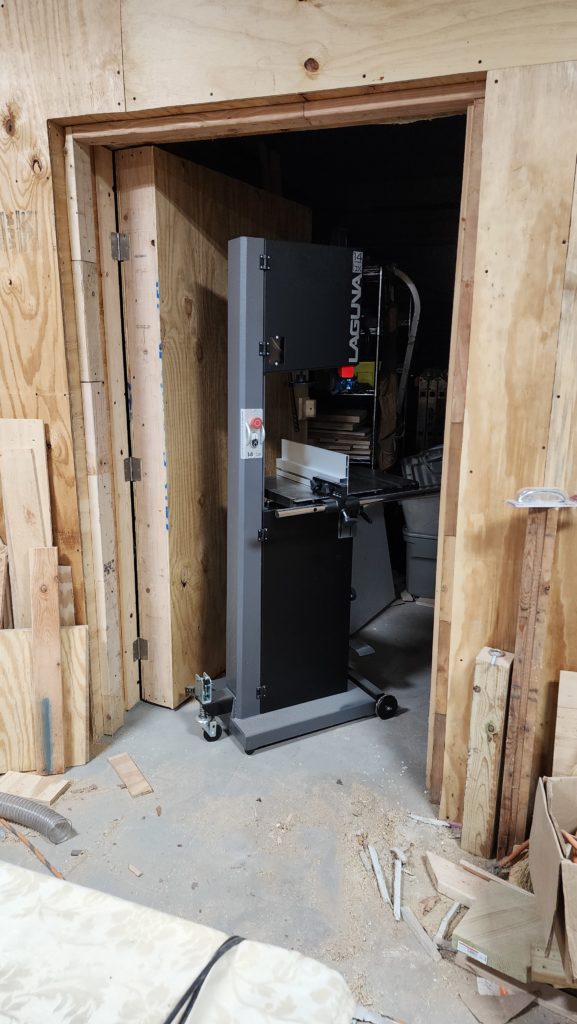
My old bandsaw had a much shorter cut height, so it wouldn’t be able to vertically slice (“resaw” as woodworkers call it) most boards from sawmills, including my own, into thinner boards. It’s still quite capable of preparing firewood, which is what I’ve been using it for, but it’s not the right bandsaw for the fine work I hope to be doing in the shop. Hence the new one, which can work boards on edge up to a foot wide, has more than 2x the drive power as the old one, and other compelling features.
There’s one more tool I plan to buy to finish out the shop – a lathe. It will go here, between the door and the library. Note the dust hose and power circuit dangling from the ceiling, waiting for somewhere to go.
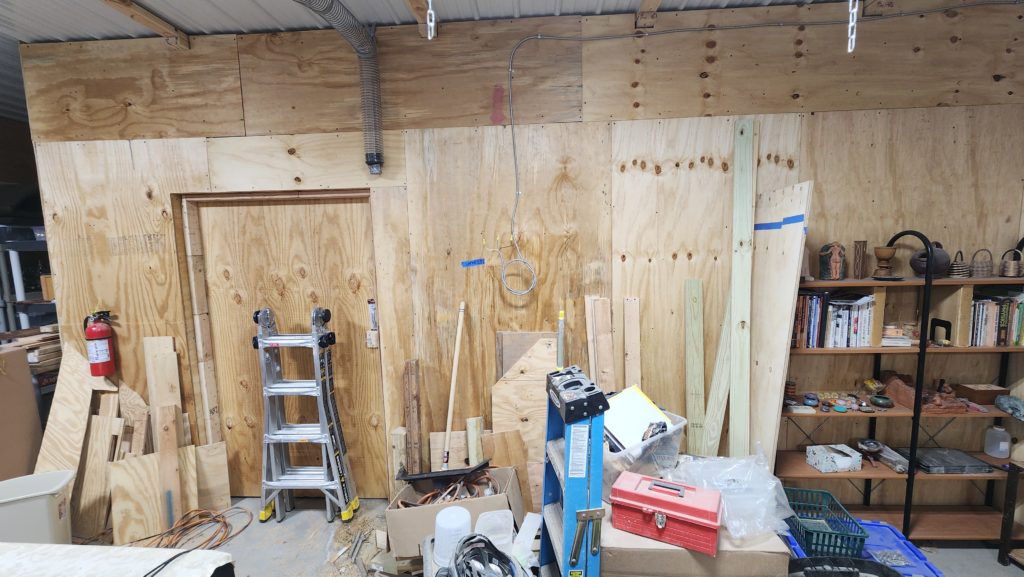
There’s still a bunch of construction materials occupying this spot, so no lathe until the place to put it is clear! It will probably be a few months before I order the lathe, simply because some of what needs to happen to clear this space is far easier to do in warmer weather, so I will simply wait until then.
And lastly in the workshop news department, I just upgraded my jointer to have a helical carbide cutter head (compare with straight-knife head, above).
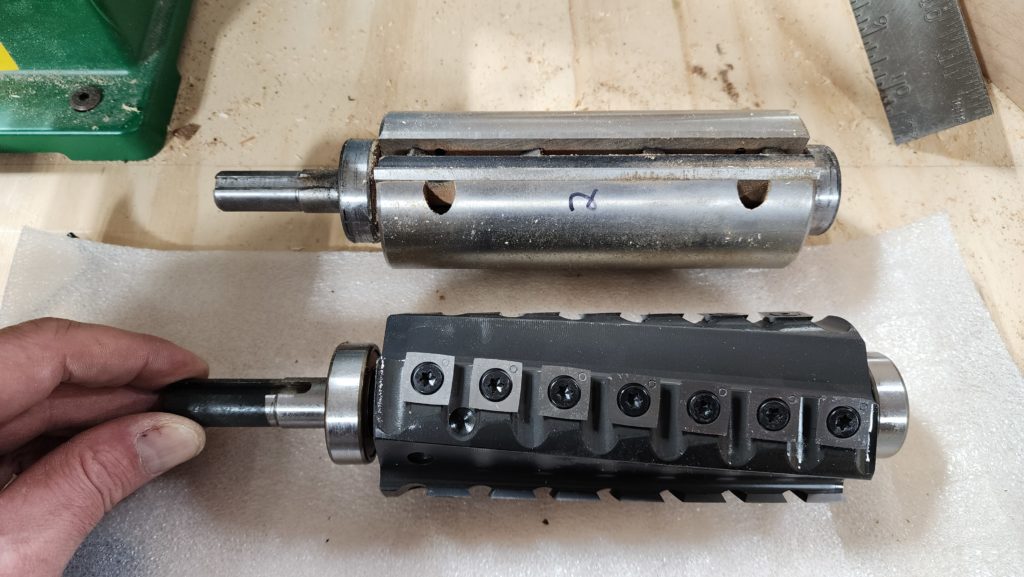
The helical arrangement means the little knives swipe at the wood at an angle, less likely to tear out chunks if the grain is interlocked/figured. Also, with each knife approaching the wood at a slightly different time, there is no simultaneous stress all across the board. This also reduces tear-out since cutting forces are more localized. Lastly, the individual carbide cutters (squares) may be replaced singly if they become damaged. One need not replace a whole wide blade, as in the case of the old cutter head. Indeed, the carbide squares have four sharp edges, only one of which is in use at a time. Chip one, just loosen it, rotate a quarter turn to get a new edge, tighten it back down. That works 3 times, then all four sides are used and it’s time for a new one. The little engraved “o” in the corner tells you what orientation each piece is in.
I also replaced the drive belt with this interesting thing: a segmented belt! I’d heard woodworkers rave about these as super smooth-running. The belt on the jointer needed to be replaced, so I’m trying one of these.
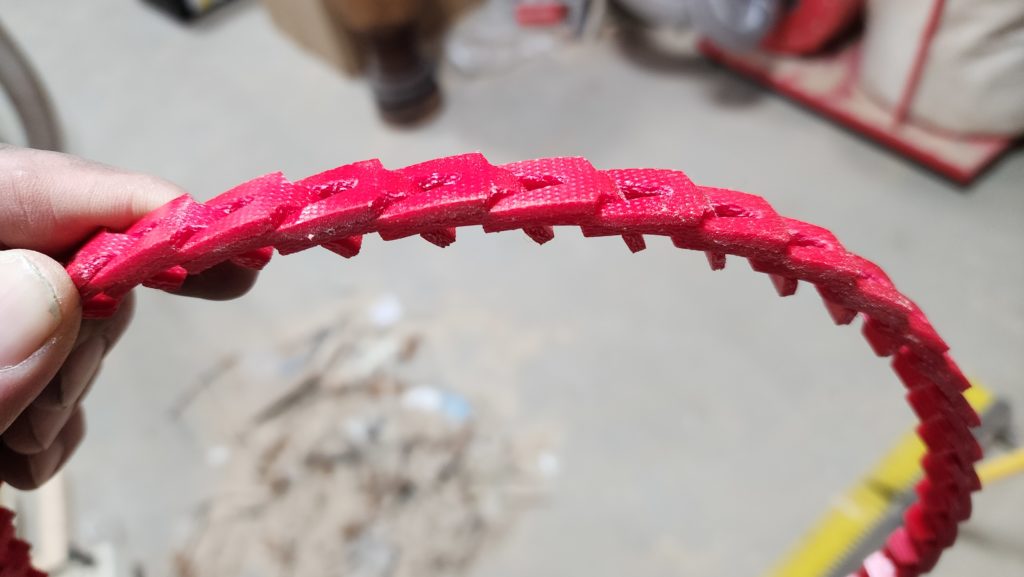
Is it any good? Well, it’s still settling in, so right now it’s not staying tight, but when it runs, yeah, it’s super smooth indeed. Such a belt as this simply cannot physically acquire “memory” — where the belt gets a permanent deformation if it sits in one place too long. The segmented nature means it is much more tolerant of misaligned pulleys, since it can more easily flex laterally if needed. Also, if it breaks, one may simply replace the broken segment and keep the rest of the belt, saving time and money. I’m hoping it doesn’t take too much to get this thing stretched out to its final length simply because adjusting the tension on this machine is actually quite difficult.
And that’s it for the workshop update. Much ado, for sure! The shop is coming together nicely, which makes me happy. Two years ago as of April, the workshop was nothing more than a sketch on graph paper. Now it’s a real place and very nearly ready for me to begin creating. It’s been a long, slow journey. This time last year, I was just trudging along on the insulation and plywood wall dressing. There was no heat in the workshop and I couldn’t use my table saw because of power supply problems (among others), so all the plywood had to be cut with a circular saw — slow to do and imprecise. Never mind working in the cold and the shop being full of construction materials and other junk, making it hard to maneuver anything. It’s come a long way! There’s still some clutter — less as I write this than there was when I took this set of photos — and I’m working on that. The goal of having the shop operational by spring seems reachable. The Tidy Room won’t be done, but the active parts should be.
In other completely random news, Compost Station #1 is full and because it’s winter and the compost pile isn’t so big it can stay hot through the freezing temps, it’s not cooking right now and thus not going down at all. And anyhow, it will only cook down so far, and then it simply won’t accept more material. Okay then, time to officially retire Station #1 and move on to Station #2. In 18mo or so, the stuff in Station #1 will have fully broken down and may be safely used as compost. . . and then I can bring Station #1 back online as soon as Station #2 is full. Or maybe I’ll need three to rotate between. We’ll see how it goes. I got 15 months out of Station #1 before it was full and Station #2 is slightly taller.
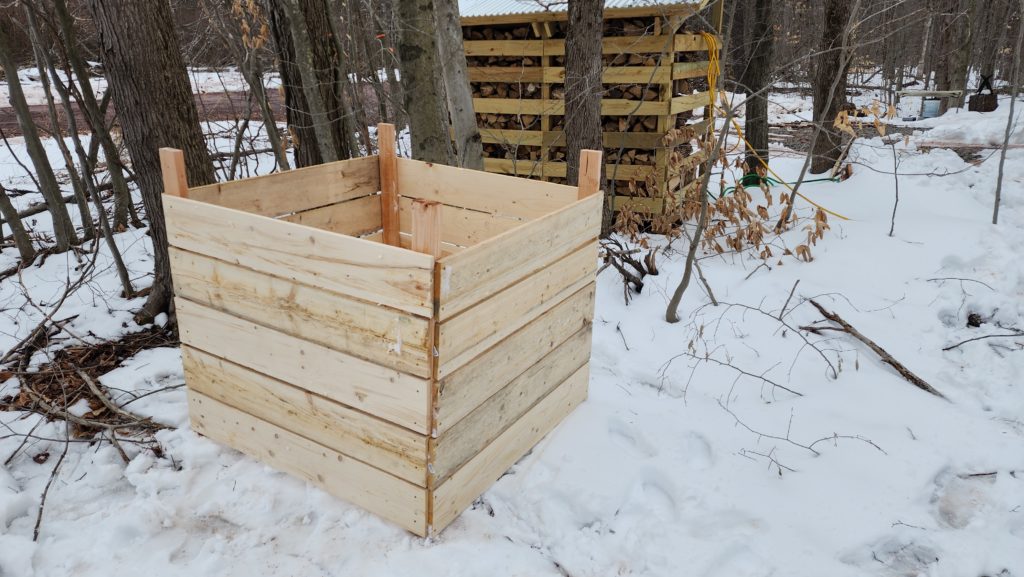
And although there’s snow on the ground today, under that snow are these spring flowers, which had started to poke through recently.

