The last two things on my pre-winter checklist are getting some fire wood and installing a wood stove in the workshop so I can comfortably finish the interior and start using the space in the winter. Getting the wood was relatively easy… call around a bit and find someone who will deliver 2 cord of wood. A cord of wood is 128 cubic feet, neatly stacked. Two cords of wood, dumped in a pile, looks like this:

It’s heavy and it’s across the driveway from the wood shed. You’d think it would be easy enough to carry, but given how little one may comfortably carry at once, even though it was only like a 10ft trip, it made a lot of sense to use my trusty garden cart for this.

I could move much more at a time this way. And who wants to deal with a full armload of wood while also trying to stack it? No thanks. Garden cart. This little thing has served me so well in the nearly-a-year it’s been since I moved here. I actually bought it years ago to help move my gear (and the 200# of which that is my yurt) for festival camping. It’s actually gotten far more use on the homestead since then!
I had a little bit of wood left from last year… a short stack in the back and 3 courses of starter piles.
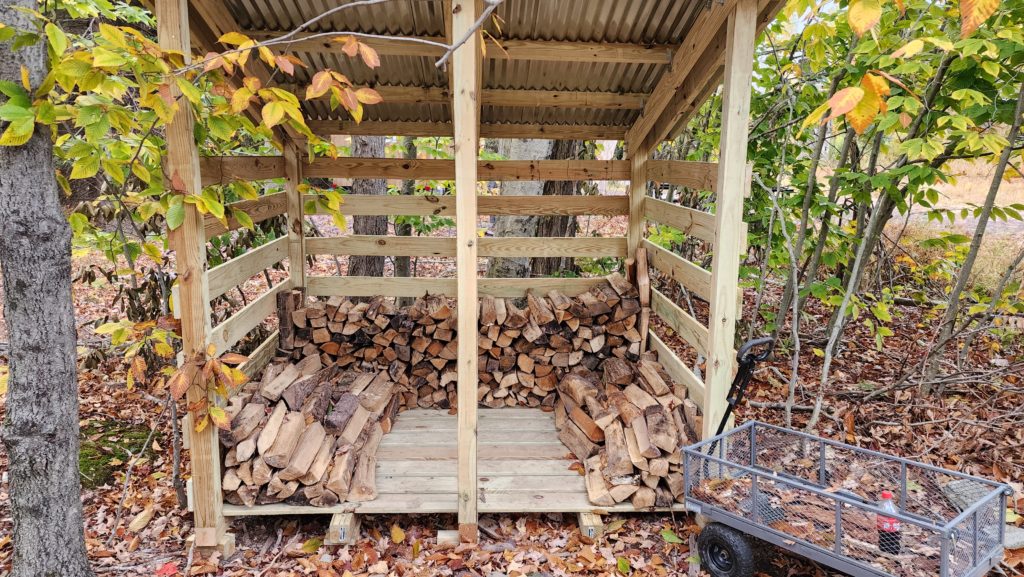

By the time the new wood was loaded, the thing had three full courses to the roof (8ft wide x 6.5ft high x 4.5ft deep (234 cubic feet) and a sizeable fourth course in front (approx 36 cf) = 270cf. That’s a lotta wood. I bought a single cord at the end of December last year and used most of it. This year I’m starting to burn wood in mid October and I plan to use it in the shop, too, hence the double amount. Workshop scraps will also go into the shop stove, as will deadfall from the forest. The HomeBox stove is too small for any of that and it’s too much trouble to cut it down to fit. Okay! One down, one to go!
Once again, a freight company had a lot of trouble finding my not-on-the-map address. This time, though, instead of calling me, they just held the shipment and waited for somebody to notice. Not cool, freight company! Three calls, numerous emails, and 12 days after it arrived at the local depot, they finally delivered it (with my having to actually stand out on the main road and wave them down!) This was by far the worst delivery experience I’ve had (though not quite as bad as when things didn’t get delivered at all, which did happen a couple of times early on). By the way, as of just a day or two ago, my address — and my road — finally got onto Google Maps! I only had to submit the request 3 times over the course of an ENTIRE YEAR, but finally it did get done. With luck, that will be the end of my delivery troubles. Well, maybe. The address and the road are on Google Maps but not yet on Apple Maps and I have no idea what Waze uses, so there may yet be issues. Still, being on one very popular map is a good start.
All 200# or so of the stove was delivered to the front of the building. But it needs to get inside and to the back of the building. And it’s a whole lot of heavy. Fortunately, I am both strong and resourceful. Garden cart once again to the rescue (with sides removed). Chock the wheels, tip the crate up on the end…


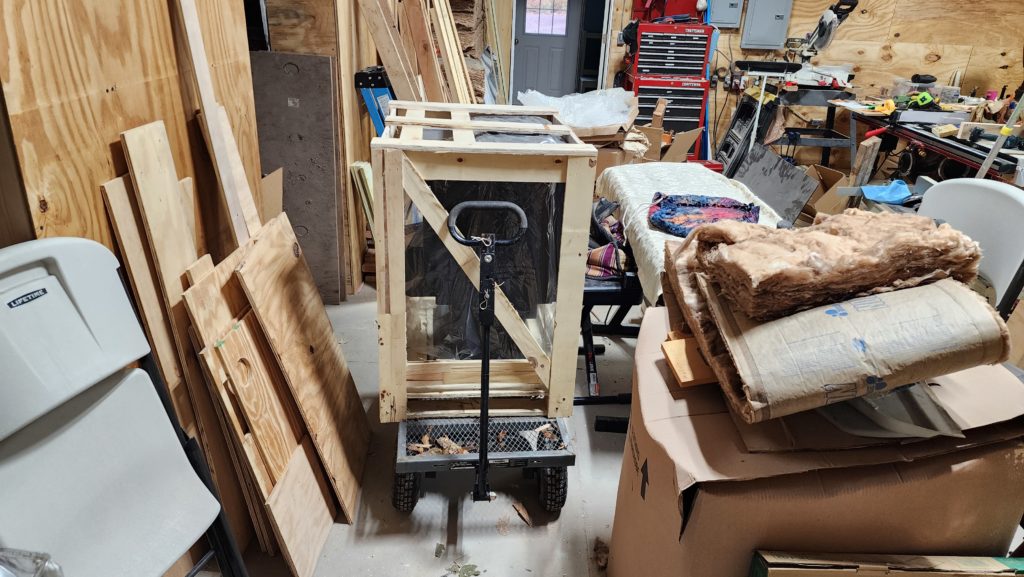
…then give a mighty heave to get it about 40% on the deck of the cart. Then I can get behind it and lift it up, the cart carrying half the weight, and push it the rest of the way onto the deck. Done. Now the stove has wheels and a handle. That made it easy to drive through the clutter of the workshop and get it into place. Now comes the fun part – installing the flue.
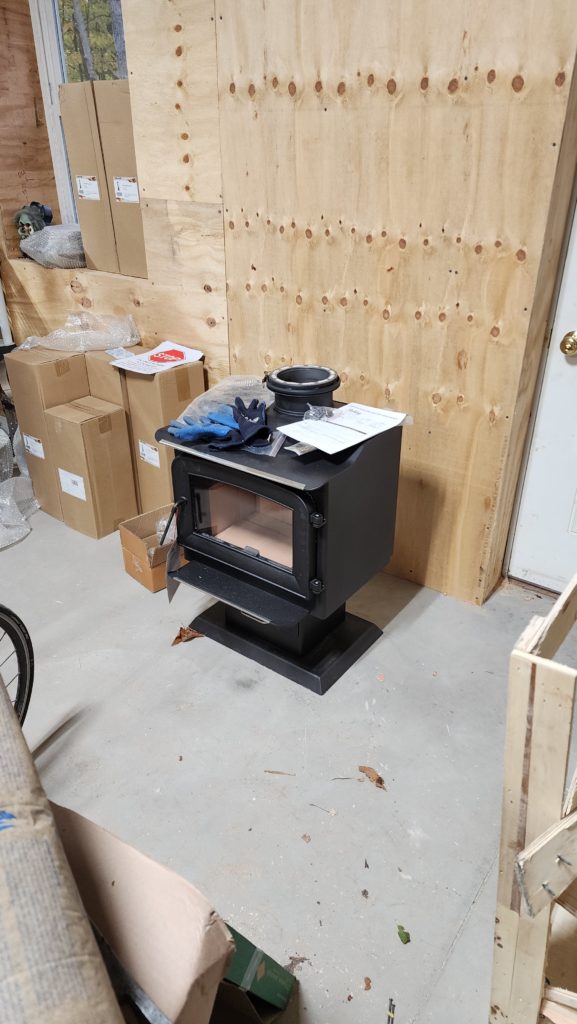
The indoor stage started out easily enough: just stack the sections of flue pipe together until it’s at the height appropriate for going through the wall. I was smart enough not to just measure it and make the hole ahead of time. I know better. Nothing ever lines up the way you think it will. I am going to build this flue outward from the stove, one step at a time. When I get to the point where the flue changes direction and heads for the wall, I’ll need a way to project the outline of the pipe so I know where to cut. For this, I just take a straight stick of plywood and use it to extend the profile to the wall. Placing the stick variously around the perimeter of the pipe and tracing where it hits the plywood wall, I get a dotted circle telling me where the pipe will need to go.

From there, I take the wall thimble and hold it up to the dotted line. Then I trace the interior of the thimble and get a nice solid circle telling me where to run my jigsaw. That’s the easy part and it’s done in just a couple of minutes.
Now comes what I think is going to be the hardest part, cutting the corresponding hole in the metal exterior of the building. This has to line up exactly with the inside hole and is complicated by the facts that (a) the exterior is ribbed, so cutting is tricky, (b) the two wall faces are 14″ apart, so any minor offset is going to get magnified by that distance, and (c) this whole operation is taking place approximately 7ft above floor level.
It occurs to me that when I put one of the thimble halves into the first hole I made, that it now gives me a cylindrical surface I can use to project the hole just like I did with the flue pipe in the first place. The challenge here is that now it’s deep into the wall and still 7ft in the air, so this is ladder work at arm’s length, not my favorite and definitely has its challenges. Here’s kinda what it looked like:

I pressed the stick (which had a tapered end so I could get the sharpie in close) flat to the interior wall of the thimble and made it as square to the far wall (white) as I could. Then I scribed the width of the stick on the wall, after which I moved the stick approximately one width further along the path of the thimble’s metal tube. This was not an exact process and left me with a pretty ragged circle…

But the ragged circle was perfectly concentric with the existing hole, so okay. I cut it from inside, since doing so from outside would be much harder for lots of reasons, not the least of which is that the circle is drawn here, not there! Jig saw again, but the whole thing is a struggle to maneuver it at arm’s length in the depths of the wall like that. I get it done and install the outside half of the thimble to see how they line up. They line up fine! This photo is intentionally at a skew angle to illustrate the next thing.

See that gap between the inside thimble half and the outside thimble half? Yeah, it’s about 2″ wide. The thimble is good for walls up to 12″ thick. My walls are 14″ thick, accounting for all the face material as well as the 12″ insulated space between them. Crap.
The good news is that the thimble’s only job is to keep the pipe that passes through it at least 2″ from anything else. To do this, the thimble has an inner ring (seen in the background) that’s 2″ offset from the outer body. That ring positions the flue pipe. The outer body — the same thing I was using with the stick and the larger cylindrical features shown above — has no job other than to define that offset gap. It’s not structural per se, but it should be closed, so no insulation or anything else might come too close to the flue pipe that passes through the middle. I just need something to span that space between the outer and inner thimble walls so no little bits of anything can get in.
A strip of sheet metal and a few rivets will do.

And presto! A continuous interior surface!

And you wonder why seemingly simple things take a long time? This is why. There’s always something.
The inside preparation is now almost complete. What remains are (a) cement the bottom of the flue stack to the collar on the stove, (b) screw the stove to the concrete floor, and (c) install the heat shield behind the stove. These will be done later, as they’re easy interior work and it’s a nice day so I want to take advantage of that to get the exterior stuff done.
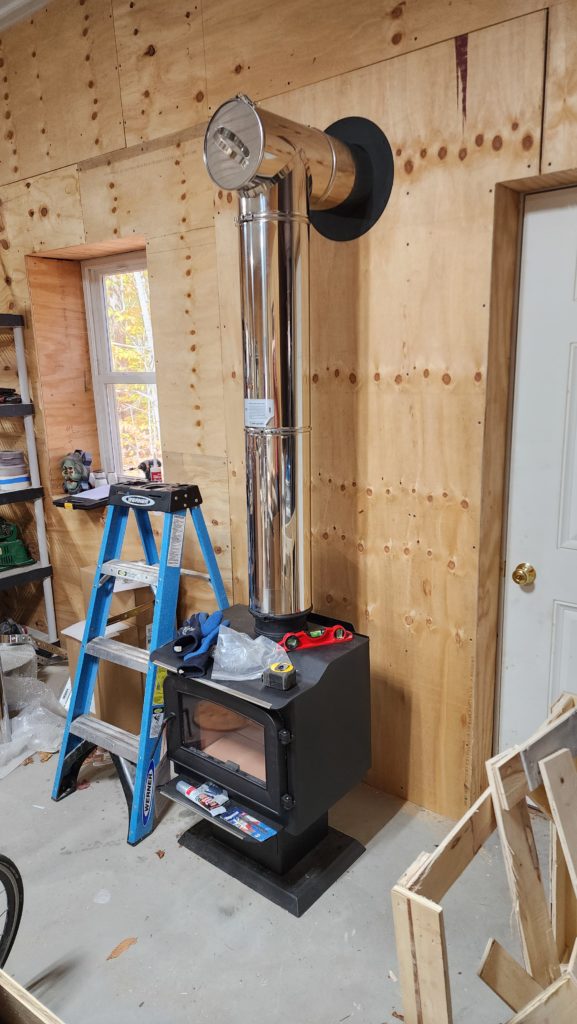
Again, I know that nothing is ever quite exactly how you think it will be, so instead of building the supports first, I extend the flue through the wall first to see exactly where the support will need to be.

From here, about 7 ft of flue will rise, which will be decently heavy. I’ll need a beefy support to carry it, plus some other accommodation to secure it in place so it doesn’t tip or get damaged by snow coming down off the roof.
Step one: mechanical support that will carry the weight of the rest of the stack yet to be installed.

There’s a special wall-support product that is meant to go with this flue system, but it’s meant for walls that don’t have 16″ eaves. It’s way too short. However, it does come with a heavy duty plate that perfectly mates with this twist-lock flue system that’s meant to carry weight, so I bought it, with the intent of using just part of that package and making my own brackets that can stand out far enough. That’s what’s shown above.
This flue system is called All Fuel HST and I gotta say, it’s great. Super easy to install — just twist lock the sections together and secure a snap ring to keep them there. Double-walled 304 stainless steel with fiber insulation means this is a Class A / UL 103HT rated system, suitable for high-temperature appliances like a wood stove and yet only needs 2″ of safety clearance! So nice. It’s quite expensive, but so well made. A premium product. I used it for the whole run, not even using black stove pipe for the interior, as people often do, just so I could take advantage of that close clearance. And the shiny stainless is pretty.
So I got as far as the picture above using that little blue ladder. There’s still about 5ft of flue pipe yet to install. That’s going to requite some longer ladder work as well as some roof work. The trouble is the land slopes steeply away from the building (more steeply than that photo shows) and the pitch of the sheet metal roof is such that it’s a bit treacherous to walk on. I’m going to need not just a safety (fall-arrester) line, but a rope that I can use in tension to help steady me up there. The best way to do that is to run a rope over the building and tie it off to a tree or something on the other side. The tricky bit is getting the rope over the building in the first place. It’s too heavy and long to try to throw it. The answer to this problem is to run a light weight line first, then use that to pull the safety rope. How to get that lightweight line over? THAT should be light enough that tying a modest weight to the end and giving it a sling-shot like pitch stands a decent chance of getting over the roof and then sliding down the far side. That’ll do. I’ll give it a try.
As it happens, I didn’t have 100ft of lightweight line, but I did have flag tape. That’s the stuff you might tie around a survey stake to draw attention to it or to wrap around a tree to tell your arborist “this one”. It’s not especially strong, but it is SUPER light and probably strong enough to pull a rope over the building. It’s worth a try since I have it in stock and I don’t have anything better on hand.

It goes up! It goes over! But then it stops. Whut? How could it stop – the roof is aluminum and sloped, it should slide down the other side easily. Then I realize what happened. It’s 8am in October. Why does that matter? It matters because at 8am in October, the top of the roof has a coating of morning dew on it. As soon as the flag tape touched the roof, it got wet and that increased the drag considerably, preventing it from sliding. Here’s a close-up showing where the tape disturbed the mist as I tried to fuss with it. The whole remainder of the roof is still lightly coated in moisture.
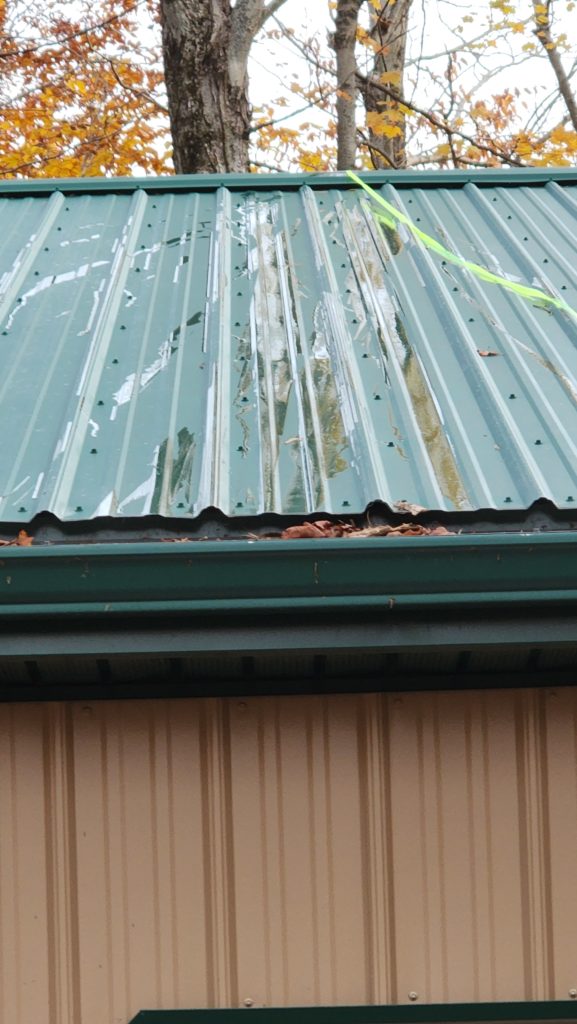
I tried to retrieve the tape, but could not, because the weight I put on the end got caught at the ridge cap of the roof. The tape broke and that was the end of that. The weight will need to be retrieved later.
Okay, I need another plan. And I need some lightweight line that isn’t flag tape. Off I go to the local general store and to my pleasure I find they have a spool of “mason line” — nylon string that doesn’t stretch much. This is the sort of thing you’d use to lay out a fence or a foundation or something like that. I buy it, but still need a plan for getting it over the building. Fortunately, today I had TWO helpers available, one of whom had a very special tool that made this easy.
After that, getting the heavy safety rope over the building was easy.
There’s still plenty of not-easy work to be done.
For starters, to actually get to the roof, a longer ladder is needed. But to have a decent angle, I have to create somewhere for the ladder to sit that would otherwise be in mid-air. This platform does that. The black spikes in front are sunk a bit into the ground to keep the platform from sliding down hill. This platform is 4ft square. You can see how much the land falls away from the building by looking at the void beneath the front of the platform. The block across the edge is what will secure the foot of the ladder.

Before going up, we need to actually pull that safety line over.

… and tie it off to something secure on the other side. In this case, an old utility pole.

After some consideration, it becomes obvious that attempting to install the upper part of the flue from the roof is asking for trouble. It’s long (about 5 ft) and heavy and the front edge of it is 24″ from the edge of the building. The middle is 30″ from the edge of the building. Trying to maneuver that thing standing at the edge of the roof seems like a Very Bad Idea. Okay, then, install it from the ground (there’s still roof work to be done for the upper stays). But “from the ground” doesn’t mean on the ground. It means ladder work. And not exactly for the faint of heart or weak of arm.
Here’s how it went.
First, helper hands me the stack, already built up. I’m on the ladder, which is leaning up against the building.

What happens in between is nerve-wracking and there are no pictures, but lemme tell you how it went. The photo below is posed, but is exactly how it was the moment I had the top of the stack installed. Notice my position on the ladder.

So how does this heavy, 5ft long thing get there? Well, my helper eased it up to me and once I had it, I rested its edge on the gutter behind me, slowly inching it up the roof until most of it was up there.
Then, I carefully drew it down, still on the edge of the gutter, until the bottom of the stack was close to the installed part, basically at gutter level — just where my hands are in this picture. Once the bottom of the stack was in place, I then tipped the whole thing vertical — manhandling it from the bottom because that’s the only purchase I had on the whole thing — moving it slowly from mostly laying down to standing vertically so I could drop it softly onto the installed section and engage the twist-lock. If I went too quickly, I’d not be able to control its motion and the chances of it tipping forward (away from the building) were very high. If it tipped even a little too far, there was nothing I could do to keep it from falling and it would not survive the fall from that height onto the pile of rocks below. That would be an expensive (many $100s) and inconvenient (many days to get new parts) accident. All the while I’m moving this 5ft stack of double-wall insulated steel pipe from the bottom, I’m also standing with my back to the ladder, trying very hard not to have the weight of the flue stack torque me out of position and cause me to fall, too!
I actually did get this to work the first time without incident, but with great exertion and concentration.
What remains is to install the flue stays on the roof. Before that can be done, though, the assembly needs to be modified a bit. For reasons unknown, the system I bought does not have a stay built for it. However, one for another system — with larger pipe — can be modified to fit this one, so that’s what I did.
To make a collar intended to fit 10″ outer diameter pipe fit 8″ outer diameter pipe, I simply cut the ends off the collar and fabricated new closure tabs. Fortunately, I had this nifty duck-billed tool from earlier roof work on the house. It makes short work of little bends like these. Shown to the left, how much material I removed from each end of the stay’s collar. On the right, the new tab formed after removing the old one.

The metal was thick enough that my regular snips just couldn’t cut it – literally. Fortunately, I had my power-shear drill attachment from prior work, so I was able to get this done neatly without resorting to using a saw, which would have made a big mess of it.

Test the fit before going to the roof with it!

Perfect. Some room to cinch it down and ensure the whole thing is nice and tight.
Just like the stays for the flue on the house, the anchor bracket holes were smaller than the roofing screws I had, so those, too, needed to be drilled out to fit. Easy enough to do and I’m glad I checked!

My helper offered to do the on-roof work and I was happy to let him. I’m not acrophobic, but I don’t particularly like working on high, sloped, potentially slippery surfaces.

This is what he installed up there.

And then it was done.

You can see a third support device in there, just below the eave, too. Nothing interesting about that. It’s job is to complement the stays on the roof, making the whole system decently rigid and most importantly robust against a mass of snow sliding off the roof.
What remains are to screw the stove to the floor, seal the flue to the stove’s collar, and install the heat shield behind it. I have all the parts for that, but this was plenty of work for now. The rest will follow soon.