Winter comes early here and it lingers. If there are things I want to do before winter, I’d better get on them pronto. And thus it came to pass, my pre-winter checklist was born. What’s on it?
- Build/buy wood storage hutch
- Acquire cordwood for winter
- Prepare and plant the spring garden
- Install HomeBox flue stays
- Clean the HomeBox flue
- Install a wood stove in the W.O.G.
- Protect the sawmill
That’s a bunch of stuff! Good thing I’m so industrious 🙂
First up, the wood hutch. Previously, I free stacked my cordwood and covered it with a tarp. This was decently effective in winter, but despite my best efforts, the stack was a little unstable and it was difficult to access sometimes because snow and ice would freeze the tarp in place. It turns out there was another critical flaw with this plan, not revealed until later, as well.
There are lots of commercial wood storage devices out there, but I wanted something big enough for about 2 cords and would allow easy access while providing decent protection from snow and rain. I saw this picture on Pinterest and thought it was just about perfect.
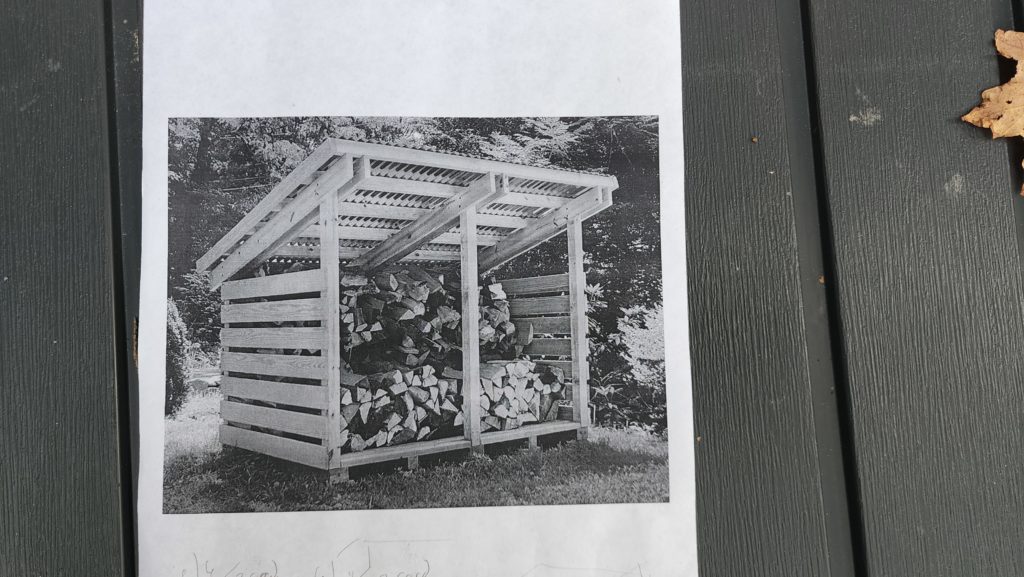
While occasionally Pinterest links will be how-tos, usually they’re not. Usually, they’re either items for sale or just a link to a finished thing that someone did and thought was worth showing off. Good for inspiration but not so much a building plan. This, of course, is not at all a problem for your humble homesteader. I know enough about building things to be able to take a photo like this and conjure a plan to build one, which is exactly what I did. What I wound up building has a couple of very slight variations, but you’ll see the strong resemblance. The real challenge, like so much of life out here, was actually building the thing without a helper. Every now and again I can get a friend to assist with projects, but almost always it’s just me and that introduces special challenges for construction. The biggest of which is that there’s nobody to hold the other end of long work pieces while I try to make them plumb or level or square or to steady something while I attach it to something else.
So for my 6-8ft high hutch, that’s 6ft deep, I was going to need to do some on-the-ground pre-building and attempt to raise and cross-brace modules as I went. And so it was. Getting started is always the hard part. Once there’s a little bit of structure in place, I can then brace things to it. But when there’s just open space, things get a bit more challenging.
It’s obvious enough that the structure’s three main arches (timber framers would call them “bents”) are really where the action is, so I built those first.
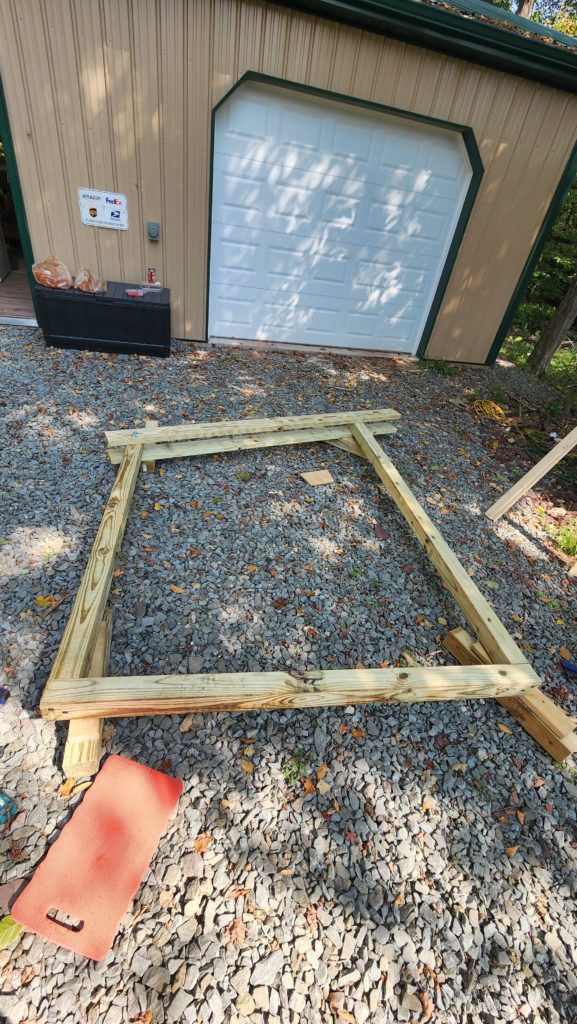
There’s still too much play in this frame to really square it properly, but I expect to be able to shove it into square as needed, in place. Also, it doesn’t need to be perfect. It’s a wood hutch, not a show house. It’s also made from new pressure-treated 4×4 posts, 6ft on the low side, 8ft on the high side, with 8ft 2×6 rafters. If this were dry pine, it would be a little heavy, but not too bad for one person to haul around. But it’s not dry pine. I mean, it probably is pine wood, but the pressure treatment makes it HEAVY. I didn’t weigh them myself, but the Internet says a PT 4x4x8 weighs about 30 pounds and I believe it. That puts the framework at 75 pounds, plus the rafters, which the internet says weigh about 25 pounds, for another 50 together. So 125 for the assembly? Yeah, I believe it. I can lift that kind of dead weight without much fuss, but remember this thing is taller than me and wide and kinda floppy by itself. And there’s no way I can hold more than one part of it at a time. Remember I said solo construction was challenging. This is what I meant.
So I get under it, walk it upright, then grab the post, brace the thing against my body, and drag it (I can’t lift it without racking it to destruction, since I can only reach one vertical at a time) to where I’m going to erect it. Oh! Right! One more detail: I can’t just build these segments in place because the hutch will fit exactly in a little clearing and there’s no room for further maneuvering or laying out a big section like this. I build them in the driveway and drag them about 20-30ft to the site of the would-be wood hutch.
But wait. I forgot to tell part of the story that happened first. First, I had to level the ground. Well, no. Leveling ground is difficult without earth moving equipment. Instead, I just had to level the floor joists. That was much easier and I’d recently had a bunch of practice leveling a floor as I was preparing the sawmill track. At this point, I’ve already put my floor joists in place and leveled the whole thing with heavy shim blocks as needed. Three of those floor joists are actually part of these sub-assemblies, though. What I do is after it’s all level, I took the first joist and built it into the sub-assembly, then just brought it back. The shim blocks are in place, so I “just” have to right the assembly and lift it into place on the shim blocks and it should be decently level. Easy peasy, right?
Well yes, but also no. Once I have it in place, what’s gonna keep it there? Good question. This would be one of those times having a helper would be super useful. Even a helper who isn’t particularly strong – it doesn’t take much to hold an assembly vertical that is already vertical. No helper today, though. What to do? Take a look at the following photo. Four of the floor joists are sitting in place. The first assembly is propped up slightly to make it easier to get under to tip it up. And something else.
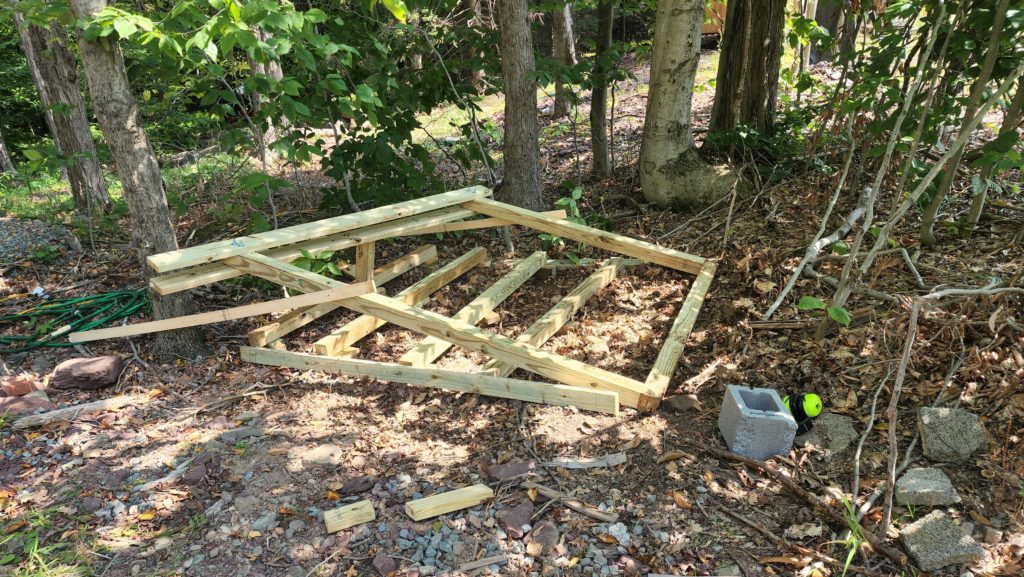
The something else are those 8ft 1x3s attached to the would-be verticals. See them, sloping off to the left of the frame? They’re attached to the verticals with a single screw and left just loose enough that they can pivot. Here’s how it goes: I tip the frame up to almost vertical, lift each end in turn onto its shim blocks, then walk away and it doesn’t fall down! How? Because those 1x3s have come along for the ride as I tipped up the frame and as long as the frame puts some weight on them (I did say almost vertical; they’re leaning into the 1x3s a little), they’ll act as a bicycle kickstand, keeping the frame in that almost vertical position while I work on other things, as long as it isn’t windy, which it isn’t. If I wanted to spend more time on this and make it more secure and more precise, I could drive a stake into the ground and attach the tails of those braces to the stakes, carefully tapping them into place before fastening, but the weather was favorable and precision was not required (“it’s just a wood hutch”) and it would only be a few minutes before the next step.
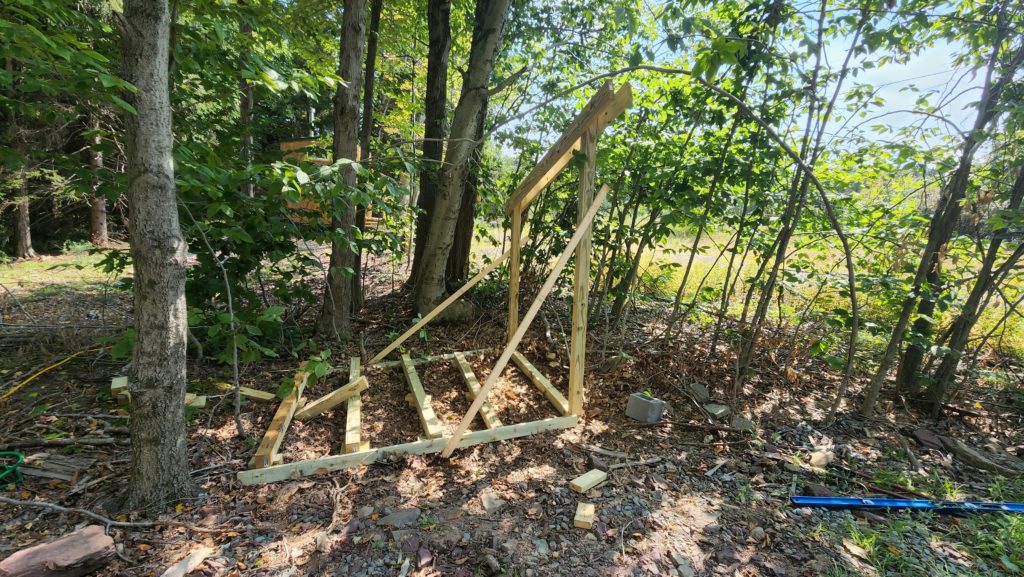
I work quickly to get the next assembly in place, to which I can then fasten these same braces, creating a cross-braced structure much more likely to remain free-standing.
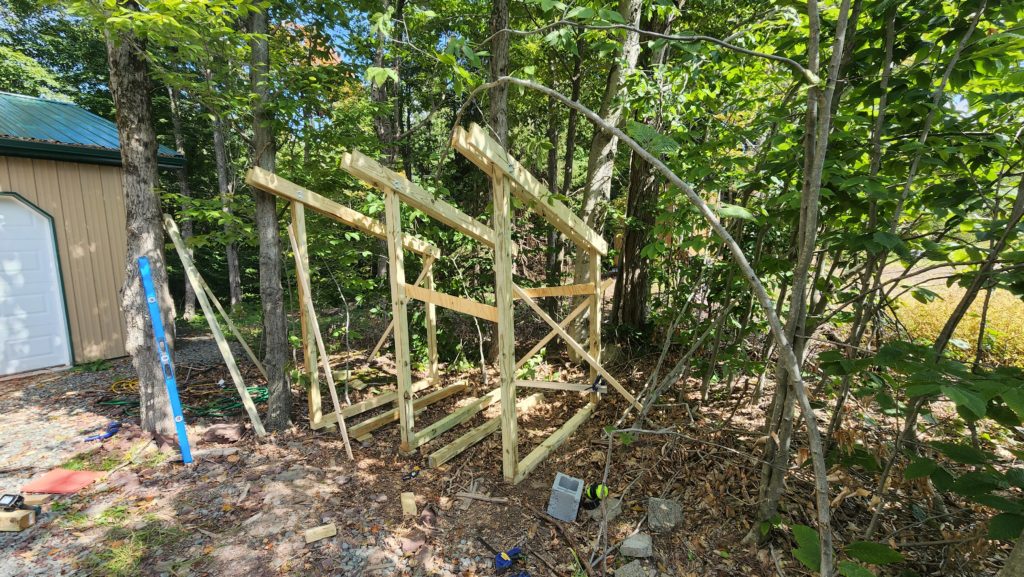
Some additional braces were added at this stage, as I did try to make it as square and plumb as I could, given the no-helper situation. If I were highly motivated, there are techniques to get this exact, such as using ratchet straps as a come-along to gently pull things into position, using more braces and not-quite-tight clamps and a mallet to do fine adjustments. But it’s a wood hutch, not a show house. It just has to be good enough and ideally not egregiously out of square to the point of making it difficult to continue the work. This whole process is stymied slightly by the fact that almost no construction grade lumber is legitimately straight and without twist. The 4×4 posts were pretty good, but not perfect – so even if one end was perfectly plumb and square to the rest of the structure, the other end might not be. Some amount of persuasion is possible, but it’s hard to un-twist a post more than just a little. It’s just a wood hutch.
The gazebo, on the other hand, that I want to be a show piece. And it will be. And I won’t be using stock 4×4 posts from the home center. I’ll be creating those members in the workshop, planed and jointed and all that, making them rather close to perfect. This isn’t that.
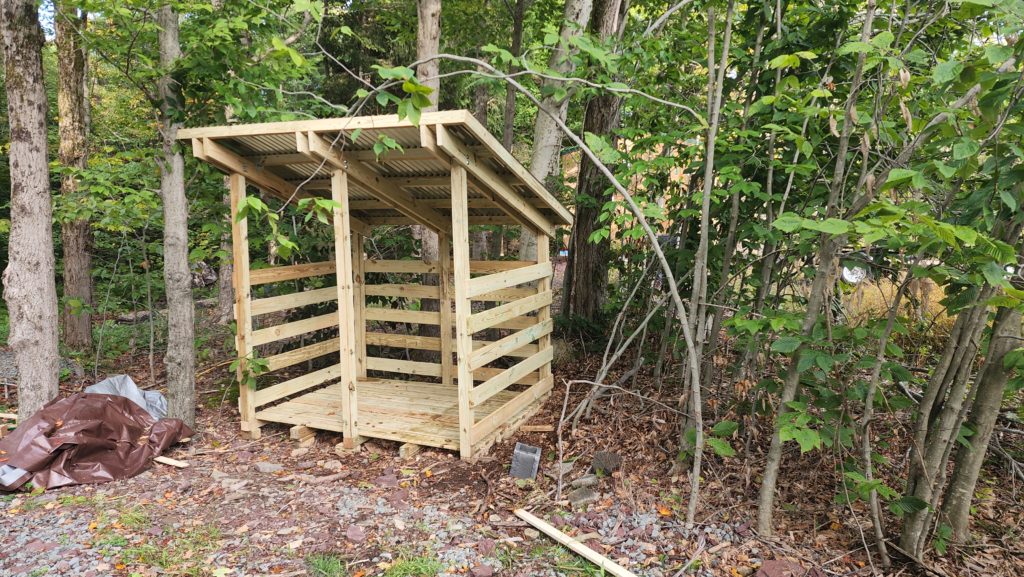
The hardest part was probably the roof, actually, since as you can see there’s not much room to set a ladder around the perimeter of the structure.
The last step was to move what was left of the tarped wood pile to the hutch. It turns out the tarp did not do as complete a job keeping the wood beneath it dry as I hoped! Indeed, there was a fair bit of fungal growth and some decay! I didn’t see any holes in the tarp, but clearly there must have been some route for water to get under there and/or some moisture from the ground below and perhaps some condensing action. About 3/4 of the wood was dry. See the black, shiny parts? Yeah, not so good.
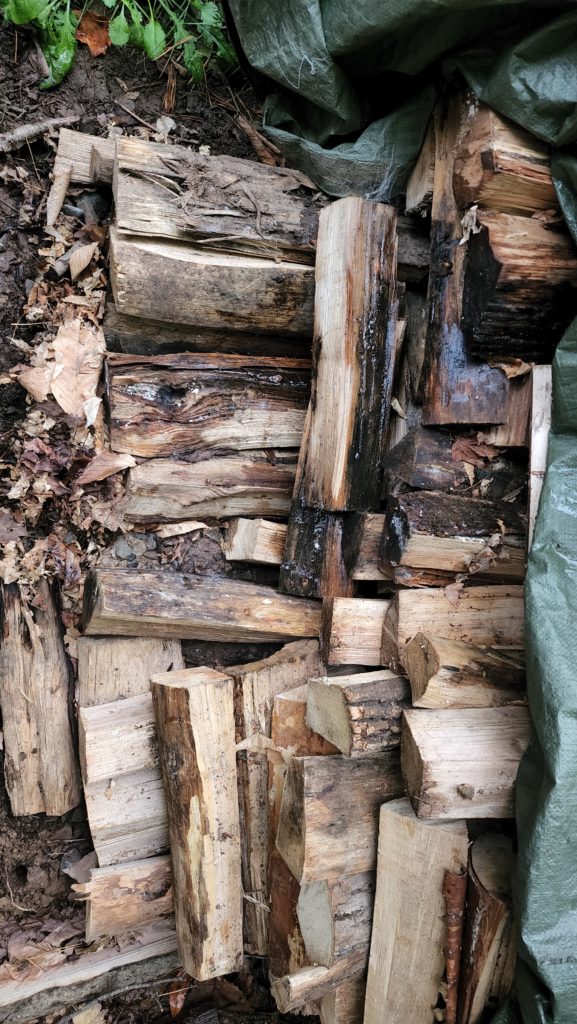
This wood has all been moved to the hutch and is in the back, where it will have a chance to dry out again. I’ll get some fresh wood for this season and stack it in front/on top of last year’s got-wet wood, so the new stuff will get used first as the old wood from the pile dries out. For sure I’m not taking that wet, slightly moldy/fungal wood into the house. That’s an air quality issue just waiting to beat up my lungs. It would probably be okay in-house when all dried out again, if it didn’t stay long (i.e., was soon burned). That’s my plan.
Before sending my motorized flue-cleaning brush up to clean out last year’s creosote, I wanted to also install some supports for the part of the flue that extends up past the roof. Why, you might reasonably ask, since the flue was fine all last winter? A valid question. The answer is I wanted the stays in place long before, but supply chain issues prevented me from receiving it until midwinter, at which point there was no way in deepest, darkest heck that I was going up on the roof to install them. I was glad the tall section of flue proud of the roof line was fine all winter, but it really is too tall to be unsupported and now seemed like a good time to get on with fixing that.
I even had some spare roofing screws (self-drilling, with soft washers to seal around them) on hand. Perfect. But first, lemme check the mounting flanges of the flue stay to be sure the screws fit nicely, before I’m up on the roof installing it. And a good thing I did! It turns out my screws were slightly larger than the pre-drilled holes in the mounting flange! This is easily remedied on the ground (in the workshop, specifically, not on the ground per se) and so it was.
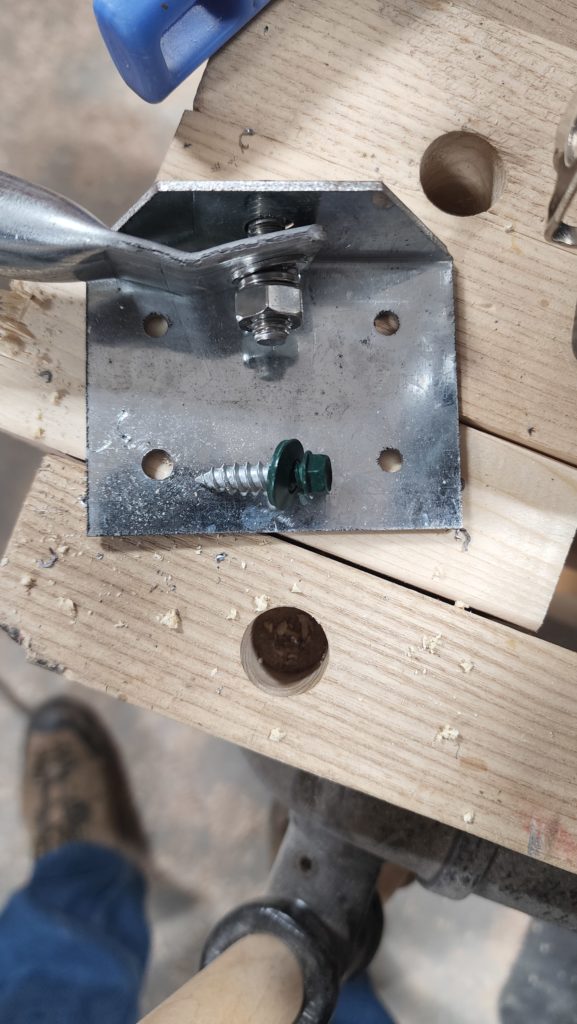
The installation process was not without its challenges, though. The flue stays have telescoping arms and use hose clamps to cinch them tight.
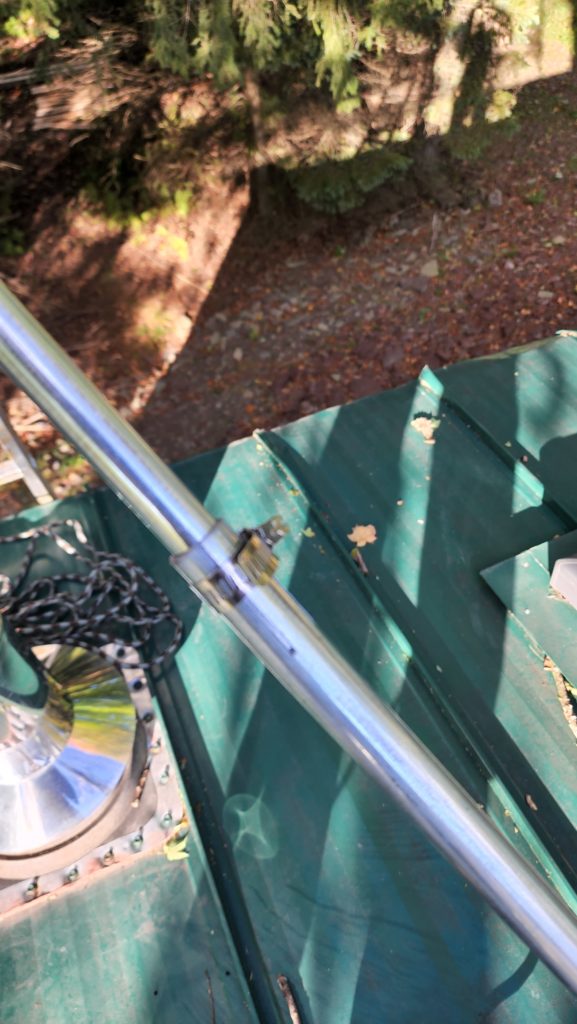
One of the two clamps broke as I tightened it! This was problematic, as I was already on the roof. I did have a helper this time, though — no non-emergency roof work without a spotter/ladder steadier! — whom I sent to the workshop to go fetch a new clamp from stock and get it to me, still on the roof. It’s good that I have one or two of almost everything 🙂 And this is also why I keep spares around.
And done.
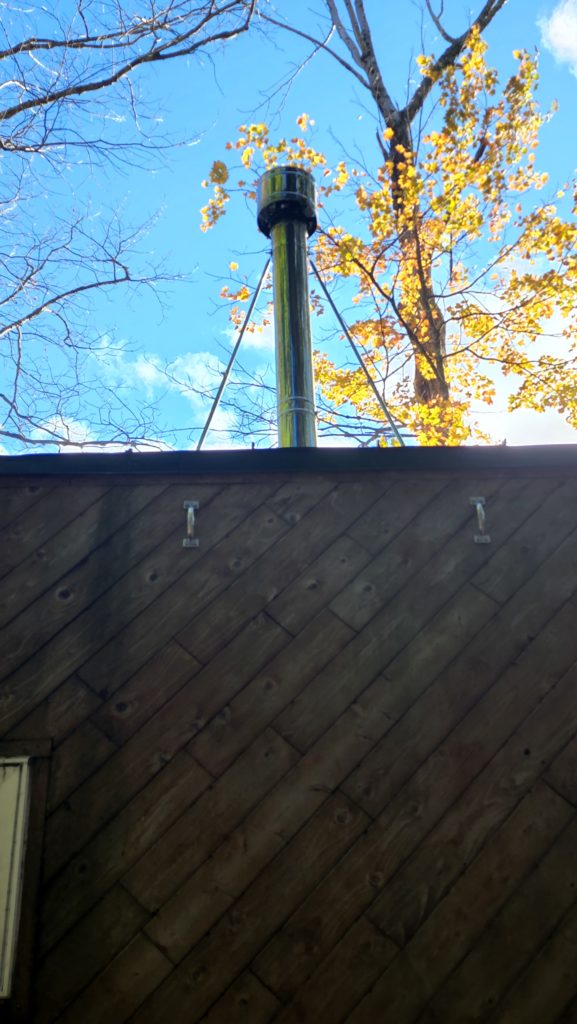
Now it’s time to run that motorized flue brush up there and clean it all out before starting the first fire of the year (which would be that night, as it’s gotten chilly here).
I don’t even remember when I last opened the door to the stove. It may well have been many months, since it’s been fair weather and I’ve had no need to interact with the stove. So imagine my surprise when I opened the door and found something wedged in by the hinge.
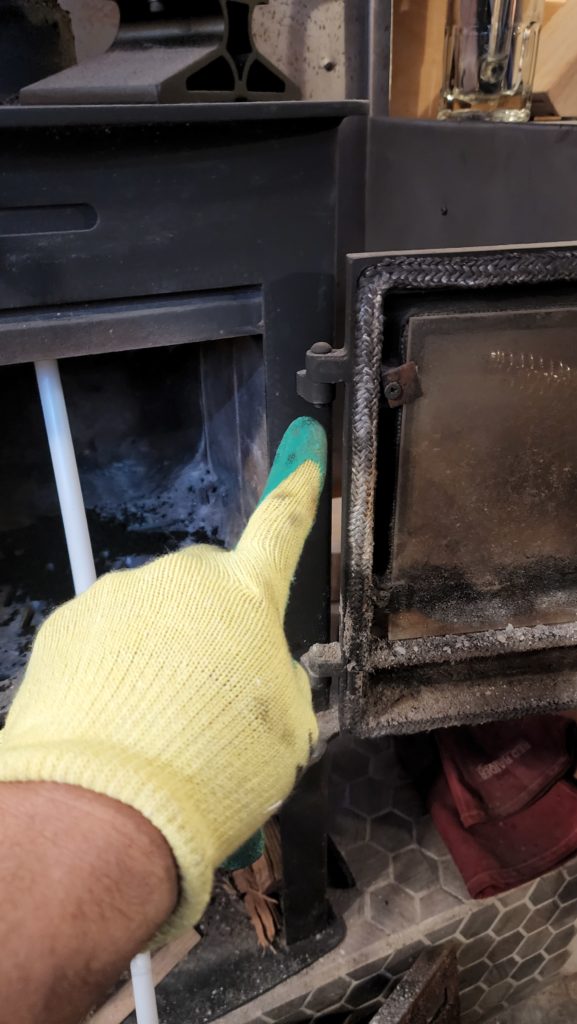
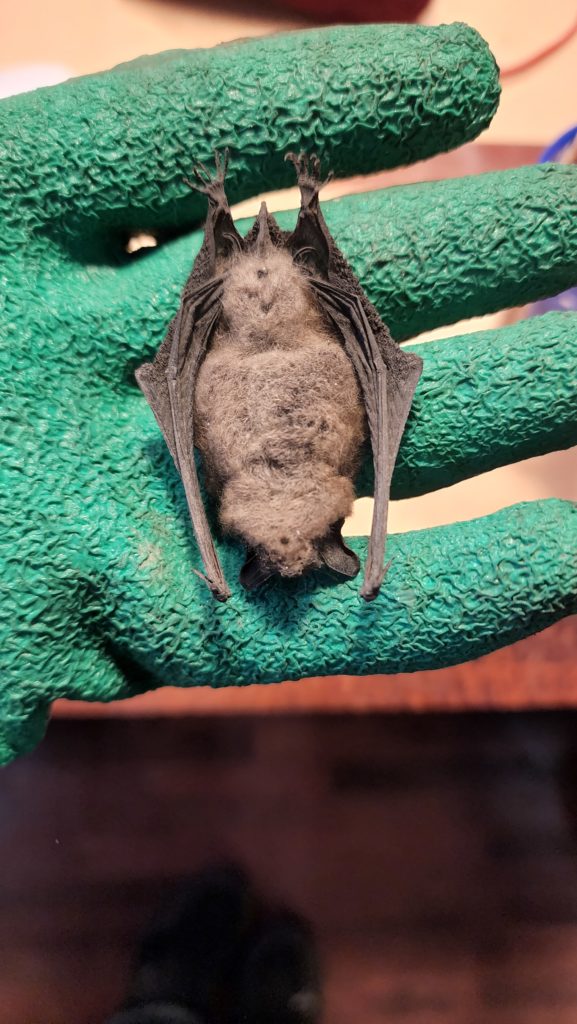
Yep. A little bat. A very dry, very dead little bat. There should be a wire mesh at the top of the flue, but maybe the bat is/was small enough to squeeze through the grids. That’s possible. It’s a fairly coarse mesh. I was already down from the ladder and my helper was gone by the time I was doing this, so there was no opportunity to inspect the mesh at this point. My best guess is that the bat saw the protected cap of the flue and thought it would be a decent place to hang for the night, slipped, and fell down to the firebox. The inside of this flue is only 4″ diameter, probably not enough for the bat to fly and too smooth to climb up, so the poor thing got stranded. And because I didn’t open that door for months, it had no chance to escape (into the house!) before dying of starvation/dehydration. Having a bat in the house wouldn’t have been so great, either, but I’d have made an effort to escort it outside if this had happened.
I laid the bat to rest in the forest, covered with some leaves, for Nature to reclaim.
And then I sent this motorized brush head, bearing a striking resemblance to Sputnik, up to the top of the flue to clean it all out.
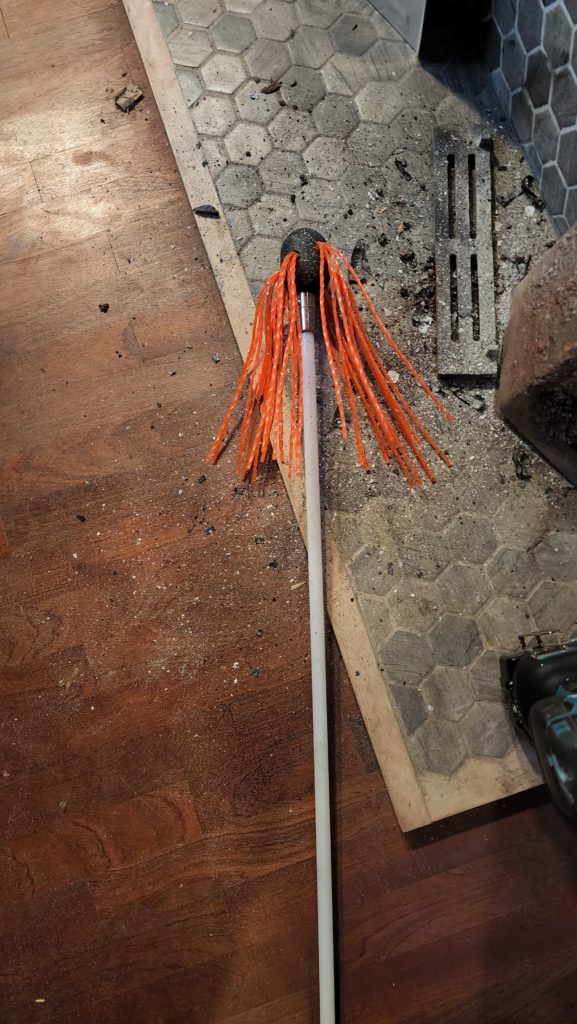
There wasn’t a lot of build-up, but it’s always good to zero it out at the start of the season.
One more item on the Pre Winter Checklist to report. The spring garden! This area by the front door is where it will go. What’s growing there in the following photo are just volunteers.
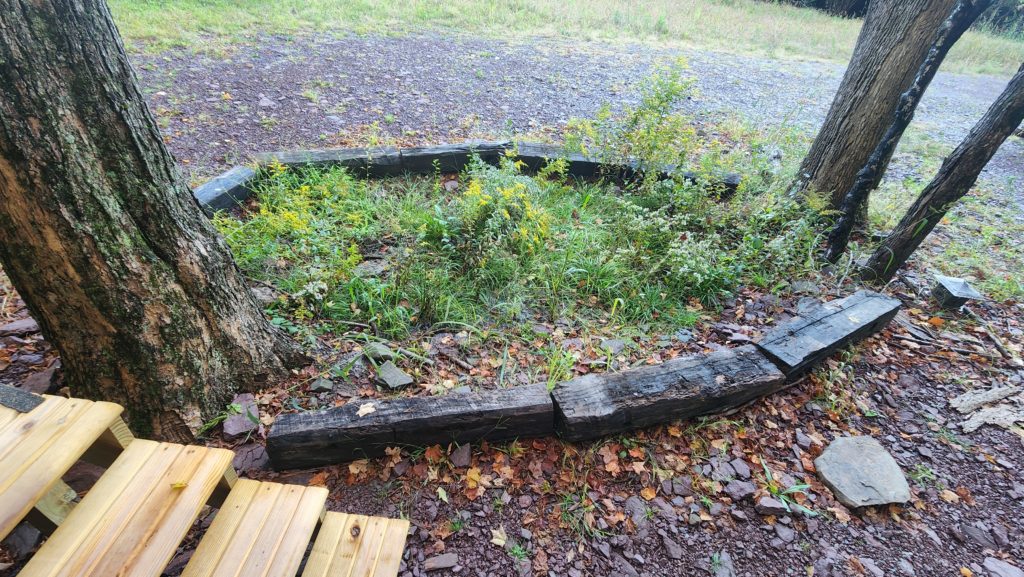
Those timbers are actually what were previously holding up the house, before I installed the concrete blocks and took off the wheels.
Step 1 – pull out all (well, most) of what’s growing there.
Step 2 – cover with landscape fabric (a/k/a “weed block)
Step 3 – have a guy come with a truckload of rich topsoil, composted from his cow pasture
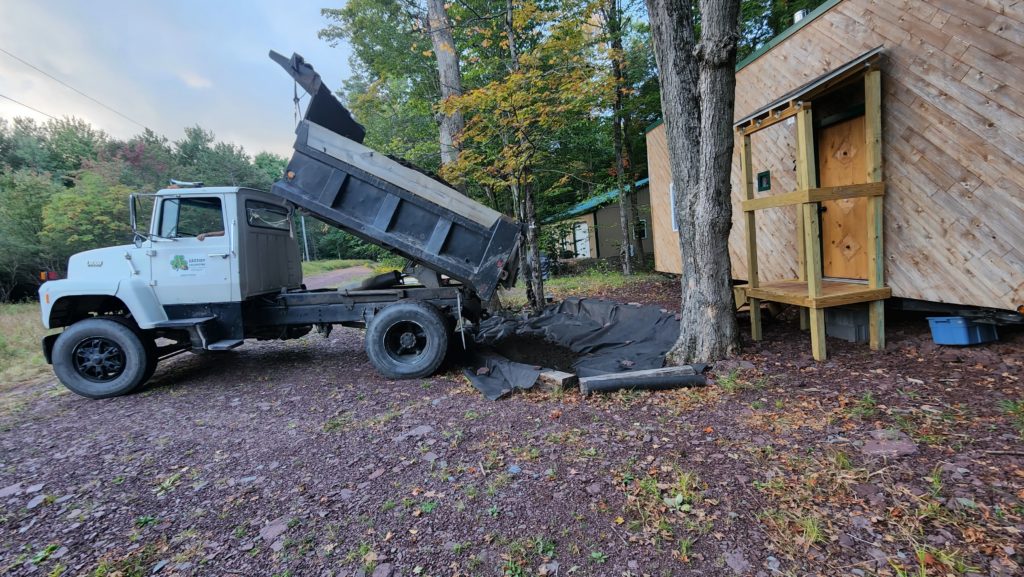
Step 4 – spend rather a while with a hard rake, spreading out the mountain into a low hill, filling in (and filling out) the raised bed.
Step 5 – take 124 spring bulbs and plant them!

I was sure to put the early crocus by the edge of the bed, so they’d be easy to watch as the were first to emerge in late winter. I have always enjoyed seeing the defiant crocus pushing through the snow, proclaiming that spring is coming. Mixed bags of daffodils and hyacinths round out the batch. Deer are keen on tulips and I definitely have deer here, so I skipped those.
And lastly, I present to you a pair of autumn images. First, a large mushroom, roughly 12 inches tall!

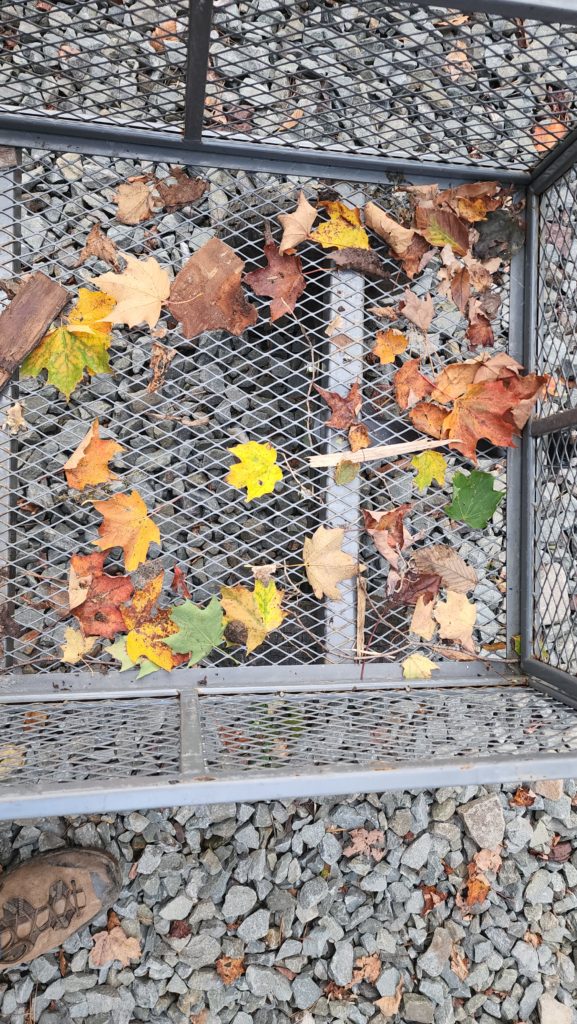
And my trusty garden cart, beginning to collect colorful artifacts of the season.
