I’ve been having some mysterious issues with the power lifting column that raises and lowers the table (and therefore also bed bridge) in the Bednette. Sometimes when I send it down, it stops about 1/3 of the way from the end of travel, gives a long beep, and requires me to go through the re-homing procedure to get it to fully retract. It’ll then be fine for a bit but will do it again. Next day, next week, it’s pretty random. I have experience with electromechanical actuators of various sorts from my own work and have a few ideas about what could be wrong, but really, this should not be my problem. The manufacturer agreed and shipped me a replacement. Lovely.
Few things are ever as easy as they might be, though, and this was no exception. The lifting column holds the table and is secured to the floor with wood screws. It had already been removed once to tighten some machine screws on the column itself. Wood screws really don’t like to be removed and re-installed. If one is very careful to match the threads cut in the wood, one can re-install a screw without damage, but it seems there is always some reduction in holding power every time. A reduction in holding power is nothing I want when it comes to a pedestal table. I have a solution for this. There are widgets called “insert nuts” which have wood screw threads on the outside and machine screw threads on the inside — allowing machine screws to be used in wood. Conveniently, the holes needed by the insert nuts are much larger than the wood screw holes already there, so all I have to do is bore them out a bit and insert the insert nuts and I’m good to go. Cool. I do that.
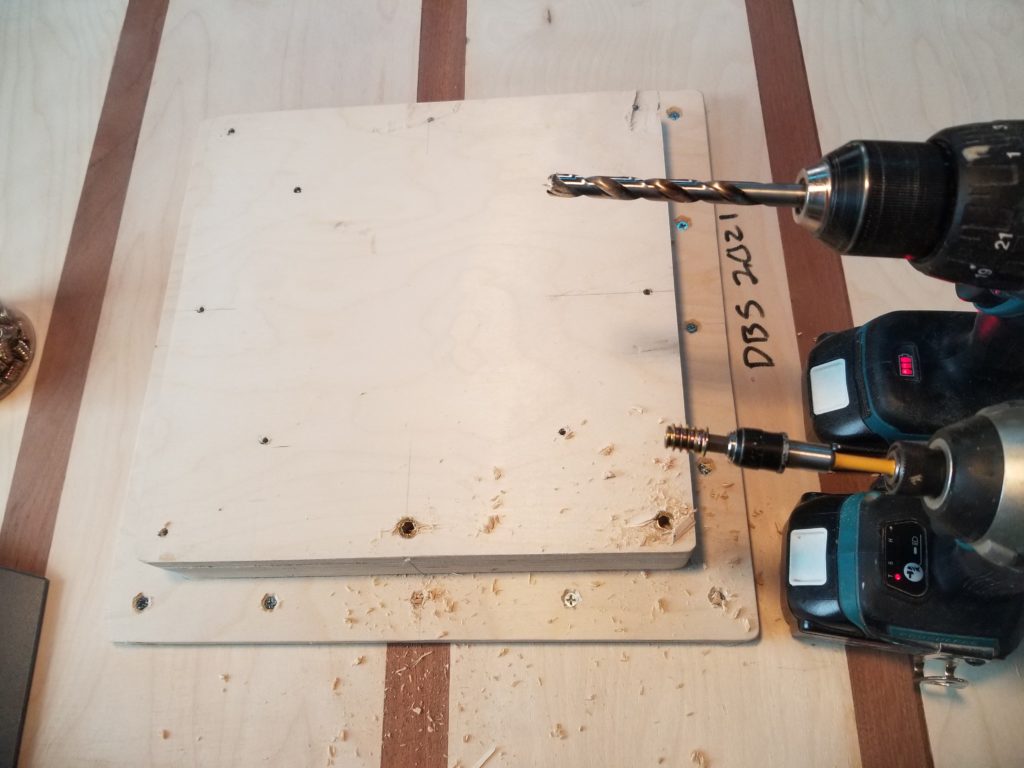
In the photo above, two insert nuts installed along the bottom edge of the mounting block under the table (center, right), one is mounted to my impact driver ready to install in the next hole to be drilled.
It’s a little bit of trouble to center the larger drill bit in the existing screw hole, but there’s some forgiveness in the whole process, so it need not be exact (which is good, because it cannot be).
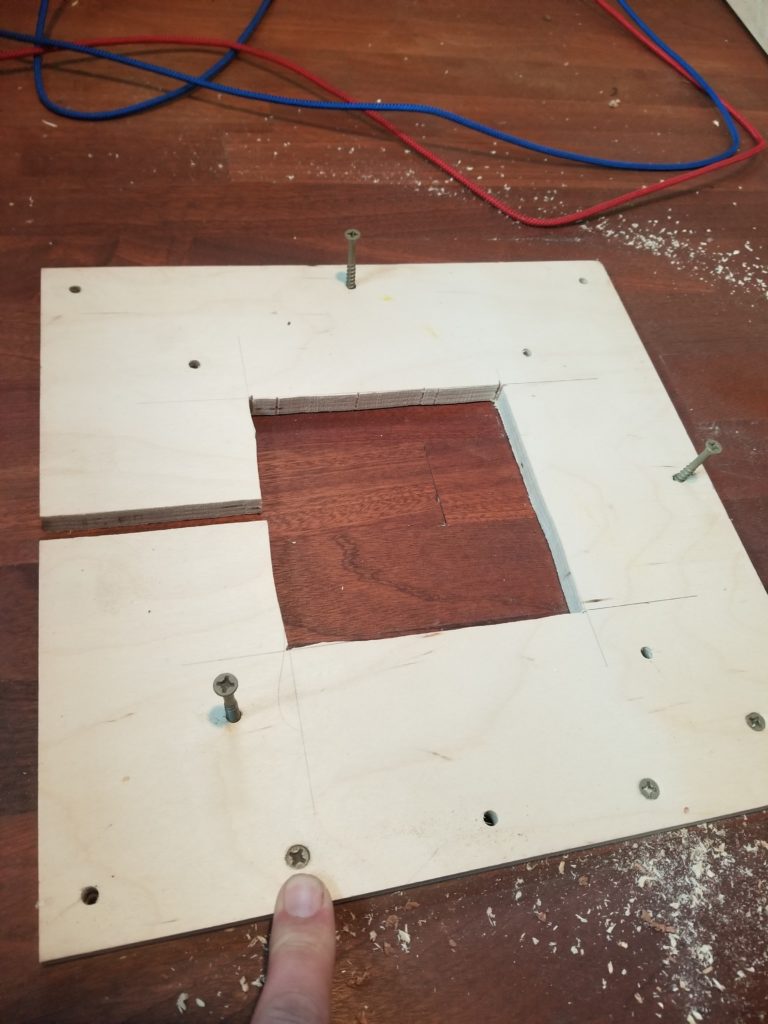
Insert nuts need to go on the floor mount, too. This is more tricky, since there’s a spacer block that accommodates the cord coming off the column and the position of the whole system has to be exact so it locates the table properly between the Bednette benches. Hm. Then I have an idea: just screw the spacer block in place to the floor, aligned best I can with the existing holes, peg it in place with a couple of screws, then screw it to the floor but with screws in new positions because the insert nuts need to occupy the existing holes to mate with the column. Okay, it should be perfectly in place now. Then I drill for and install the insert nuts.
Shown below: 3 screws locate the plate as I drive new floor-attachment screws between existing holes, which will soon be drilled out to accept insert nuts.
A quick check that the holes are deep enough…
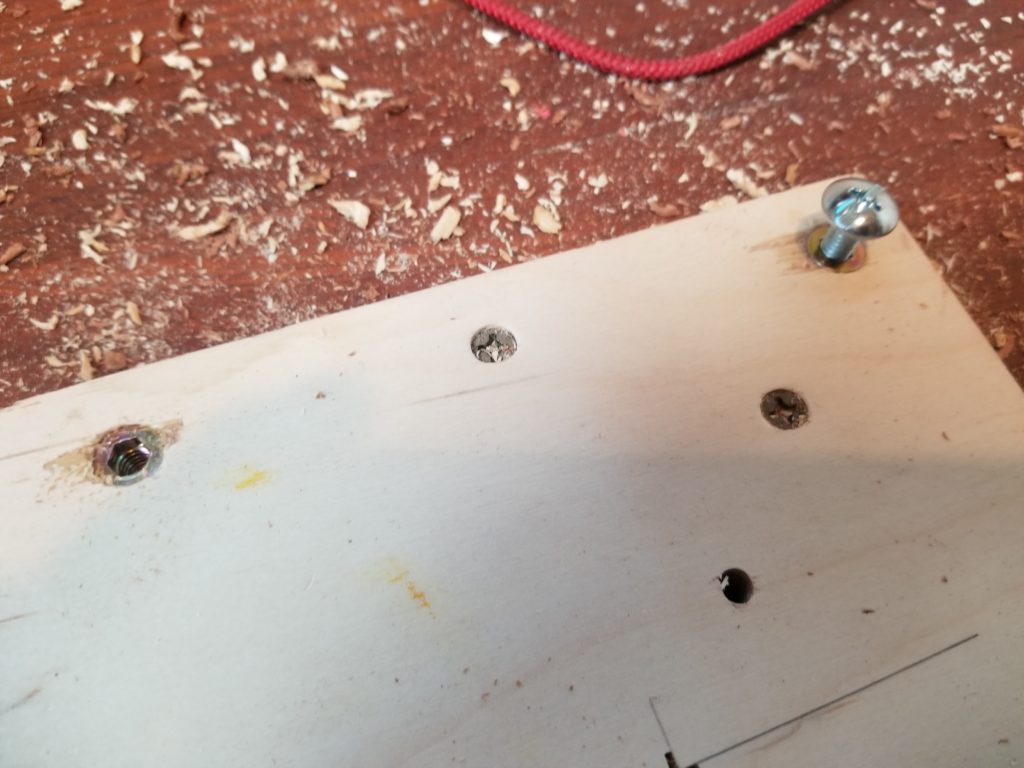
Yup, all good. Excellent. Now it’s time to mount the column to the spacer block on the floor. This should be a simple matter of driving about ten machine screws.
Then I find the 1/4″-20 machine screws that the insert nuts accept are in fact too big for the pre-drilled holes in the lifting column’s mounting plates. Shit. But only a small pile of shit. I can deal with this, too. Hello, step drill & cutting fluid. I didn’t expect to visit with you today, but here we are!
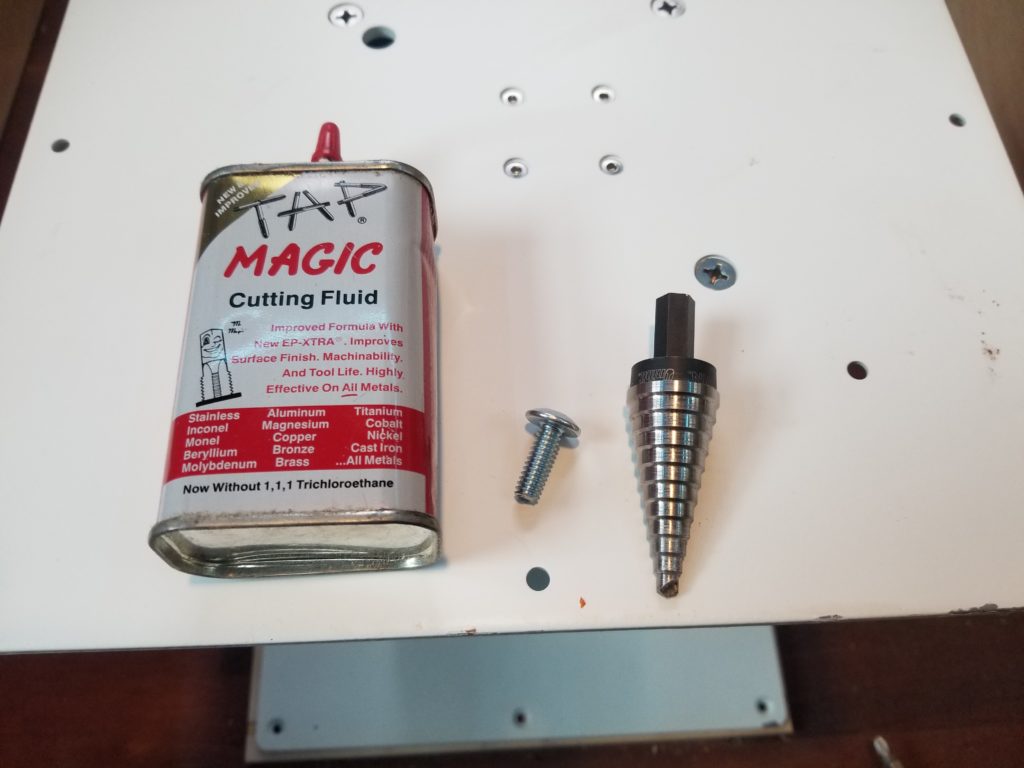
It made a mess of steel shavings, but also made the holes big enough.
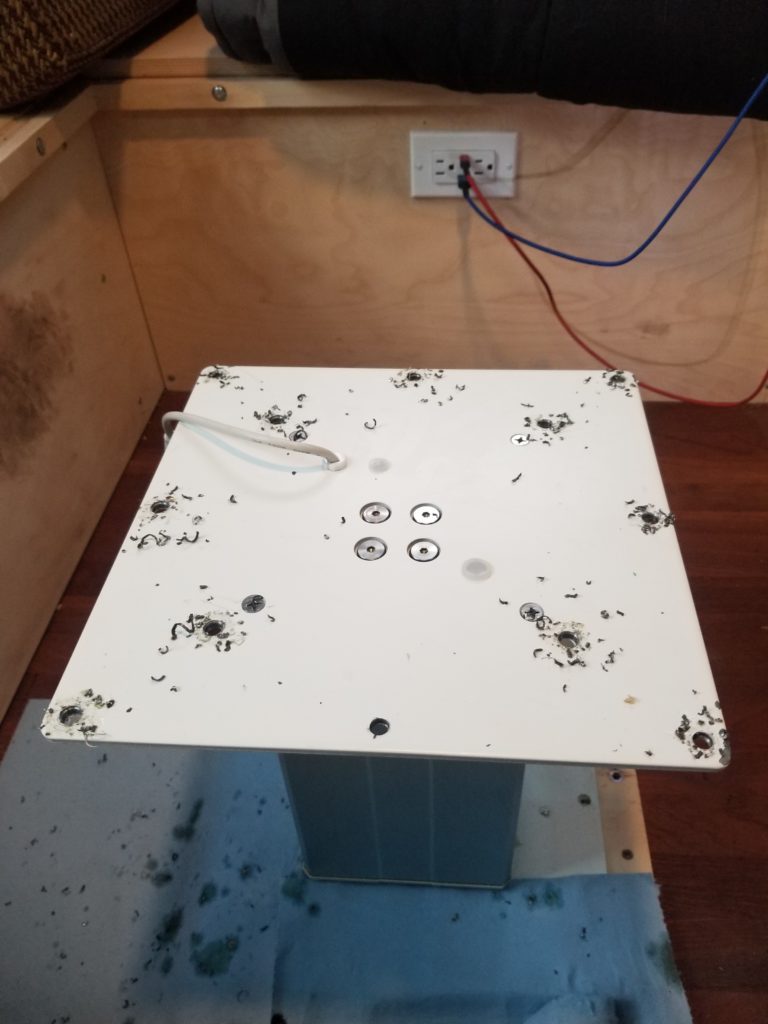
Now it all fits.
The manufacturer chided me lightly (they’re Canadian, being harsh simply isn’t in their DNA) for having cut the connector off the last one. This was why, though:
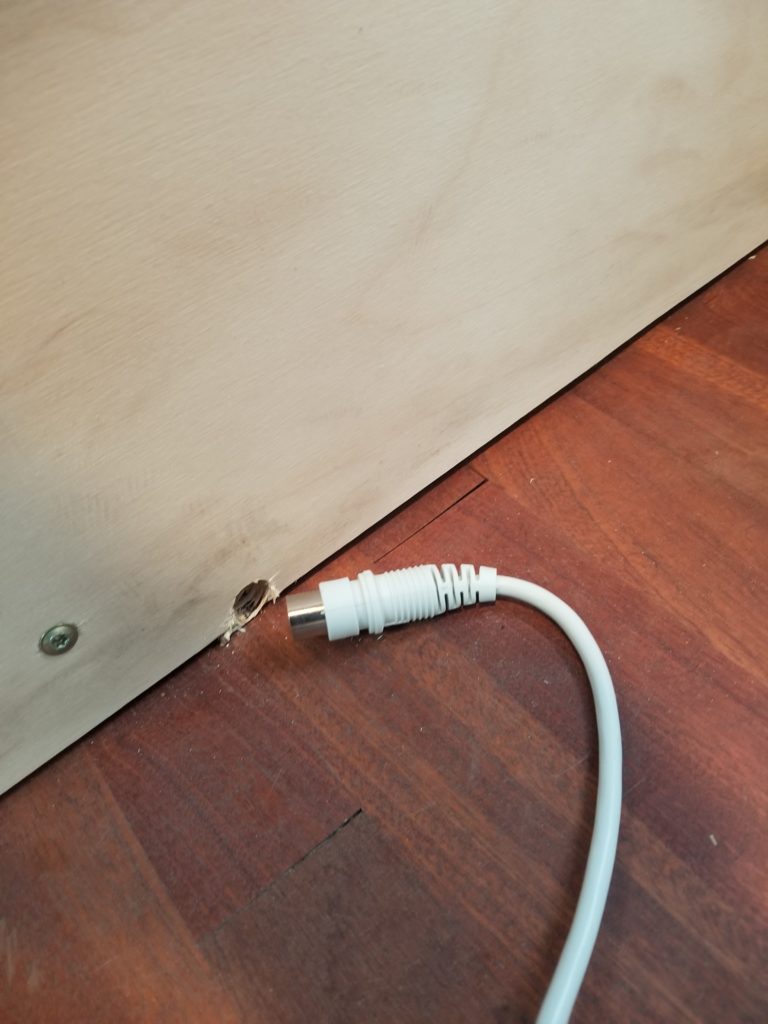
Original hole
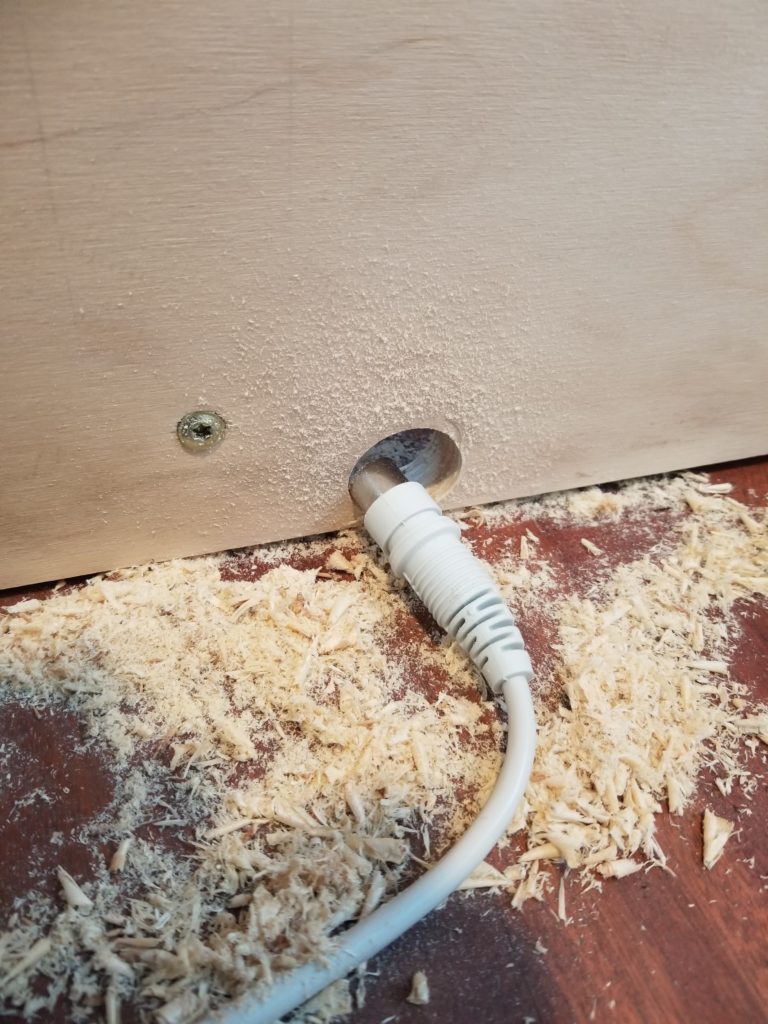
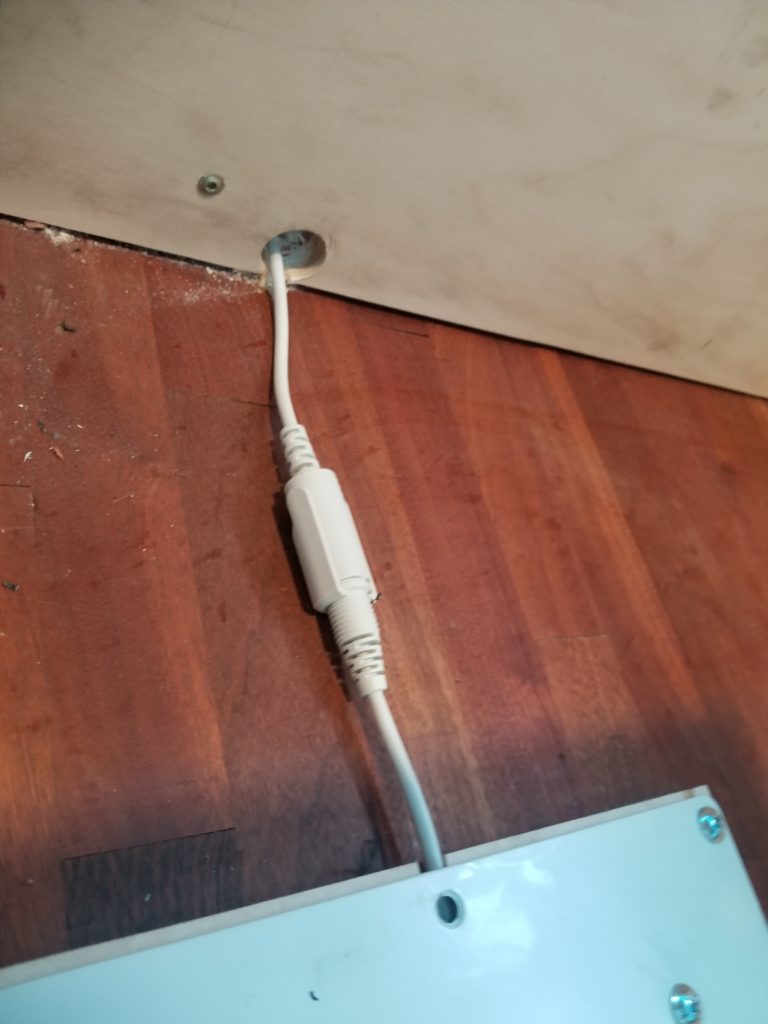
In order to accommodate the connector, I would need a much larger hole in the wall to pass it through, rather than just enough for the cable itself. Also, it means the connector junction itself is right there on the floor, where I really don’t want it. Still, in case anything needs to be replaced in the future, it does make sense that the connector should stay on rather than my soldering the wires together directly. I’ll need to build some kind of shelter for this, though, since it’s in the foot well of the Bednette.
And, finally, done. Doesn’t look like much, but what it now is that it wasn’t before is held in place with machine screws with effectively infinite removal/insertion cycles so if anything need further service, it’s not going to be a big deal like this again. Except for drilling out the mounting plates, if needs be.
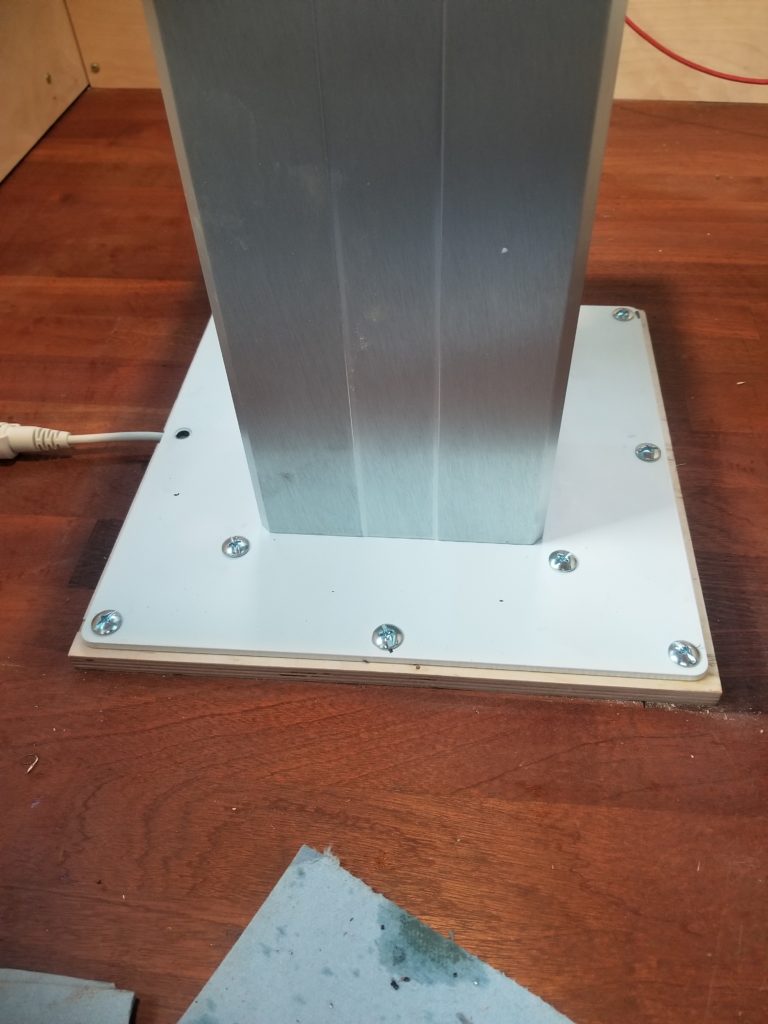
Despite my best efforts at getting everything aligned, though, everything was not aligned, though.
There was a slight interference at the end of the table with a cabinet lid. The ends of the table are already finished, so what is needed here is a visit from a handplane to shave down the edge of the cabinet lid.
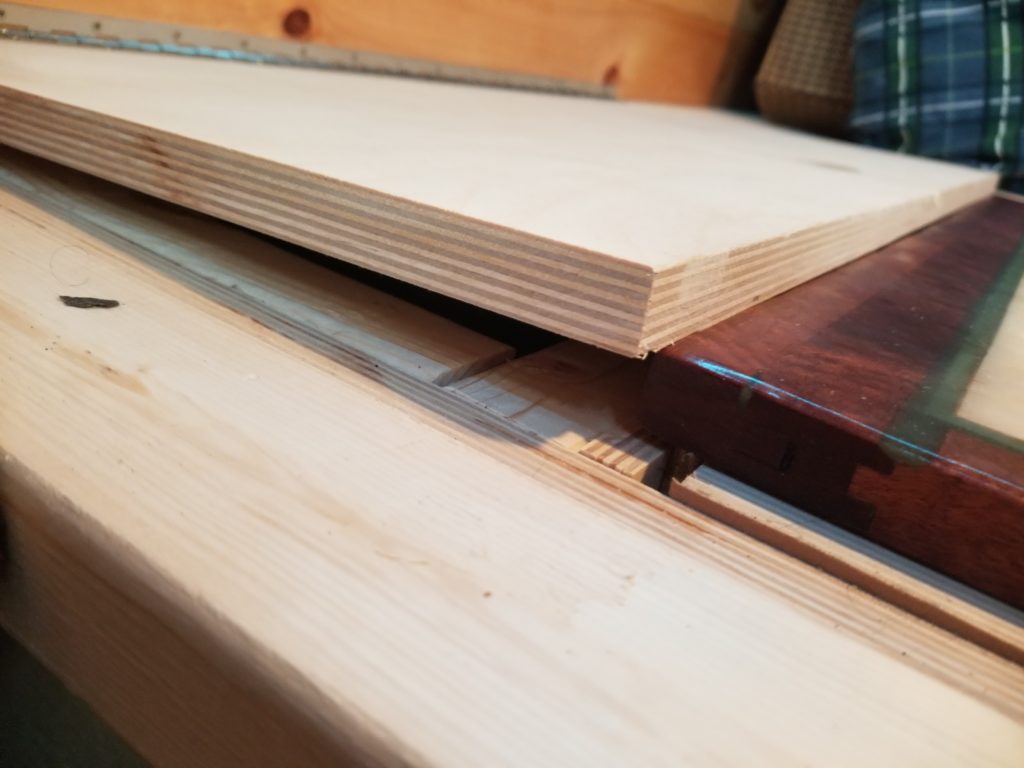
What was that about nothing being as easy as it could have been? Yeah, that.
After talking to my sales rep about getting a new, more powerful inverter to run the heavier equipment in my workshop, I was walking back to the house from the W.O.G. and noticed a smell. Now, I have never been on this land at this time of year before, so I am not acquainted with all the smells and sounds and such that might appear variously across the seasons. That said, I was motivated to check on my solar array, thinking there might possibly be something wrong there, causing the smell. The smell faded as a got closer in, so I’m sure that wasn’t it, but still, as long as I was there, I went to open what’s called the “combiner boxes” — where the wires from the solar panels themselves come together and where individual circuit breakers and the lightning protection device is located — to take a look inside to be sure. There was no smell, but there was a problem in one of them! For starters, the box itself was warm. It was 60F at the time and all the other metal in the area was cold to the touch, as I’d expect. Except one of my two combiner boxes, which was warm. Not good. Not an emergency, but not good.
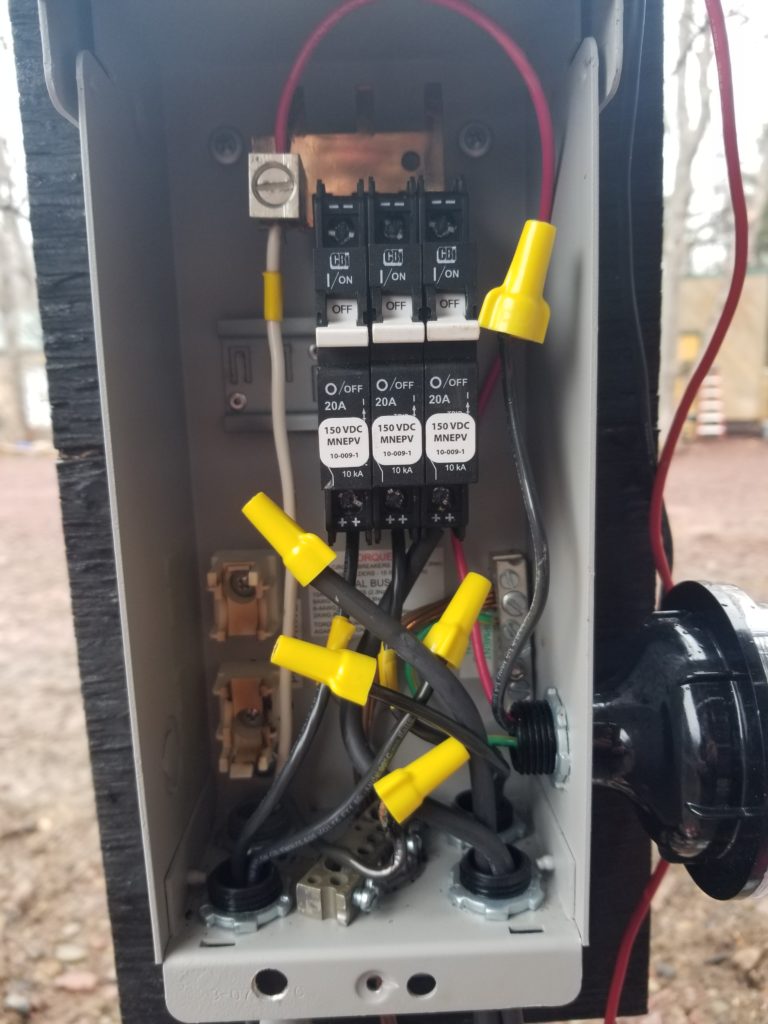
I saw one of the breakers had tripped, which is also not good. I could not explain why it tripped, but upon inspection inside the box, I did see something very wrong, this:
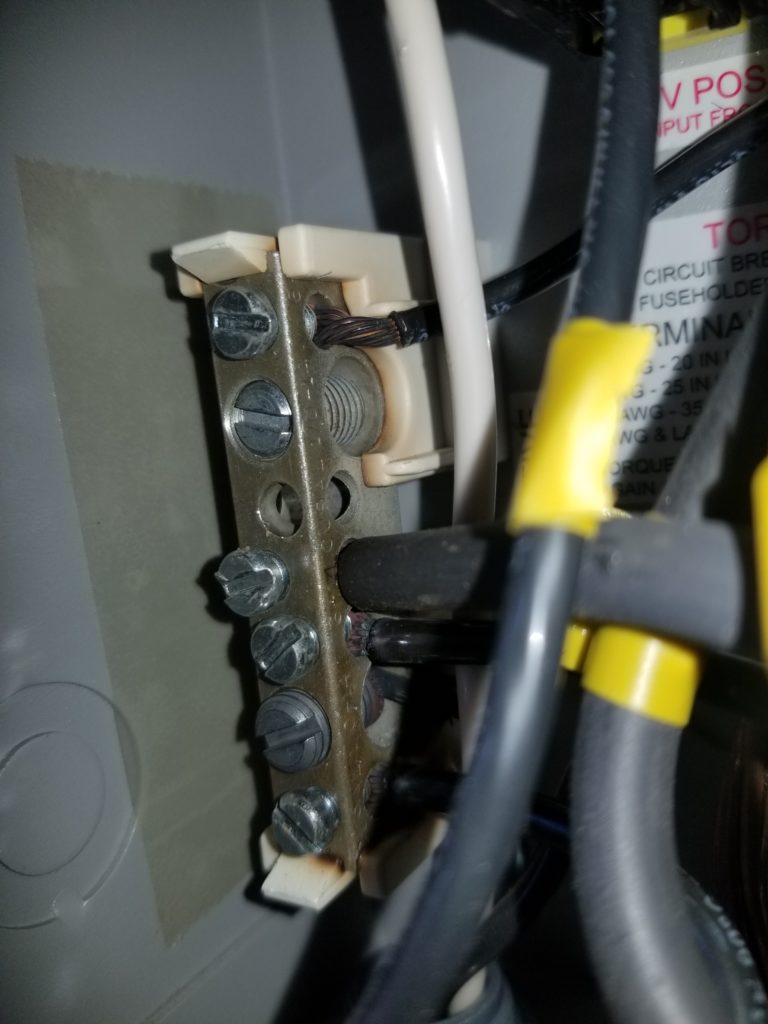
What exactly is wrong with this picture? This is what’s wrong with that picture:
- The bus bar (the metal structure with the screws and wires going into it) is not a uniform, bright color. The top is a different color than the bottom.
- The white plastic bracket that holds the bus bar is brown/black in places – see the hollow by the big unused terminal toward the top and around the retainer ears at each end of the bar.
- All the wires were trimmed neatly before insertion – the fact that some bare wire is seen at the top means it got so hot the insulation melted away.
Hm. What went wrong? Nothing else in the box looks amiss. It’s not actively burning now, but it is slightly warm. It should be cold.
The first thing I check is the tightness of the terminal screws. It is vital that these are very, very tight. A little looseness can cause arcs (similar to sparks, but sustained) which in turn can cause buildup which can increase resistance which in turn causes those things to get hot when current flows. After shutting everything off for safety, I give each screw terminal a twist. Tight. Tight. Tight. Turns. Tight. Wait. TURNS?? Nobody should turn at all. Which terminal turned? The one that has the tap for the entire bus bar – namely the combined output of all the solar panels. This is the wire that goes to the power center in the house and carries all the energy. This wire is also known as the very worst possible choice to be loose of all the ones present in the combiner box.
I take a closer look with better lighting.
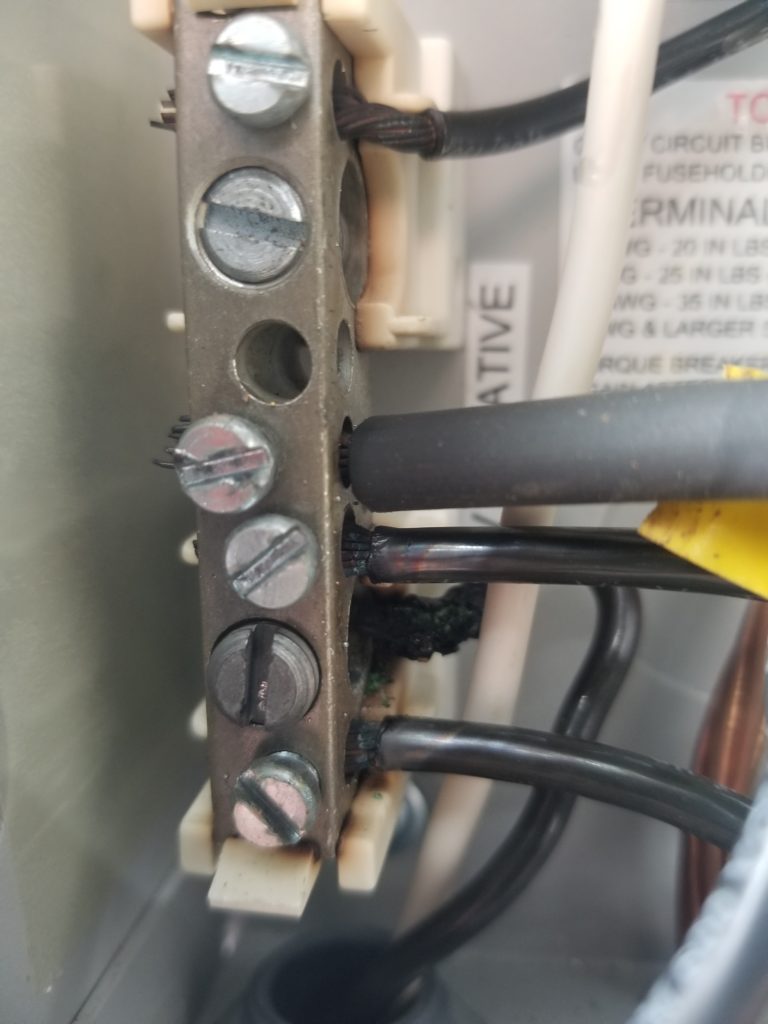
See the black wire coming out the terminal with the larger screw, second from the bottom? See how gnarly it is as it heads behind the white wire? Yeah, way too hot. Not now, but at some point (or points) it definitely was.
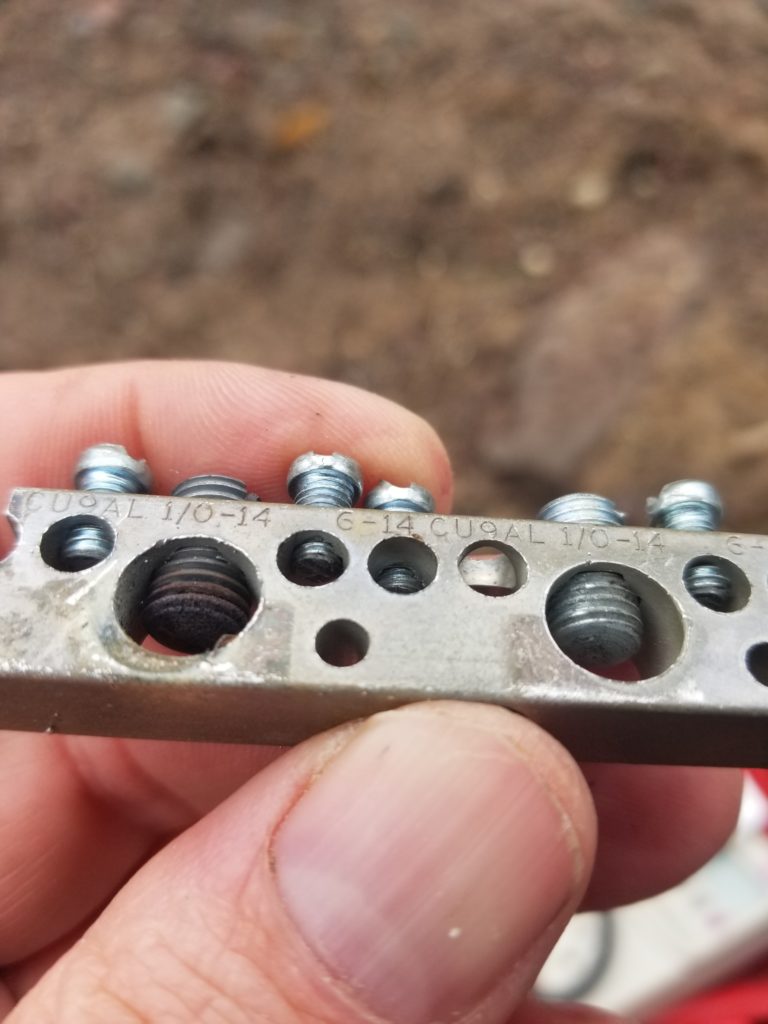
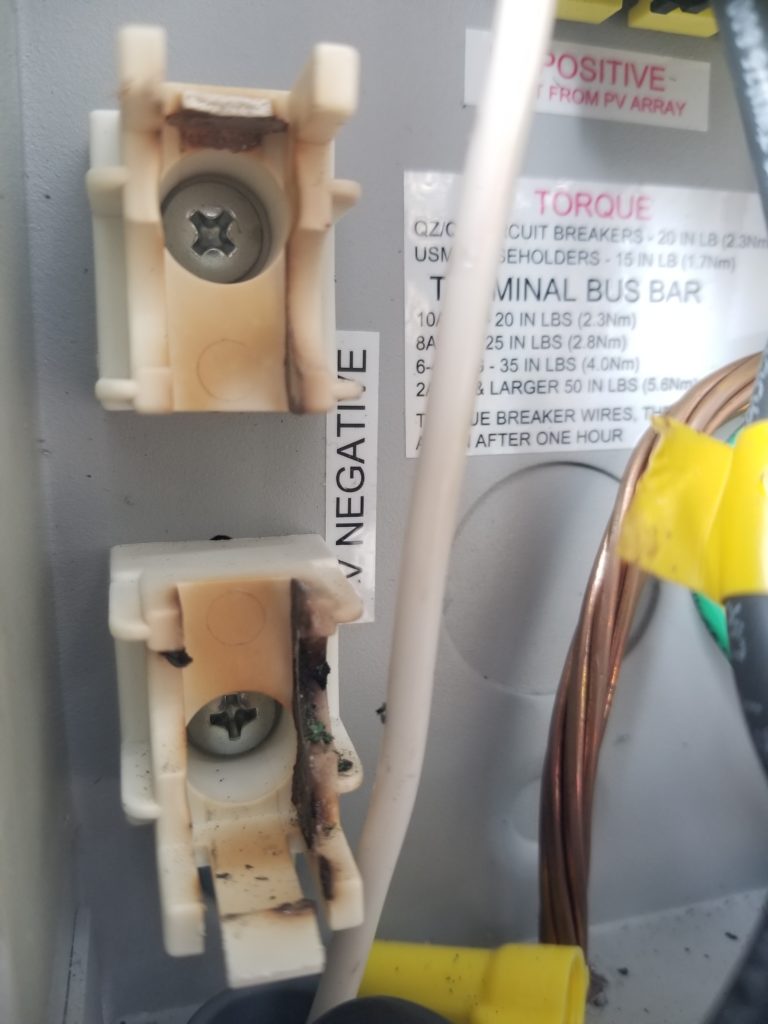
At left, the bus bar itself. Notice the discoloration on the fat terminal screw on the left, compared with the one on the right. The plastic bracket shows signs of heat extremes, too, most notably at the bottom exactly where that larger screw terminal was located.
Conventional wisdom is that after tightening a screw on copper wire, go back after an hour and tighten it again. This is because copper deforms under pressure and can actually “cold flow“, moving under the screw and no longer being tight after a while. I am always mindful to re-tighten my terminals but it seems either I missed this one or it flowed twice. After being in service for 4 months, whatever little bit of not-tight there was became a problem. A small enough problem that nothing outward was seen but a big enough problem to get hot enough to scorch plastic and melt insulation.
While I could wire-brush off the bus bar and just clean everything up in there and put it back, I will instead get a new one and a new bracket so if it happens again, I’ll be able to tell by discoloration again. The good news, if there is any, is that nothing actually caught fire and that the house doesn’t use much energy at all this time of year, since I’m working in the W.O.G. (different power system) and it’s still cool enough that the fridge isn’t working very hard. I can probably live on battery for a week while I await replacement parts. But first I must figure out which are the correct parts. I’m on that now.
Until then, everything is capped off and turned off, for safety.
