Now, that at long last the W.O.G. has power and the office (that’s the O in W.O.G.) is sufficiently built that I can actually use it as an office, I’ve been using it as an office! It has increased my daily commute considerably. Previously, I did not actually leave the house and while a couple of trips from the cabinet where the office things were kept back to the dining room table were required to set up the office, getting there required zero steps. Now it takes 60 steps and dressing at least a little bit for the weather. Sixty steps, though, is short enough that a full suiting-up is not generally required — just enough to not be abused by conditions while I spend somewhat less than a minute walking door-to-door. Still, having 5x the space to spread out my gear and being able to leave it there, is really nice, just as I thought it would be. So, too, having the cabinet space in the house free for house things. So, too, keeping a sharper partition between home space and work space, something that’s always been important to me.
There are some issues with the new space, though. The biggest one is that the floor is SO COLD. A thermometer at ankle level reads about 48F, even while one at chest level shows a comfortable 70. This makes for some cold feet. Thick wool socks and a foam pad under my feet help, but really, there’s a problem to solve here. Why is the floor so cold? Well, for starters, it’s a 4″ slab of concrete resting on frozen ground – that’s not a good start for warmth. Further, about 90% of that concrete extends under unheated space, so its ability to sink the heat out of my office is unencumbered. I am using that DriCore subflooring with the foam backing – about 1/2″ of high density foam – and the vinyl plank finish flooring I used has another 1/8″ or so of foam underlayment built in. Still, that’s not exactly the R-38 performance I get from the foot-thick insulation in the walls and ceiling. I didn’t think it was going to be, but I also didn’t think it was going to be this bad.
I also notice some strong drafts along the floor. There’s cold air definitely coming in under the doors. I have some barriers set up against that — just scraps of drywall right now — which I’ll formalize soon. That helps some but there’s still some moving cold air happening the origins of which I can’t quite place. What to do when faced with a tricky problem? Buy a new tool! Of course 🙂 An infrared camera is now on order and will be here next week. I got one with an integrated visible light camera, too, so it can overlay the thermal color key, which is quite low resolution by today’s camera standards (256×192 – 0.049 megapixels), with a visible spectrum image at 2MP, which is lower than modern cell phone cameras but about what you might have gotten 5 years ago with a webcam in your laptop. Decent, but not for portraiture. It’ll be perfect for this. These things are kind of expensive (>$400) and that may seem like overkill for hunting down drafts, but I expect to use this for many other projects in the future, so I believe it’s worth the investment. And of course it’s a cool tool, which has intrinsic value 🙂 I have also learned during my research phase that these things are good for other kinds of diagnostics which are not intrinsically thermal, such as locating water leaks or finding studs in walls — things which can be revealed by differences in temperature that are imperceptible to humans. Nifty!
I did think that one simple solution would be to direct a circulator fan to blow the hot air from the heating unit down toward the floor, but the only thing that did was cool that air and now I had a wind chill instead of equilibration. The cold floor was no match for the heater. Okay – first things first – understand what other sources of cold air there are, mitigate those, then see how much is really conduction through the floor rather than the floor simply being chilled from the top by the drafts across it.
Before you start shouting at the screen “you should have installed in-floor radiant heating” or “just use a space heater”, I’ll tell you that I just don’t have the energy budget that’ll support that kind of consumption. What I need is insulation and draft prevention, so I can keep the heat I do have. It may not be possible – but first I need to understand the problem more fully, hence the IR camera.
While it hasn’t been above freezing for days, I’ve still been incrementally working on getting that garage door opener installed. Slow and steady – there’s only so much sub-freezing ladder work a person can do in an afternoon. This has turned out to be more challenging than expected. I could have had this done by the door tech for $600 when I had the W.O.G. shell built, but figured I could save $400 by installing it myself – how hard could it be? Well, the answer is that this particular door, as installed, does not match up especially well with this particular opener’s kit. I’ve had to make some modifications and adjustments – involving quite many trips up and down the ladder to install / check / uninstall / modify various parts until things went together well. And that doesn’t count how many times I dropped nuts and bolts and tools. Even with my magnetic bracelet, which does a decent job of holding onto hardware — cold fingers don’t have a lot of dexterity!
So, more challenging how? Here’s how. That metal feature at the top of the door is clearly the very best place to attach the opener arm, since it is already nicely secured to the door. However, doing so, even at the shortest possible configuration of the arm (shown), meant two things I didn’t want.
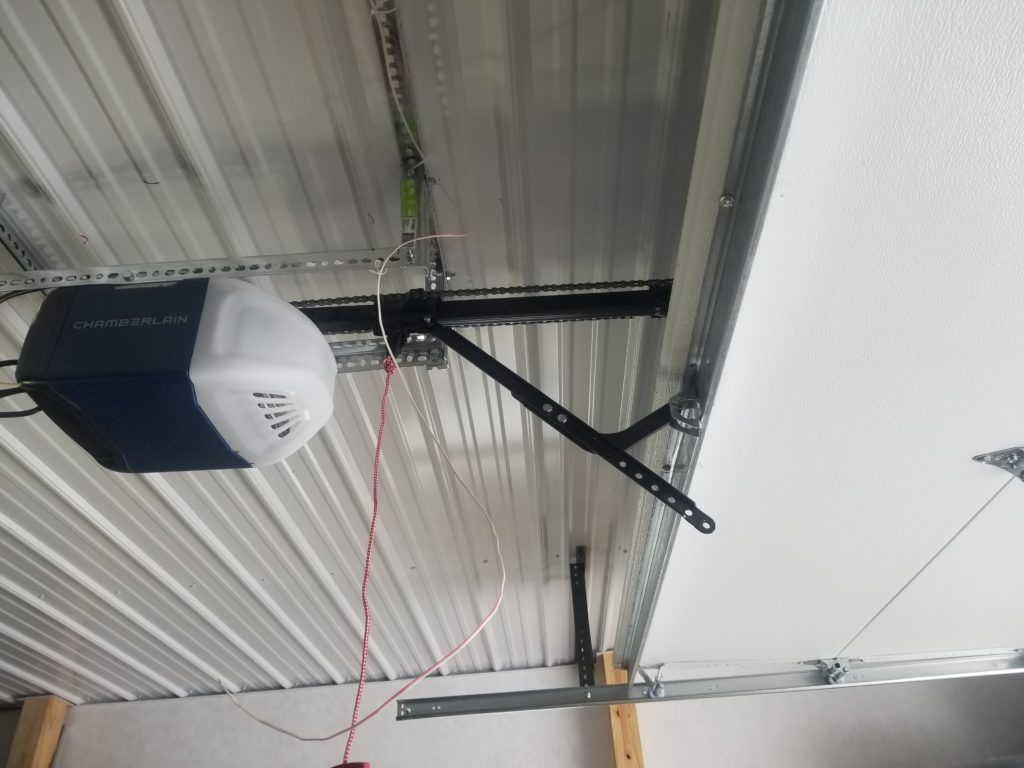
The first thing was that with the opener fully retracted, the door didn’t actually reach full height of opening.
While a little disappointing aesthetically, this is not technically a real problem, as there is still plenty of clearance for the top of my car and the top of my head. Still, up should be up and open should be open, yes? Yes.
The other issue, which was the real problem, is that if the opener arm is disengaged from the chain drive trolley – when you pull that red handle to release the door for manual operation – the door wanted to raise all the way up to the proper height. That’s good, except that meant the arm, and the bracket that connects it to the drive trolley, went too far back, jamming into the safety stop at the end of the drive track that prevents it from slamming into the motor proper. That’s no good. When one opens the door manually, it’s generally done with a mighty heave-ho. Having to remember to control it for a gentle impact topside is just a non-starter. Okay, then, what about moving the arm further down the face of the door so the door can be higher when the arm is fully retracted? I tried that.
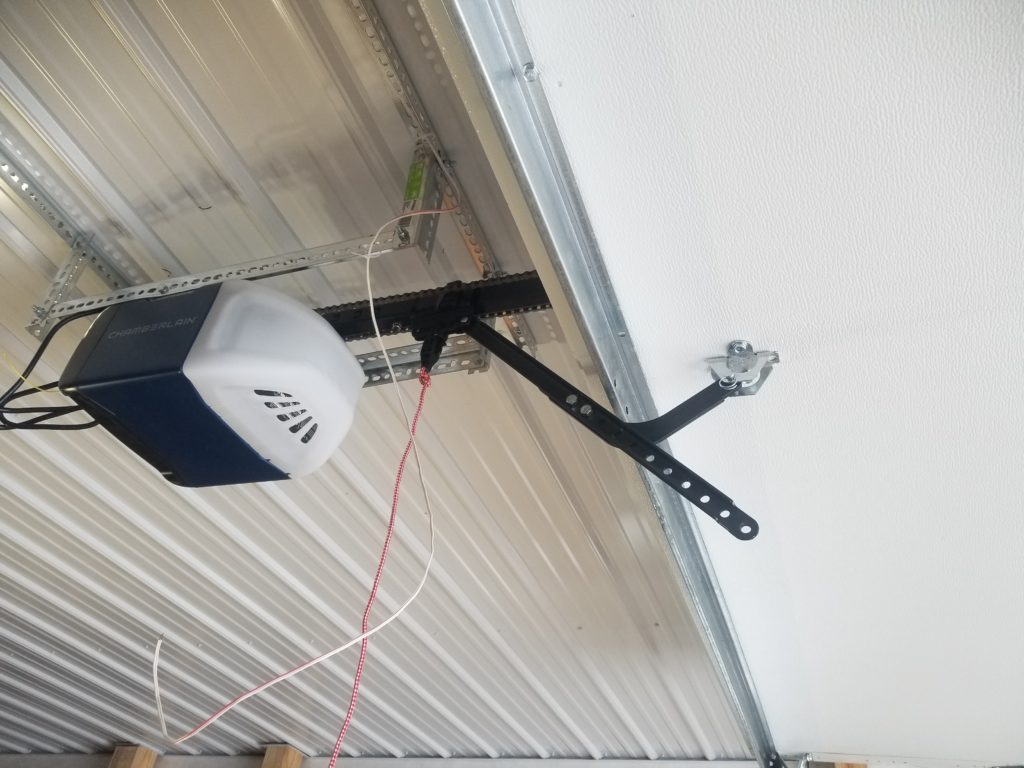
This was as far down the face of the door I could put the bracket and still have the rest of the arm clear the metal rail at the top of the door. I didn’t want to remove that rail, not knowing if it had structural importance to the installation. Okay, then, here is where it must go. How does the door operate in this case? Well, it still jams into the stop in front of the motor a little, but much less than before. How about closing?
With the arm at the far end of travel, the door wouldn’t reach the ground! This is clearly not the answer. Even if I removed that metal rail at the top of the door, which would let me move the arm further down the door, meaning the total extension available to the door would be less, it would make this gap worse, though it would alleviate the jam at the motor end of things. What I really need here is a slightly longer drive track, so the full height of the door can be accommodated in the up position as well as the down position. Maybe what I have here is an opener designed for 7ft tall doors and I have an 8ft tall door. The opener’s manual didn’t talk about compatible door heights, as far as I saw. But here I am, so what I need is a solution.
With the arm on the cross bracket, the door will close fine and when open under drive control, it’s open enough to easily drive in, so really the only problem I have is when the door is free of the drive mechanism I don’t want it to slam into the motor when raised. Okay, then, I know what to do.
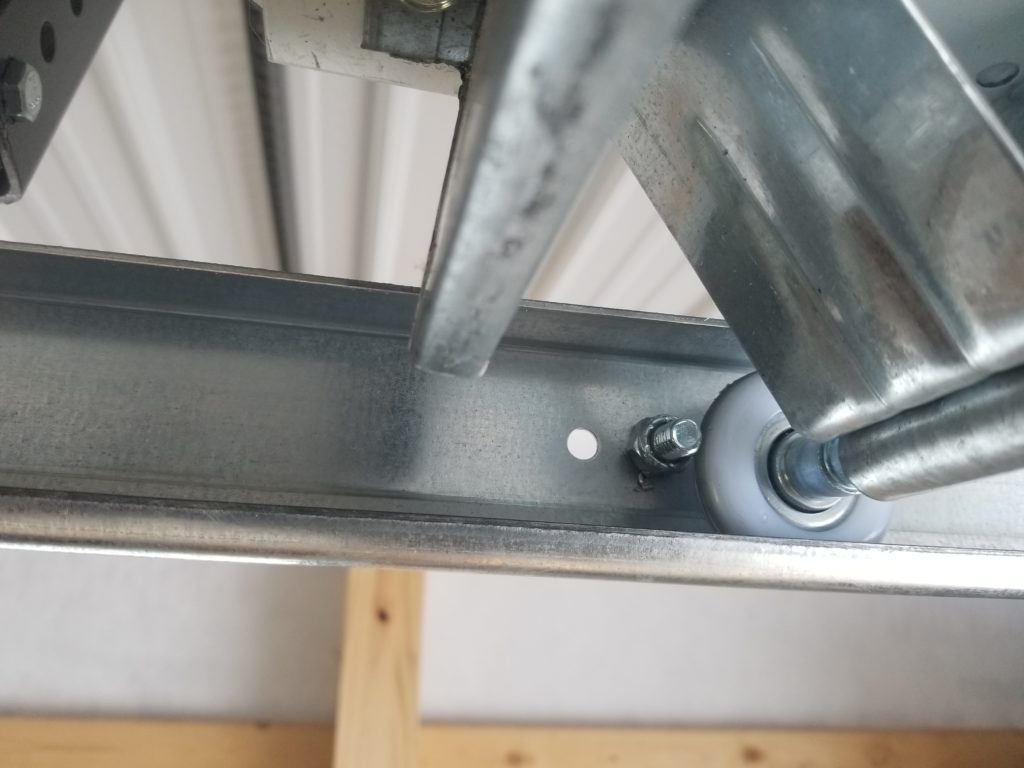
There were already pairs of holes drilled periodically along the door track and it turns out there was a pair just where I wanted to stop the door’s ascent. Perfect. Well, almost perfect. The bolts I had were slightly bigger than these holes, so a minute with the drill was needed to gain some clearance. Done. Now I have these bumpers which will stop the door before the opener’s arm parts slam into the motor. By how much?
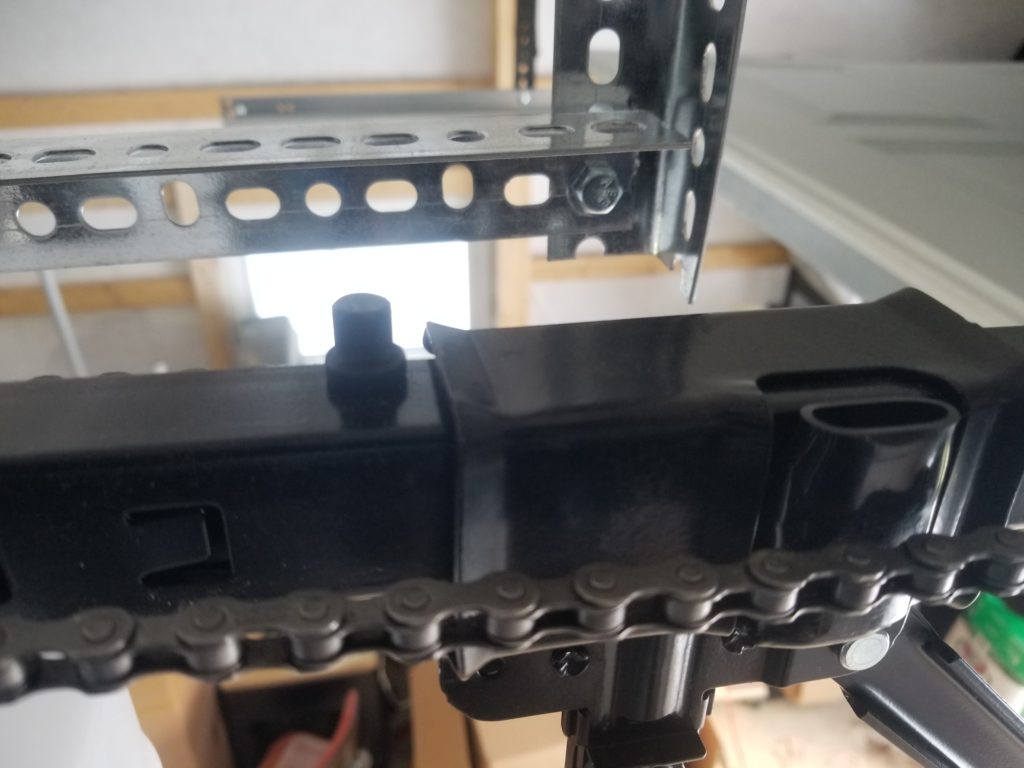
About a half inch. The rectangular sleeve is what connects the arm (extreme lower right) to the chain-driven trolley (not shown). The round thing sticking up is the hard stop that protects the motor from a runaway door. Not a lot of clearance, but I don’t need clearance. I just need it not to slam. The door’s wheels may slam into those 5/16″ bolt stops all they want. Problem solved, or at least I think so.
I have wired in the sensors but still don’t have power to the unit nor have I calibrated its travel – these are what’s next. I don’t actually have a formal power feed to the garage part of the garage at all yet. It’s just extension cords under the door from the office, since that’s the only place there are installed power outlets. All this to say that getting power to the opener for its permanent installation is more than a little bit of work. I’ll probably just test it out using the extension cords, though, so if I have to do anything radical to the installation to deal with whatever, I don’t have to also rework the electric to follow.