When I was inspecting the flue (inside and out) after the smoke ingress incident, I did notice some things which now collectively shed some light on how smoke and creosote could have been coming out the way they were.
First, the “string of pearls” by the flue collar. That had nothing to do with any gasket cement at all. But how did creosote get forced out of there? The answer is that I had a tall stack of wood in the firebox at that time. Tall enough to obstruct the draft to the flue collar itself, causing the wood at the top of that stack to burn poorly, but very close to the roof of the fire box. Examining the top of the firebox from the inside, it’s clear that this poor burn was depositing creosote right there. The red at the top of the opening is actually just my fire tending glove, blocking the bright ambient light so it didn’t throw off the exposure.
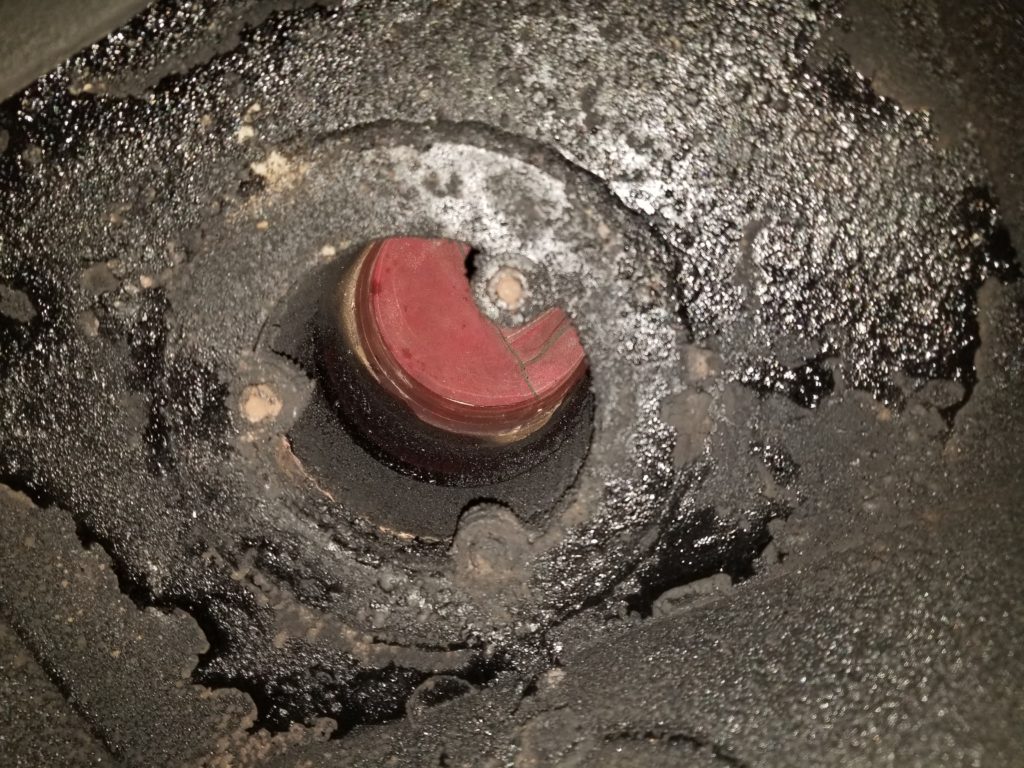
There’s quite a deposit of creosote right there. It’s easy to see how it could just wick up around the flue collar (the ring with the three bolts) and ooze out at the top of the stove. There need not be any pressure at all to make this happen. Capillary action would do it. Because the draft was so poor, the deposits didn’t get carried up the flue. They hit the roof first and stuck there, slowly wicked up behind the flange of the flue collar, producing the string of pearls on the other side (the top of the stove). Okay, one mystery solved.
The next question, is how was smoke coming down the chimney? The answer goes hand in hand with the one for how was there creosote coming out from the single-to-double-wall flue adaptor. The nesting of the sections of flue is such that upper ones fit inside the tops of ones below them. Like the lapping of sections of downspout, these were nested so any rain that might make it into the top of the flue would not emerge into the house but would be directed into the fire box. This also means that looking at it from the bottom up, that there is a path out of the flue from below. If the upper section nests into the lower, the lower is around/outside the upper. Something moving slowly up from below, without a strong draft to take it up the central part of the stove pipe, could leak out one of these joints.
Here’s a simplified sketch of what I’m talking about. In actuality, there is an inner pipe and and outer pipe for the flue (with fiber insulation between them) but the concept of the lap joints carries.
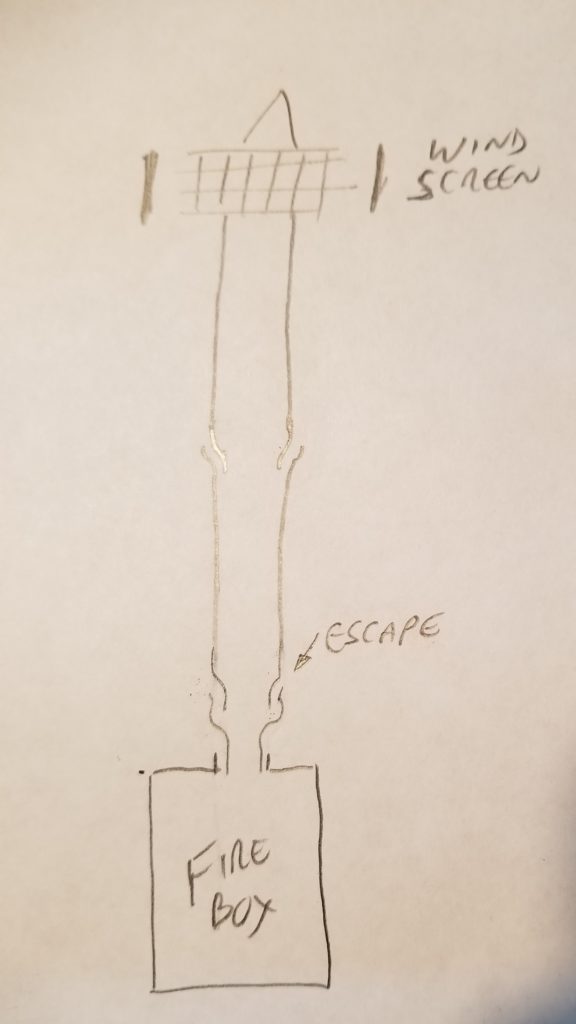
See where I wrote “escape”? Slow moving gas (carrying creosote!) could come out that way if the draft up the center of the flue wasn’t strong enough to draw it out. Now remember this is the INNER pipe and there’s an OUTER pipe as well. The gas escaping from the inner pipe would be deflected by the fiber insulation just above the joint and thus it would seek some other exit. The nearest exit may be below you! There was some glare on the sketch but I think it illustrates the syndrome decently, even so.
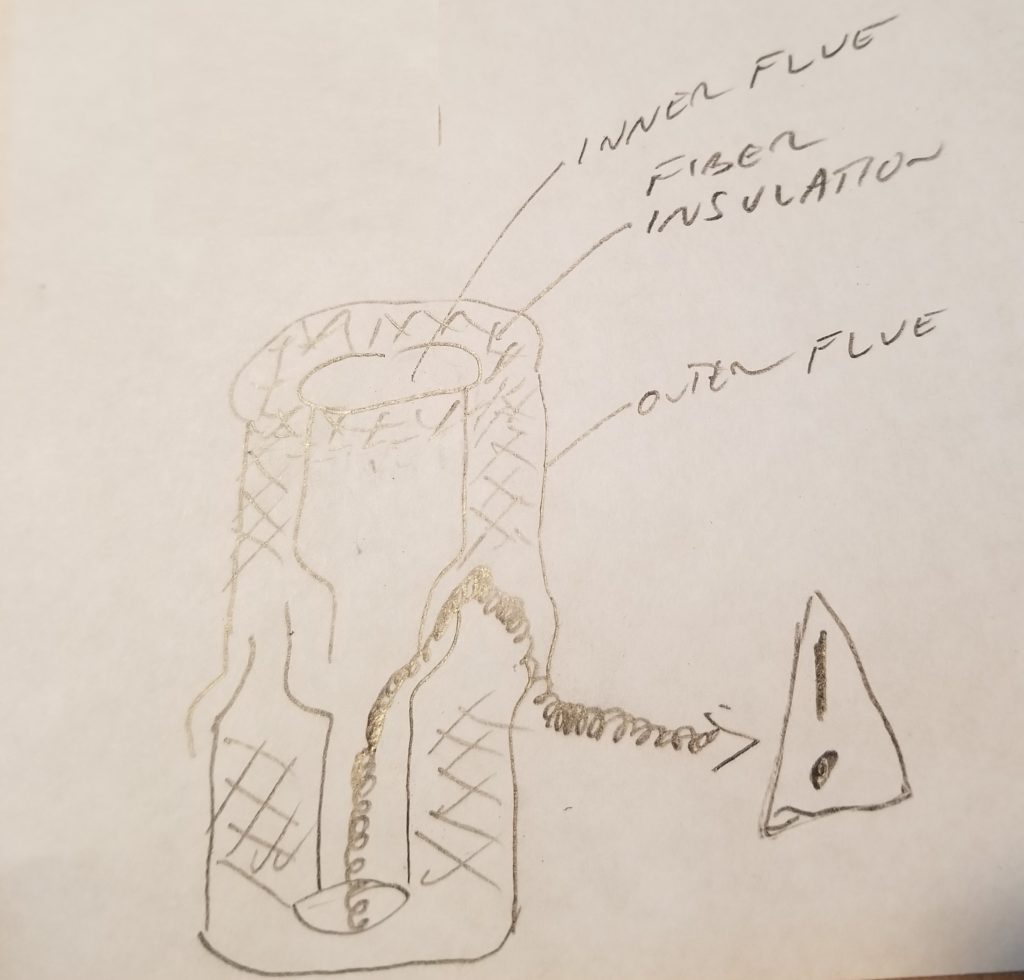
If there was wind outside (there was), that could also drive air down the flue, or at least keep a weak draft from properly drawing all the gasses up and out, forcing them to seek an alternate route, such as the one shown.
Mystery #2 solved!
Mystery #3, why was there creosote dripping from the underside of the adaptor, is answered by the same reasoning as #2.
The inside of the flue itself, while far from pretty, was also far from obstructed. There was a very thin layer of deposit inside, but definitely not enough to obstruct flow in any way. However, it certainly indicates that not all of my burns have been hot enough to keep the flue clear of deposits! I have since purchased a burn monitor to be more aware of this so I can tend the fire more knowledgeably.
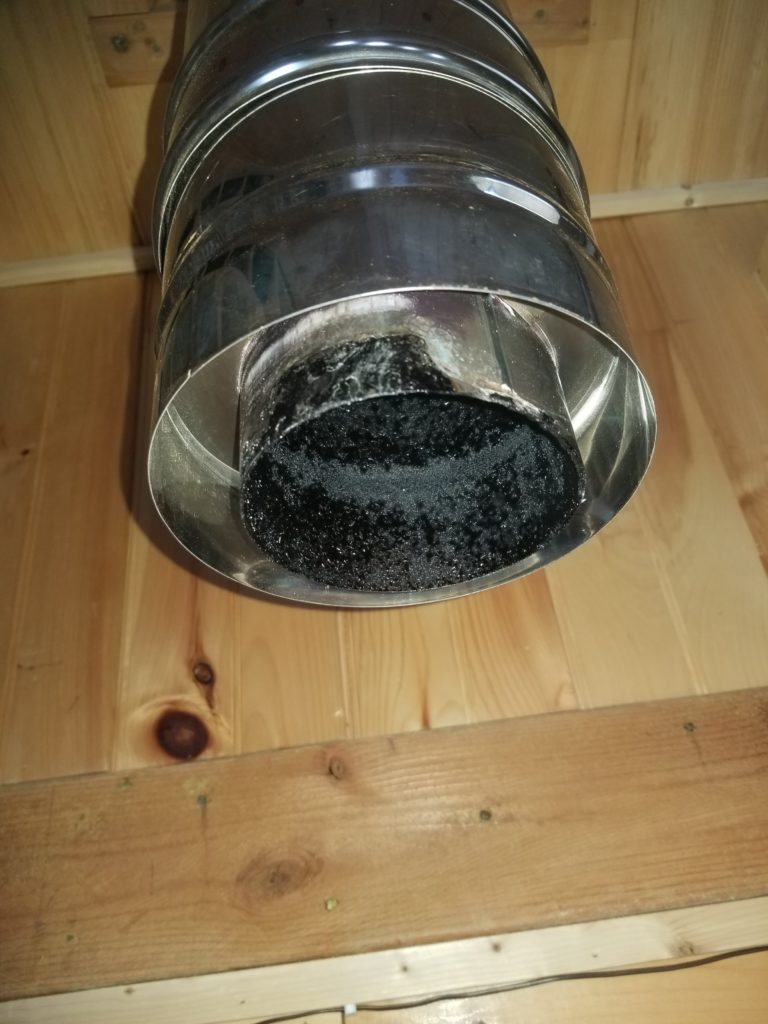
Tellingly, there is a deposit on the outside of the inner pipe, showing that indeed there was some escape out the upward-facing joint of the inner pipes. That could drip down before it solidified.
Meanwhile, it’s been very cold here.
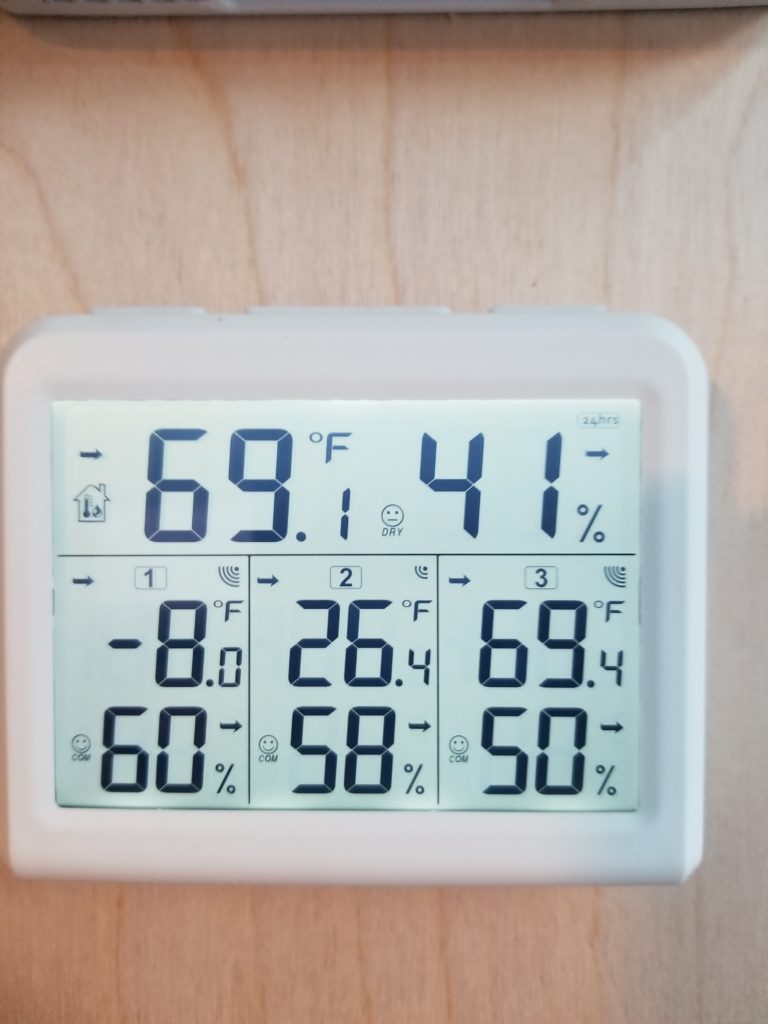
Top row – readings from right here. Bottom row, #1: outside, #2, the office (still unheated, but well insulated so it’s staying surprisingly warm considering the outside temp, #3 the utility loft by the battery system in the house. The humidity readings are fairly inaccurate, but the temperature sensors are decent.
What’s to do when it’s cold? INSIDE WORK. The cozy loft needed a nearby outlet for the HRV (which has been running via extension cord this whole time) and as long as I’m running cables, might as well run a 12V circuit for the future installation of lights up there, as well.
The nice thing about running the wires on the surface of the walls is that it’s very quick and easy to re-route them and add more.
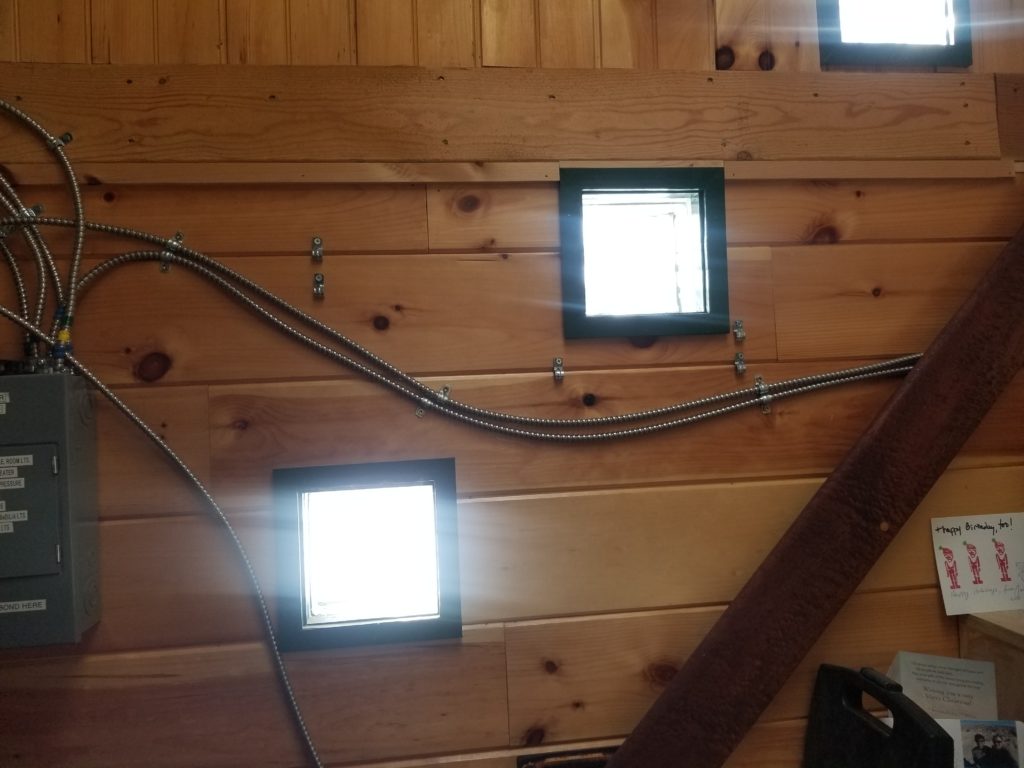
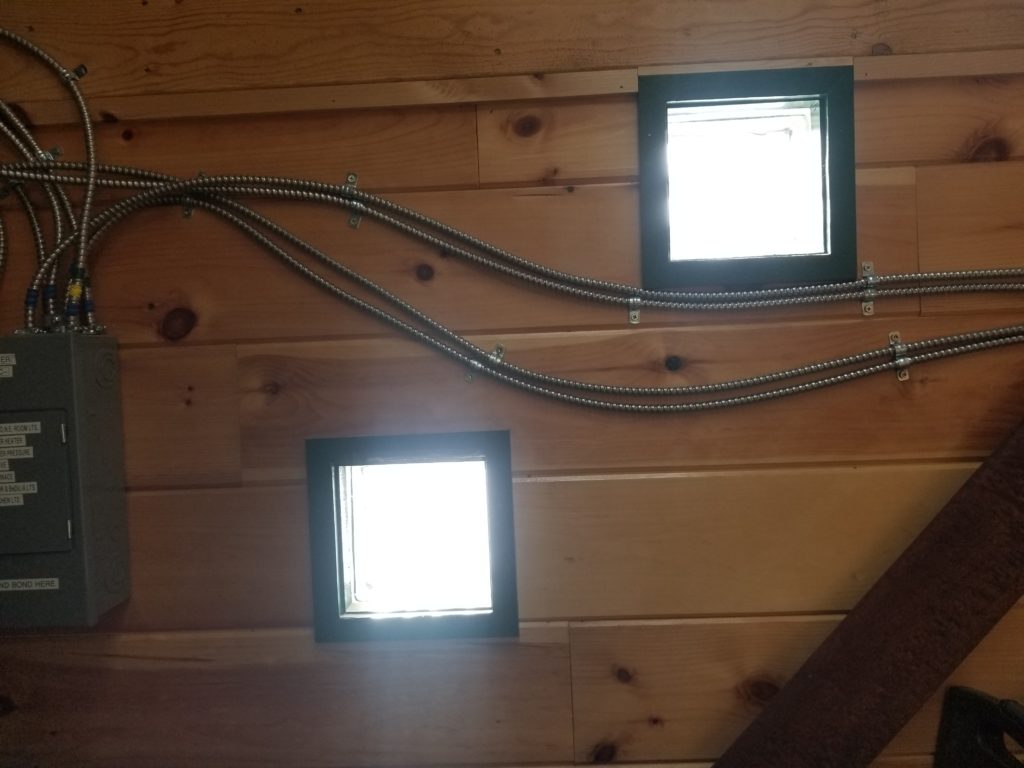
These two on the left used to hug that middle window but my two new cables really want to be there instead, since that’s the best route up to the cozy loft. No problem! Unscrew the cable clamps, release the cables, install new clamps lower, and fasten the old cables to the new clamps.
Next, just run the new cables under the old clamps and presto, done.
You might think that all this exposed utility work might be unsightly, but really, it’s not. It’s just a bit of an industrial aesthetic. It works. And it sure is easy to maintain 🙂 Also, running new circuits doesn’t require fishing stuff through the walls, which would be particularly difficult given that the walls are filled solid with rigid foam insulation. There’s no room to snake a wire through. If it were fiberglass, sure, the wire would just compress the fiberglass out of the way a little and that’s that. But rigid foam? No going through that just by pushing. So in addition to it being easier to run on the surface than in a hollow wall, it’s also not possible to run in a hollow wall here because the walls aren’t hollow!
I didn’t take a picture of the new outlet, but you may imagine it’s an outlet. It’s actually a little more interesting than most. It has a USB-C and USB-A charging port built in, so one may directly connect devices in need of being charged without needing a dongle of any kind. That’s handy and tidy. There’s one in the BeDiLiA, too, under the table. I use that one all the time to charge my tablet and my phone.
A few weeks ago, I installed some blinds in the BeDiLiA to keep out the moonlight and control cold air coming off the windows (not a draft from outside, just their being cold creates some convection) when the temperature is extreme. Minus 8 counts as extreme. The blinds are doing a great job, as proven by this ice revealed when I raised them one very cold morning. Though it was 60-something in the house overnight, the space between the blinds and the window glass clearly got much colder than that. Usually, I just get some condensation, occasionally a slight frostiness. That -8 day, I got legit ice. Not a lot of it, but definitely more than a thin layer of frost.
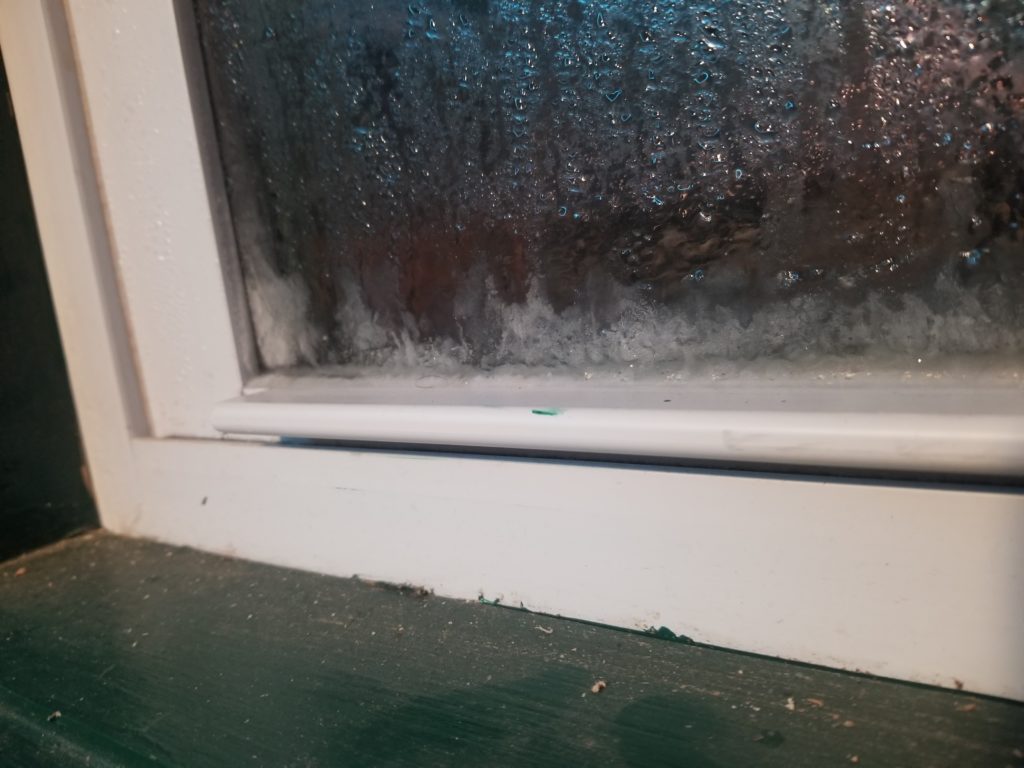
I keep the blinds up during the day to keep the windows dry. The cool air off the windows is refreshing, too, when the radiant heat of the stove is high. For sleep, though, I’m not looking for refreshing, I’m looking for cozy warm, and for that, blinds-down is the way. It does mean I get ice when it’s super cold out, though.
