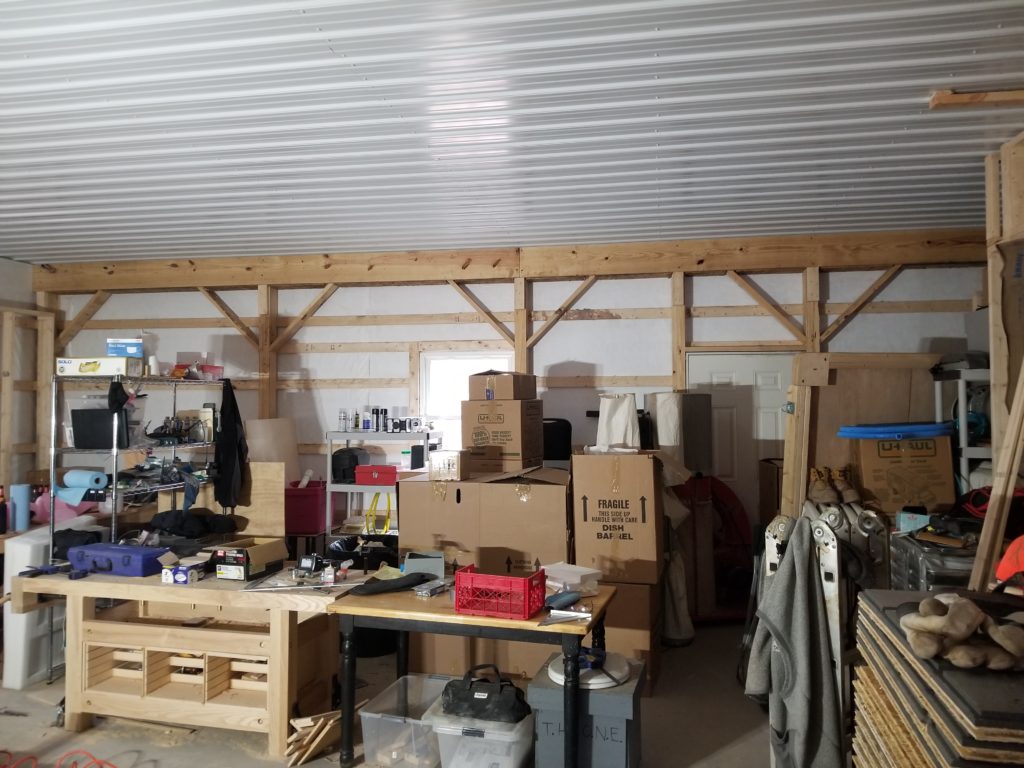
Things are moving along in the office partition, though by “moving along” I mean “wow, drywall joint compound takes quite a long time to dry when it’s cold”. And by “cold” I mean “what, 60F isn’t hot enough? That’s the best I can do with my electric heater”.
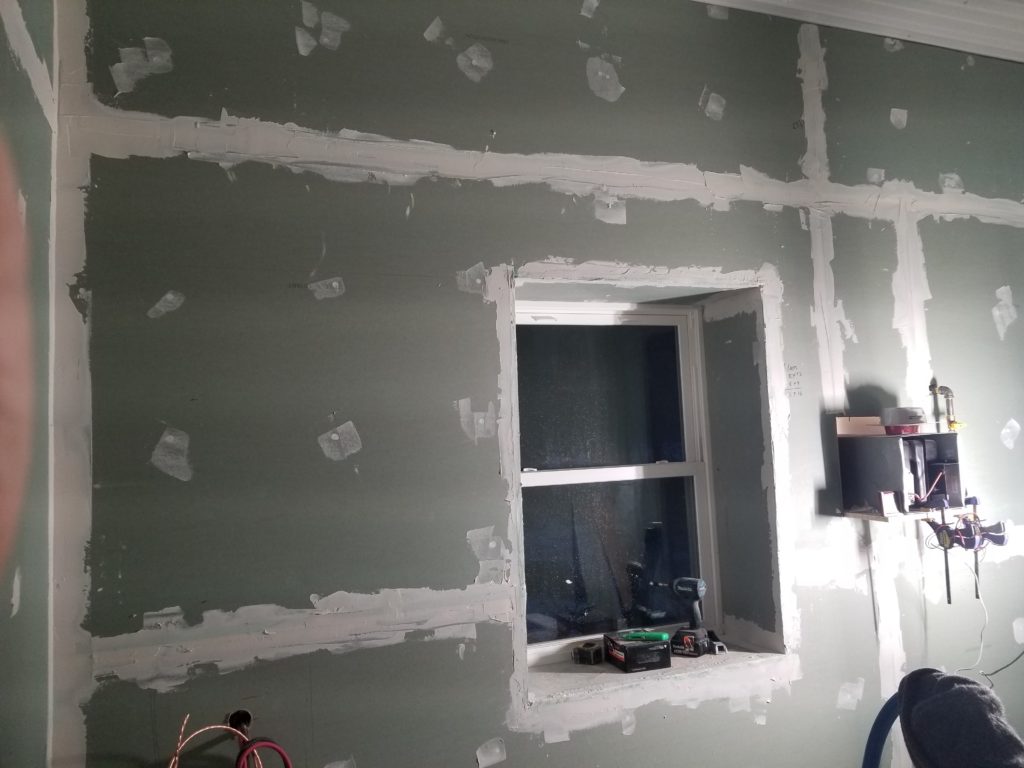
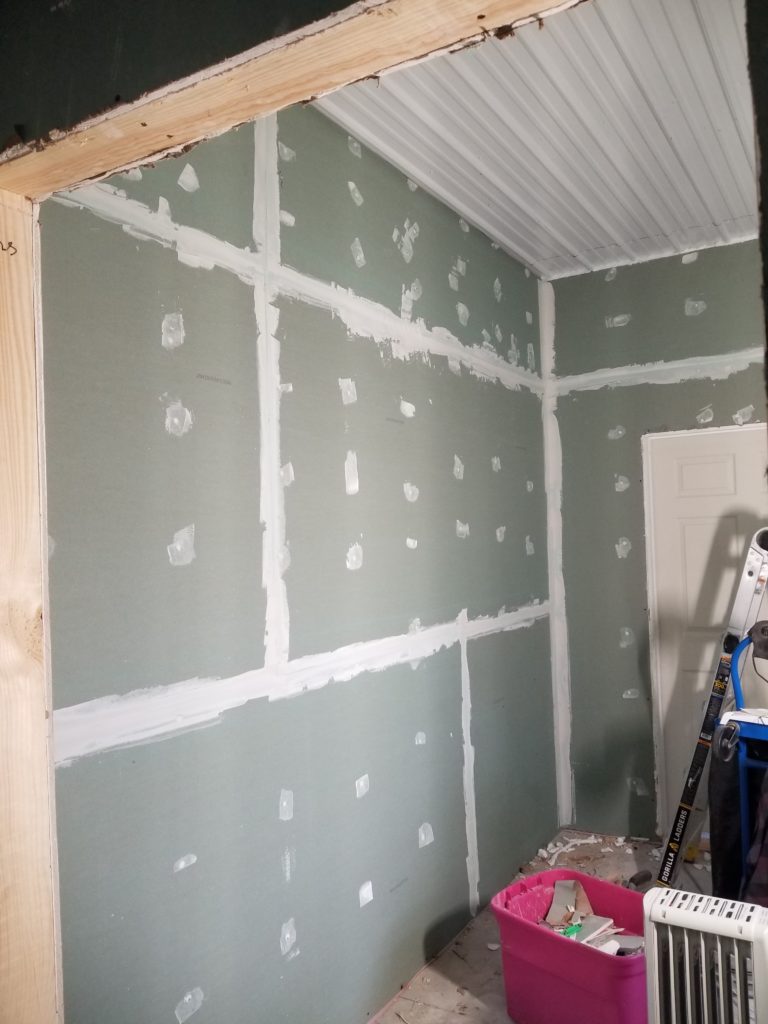
Even slow, the office is starting to look a lot like “interior space” and less like “workshop” or “barn” as I continue the wallboard effort. It occurred to me that part of the reason my little electric heater was taking so long to heat the area was that the thing warmed itself pretty well, tripping its thermostat and cutting the heat because it was warm enough, though the room wasn’t. I fixed that by adding a fan to draw the heat away from the heater and, for that matter, circulate it more aggressively in the room.
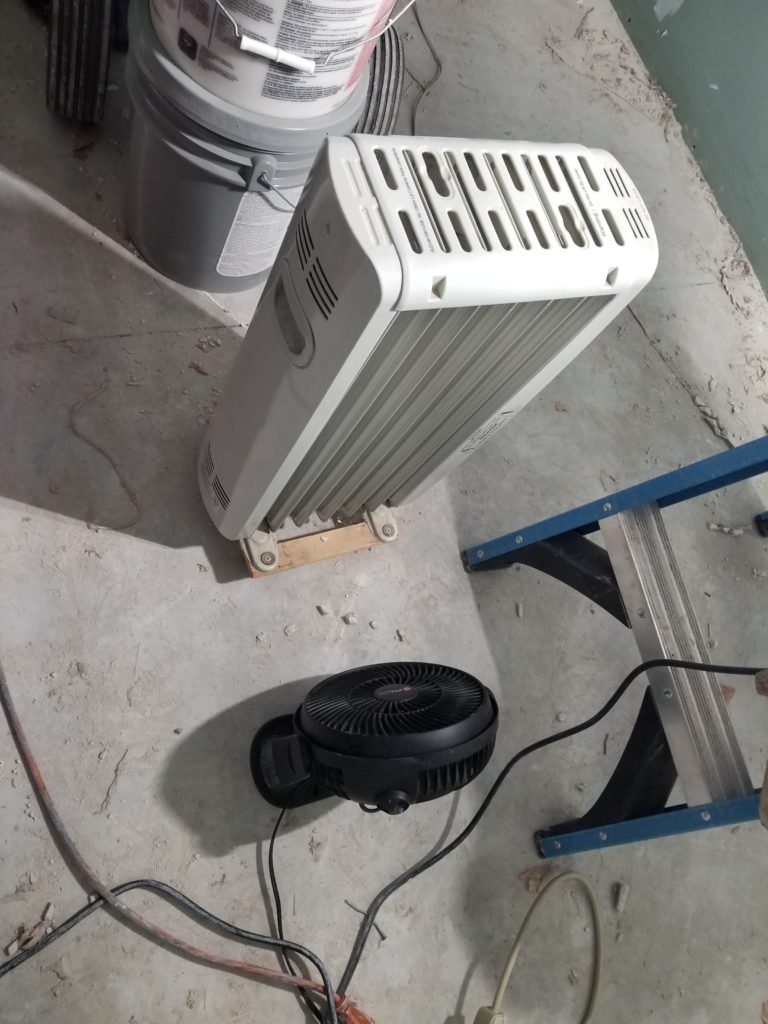
This made a huge difference. The room heats up much quicker now. I bet it’ll go faster yet and hold heat better as soon as I can cover this concrete floor. I have a plan for that – indeed, I also have parts for that – but they’ve not been installed yet because the drywall is the most important thing right now.
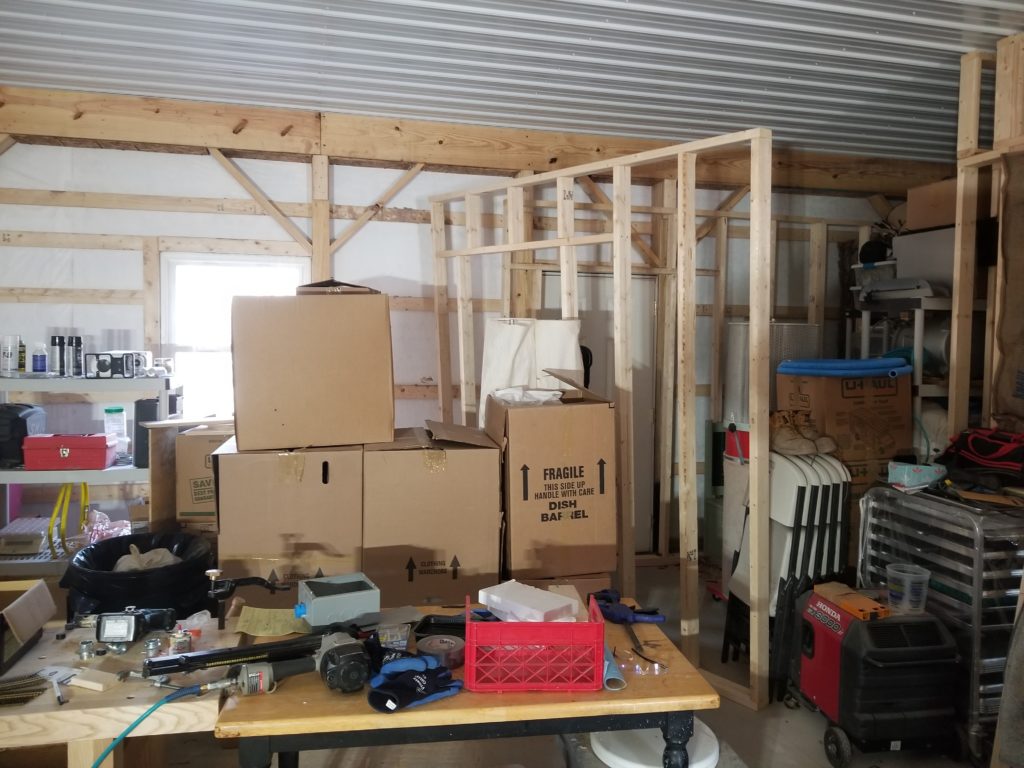
However, because the joint compound is taking a couple of days to dry, that means once applied, I have some time on my hands for second and third priority items. What are those items, you might ask? Well, part of my overall inconvenience is that I have this big pile of building materials still in the middle of the workshop:
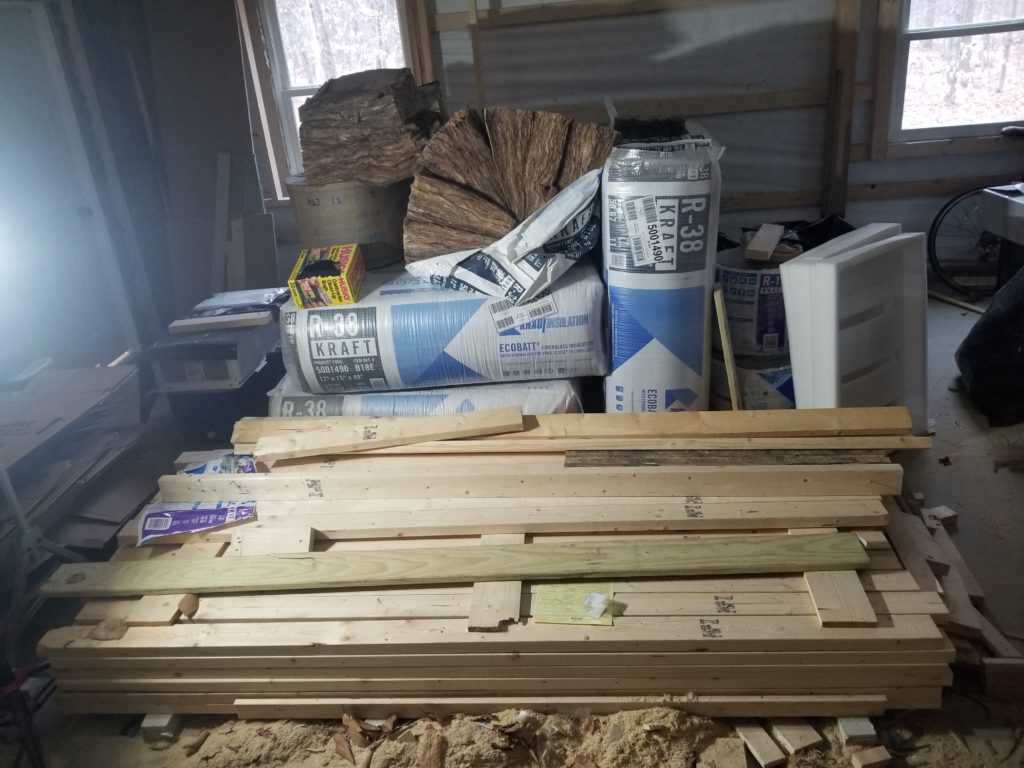
This makes it difficult to do some other things, like move my machine tools from the periphery of the garage actually into the workshop part of the W.O.G. How can I get rid of this pile of studs and insulation? I know! Build the things they were meant to become! What’s that? The rest of the interior walls of the W.O.G. At first, I built the partition between the garage and not-the-garage, just so I could close off the not-the-garage from the weather. Next, I built the office because I need the office. But what I didn’t do was finish the interior walls that had nothing to do with the office or the garage because so many other things were more important.
Well, the more important things are either done or depend on the completion of the office and the office depends on the drywall joint compound and I can’t make it dry any faster than it’s drying now. So I have some time. And I have some studs. Clearly, it’s time to finish those interior walls while I wait!
The irony here is that in order to make space, I need to consume this pile of building materials, but to consume the building materials, first I need a clear section of floor, roughly 10 ft square, so I can actually build the wall modules that consume the studs! So to make room, I need to first make room…
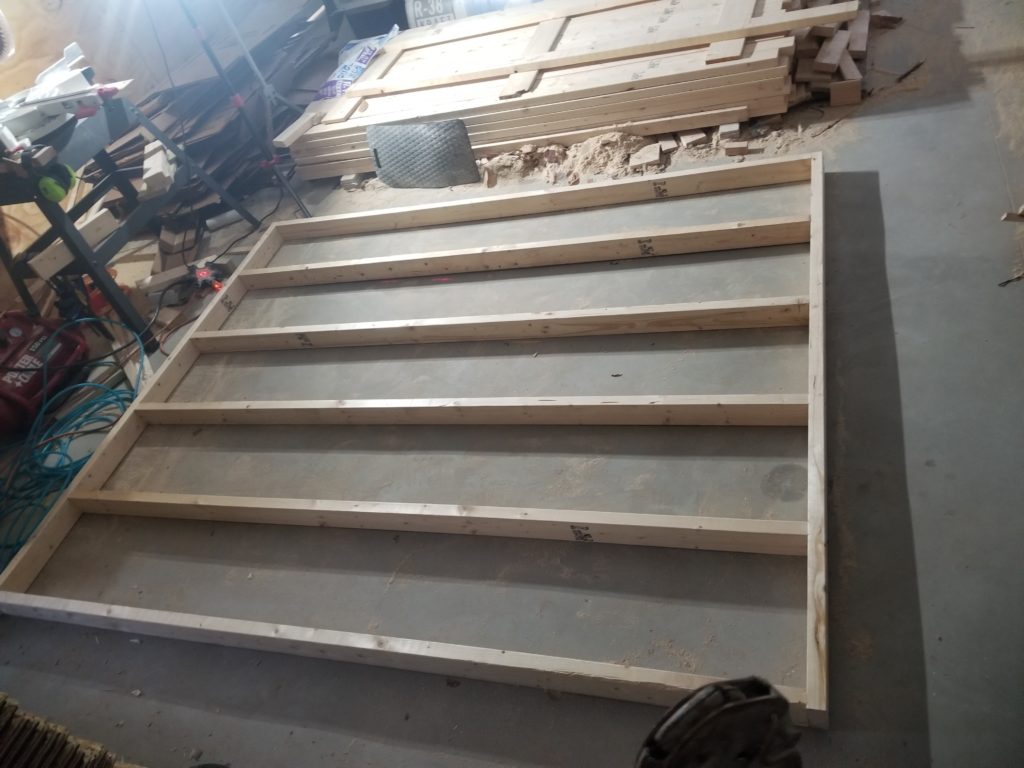
There was much shoving and stacking.
The next challenge is that the workshop is already loaded with moving boxes (though less so now that I have unpacked some things into shelves) and shelves. These were necessarily located around the perimeter, so I’d have room to do stuff in the middle… like build things. But once I build the wall modules, I need to maneuver these 8ft wide by 8ft-3″ tall things into position… at the perimeter of the room. Where all the stuff already is (and had to be).
See what I mean? The next sections of wall go in front of those posts in the background there. Do you see an easy way to truck an 8′ square of anything from where I’m standing (the only place there’s room to build the wall modules) and that back area?
Well, it can be done with some creative maneuvers and a deep understanding of spatial relations.
And so it was.

The lower course of the back wall is now in place. The upper course is next, followed by all that insulation. I still think I actually have considerably more insulation than I need — the estimate did not factor in the doors and windows and I rounded up for all the not-full-sized wall modules, too. This was on purpose, so I’d be sure not to run out (it’s a 2 hour endeavor, minimum, to get more insulation) in the middle of work, but I still think I’m going to have more than a full package left over. Not a problem, I should be able to return them for credit, but it does mean the insulation is taking more space than it technically must, which just makes everything more difficult.
The astute observer will notice that about half that pile of studs has been consumed by the work so far. The upper course should use a bunch more, probably getting close to using them all. I also built a pair of barn doors (well, actually I built more than a pair – the first ones didn’t fit and were hard to disassemble, so they’re still standing off in a corner somewhere for future reclamation) from this stud pile, so I might actually run out before I finish the upper course. That would be okay, I know where to get more.
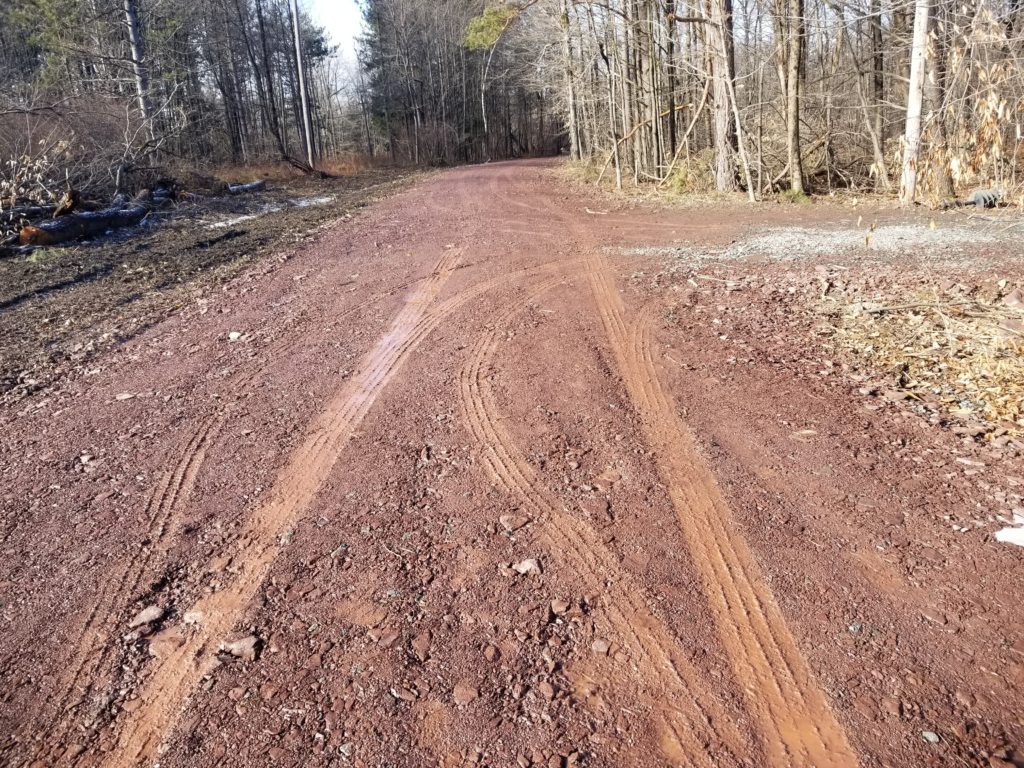
In other news, it was meaningfully above freezing today so I took the opportunity to start the installation of my road signage. I have the sign posts but not the sign itself, which is still in production. Those sign posts were actually the first direct delivery by UPS to my homestead — and gave me hope that I can stop sending things to the street address of the post office (which is complicated by their being only open for 4h a day) and instead get them directly, even though my road isn’t on maps yet. Indeed, I didn’t see the truck, but I did see its tracks today!
and four parcels were delivered right where I wanted them. Huzzah! One of those parcels is a “deck box” – a big plastic trunk which I’ll be using in the future as parcel repository, so delivered things can be kept out of the weather. It turns out this is so much a thing that one can order commercially produced stock signs that say “UPS / FedEx / Amazon / USPS Please Leave Packages In Box” in a variety of sizes and formats. I got one for my box, too.
So about that sign post. How does one drive it into the ground? Well, one buys a cast steel “driving cap” for them, to distribute the applied force and prevent damage to their tops, and then one bashes the heck outta them with one’s 8# sledge hammer.
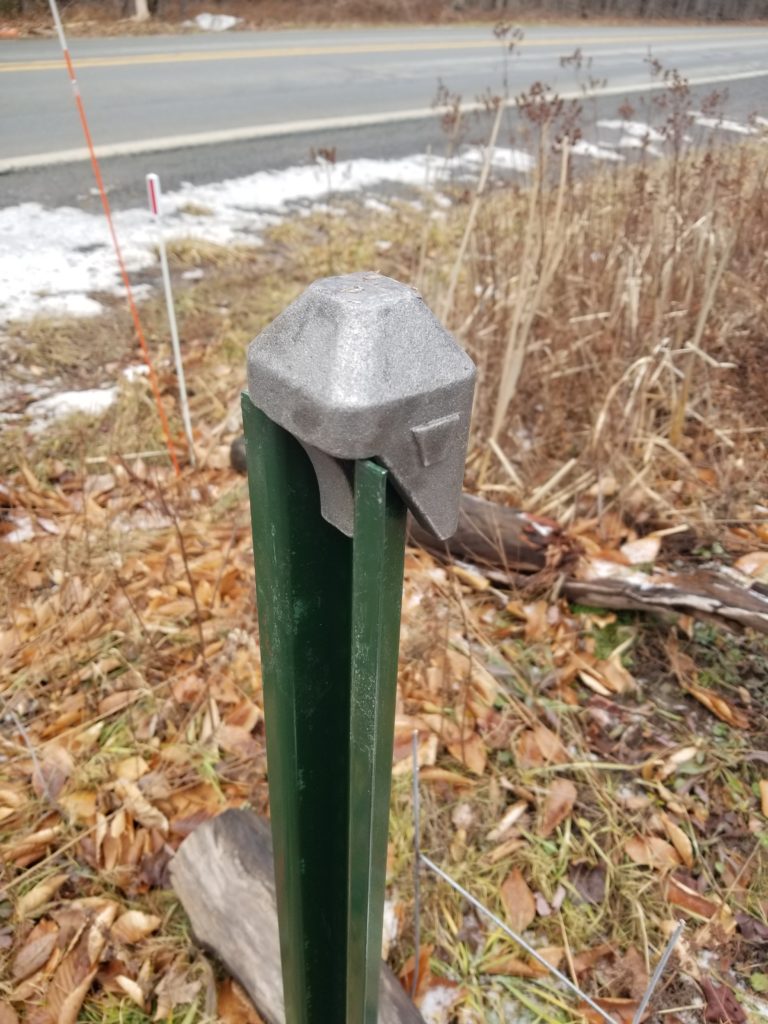
I have two sign posts – one for the street sign (above) and another for an on-property display that will have three things on it: one sign that says “deliveries” with an arrow that points toward the box, one that says “residence” that points to the other box, and one that says private property/no trespassing but has a soft, non-aggressive look.
So a-bashing I will go. The post for the on-property sign went in decently. It’s not quite at depth yet, but less than a foot to go. These posts are only 4ft long – the idea is they get sunk deep into the ground with just a stub showing, to which the main sign post is affixed with special break-away bolts so if a vehicle actually hits them, they fall away rather than potentially enter the passenger area of the vehicle or scrape along its underside (where the fuel tank is). So I’m driving these 4ft posts into the ground with my 8# sledge. The one for the road sign, though, goes in only about half way and then stops abruptly. When I whack at the driving cap, it literally bounces up. Clearly, I have hit a rock. This is quite inconvenient as the depth of the post already makes it very difficult to remove, yet I cannot drive it to the proper depth, either. Sinking it only 2ft down might not be sufficient to properly anchor the sign and it’s definitely not below the frost line around here, so it may get spat out by the earth during freeze-thaw cycles. More to the point, the municipality says the anchor post has to be 40″ deep.
I’m not quite sure what to do about this. The rocks around here tend to be shale, which shatters pretty easily. I don’t know for certain that I’ve hit shale, but odds are definitely in my favor. The steel sign post is really quite hardy but it’s not exactly meant to split rocks. Even so, attacking it with the sledge is likely to crack the rock below, though it is also compressed by being a couple of feet below grade, so even cracking it doesn’t assure I can drive the post between the split rock.
I might just get a spade and dig out the post, and the rock, then re-set the post. But that’s a heap of work. But so is assaulting the top of the post with the sledge when it doesn’t want to go. Hm.
Two other totally random bits of update.
I had to adjust my flue pipe a little bit, after noticing that the fitting which goes from the pipe into the wood stove wasn’t seated properly. I have past self to thank for this little note up in the ceiling, behind the dressing panels (removed here), which save me a few trips up and down the ladder trying to find the socket that will fit the bolts on the clamp collar which I must loosen to be able to reposition the flue down a little bit.
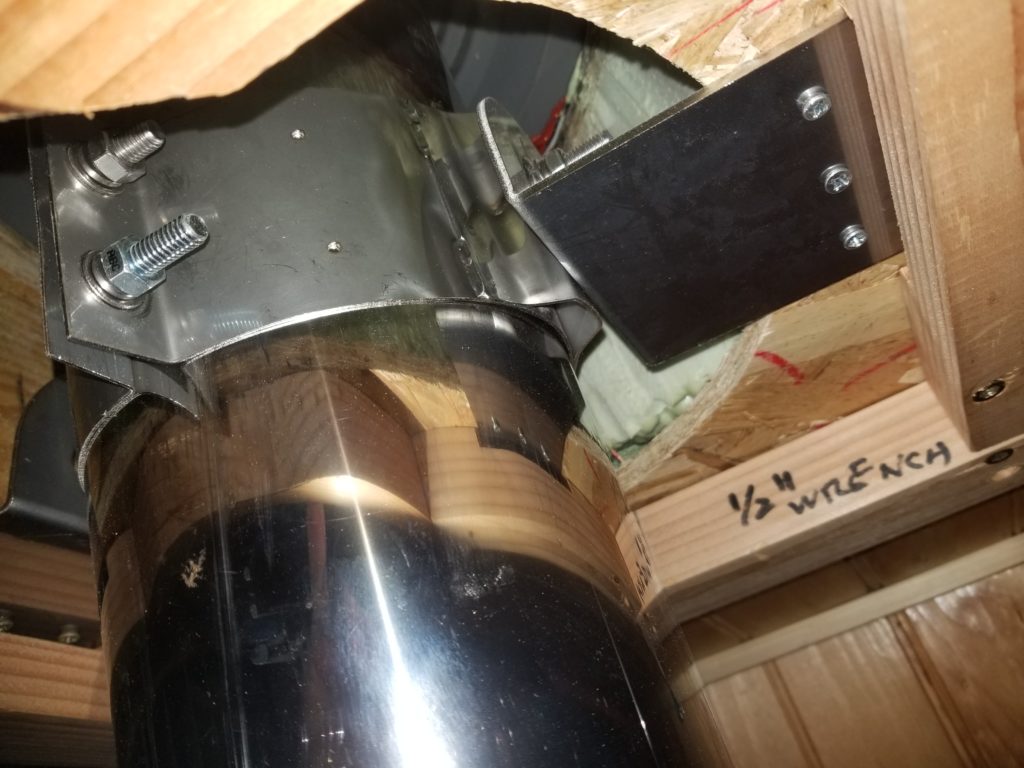
Evidently, all I need is a 1/2″ wrench (or socket) for the job.
There’s a chair I fixed out there somewhere that has “4mm” written on the bottom in sharpie. That’s the size of the hex wrench needed to tighten the screws. Future you will thank present you for leaving them notes like this, answers posted right where the questions would arise.
And, lastly, I needed a lock nut for this blue fitting so I could use it in an electrical junction box. These lock nuts come in a variety of sizes but are usually pretty easy to get, no matter the size. Due to supply chain madness, however, there were NO lock nuts of this size to be found. What’s a fellow to do?
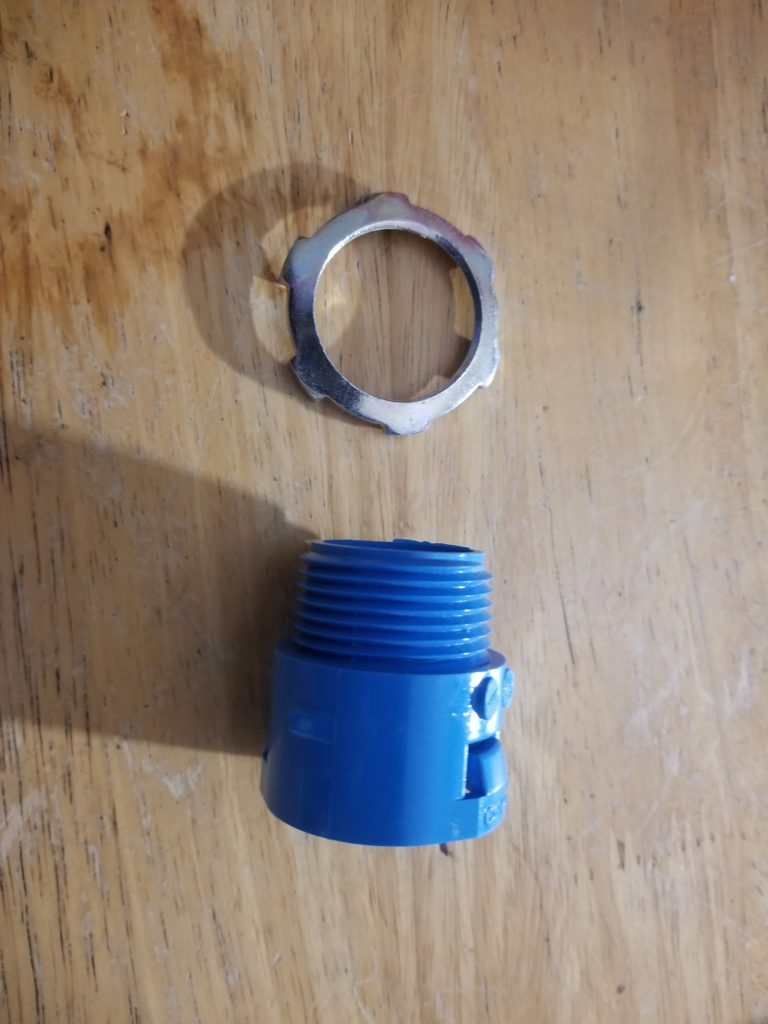
Well, I noticed there was a metal fitting that came with a locknut that was apparently the right size.
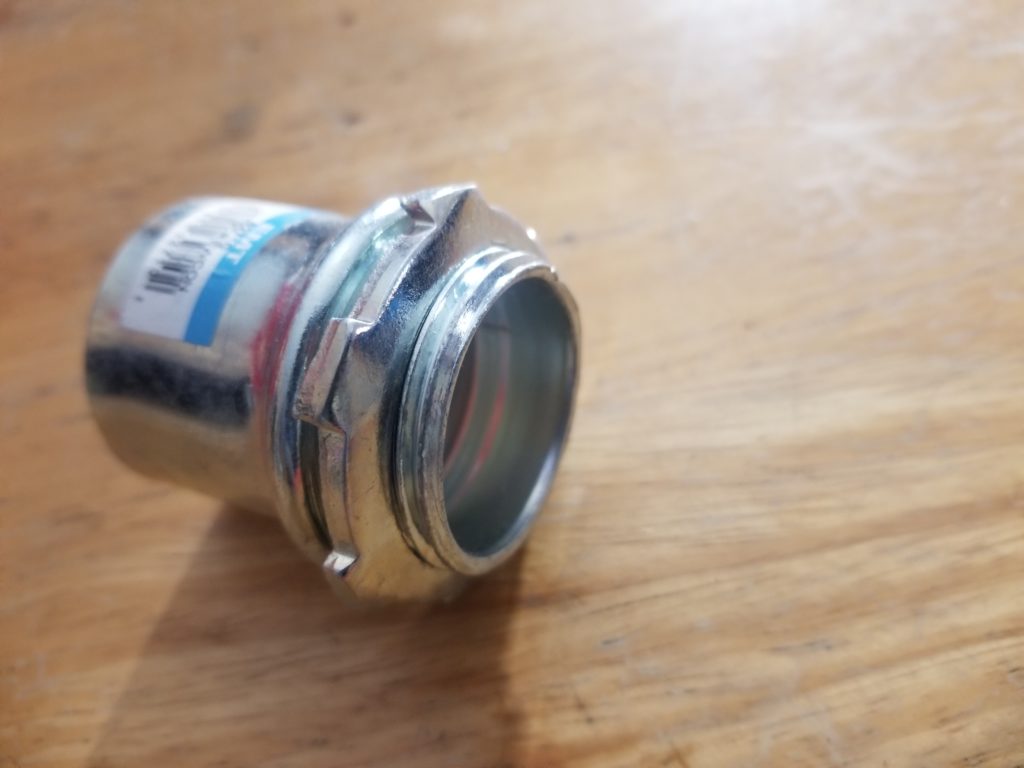
The fitting was about 3x the price of what the locknut would have cost (if I could have bought one individually) but I only needed three of them and the actual price of the fitting was like $1.45, so okay, fine, I’ll buy three fittings I don’t need so I can get three locknuts I do. A jerk would have unscrewed the nuts and just pocketed them, but I’m not that guy.