The current goal with the W.O.G. is to get the office partition done enough to use, so I can stop using the BeDiLiA as my office, which, because of its many functions, cannot accommodate leaving my office things there, so I need to assemble and disassemble my office every workday. Not my favorite. And I don’t want to work in the residence anyway. That’s why there is an office partition in the W.O.G. Getting that partition ready for use has been slow going for a number (3) of reasons: (a) the rest of life is still happening, so I can’t just spend all day making W.O.G. progress; (b) it’s cold and dark (see also “winter”) and therefore construction work is harder because things are brittle, hands and feet are cold, there’s snow on the trailer, etc; (c) my day job is demanding and by the time the workday is done, I don’t always have capacity to go do a few hours of work in the cold. So yeah, still not done, but making headway, especially on weekends where I can get some momentum and daylight. Yes, I can use the generator and work lights, but that just makes it all the more bother to set up and break down. . . not helpful when motivation is low due to it being cold and dark to start with! Not to mention a bit of construction burnout on the part of the builder (that’s me).
There has been progress, though! Slow and steady, it happens. Let’s take a step outside to the place where the propane tanks will live. There are a few things noteworthy about this picture. First, this is a temporary solution — I needed something that will get me through the winter and there are only so many hours of even kinda-ok outdoor building weather right now, so I rushed this thing together in an afternoon just so the tanks would have something solid to stand on. Second, note the regulator/switch (silver thing with hoses) is now mounted more or less directly to the pipe as it emerges from the side of the building. Why I didn’t think of this FIRST I couldn’t tell you, but at least I thought of it third and had the good sense to re-do it until it was good enough. Now it’s good enough. Those longer studs in the back will also serve as attachment points for some side shields and a simple roof to shed snow. Again, just enough to get me through this winter. Next year, I’ll rebuild this (when it’s not heating season) into something more refined and durable. How long will 80# of propane keep my office warm? Well, there’s R-38 in the ceiling and in the walls, so that should keep the heat in very well indeed. The floor is bare concrete right now, which definitely draws out heat — I’ll need to do something about that. I haven’t decided what yet. Maybe some XPS foam boards on the floor and then plywood and something nice over that. Of course that would add thickness to the floor and therefore mean a significant step-up (or down) going to (or coming from) the office. A thin layer of foam sheeting and a wood finished floor would fit and have decent thermal resistance against the concrete. Some DriCore panels would do it, too. We shall see.

I also noticed the downspout exhaust was eroding the area — I definitely don’t want it to undermine the propane deck — so I added a downspout extension after this pic was taken. I will probably create some kind of rainwater catchment system — or maybe not, there’s a whole big lake on the property, if I need a little water for irrigation. In any case, the rainwater wasn’t going where I wanted it (as seems to so often be the case) so mitigation was necessary.

Is that my bicep bulging from all that lumberjacking? 
Nope, it’s just me warming the leak check solution in my jacket!
Once these tanks were in place and the regulator/switch was in its best (and third) configuration, once again time to check all connections for leaks under pressure. I am pleased to report that all connections passed their test in one try.
Another important thing for the propane system for the W.O.G. is to make sure the piping is grounded. Chances are since the flange is screwed through the metal siding that there’s a ground path already, but just to be sure, I ran a dedicated ground lead from the pipe to the ground rod I was already using for the power system. That wire from the left is the one that comes from the gas line.
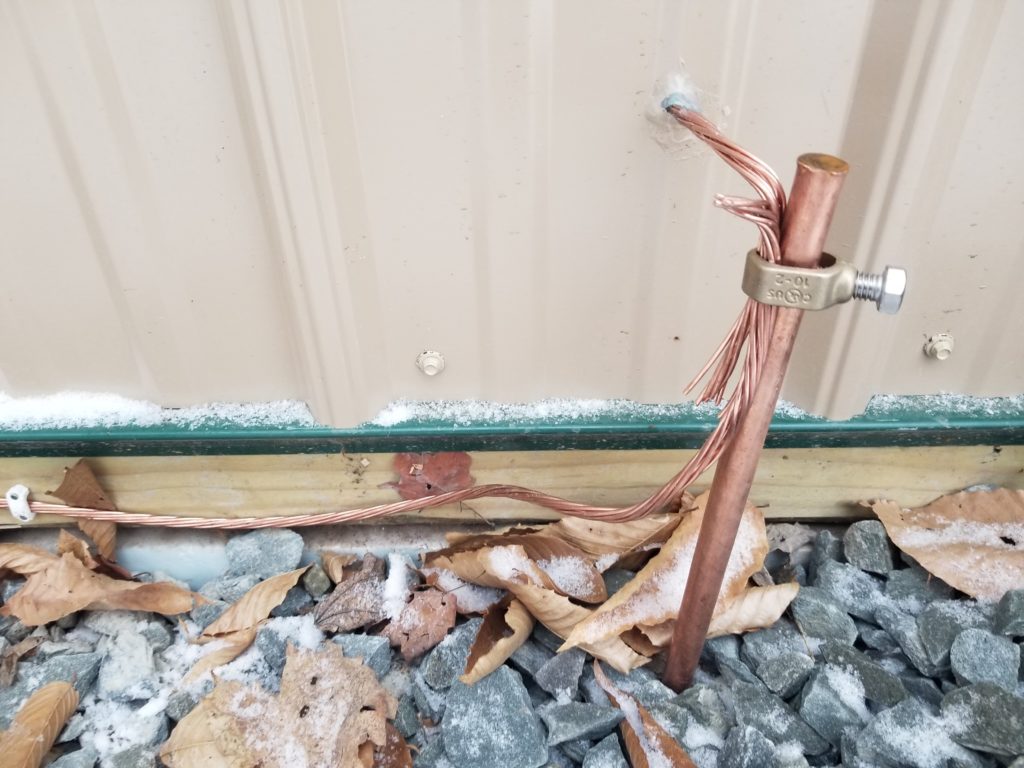
I did not have to cut the wire. I had precisely enough left after (a) grounding the house, (b) grounding the house solar array, (c) grounding the W.O.G. solar array, (d) grounding the W.O.G. power center (well, the wire is ready for the power center, but the power center isn’t actually installed yet), to do this last job of grounding the propane line for the W.O.G. About six months ago, I bought the grounding wire I’m using here. It was sold by the foot, so when the clerk asked how much I wanted, I made a wild guess and said 50 feet. Turns out that was exactly right. Every now and then chance resolves in my favor 🙂
Speaking of the solar arrays… life on solar power comes with two problems (a) storing solar energy for when you need it (got that covered with a big battery system) and (b) keeping the panels themselves free of snow in the winter!
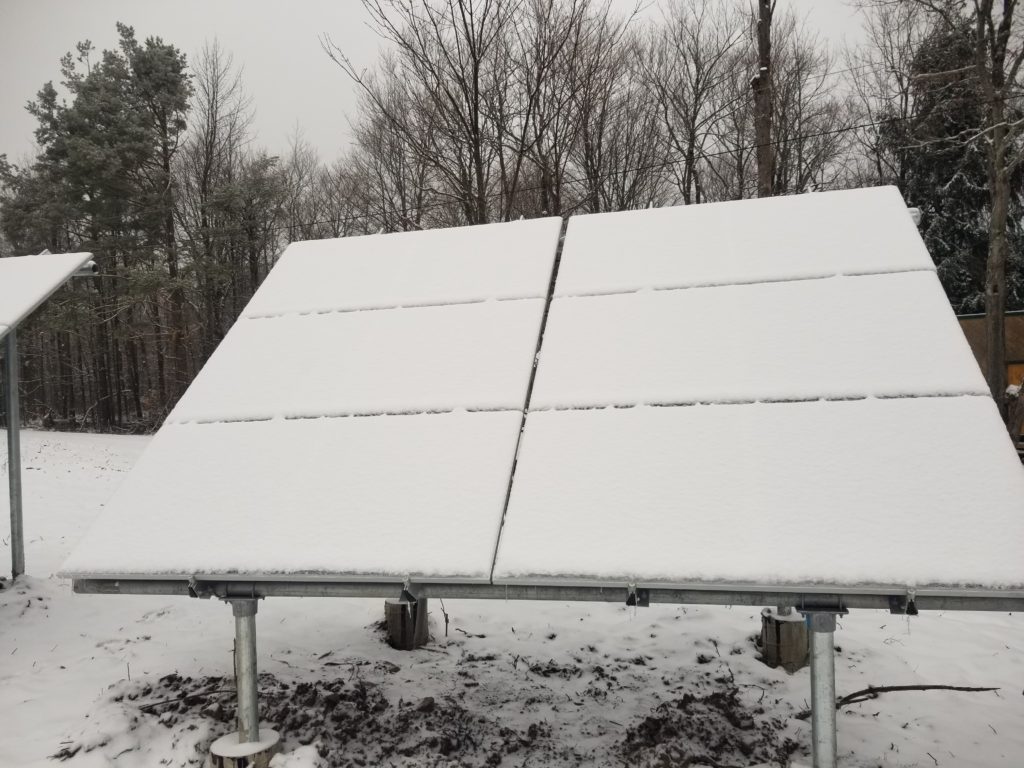
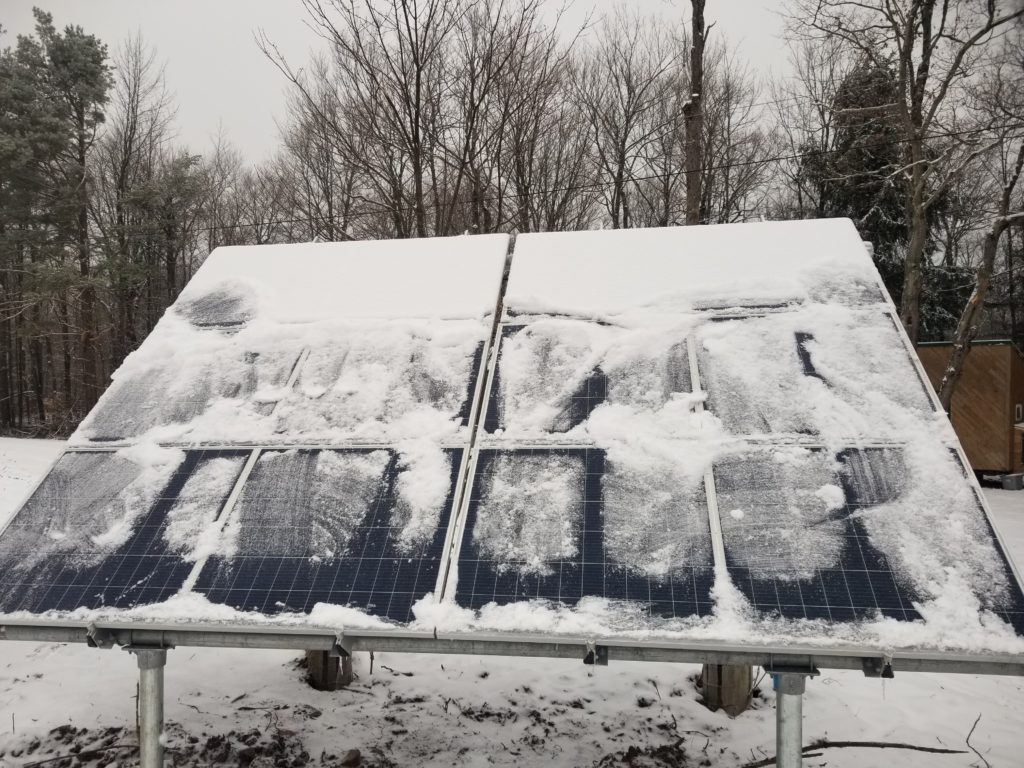
Fun fact! These panels were designed by a Canadian company (named unimaginatively “Canadian Solar”) who had the brilliant idea of putting active parts on the backs of the panels as well as the front! Now, for a roof-mounted array, that would make no sense at all since the backs just face the roof surface. For a ground-mounted array, though, such as mine, the back is exposed. But wait, I can hear you say, “they’re going to always be in shadow if you’ve oriented your array properly!” and you’d be right. And you’d be wrong! When there’s snow on the ground, that snow will reflect light onto the rear of the array. It’s not like direct sun, of course, but it’s quite a lot more than nothing!
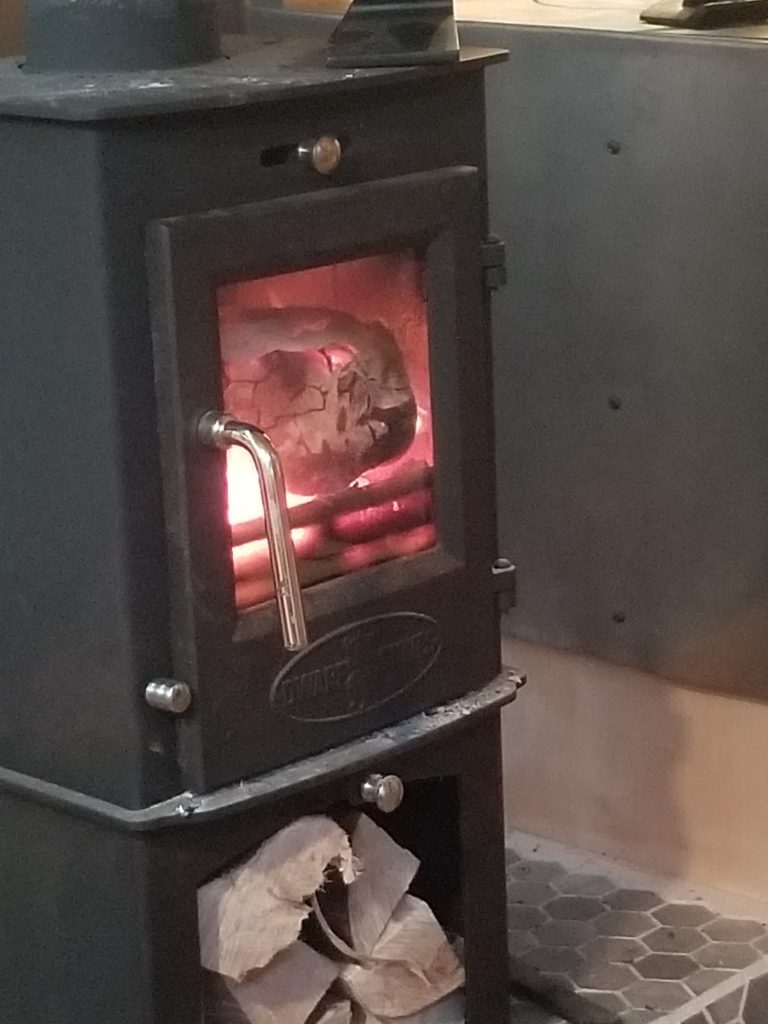
From cold… to hot… we digress! It has been a real pleasure (and good exercise) heating (the house) with wood. I do prefer using something renewable for my primary heat as well as specifically enjoying the fire itself, the light, the warmth, the smell and sound of it. However, it also means I need to harvest wood to keep the stove stoked. I’d have been doing this gradually over the summer if I’d been here over the summer to do it! Instead, I am scrambling to harvest wood in a timely fashion as I need it. So far, at least, I am burning it slower than I am harvesting, the weather has cooperated, and there’s sufficient deadfall that I don’t even have to fell any standing trees. The deadfall is in various states of dryness, definitely not super dry like seasoned wood would be, but in a hot stove it dries out enough soon enough to burn and be useful, so okay.
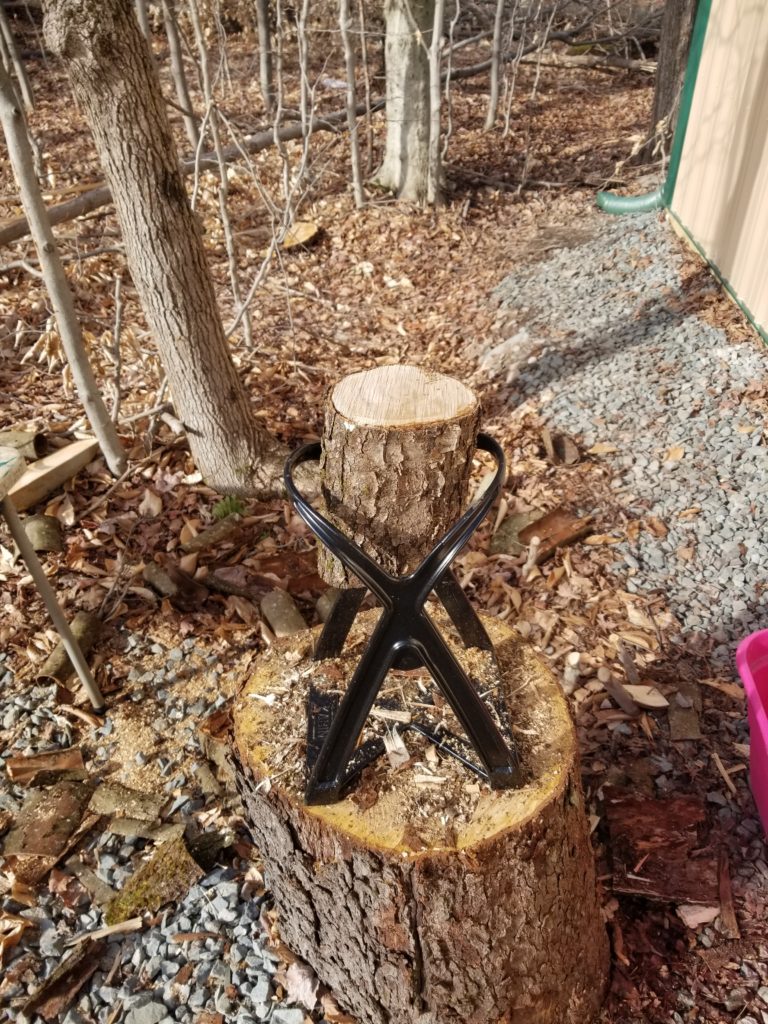
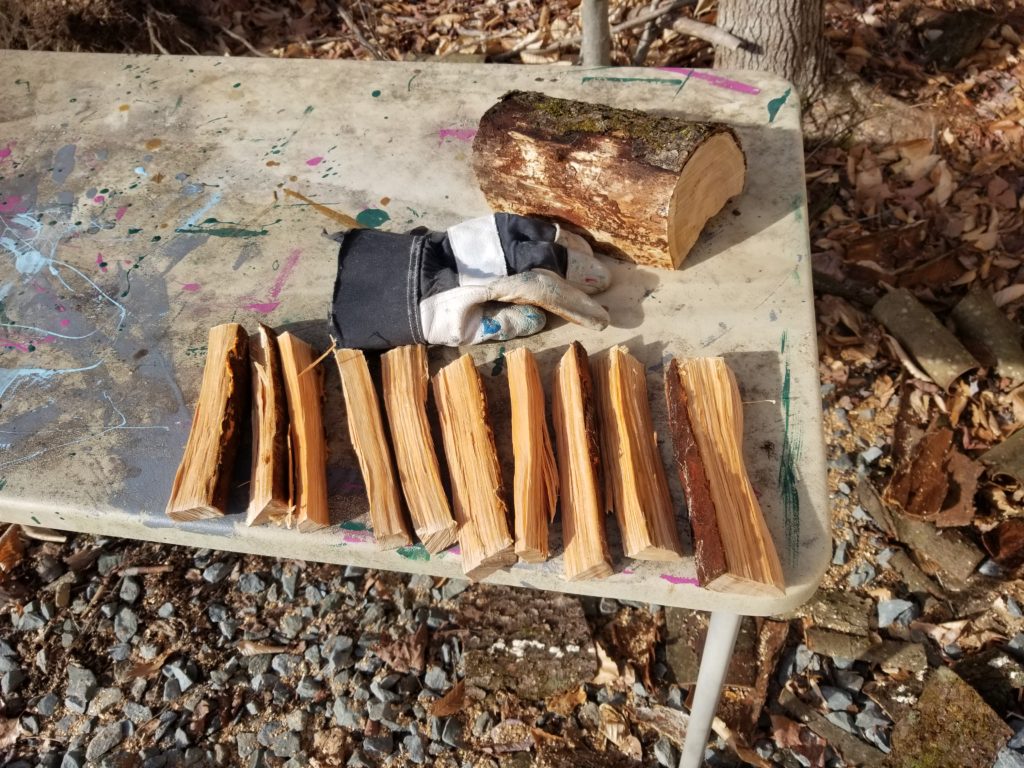
My wee stove takes wee logs. I have talked about this before, but I happened to have recently taken a series of pictures that tell this story particularly well, so I will tell it again with them. First let’s talk about logs.
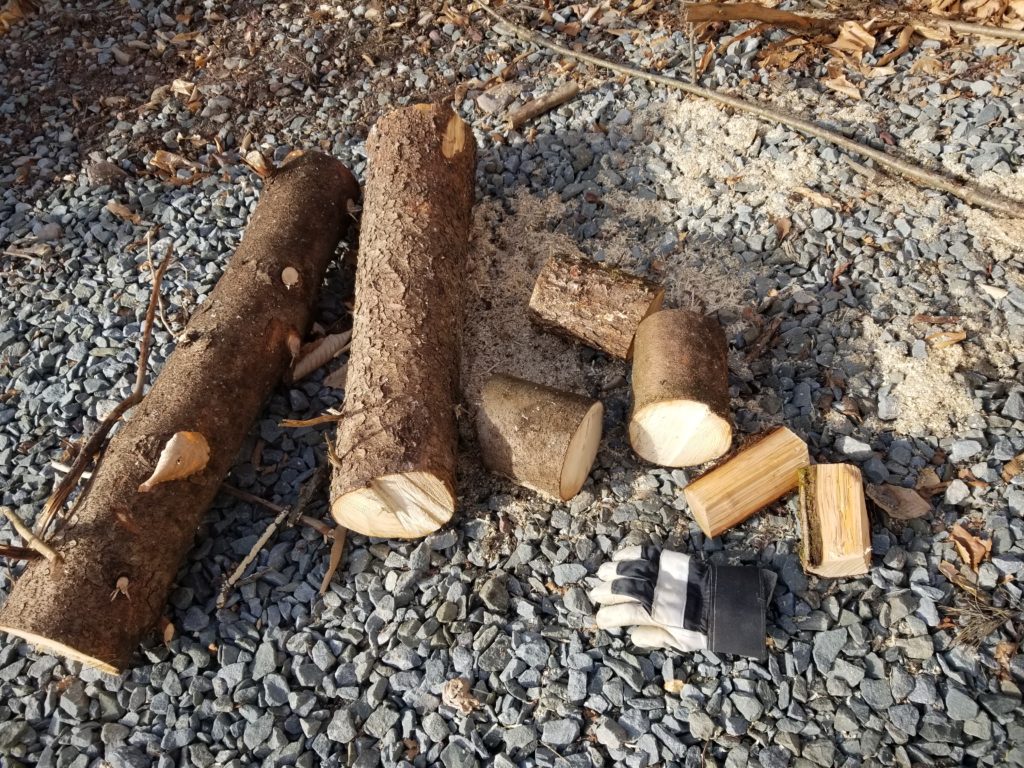
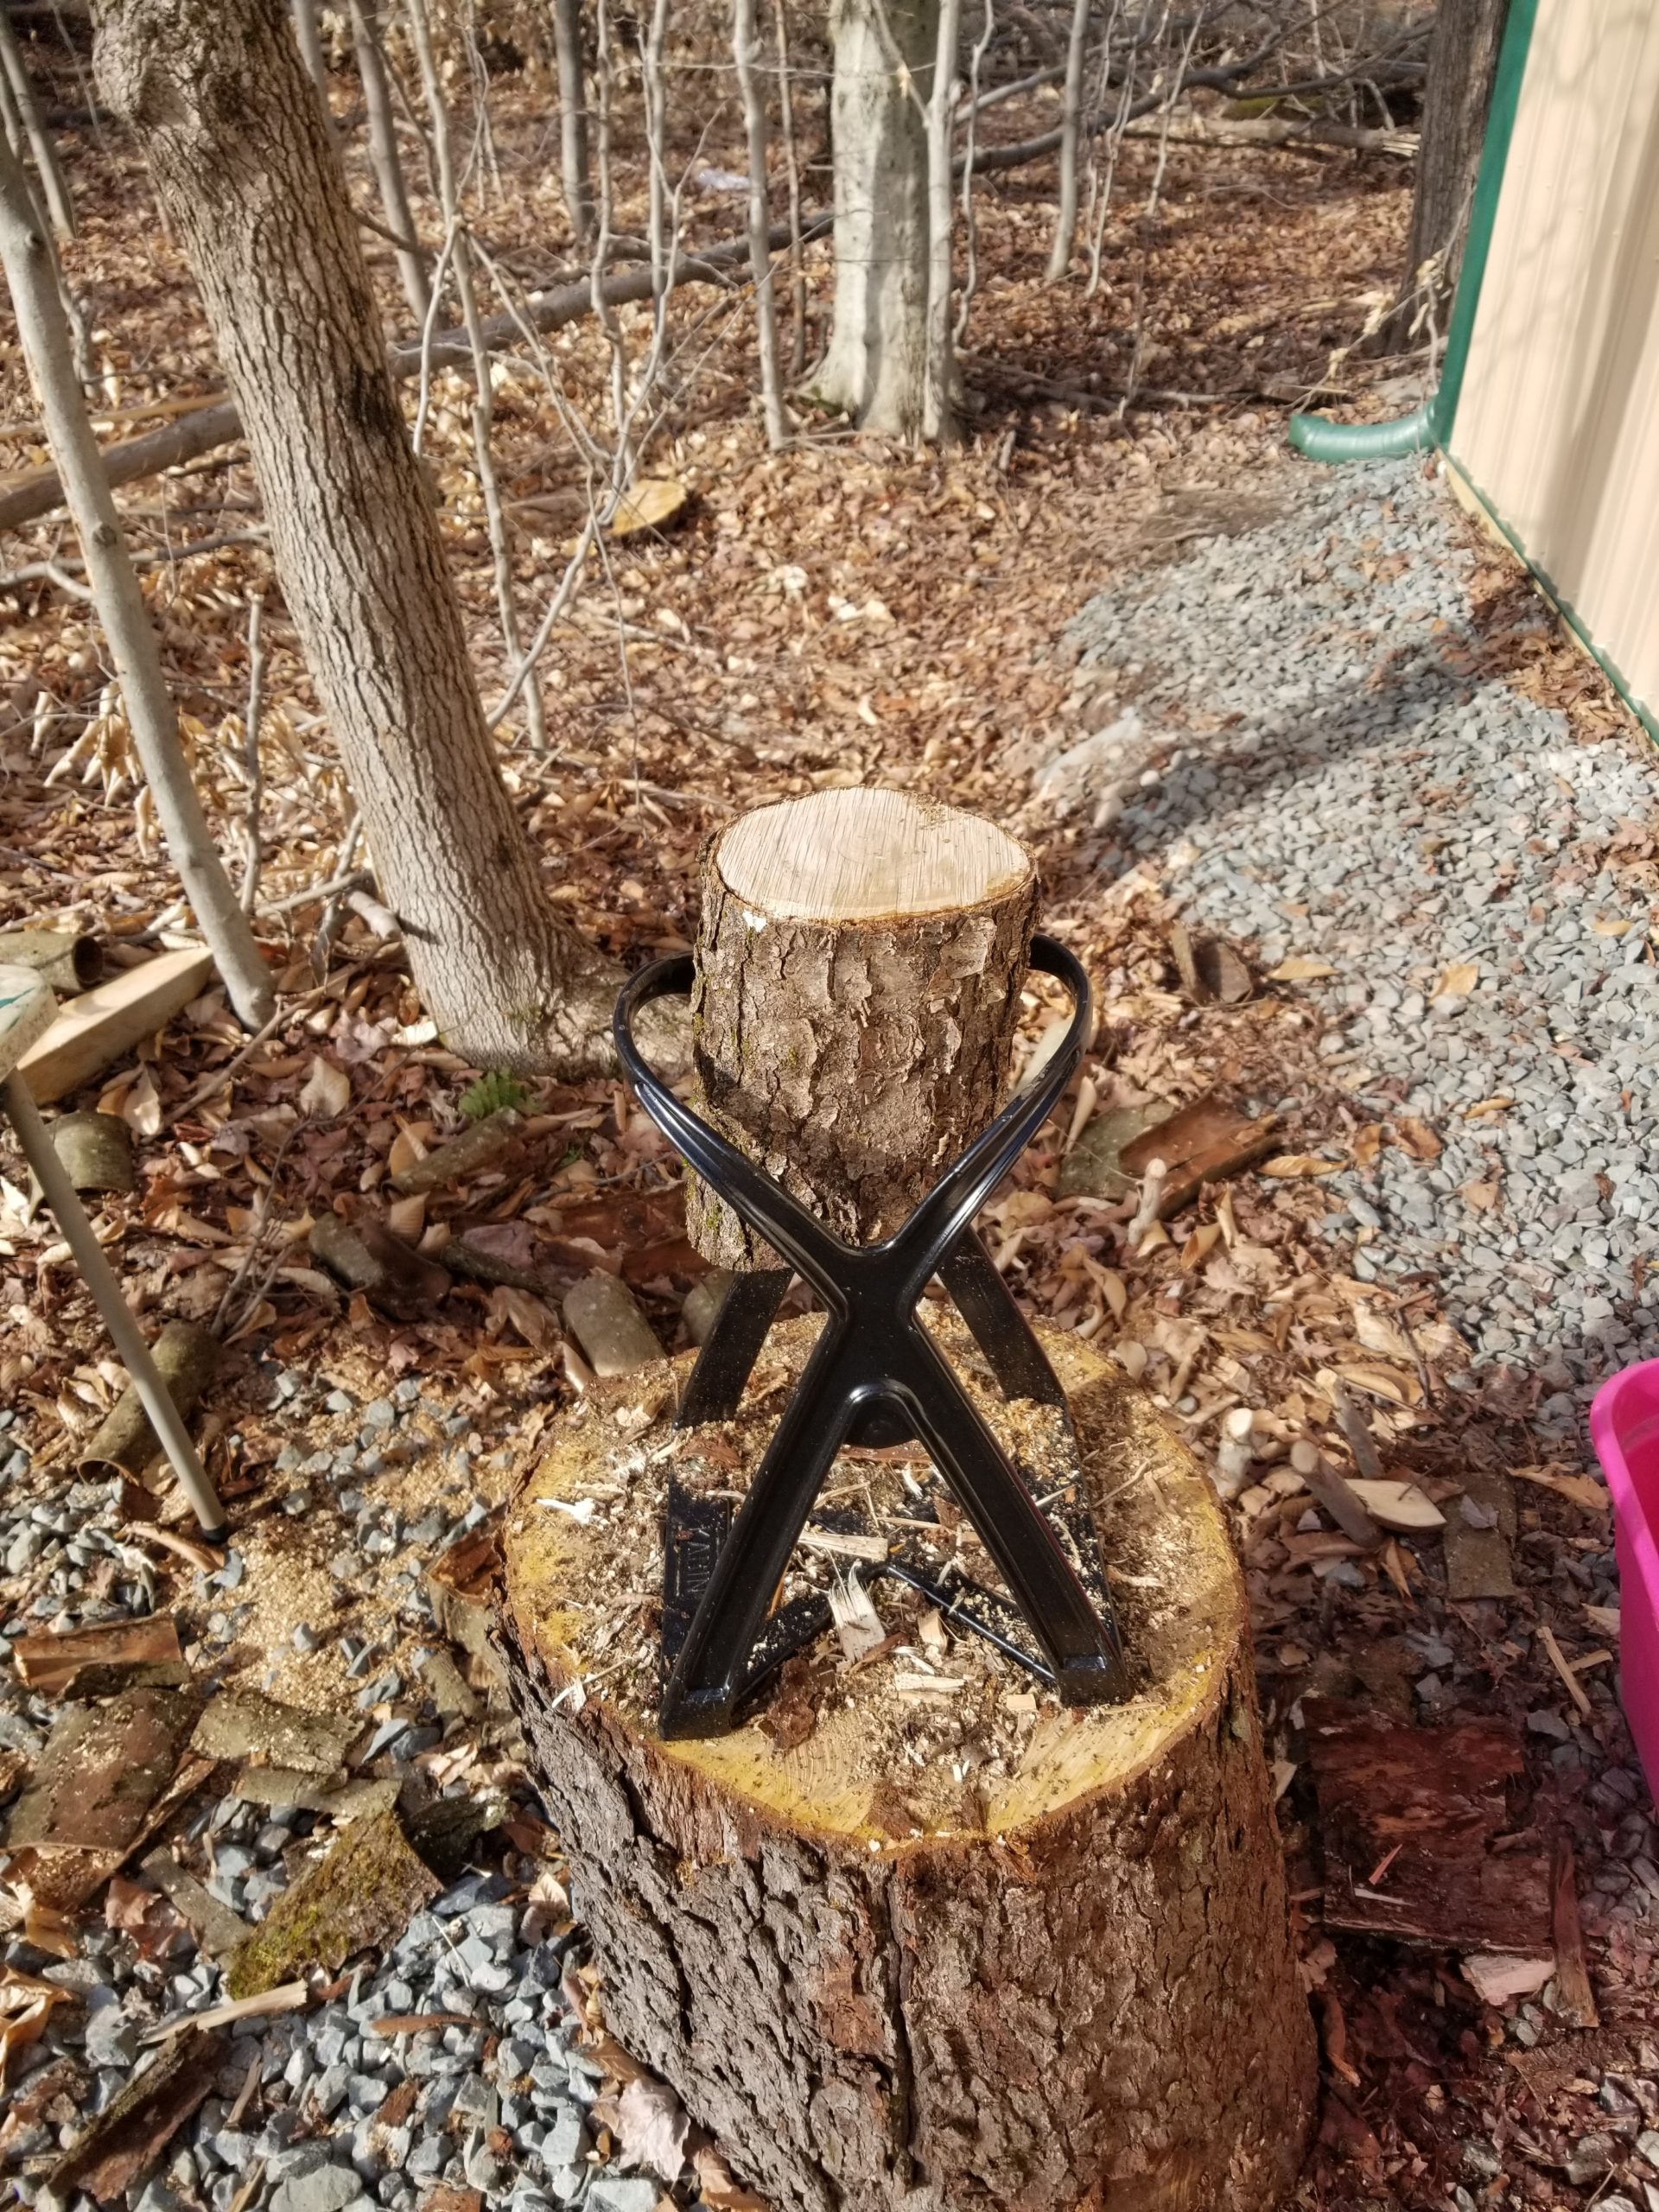
Here’s a modest section of tree that I harvested. Instead of ~18″ long sections to split, though, my wee stove needs something more like 8″ for the wood to even fit in the fire box. Note the black-and-white glove for scale. My hands are big, yes, but still. I have a nifty widget for splitting the small logs into quarters so they’re easy to burn. It’s an inverted wedge – one drives the wood onto the wedge (rather than the wedge into the wood) — which makes for a much easier (bigger) target for the sledge and furthermore puts the weight of the wood to work.
Set… 
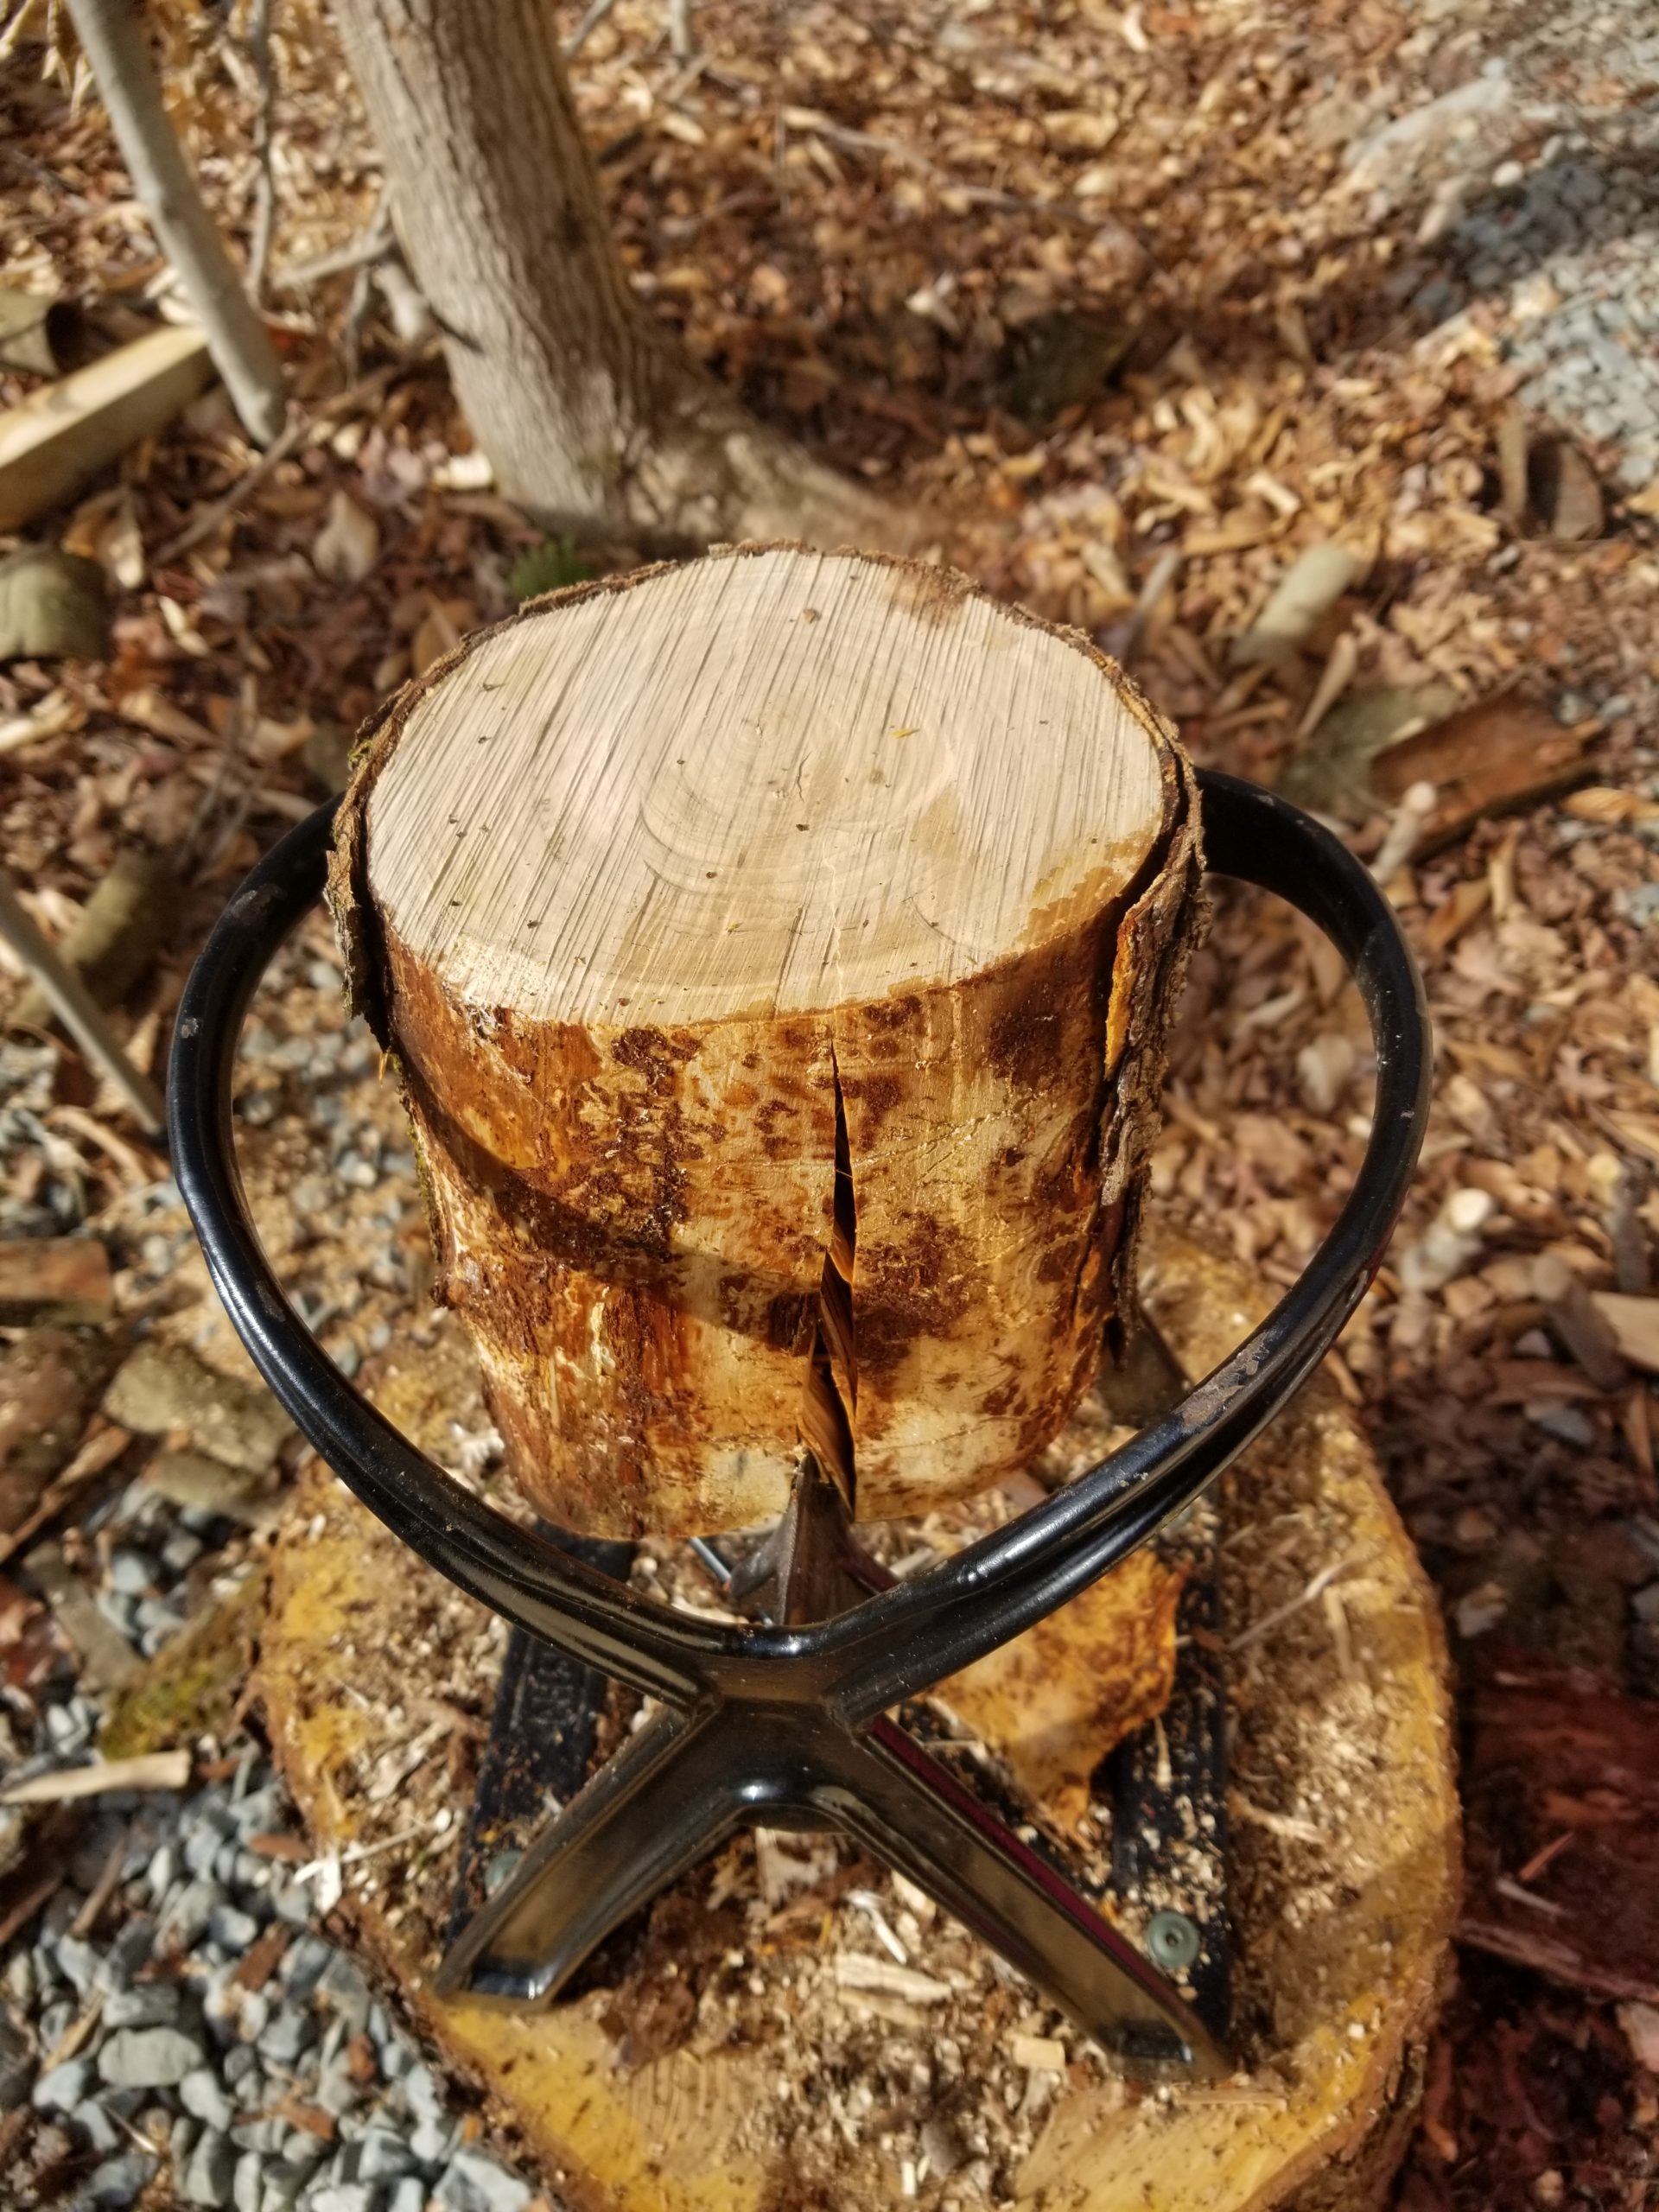
Drive… 
Split!
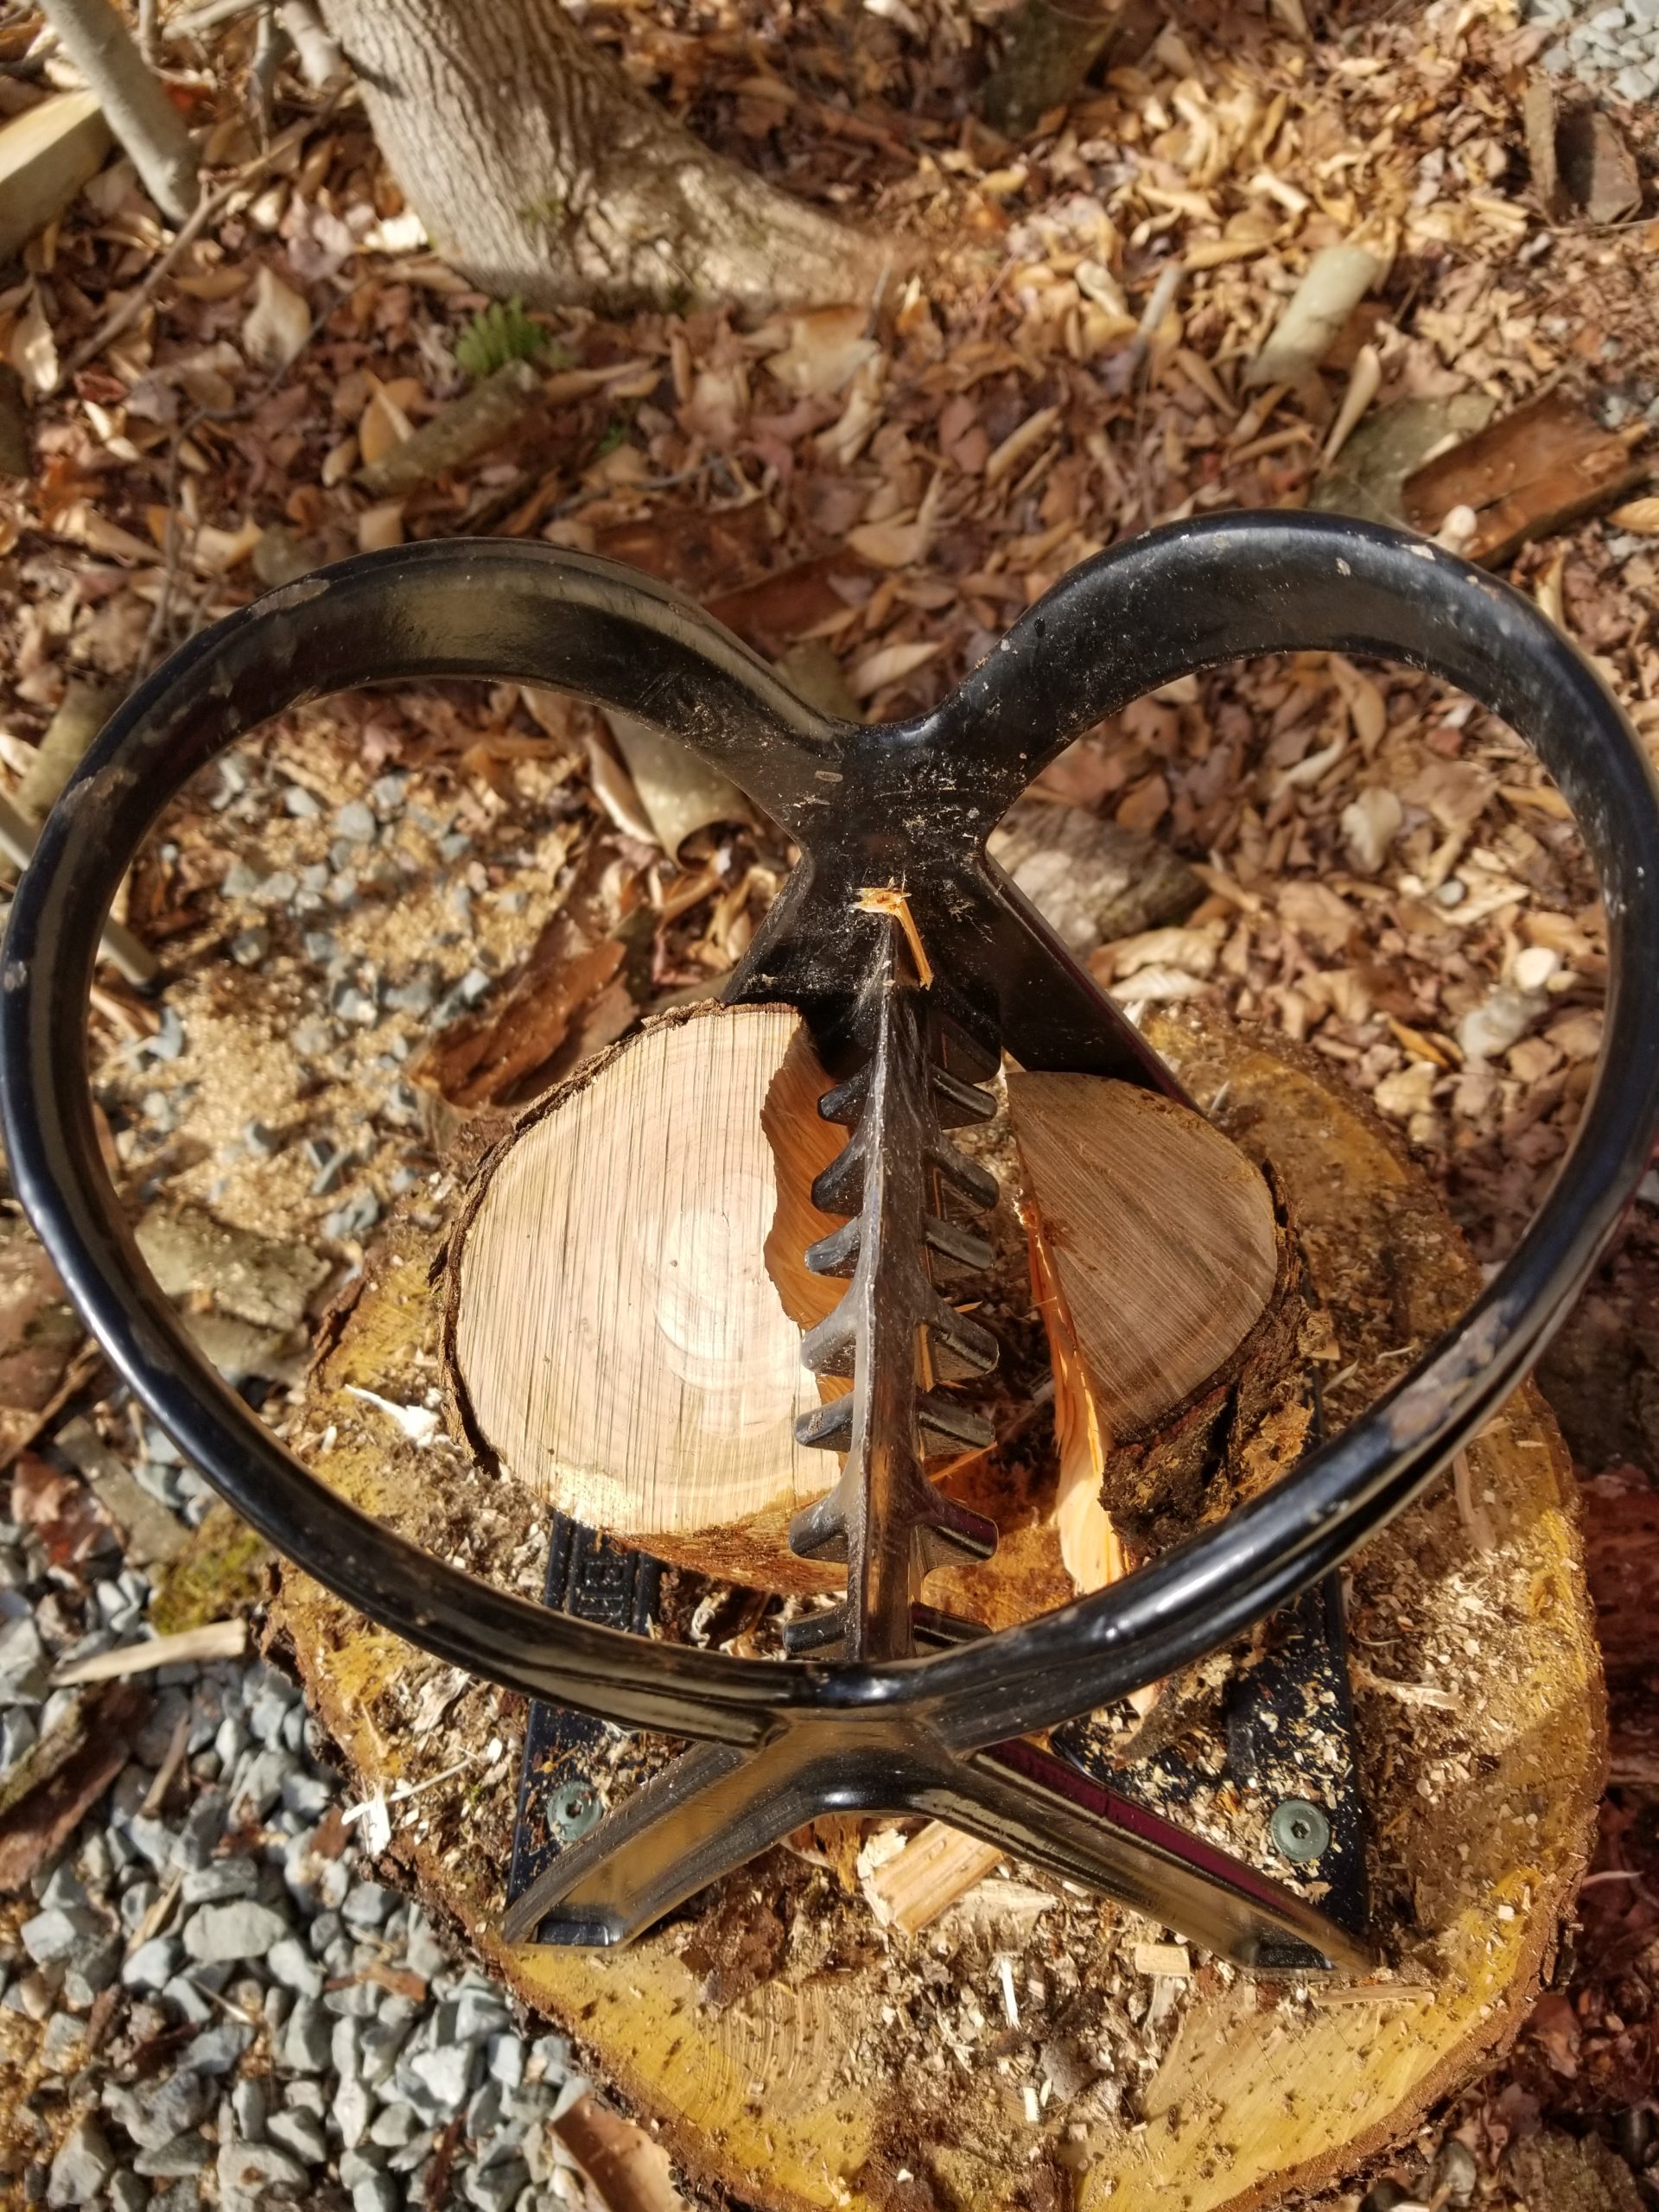
This format also makes it easy to split already split wood into small pieces for use as kindling.
Sometimes, strange things appear in the stove’s firebox… like this turtle head.
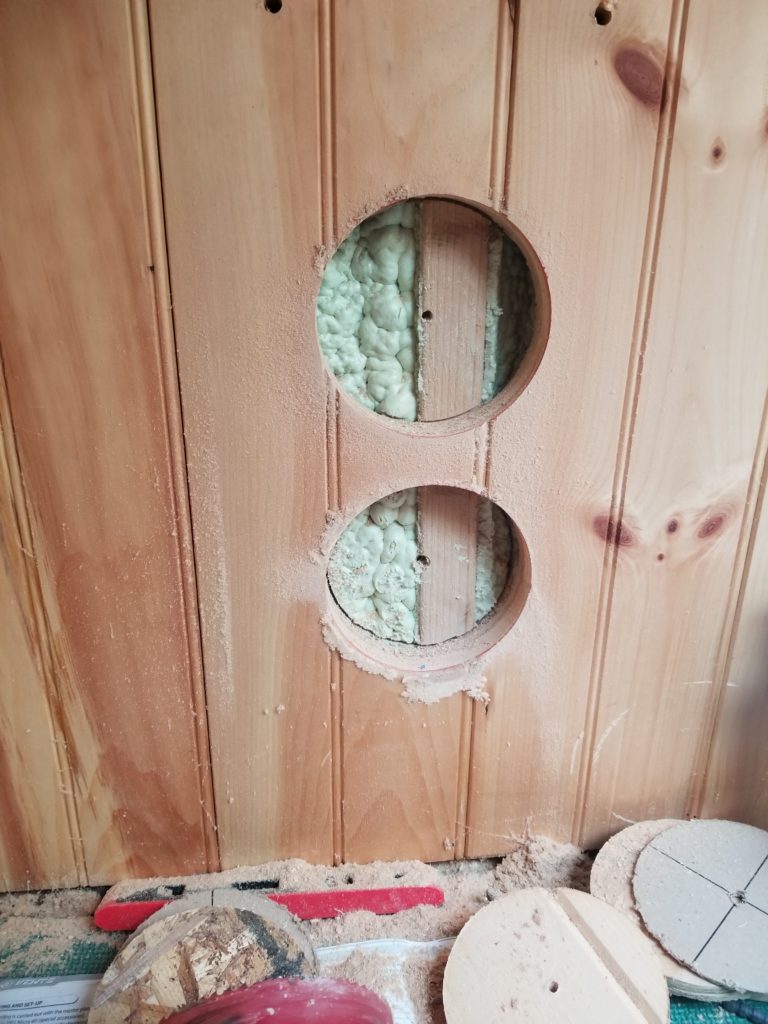
Meanwhile, back inside the W.O.G., I finished the insulation job for the office partition — actually, for pretty much the whole area that isn’t the workshop proper. Some of that work required a little more thinking than you might expect. For example, my 12″ thick walls are formed by simply framing a 2×4 stud wall in position such that the inside face is 12″ from the metal walls of the building. I then simply install 12″ thick insulation in the stud bays and that’s that. Except at the top, where there are these big headers. It’s difficult to trim insulation to fit that profile, and the 12″ thick stuff is too thick to just compress over the headers, but I don’t want to leave that space open, either! The solution I came up with was to take some loose material and shove it into the space between the top of the lower wall’s 12″ thick insulation and the header, then plug the wall with insulation suitable for 2×4 spaces. That did leave a little gap between the inside wall’s insulation and the header/fill, but was overall a good compromise between insulating effectiveness and ease of installation. I could have added an inch of loose fill there, too, but at that point it’s unlikely to have made much difference and would have been quite a lot more work to deal with it in that undefined space.
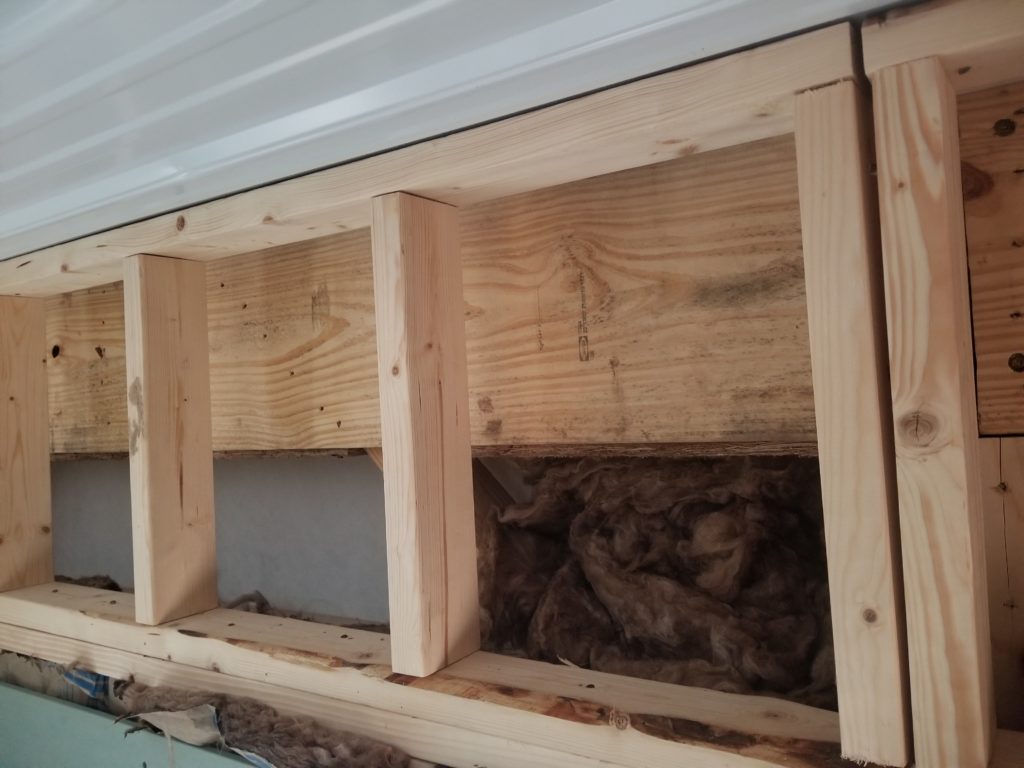
Loose fill the gap, then cover with stock insulation 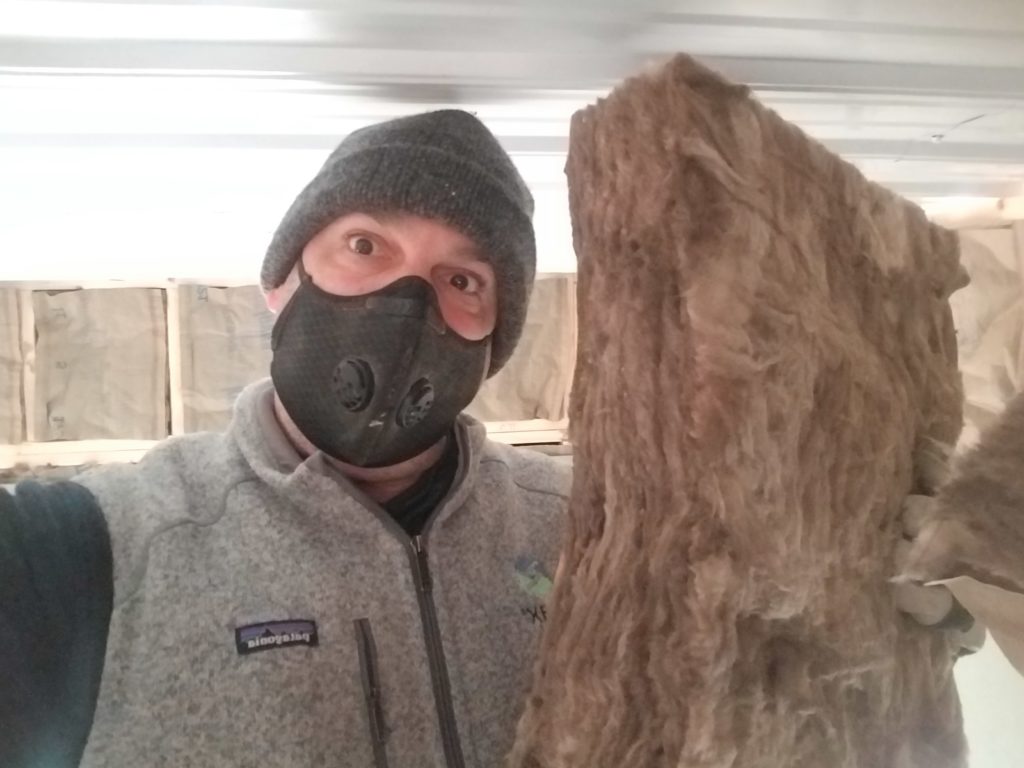
Yep, it’s cold in here. Vest + flannel overshirt + turtleneck.
As the insulation is completed, I have been installing the wallboard. I got very close to my goal of closing off the office & washroom area this weekend but it had become dark and I had become tired before I could install the last door. This is what it looked like as I closed up for the day. I’m using mold-resistant (“greenboard”) drywall because I anticipate it being very humid in the building in the summer, since it is set in the woods, after all.
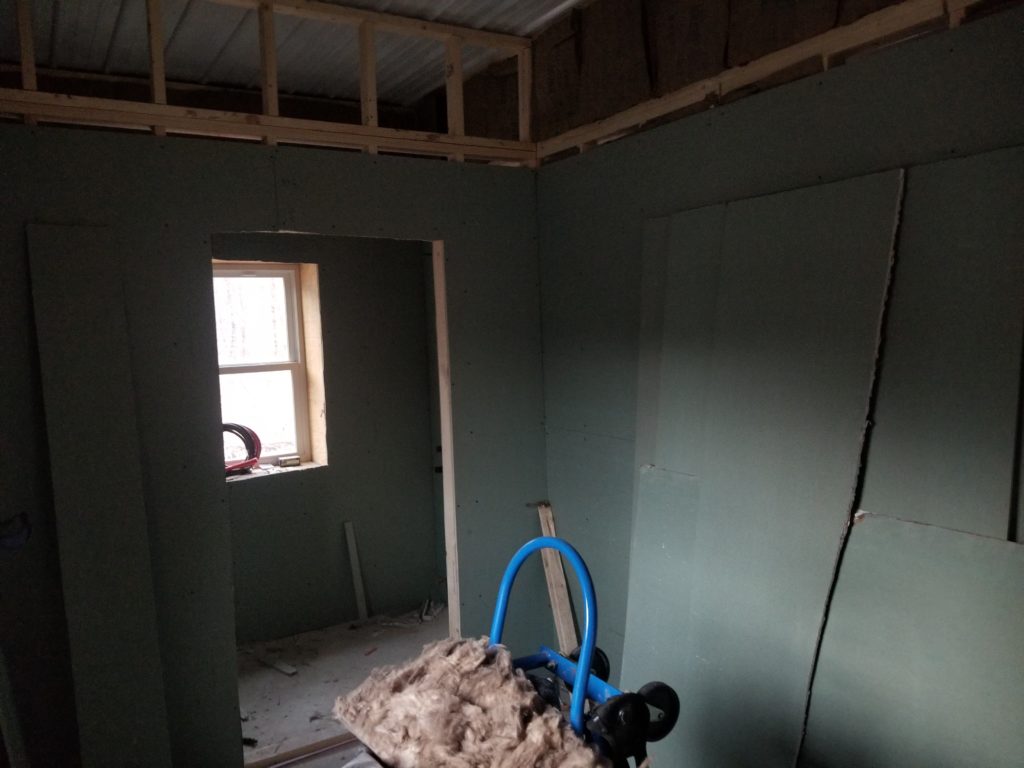
Lowest 8 ft pretty much done throughout 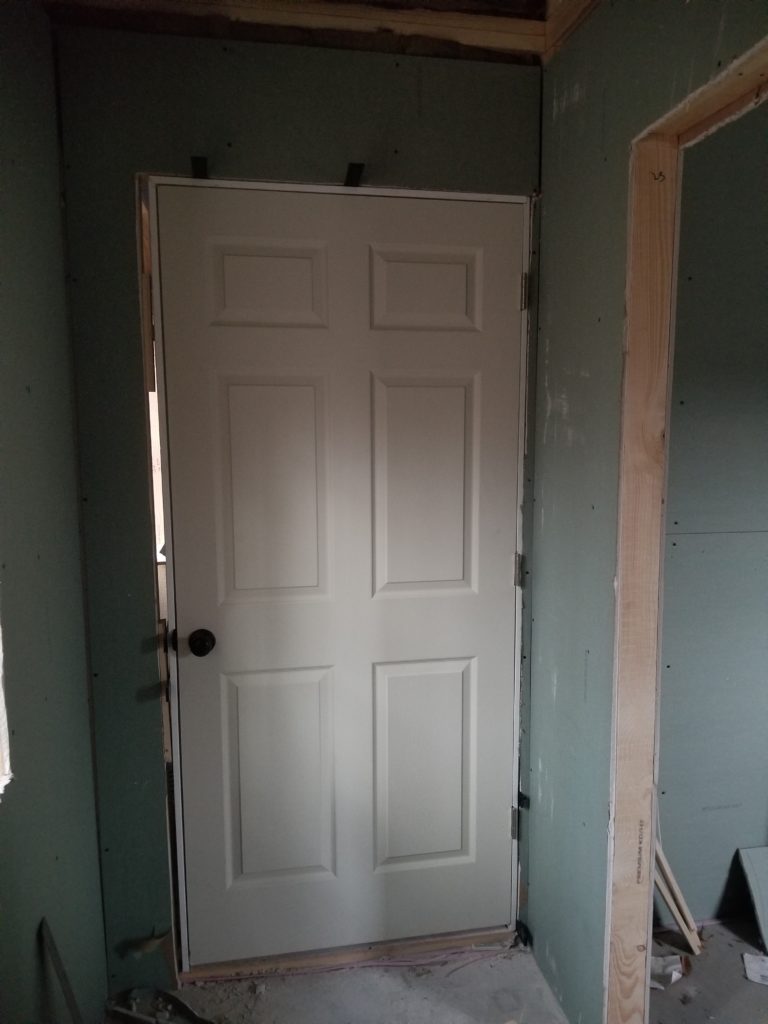
View from where the T.H.R.O.N.E will go (door to shop)
The other door I need to close off the office area is the one between the office and the mudroom. I have the door but I just didn’t have the energy to install it today. Soon, though, and once I do, there will be an insulated-on-all-sides volume composed of the Executive Washroom and the Office proper. I will then fire up the heater and start keeping that space at about 60F which is required for application of joint compound. And anyhow, it will make working in there a lot more pleasant. With mostly foot-thick R-38 insulation throughout, I’m anticipating the heater won’t need to run very often at all.
One thing that’s made other things harder to do is the fact that my table saw has been buried deep in the garage along with most of the other workshop stuff the movers brought. The table saw is by far the best way to make shelves for my cabinets, for example, the having of which means I can unpack some other things into the house and start using them! I tried using my circular saw (never mind that a table saw is circular, too) for making shelves and it worked, but badly because I didn’t have a good workbench available to hold everything steady while I cut. I spent a few hours digging out the garage and trying to make some sense out of it all. It was a lot of lifting and schlepping and such, but time well spent:
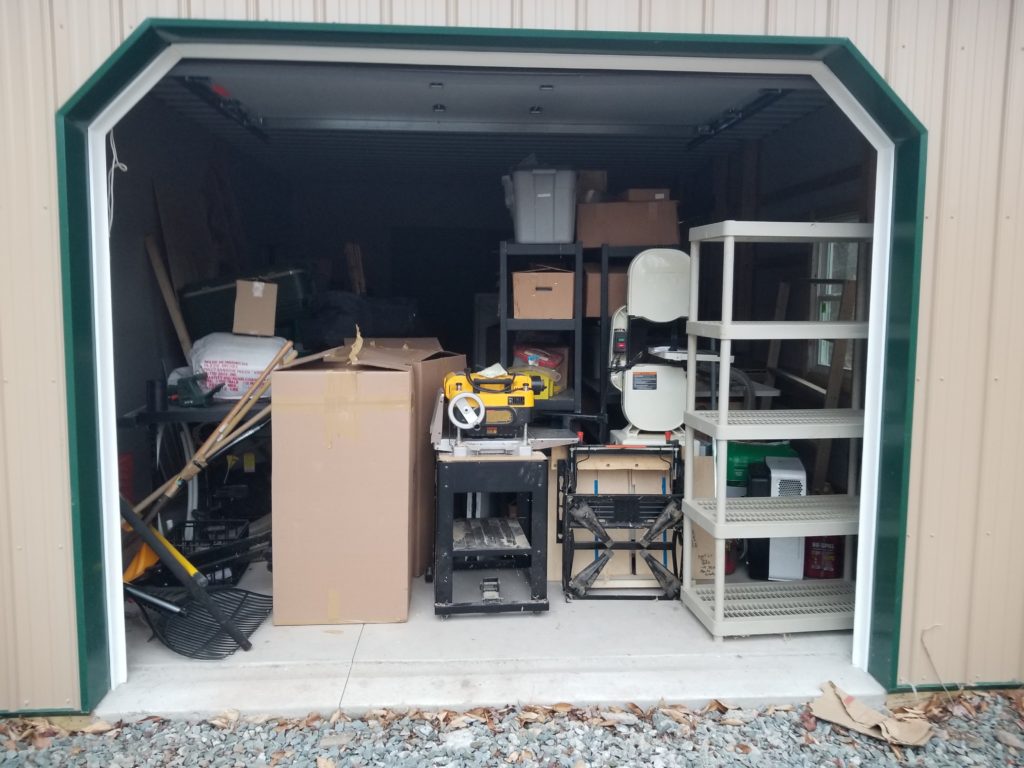
Before 
Now with 100% more table saw availability! 
And I can park in it, too!

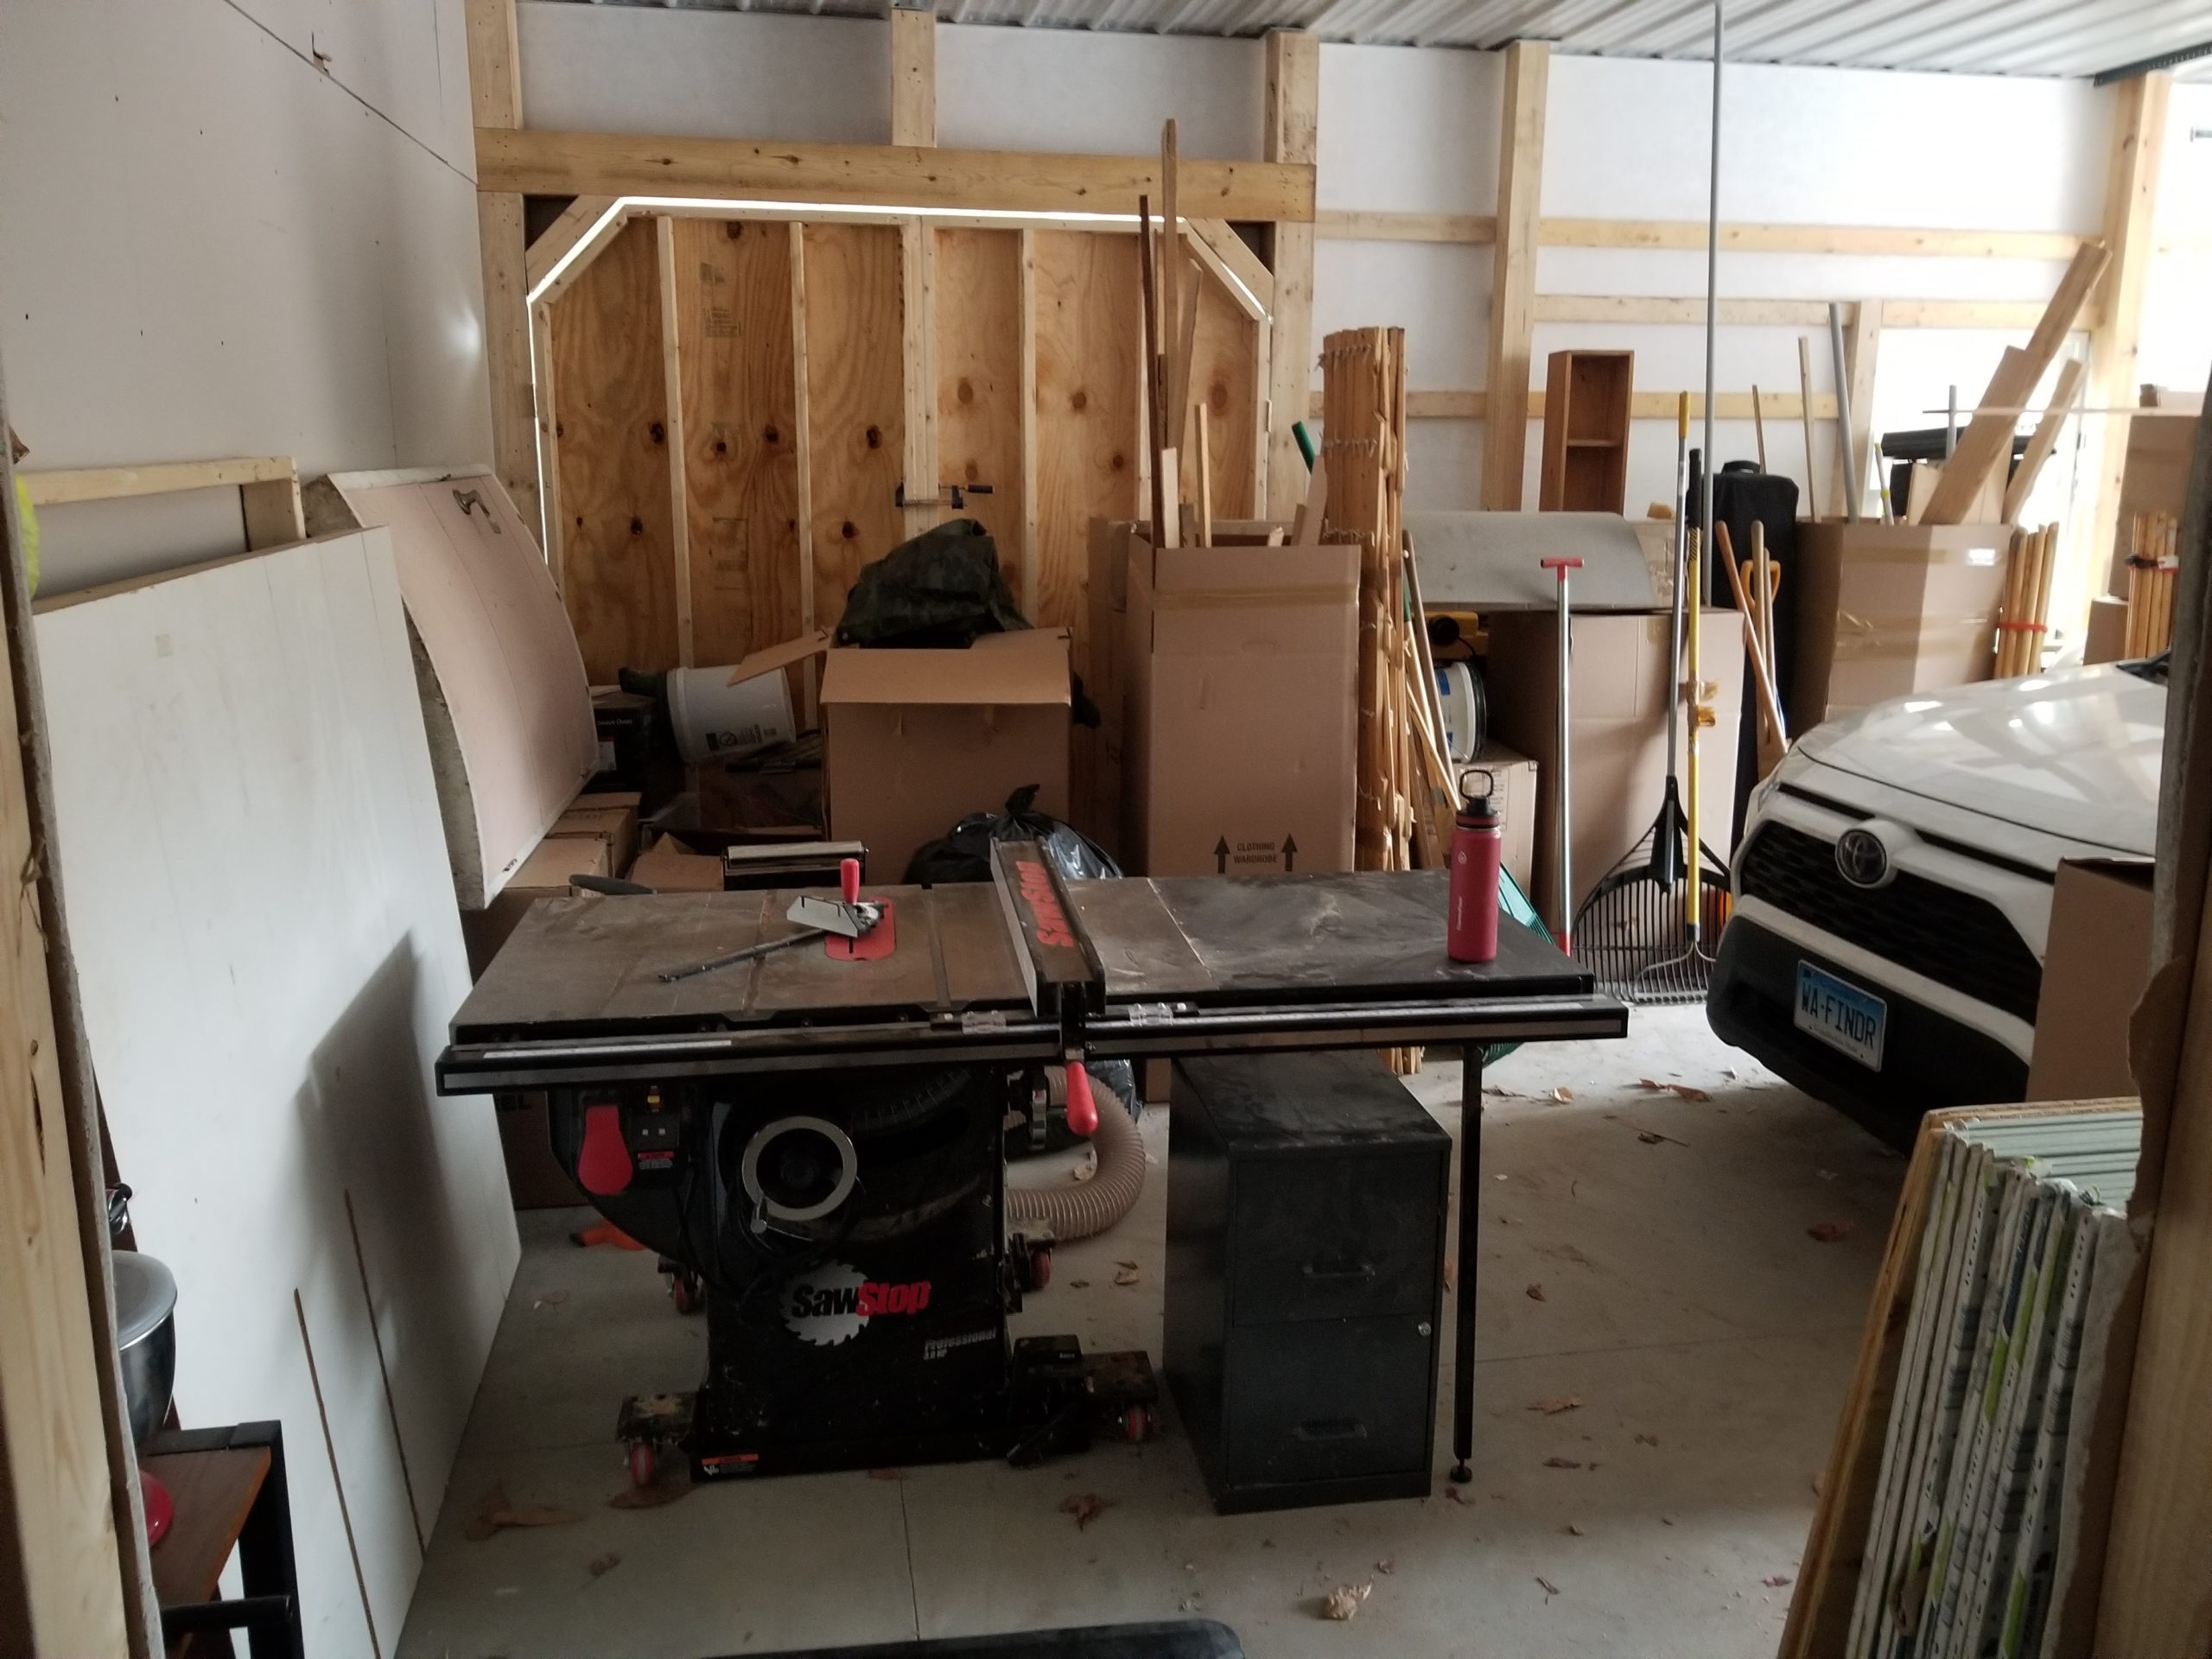
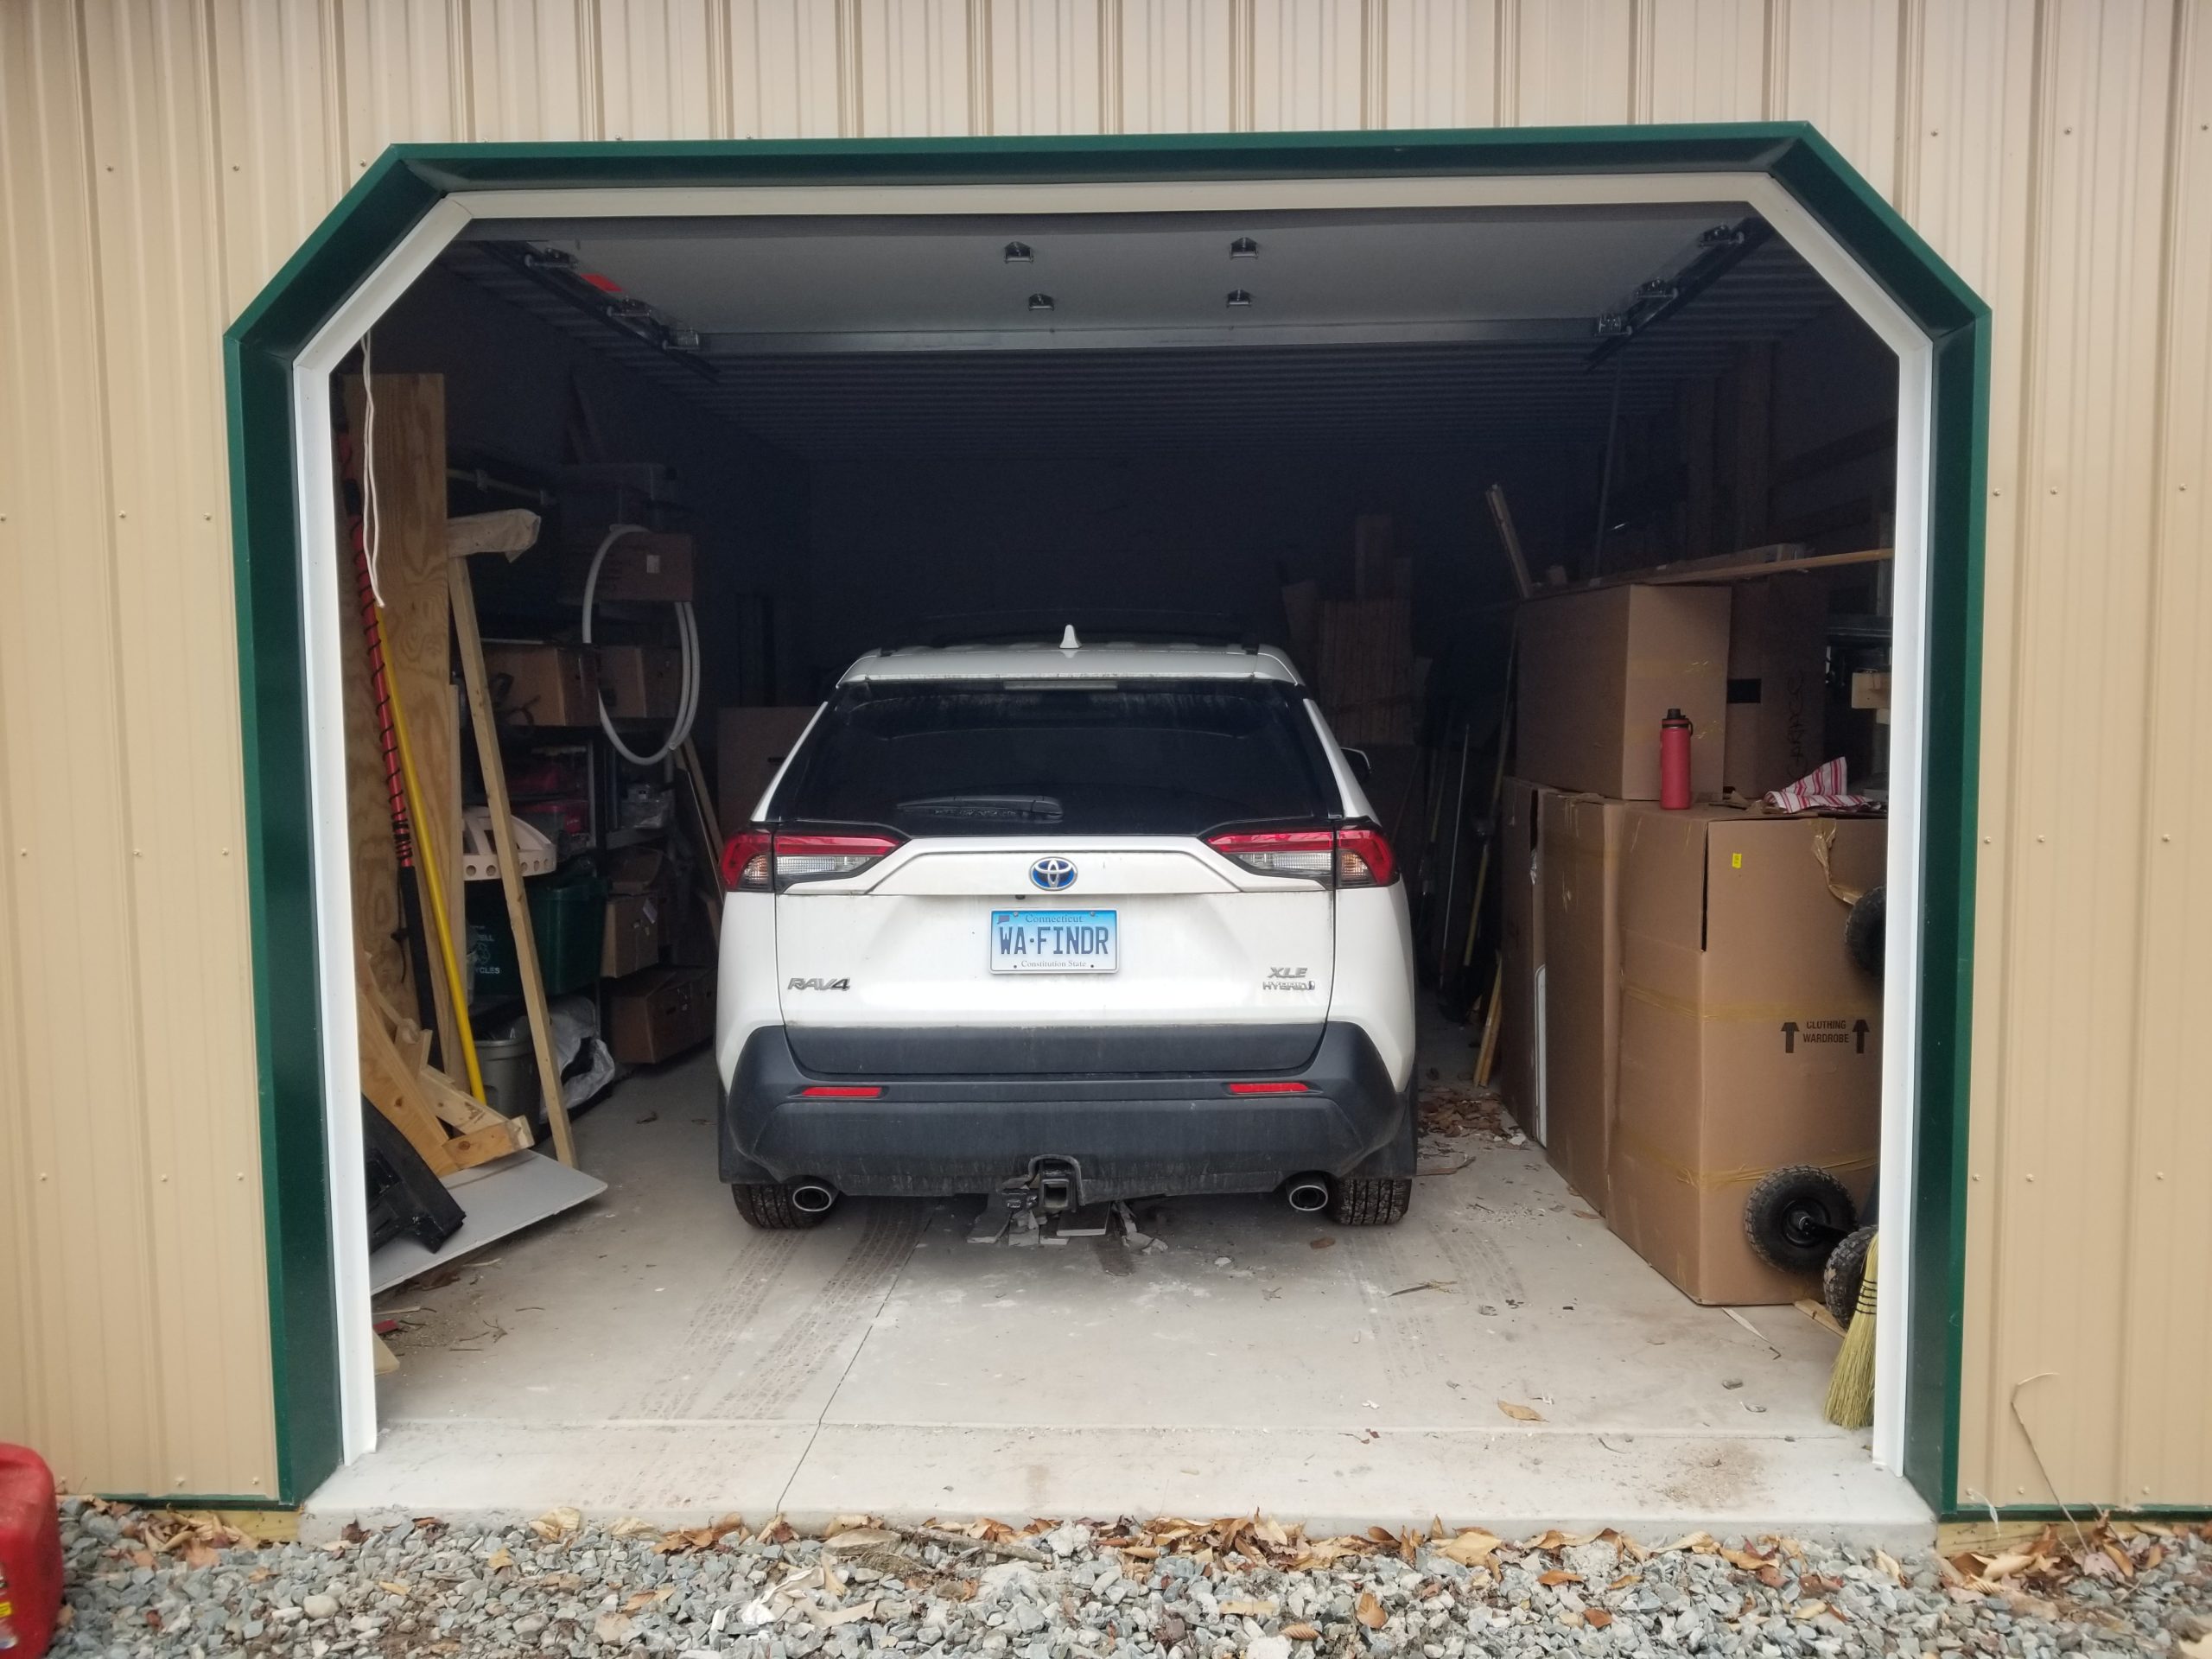
This process also let me inspect each box in the garage and give it a more useful label. Some things got unpacked for immediate use, like those 3″ construction screws I found and I liberated my workbench, too. I managed to make good use of the shelving units and was able to make a car-sized void in the garage so at long last I can actually park in it! There’s no power opener (well, there’s no power yet, either!) and actually there’s not even a handle on the outside of the door, so opening and closing the door is reduced to yanking a thin rope. Kinda inconvenient, but it’ll do for now. For sure when I have power in the W.O.G., I will install an electric door opener for this.
In random HomeBox interior news, some little things recently arrived which make the T.H.R.O.N.E. Room a bit more homey.
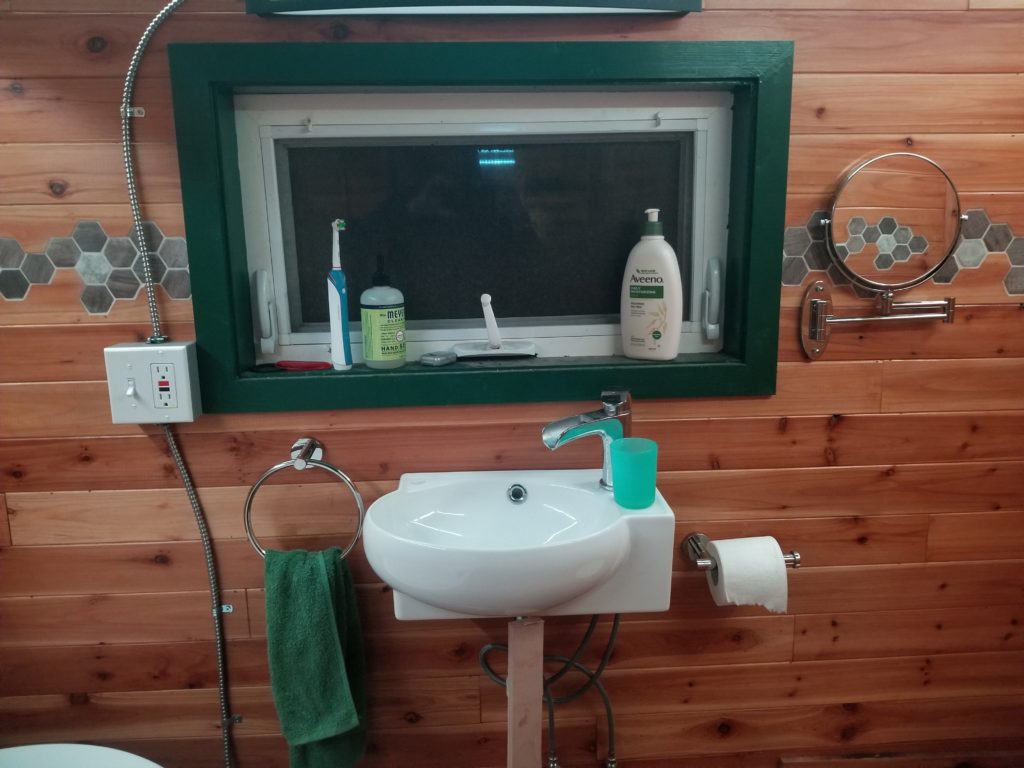
What’s new in this picture? Towel ring, TP holder, and a mirror! It wasn’t until a solid 3 weeks of being here that I had any mirror at all, and at that point, just a little handheld one. That works for some minor tasks but is difficult to use for grooming and haircuts. I will probably install some wee shelves or something in here to hold the stuff that’s currently living on the window sill, but that’s definitely a very low priority thing right now. The window sill is doing a fine job of holding my essential bathroom supplies.
Two more topics for today’s update. The first, a realization: while it is tidy to put my bedding away in the BeDiLiA bench every morning, there’s actually no need for that. I mean, if I’m having guests, sure, I should put the bedding away to make the BeDiLiA tidy. But if it’s just me, there’s plenty of room to leave the bedding out, to the side, where (a) it stays warmer and (b) is much easier to put onto and offa the bed. Evidently, it took me a month to realize this. Well, at least I did realize this! I had been thinking that the in-bench storage of the bedding, while effective, was also really inconvenient because the bench boxes can only be accessed by crawling on the table (in the down position) with the cushions set aside. This was a lot of machination for everyday operations. Much thought had gone into various ways to make the bench storage more accessible, but really, the right solution is simply not to use that storage for everyday things!
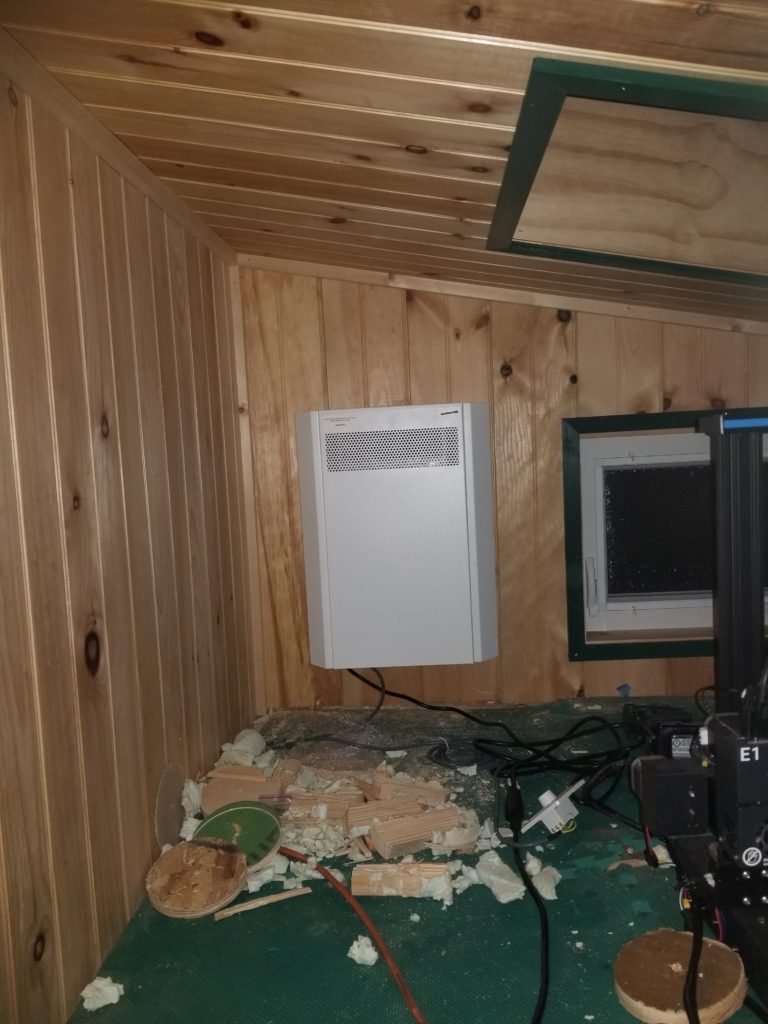
And finally, the Heat Recovery Ventilator. Installation had a few challenges.
First, the housing of the unit itself had two things stuck to it, a label with some electrical warnings and the manufacturer’s badge. The thing is, they were upside down! The cords come out the bottom of the device. The access panel folds down and forward. The installation template shows the ducts are toward the bottom of the housing. If all these things are true and consistent, then why, when orienting the machine accordingly, are the label and badge upside down? Factory worker being silly or defiant, maybe? No idea. But it sure threw me as I was trying to ascertain exactly which way was up for this thing. The space in which it was to be installed would not accommodate inverting it if I got this wrong and I was not at all keen to drill a pair of 5″ holes in the side of the house only to discover they were wrong and I needed to drill two more.
After finally assuring myself that the label and badge were simply applied wrong and that the device itself could only be oriented properly one way, I committed to installing it that way, upside-down markings and all.
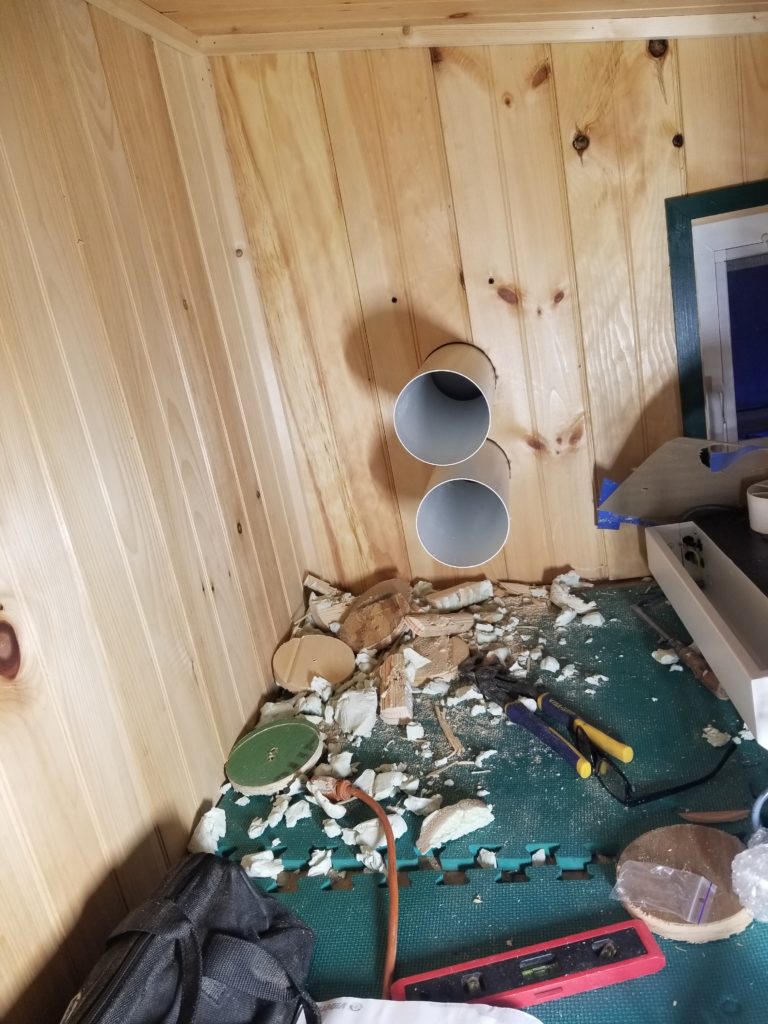
First thing, drill those 5″ holes through the wall! I had located the unit decently centered between the interior wall and the window, for aesthetic reasons, as well as practical ones – it would be easier to install with some room on both sides. There was one thing I didn’t do before I started to drill, though. Can you guess what that was, looking at this picture?
I failed to consider where the studs were. I probably could have located the machine 3″ to the left without making it too hard to install, though for sure it would look odd there, grossly not-centered on the wall. The ducts are actually centered on the machine and the body of the machine is wide enough that I could have re-drilled those holes 3″ to the left and had the body of the machine cover this unfortunate lack of forethought, but that would actually have been very difficult, since there would be nothing to guide the hole saw and it probably would have wandered into this partial cut, making a big mess of everything. I remembered building this little piece of wall (it’s the tail end of the house, in the cozy loft) and I know that this stud is not particularly important to the structural integrity of the house. Two or more of them missing might matter, but one, nah, one can go no problem. So I just kept at it.
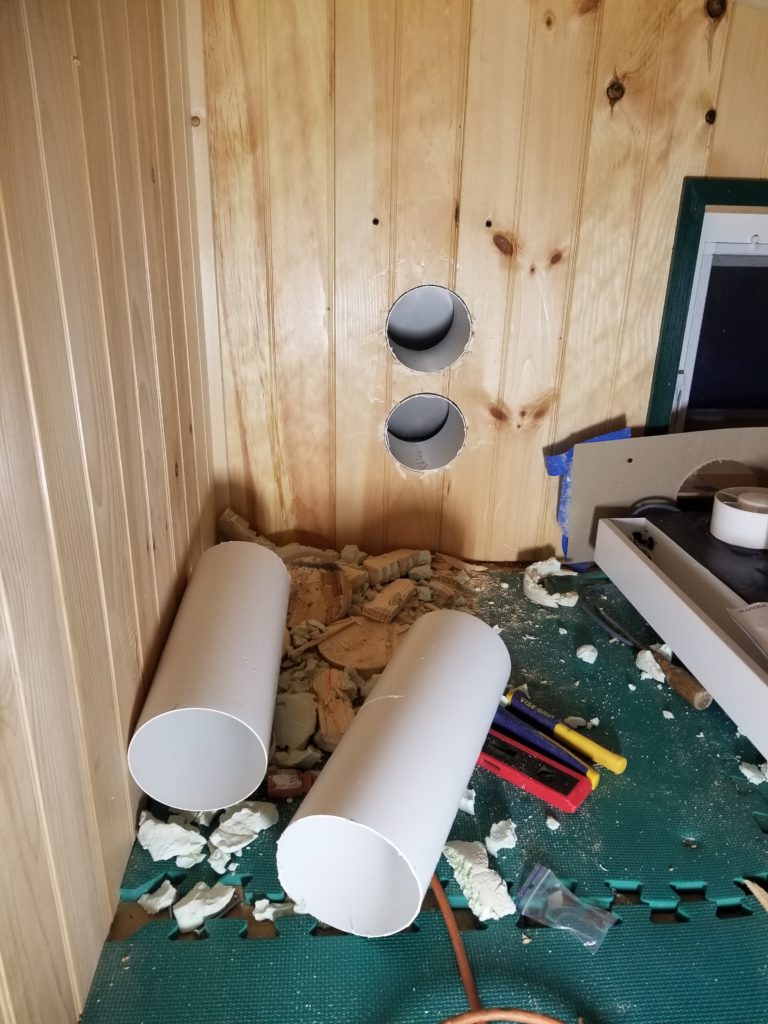
The instructions said to let the plastic ducts extend 10mm outside the house, set them in expanding foam, let that harden, then trim them flush to the interior. It was cold and I wasn’t certain the spray foam was going to set up properly in that temperature. And anyway, marking and cutting the ducts at the necessary angle outside, at the top of a ladder, in winter, didn’t sound like fun to me. I had a better idea: install the vent cover outside, then simply push the ducts through until they met the cover, which was already angled down to shed rain so even hitting the cover with the duct wasn’t going to block it — no need to make an angle cut at all or even measure a specific offset from the side of the house. So that’s what I did. What about the foam for insulating around the ducts? Not necessary. They fit snugly as-was and my walls are already filled with foam (that’s the green stuff in the previous picture). What about a tiny bit of air space around the ducts letting bugs or cold air into the house? Nope, the back of the HRV unit is one big gasket, quite effectively sealing it all out. Okay, then, all I need to do is cut these ducts flush with the interior and I’m good to go. MultiMax to the rescue… again.
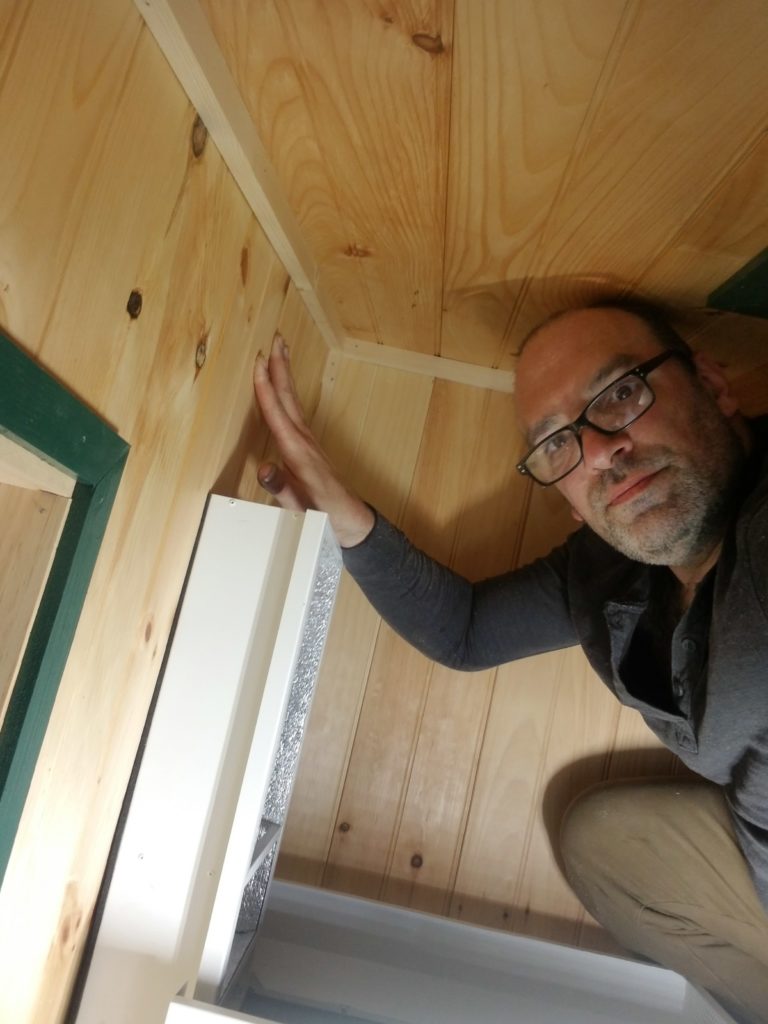
If it looks a little cozy (“cramped”), that’s because it is.
Here’s me in the space, as I complete the installation, showing just how much space there isn’t up here.
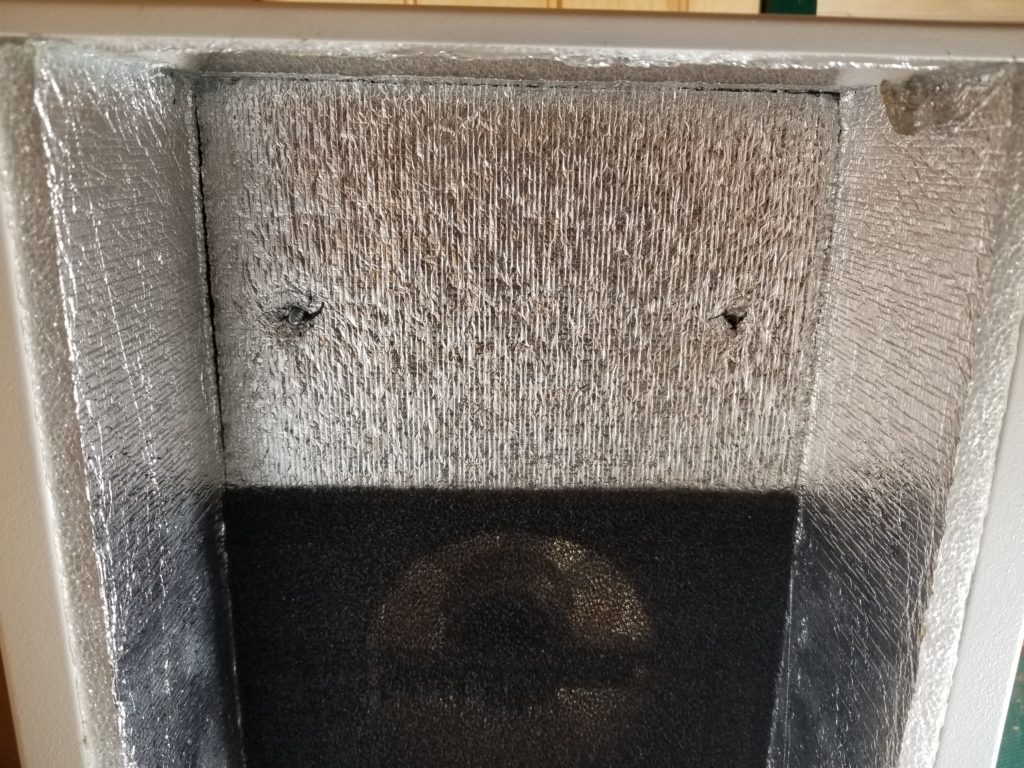
Four screws mount the unit to the wall. But what there aren’t is any indication where those screws should go! Feeling through the gasket on the back of the unit, I can find some bosses that align with the markings on the mounting template. The screws must go through those. Okay, but how to locate those holes from the front, where the screws get driven from? Any pre-punched holes, or even markings? Nope, just some insulation inside the unit (silver sparkly stuff in the picture).
I found those bosses again by touch and just worked the screws in through them from the back to pierce the insulation. This made little holes I could see from the front, so I could properly locate the screws for mounting. While I appreciate that it may be difficult to pre-punch some holes in the foil insulation for this, the least they could have done is punched through the sheet metal and the gasket rather than making me feel for it.
And done.
You can see what I mean about how odd it would look if this machine had been shifted 3″ to the left. It would also have been difficult to install simply because that would pretty much consume all the hand room on that side.
Outside, it looks like this (the double-louver thing is the vent/intake cap at the other end of the ducts).
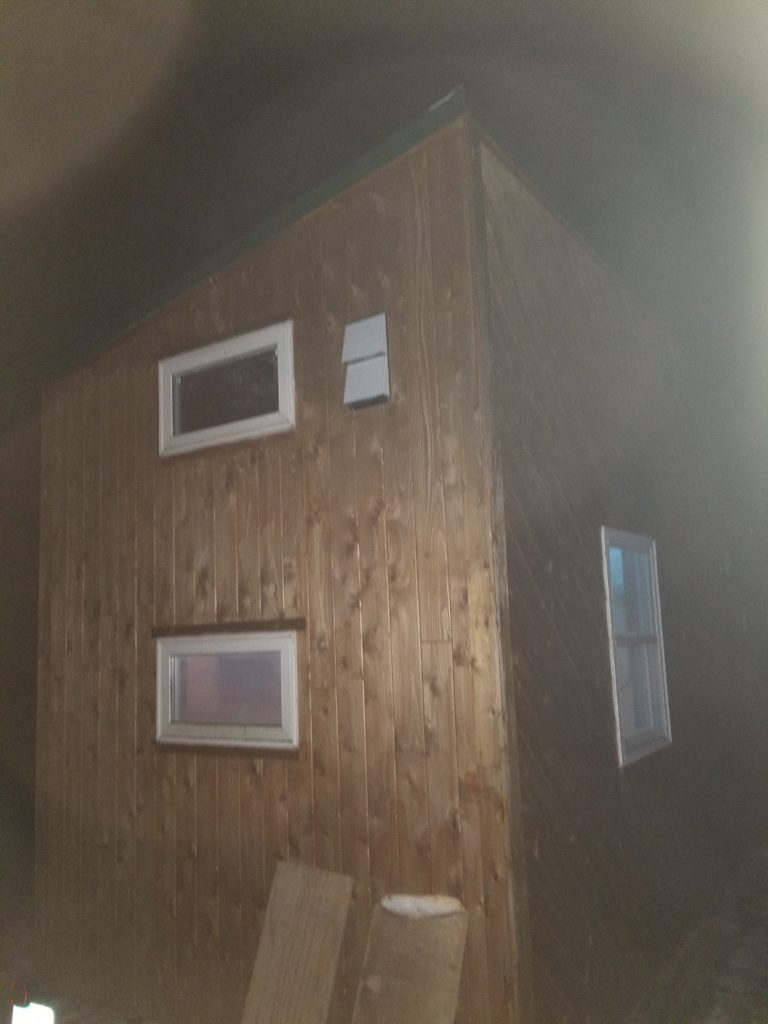
While I was up there, I did notice something alarming. Evidently, a woodpecker has found my house appealing.
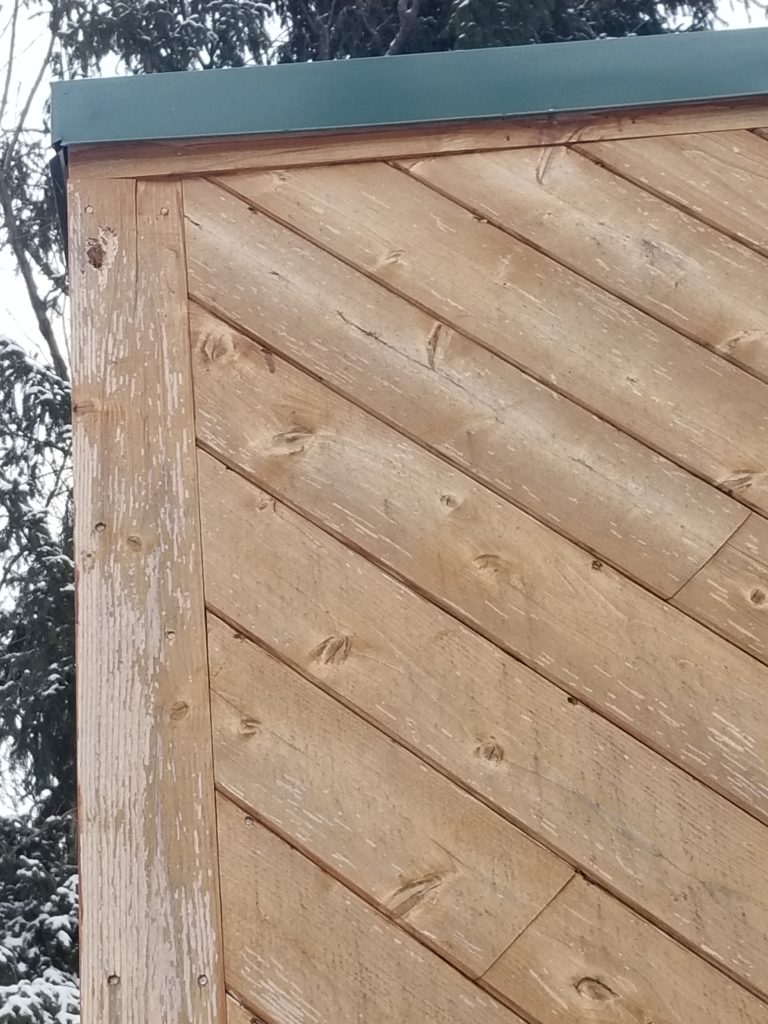
That, and disappointingly soon after I applied the exterior finish, it’s clearly time to apply some more. Or maybe not – the wood is cedar, if I just let it weather, it’ll turn a nice gray. I do like the ruddy look, though, and it goes nicely with the green roof & accent paint (which is color-matched to the roof), so maybe it’s worth the trouble. Or maybe not. Ask me again next year, when I still have so many other things I want to be doing besides refinishing the house.