I liked the look of those cabinet doors and the bednette table so much, I decided that’s how I’m going to dress all the cabinet doors and drawers in the house, which, as it turns out, is more than you might think. This represents two days of Panelpalooza:
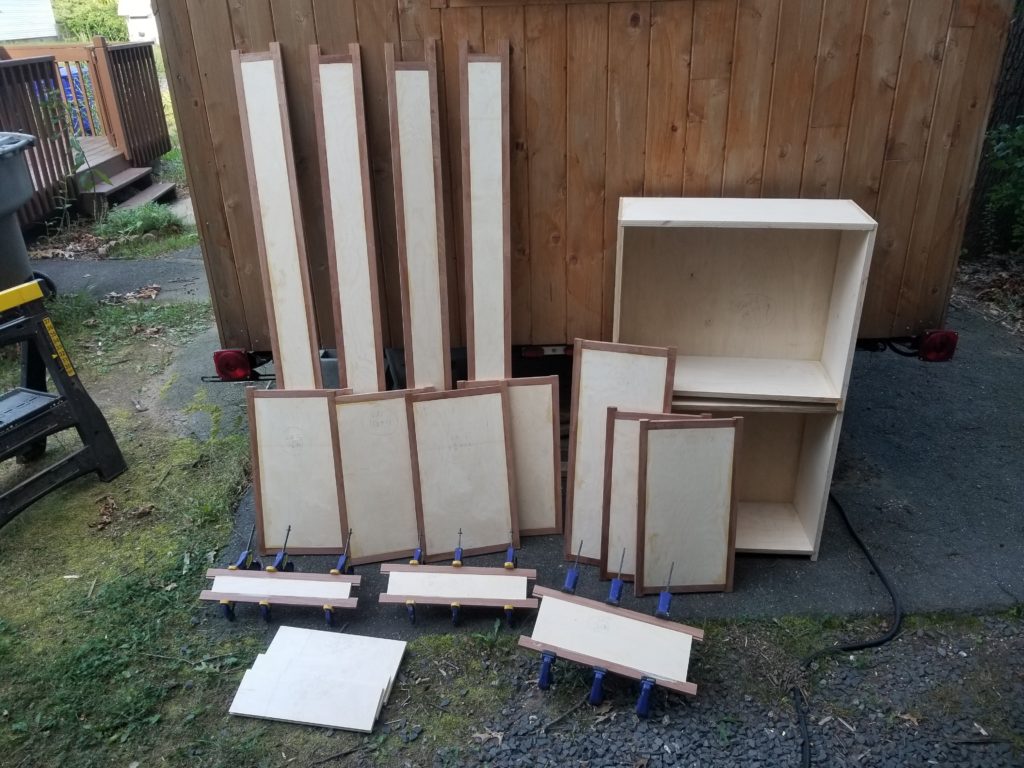
I didn’t quite finish all of them, and obviously, the edges need to be cut flush, as well, but this does represent rather a lot of work, even if maybe it doesn’t look that way.
What’s the work?
- Cut all the rectangles from four sheets of plywood.
- Mill grooves on all four edges of all rectangles, including those long skinny ones, to mate with the trim
- Take a pair of 13-foot x 6″ long x nearly 1 inch thick boards and turn them in to a lot of strips 1-1/4″ wide by 5/8″ thick.
- Mill a tongue onto each of those strips.
- Using oversize strips on long sides, glue each one in place.
- Cut excess off after glue dries.
- Transfer each panel’s short side width to a pair of short trim strips and cut them to fit perfectly, exactly as built (never mind what measurement I thought they were supposed to be).
- Mill grooves in the ends of those.
- Apply glue and tap into place.
There were four bifold door panels, six drawer fronts, 4 cabinet doors, 3 pantry doors, and two new cabinet bodies, too, for that matter, which were their own labor of layout, grooving, refining, gluing, clamping.
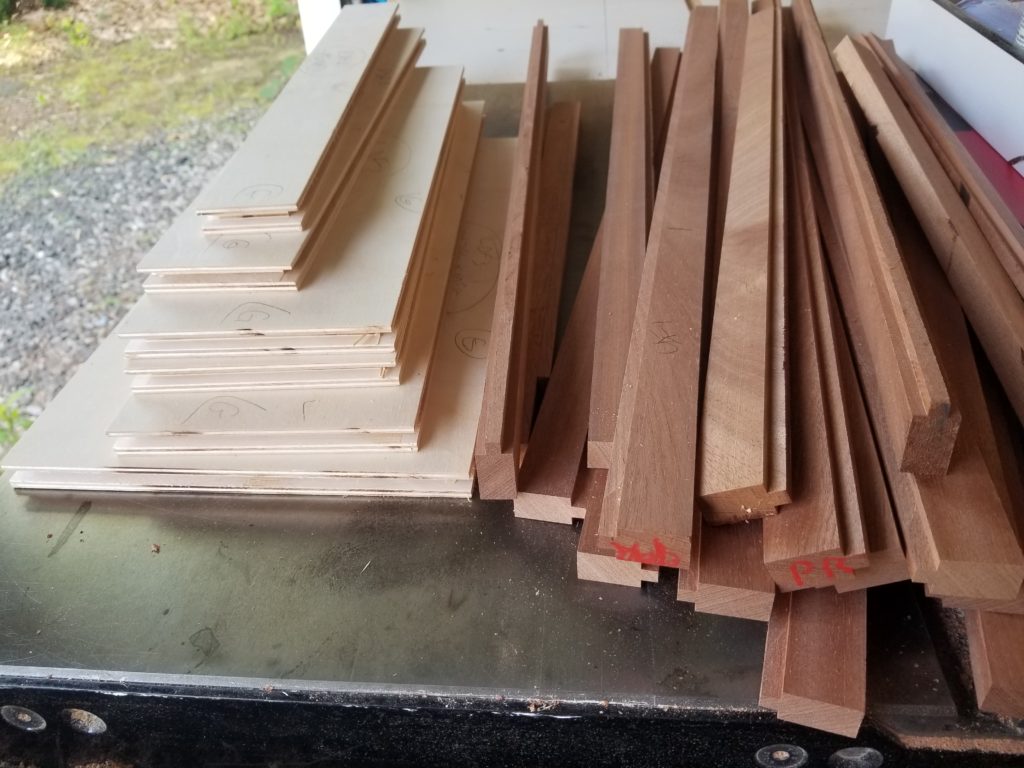
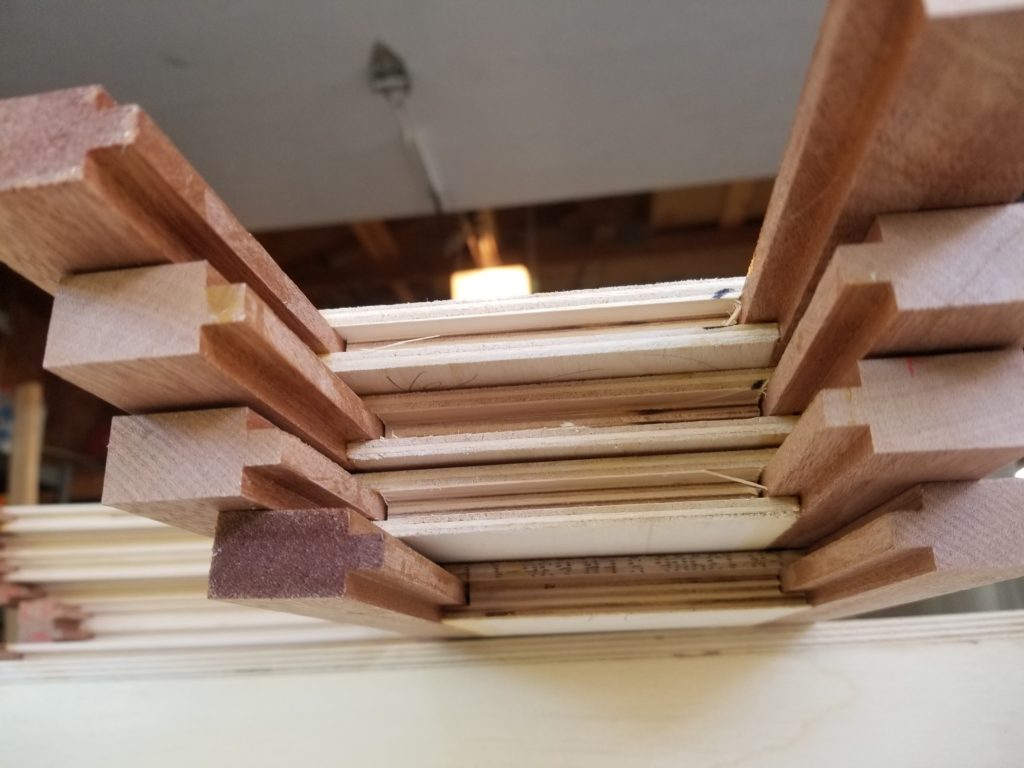
A bunch of ready-to-cut strips, with tongue features, and a short stack of drawer fronts with side grooves (all panels were build this same way, regardless of size).
To keep it all sane as I worked, each piece was identified by an abbreviation for what it was as well as what size it was supposed to be. Why mark the size? Easy: cutting rectangles from a big piece of plywood is awkward if one doesn’t have a panel or track saw (I don’t), so precision is only so-so in that operation. I opt to cut them slightly oversize, then go back with the individual parts and cut them again to exact size. Thus, knowing what their final size should be on a part-by-part basis is useful and going back to my drawings to look up each one is a bother. Hence, each part marked with its name and size.
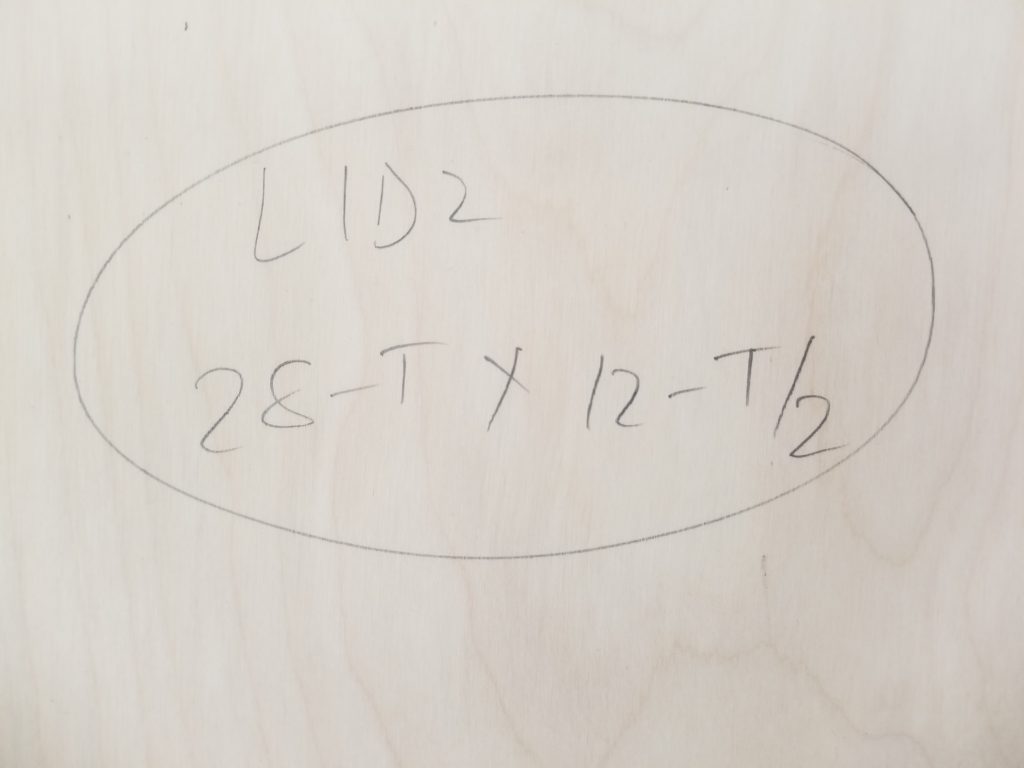
Sometimes, the size of the part references the thickness of material rather than some specific number. That’s “T” as shown above. Plywood, be it US or metric (cabinet plywood is sold in metric thicknesses), is rarely the size they say it is. For that matter, from sheet to sheet they often vary a little. It doesn’t matter much for many things, but when trying to make a tight fit in a groove, say, it really matters that the thickness is what you think it is. Measuring by numbers can get you close, but there’s always marking and transcription errors. The best thing is to use the thing itself to measure and mark against that. In this case, for the 28-T dimension, I set the table saw to 28″ exactly, then put a shim of thickness T (namely, simply a piece of material) between the fence and the part, then cut. Presto, a part that is one thickness shorter than 28″, without having to translate my 18mm to inches (which doesn’t go well) or deal with any divergence from 18mm. The thickness literally is the thickness, so I know it’s right.
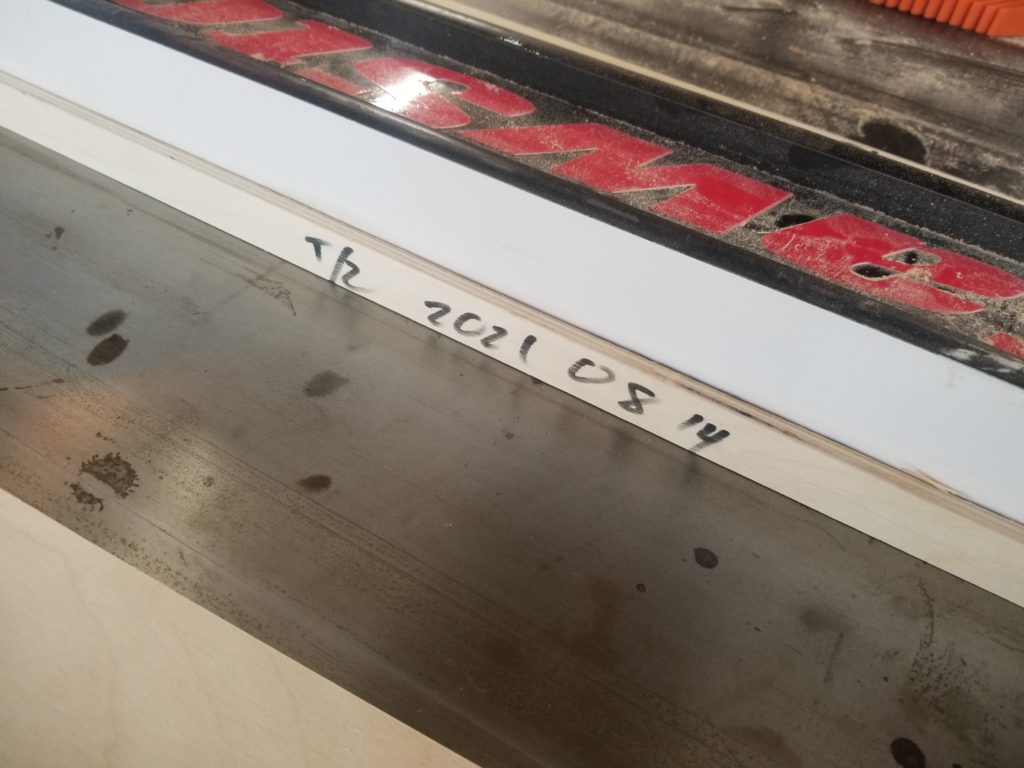
Because even different batches of plywood of the same nominal thickness can vary, I marked my shim with the date so I’d know it was the one that belongs to this batch of material.
Shim against rip fence 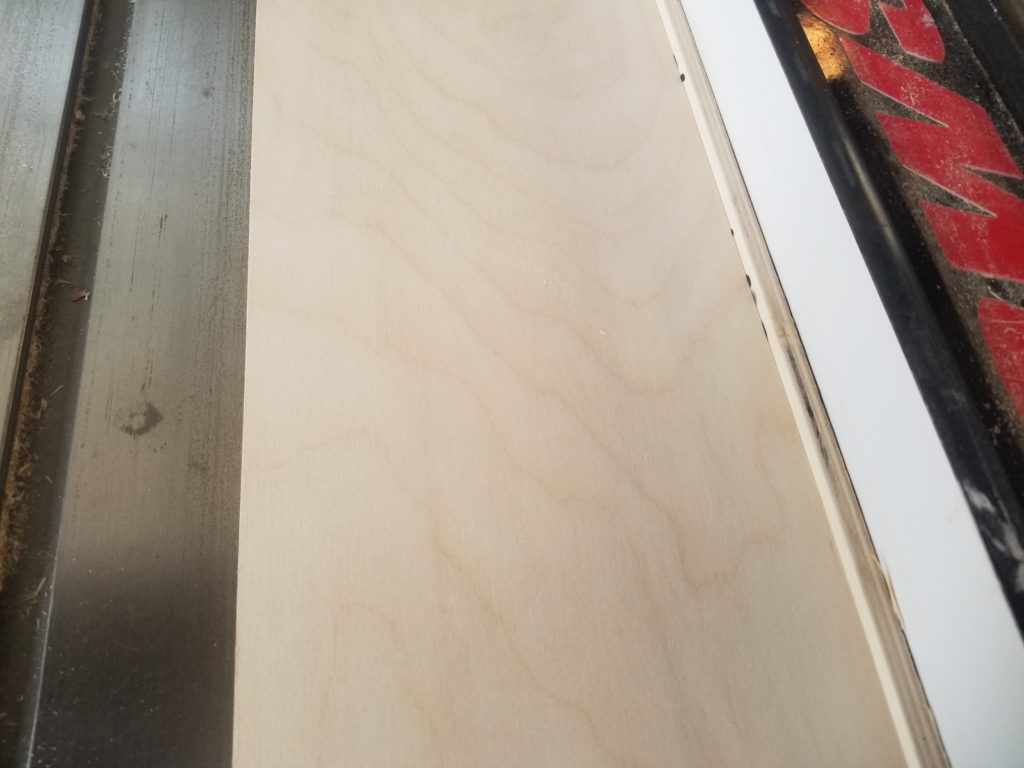
Stock against shim against rip fence
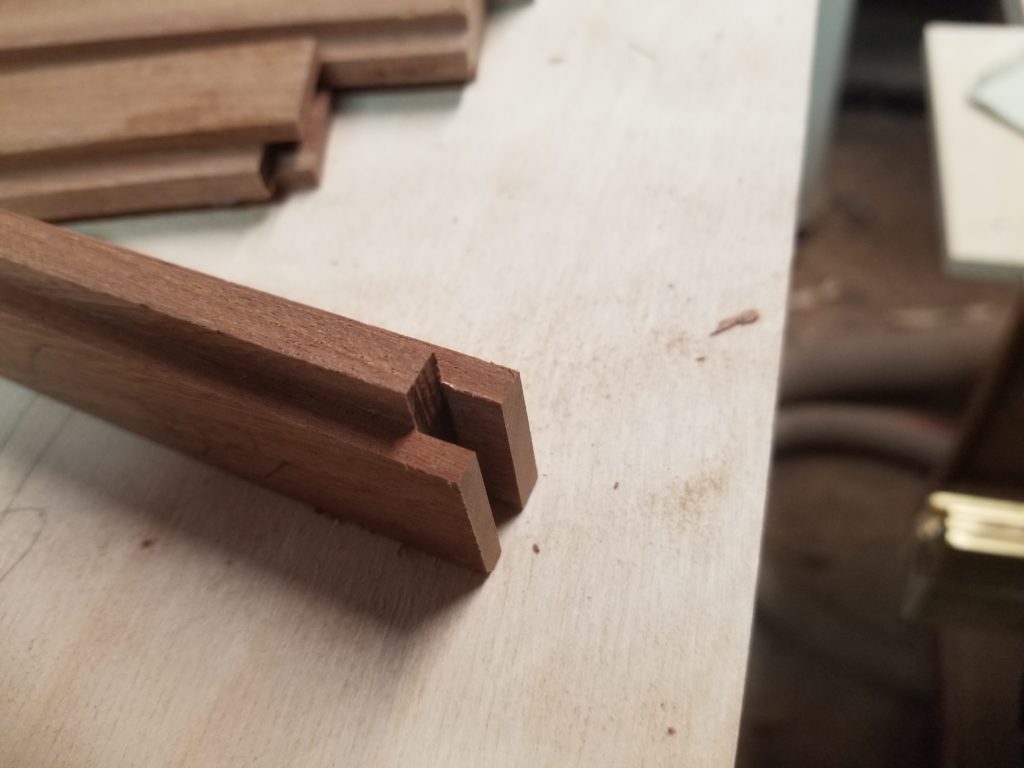
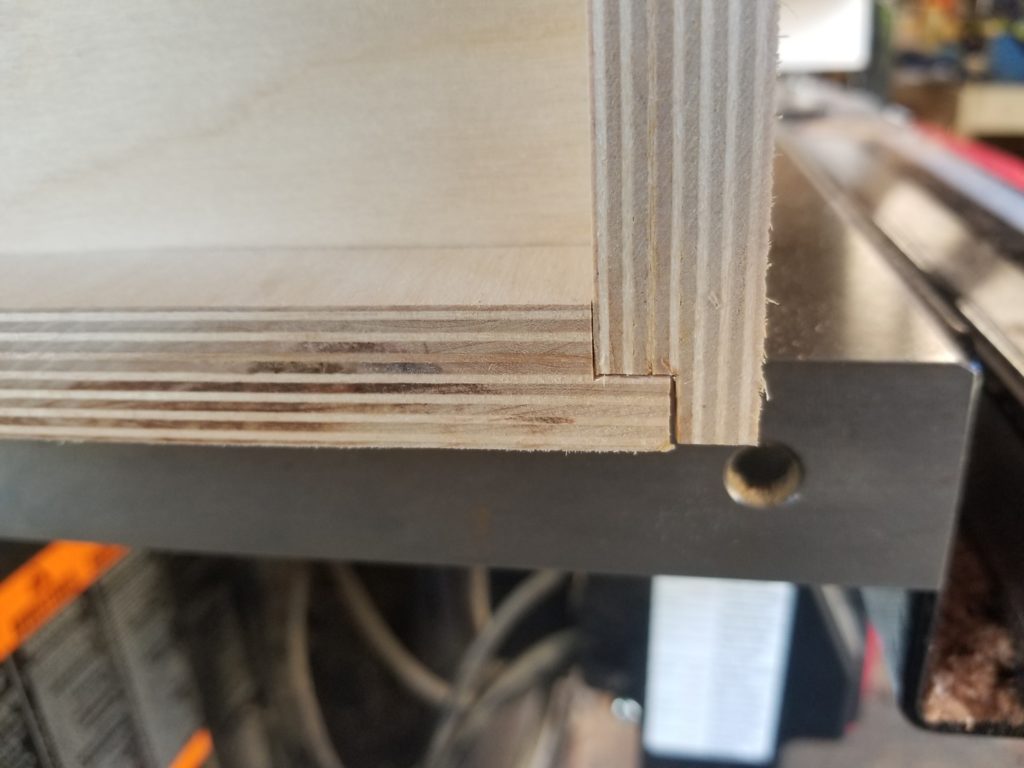
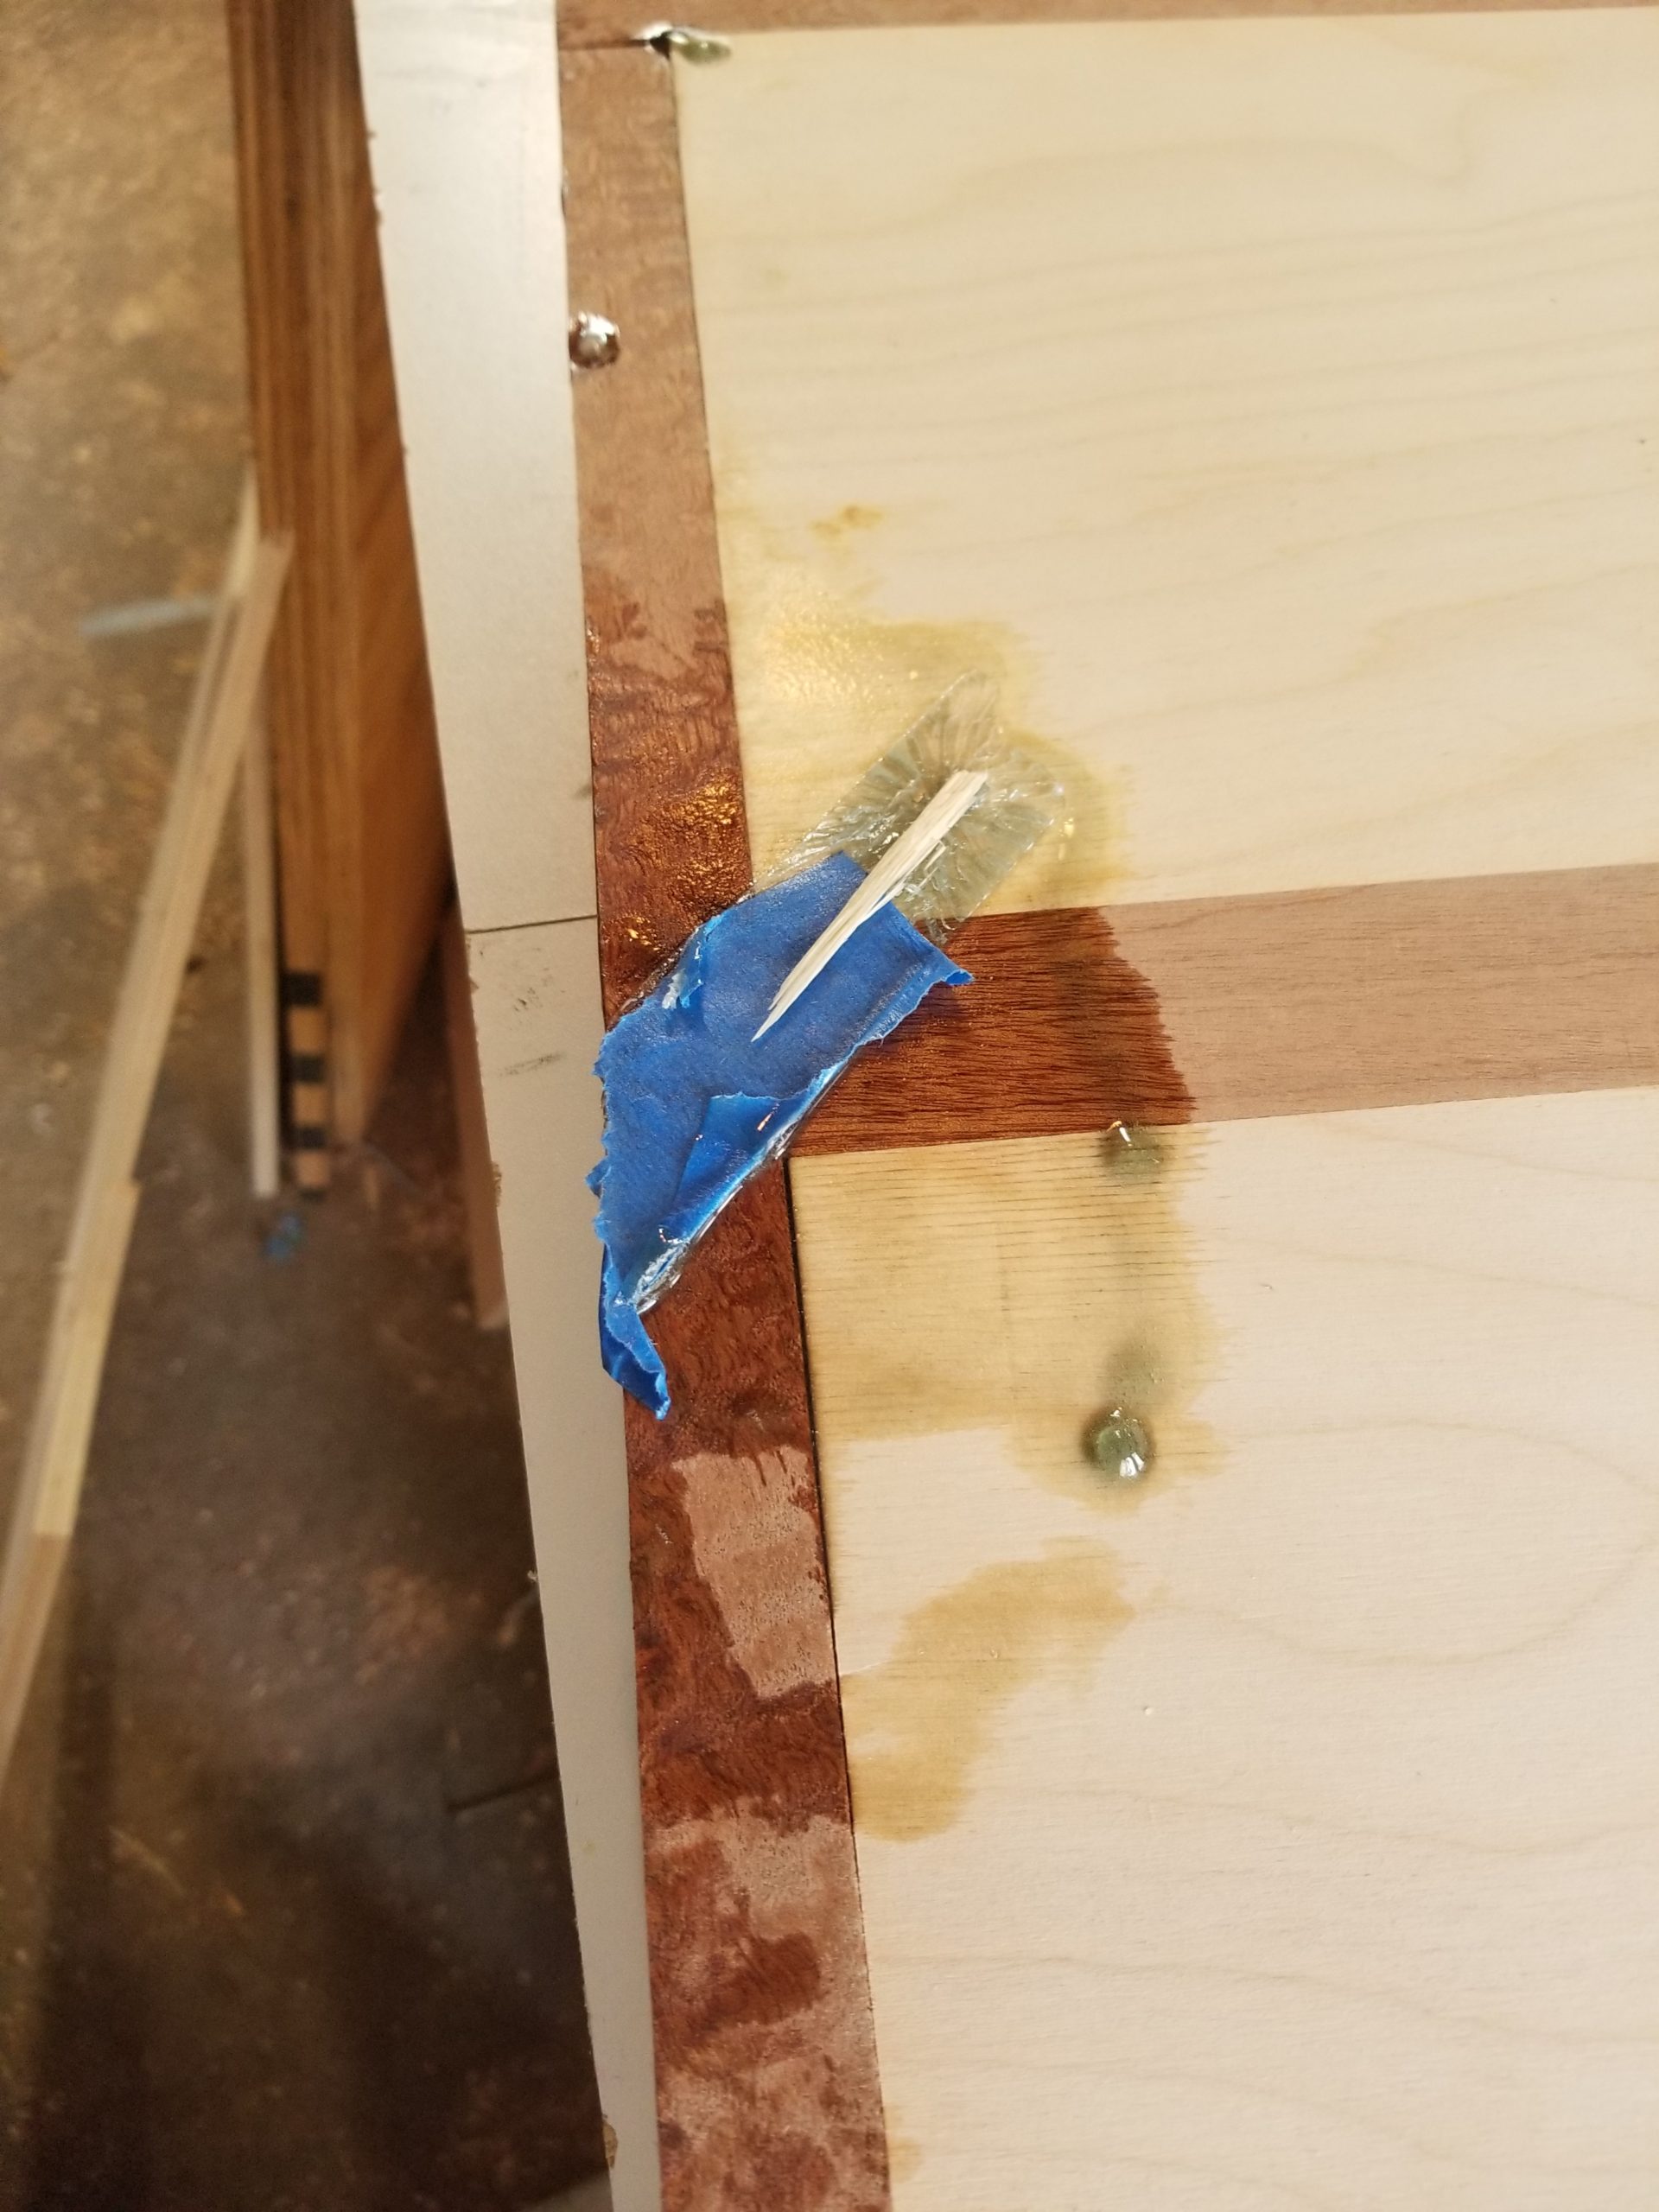
For best fit, knowing that nominally same-sized work isn’t always the same size when assembled, and knowing that this particular construction technique, unlike floating panels in frames, requires absolute precision, I glued on the long sides of the border trim first, then transferred the corresponding width as built so I could cut the short edge trim parts exact, without ever knowing their numeric measurement.
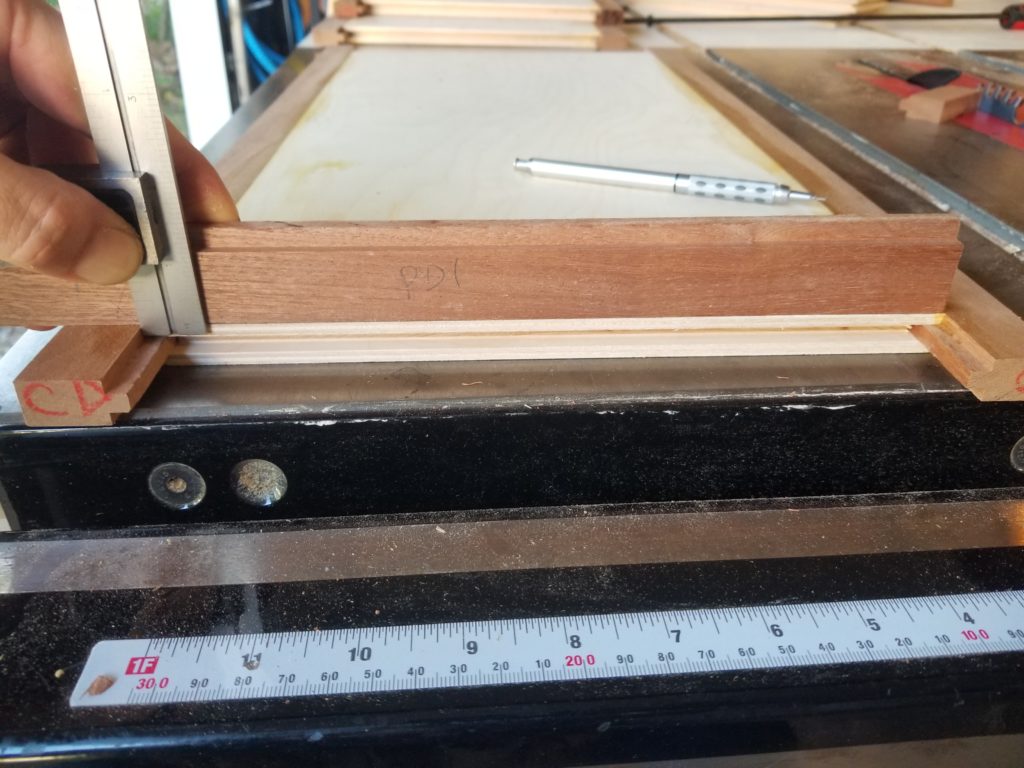
Lay the prospective trim piece in position, then use a mini-square to transfer the edge of the shoulder up to the new trim piece, then mark (to the left of the silver metal part). I needed three hands to take this as an action shot, so because I only had two hands today, the actual marking is not shown. Remove prospective trim piece, crosscut precisely at the table saw. Presto! Not quite absolutely perfect, but far, far closer than the other doors I did where I didn’t do it this way. A floating panel-in-frame, on the other hand, need not be precise at all and there’s a lot more give to just pull or push the parts together as needed to close the frame so if they aren’t perfect, it still looks perfect. This solid construction can’t do that, but it sure looks fine.
This photo adds nothing to the story, but I just thought it was a fun angle, so here ya go.
Speaking of photos, I don’t just take pictures of work! It’s been quite a while since I went on a nature walk with my SLR camera, but I do take work breaks in the yard and it turns out there’s some pretty flowers to be found right here at home sometimes.


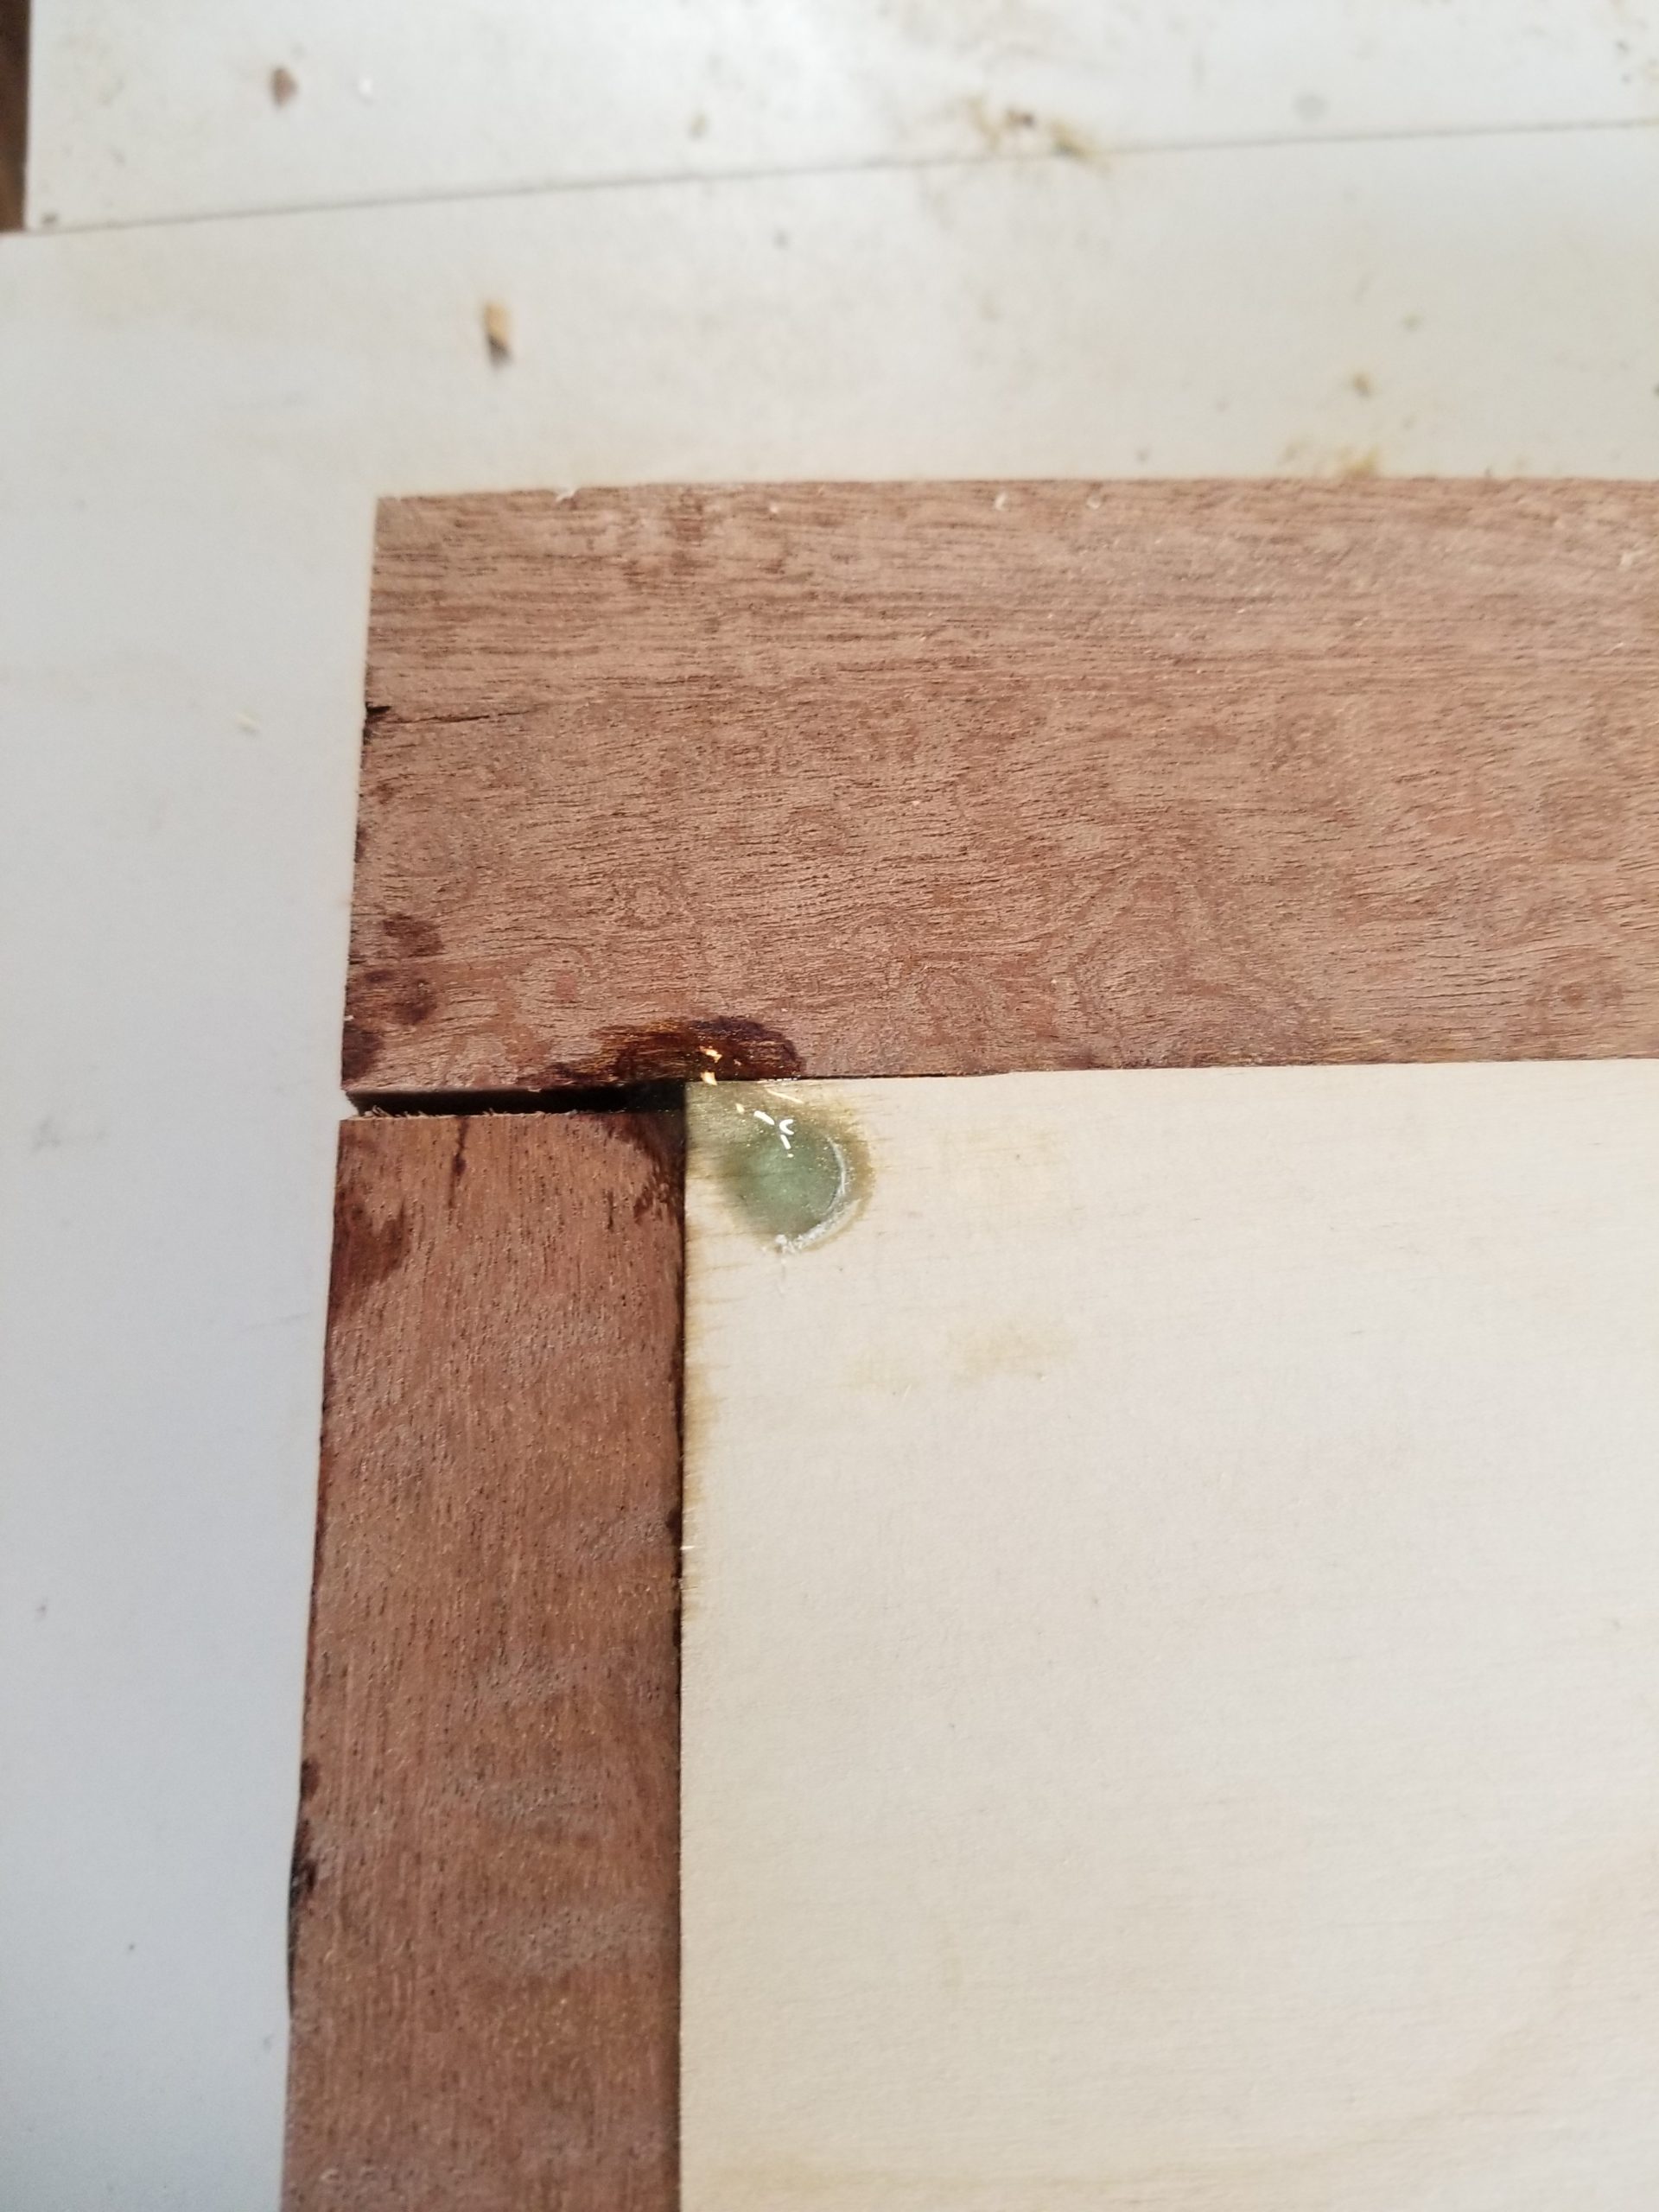
The hardest part of Panelpalooza was cutting the cross grooves in the short end trim pieces. It’s always hard to work with small parts and working with small parts on the router table is even more tricky than small parts elsewhere.
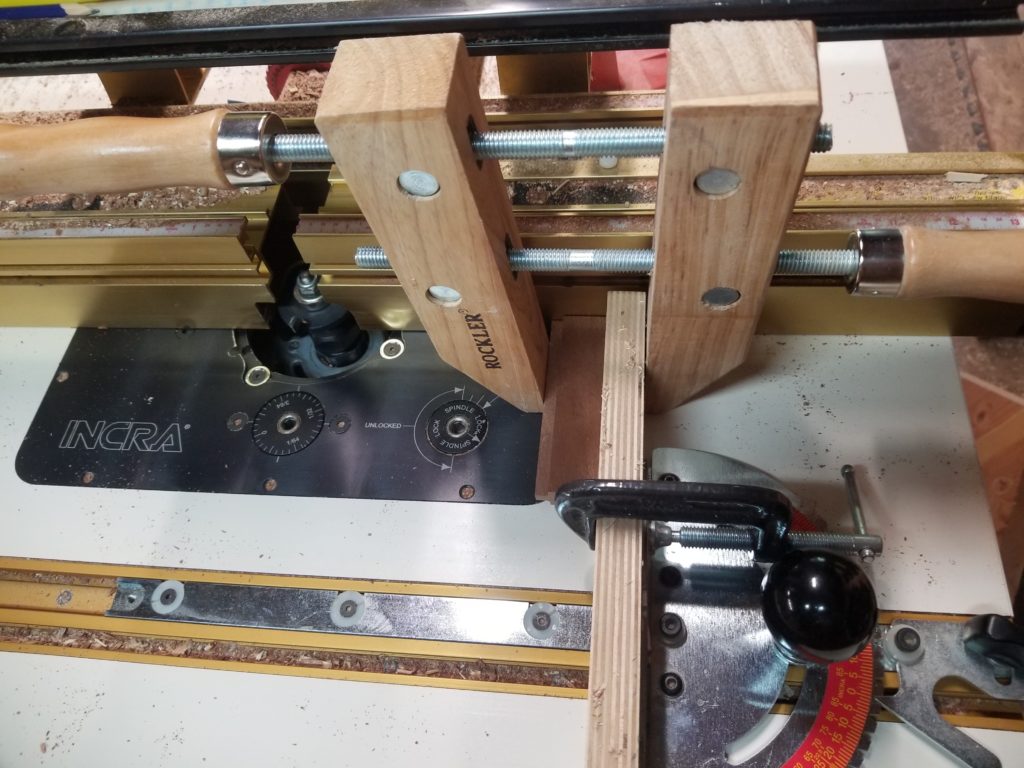
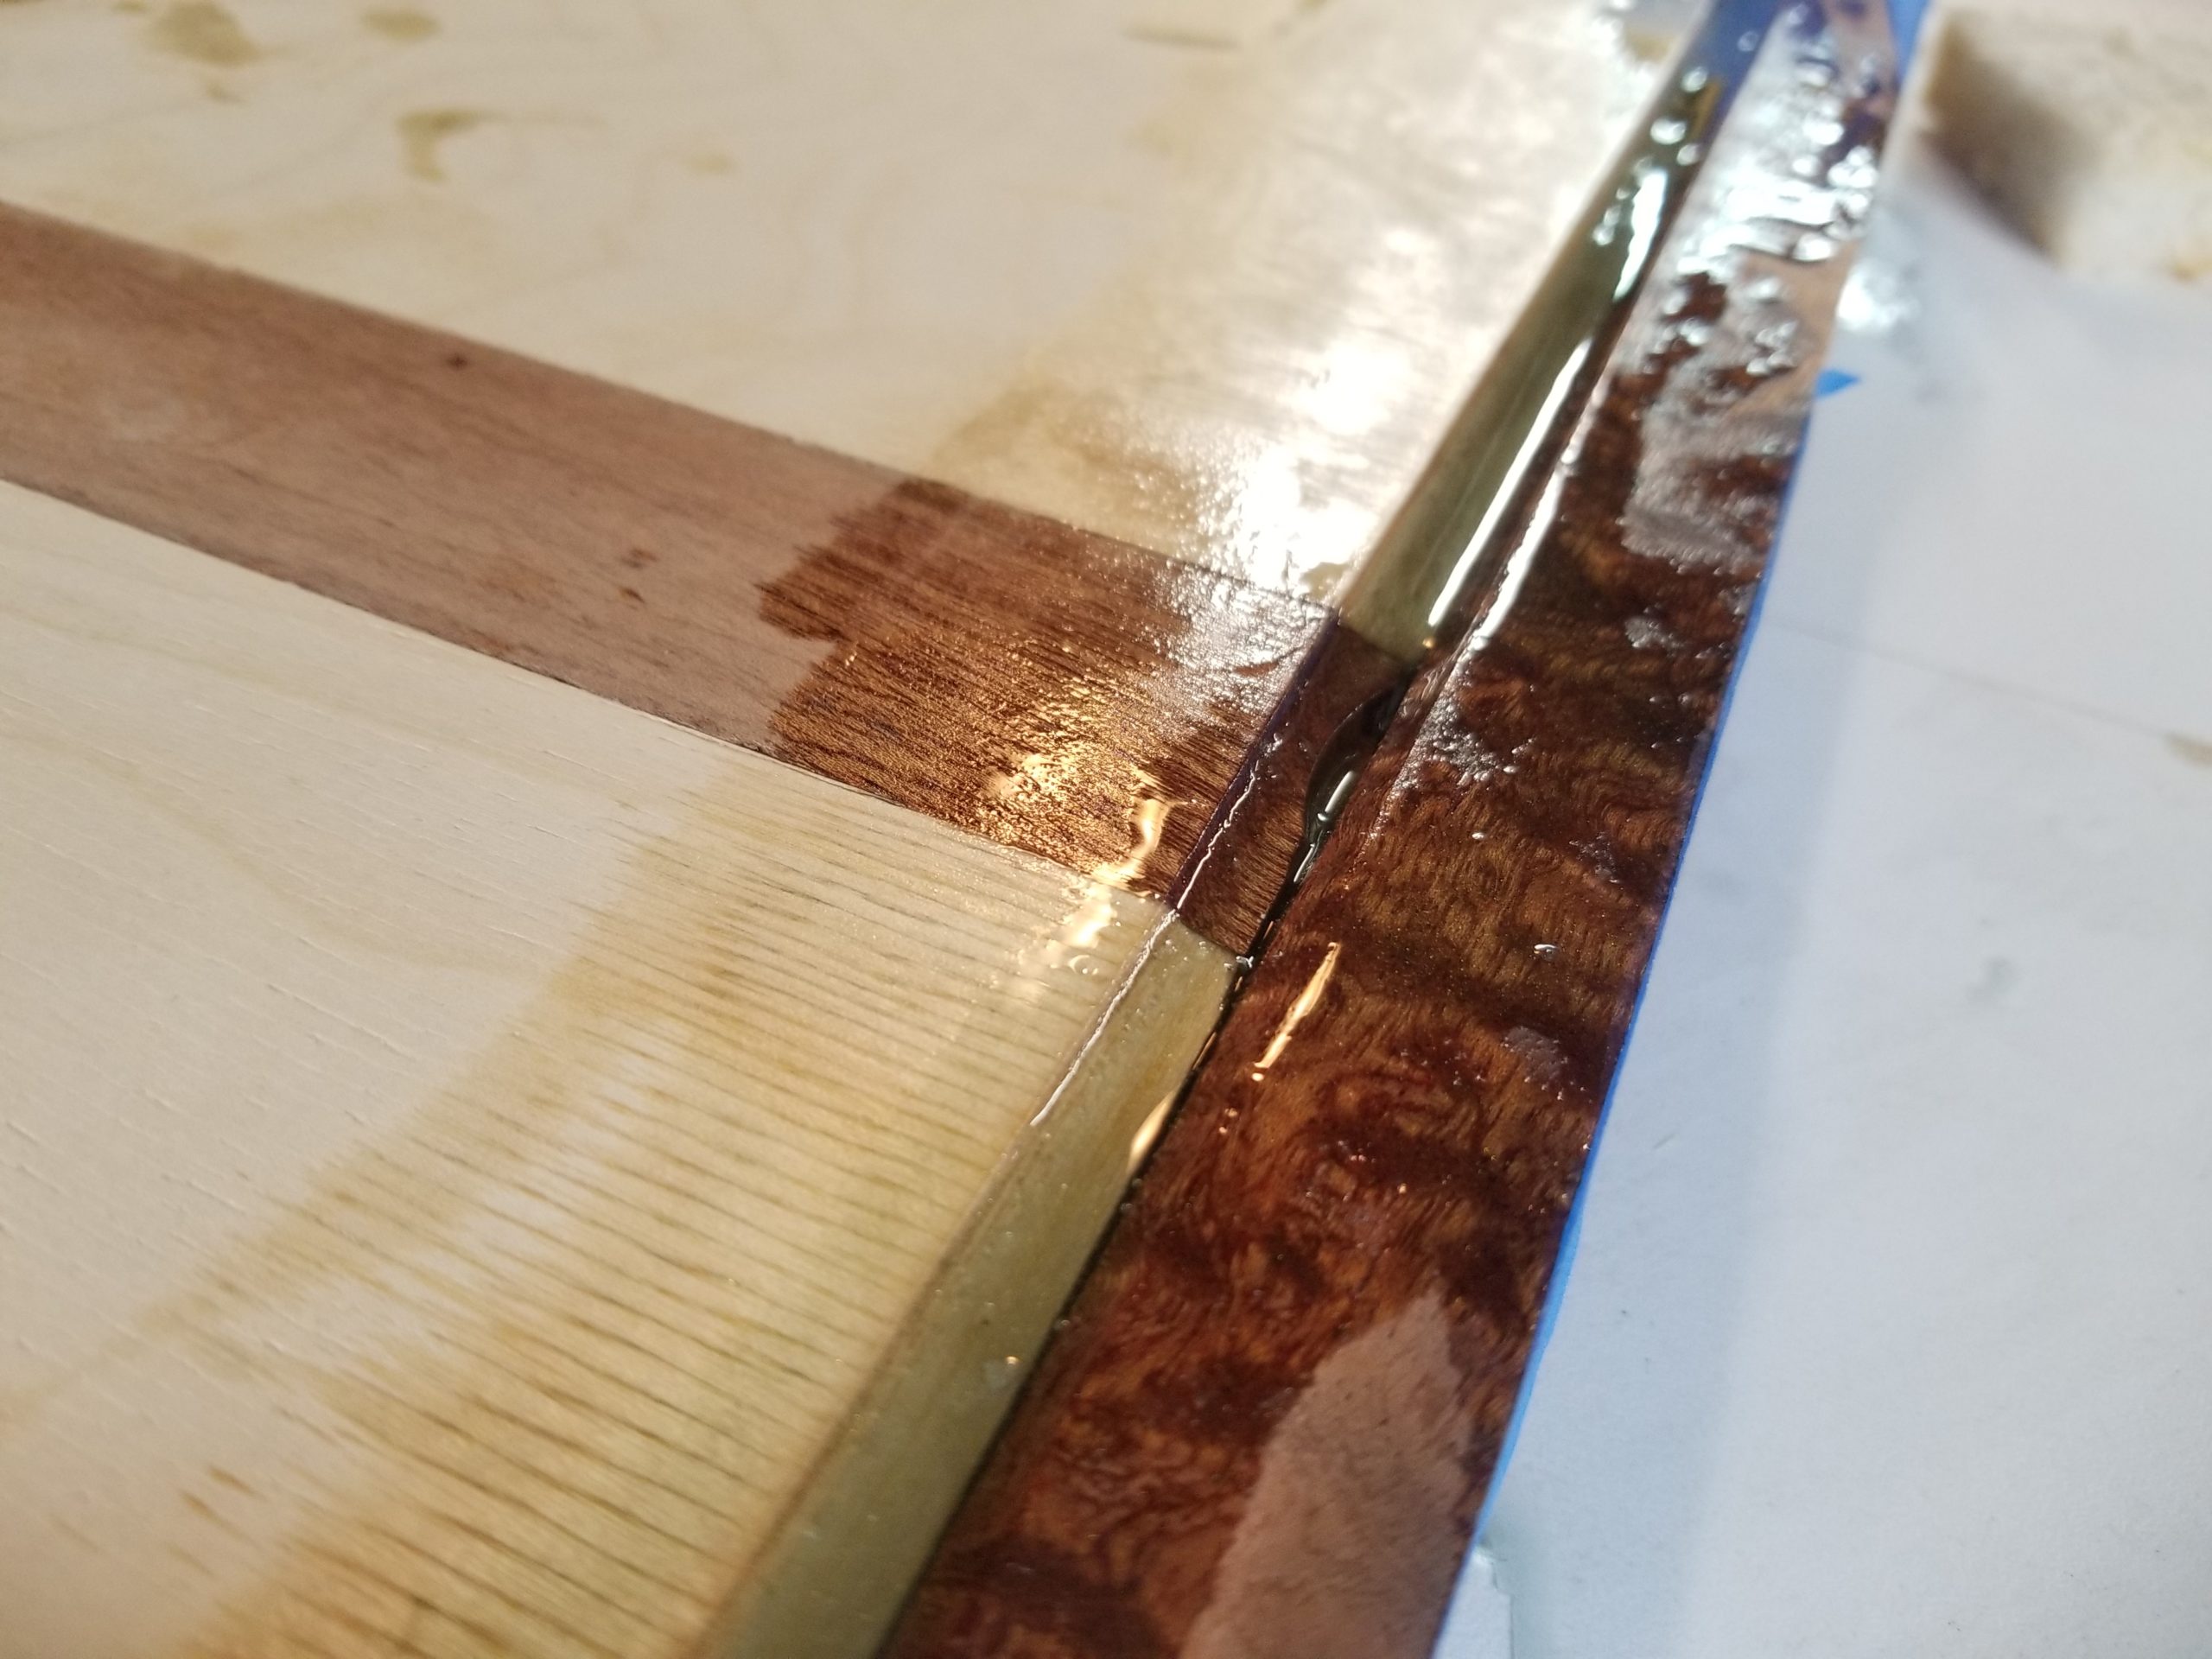
A beefy clamp and backer board clamped to sliding miter gauge did the trick, but slowed me down a bunch. Each piece had to be set against the rear fence (gold), clamp to the backer board (striped edge), then run through the bit, then backed out carefully, then flipped around, re-positioned, re-clamped, and re-run to groove the other edge. A lot of fussing about, since the fit had to be as close to perfect as I could make it so that these parts (shown below) mated perfectly with the long parts (in woodworking, the long vertical bits we call “stiles” and the horizontals we call “rails” — now you know, too). Getting that groove to line up perfectly with the tongue feature, too, required some finesse.
And some quick work with a sharp chisel to clean it up after because finesse wasn’t enough 🙂
And so it was, two days of Panelpalooza. I didn’t quite finish all the things, partly because I had to run out and get more sapele wood (the red stuff) because I somehow didn’t count all the parts properly when estimating for the original purchase. That was 90 minutes out of my day. And at some point, this desk jockey simply didn’t have any more standing endurance to keep at it into the night in the wood shop. So okay, I’ll finish the last of the drawer fronts later.
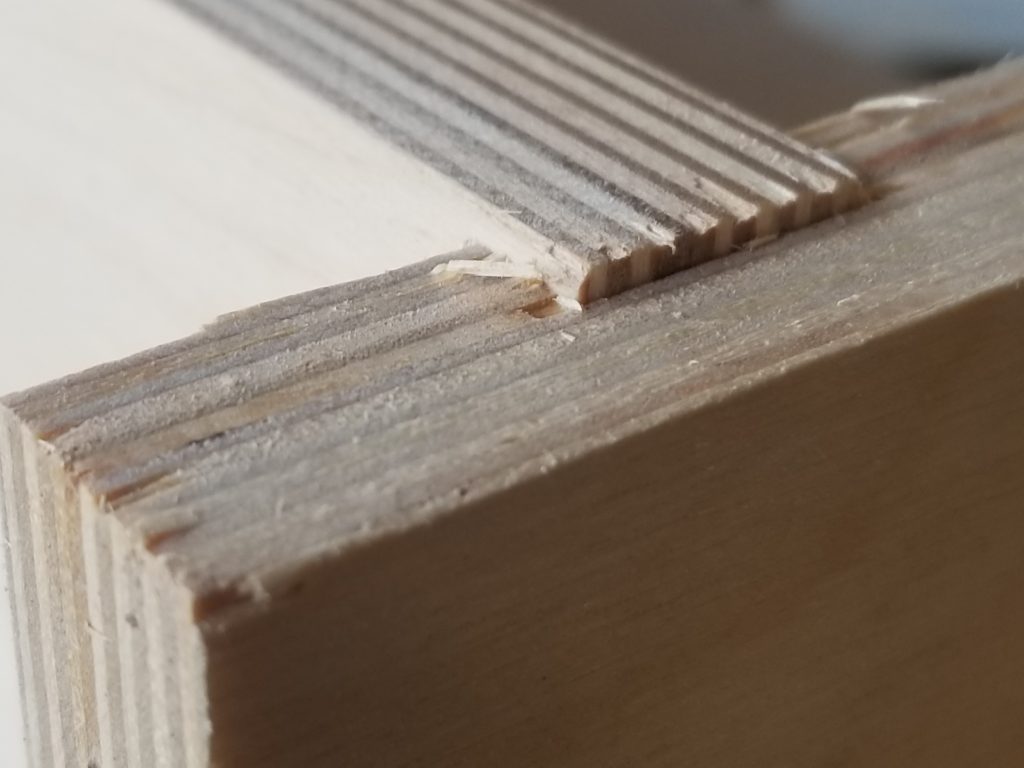
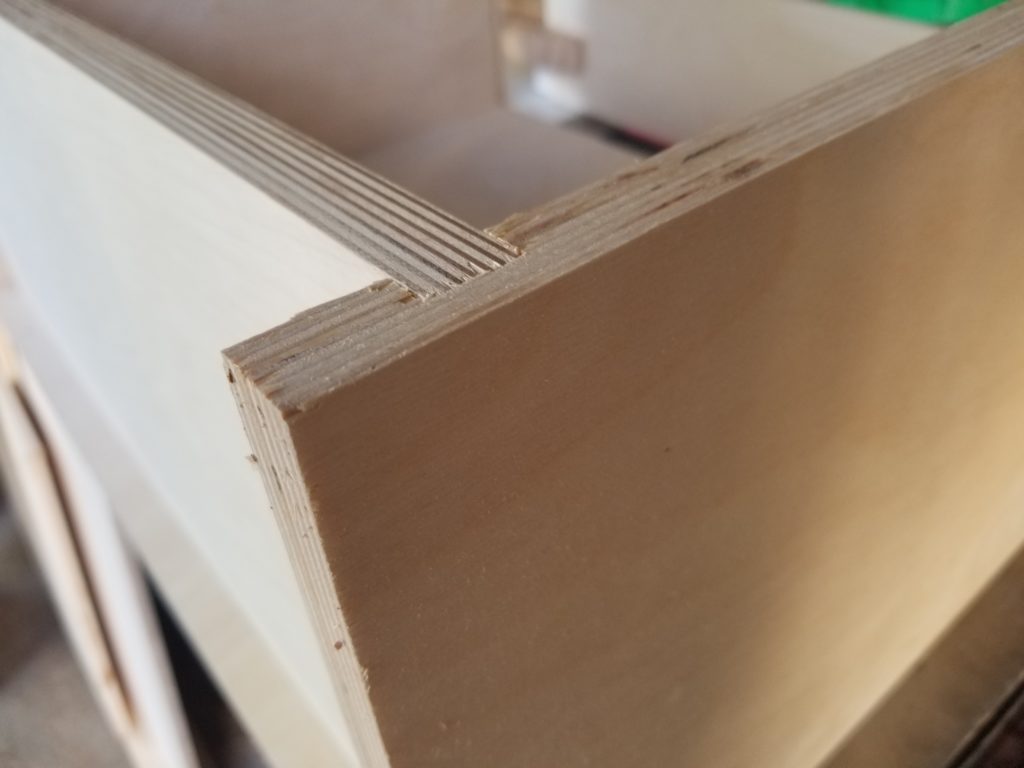
The cabinet bodies went together pretty easily, happily. I remembered messing up last time so I spent extra attention this time drawing out the design and being certain of all the dimensions. And I dry fit them before glue-up, too.
Good thing I did, as it turned out a certain set of grooves wasn’t quite deep enough, causing the walls to stick out and the floor to come forward of the case.
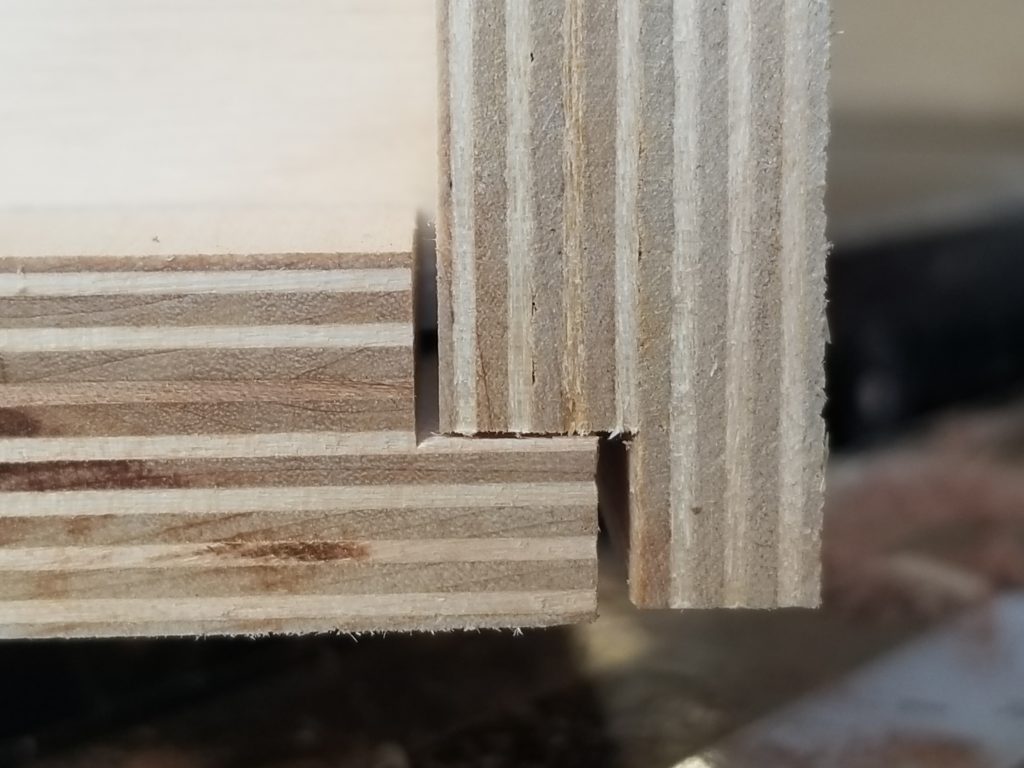
Back to the table saw, raise the dado stack a little, re-groove the parts, and try again.
Still a tiny bit loose on the corner, but close enough.
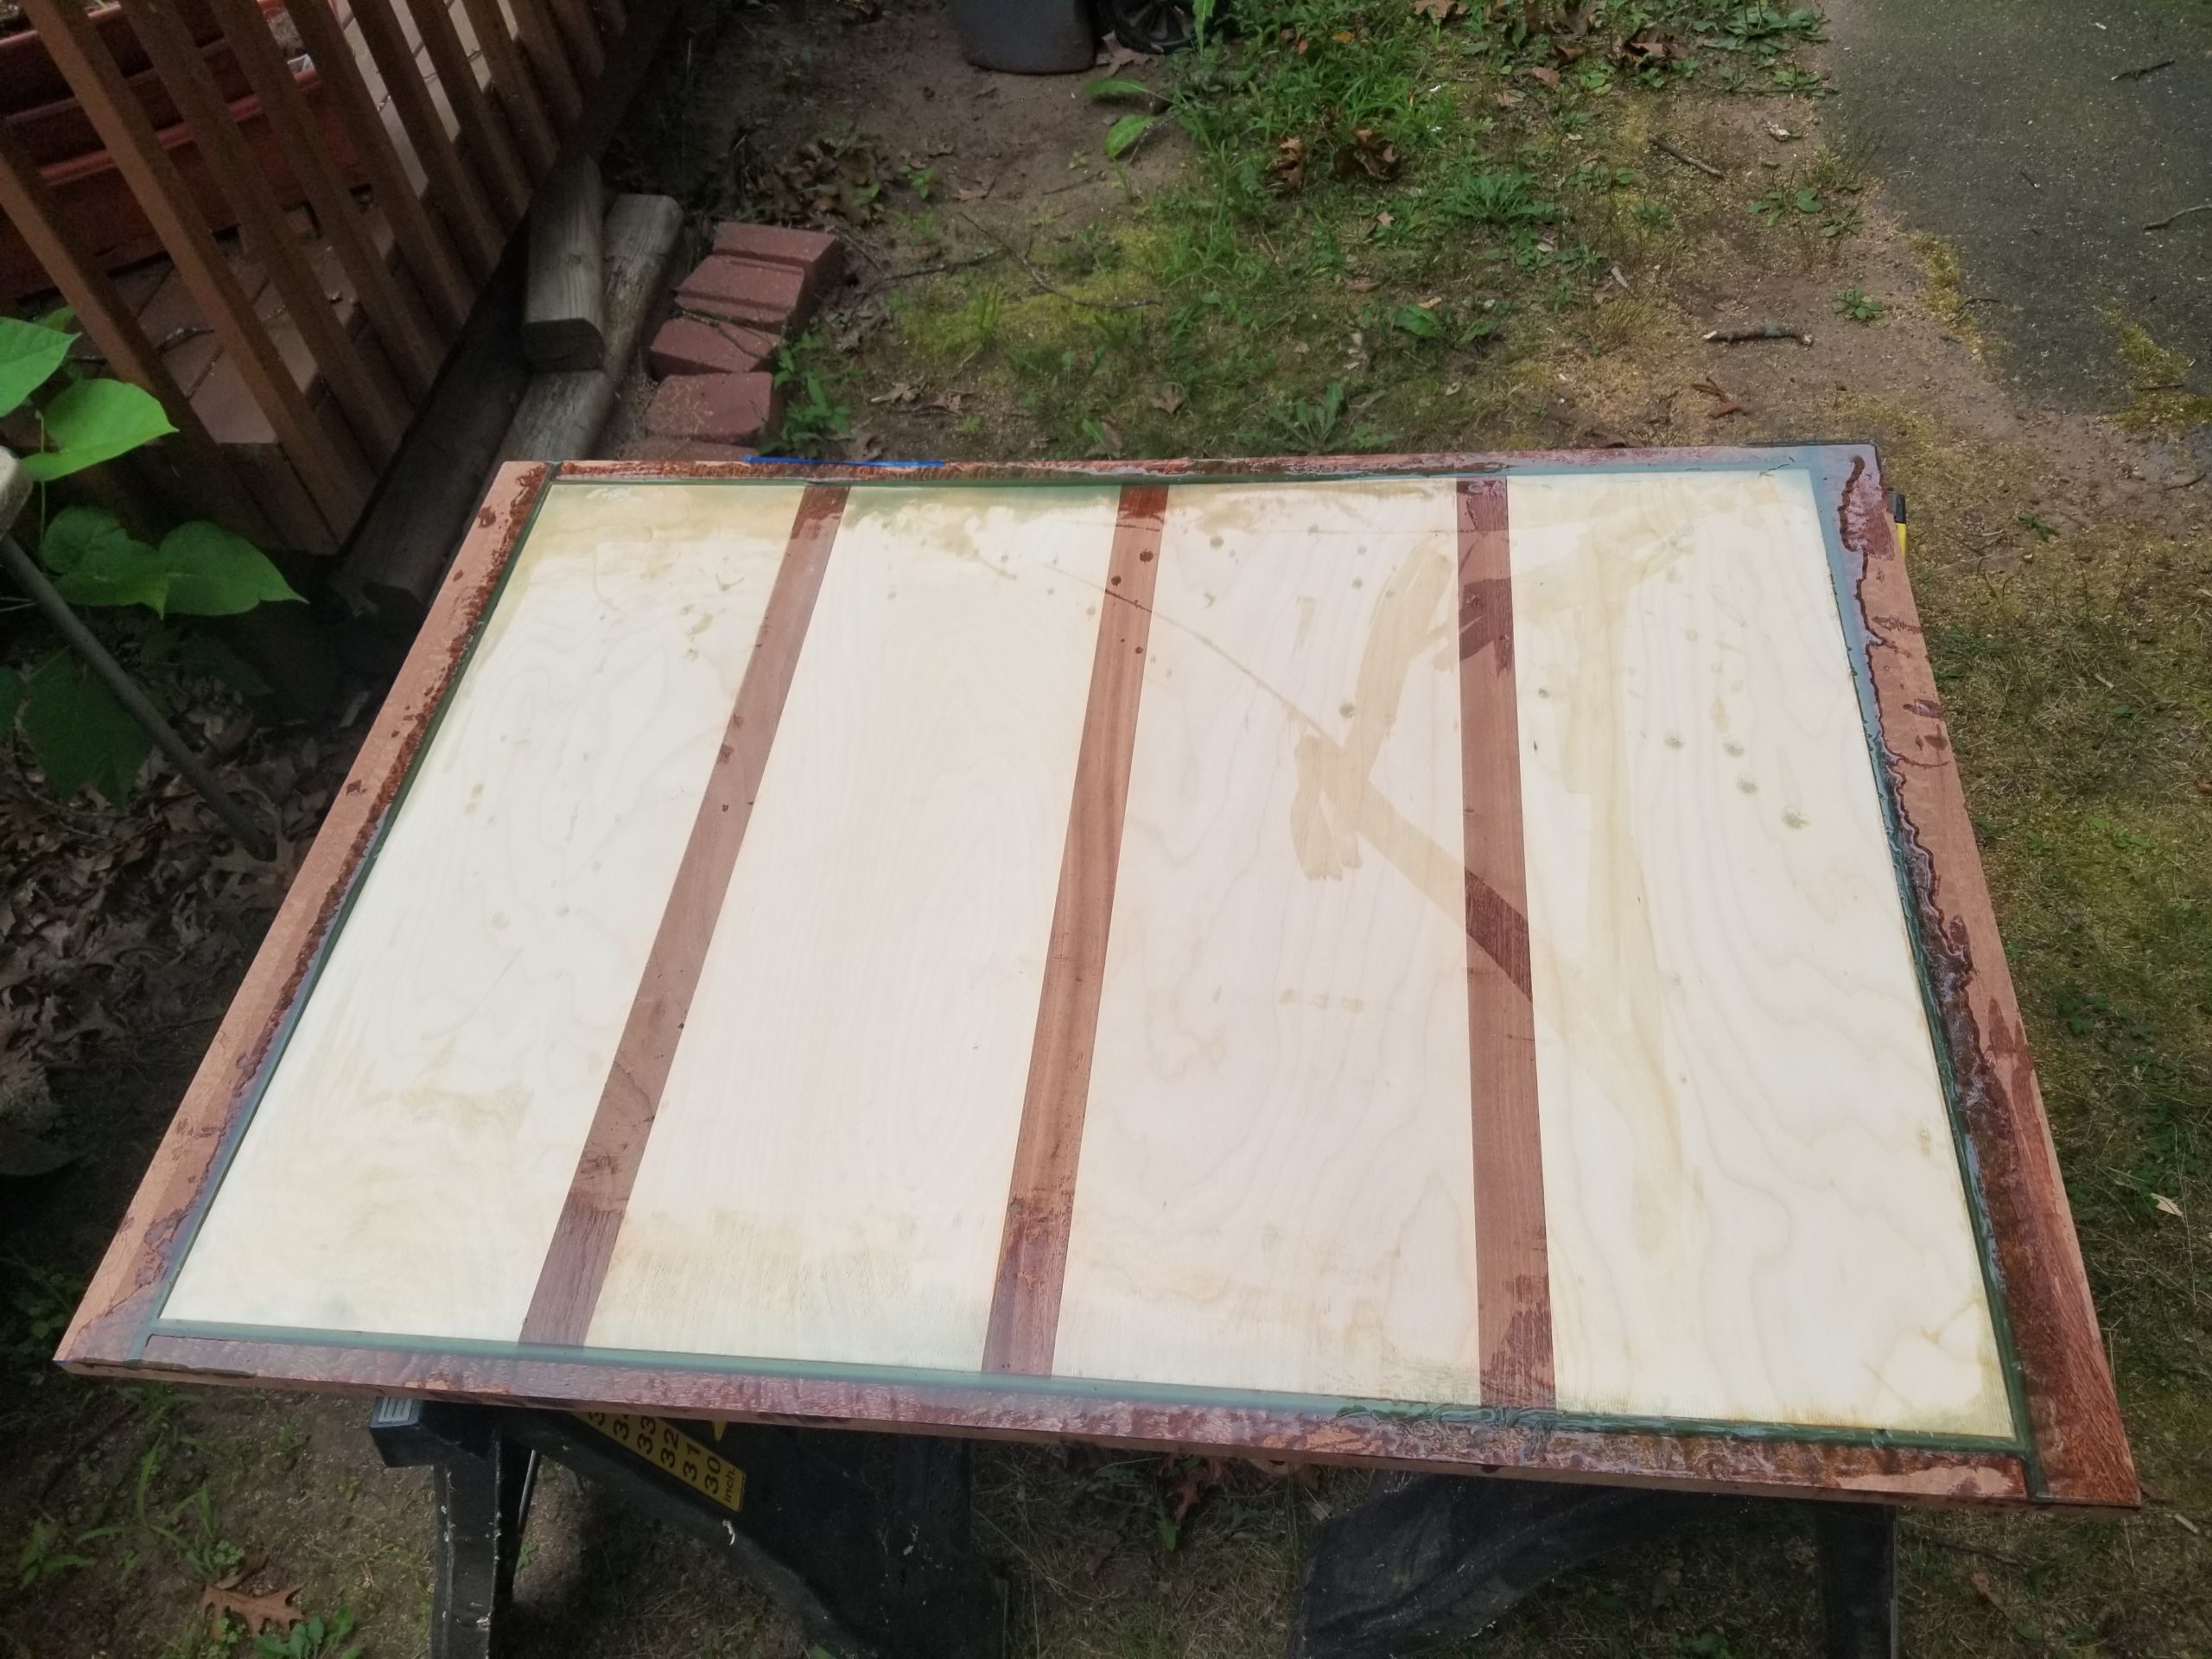
While technically not part of Panelpalooza, I also worked on the betnette tabletop. It turns out that some of the voids in the joinery were so bad that the epoxy actually flowed into the body of the tabletop and in some cases, also out the other side! This created (a) a big mess and (b) didn’t solve my problem of filling the defects with epoxy and having them stay full. The big mess I managed with a makeshift bandage made of masking tape and shims. That was enough to slow the through-leak down to almost nothing such that it could actually set. That, in turn, was enough to plug the leak.
Before running a second batch on top to fill in the level, I taped the heck out of the back just in case I was wrong about how sealed it was.

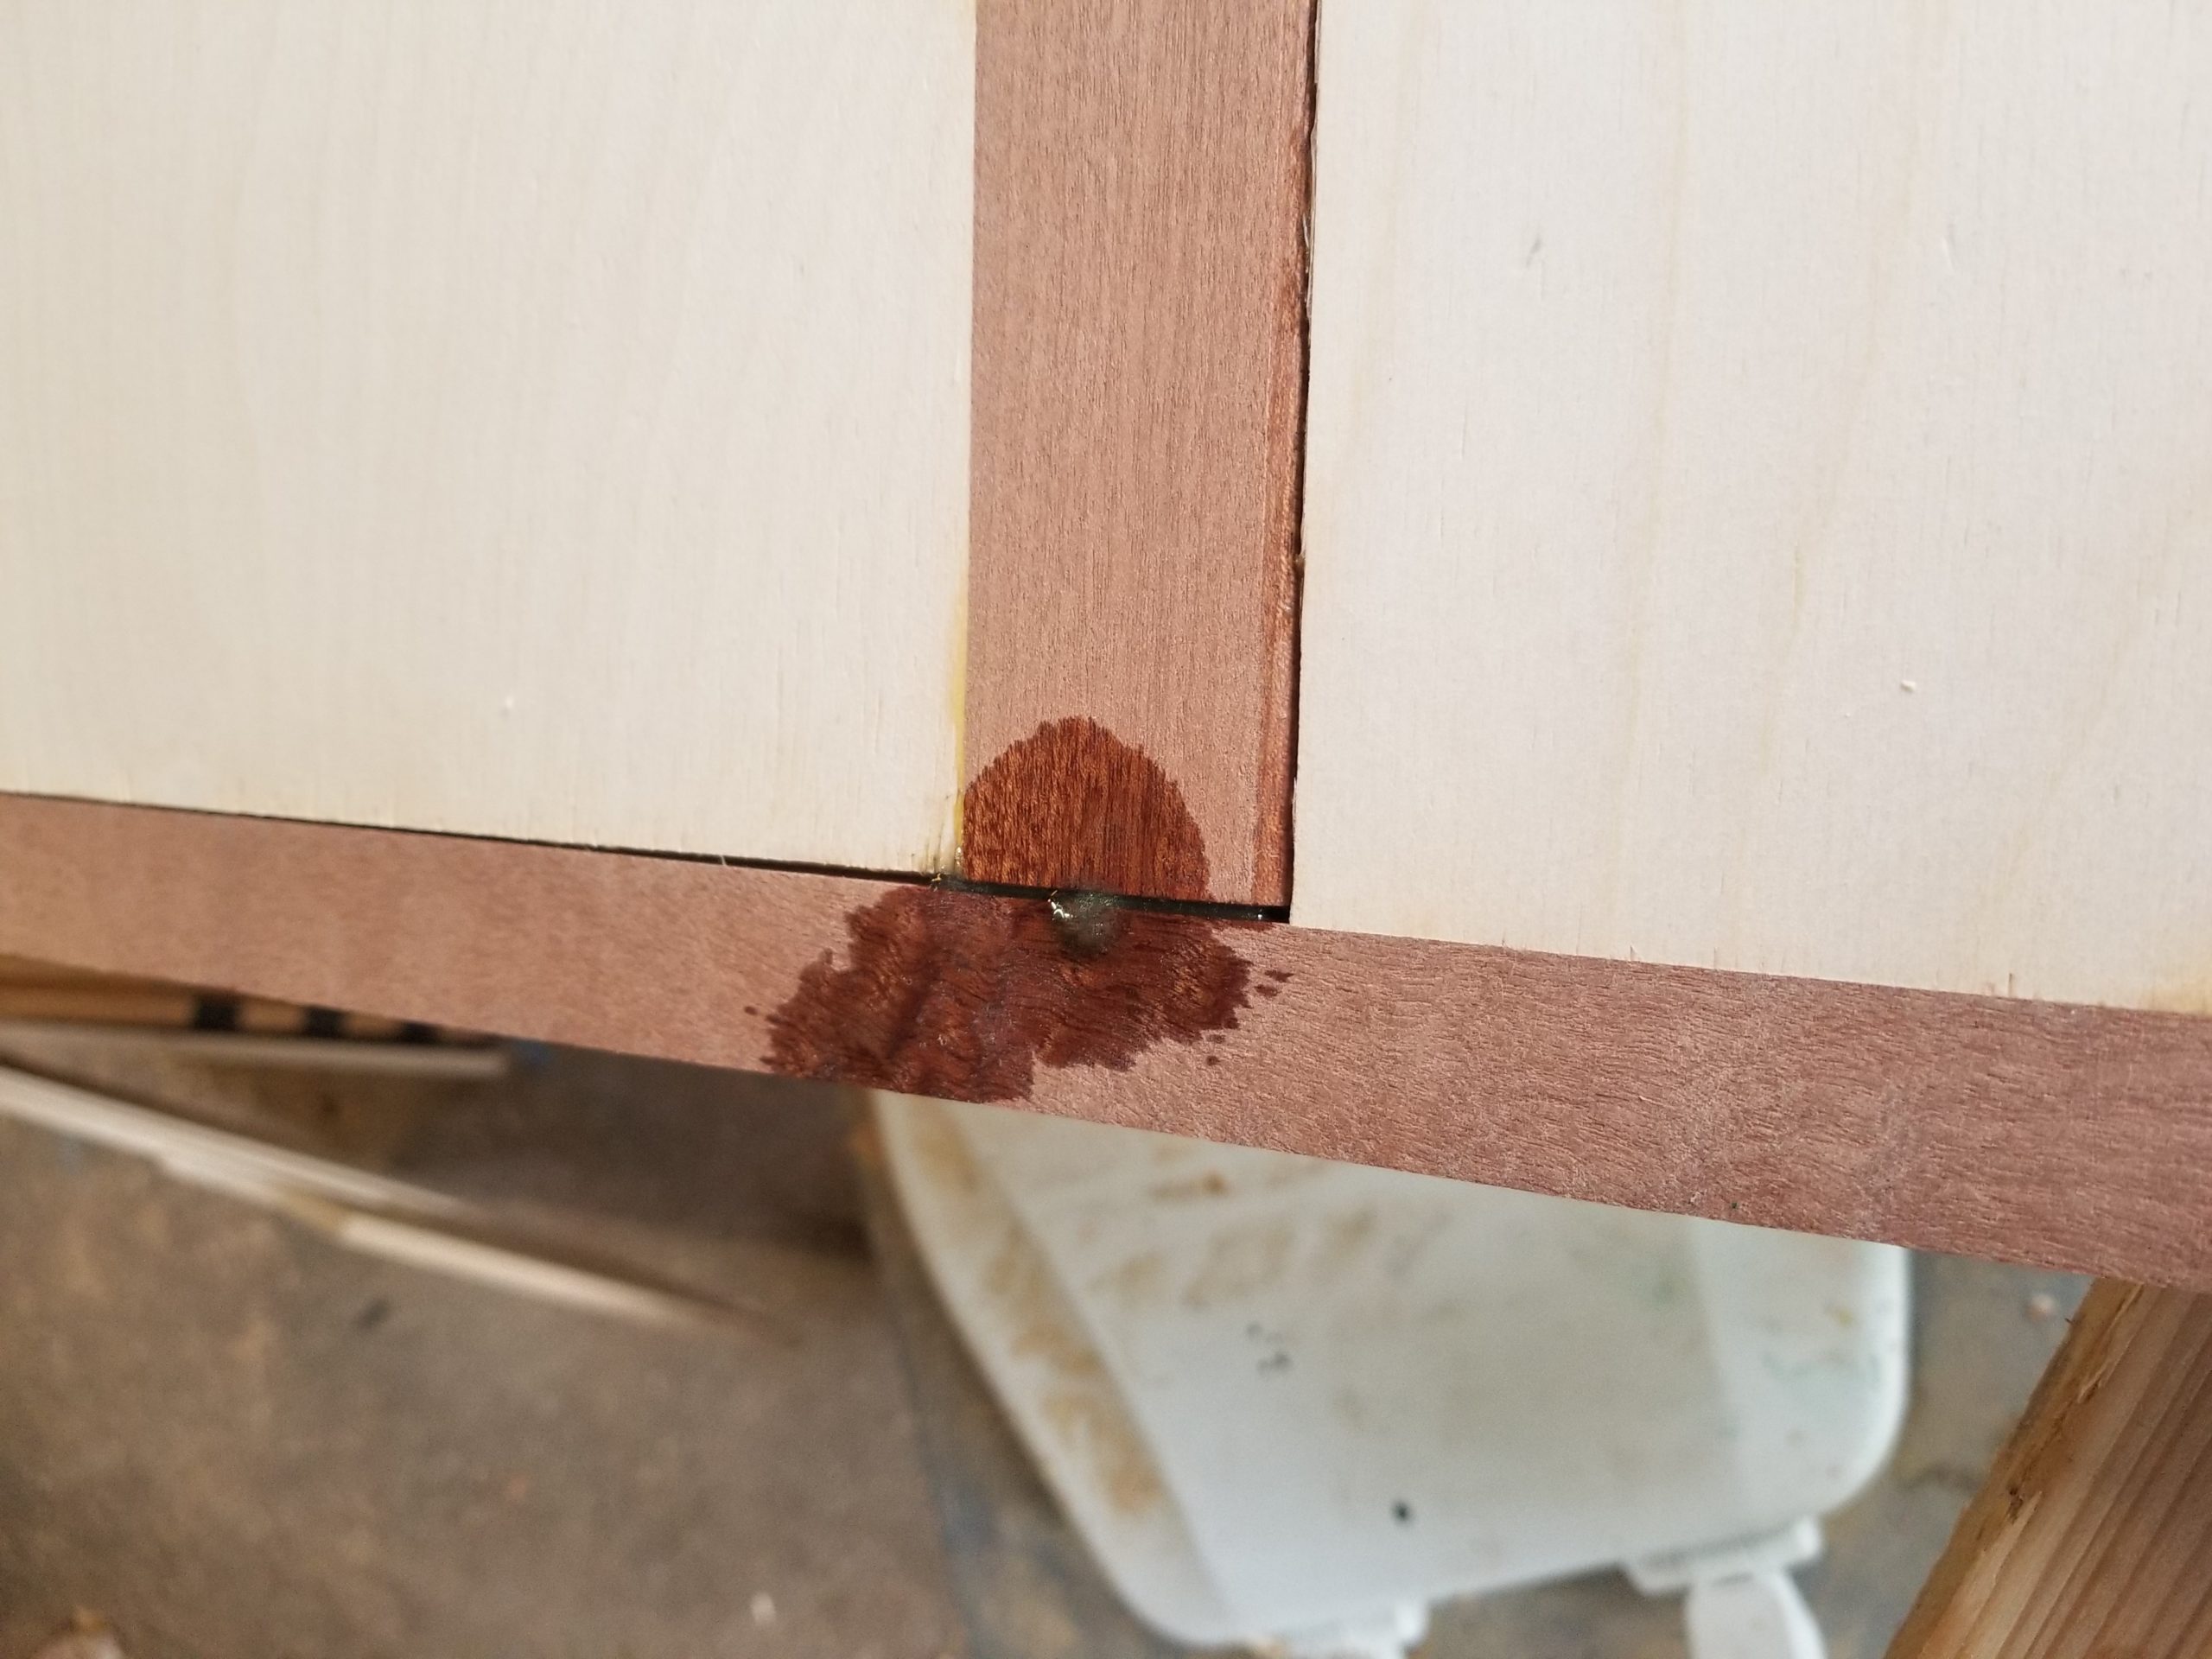
Leaked through here 
And here (tape is remnant of bandage) 
And here 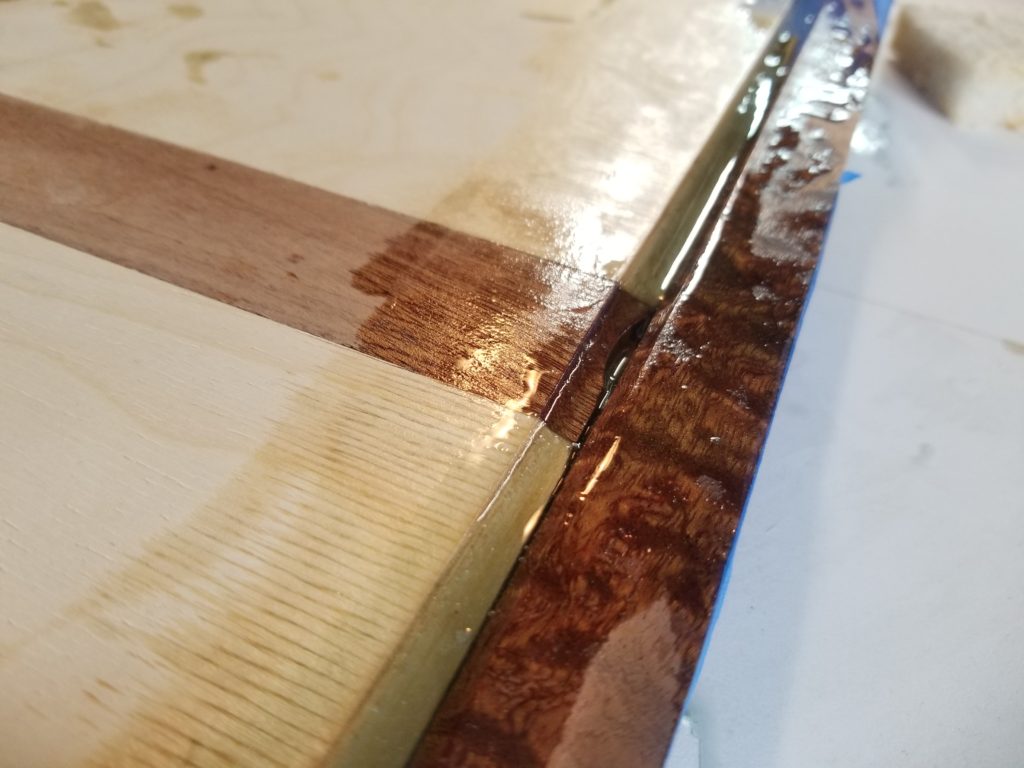
And lost a lot of material here 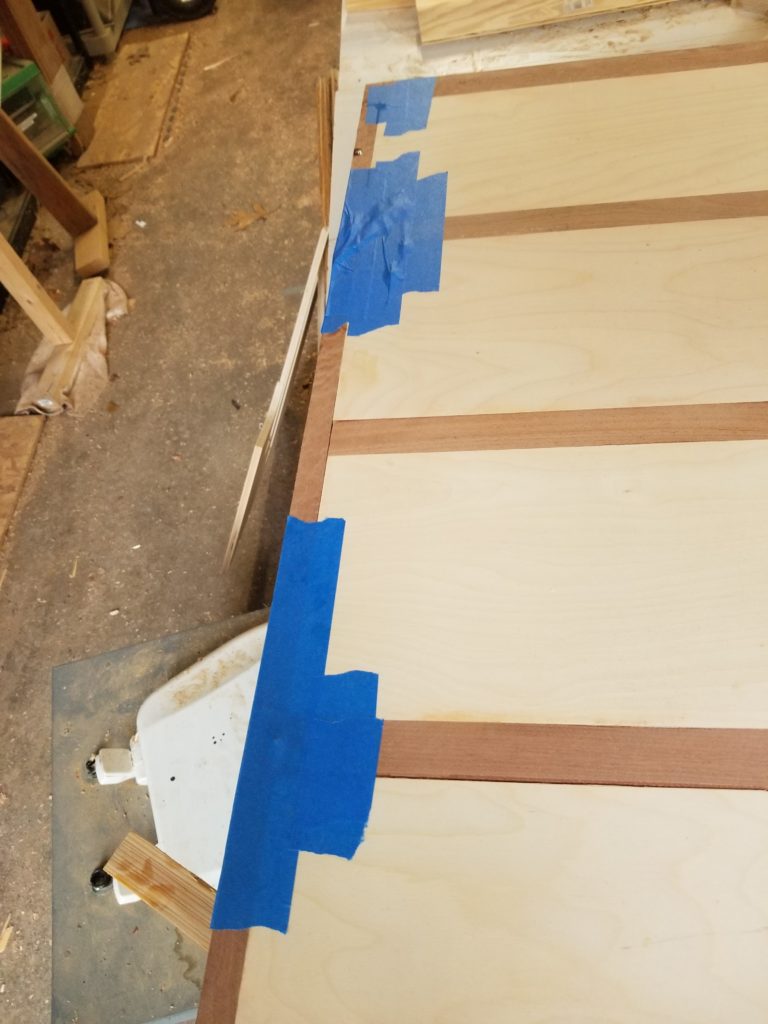
Before second pour, backed it all with lots of tape.

I ran a second batch on top of what was there to fill in where the drainage had caused the level to fall. That seemed to work and ultimately solved (b). Next step was to spend a lot of quality time with my orbital sander (why don’t I have a handheld belt sander for this kind of work? I don’t know, but I will, soon).
Before (click for larger) 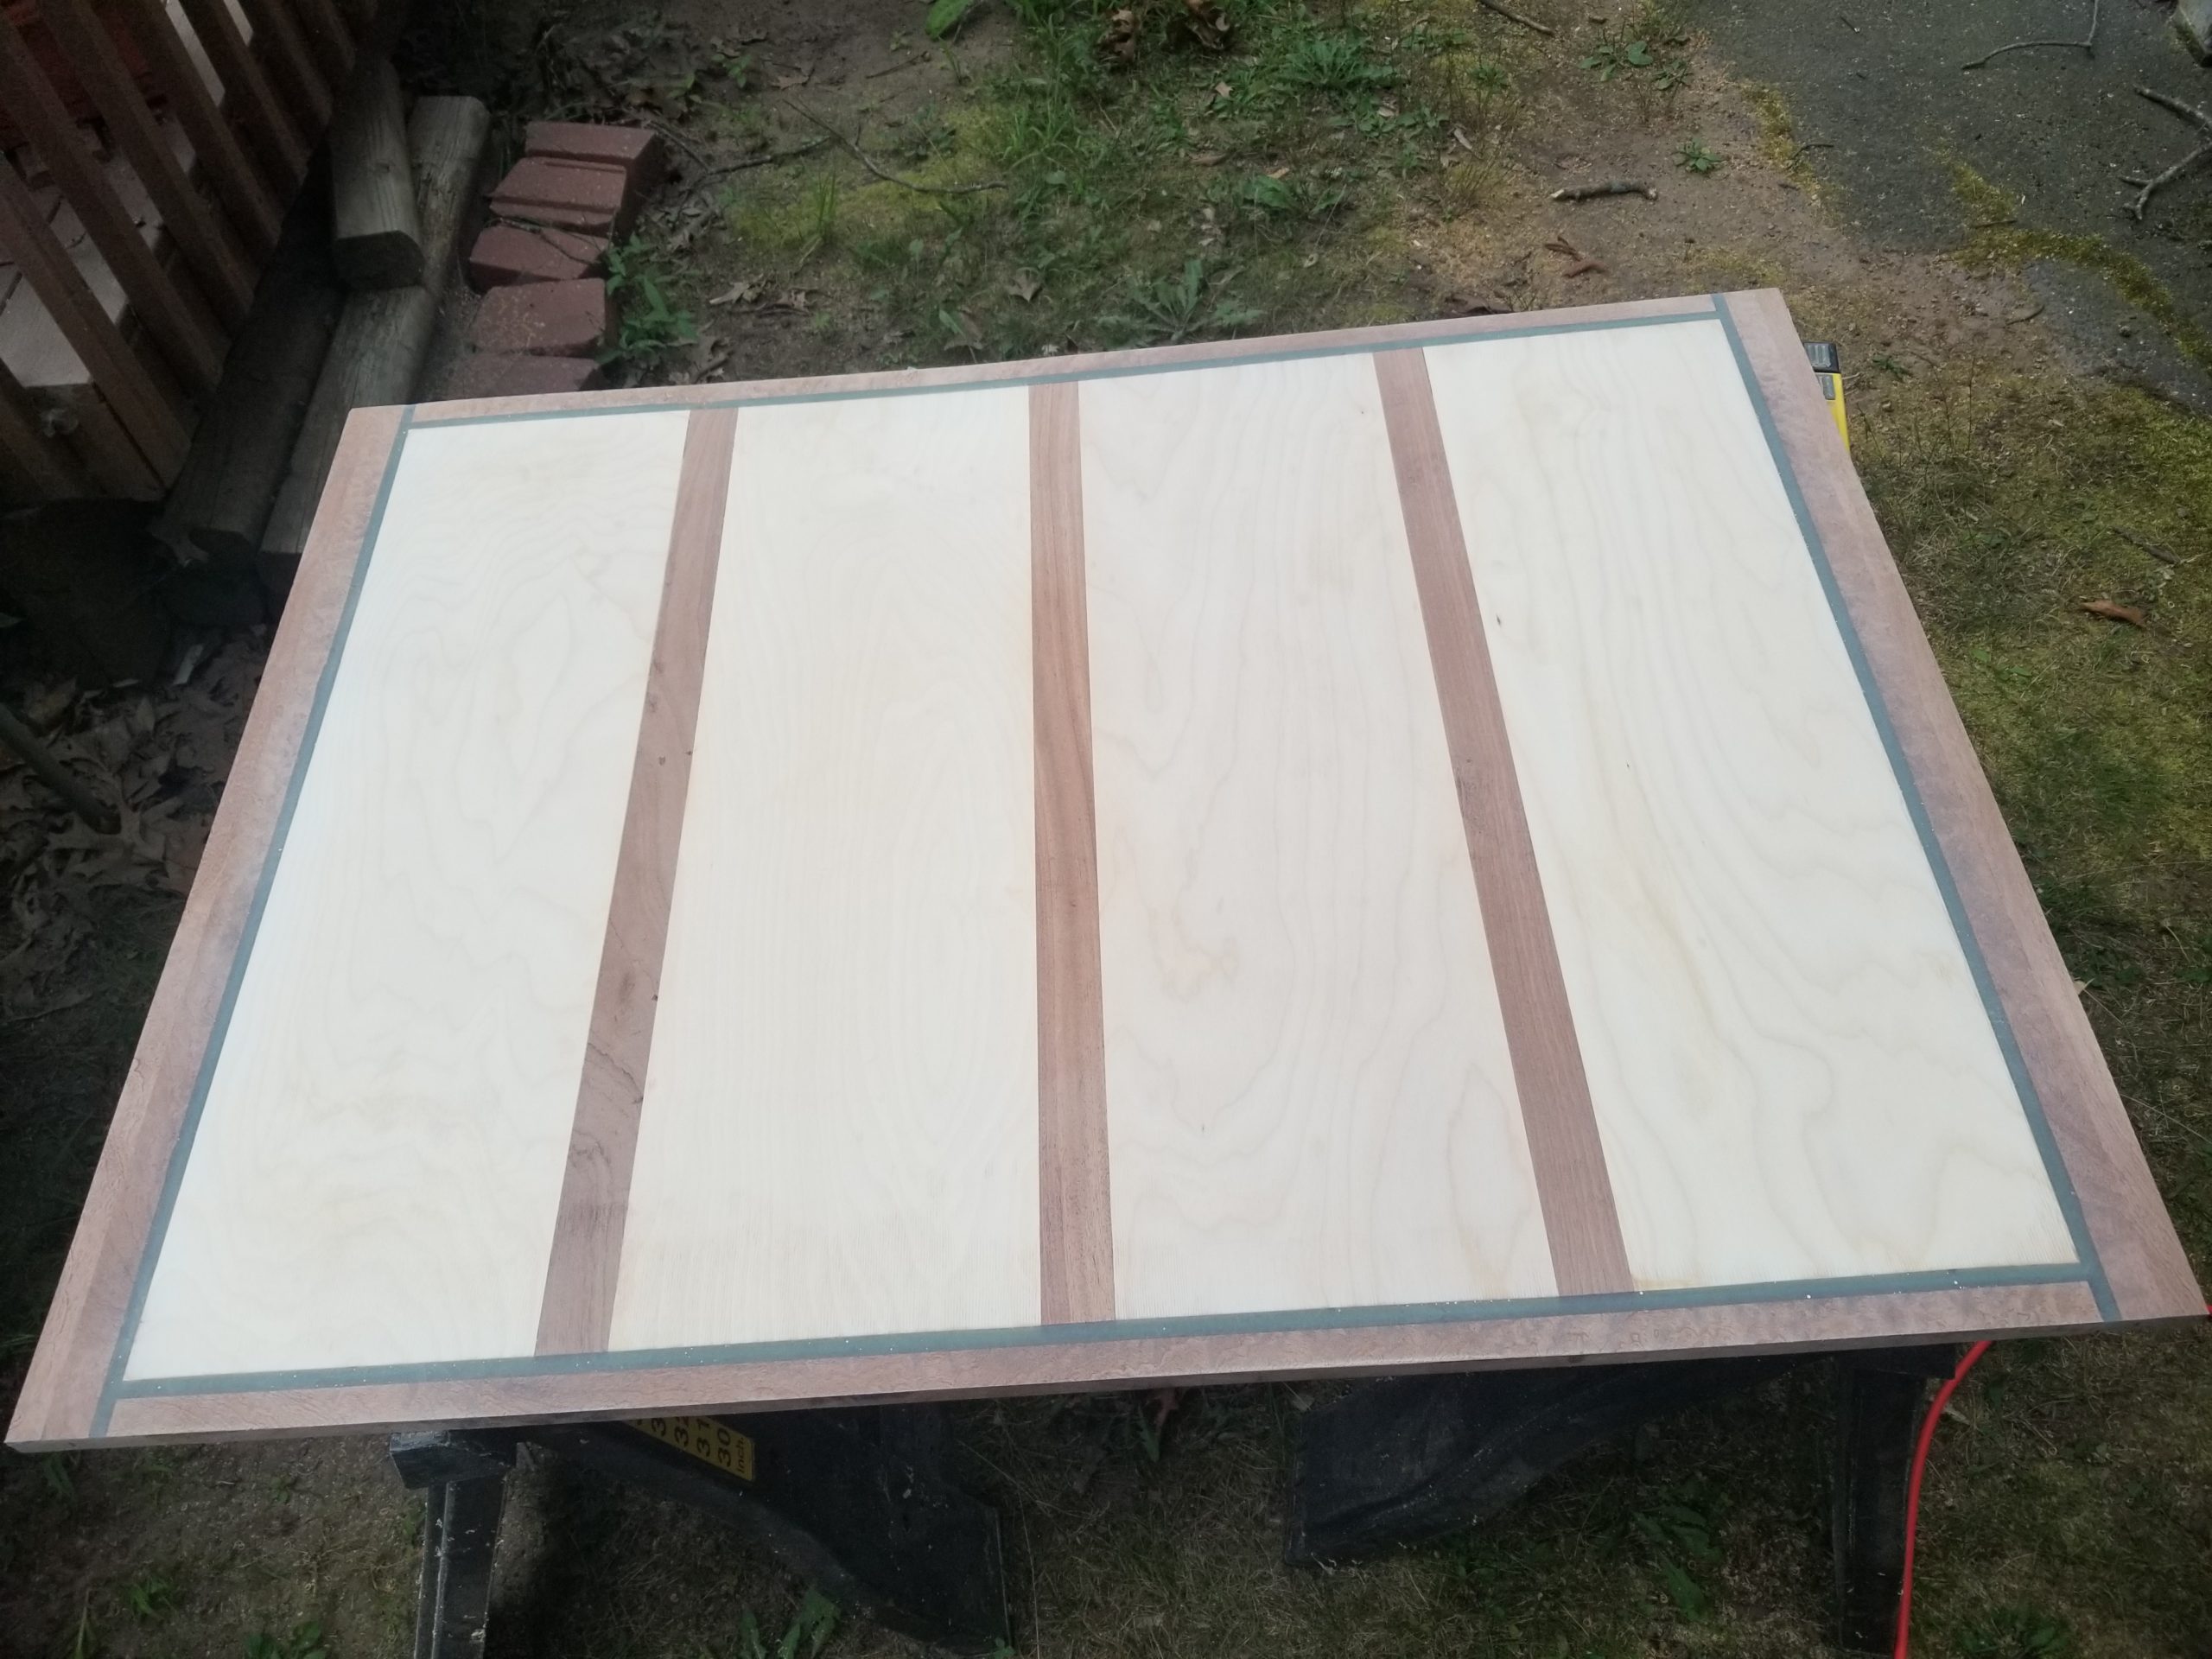
After (click for larger)
The epoxy is dull after sanding, but that’s fine, I will be pouring a top coat which will gloss it right back up.
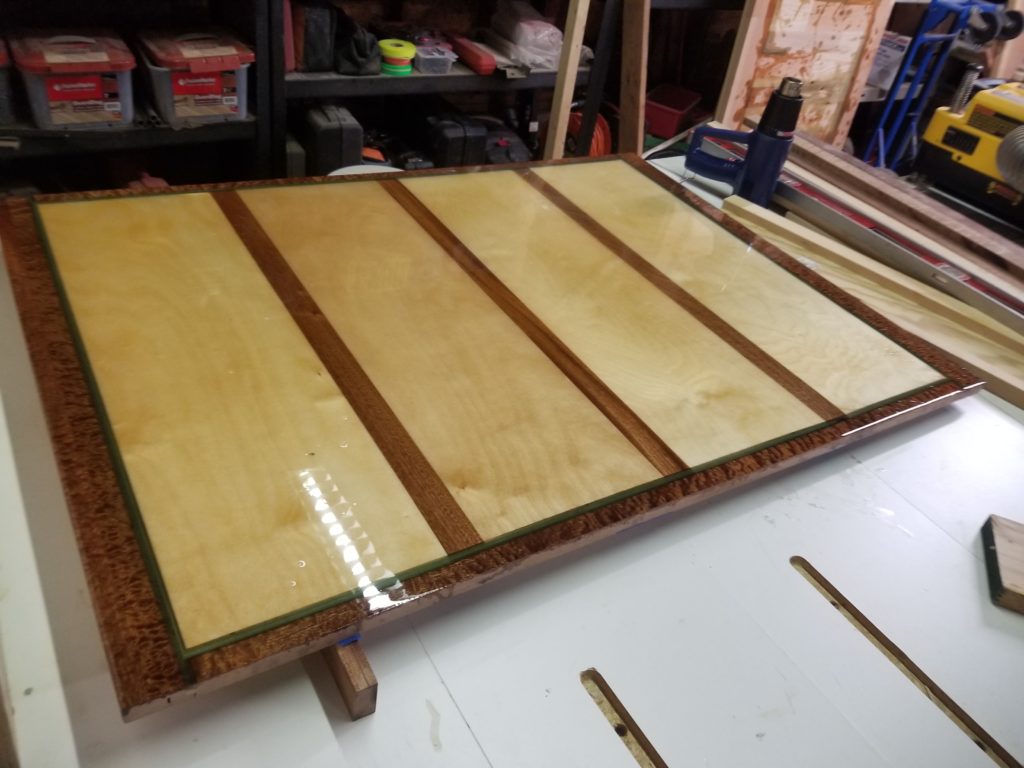
From a distance, it looks kind of fantastic. But it turns out there were many surface defects, some moderately serious, that I just can’t abide. I have a number of hypotheses about how it all happened, some having to do with the catalytic effect of the heat I applied to help settle the bubbles, some having to do with the pores of the wood releasing air into the epoxy, some having to do with the fluid dynamics and surface tensions of a shallow pour (I was low on material by about 20%), but however these may be, the result was some mountains and some bubbles in the finished product, despite all my efforts to mitigate these.
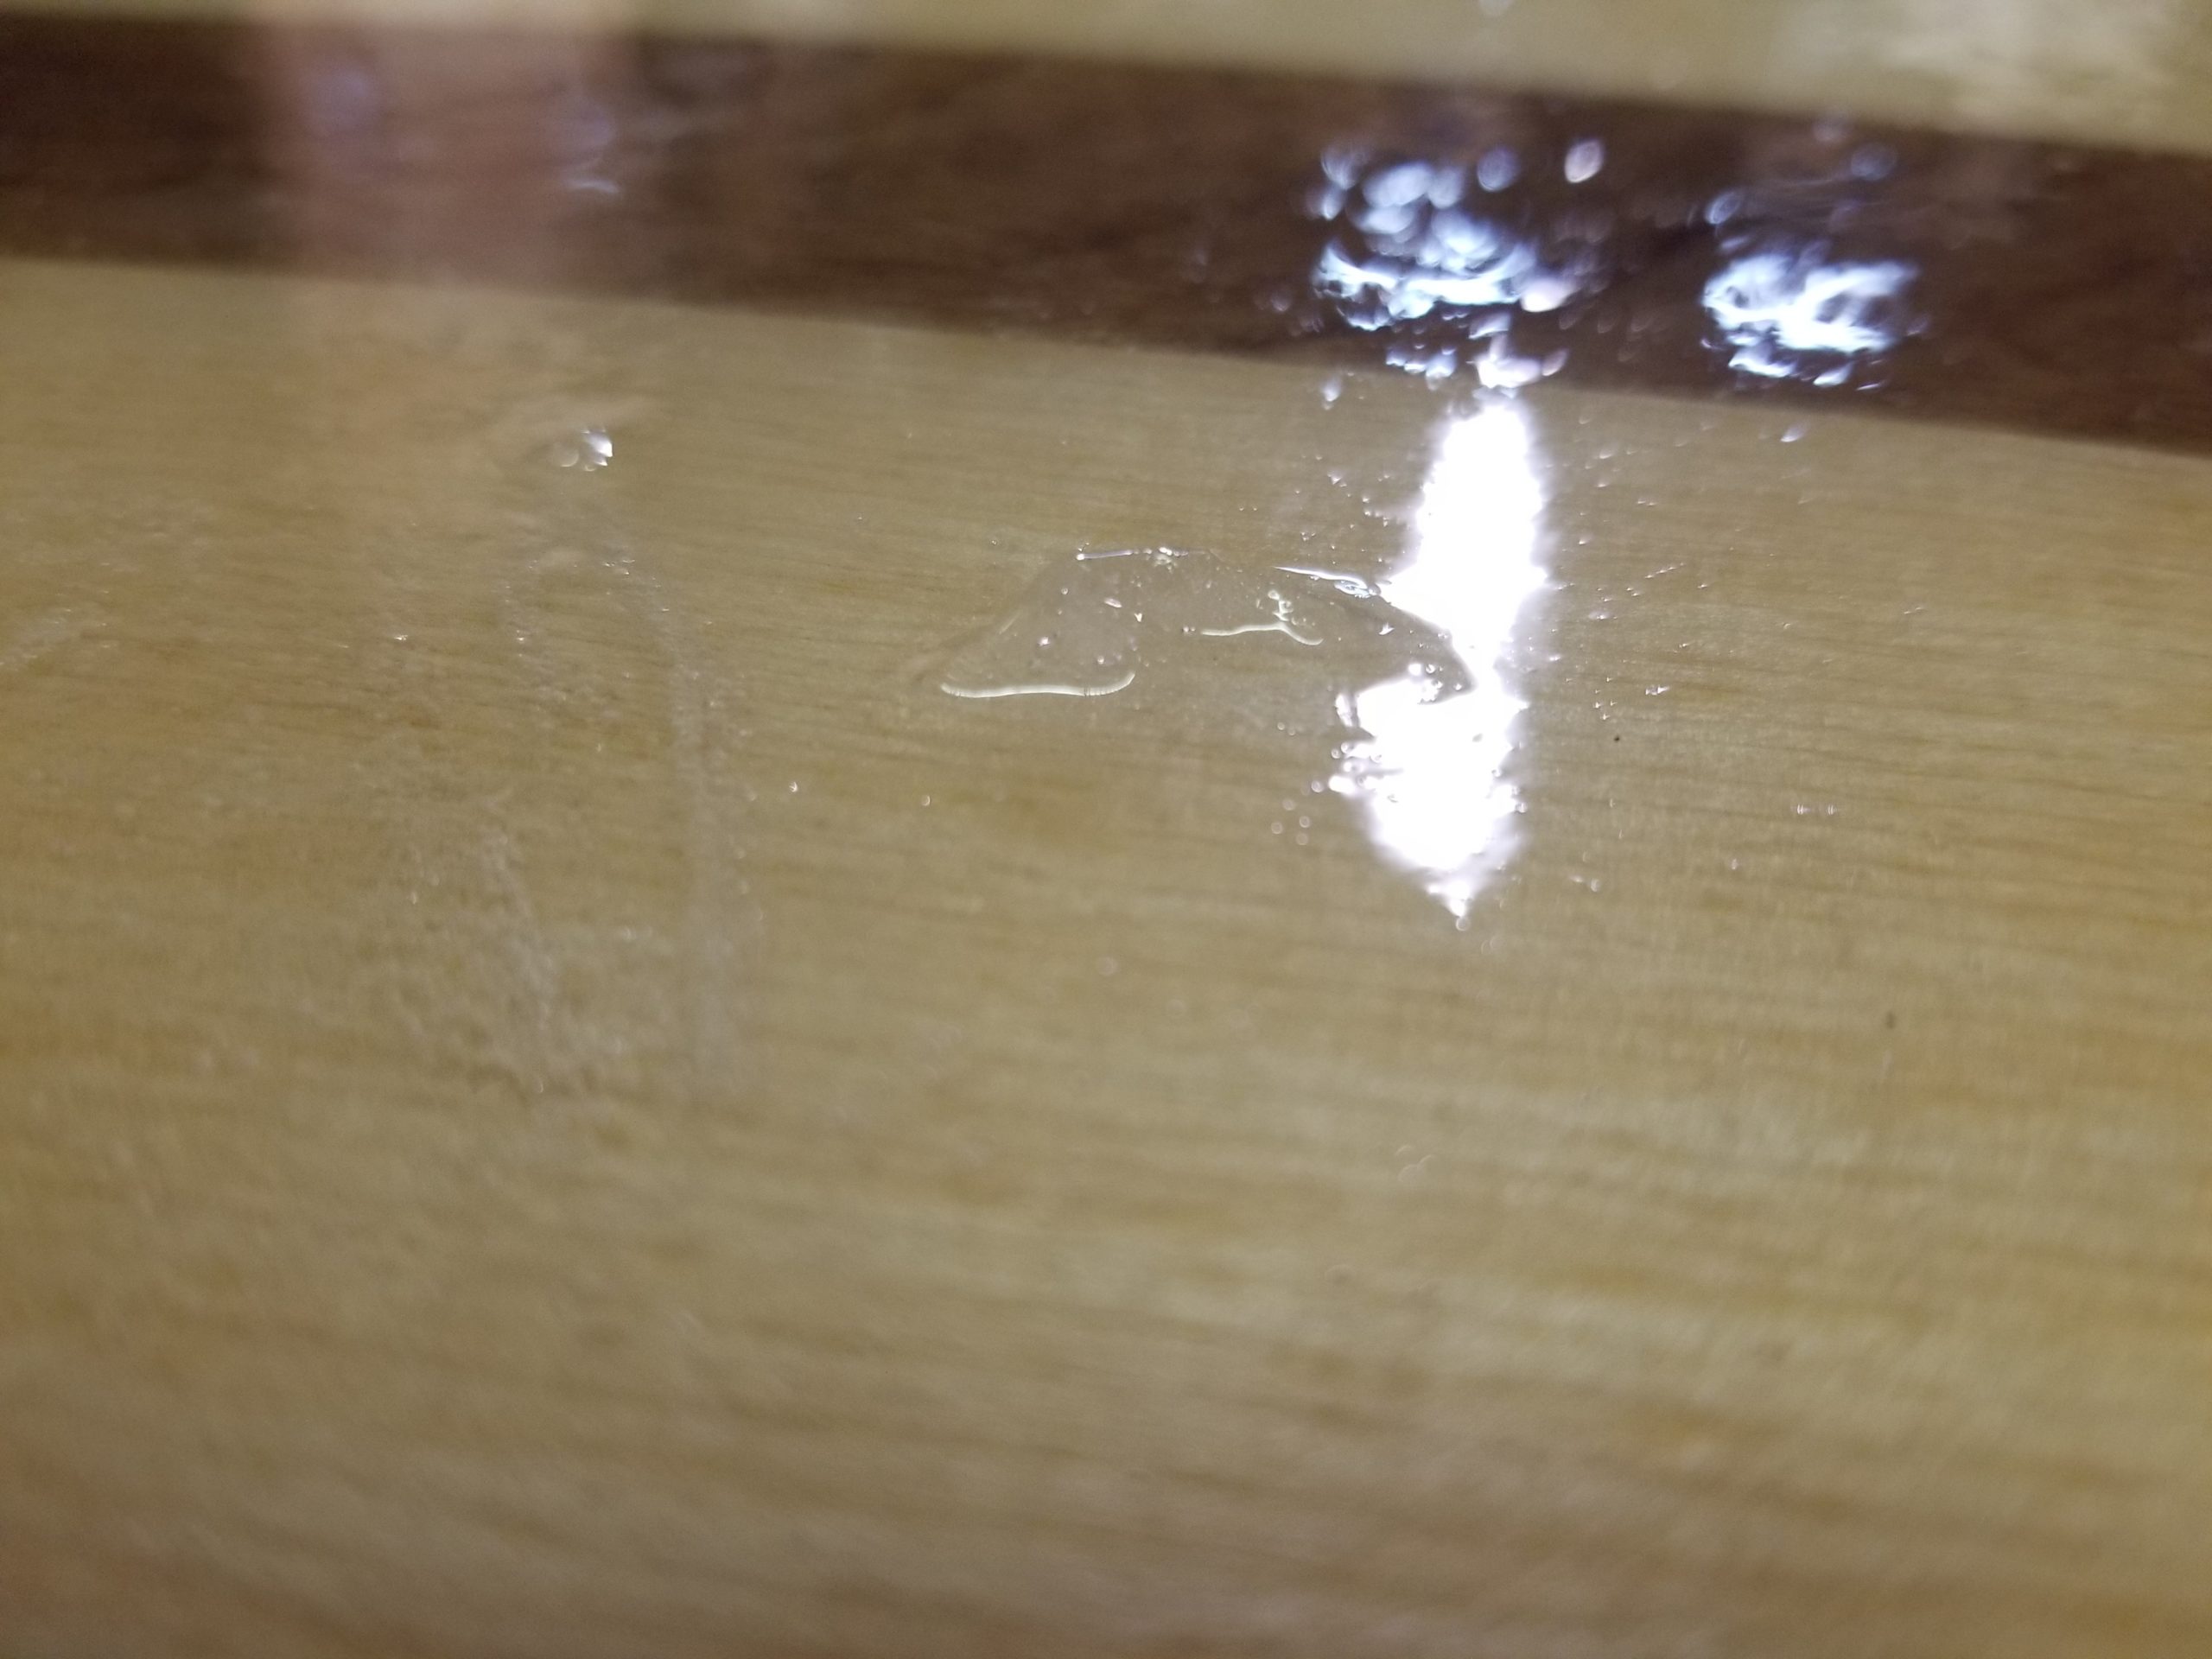
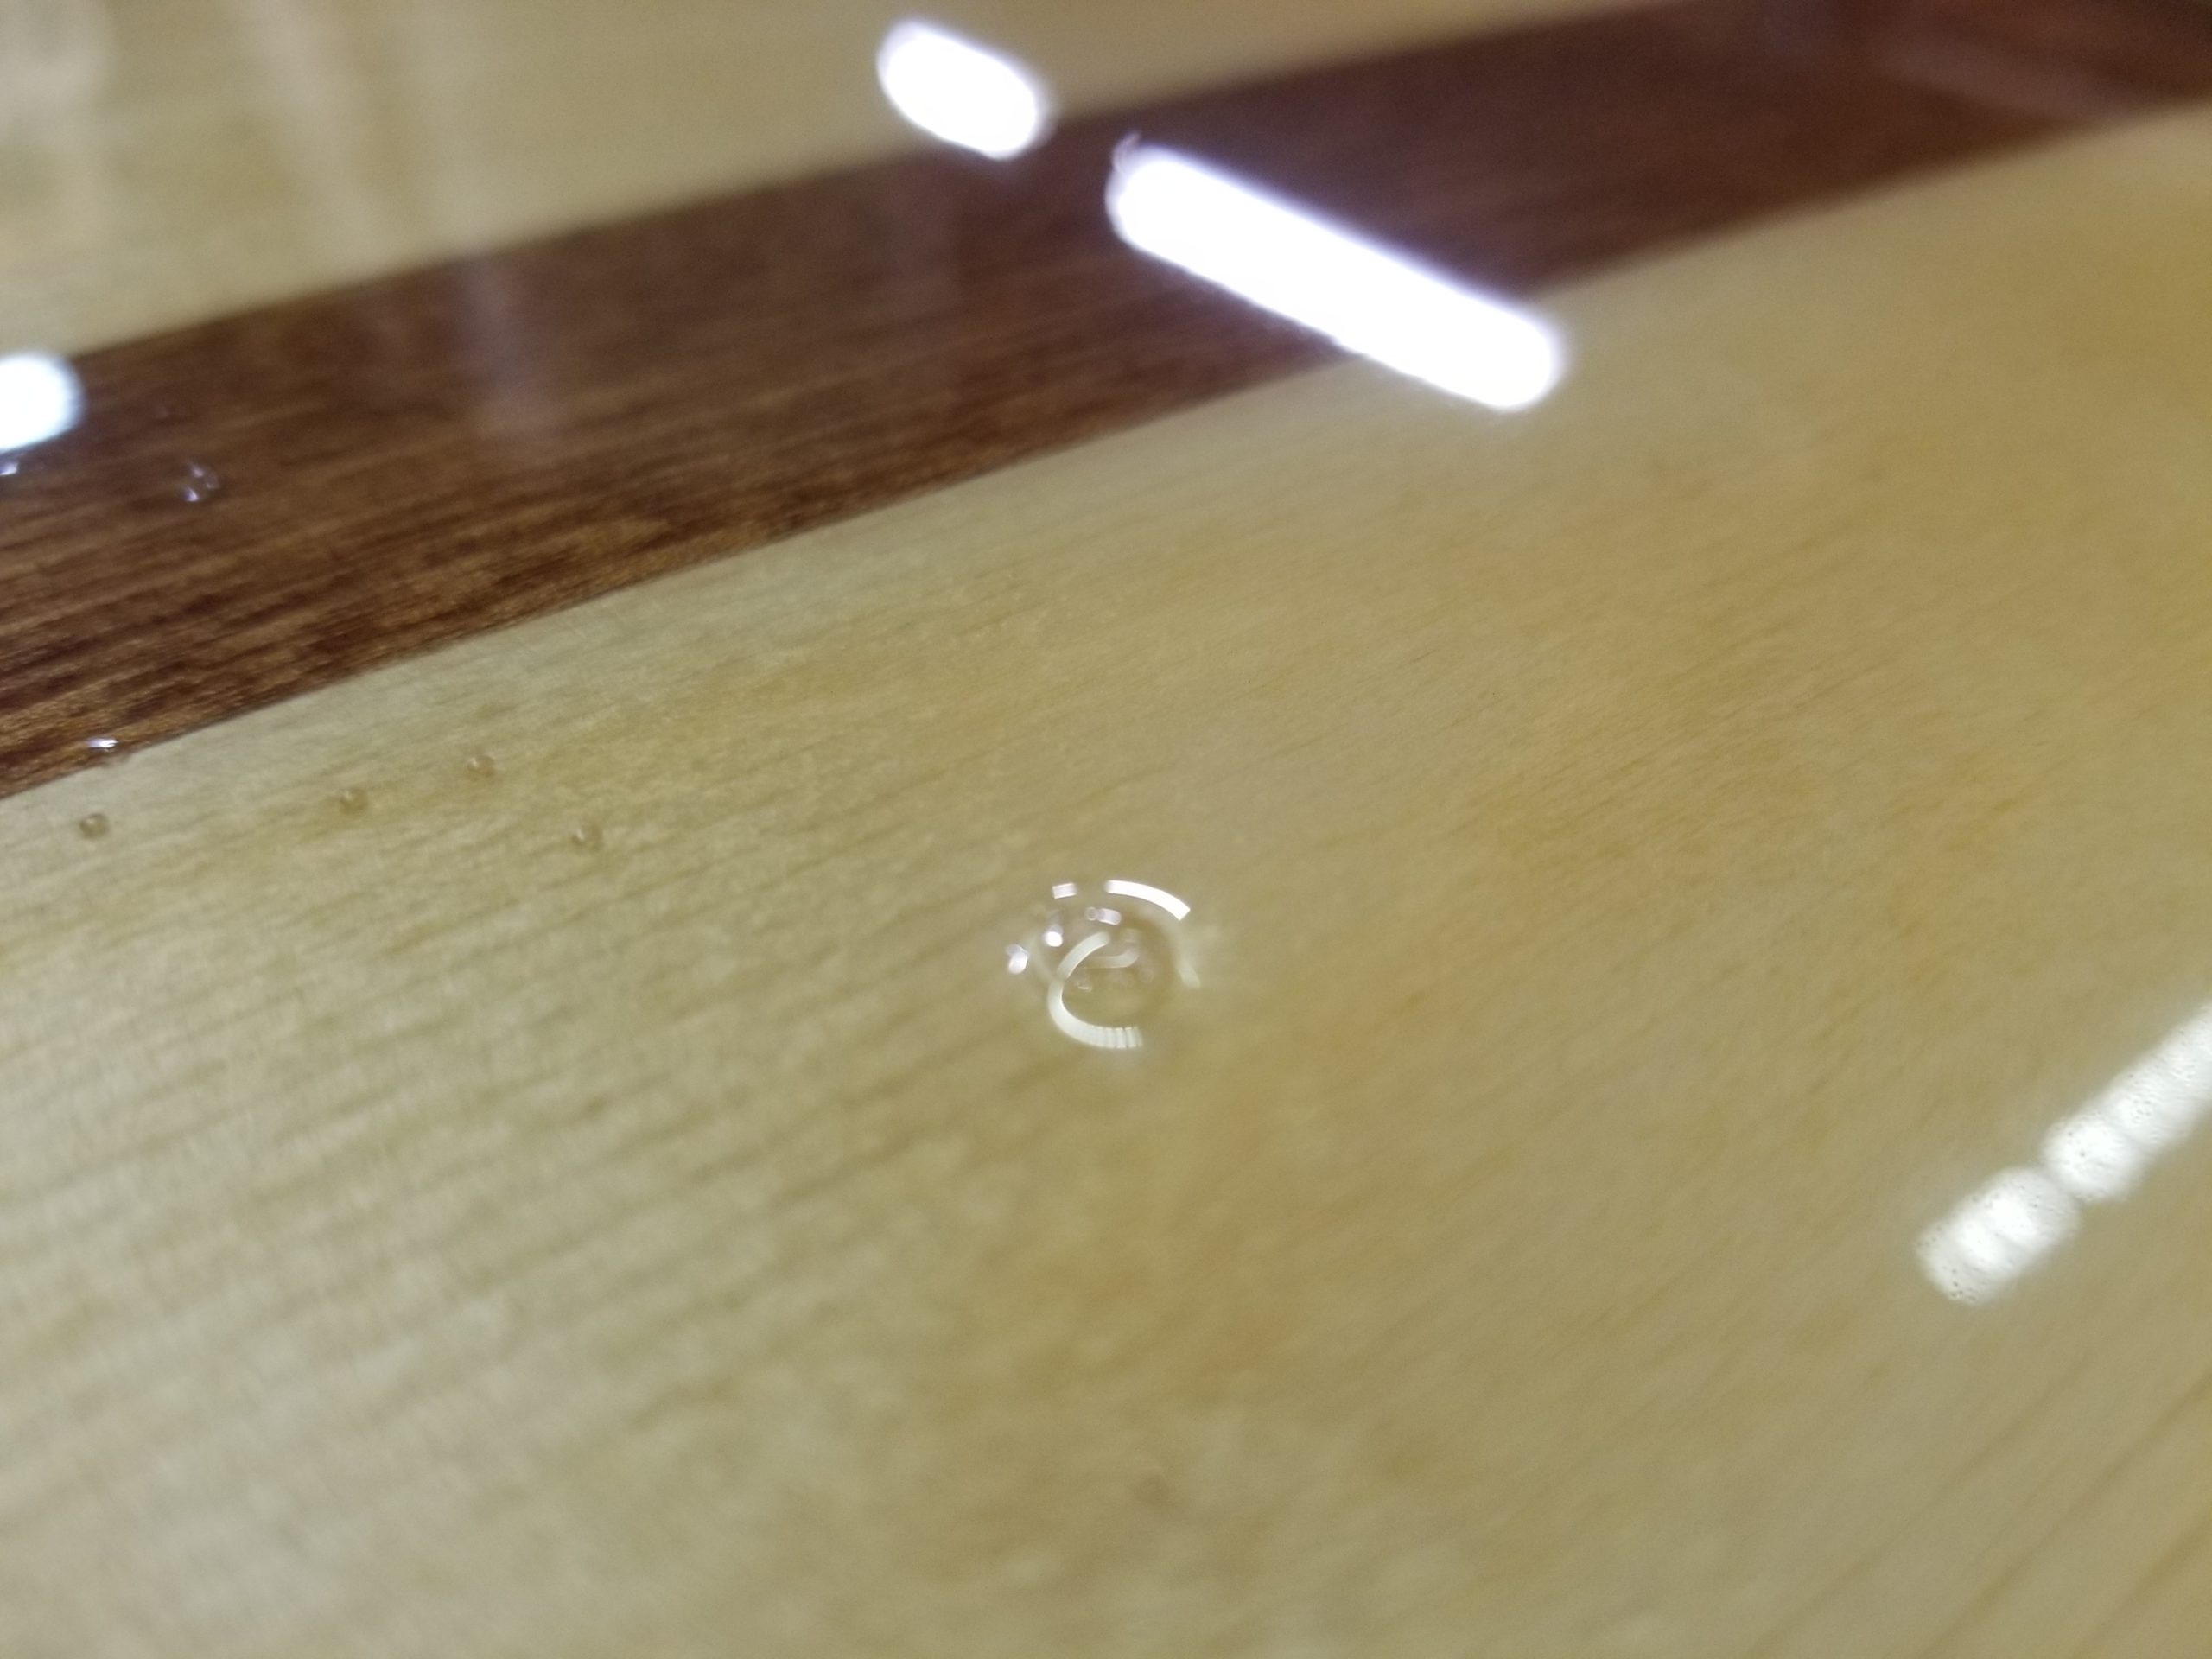
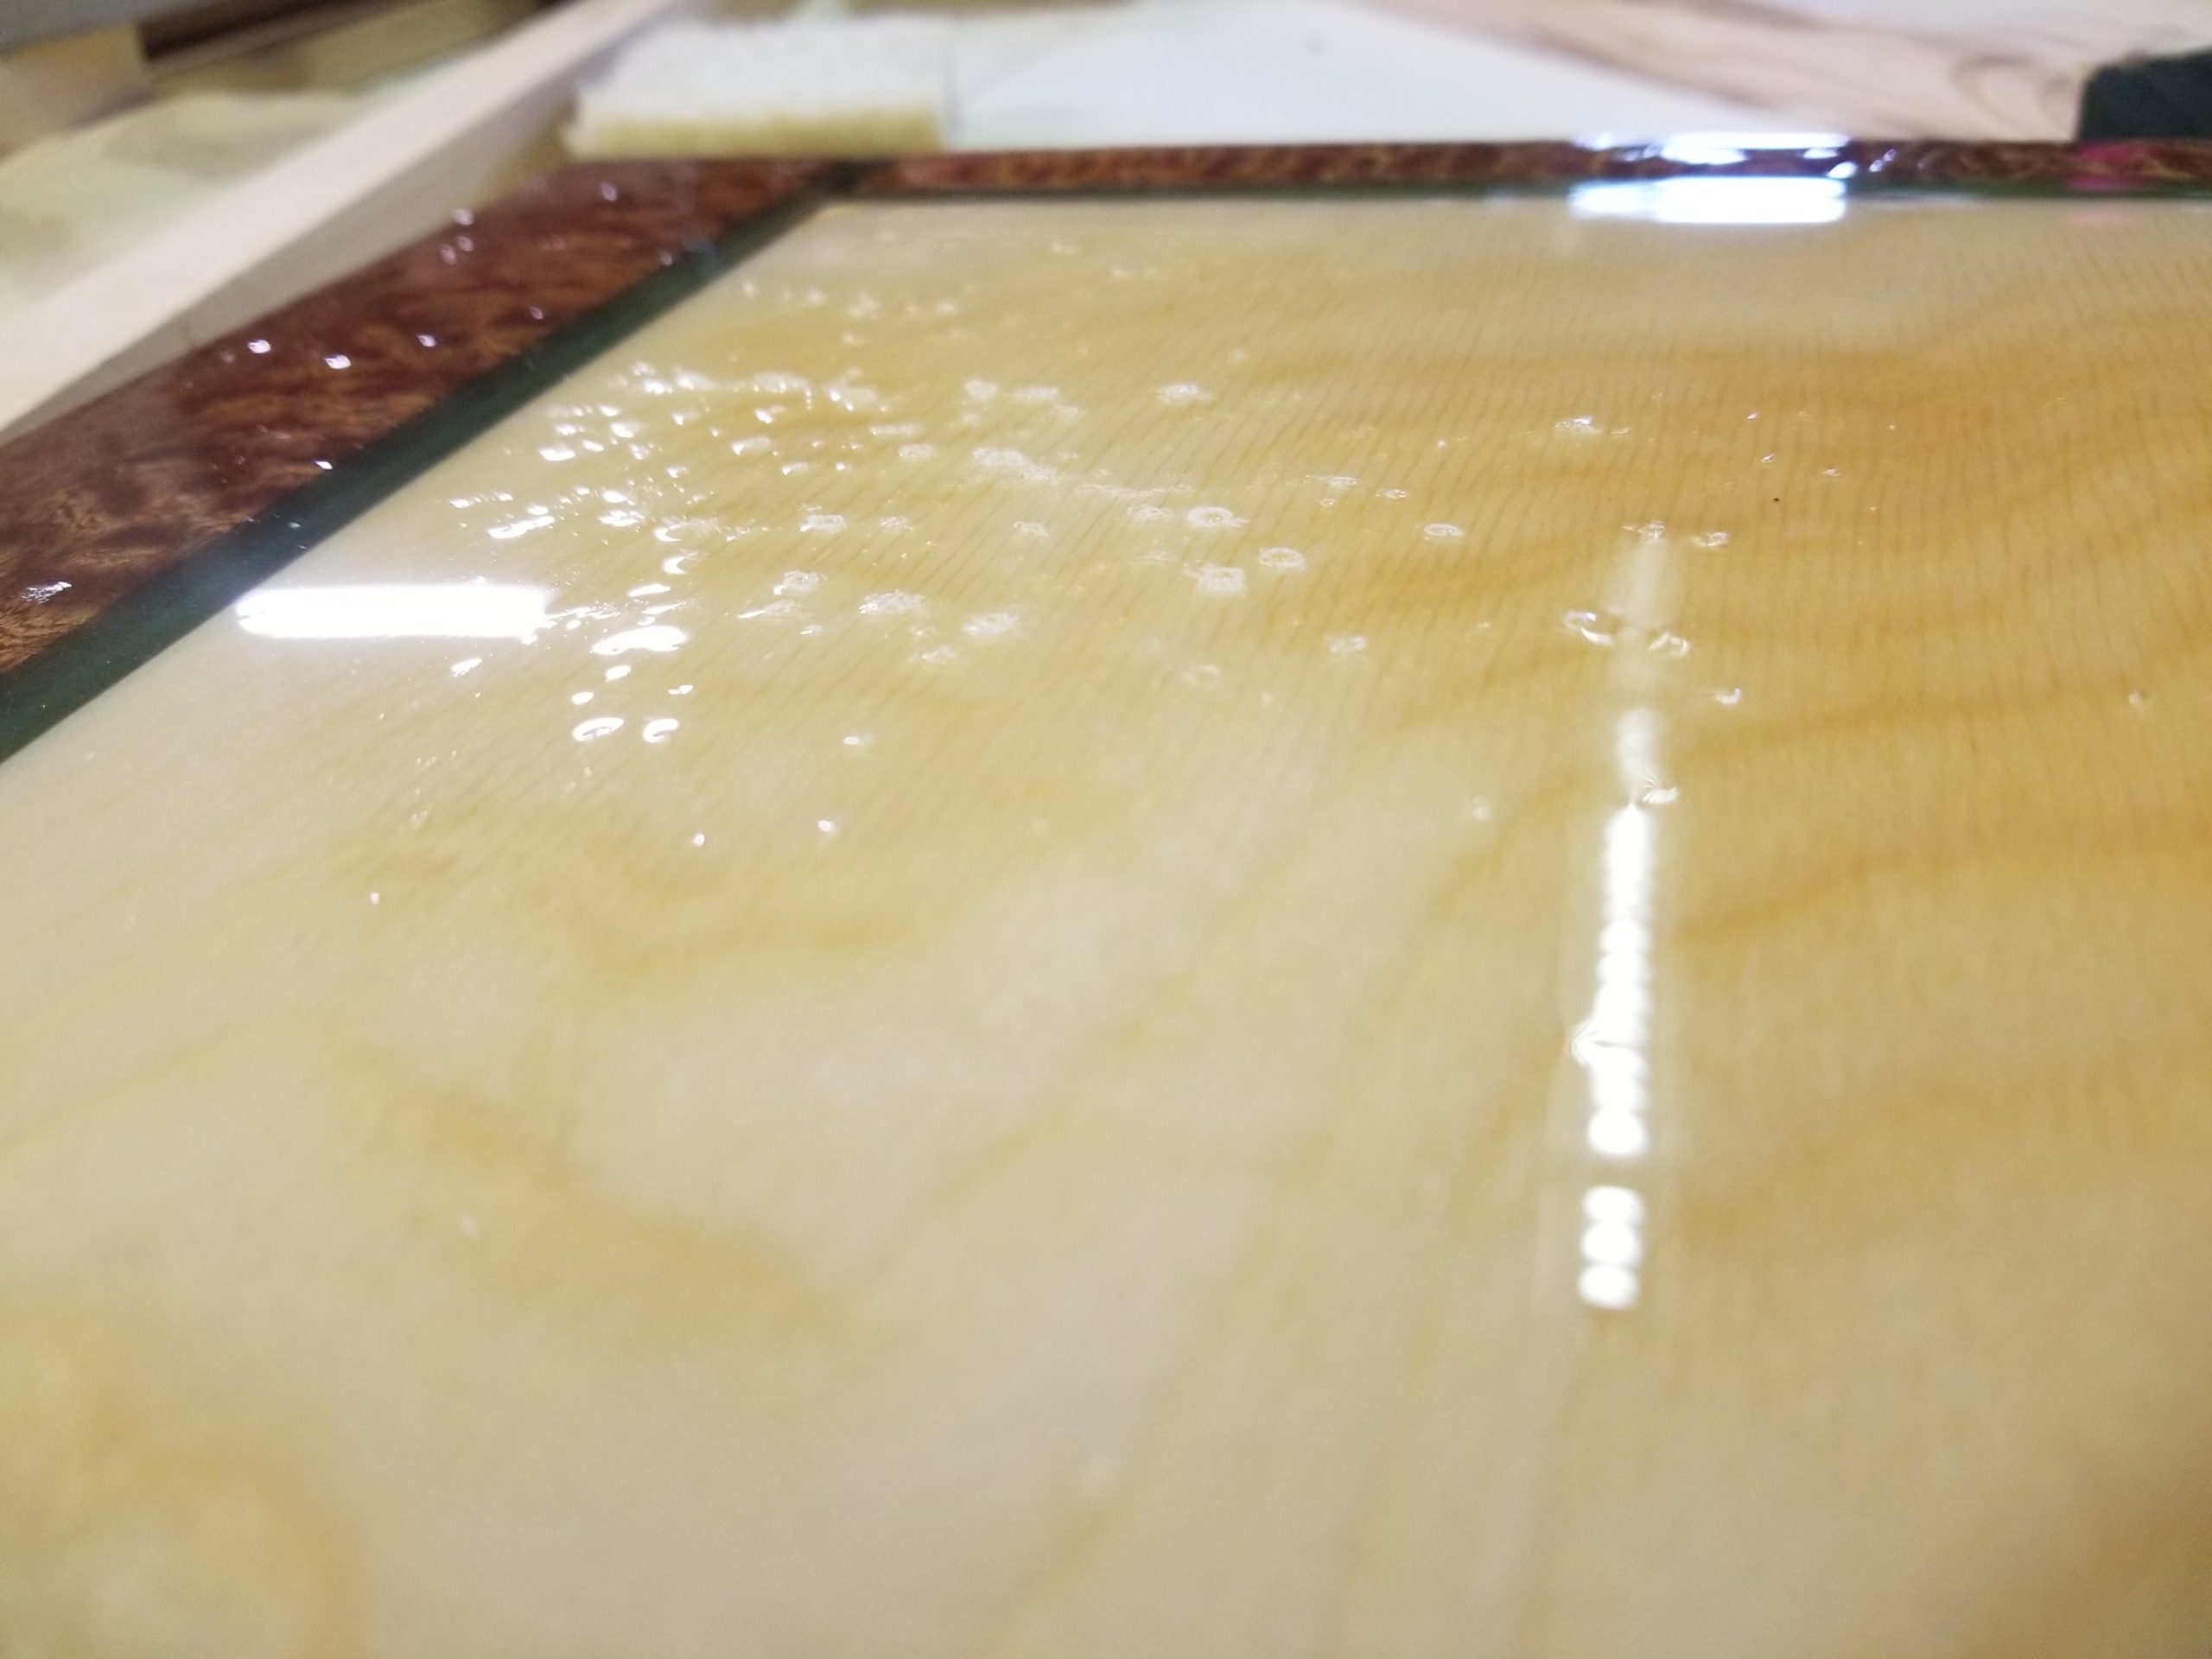
It’s also SUPER slick, like wet glass. While the high gloss looks nice (where the bubbles and mountains aren’t), from a practical standpoint, nobody wants the things they place on their table to go sliding off the edge at the slightest provocation. I’m not quite sure what I’m going to do about this. I think the answer is to sand down the trouble spots and top coat with something that isn’t epoxy (I have some stuff that is supposed to bond to it), and let that top coat fill the voids created by shearing off the bubbles by sanding. It should also restore much of the luster lost to sanding, as well. If needs be, I’ll gently sand that top coat with a high grit if it’s too glossy/slippery. I do hope this table top can be saved — it is lovely, aside from its issues.
Speaking of the bednette… I wanted to install the lifting column and travel limit switch only to find that the limit switch solution sold me by the vendor isn’t going to do what I need it to do (when the column resets, it needs to travel beyond the limit — no good! — and the way the switch works is actually incompatible with the controller that goes with this column!) so I’ll need to solve that travel limit problem another way. I have an idea. I’ll tell you when I do it 🙂
Meanwhile, to save bulk, I removed the connectors from the cables between the control box and the column and just soldered the wires through. But then it stopped working! WHUT??? Yup. Then I had an idea: I connected the (now liberated) connectors back together and observed which wires went to which wires. It turns out that while black goes to black and oranges goes to orange, no other colors go straight through! That’s why it didn’t work when I connected red to red, yellow to yellow, etc, like would otherwise seem obvious and natural.
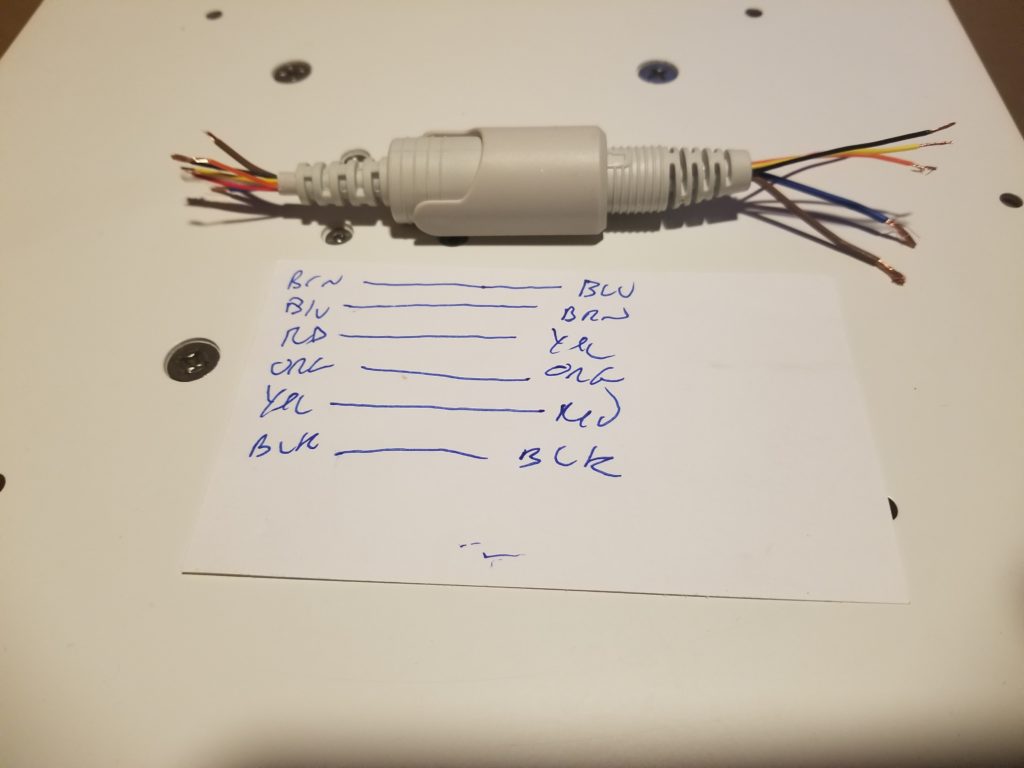
After tracing the wire swaps (blue and brown; red and yellow) and accounting for them in my connector-less installation, functionality was restored! Yay, I didn’t break it! But really, kinda rude to swap colors along the route, don’t you think? Also: why isn’t anything as easy as it could be??
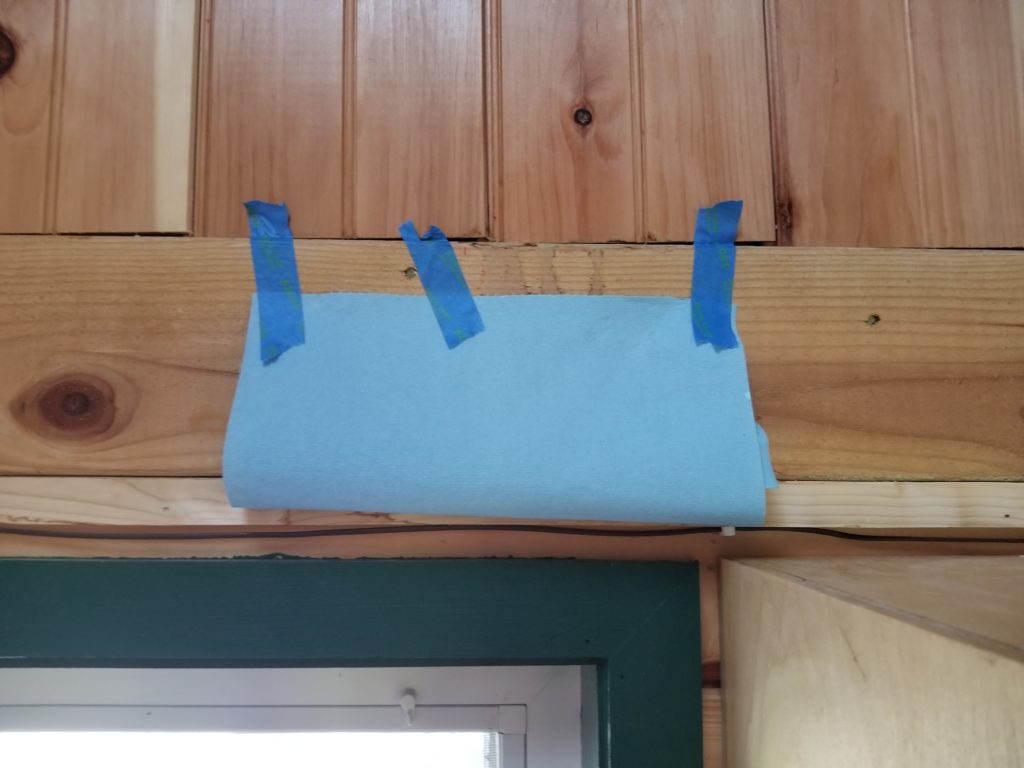
Well, actually, one thing was as easy as it could be: installing that pre-painted window trim from last time.
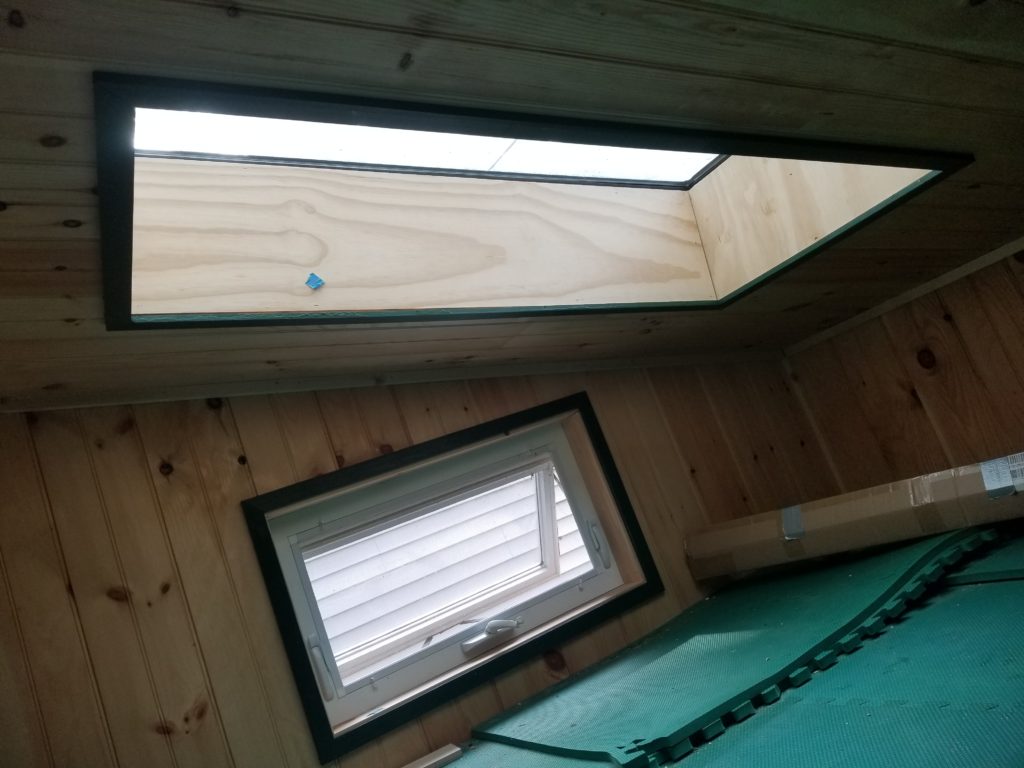
Now both skylights, as well as the Cozy Loft side window, are fully trimmed out. I still need to shellac the facing (that’s what the dots of blue tape are there to remind me about) but at least all the edges and faces look nice now.
I’ve also been up on the roof to see about mitigating Demon Cat. Remember Demon Cat from last post? I went up on the roof to see if there was anything in the skylight area that might possibly let water in. The angle to inspect under the flashing was really oblique and hard to see. I wound up using my phone camera to take pictures under there as a way to inspect it.
It was hard to tell, but I thought there were two spots in the flashing that looked like exposed seams that might admit water.
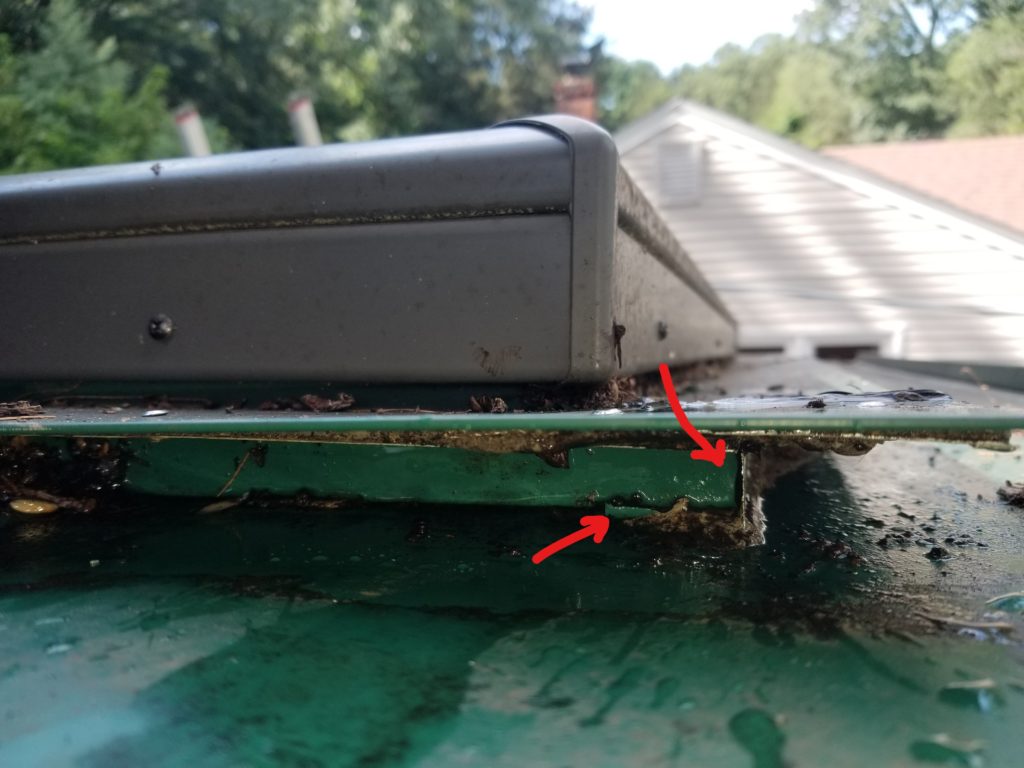
The flashing job was really difficult to do, and new to me as a skill, so it wouldn’t surprise me if there were some defects in it. While I wasn’t equipped at this time to do an exhaustive test — flooding the area with water to see if Demon Cat got wet — I did have a tube of sealant with me and decided to just spooj the heck out of the area, figuring if this region was letting water in, it wasn’t going to after I was done.
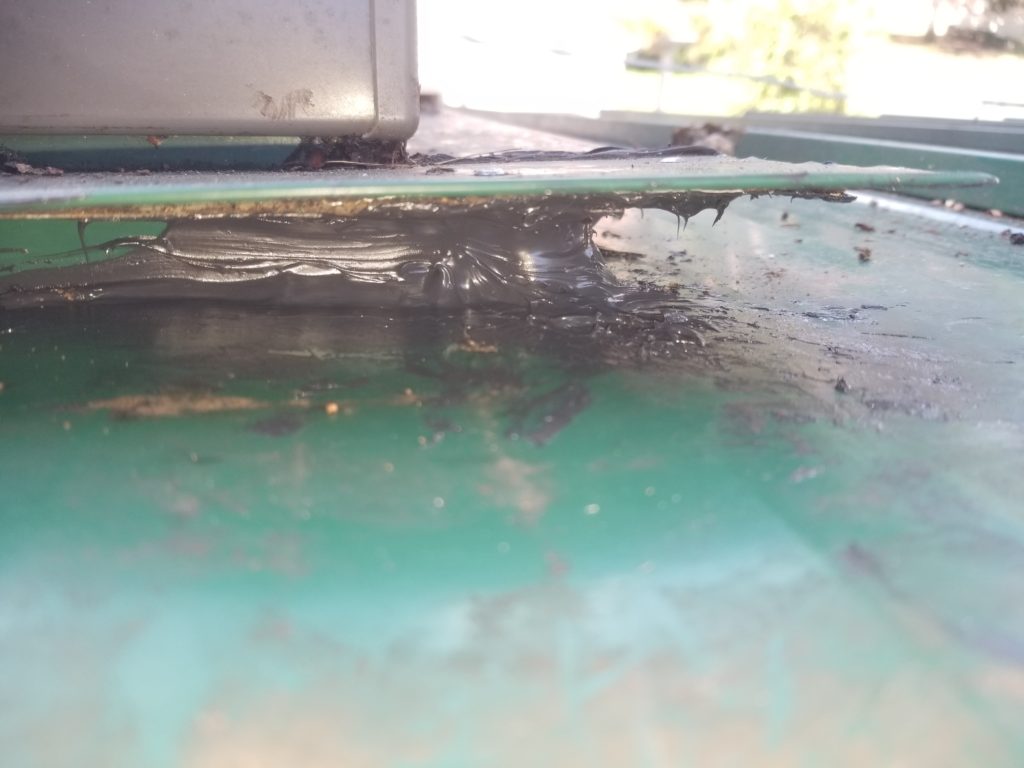
Of course the tip of the caulking tube couldn’t get into that recess (which is actually several inches deep, though it’s hard to see from this angle), so what I had to do was just squeeze out a bunch and try to massage it into place using gloved fingers though I couldn’t actually position myself to be able to see what I was doing. After a bunch of fuss, I got it done well enough. It’s a bit messy, but nobody would ever see it unless they were already on the roof and in that case, what are they doing on my roof??
So, did it work? Well, I put this paper towel over Demon Cat such that if it got wet, even if I wasn’t there to see it, I’d notice. If the towel gets wet and then dries, it will still wrinkle up a bunch. As an extra indicator, after this picture was taken, I draw a line across it with a sharpie marker. If it gets wet, it’ll probably cause the ink to run or separate a bit, too.
There has since been one hard rain and I’m pleased to say the towel shows no signs of having gotten wet. I’d like to see it survive a few more storms before really believing in it, though. Maybe I’ll just use the garden hose to simulate one. Those two new cabinet bodies are going over this exact spot, so I’d like to know it’s dry and happy first.
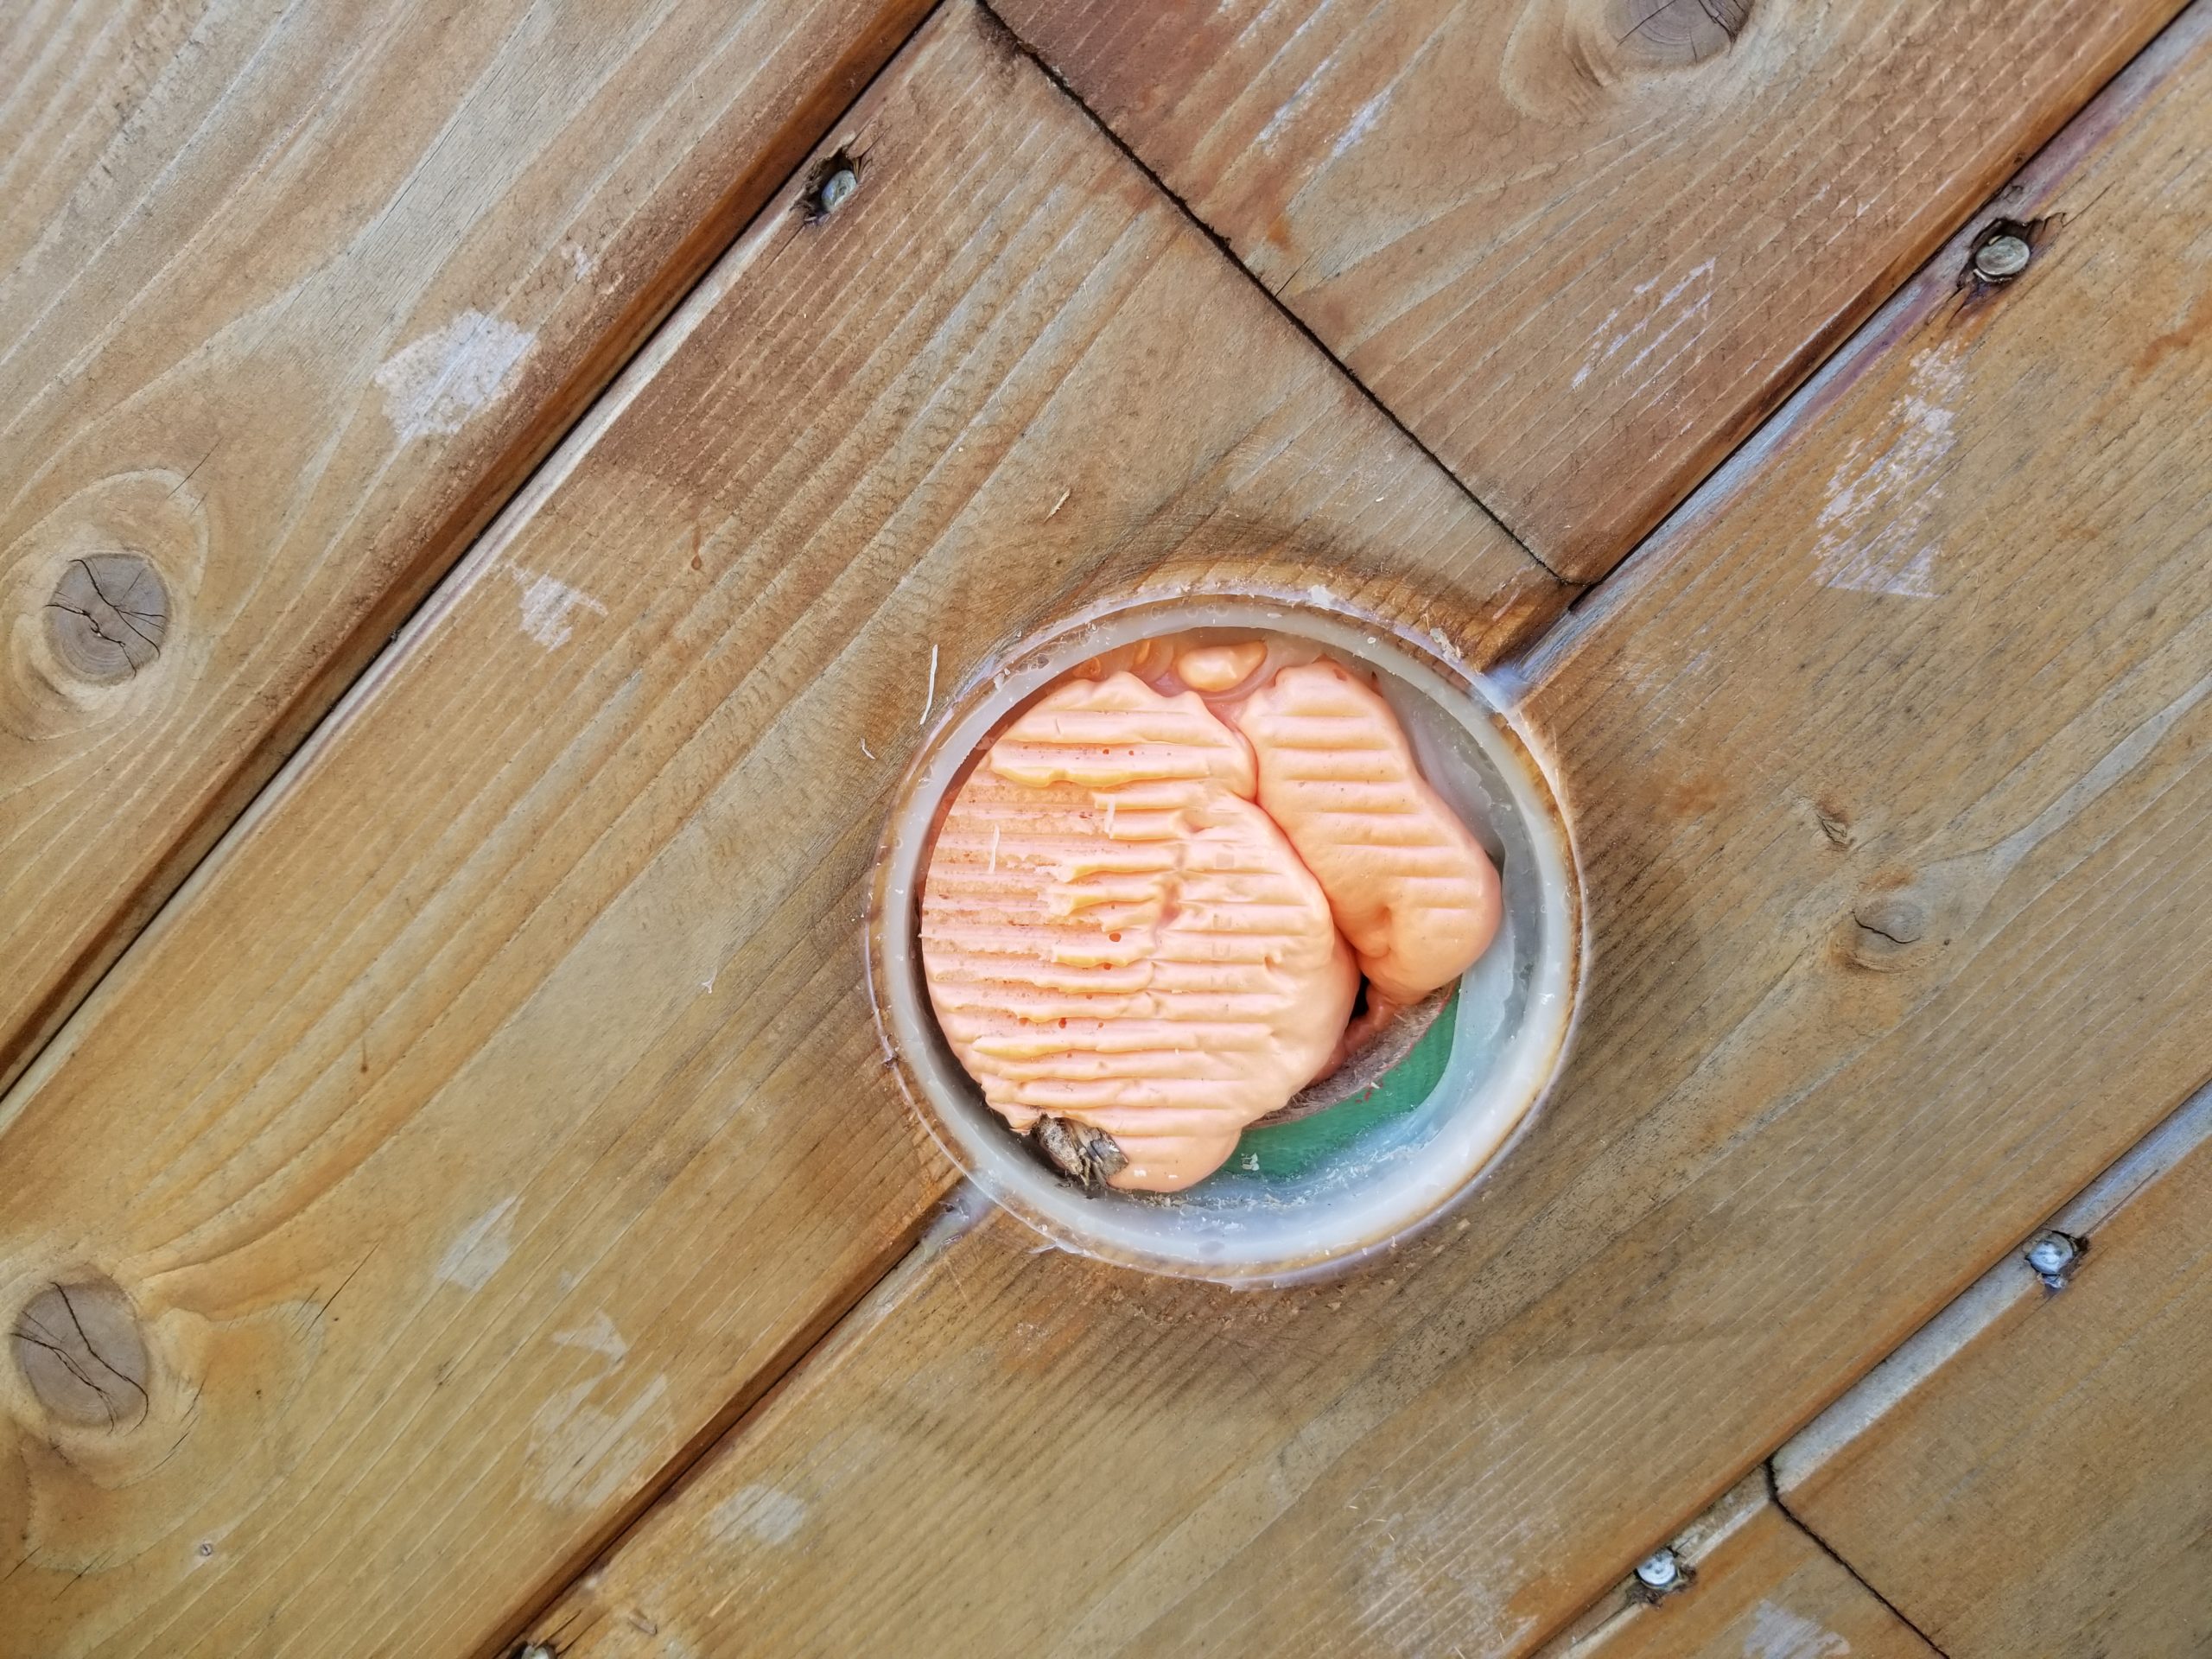
And lastly, Orange Foam!
I wanted to seal the fresh air inlet for the wood stove so there wasn’t any fresh air let in anywhere else, so I turned to my good friend Spray Foam.
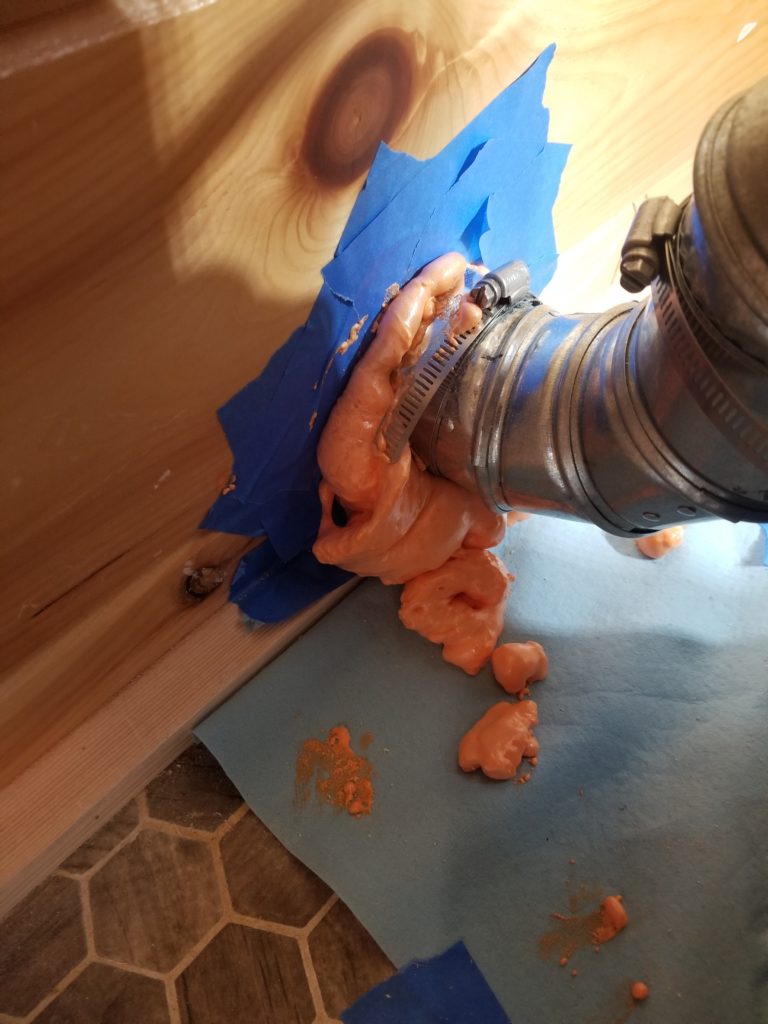
I did have the presence of mind to mask off the wall and put out a paper towel to catch the dribble on the inside. I’ll take a blade and tidy that all up later. What I didn’t realize, was that there was a gap at the end of the duct and that the spray foam was going to work itself around the end of the duct, through the gap, and actually plug the intake completely!
Ooops.
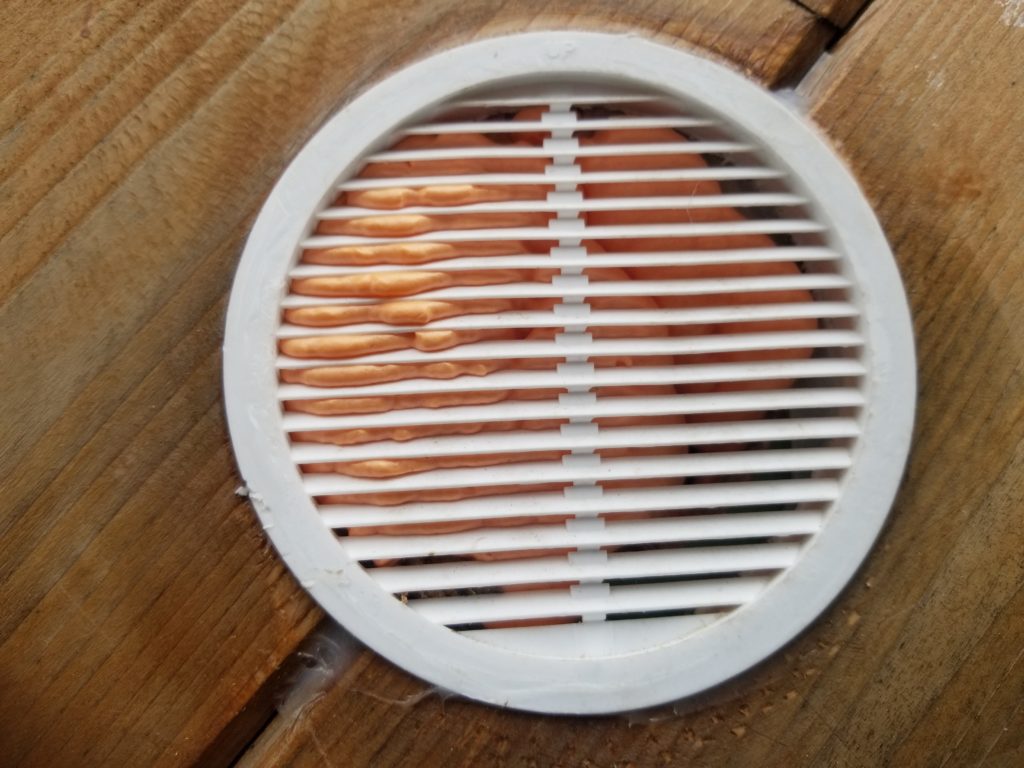
It turned out not to be such a big deal to fix. The foam didn’t bind to the duct (which is smooth sheet metal), so once I cut it free from the little bit of wood exposed at the end, I could clean it out pretty easily, then re-install the grille.

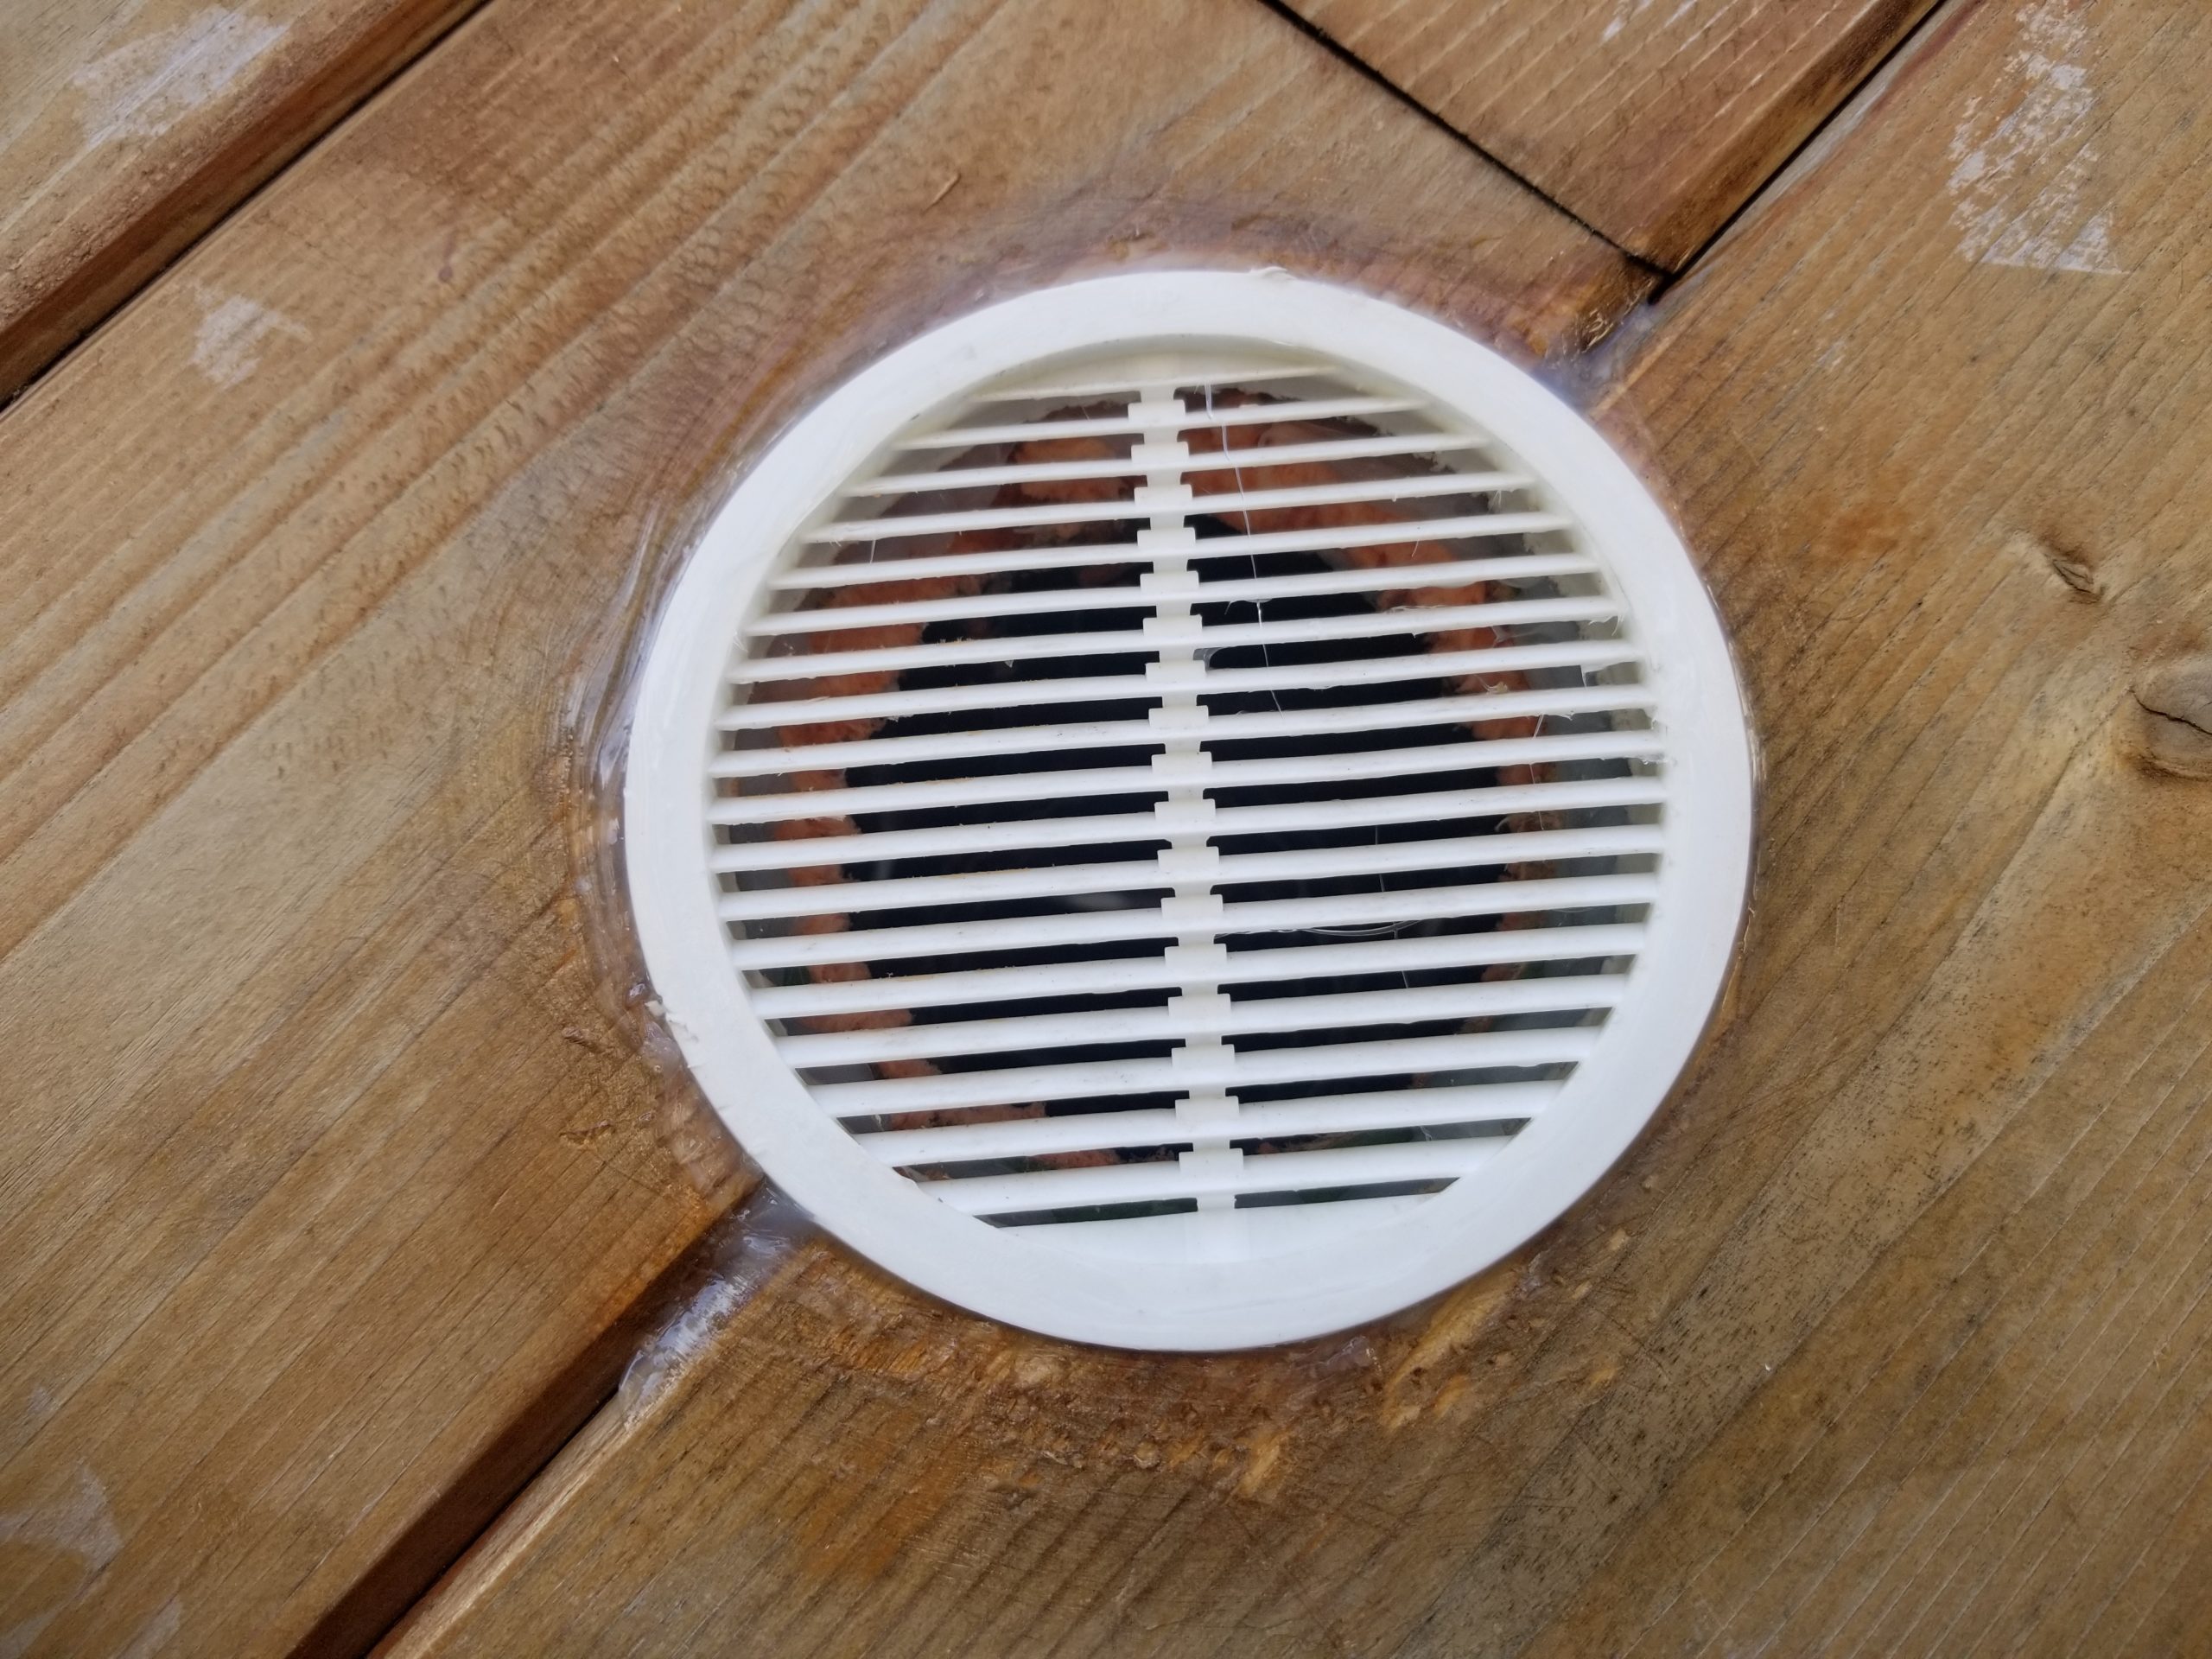
The grille is actually properly horizontal – the camera was tipped slightly and I’m too tired to fuss with the image 🙂
What’s next? Finish the panels, install the cabinets, test for water/Demon Cat Ressurection, install the cabinet and closet doors, install the bednette column and my secret solution for dealing with the travel limit issues, finish the bednette table top, to name a few. I’m almost ready to install the heat shield, too, after which I can test-fire the wood stove! But not today.