Much to report since the last installment. Let’s get right to it!
That blinding vanity light in the T.H.R.O.N.E. Room was just too much, so I bought a different light. That light is lovely, but it wants to be mounted flush to the wall, in front of a junction box. But my tiny house doesn’t have in-wall junction boxes. It has surface-run utilities. How, then, to mount this new fixture? Well, I could install a surface-mount junction box, then mount the fixture to that, but it would look terrible, with a huge gap behind the fixture.
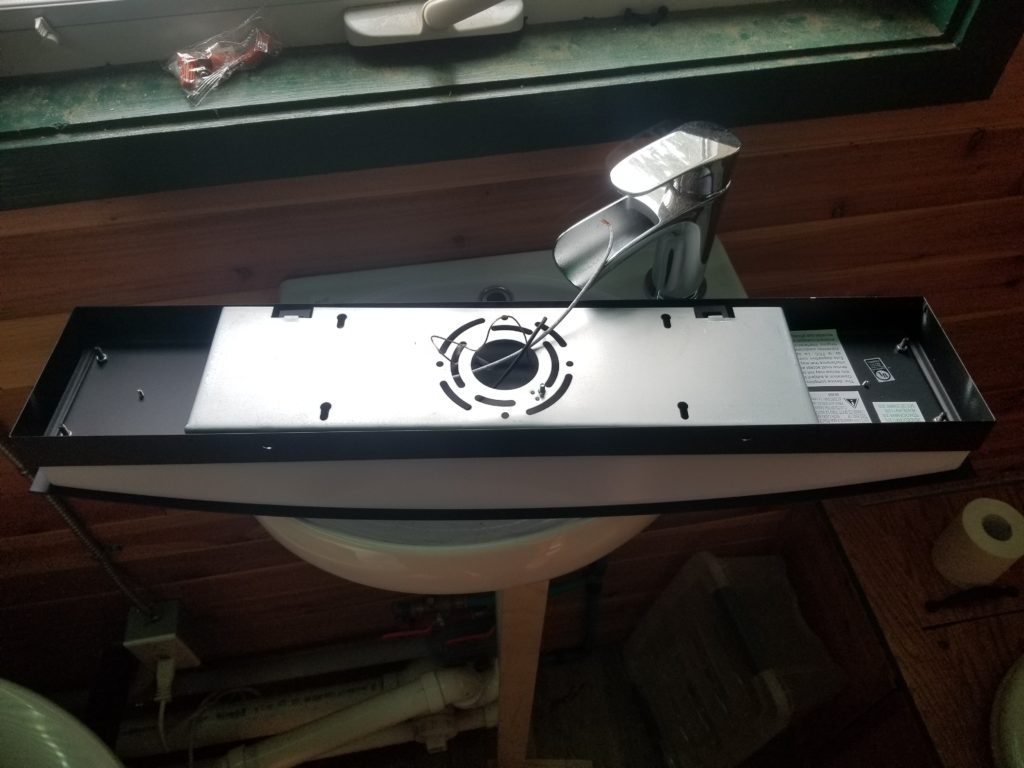
I could build a soffit-like contrivance to mount the junction box inside, then mount this to that . . . but again, it wouldn’t look so great and would definitely be more work than I care to exert. I did notice that the mounting plate for the fixture has keyhole slots so it can mount with screws to anything that can take screws – such as the T.H.R.O.N.E. Room’s wall – but I still need to connect the electric. If only it had a knock-out on the side of the fixture.
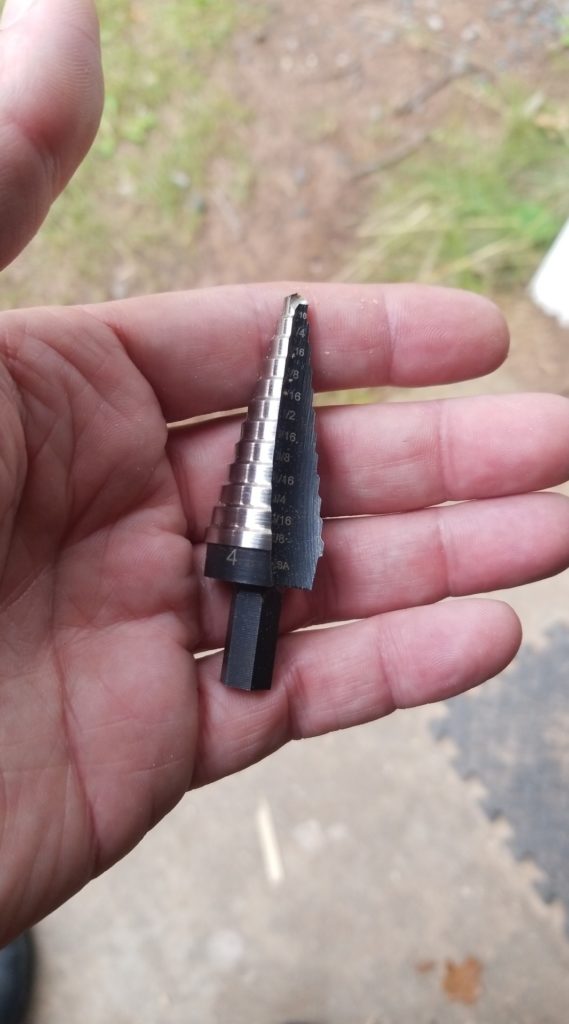
Hello, metal-eating step drill. You’ll do the trick just fine.
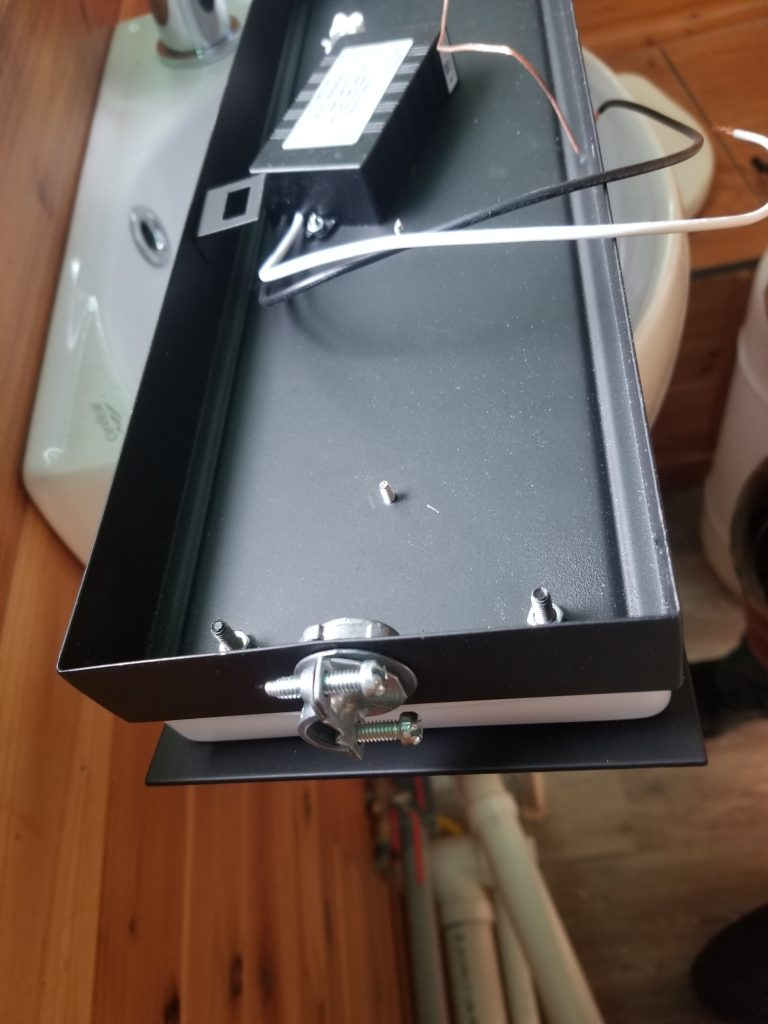
And presto! Suddenly there’s a perfectly-sized hole in the side of the fixture for running my supply wire (shown here with cable clamp installed)
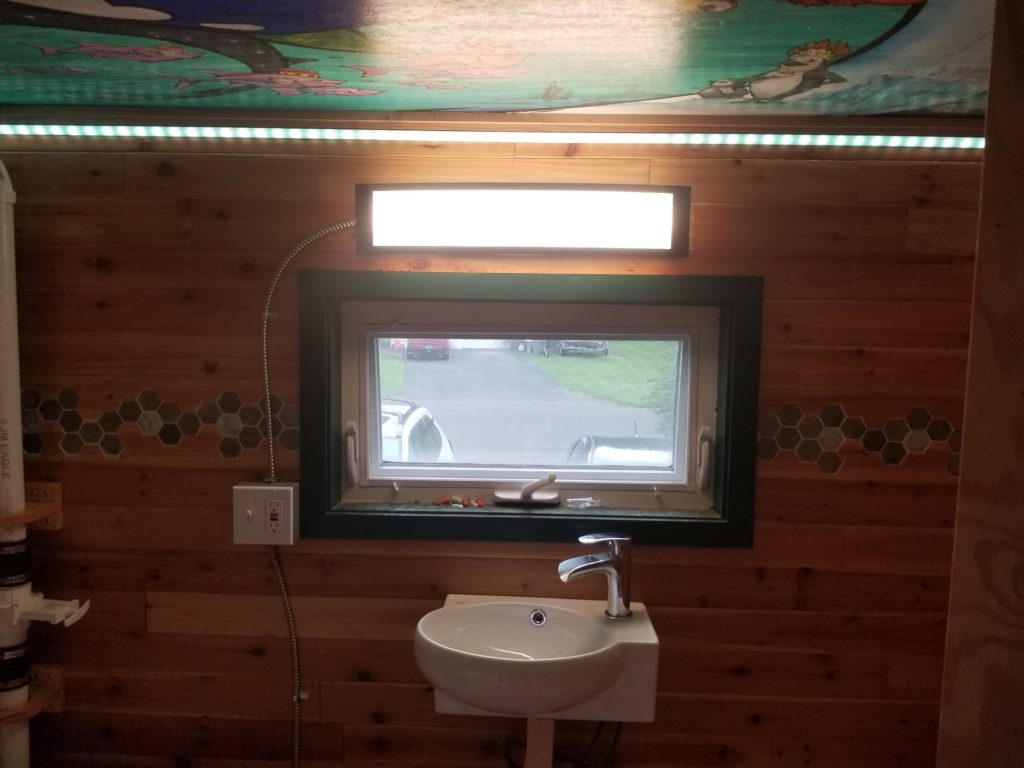
The new light is still quite bright, but at least it is more diffuse and I put it higher up, so it’s in a position to illuminate for grooming purposes but not actually blind me.
So, remember the furnace with the faulting fan bearing? It turns out there is no faulty fan bearing. To find this out, though, I had to first un-install the unit, which, among other things, meant un-sealing the exhaust/intake assembly from the side of the house, unscrewing it, scraping out the sealant from everywhere so when it was time to re-install and re-seal it, the new sealant would have a relatively clean place to go.
My friend J suggested that I could evaluate the machine without the gas hooked up — it should still spin up the fan (which happens before the gas is turned out, and before the internal ignitor gets going) so if it is the fan, I’ll be able to deal with that directly, without worrying about the gas. Excellent. I’ll do that. So I do that.
Before I power up the unit, though, I notice that its sheet metal body is a little rhomboid rather than more properly rectangular. It must have had a rough journey here. I do remember thinking it hadn’t been well packaged and I do remember noticing it was a little bent, but at the time didn’t think much of it. So before doing anything else, I just gave the thing a solid squeeze to right it. Then I checked out the fan by hand and found that it moved freely and didn’t hit anything. Then I connected the power and shunted the thermostat wires to call for heat. The fan comes on and… it sounds fine! There is a rushing of air but no other sounds that don’t belong. Huzzah! Maybe it was just being a little bent that was causing the noise, even though I couldn’t determine that before. Okay, it’s happy now, so time to re-install it.
Up the ladder I go to install the exhaust/intake assembly. The tricky bit here is how to manage a handful of screws while at the top of an extension ladder? I just stowed them in a pocket when I was removing them but now my hands are in nitrile gloves covered in silicone sealant and I don’t care to ruin my jeans by sticking my hand in a pocket. What to do? I remembered my special magnetic screw bracelet! It’s the perfect thing for this exact problem.
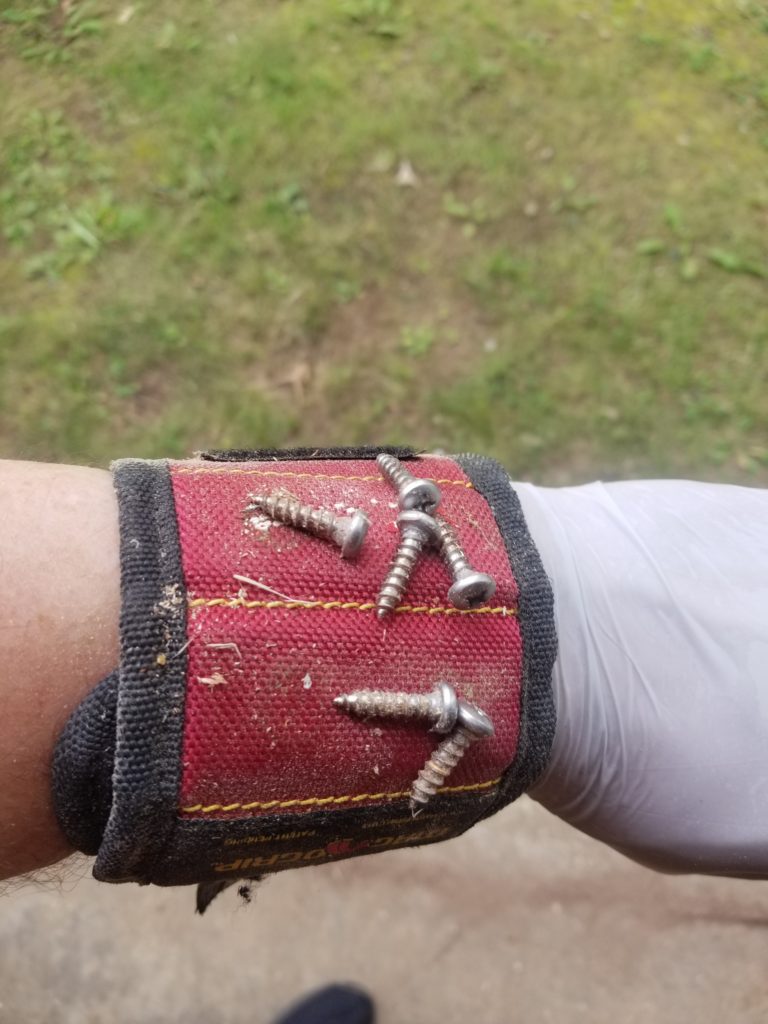
If you don’t have one, you should get one. They are immensely handy. Well, wristy, but still.
Okay, outside work is done, time to button up the front grille of the furnace and get on with other things. I do that. Just to be sure, I power it on again… and the noise is back! GAH! But I do not fret. Instead, I tweak the sheet metal housing of the furnace some more, now that it’s been moved about a bit, and behold, the noise is gone. If I had known that fussing with the metal would have cured it before, I’d have saved myself a few ladder trips, a sealant un-doing, a sealant cleanout job, and a sealant re-doing, but, well, I didn’t know then what I know now. I do know now, though, that should the noise return, I will just fuss with the housing until it’s gone rather than go through the surprisingly inconvenient steps of un-installing and re-installing the unit.
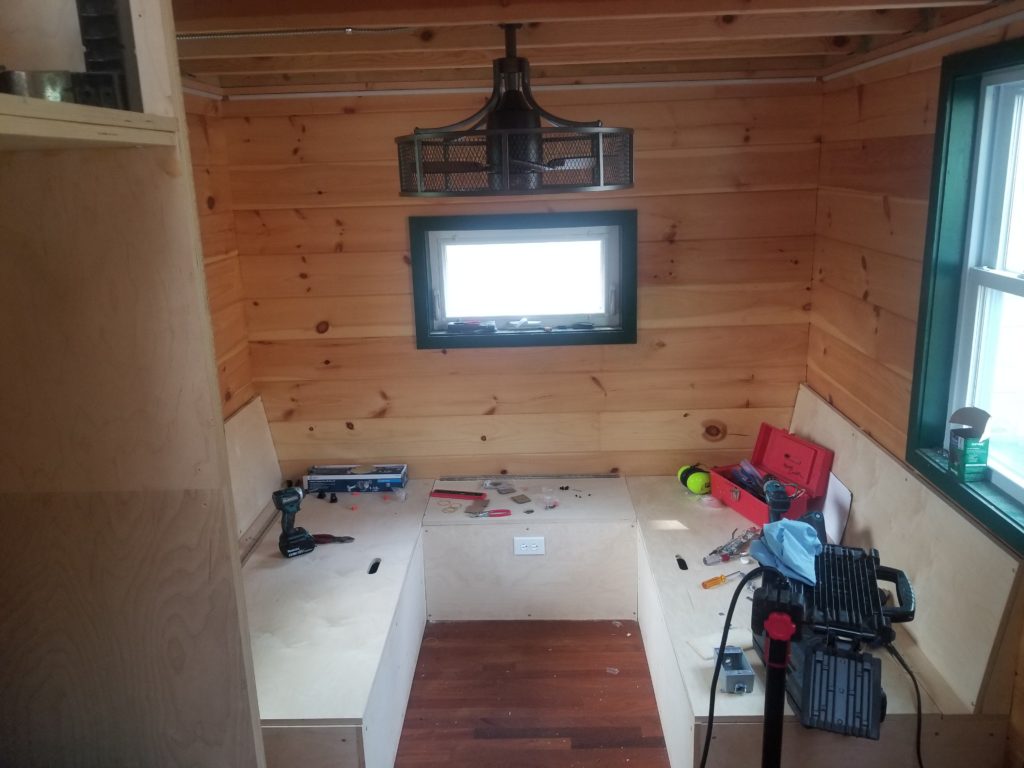
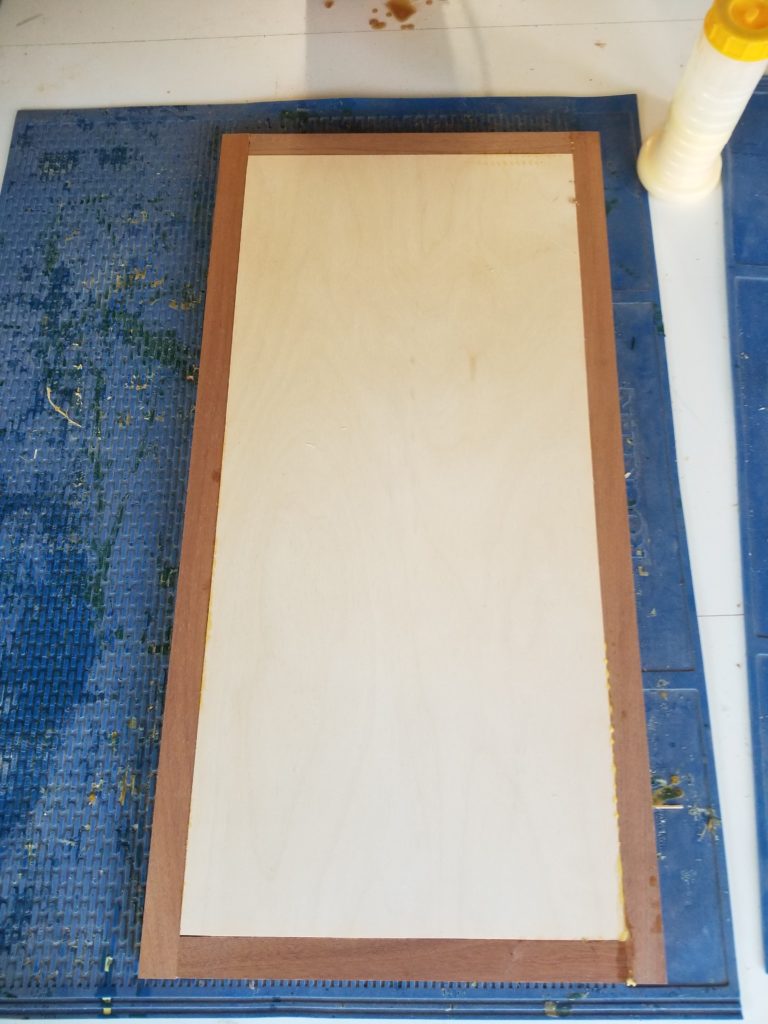
There’s been a bunch of work on the Bednette, too. First, the tabletop. I didn’t have any wood that was big enough to make the top so I pieced together some cabinet plywood along with what was once flooring scraps/extras and glued it all together to make the table.
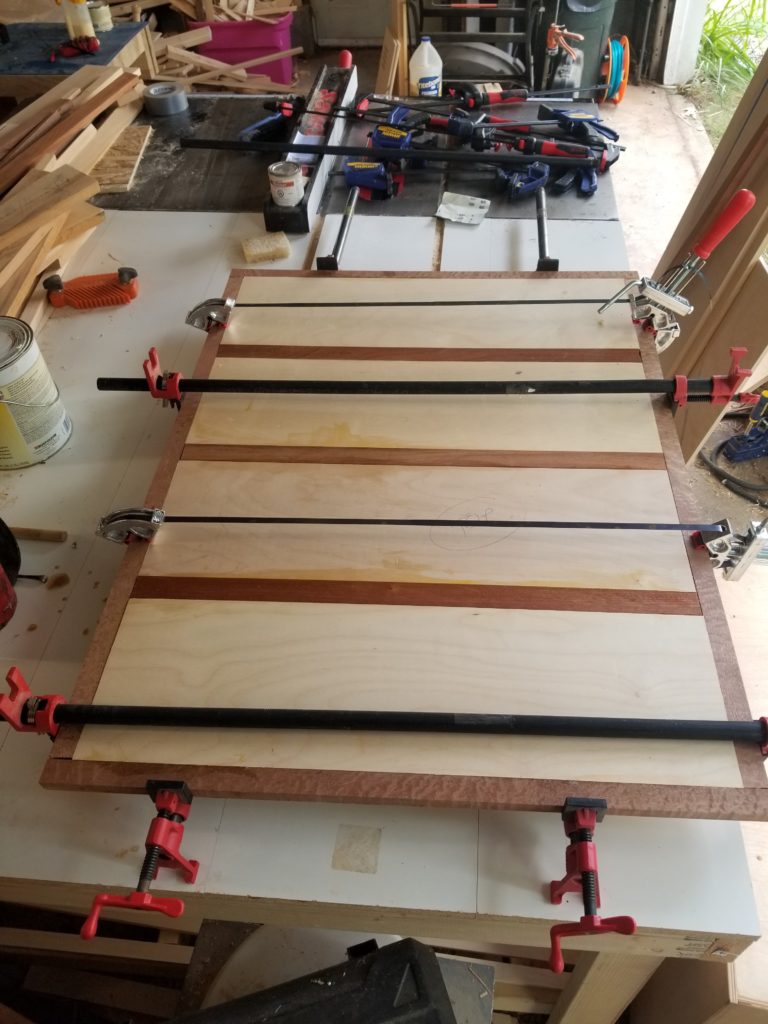
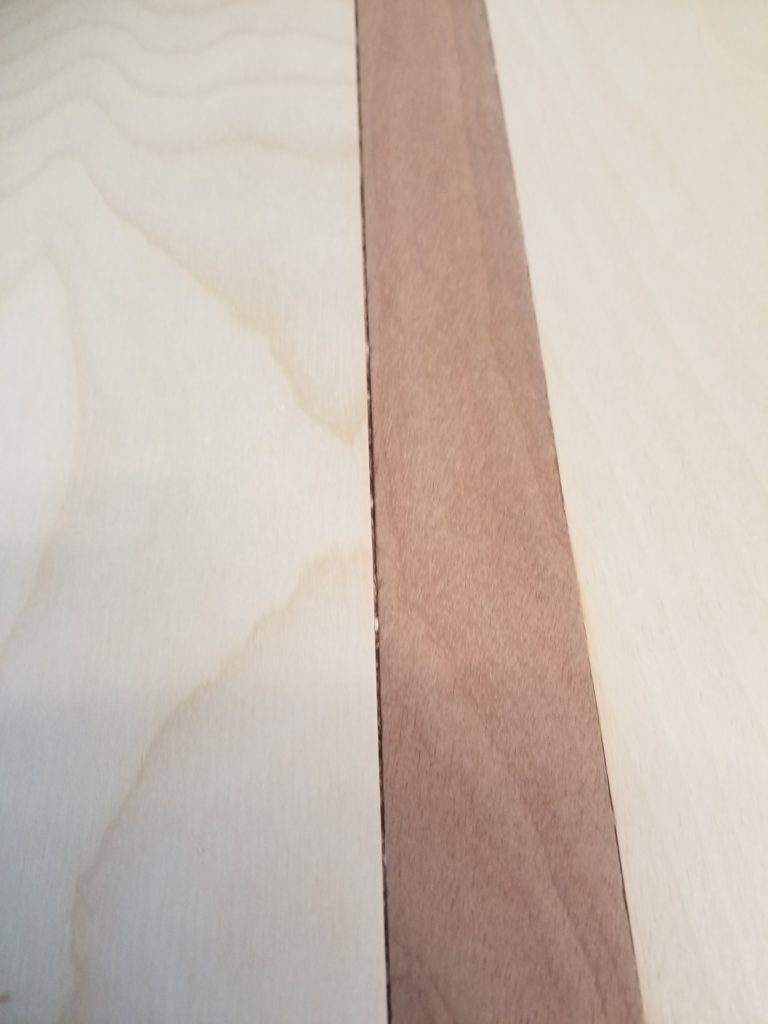
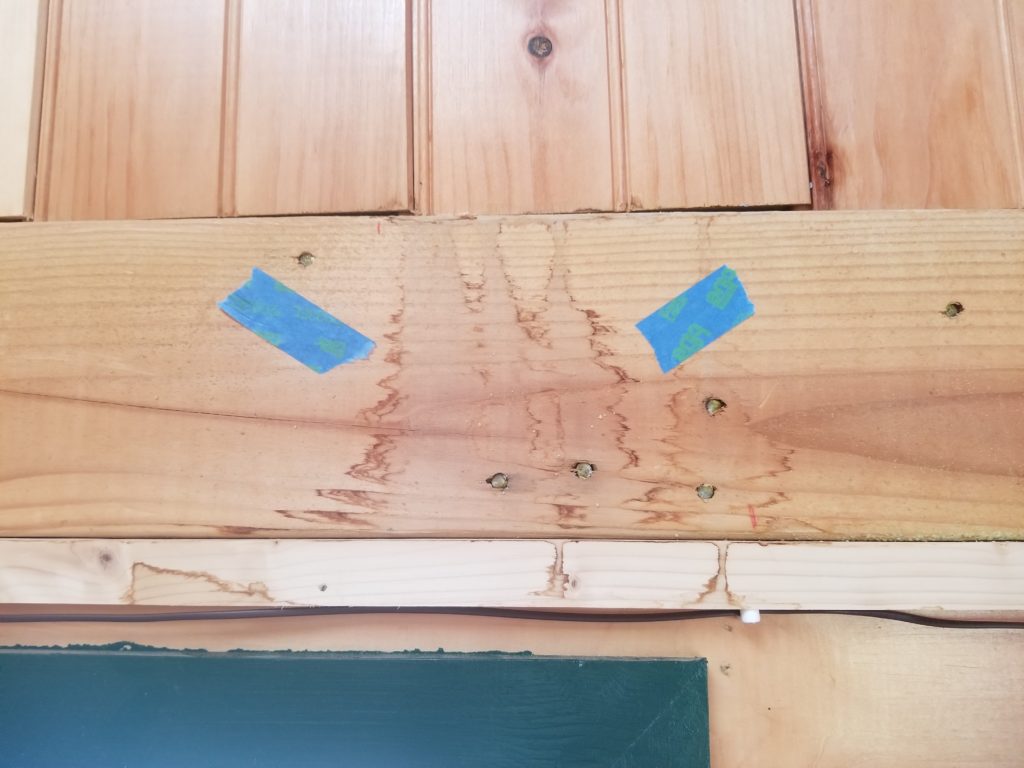
You might notice that there are a few subtle – and less than subtle – gaps. Indeed, it’s true. My skills at precision frame-and-panel fabrication are not as refined as I would like them to be. There are a few things that can be done about it, though… First, for minor gaps, mixing some sawdust with wood glue and simply filling the gaps works pretty well to disguise them. Shown below, a gap to the left of the dark board, then the same scene, filled.


In some cases, though, I simply lost control of the part while machining it and gouged out a bit of a chunk. In other cases, the gaps were too big to fill with glue-and-sawdust. S had a brilliant idea: route out a channel over all the gaps and do some kind of inlay there. That will disappear the gaps and add a decorative touch! This is a fine idea! My inlay skills are so-so, but I could probably get this done. I had an even better idea, though: liquid inlay! Guaranteed to fit exact. So I routed the channel, which you can see drove right over some pretty egregious flaws (dark horizontal line, left, and seriously gaping hole, right).


Then I mixed up some epoxy and added a fair bit of green pigment (green is my accent color in the house). Then I poured it in…
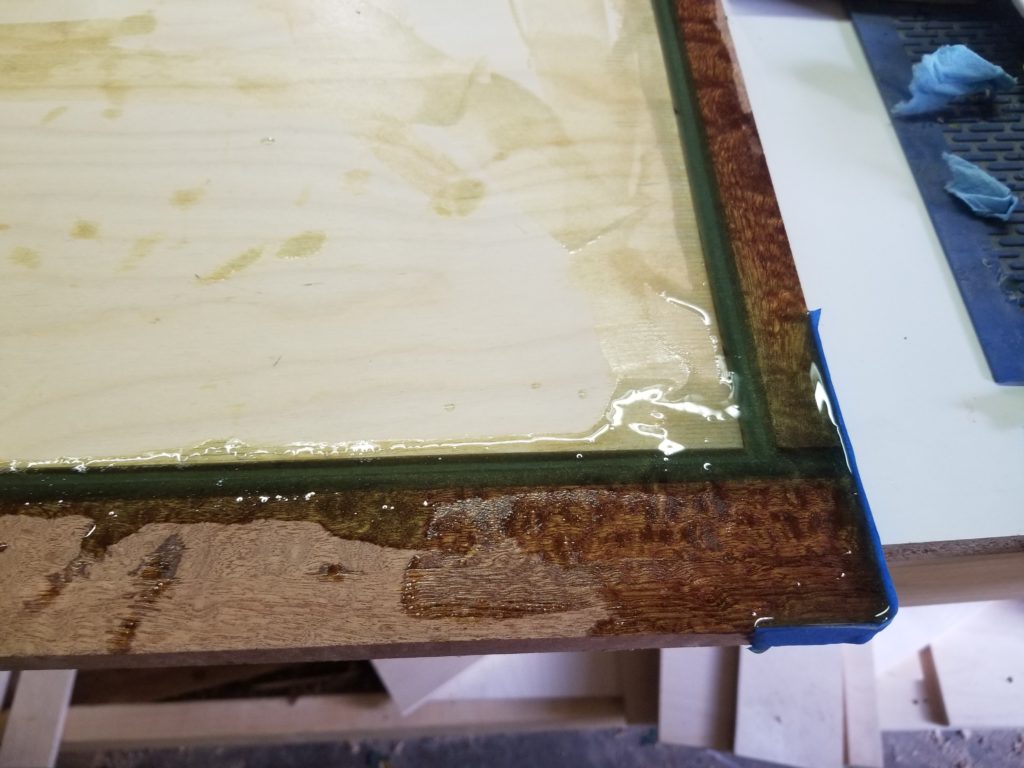
Which for now just looks like a mess, but when the epoxy cures, I’ll sand it all flush, which will also get rid of the spills and drips and such, after which it should look pretty nice. It turned out that despite a moderate amount of pigment added to the epoxy, it was — when wet, at least — still fairly translucent, revealing some of the flaws below if one were to inspect it. However, instead of there being glaring errors, now there’s this nice green border which only reveals the flaws upon closer inspection. An improvement, for sure. This is a slow-curing formula, so it’ll be a week before I can sand it to see how things look for real.
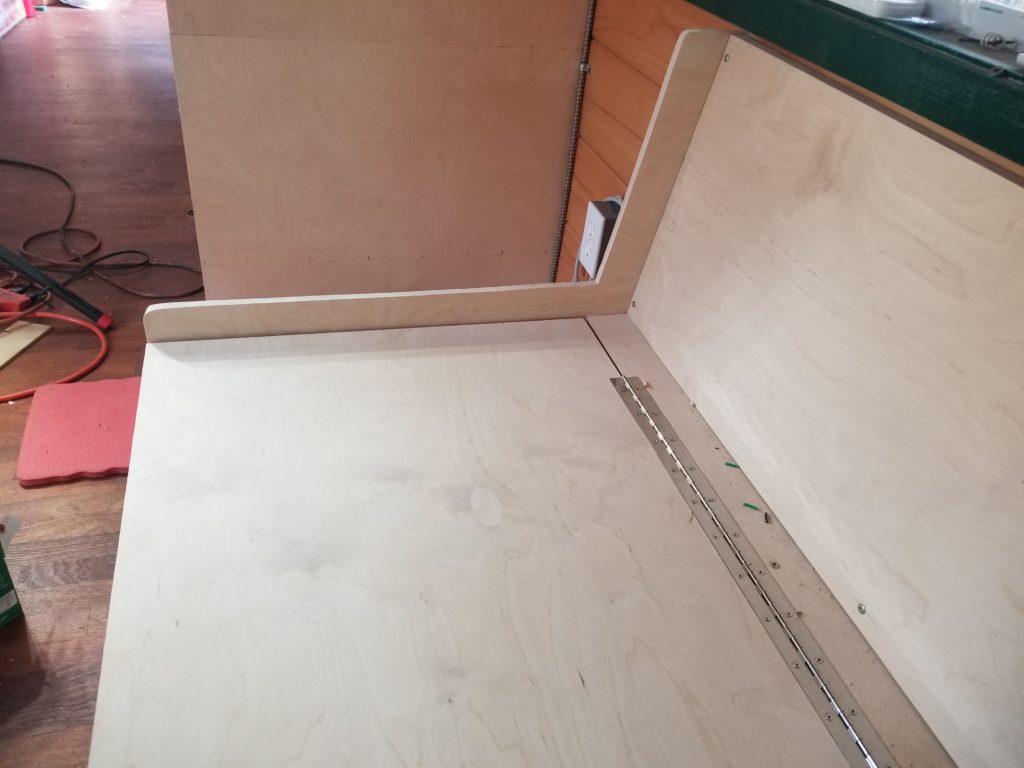
Elsewhere in the Bednette, I added the cushion-keepers to the ends of the benches, thus.
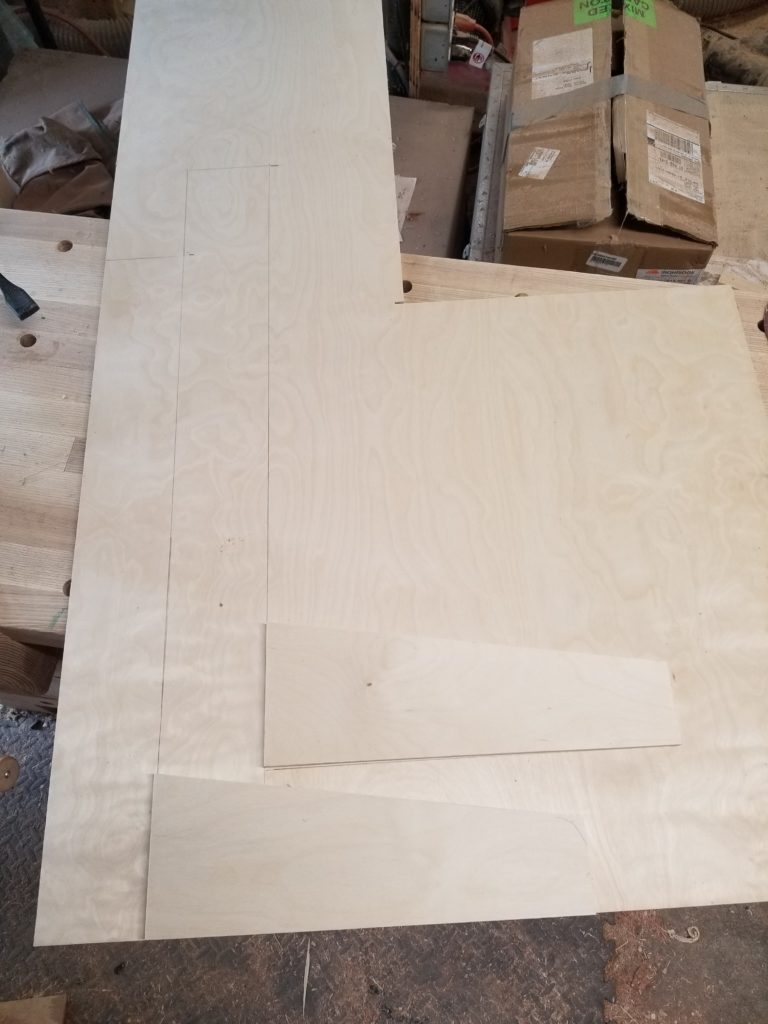
At first, I had intended to fabricate these in multiple parts due to the large area they cover. Then I happened to notice I did, in fact, have a large-ish piece of cabinet plywood left over so I could actually make them as a single part. They’d be much stronger and more aesthetic that way, so that’s what I did… sadly, this realization happened after I had already cut the smaller parts, so those go back in the scrap pile.
Laying out the monolithic parts, using the previously cut parts as a partial template:
And speaking of cushion-keepers, I have found someone to sew the cushion covers! I could probably have done this work myself, but really, I have plenty to do already and a recently unemployed friend had the skills, so why not help her out with some piece work and save myself the trouble? Exactly. Done. She has the foam now and the fabric should arrive this week. What will it look like, you ask? You did ask, didn’t you? It looks like this:
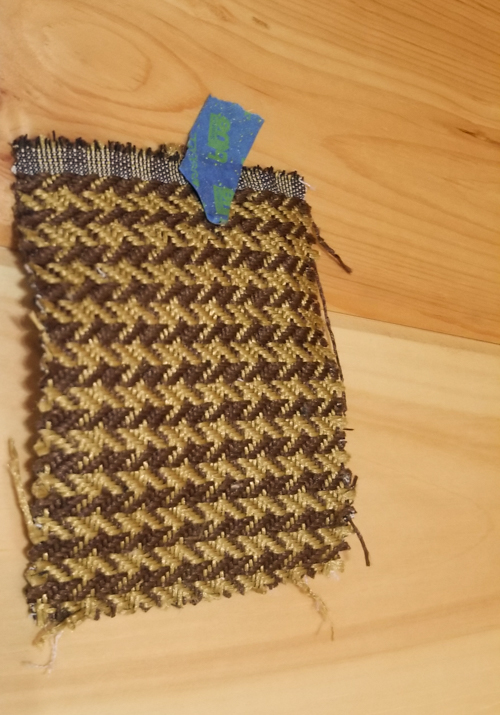
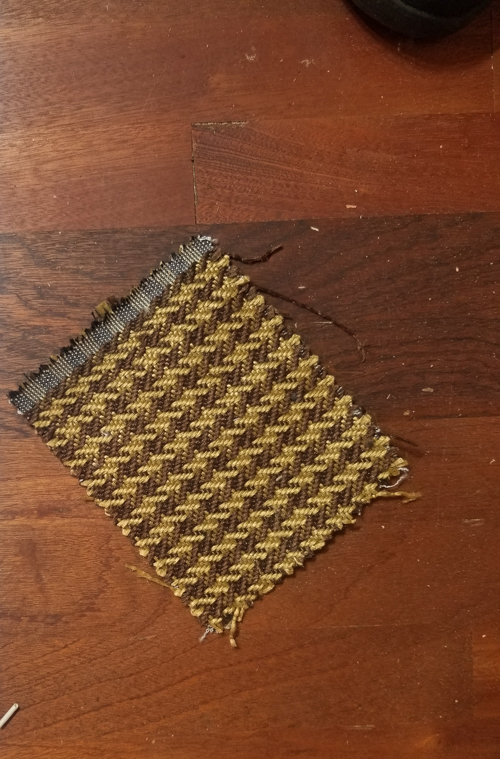
Which at first I thought might be too busy, but when one isn’t looking at it up close like this, the two tones blend together harmoniously and the pattern just fades away. The brown in the pattern picks up the red and brown tones of the flooring and the gold picks up the amber tones of the wall dressing. I think it will look very nice as cushions — and will be right in the same scene as the table top, which also features both red/brown and amber tones.
And for our last stop in the Bednette, the ceiling! S asked whether I had considered installing a ceiling fan in the tiny house. I told her I thought she was crazy – there’s no headroom! And then I thought about it some more. It is true that there’s no headroom for even a flush-mount ceiling fan, but that’s assuming anybody would walk under it. There’s no headroom under chandelier over a table, usually. The table protects the chandelier by establishing a no-walk zone. What if I got a really compact ceiling fan, then, and installed it directly over the table? Nobody will ever walk there, so it would be safe! The question is, can I find a ceiling fan with a sufficiently small wingspan? The answer, it turns out, is YES. And it even has a bit of a safety cage around it and a nice light, too!
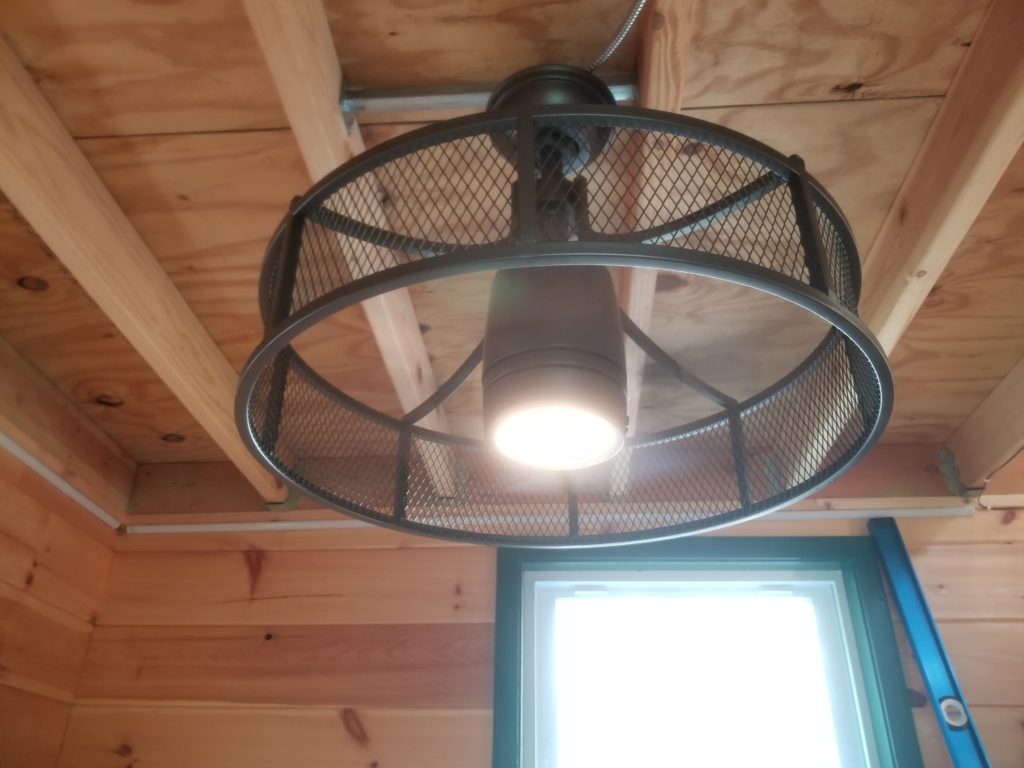
There is no hazard to people seated, entering, or exiting the Bednette, and now there’s a fan to help keep me cool in bed in the summer and some dimmable task lighting for over the table — romantic mood lighting or bright for reading or food prep. Perfect.
But as you may recall from a previous post, there’s more to a bedroom than sleeping. Is there clearance for anything but missionary position under the fan? The answer is… not really. However, I already knew that and adjusted the position of the fan accordingly. The fan is actually located at the end of the table, rather than centered above it, such that is effectively above only half the bed when the Bednette is in sleep mode. The other half, the side against the wall with the window, has full clearance, even for a big person such as myself. There’s a minor chance of coming into contact with the fan in that case when sitting up or kneeling, but the fan has a cage around it (almost as if I planned this far ahead!) so even if contact happens, contact doesn’t happen. Not with the spinny part, anyhow. Nobody gets hurt. The fan just rocks a little on its pivot. No problem. And I have a fan to keep comfortable in summer and a light for the table. Win.
Now to the galley, where I am pleased to report there are now upper cabinets!
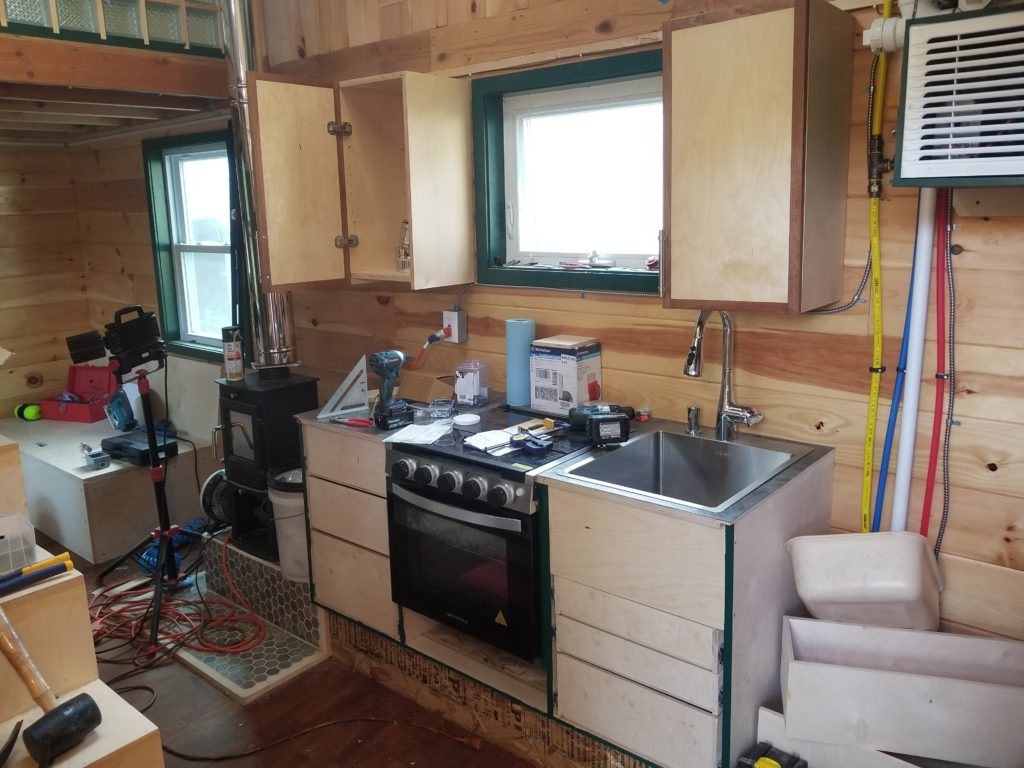
There are holes drilled for shelf pins and at some point I will also make some shelves to sit on yonder shelf pins.
The doors are made from the same cabinet plywood I’ve been using elsewhere in the galley and the Bednette, plus a frame made from flooring scraps. As it turned out, the cabinets needed 13.5″ wide doors but the widest plywood I had on hand at the time was just under 12″. That’s what gave me the idea to use the flooring scraps for a border. I have also improved my frame-and-panel technique a bit. No gaps here. The little space next to the tongue is intentional – it allows for glue squeeze-out and a snug fit of the shoulders of the joint, which are the parts you see.
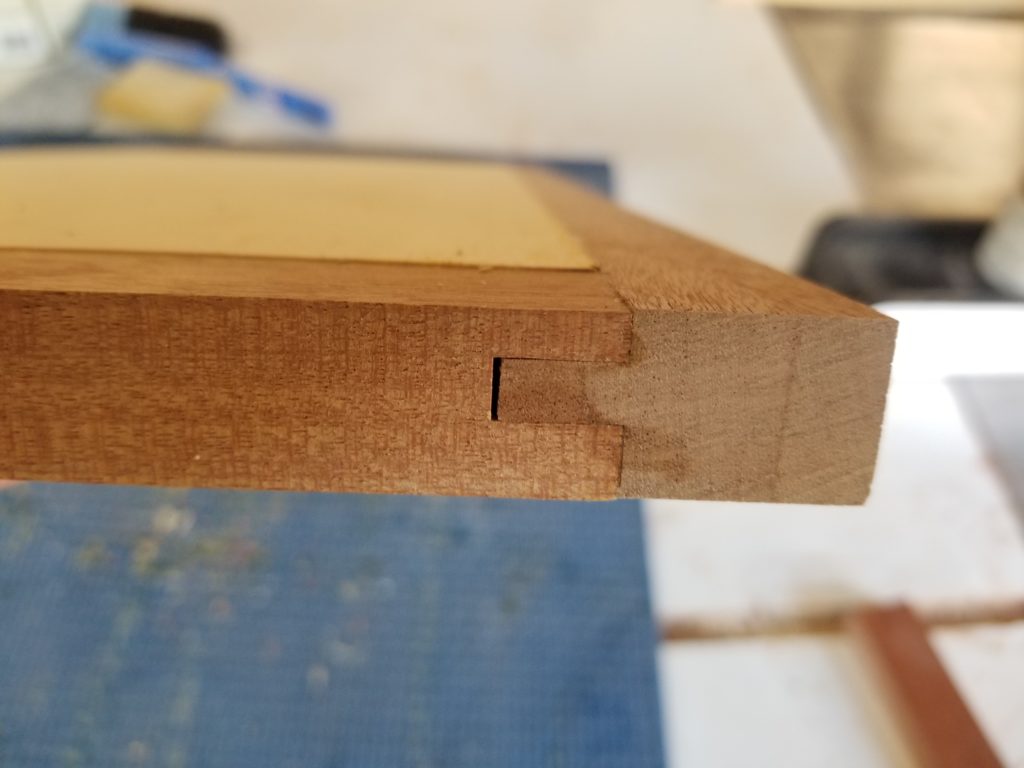
The door on the right is shown just after gluing, before cleaning up the squeeze-out and finger prints. No gaps 🙂 I really like the simple, elegant look of these doors and plan to make the lower cabinet drawer fronts the same way. I’m not absolutely certain I have enough left over flooring material for this, but if not, I’ll buy more. This is a nice look and I’m keen to keep it going. For those of you following along at home, the main field is stuff commonly referred to as “Baltic Birch Plywood” or “cabinet plywood”. The border is Sapele, a relative of Mahogany that looks as nice and is a fraction of the price.
There was one minor goof with the cabinets — it turns out the top of the faucet hits the edge of the bottom of the cabinet that’s over it.
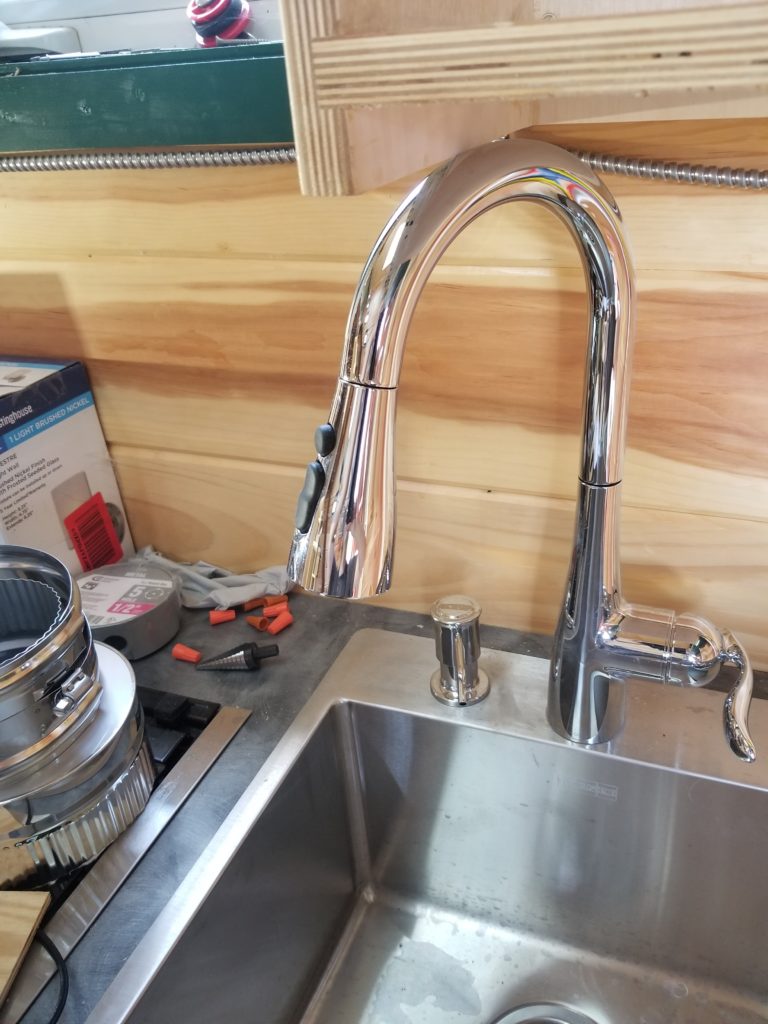
It’s a little embarrassing, but really, it doesn’t matter. If the faucet were positioned any further to the left, it would spray onto the counter rather than into the sink anyhow. And if I really wanted to spray onto the counter, I can: the faucet head is on a hose and can be pulled out a bunch and positioned anywhere I want.
That odd-looking metal thing to the left is the final two parts required to finish installing the wood stove — the flue adaptor that fits the double-wall stove pipe to the single-wall port on the top of the stove itself. Installation of that will be soon-ish. Speaking of wood stove, I will also need to install the heat shield behind the stove and over anything that’s within 18″ of the fire box. So besides the base cabinet and the wall, what’s within 18″ of the fire box? Well, it turns out the lower corner of this cabinet is!
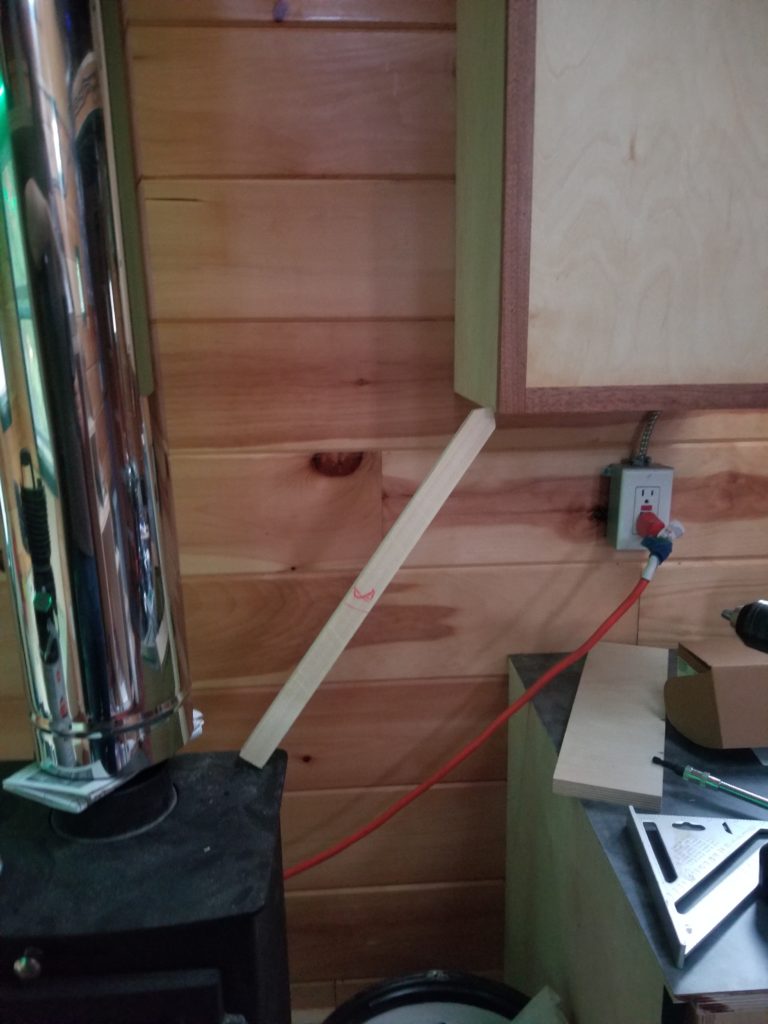
It’s not necessary to put a heat shield on the whole side of the cabinet. Really, all that’s necessary is an L-shaped piece that can protect the lower edge of the cabinet where the stick points. That’s going to be a little bit of a bother to fabricate, though the kind of metal required for the shield isn’t so thick that I can’t manage to bend it myself one way or another without a proper metalworking brake. Actually, maybe I’ll just by some L-shaped stock for this. Chances are that the corner would actually be okay without any protection, given the airflow produced by the heat shield that will go below it on the side of the base cabinet, but better safe than burned down, right? Right.
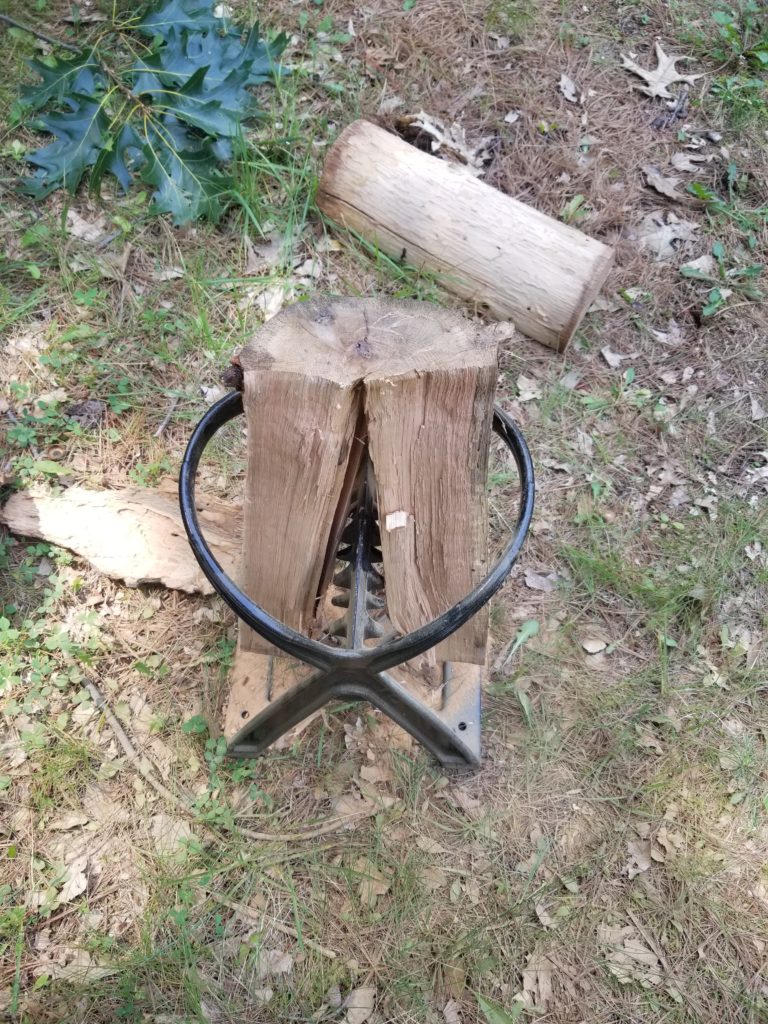
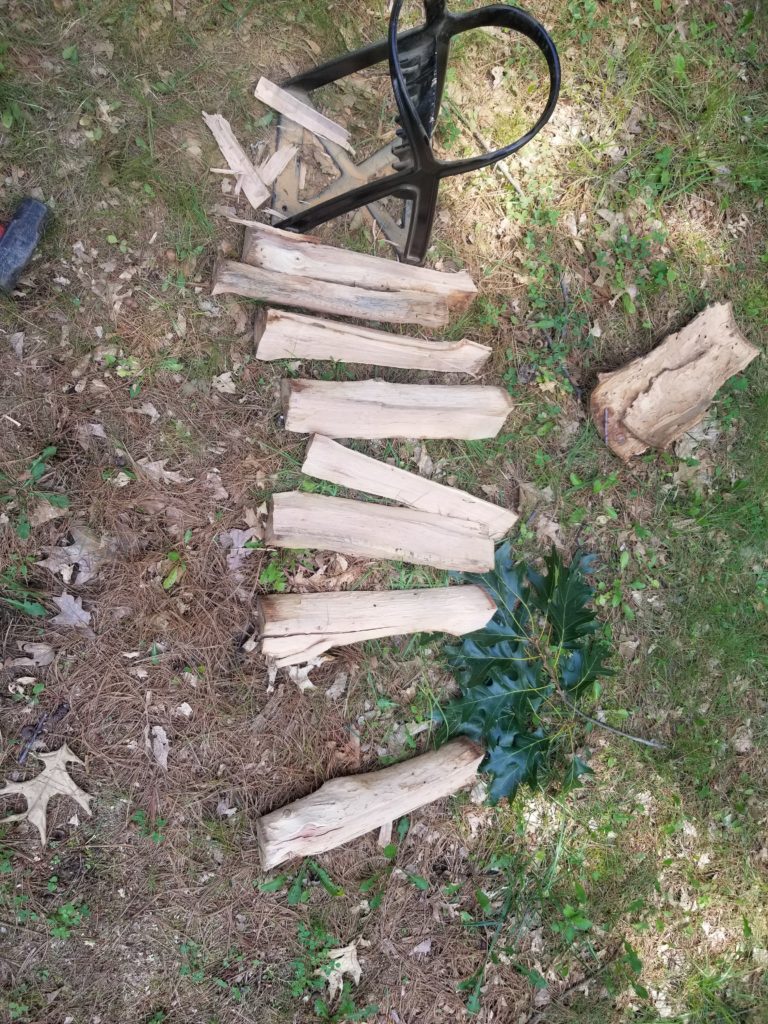
And speaking of wood stove, the chain saw is plenty to cut logs to the short length the stove wants, but what about splitting them down further into manageable pieces? I found this clever widget online: it’s essentially a wedge but the wedge is fixed and the wood moves over the wedge rather than the wedge moving into the wood. Place the log on the wedge and then hit the log with a 4 pound hammer. The very first split was pretty hard to do — probably over-capacity with the log I was using. Once in half, though, the rest of it split off very quickly and easily. There are a few versions of this concept for sale out there – this one seemed to be the most robust of the lot. It’s called Kindle Quick.
I promised you a demon cat. I might imagine you are curious as to what a demon cat has to do with my tiny house project. Well, let’s get started by looking at the cat.
Demon cat is actually a water stain. In heavy rain, a very small but not-ignorable amount of water drips out from behind the bead board. At first I thought there might be damage to the siding or something, but then I realized this is in perfect alignment with one side of one of the skylights. I suspect there’s a leak in the roof and water is coming down the side of the skylight, tracking the rafter, being delivered to the wall, tracking down the wall, and when it hits his horizontal board, can’t track down any more so spills out. It’s really not much water at all – I do not think it’s enough to cause mold, the wood can just absorb and diffuse such a small amount of water, but still, water coming into a house is a problem that needs to be addressed. Earlier I thought this might be related to the rainwater ingress at the water heater (since fixed) but no, it kept coming after that was fixed. Okay, then, time to go up on the roof. I do not especially enjoy roof work, but I don’t get to choose. I’m hoping I can identify a gap someplace I can simply attack with some sealant and be done with it. I don’t really want to have to tear into the ceiling and the wall to go hunting. That won’t be any fun at all and will definitely leave a scar.
Last on the construction update is this simple scene:
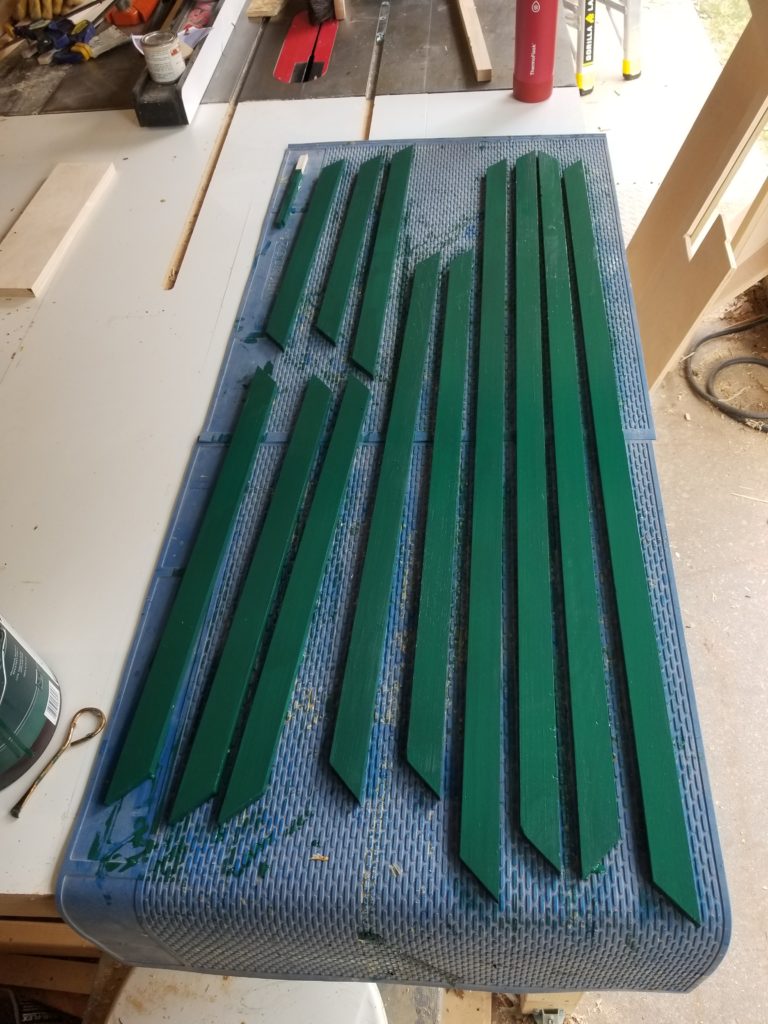
What is this? These are trim pieces for the skylights and the Cozy Loft window, pre-painted. They’ll get installed sometime soon, too. Of course, most people who build houses just buy their trim stock, cut it, and install. Me? Nah. I like to reclaim scraps and make them useful again. This takes a lot more time (to find them, make a plan to composite them into useful pieces, then do that) but is a lot less wasteful. These trim pieces were actually once some skinny bifold doors I made a couple of years ago for the coat closet but I didn’t like how they turned out. About half the body of the doors could be reclaimed and so I did. And they became this trim.
In other news, two weeks ago I met with an excavation contractor (third of 3…) who I am hoping will be able to do the site prep work I need done. Today he has actually sent me a formal bid for the work, unlike #1 and #2 who both came to review the job, seemed interested, then #1 said he didn’t have time and #2 didn’t even return my calls. Third one’s a charm? I hope so. And then there’s the building permit for The WOG, which was at first rejected on a technicality… sigh. I keep going and going, but I tell ya, sometimes this whole thing is really draining mentally/emotionally as well as being physically and mentally demanding in the construction aspects. I am eager to be finished with the building and the moving-in parts and actually get on with living. Even then, there will be WOG build-out to do, but that can be done at a relatively leisurely pace. I am looking forward to having my free time be free again 🙂