Some people have asked me whether I have been employing all the new decorative woodworking skills I’ve learned to the various projects inside the tiny house. The answer is “no”. The answer to “why” is that I’m still such a novice at that stuff and even pros take a long time to make these beautiful things and I don’t want to be working on this for the next ten years to make it optimally beautiful. I need it to be functional! The good thing about building the tiny house like a conventional house (unlike an RV, which is largely made of plastic & fiberglass), is that just like a conventional house, one can upgrade/remodel/etc. There’s no reason I couldn’t spend a winter creating magnificent marquetry cabinet fronts or some such and then just swap out the utilitarian ones I was using before. Will it happen? Probably not… but who knows?
So I finally figured out where everything fits in the kitchen – the trickiest part was locating the propane furnace, which has air intake needs, requirements about what can be close to it, it has to get hooked up to gas and electric, and it has not not blow directly on anything – or anybody – as it runs. At one point, I was thinking of stowing it below the fridge but that meant putting the fridge on a riser which complicates things unnecessarily. Ultimately, I discovered that it would in fact fit above the fridge if I built a little cabinet/sleeve for it. There’s almost a whole inch of clearance around the sleeve and the fridge (below) and the graywater drain manifold (above). A whole inch! Hey, it may not sound like much, but considering the decisions which drove all of those sizes and placements were made two or three years ago and only recently did I want to put the furnace there. So the fact that there’s an inch — rather than a negative inch! — is a big deal and I’m happy about it. Here’s a quick model of the plan (furnace shown w/o sleeve).
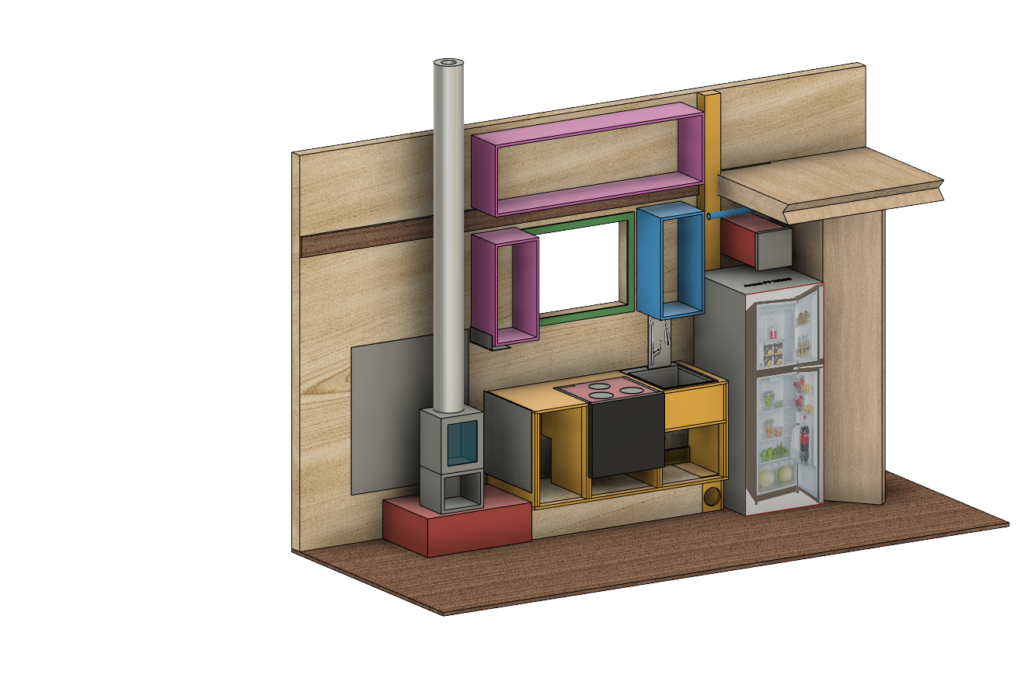
The first thing I noticed about this is that the drain manifold, shown here as a blue pipe (next to blue-highlighted cabinet) pretty much abuts that cabinet, rendering the cleanout plug at the end of the pipe mostly useless. I’m going to need another way to clean out that pipe if it were to become clogged. Drilling through the cabinet is just not an option. Here’s an actual photo of the location in question. The blue tape on the wall approximates the right side of the cabinet-to-be. Just an inch or two clearance to the clean-out plug — hardly room to even remove the plug, let alone get a snake in there. I need a solution.
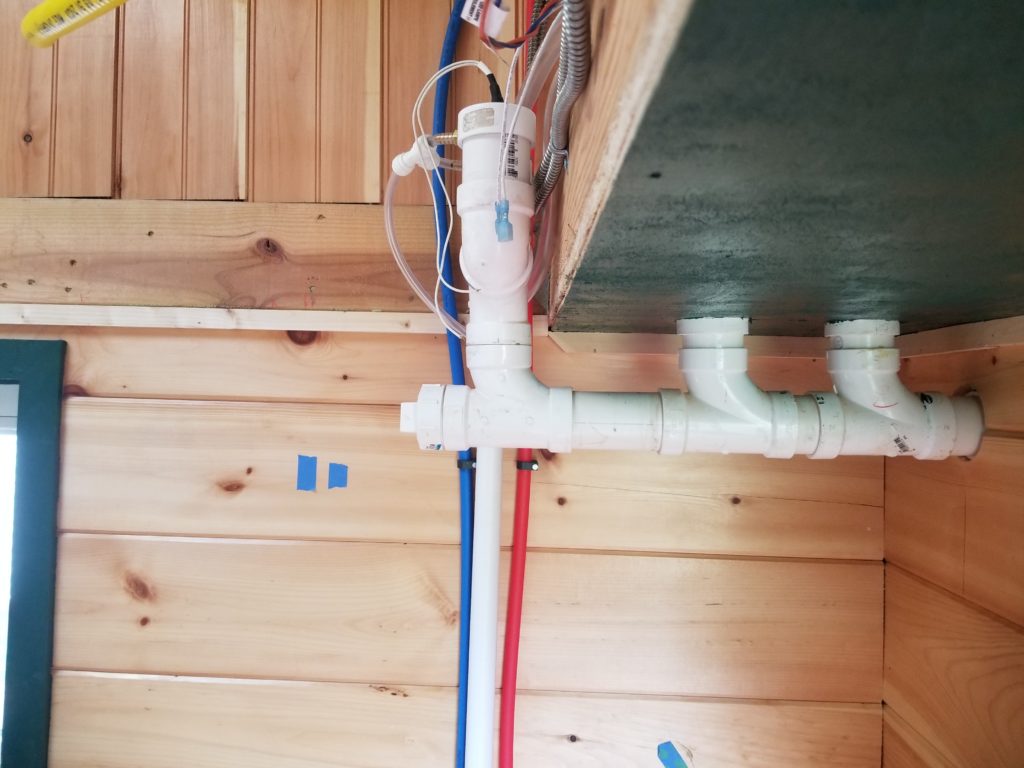
I noticed there was a segment of pipe that was long enough that if I cut it, there would still be two stubs I could use to solvent-weld a new fitting in place. Also, the fitting itself was about the size of the span — so all together, I could install a new tee fitting just to the right of the one with the plug and make that the cleanout access. Not absolutely perfect, but should be good enough since the direction of flow is to the right.
Okay, then, time to cut the pipe. My dear friend MultiMax is at it again.
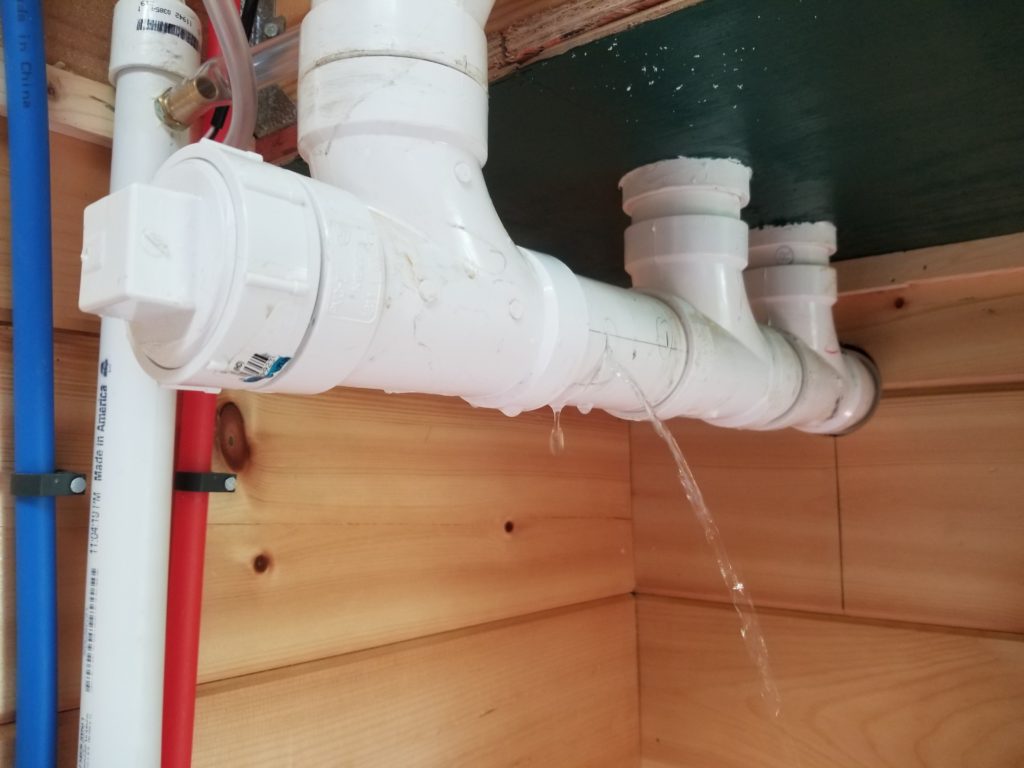
WATER?? I thought I drained everything for the winter! I mean, I did put antifreeze in the whole system and furthermore I had a heater running in there to keep it above freezing anyway, but I did think I had drained the graywater tank. Okay, maybe a little water just sitting in the pipe didn’t drain out last year. I grab some tape, band-aid the cut, find a towel, mop up the mess, come back with a bucket to catch what’s left of the water, and take off the band-aid. The water keeps coming. And coming. Way more than seems like would be just sitting in the drain pipe. Then it occurs to me to check something…
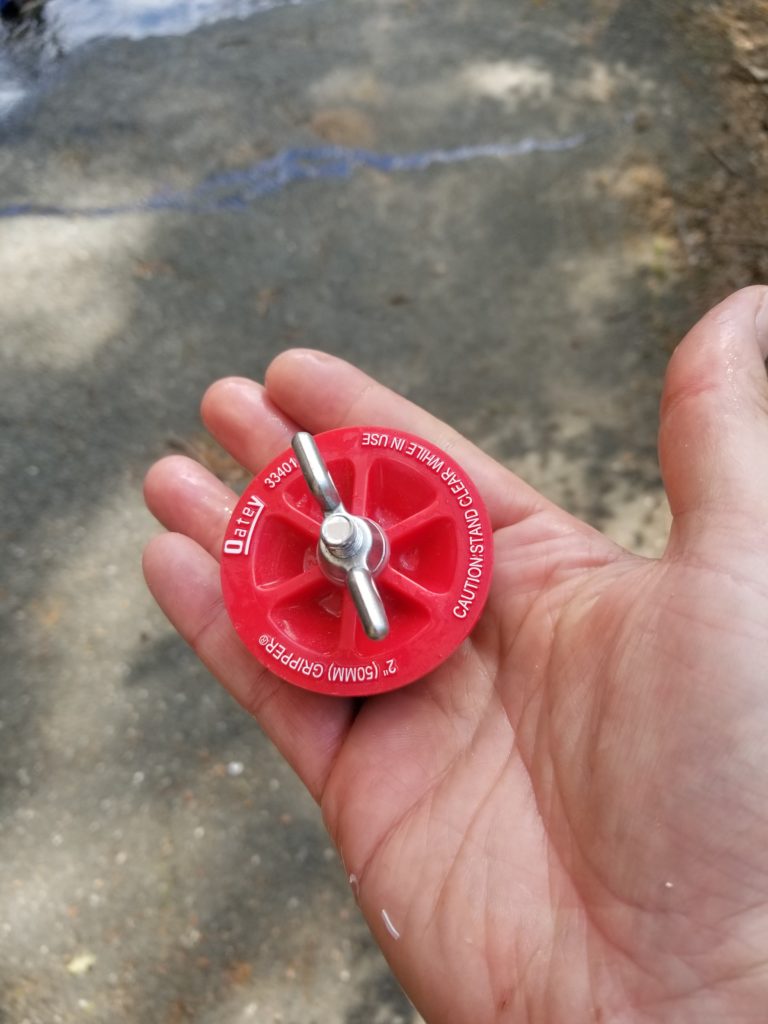
Yep. I forgot there was a plug at the very end of the graywater drain. I put it there to keep out pests but it also keeps in water. All of it. When I pulled the plug, there was quite a release.
Alright, excitement done, now back to solving the problem I was there to solve.
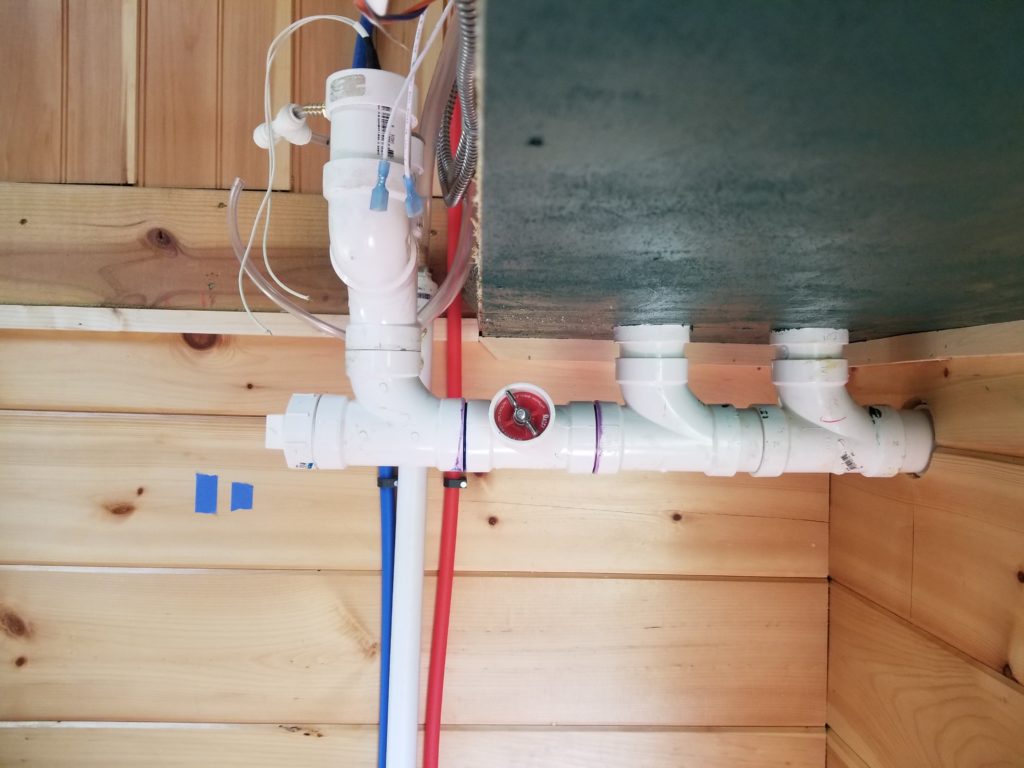
And voila, a new fitting that will let met snake out (nearly all of) the drain manifold if I need to. The furnace sleeve is going to go right underneath there. Obviously, if snaking out the drain should be necessary, it will also be necessary to give the furnace a raincoat (a/k/a cover with a plastic bag or something) first. And as long as I’m here, there’s a pipe strap I’ve been meaning to install for quite some time.
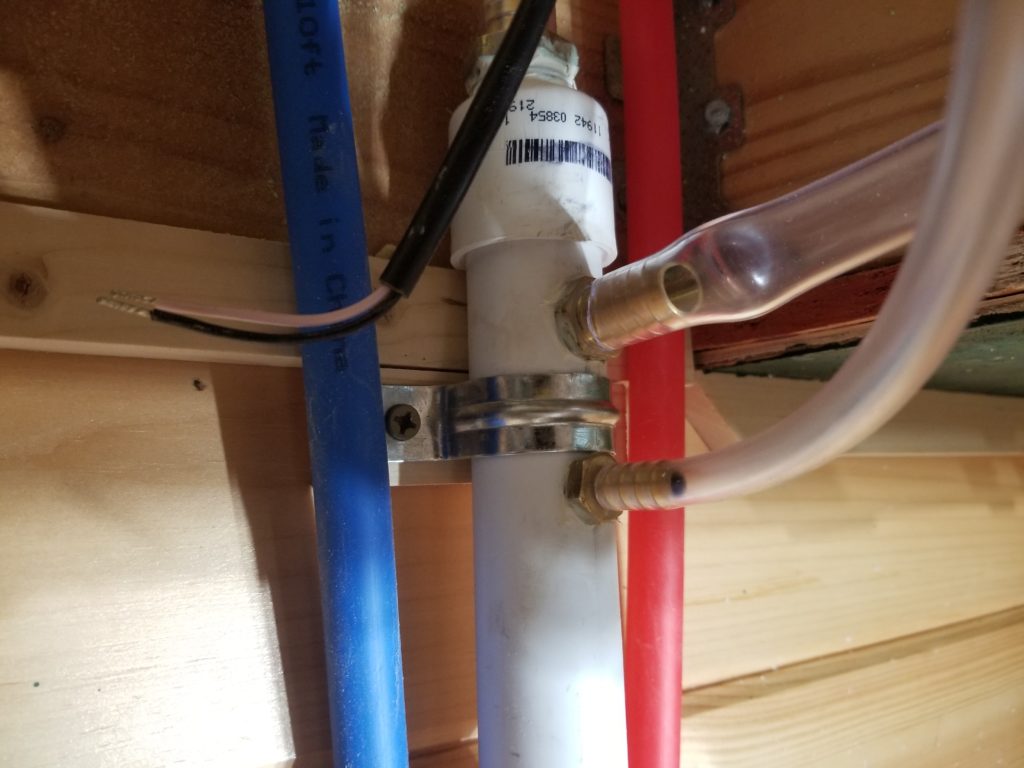
What is this wacky thing? It’s the vent for the gray water level sensors (need to let the air out so the water can rise) as well as the condensate/intake/emergency drain for the water heater.
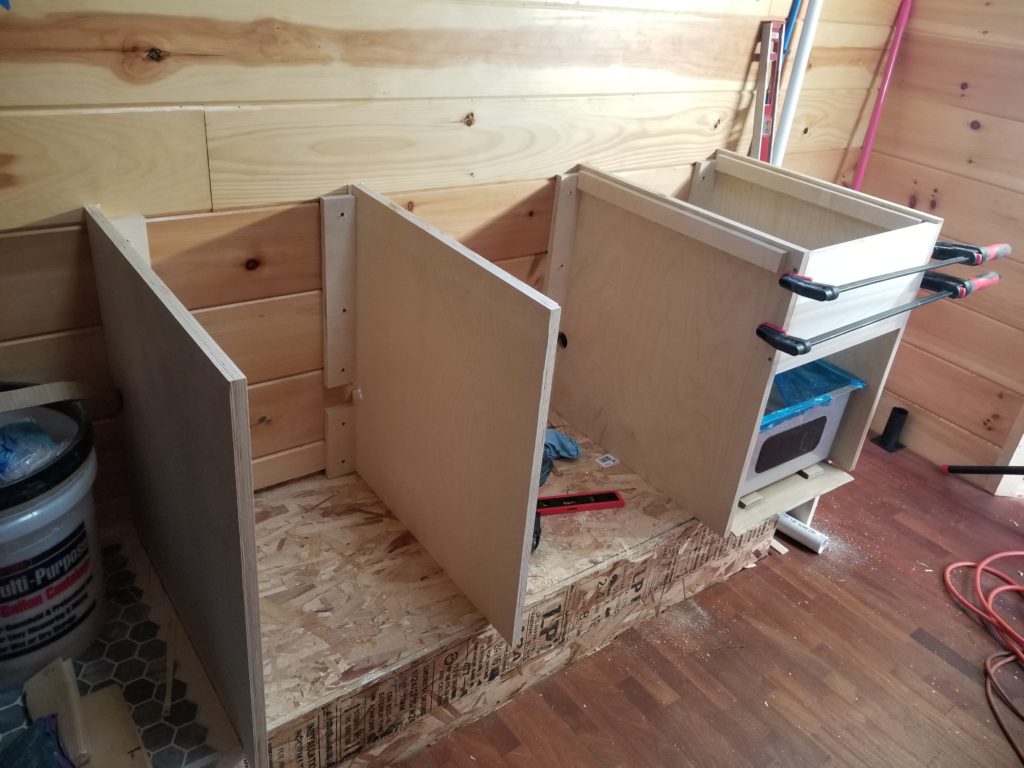
With the cleanout (and pipe strap) done, it’s time to move on to the kitchen base cabinets. This is gonna really transform the space. It starts with the verticals. These are going to be some very simple cabinets. I do know how to make much more fancy ones, but this is a simple house and I’m more interested in getting it done than making it fancy.
Verticals done, it’s time to transfer their measurements to what will become the counter top as well as make the cut-outs for the stove & the sink. I note with amusement that the only unobstructed section of the counter top is this 18″ x 24″ area shown below. All of 3 square feet. That may not seem like a lot, but proportionately to the living space, it’s immense. I mean, without even subtracting the built-ins, the wall-to-wall interior of the house is like 23 x 7, give or take – roughly 160 square feet (if you want to count the 60 square feet of the cozy loft, you have to count it at 1/3 since it’s only 40-something inches tall at best and slopes down at 10 degrees from there). But 3 square feet of 160 is 1.875%. Scale that up for a 2000 square foot house, say, and that would be equivalent to 37.5 square feet of counter space! A standard 24″ deep counter means that’s almost 19 feet wide! Decadent! So this 3sf section is my 19 foot countertop… proportionately speaking.
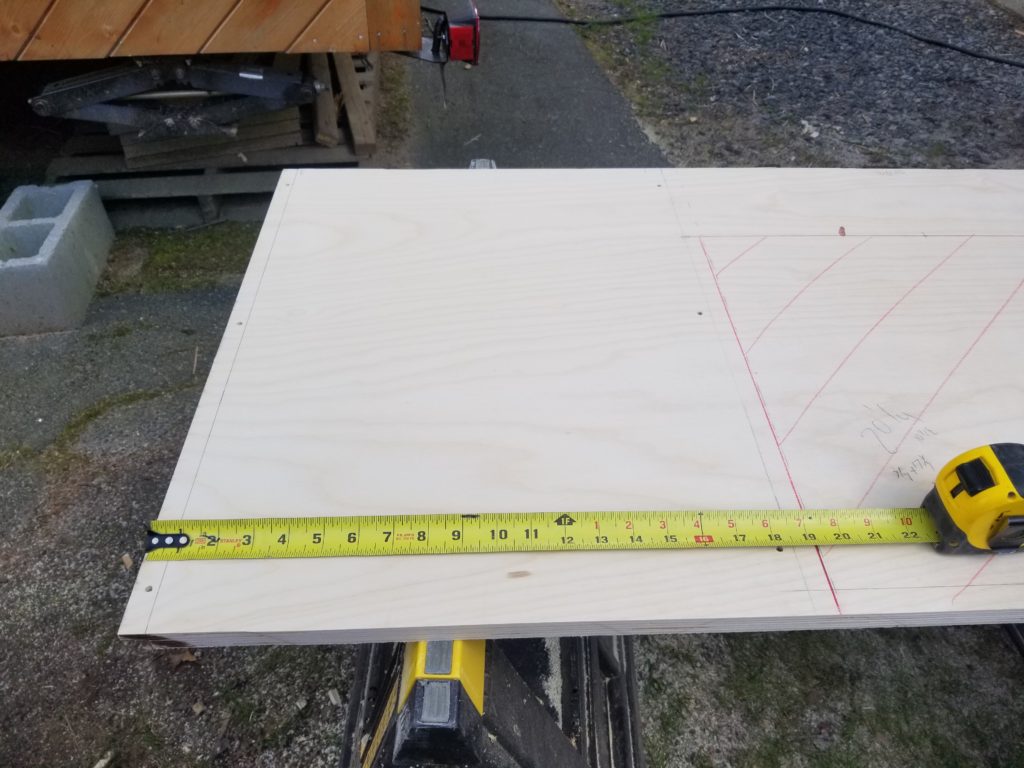
From a practical standpoint, the stove has a tempered glass cover which makes it usable as gentle prep space (don’t use a tenderizing hammer there, but no problem to chop carrots on a cutting board). That’s another 3 square feet or so. Living large in my tiny house!
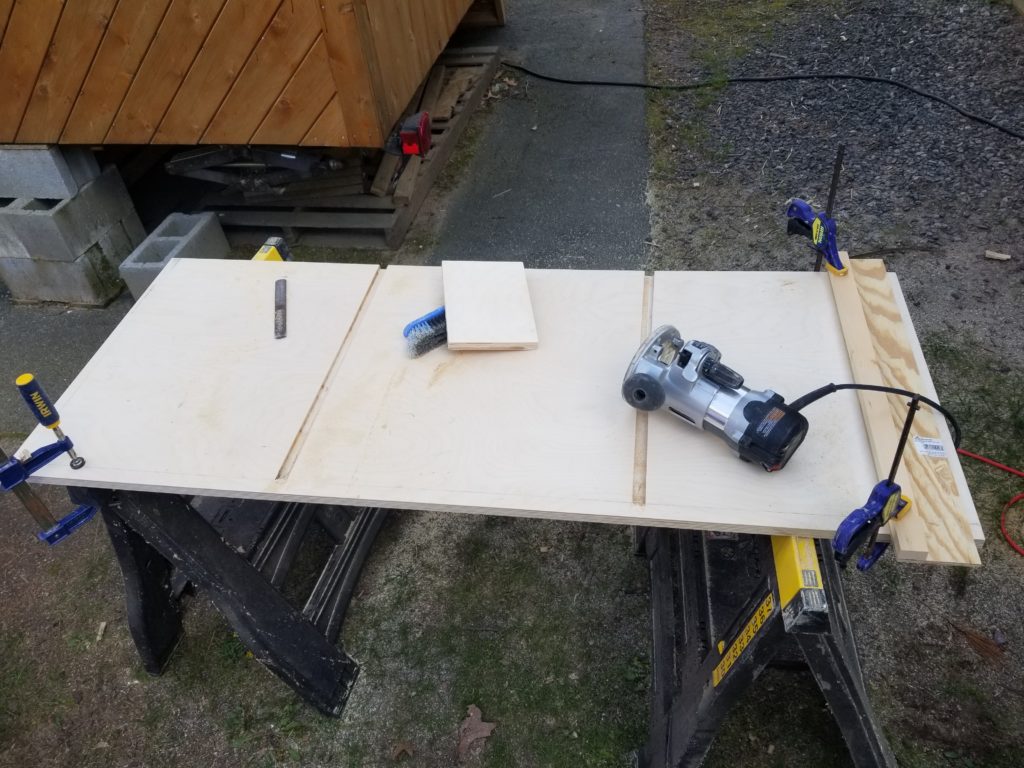
To make it easier to get everything lined up, I routed channels so the verticals fit into the countertop, holding them square and in position without any other shenanigans. Do this before making the cut-outs for the stove and sink so the board has some staying power while I’m working it with the router.
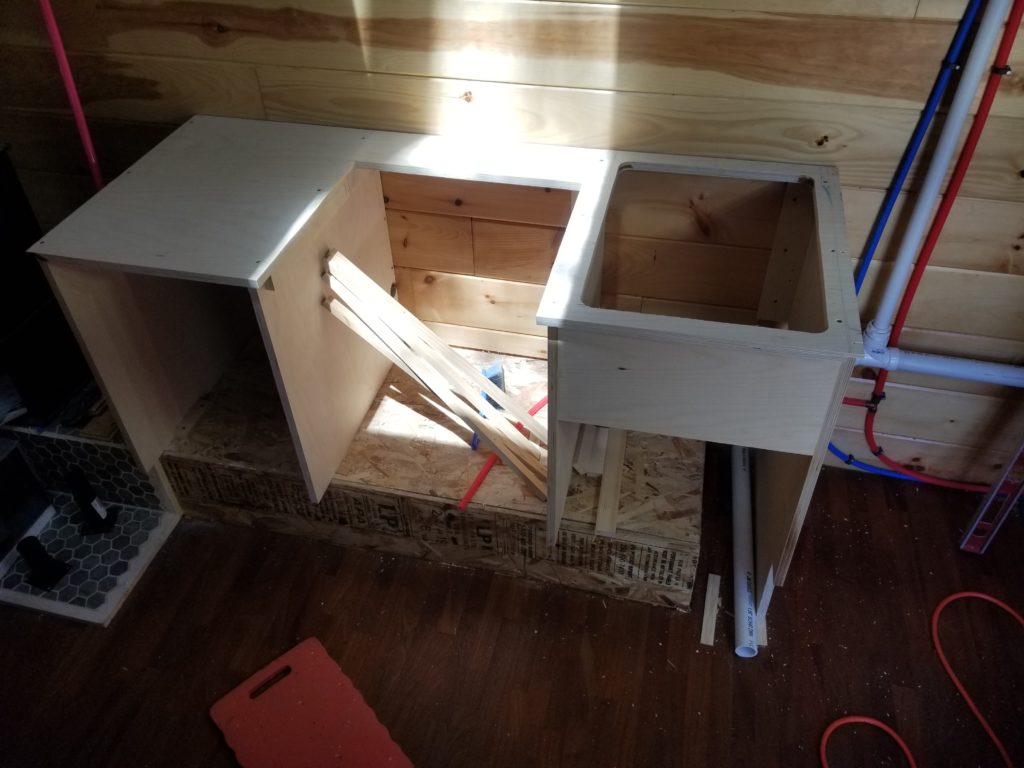
Does it fit? It fits. A little persuasion required, but that’s normal 🙂
Do the things fit in the places?
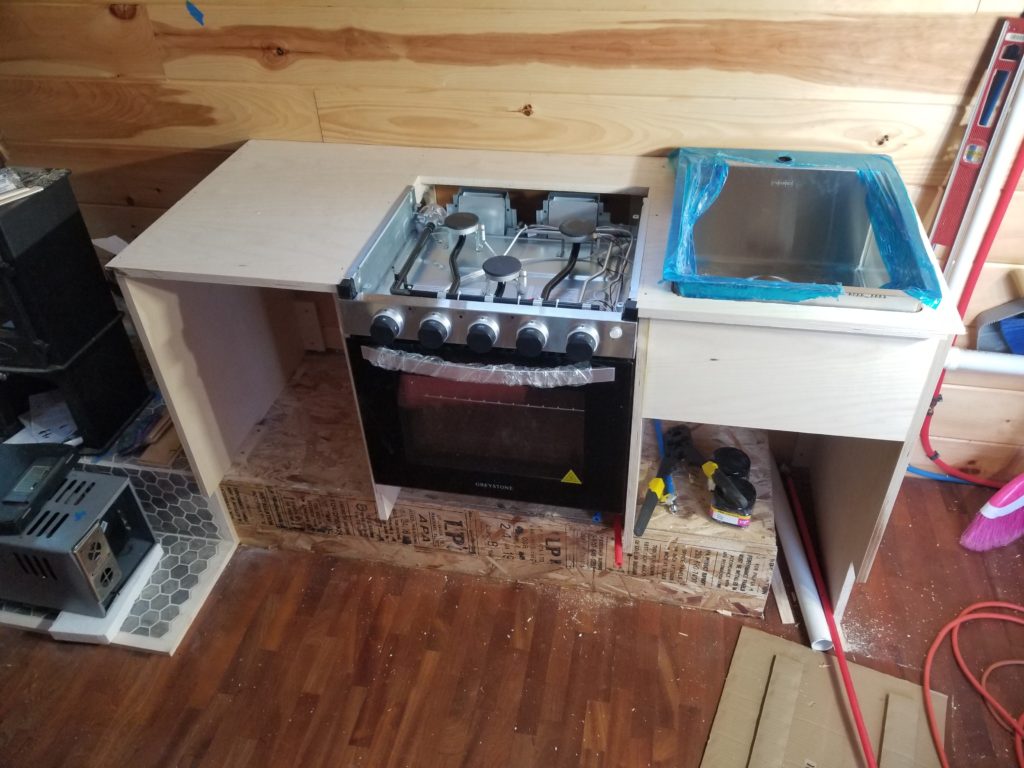
They do! Excellent. This is starting to look a bit kitchen-like! The pan and cover for the stove are temporarily removed and because the sink has little clips that will make it stay in the hole, I have it up on blocks to keep those clips from engaging.
Now the miracle of contact cement. This stuff is magic. Paint it on your countertop. Paint it on your laminate. Then let it dry. Then, it being “dry”, you put it in position (being very diligent not to let the dried cement-painted surfaces touch — some sticks are handy for this)…
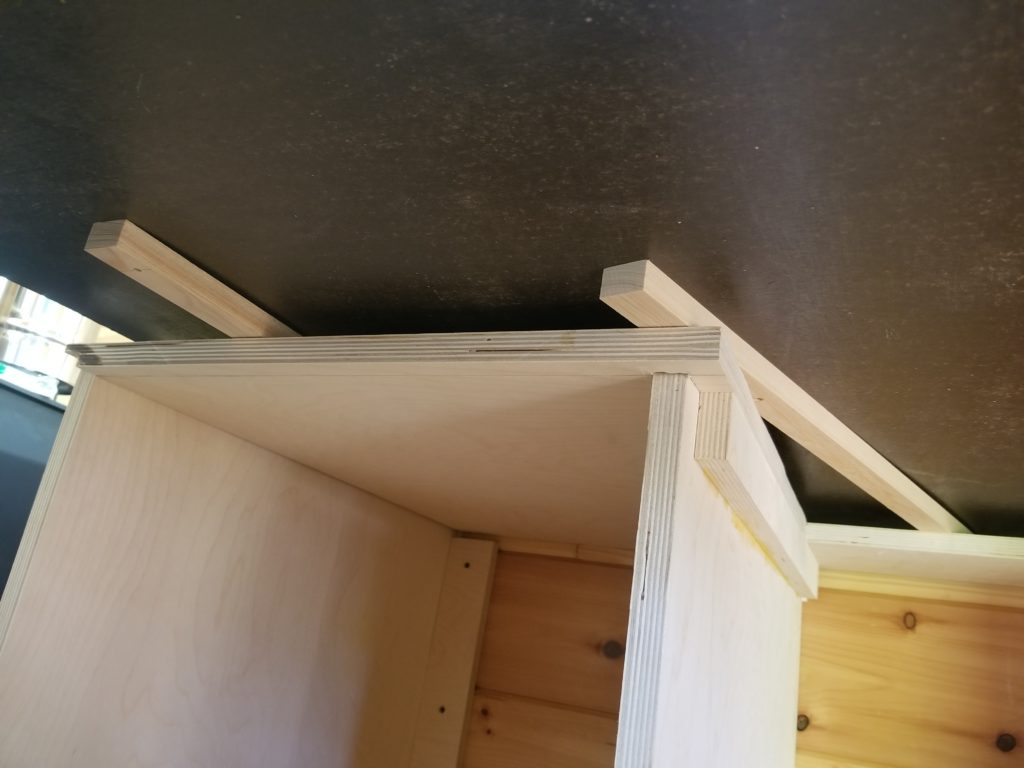
And then when you like where it is, carefully slide out the sticks and use a roller to fix the adhesive. Even though it was “dry”, it bonds to itself.
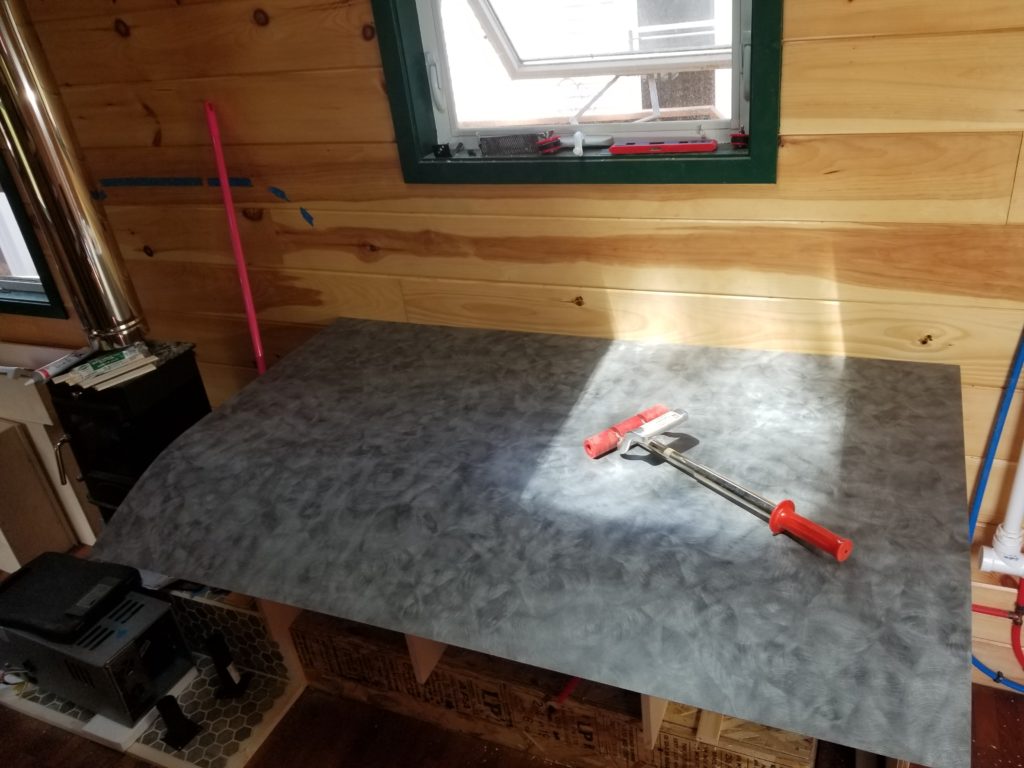
This is great – no drips, no fuss, a chance to slide things around til they’re right, then blam, it stays put. One does need proper PPE to work with this stuff, because besides being great, it’s neurotoxic and especially flammable, but no problem there. I am fully equipped.
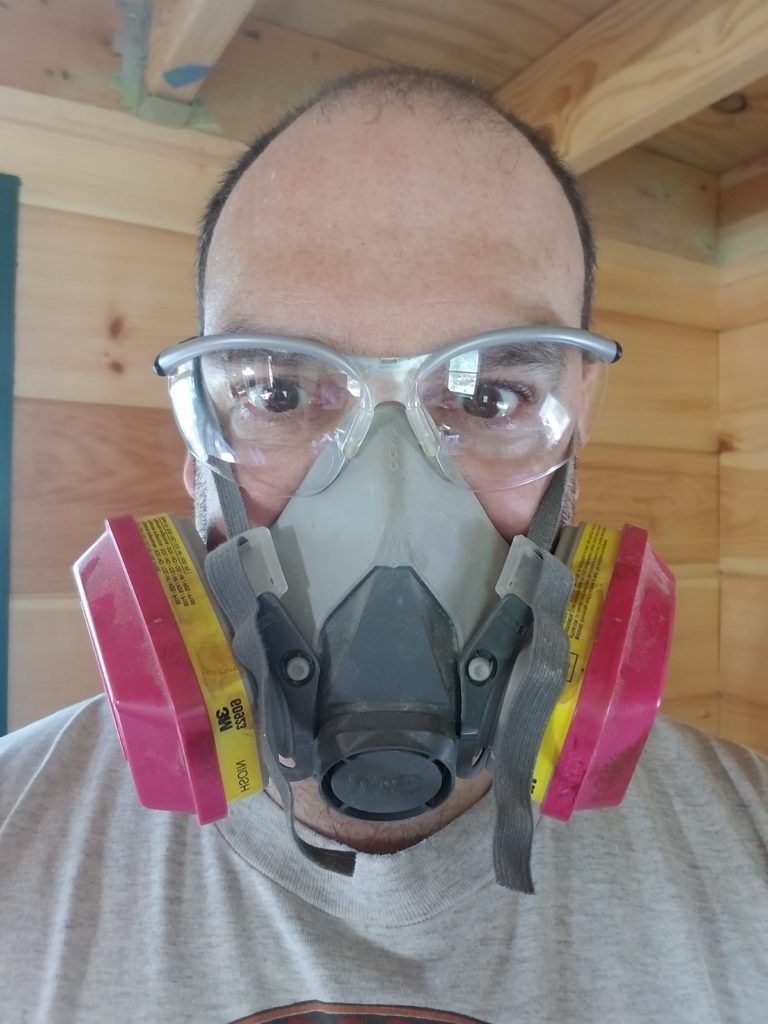
Next, go after it with a flush-trim router.
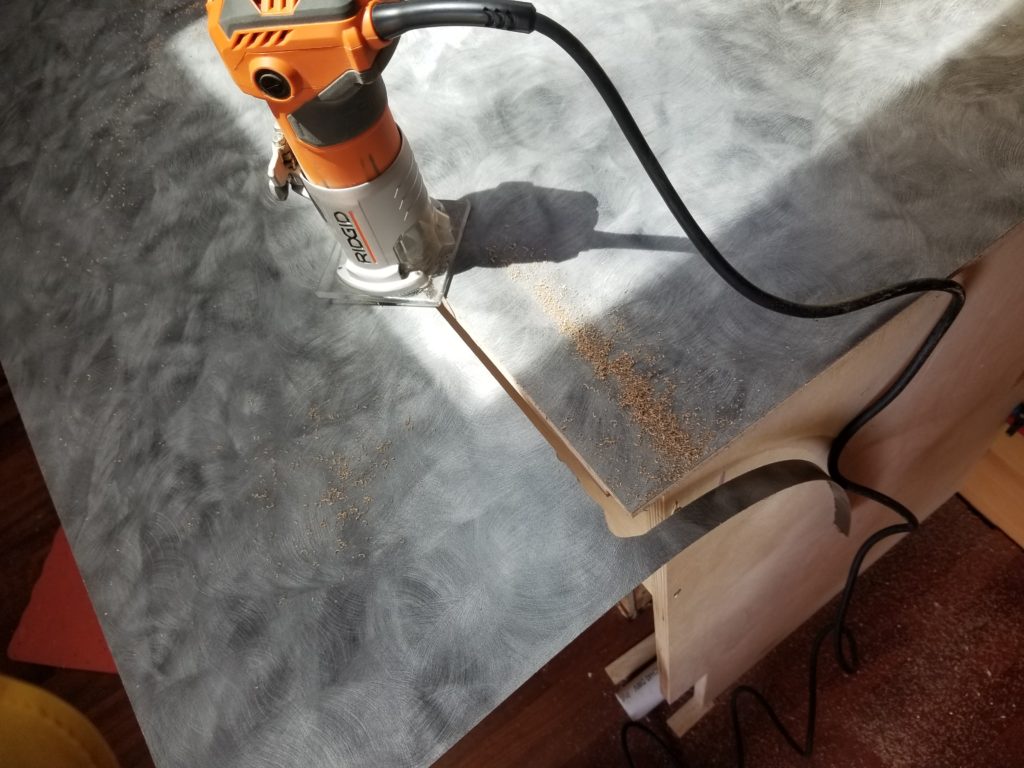
Which while quite effective at tracing the outline of the laminate, it also turns that cut-away path into laminate dust. A lot of laminate dust. If I had really cared, I might have rough-cut the shape ahead of time, saving the cut-outs for the sink & stove before applying the cement so I could use them for something later. I had nothing in mind so I didn’t bother. I have plenty of materials in my “maybe use this later” bin already.
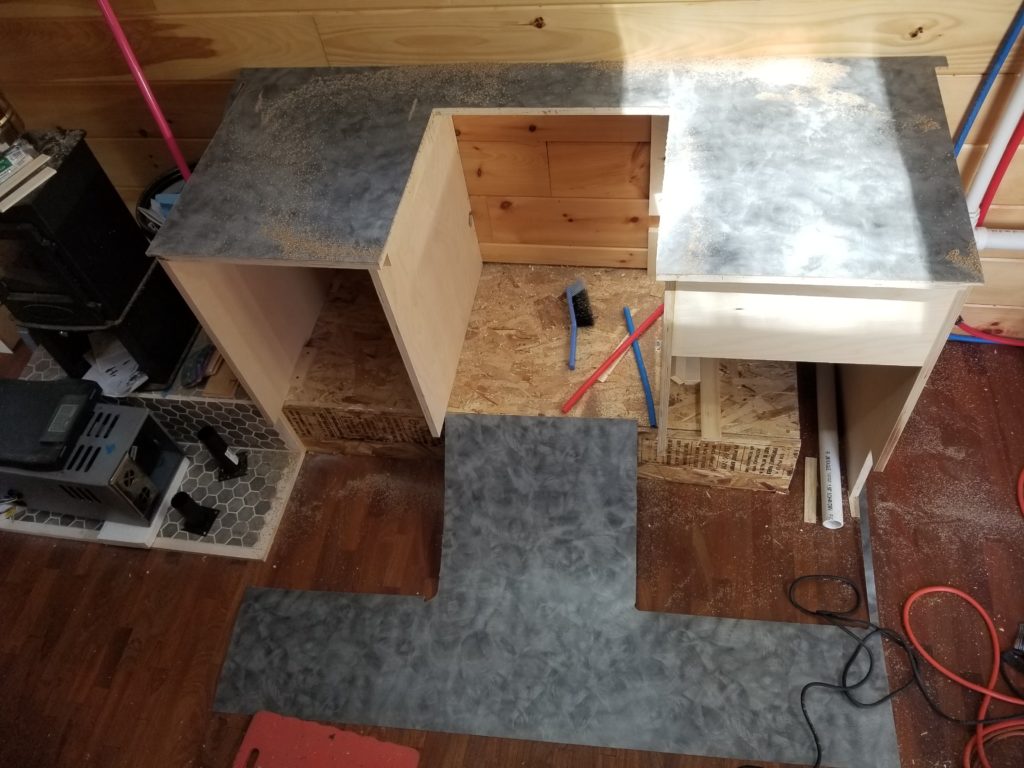
A quick touch-up to reach the stubs the router couldn’t reach (against the wall), drill a hole in the sink area so I can run the router there, too, and then it is done.
Before doing much else with the cabinetry, I need to know where the sink drain will go, as well as the faucet supply lines and of course the gas feed to the stove.
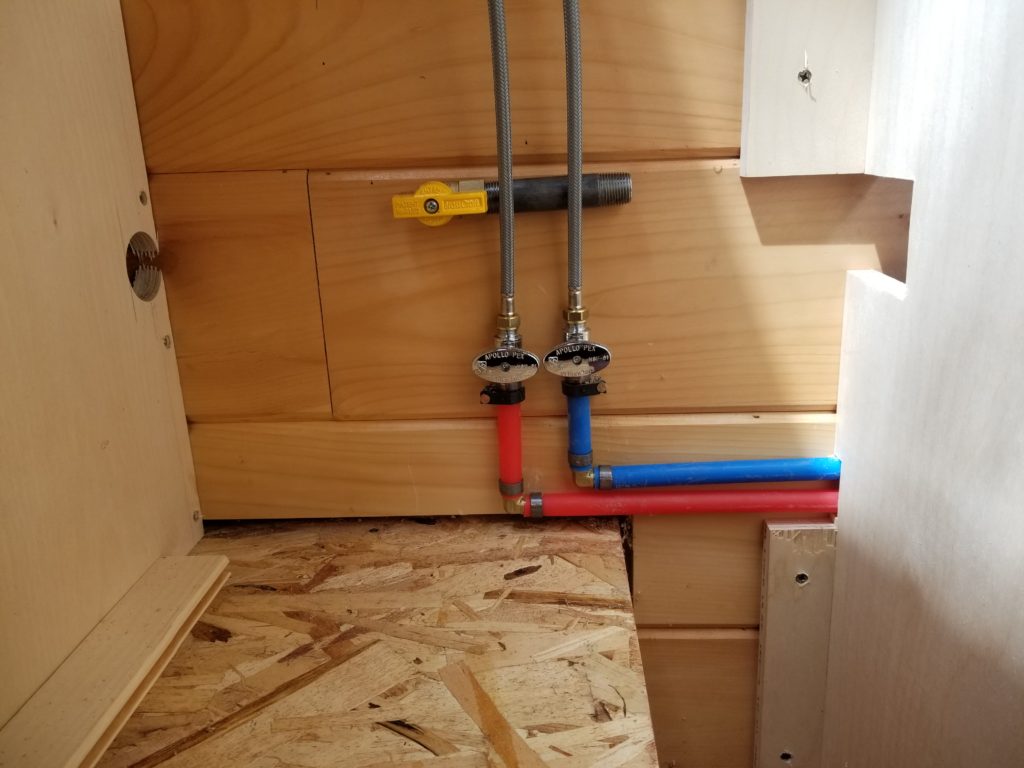
My gas line is this semi-rigid stuff called Corrugated Stainless Steel Tubing. Easy to use, lightweight, and you can go gently around corners or obstacles with it no problem. It’s almost as versatile as PEX is for water lines, though it’s more work to apply fittings. Anyway, the thing is the gas cut-off valves need some staying power so when a person goes to turn the lever, the torque isn’t conveyed to the CSST, which isn’t meant to take any mechanical stress. Black pipe, sure, no problem, but CSST, don’t do it. No problem! I’ll just fit my gas valve to a stub of black pipe, attach that with a strap to the wall, and I’m good to go. I’ll interface the pipe to the CSST just as I would if I were running the CSST directly to the valve. Piece of cake. This piece of cake, though, has some length to it. And of while CSST can bend, it has a moderately large turning radius. It doesn’t bend sharply, so one needs to give it ample room to meander. The valve had to be more or less in the middle of the cabinet to allow for that. This led me to the following situation under the sink. Not shown, a 1.5″ drain pipe that comes through that notch on the right, along with the CSST. You’ll notice the gas valve and the black pipe are behind the water supply for the faucet. The black pipe doesn’t care, but having the valve handle so close to the supply lines (which will be more slack in real life — here, they’re just flopping around and not actually spanning the real distance to the faucet) means those slack lines may get in the way of the handle, or if there’s a need to service it, now it’s a bunch more work than strictly necessary. No bueno. It was easy enough to move the supply lines four inches to the right, which solved the problem, but it was one of those annoying bits where not having had a fully-formed plan when I started meant that I had to do some things over again as the constraints of the work become evident.
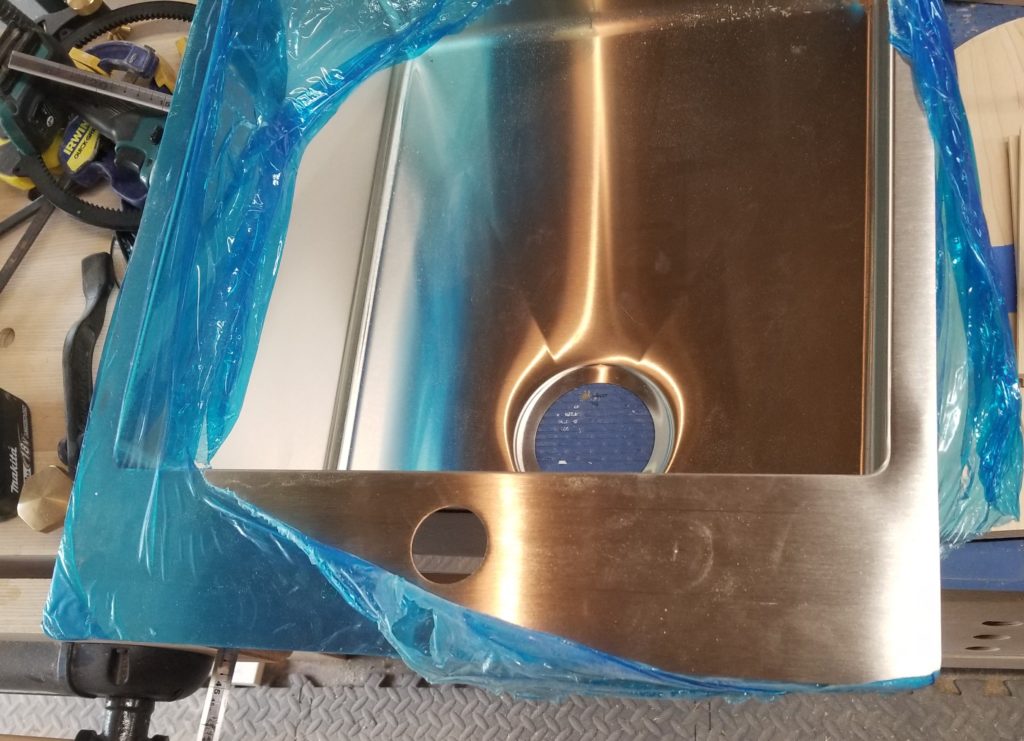
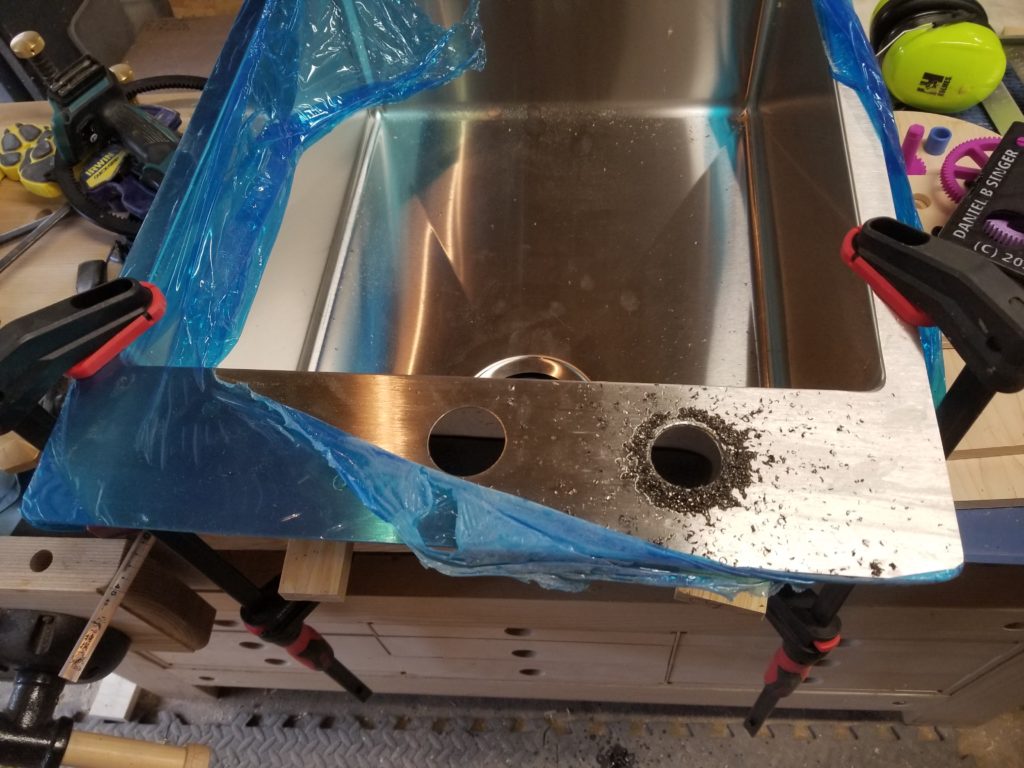
After that was all done, my attention turned to the sink. What was wrong with the sink? Nothing. But I wanted a soap pump and the sink wasn’t punched for anything more than a one-hole faucet. Cut a hole in stainless steel? Sure. It won’t be pretty, but I can do it. That’s one thing I’ve noticed about my own thinking that isn’t true of most people: if I see a thing that isn’t quite the way I need it to be, I consider my tools and skills to see if there’s a way I can modify it to accommodate my needs. I’ve found that most people don’t think that way. If the sink has one hole for a faucet, it’s a one-hole sink, end of story. Me? I get out the hole saw and the cutting fluid and in a little while, I have a two-hole sink.
It has been a while since my last post so there’s lots to catch up on. One of those things is the long-awaited Keister Coaster – the flip-down seat for shoe management. I had a nice walnut board in the workshop and some maple scraps from another project which I inlaid into the walnut…
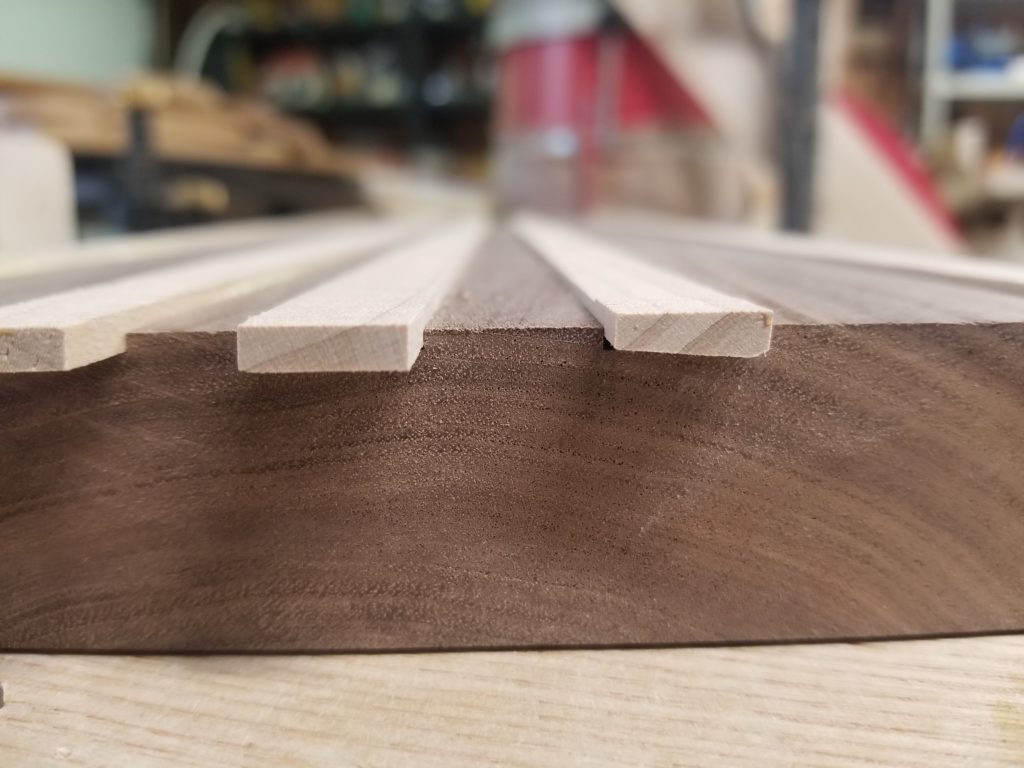
… then planed flush…
I do enjoy making shavings. They’re so cute 🙂
And now there’s this!
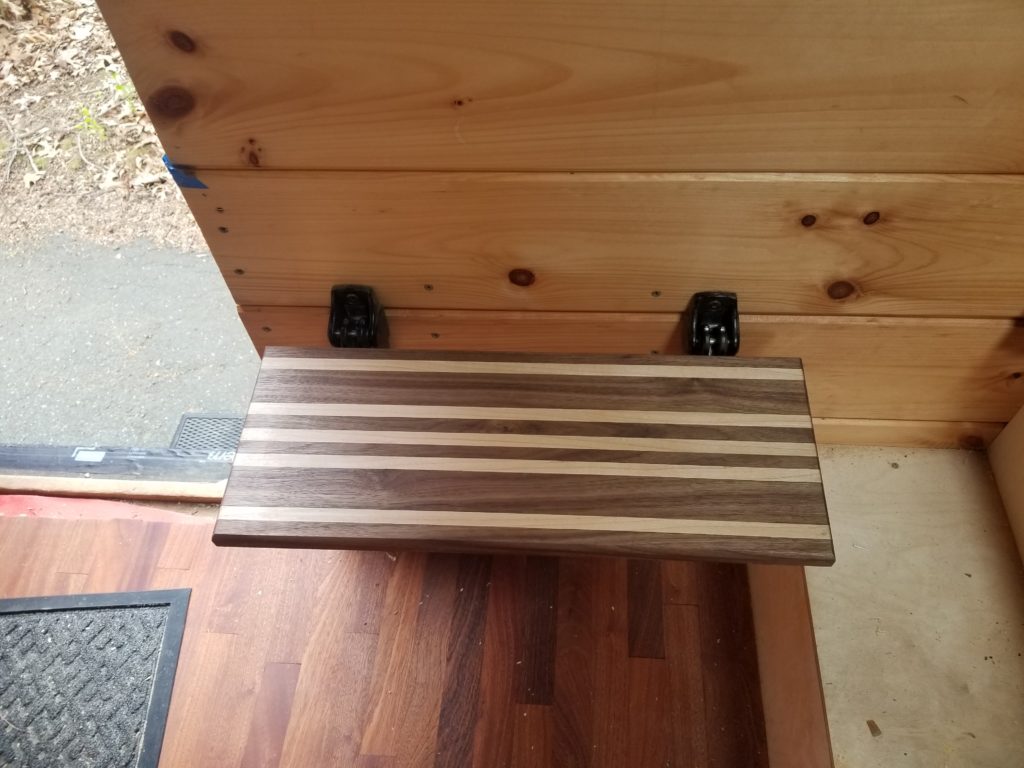
I noticed when I flipped it up that it looked like it was kinda cock-eyed.
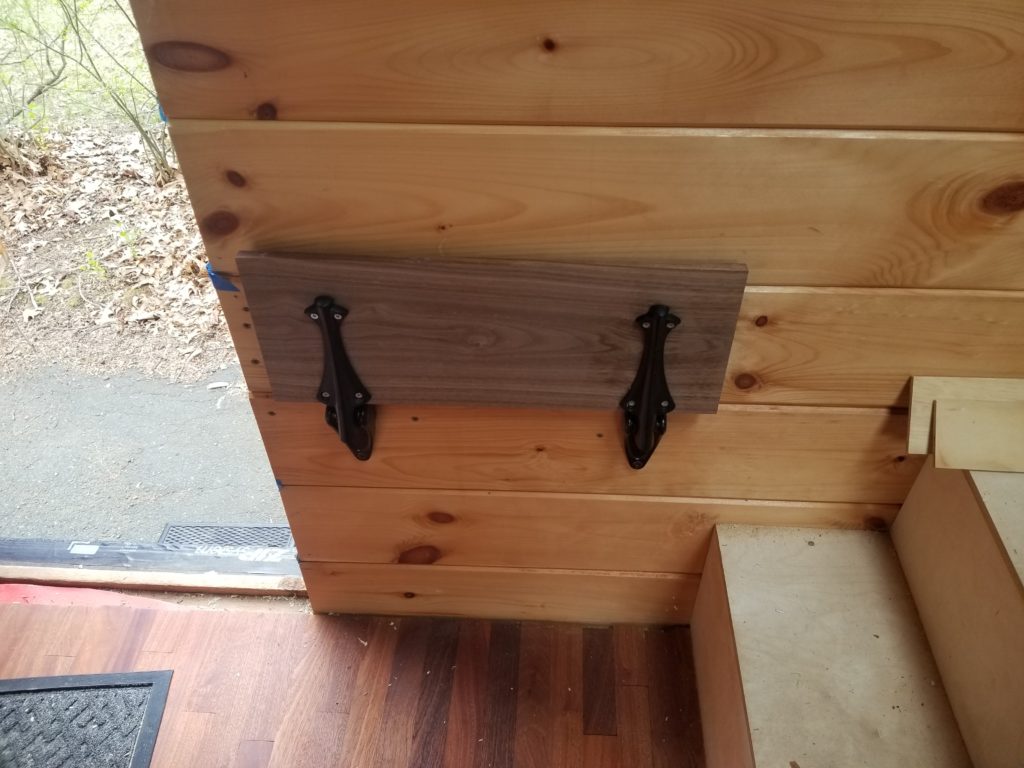
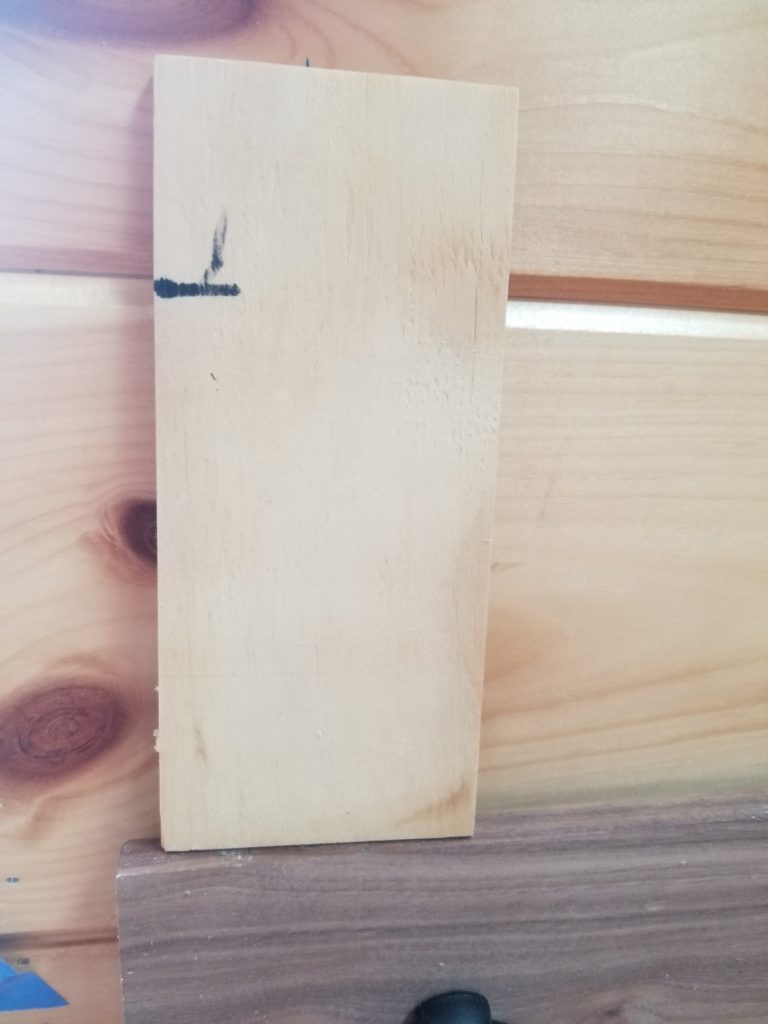
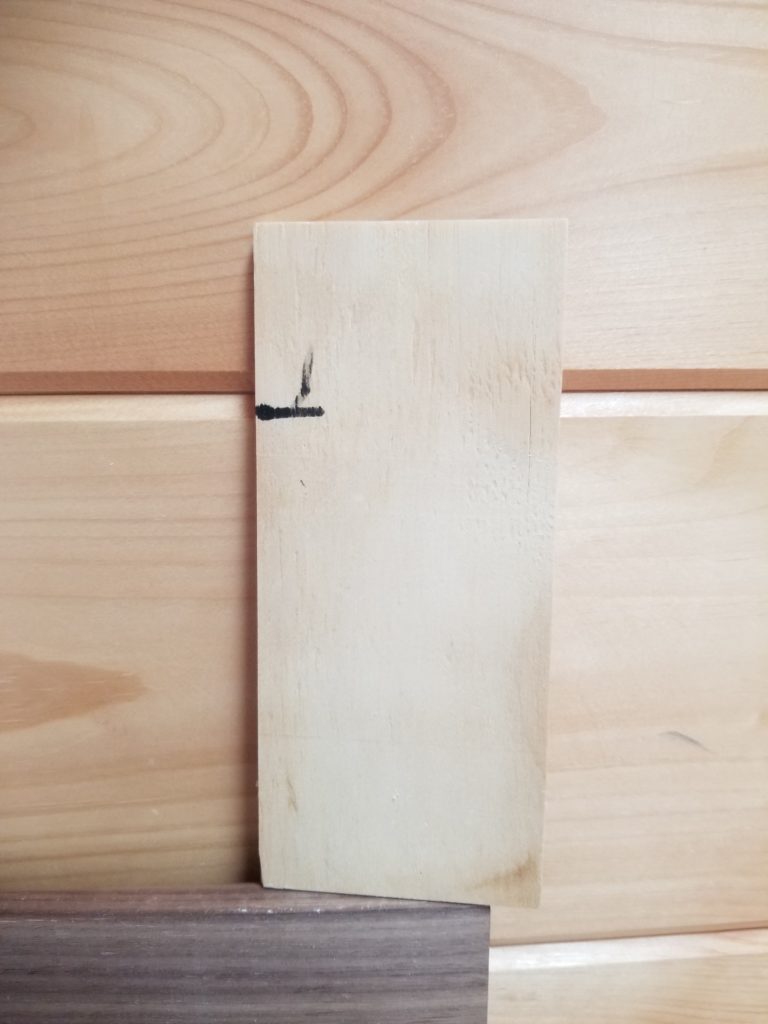
Was it the angle? Was it an optical illusion? Did I just mount the brackets not-quite-level? I nabbed a scrap and made a mark on it at the wall seam and used that to check the seat. I don’t care if it’s level so much as it needs to be parallel to the lines in the wall, which are mostly level, but more importantly, they dominate the scene so they get to say what “level” means here.
How did I do?
Well, from the look of it, maybe 1/8″ off parallel. Not bad. Not amazing, but not bad. So why does it look – to me at least- like it is so far off? I figured it out. It’s the grain pattern in the board. It flows down to the right, not parallel to the seams in the wall boards, making it look like the seat is rather skew when it’s actually pretty close to right. Ah, well, so it goes.
If some day I make a new Keister Coaster that’s straight grained or has some other patterning in it, eight screws out and in and I can swap it.
Now back to the kitchen. With the cleanout plug dealt with and the water supply moved so the gas line can go where it needs to go without being obstructed, and with the cabinetry started so I know where all the things go and have a sense of how the gas plumbing is going to happen (relevant for the furnace, too), it’s time to get back to installing the furnace under the drain manifold.
I realized that the sleeve for the furnace is going to be built exactly like a cabinet drawer – so why not also build the cabinet drawers while I’m at it? This would save a lot of time, actually, since I can set up the machines for the various cuts and grooves and then process all the parts for that step at one time. This means I need to measure my cabinet bays, consult the drawer slide instructions, figure out how many and where… so I do all that. As it turns out, I have just enough cabinet plywood to make all this stuff, even though when I bought the wood I had not really contemplated it. I’m not sure how that happened, actually – or maybe I did think of drawers and simply forgot 🙂 I’ve got a lot on my plate these days.
Be that as it may, I had the wood, so I made the drawer parts.
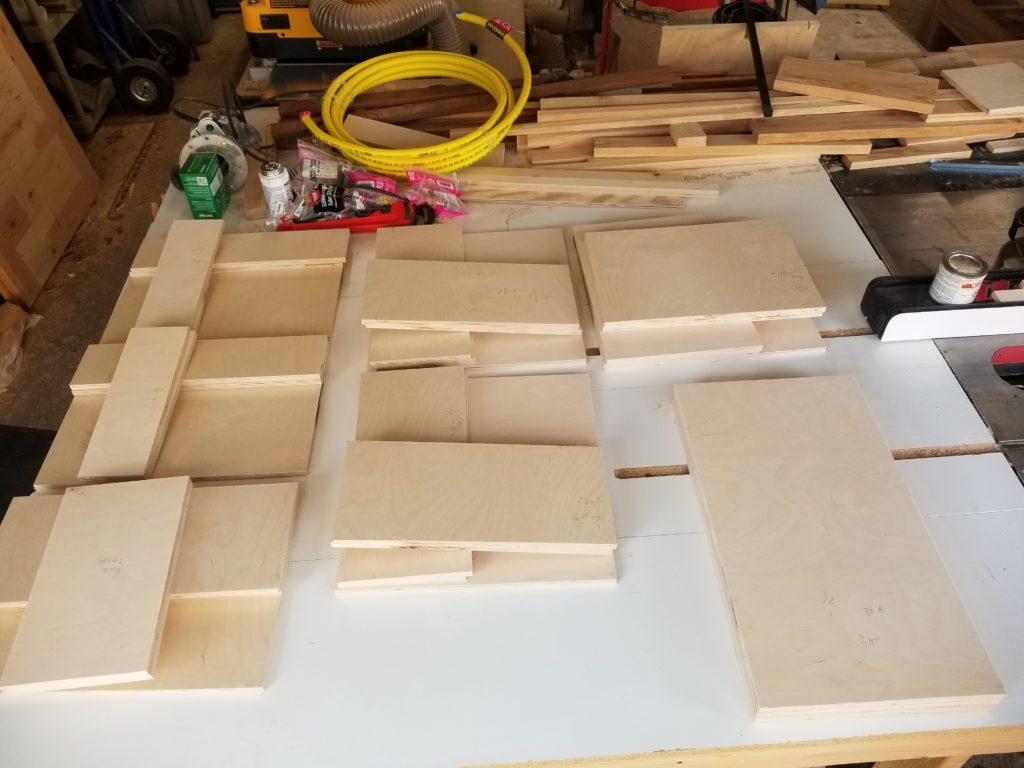
As well as the parts for the furnace sleeve. Then I did all the joinery bits, such as these grooves and the corresponding tabs that fit in them, variously.
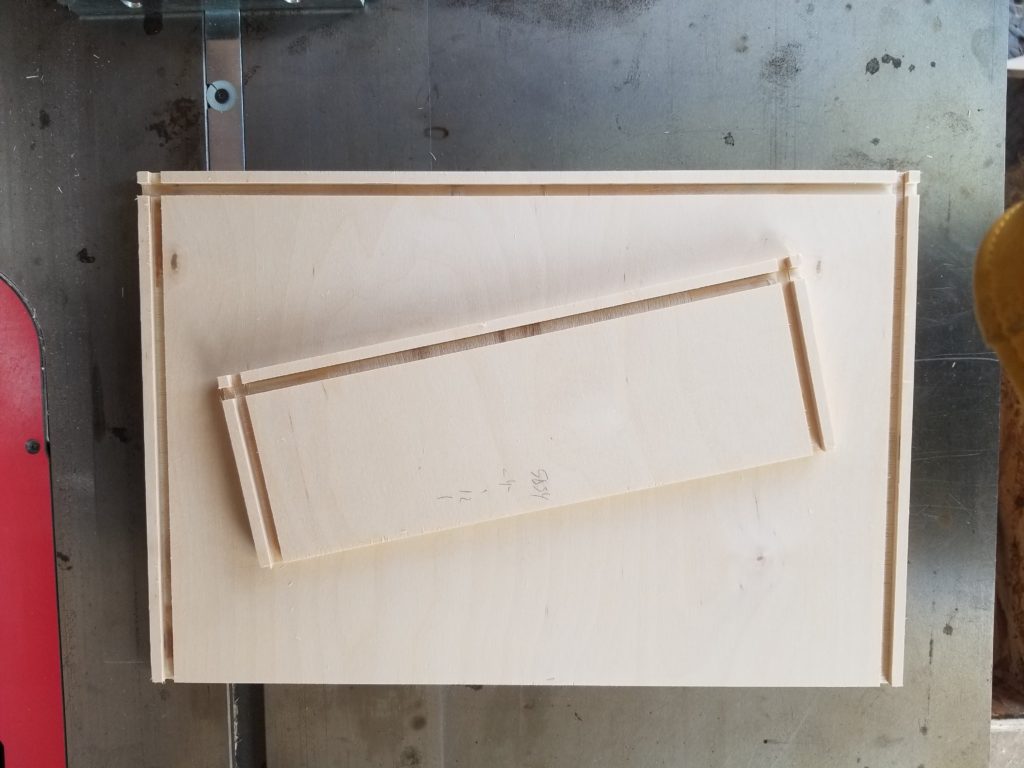
The basic idea here is that the drawer front is locked into the drawer sides such that even before glue or fasteners, the drawer is mechanically sound. You can actually pull on the front and the drawer comes along with it. In this random image from the internet, the grooved part is the drawer side and the tabbed part is the front (showing one corner only, not the full drawer).
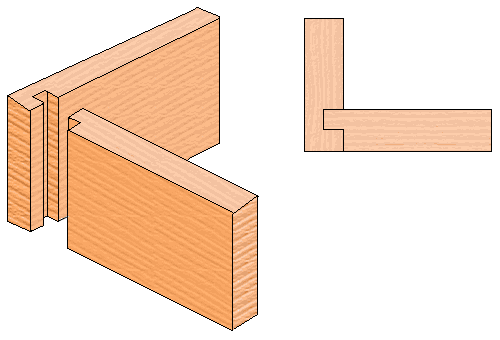
It’s a relatively simple joint to make. It’s sturdy, tends to square itself (not perfect, but it wants to be square – the better it fits, the more self-squaring it is) and is quite strong when simply glued.
So all those blanks are now grooved and tabbed, waiting for their turn on the glue mat. There are only so many clamps… thus these will be put together one or two at a time over the next day or so.
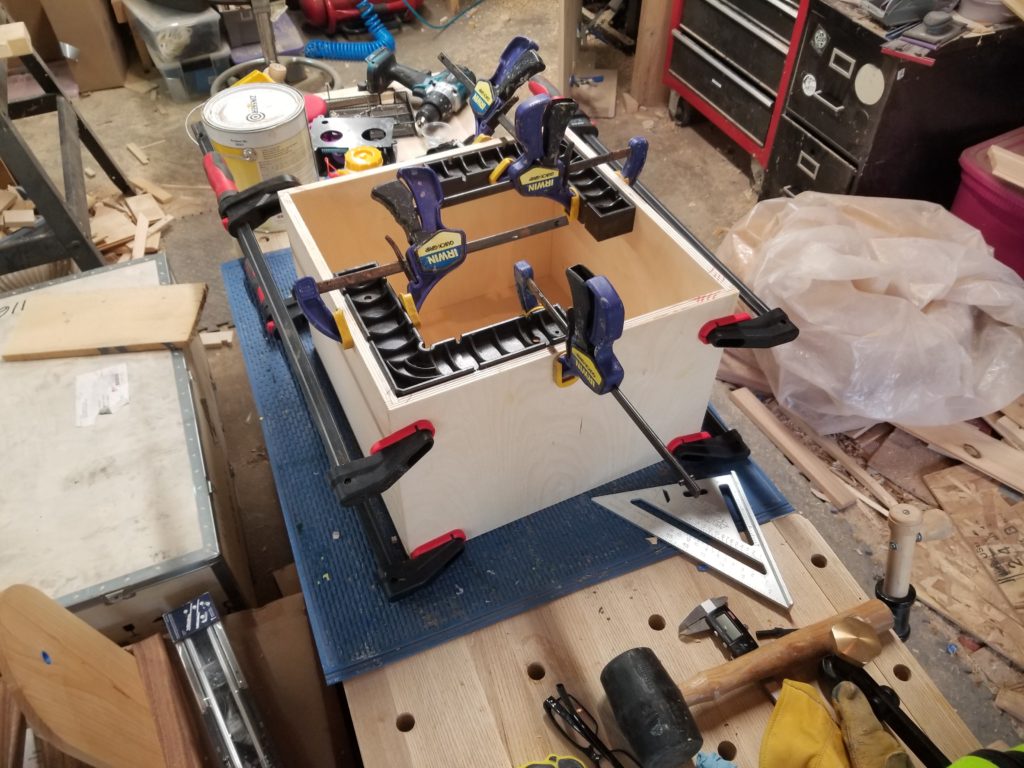
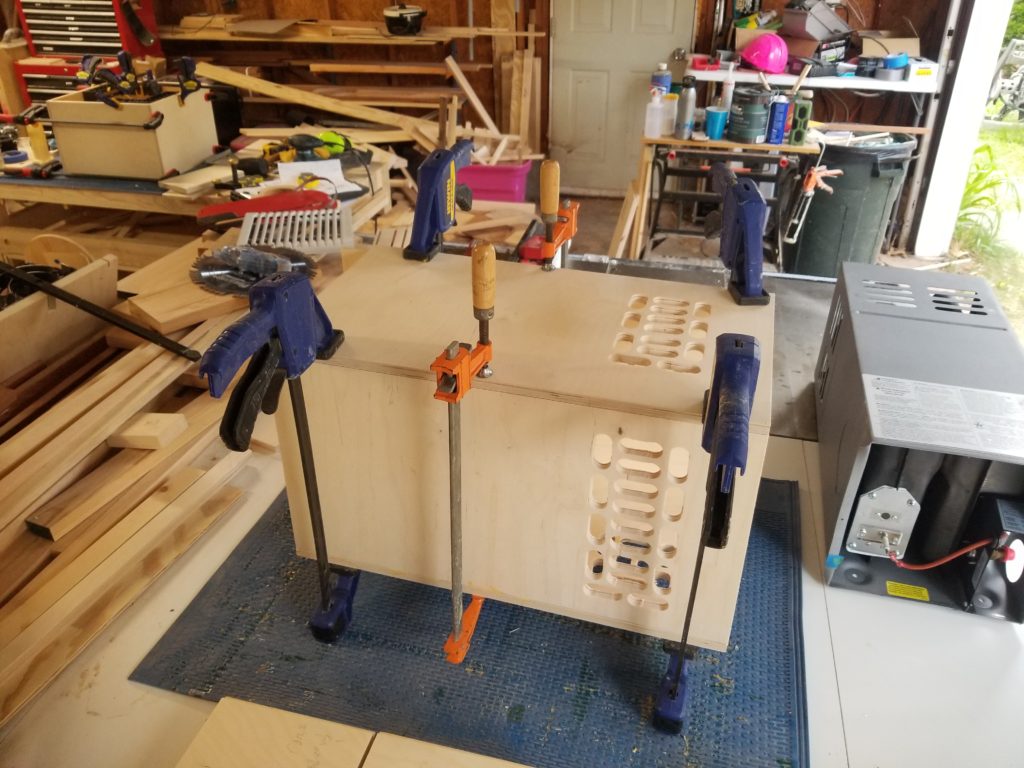
And here is that furnace sleeve I keep talking about. The holes are where cool air is drawn in before it’s heated and blown out the front (left). The furnace itself has slots for the air intake:
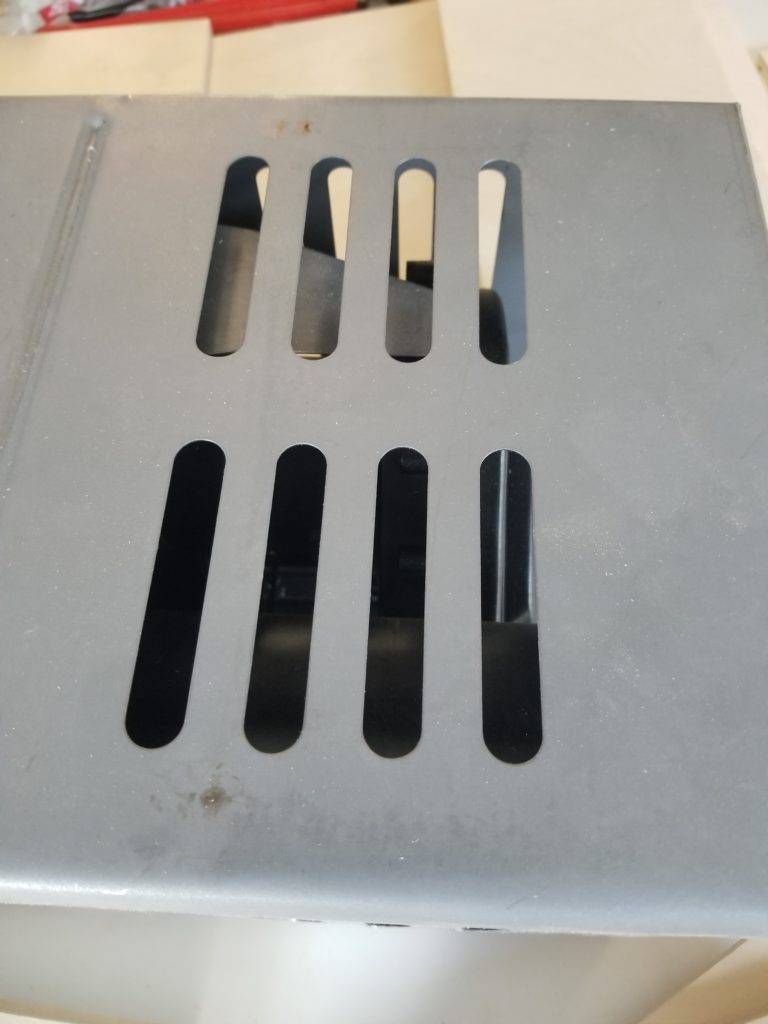
I didn’t like the look of the slots, so I made an array of 3/4″ holes instead, which I thought was more aesthetic.
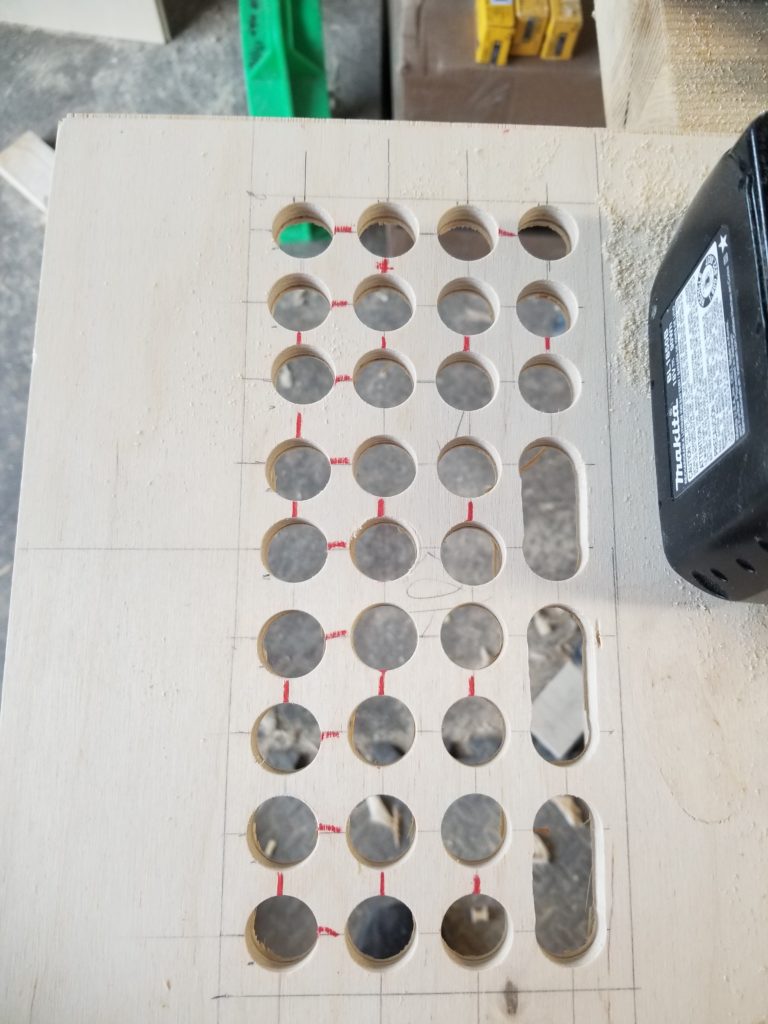
The thing is, when I did the math on the area of the holes vs the area of the slots, the holes has significantly less open area, even though it looks like a lot. So I turned the holes into little slots with a jig saw, shown here just getting started (you can scroll up and look at the finished sleeve to see how it went). The jig saw was a sloppy way to make slots, but it was kinda too late and I didn’t have any more wood to re-do it, even if I wanted to, which I didn’t. This all goes in the back, against the wall, over the fridge, largely blocked from view by cabinetry. There is no reason why this needs to be anywhere near perfect. So it’s not.
In completely random other news… the solar panels have arrived, along with the power center & battery system for The WOG.
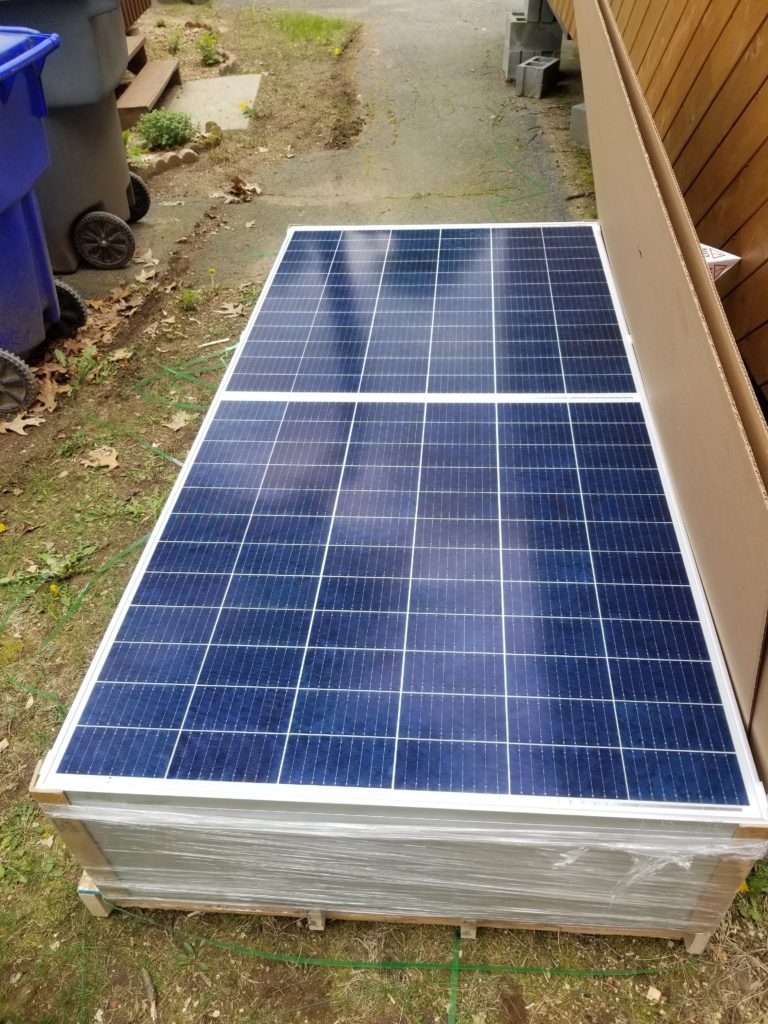
These panels are a bit larger than others I’ve seen. They’re about 7ft long and 3.5 ft wide. Here, let me show you how big that is (please forgive the crazy eyes – I’ve never been good at selfies). They’re taller and wider than I am. And at about 70 pounds each, a bit awkward to handle at that size.
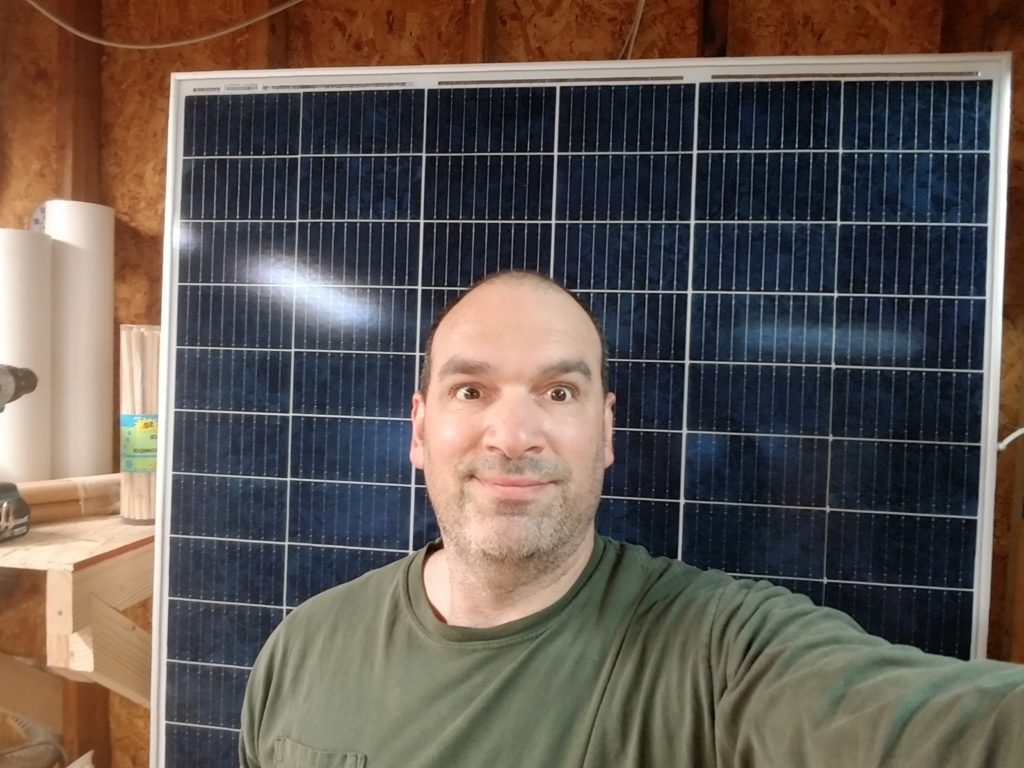
I will definitely need some help getting those mounted on the rack when the time comes.
When will the time come? Well, the solar array won’t go in til The WOG is built, since that’s where I will want to stage the parts during assembly. The WOG won’t be built til the permit is granted. The permit won’t be granted til I have a site survey, which I neglected to do already, so am now scrambling to get that done. The excavator guy who would be preparing the site is himself booked out for a month or two anyhow, so it looks like there may be some delay. We’ll see what can be done to move things along in the interim.
