It seems my replacement batteries are finally on the move from California. Today’s tracking report has them at a depot in Albuquerque. I do hope they don’t take a wrong turn from there. You know, I’ve known about the city of ABQ for many years but never really stopped to think about how to spell it until I saw it shown on the tracking report. Wait, is that al-bah-kwer-key? Yep. Except it’s “Albuquerque”. Quirky.
So, without batteries this weekend, still no power system commissioning and thus no plumbing test, either. I realized the baseboards need some other things to be done first before installing them makes sense (everyone who is surprised that something must first be done, stand on your head). What, then, can I work on while I wait?
For one, I can seal up the penetrations in the Propane Porch where the pipes and conduit go through the wall to the T.H.R.O.N.E. Room. This, as it turned out, was surprisingly (well, surprising if I wasn’t already accustomed to how hard everything is to do in a cramped space) difficult. Getting the caulking gun near, and more importantly around all of these penetrations was pretty much impossible. The Propane Porch isn’t that deep and with the plunger of the caulking gun sticking out the back, that thing is actually pretty long, making it really hard to maneuver. Never mind how close together everything is, also making it hard(er) to maneuver. Happily, this is basically “the shed” and there is no need for things to be beautiful in here. So I just wiped the caulk around the pipes with my finger, cleaned it up as best I could (which wasn’t that great), and said, “it’s the shed, nobody cares” and enjoyed a few moments of peaceful acceptance. More to the point, I won’t be getting drafts or bugs crawling in this way, and that’s the important part.
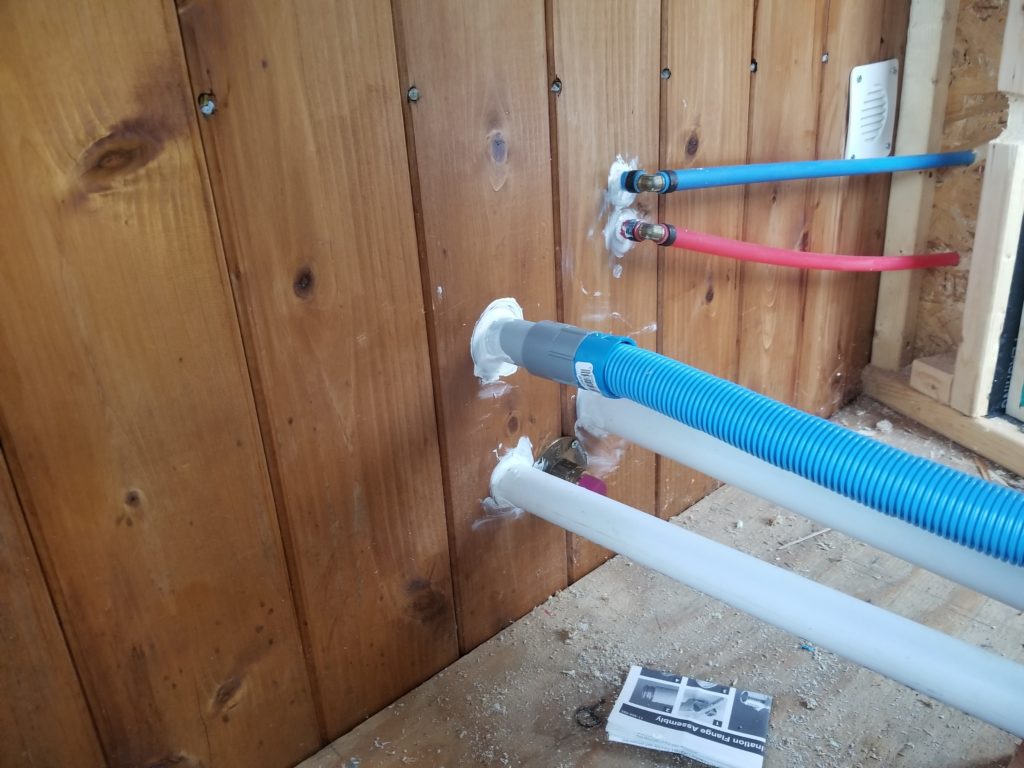
While I was at the Propane Porch, I happened to notice the screws for the hose hookups were rusted. Ooops. Musta forgotten to use stainless hardware.
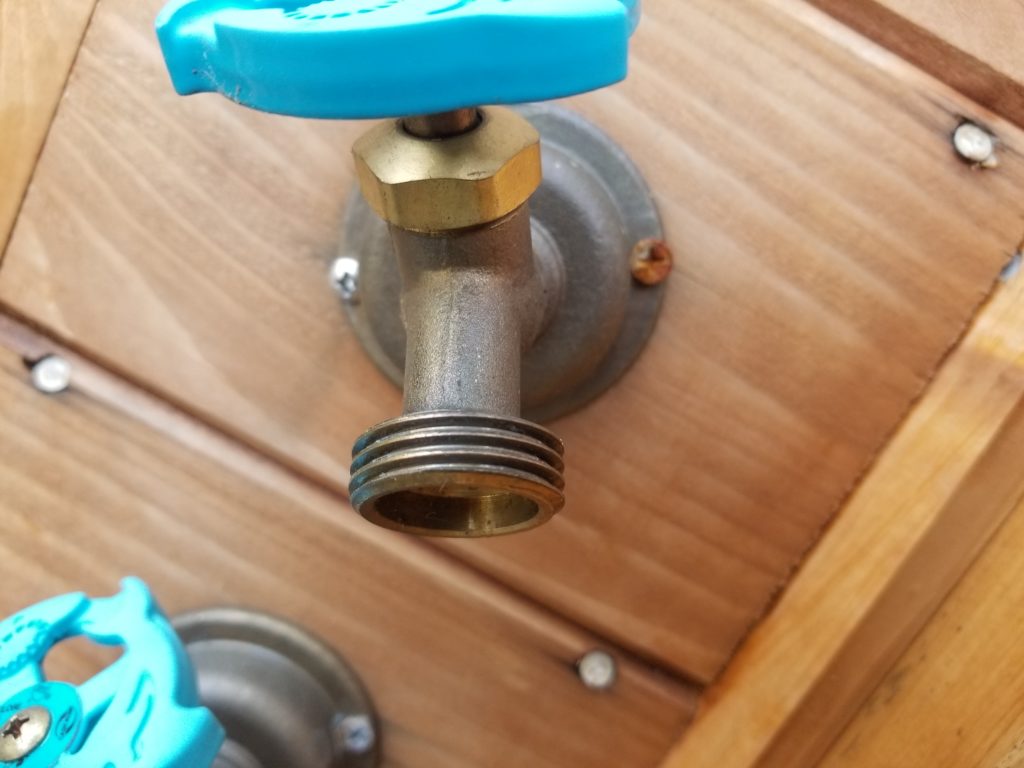
On the right – a year’s worth of rust. On the left, a new stainless screw.
A few other finish-it-up items crossed off the punch list today, including handles for the side cars in the T.H.R.O.N.E. deck proper.
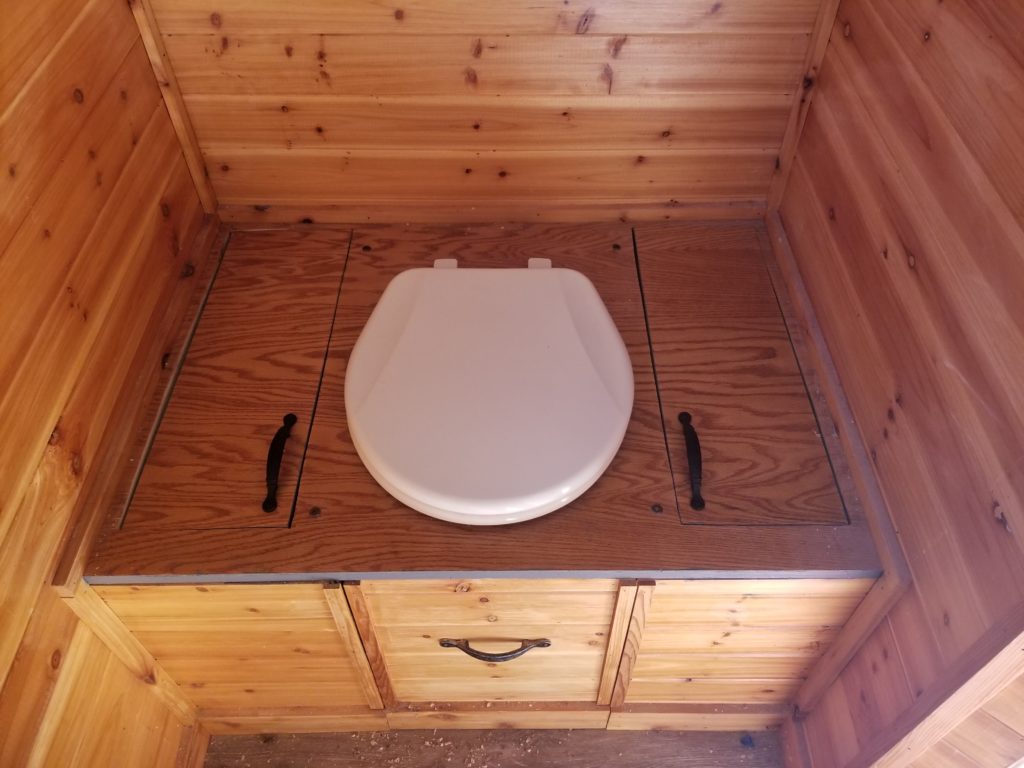
I’m still rather embarrassed by how poorly the sidecar doors fit. They look “not great” in this shot. Up close, I would honestly call them “pretty bad”. The issues begin with having freehand-cut the panels out of the deck. I’m pretty sure I “straightened them out” after that, which more than anything made them smaller and thus poorer-fitting. Then, when doing the hinges, I was working in very cramped quarters without having anything really straight or square to reference, so there was a lot of eyeballing/fudging it. Honestly, it’s kind of amazing that the doors fit and operate even this well, considering. Re-making them isn’t an option, unless I want to really disassemble the entire thing here, which I don’t. I have learned quite a bit about how to do this thing better, should I ever do anything like this again. Those lessons had a cost and the cost is what’s wrong with this bench. It will, however, securely hold a fairly large individual and let them do their business, which, at the end of the day (or any other time), is all it really has to do. It doesn’t have to be beautiful, even though I wish for it to have been. Instead, it is beautifully imperfect.
While I was working on the hinges, I felt a little something on my neck. I gave it a quick brush-off and found out who it was.
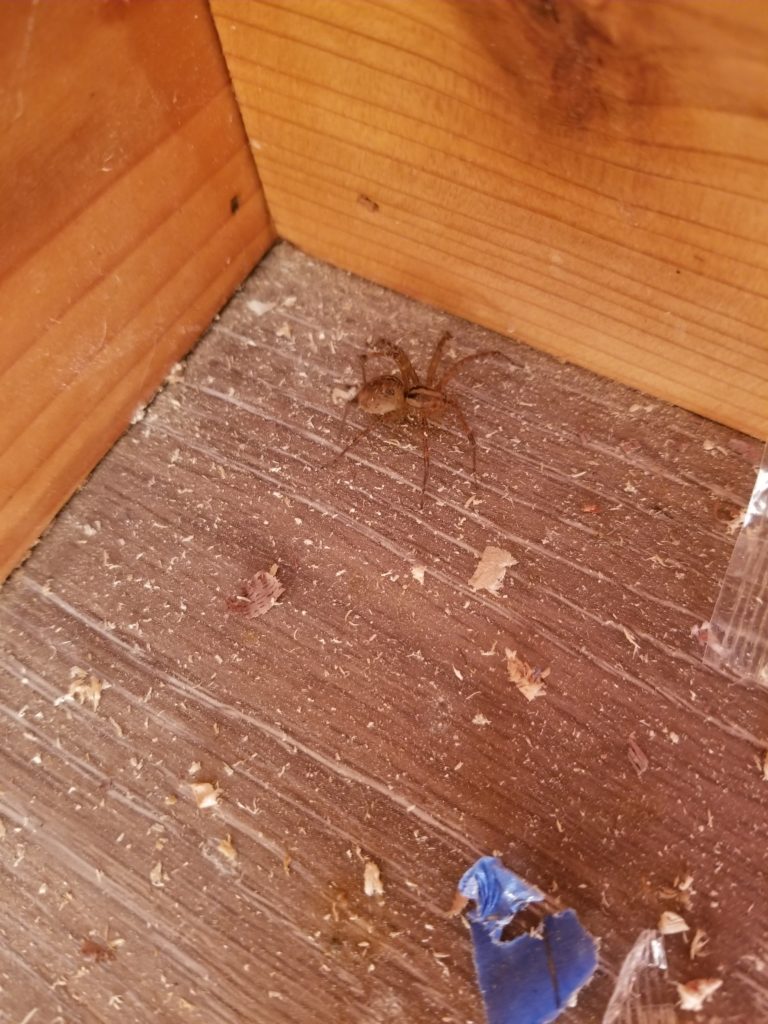
Hey, spidey! Nice of you to visit! This one was about the size of a quarter, tip-of-leg to tip-of-leg. Not particularly menacing and not believed to be venomous to humans, but definitely caught me by surprise. I escorted my guest outdoors.
Back to the punch-list.
Next up: dealing with the vent/overflow/drain lines for the sensor risers and the water heater, respectively. The easiest thing was to bring them together, below all of them, so they could drain/vent easily yet not manifest as a forest of tubing heading down to join the kitchen sink drain pipe.
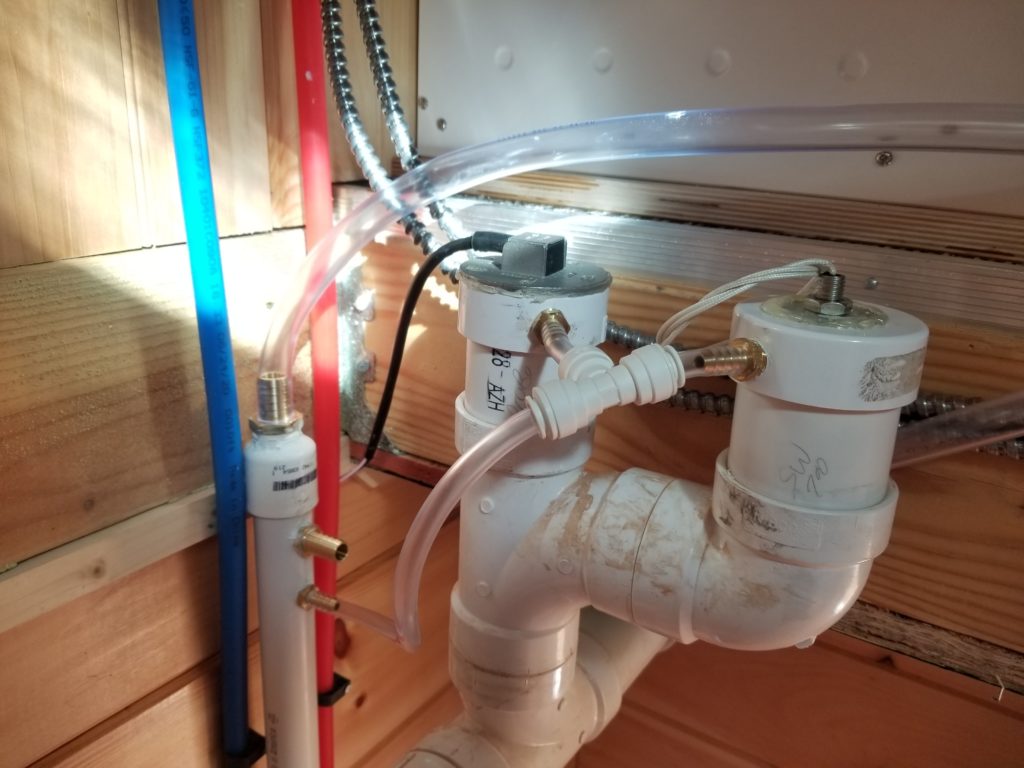
This is what I came up with: a 1″ standpipe drilled to accept an array of hose fittings to receive all the aforesaid. As it turns out, if you drill PVC pipe just right, you can actually screw in MIP fittings right into it and they’ll be water tight (for drain purposes, maybe not for pressure use). The PVC is soft enough to let the brass threads cut into it and if the hole isn’t quite the right size, the PVC is soft enough to give a little if you don’t actually crack it. You’ll see here the #2 fitting does not have its tubing attached. That’s on purpose. The tubing that goes there comes from the water heater’s condensate/rain tray. Right now, it empties into a bucket.
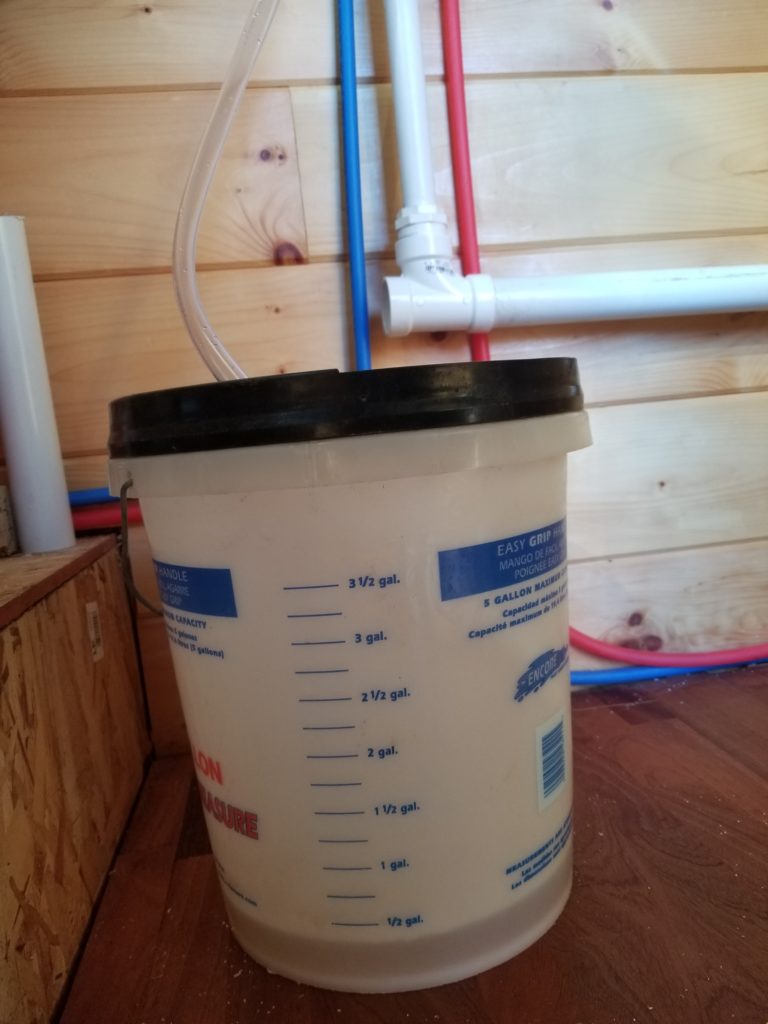
And yeah, that bucket has approaching half a gallon of water in it! We’ve had some heavy rain. More to the point, if I plugged the left side of the tee (where the kitchen sink will drain) and plumbed the tubing to the standpipe instead, then this half gallon of water would flow to the graywater lift pump.
That sounds like the right answer, doesn’t it?
And it is. And it will be. But for now, since there’s no power, the lift pump can’t lift. And even if it could, the lift pump has an open port (waiting for the wash sink drain hookup) that would let any water which flowed into it flow out of it, onto the T.H.R.O.N.E. Room floor. Hence the bucket.
Speaking of the lift pump, though, there’s one more thing to do about that up in the Storage/Utility Loft. Namely, the riser needs to be actually connected to the holding tank intake manifold. That’s this. Here’s where it comes up.

And there’s where it enters the holding tank intake manifold.
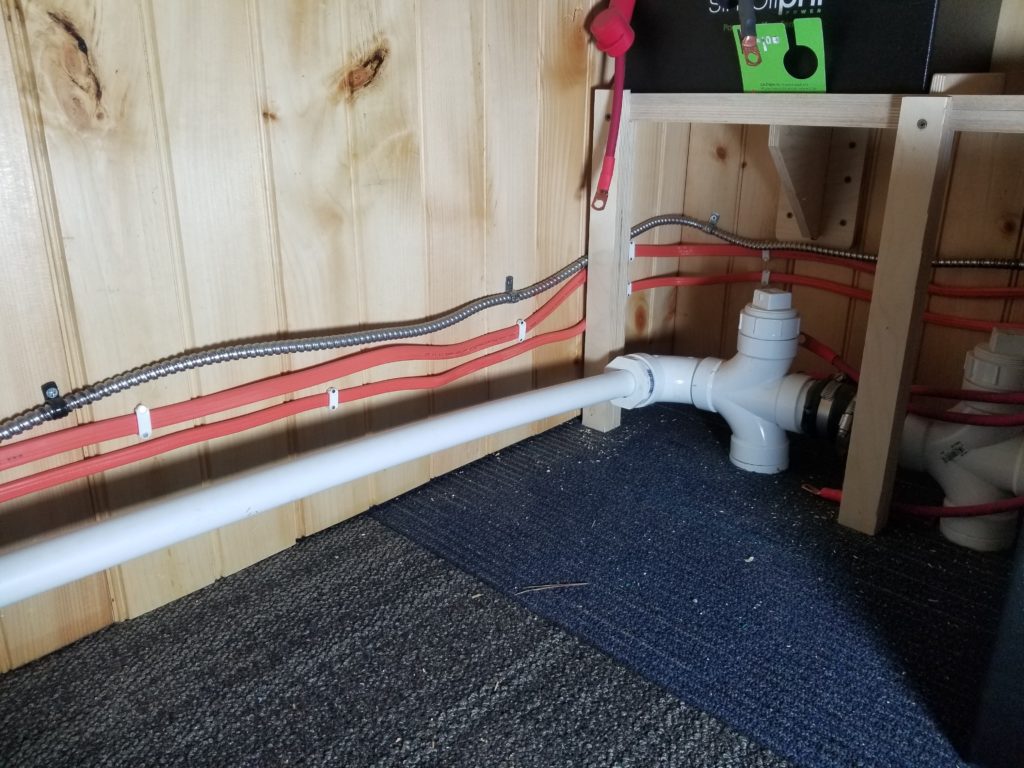
Having the intake manifold on this side of the house while the lift pump is on that side of the house doesn’t really make sense. It made sense before, when the lift pump was going to be located inside the T.H.R.O.N.E. bench itself (left side car) and the gray water riser would have come up right here in this corner instead. That’s what I thought I was going to build when I installed the gray water tank and put its intake here. Later, I realized the lift pump needed to be on the other side of the house to more sensibly serve all the things it serves without having even more pipes transiting the T.H.R.O.N.E. Room, so changed its placement. I couldn’t change the placement of the intake manifold, though, so it is where it is and thus I had to cross the SUL to fill it. And so it is.
While I was up here, it seemed like a good time to bring those wrong-breaker batteries back down and pack them for return. I had mentioned to a friend how heavy these were (~80#) and how hard it was to get them up the ladder to the loft and she said: why didn’t you use a pulley? Derp. Why not, indeed. I even have one! I bought it to raise the Power Center, which is bulky and weighs in at about 125#. In my defense, the pulley doesn’t live in the house, so it’s out of sight (out of mind). Anyway, with her suggestion, I remembered I had one and tossed it up in the loft to remind me to actually use it to trade out the batteries.
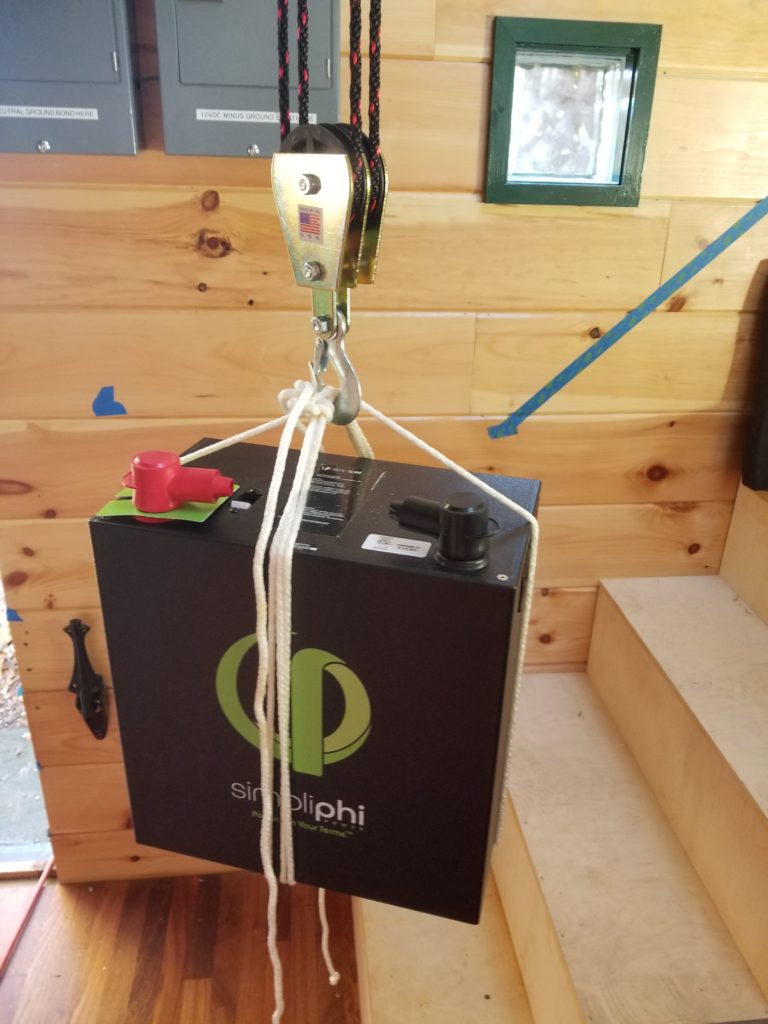
Eighty pounds… going down. Gently. This one module can hold enough energy to run the entire house for 24h.
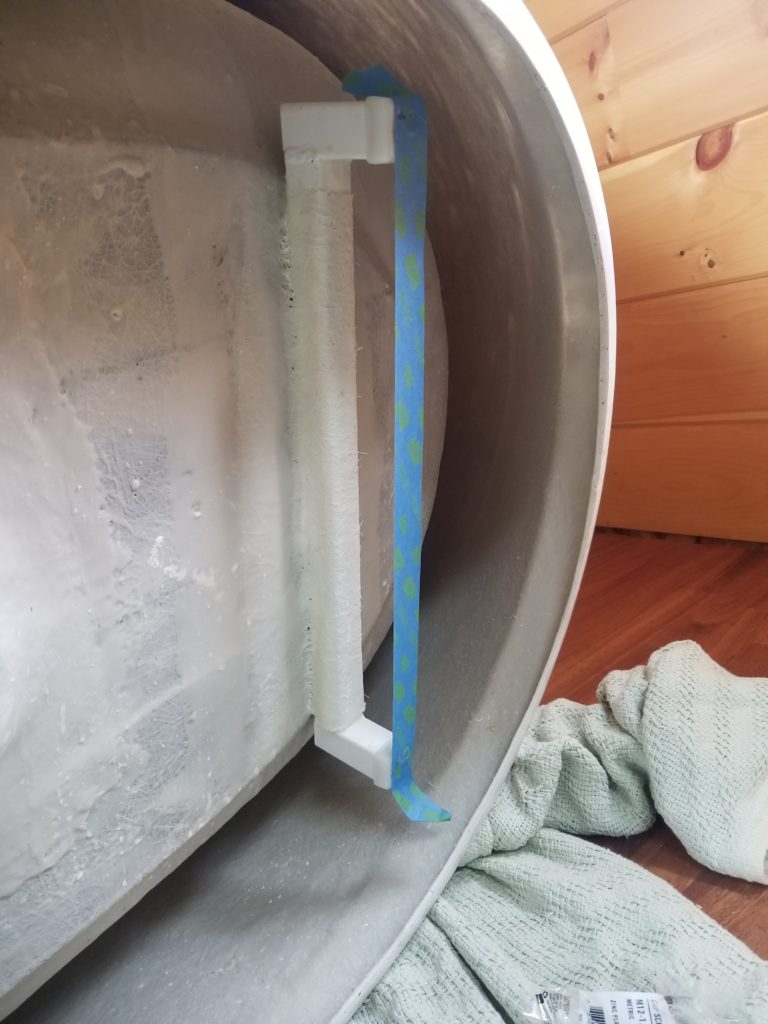
Last on the docket for little stuff I can do now while I wait for the batteries: get the tub ready for installation! Optimistic, I know, but it’s actually pretty likely to happen in a week or two. Here, you’ll get to see the beginnings of what I was trying to explain about how I am going to mount the thing.
The first step is to remove the feet and bolt on some runners. Because of the angles and materials involved, it was hard to measure the hole-to-hole spacing for the foot bolts. I had an idea: don’t measure it! What? Yeah. Don’t measure, just copy. Apply tape…
Then press tape into the bolt holes, making an impression in the tape.
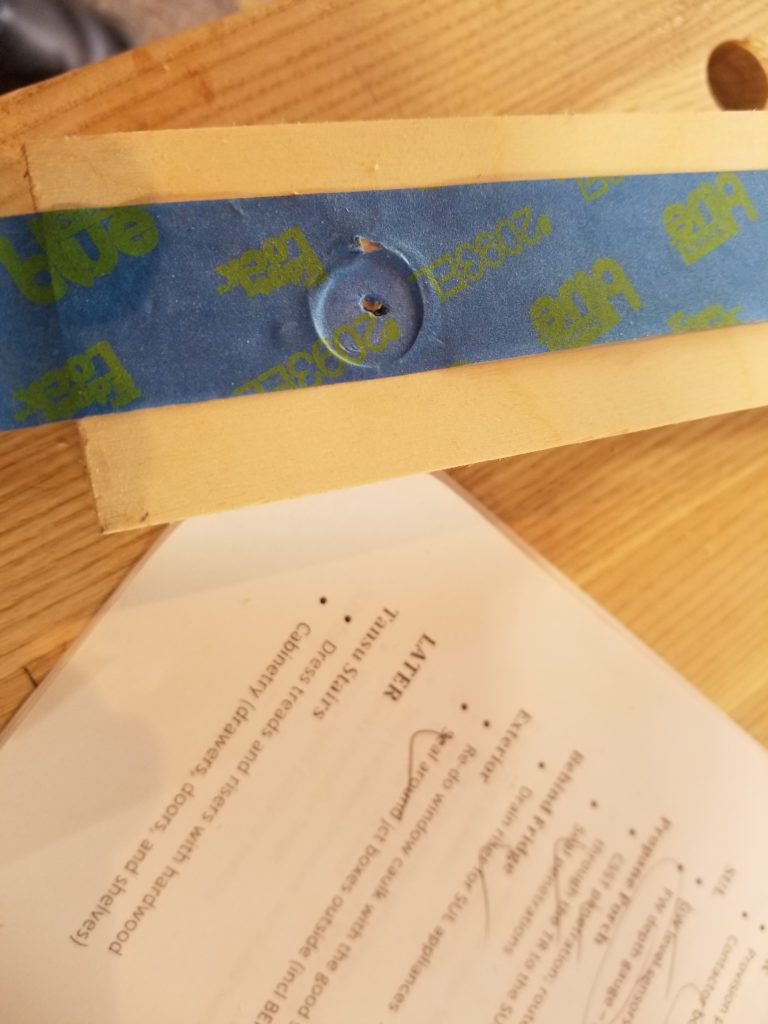
Then apply the impressed tape to the runner, eyeball the center (close enough, I’m going to over-drill the hole a little anyway), then drill through. No measuring! Just doing.
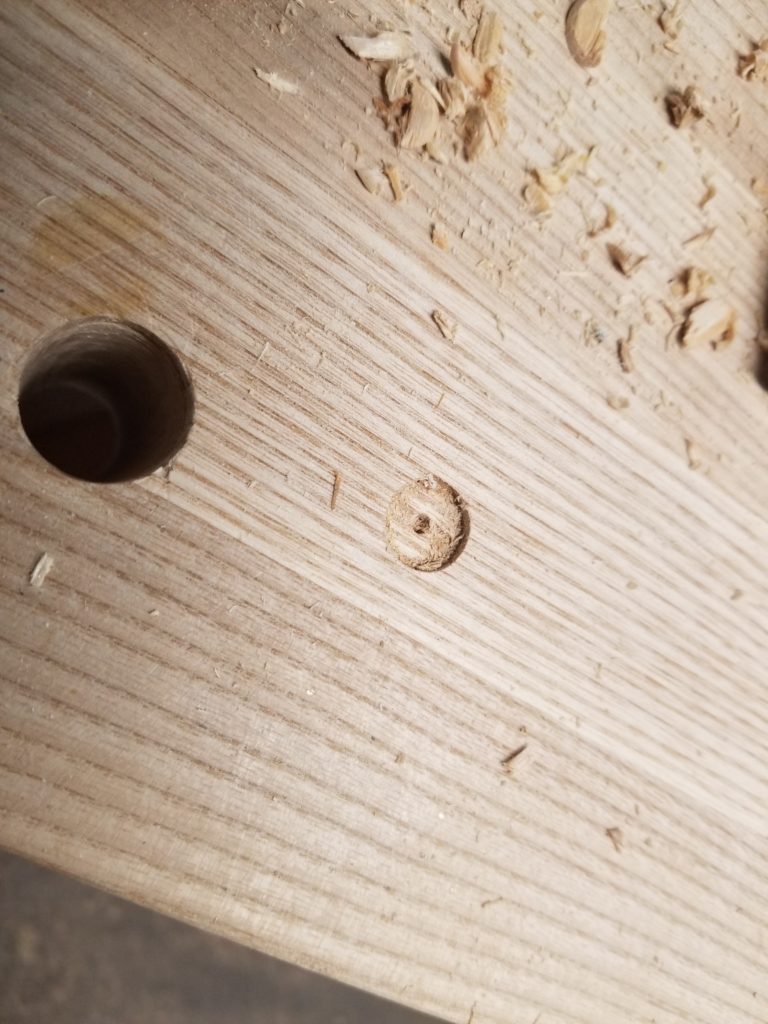
Sadly, in the doing, I forgot how fast my brad point drill bits are and went through my backer and into the bench about 1/8″. Not a big deal, really — a bench without scars is a bench unused — but it was the first real scar and thus gave me a moment of pause as the bench went through this rite of passage.
The holes, though, were perfect. The first runner piece bolted on neatly. This is just a test-fit. I used washers for the final doing.
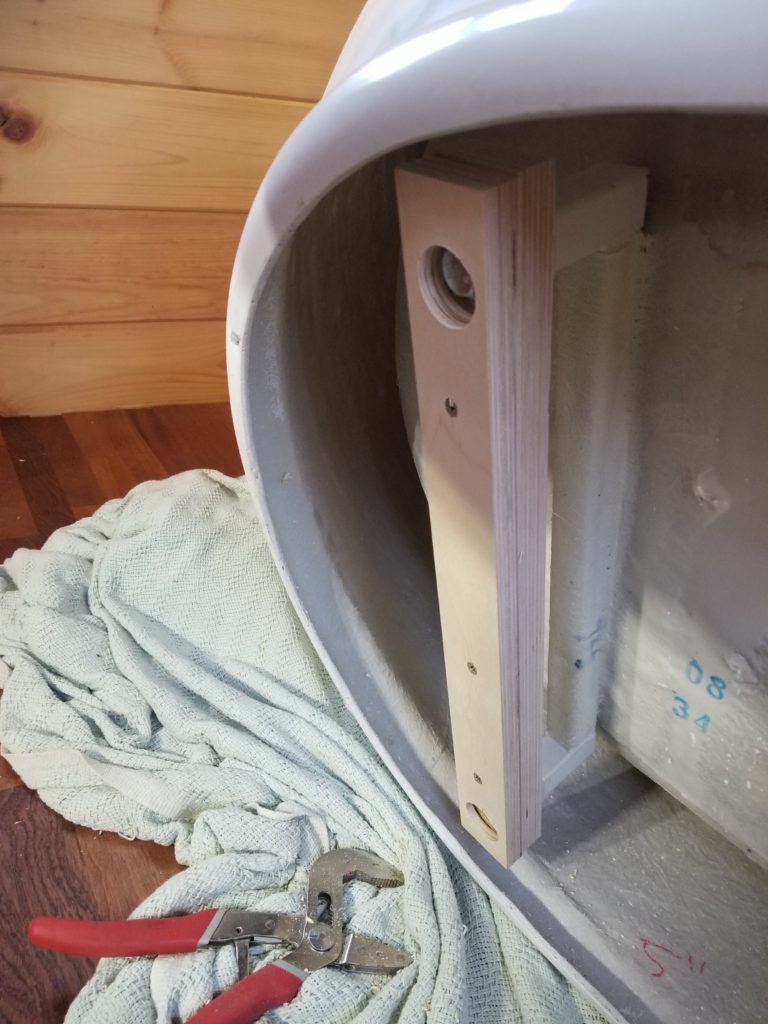
Second course with clearance holes for the bolts & washers, thoroughly screwed to the first.

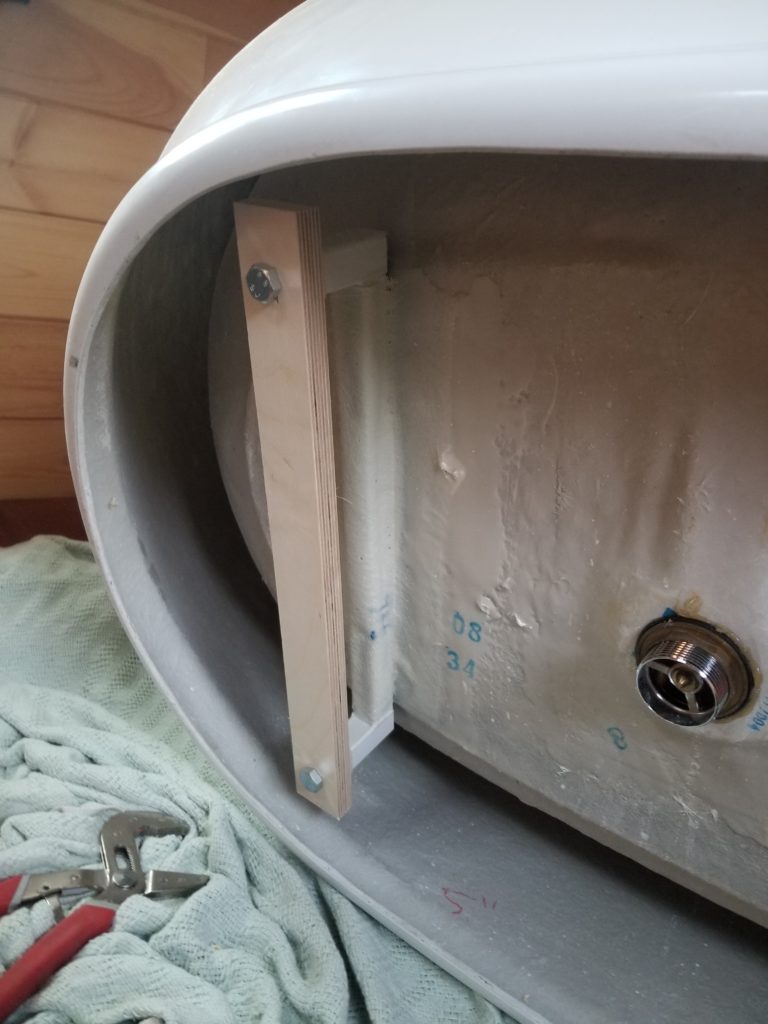
Here are three courses all together, bringing the plane of the runner just beyond the edge of the tub skirt. I have clamped a fourth piece in place to show what comes next.
One more piece of plywood, more-or-less D-shaped, is next. It will get attached to the runner and protrude out the back a bit, kind of like how this scrap shows, but curved to match the profile of the tub for aesthetics. That piece sticks out beyond the skirt and enough past the curvature of the tub basin itself such that I can then affix that to the floor using “hanger bolts” — half wood screw (for the floor) and have machine screw (for bolting the tub to it). This will let me use machine nuts for the final attachment, making it both easier to torque it down and possible for me to remove the tub and re-install it without risk of stripping screw holes in the floor. Why would I want to remove this tub I’ve worked so hard to make ready to install? Simple: if I ever need to service any of the plumbing behind the tub, the tub would have to come out.
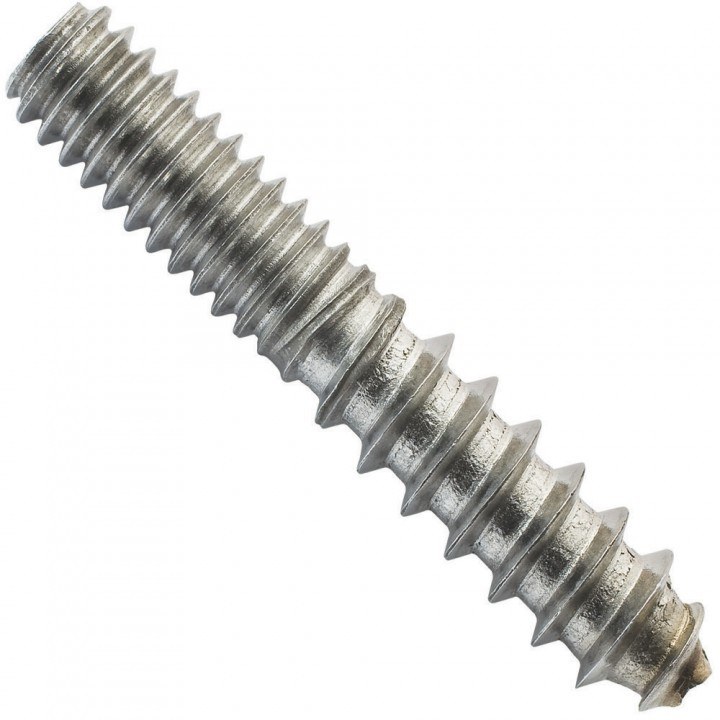
A hanger bolt. Part wood screw (lower), part machine screw (upper).
Next up: more conversations about gray water management with the guy and hopefully by next weekend the batteries are actually here and I can move all these things forward a bit more.