Tropical Storm Isaias took out power here last Tuesday. Today is Sunday. They say power will be restored by next Tuesday, a week after more than 900,000 customers lost power due to the high winds from the storm. So for me, while I do have a generator, it’s a very small one, just enough to keep the fridge, a fan, and a computer going — no power tools on top of that, so my workshop is quiet. But it’s the weekend, and I want to make some progress on my house! What can I work on without power tools? Ironically, the answer is… the power system!
My wire did finally come, nearly a month after I ordered it, so I’m actually ready to go. And so I do. The first thing is to pull 11 heavy wires through that new conduit I installed up to the junction box in the corner of the Storage/Utility Loft.
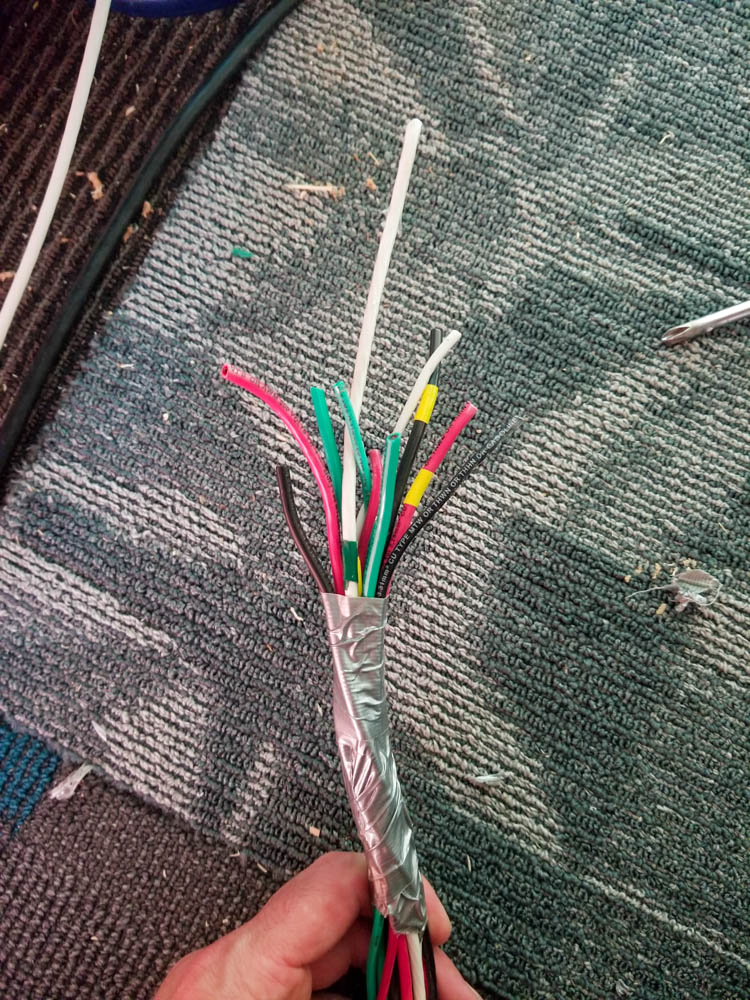
I’ve pulled wires through conduit before, but never so many at a time. It’s not really feasible to pull some and then pull more, as things get pretty tangled in there if you do. Really, the only hope is to pull them all at once. In this case, that’s 7 lines of 10 AWG and 4 lines of 12 AWG. That’s going to be a pretty stiff bundle, even for stranded wire. I’ll need something to ease the way…
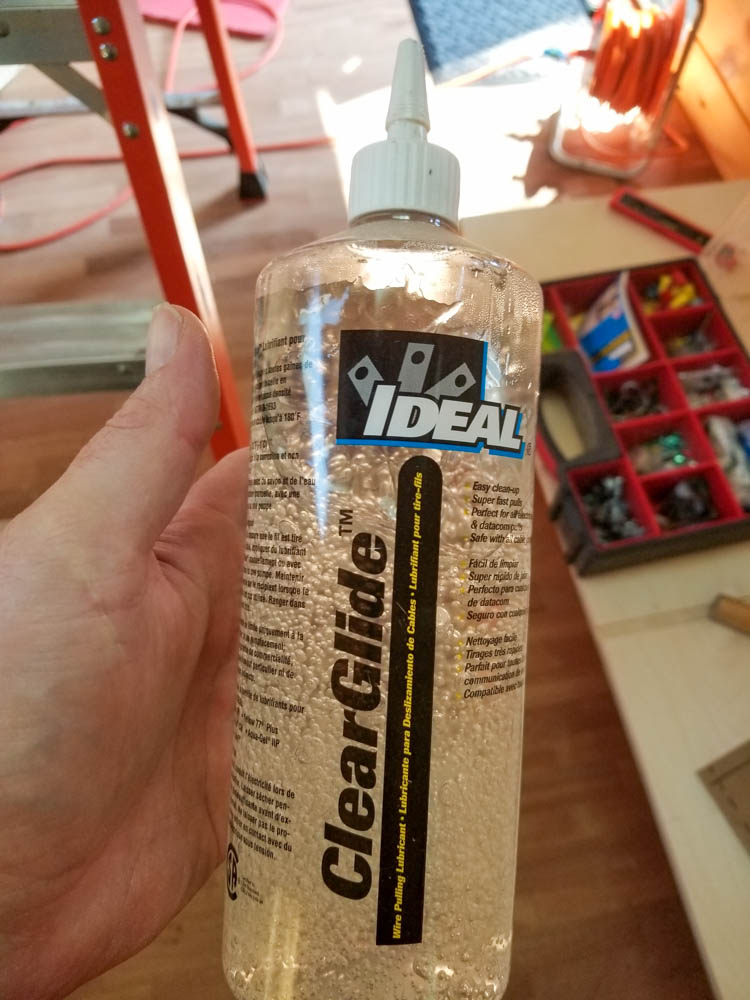
Conveniently, I have a bottle of this stuff, which is, well, ideal for the job. Yep, there’s such a thing as wire lube! Who knew? I did, actually.
What’s funny is that this stuff looks, feels, and smells rather a lot like water-based sex lube, too. I wonder if it’s the same stuff, just in a party-sized bottle, possibly formulated with less concern for hygiene.
Let’s get started. I thread the wire pull, which is an anomalous thing in that it’s effectively a rope you can push. They always say in mechanics, “you can’t push a rope”, which indeed is true. Unless it’s a wire pull, in which case it is a rope you can push. Or, more specifically, some high strength plastic filament that is stiff enough you can push it through conduit but flexible enough to go around bends and generally act like a ferret.
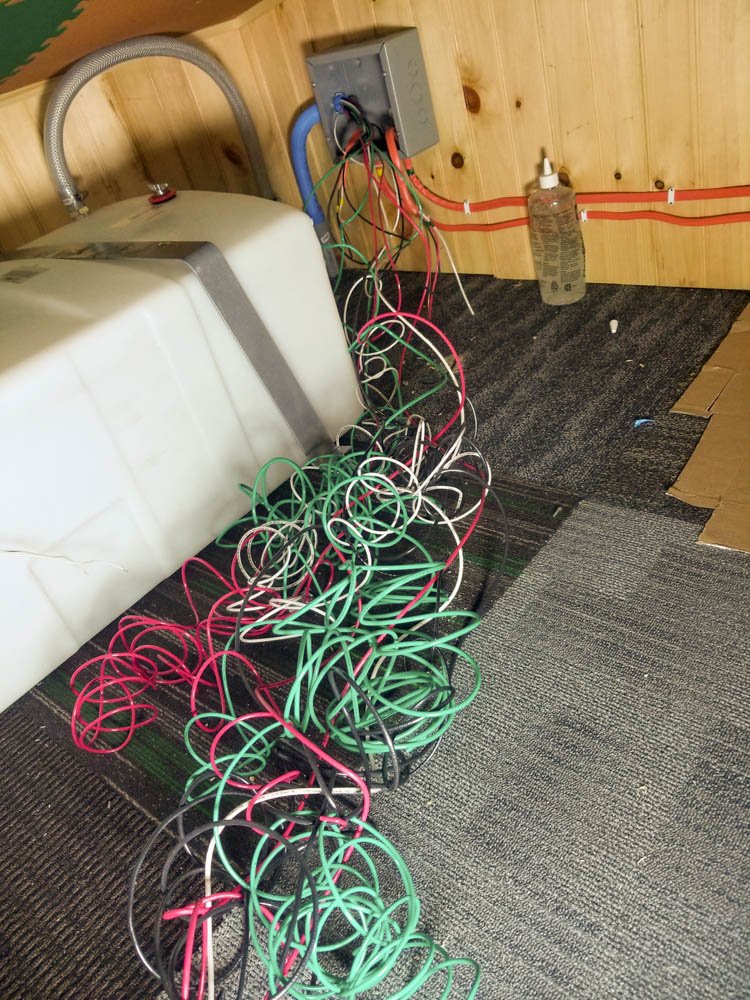
This is gonna take a while, since today (like most days), I’m working without a helper. So I go downstairs, pull a bit, then go upstairs, untangle the wire a bit, maybe guide some in and add some of that ideal lube to help things along. Untangle, you ask? It looks positively orderly on its way into the conduit here!
Sure, but all this wire arrived on spools and thus has a memory of being curvy, not straighty. So, no, it doesn’t stay tidy for long at all. No hairbrush in all the land can untangle this one. Gotta just work it as I go. And so it goes.
Dutifully, and without too much heavy hauling, the wire emerges in the T.H.R.O.N.E. Room, lead by my trusty yellow pull line. Of course it’s covered in slippery wire lube, making this a bit of a sloppy mess, but at least it’s moving through the conduit nicely and I have a big roll of paper towels at hand anyway.
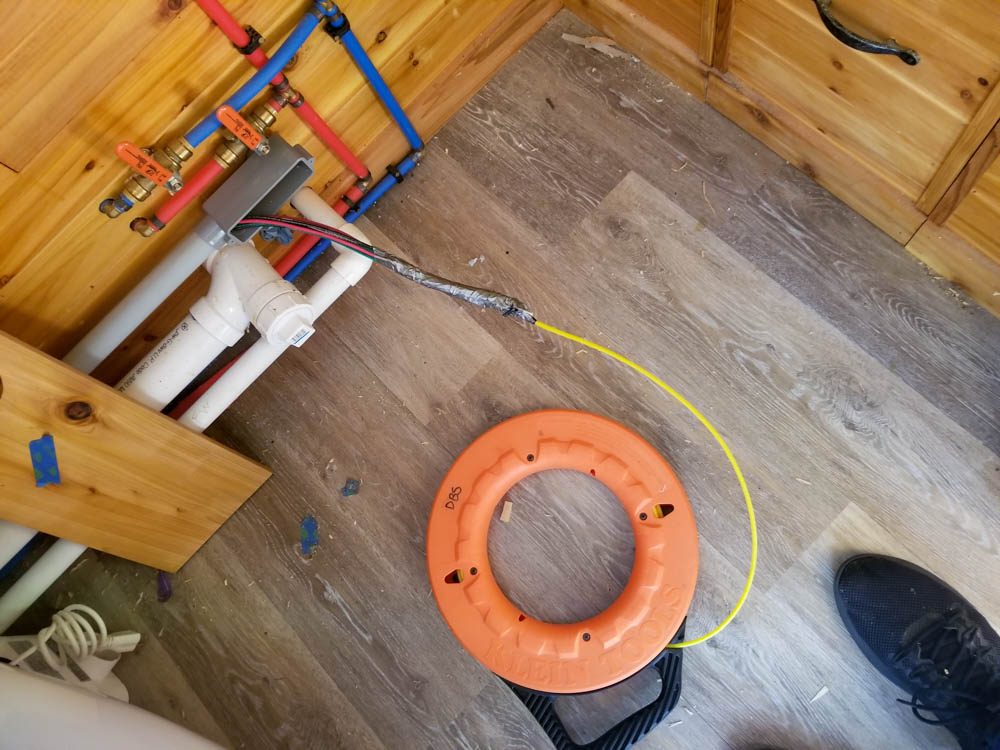
Now if only I had thought this through just a little more, I could have saved some time. The wires aren’t going to the T.H.R.O.N.E. Room. They’re going on to the junction box in the Propane Porch. If I had started the pull line from there, I wouldn’t have to undo this bundle, move the pull line to the junction box, thread it back through the wall, and re-attach it to the bundle to finish the run.

Hindsight says, dude, you should have started the pull from here…
… and when it came out here, routed it back up to the SUL (where the wires now emerge) so you could do one long pull instead of two, including unbundling and re-bundling the wires.
Ah, hindsight. As it was, I did manage to gain some efficiency. Instead of pulling the wires entirely into the T.H.R.O.N.E. Room and then pulling them newly to the junction box, I did re-route the pull as soon as I got this far such that I could then pull a couple of feet of wire into the T.H.R.O.N.E. Room, then go out to the Propane Porch and pull those couple of feet out to the junction box, inch-worm style. This prevented a repeat of that big, tangled mess, at least, though it was slippy work given the lube.
A couple of feet in, a couple of feed out. Wipe lube off hands. Repeat.
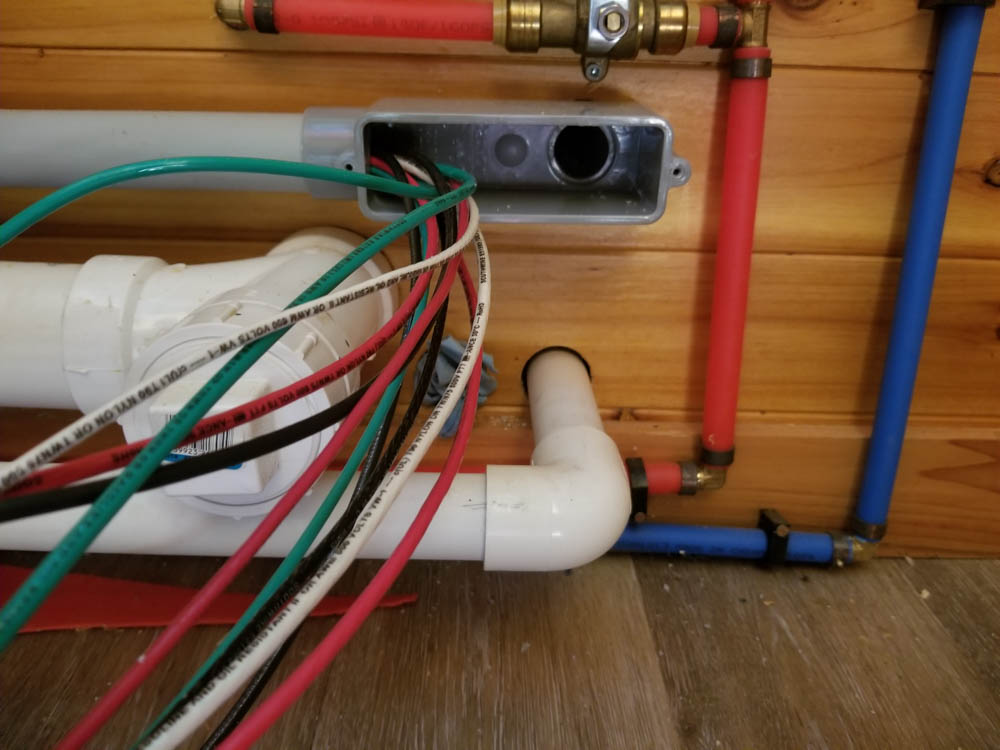
Of course, the junction box isn’t the end of the line, either. These are three distinct groups of wires, each bound individually for the generator inlet, the solar hookup, and the well pump junction boxes, respectively. I could have cut the wires and then joined them back again, but why bother? This isn’t actually a junction box per se, it’s more of a distribution venue. How will I know which wires go where? I had the foresight to tag them with color-coded tape (on both ends!) before I started. Yellow = sunshine = solar. Blue = water = well pump. Green = greenerator 🙂 I just split them out here and pulled them home to their respective destinations.
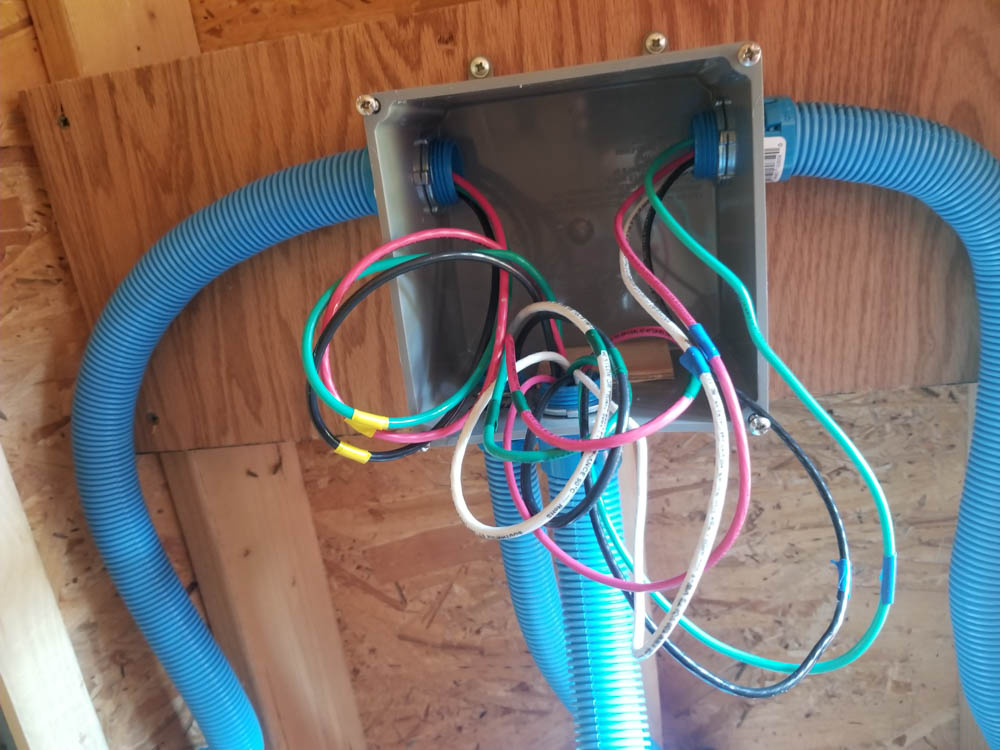
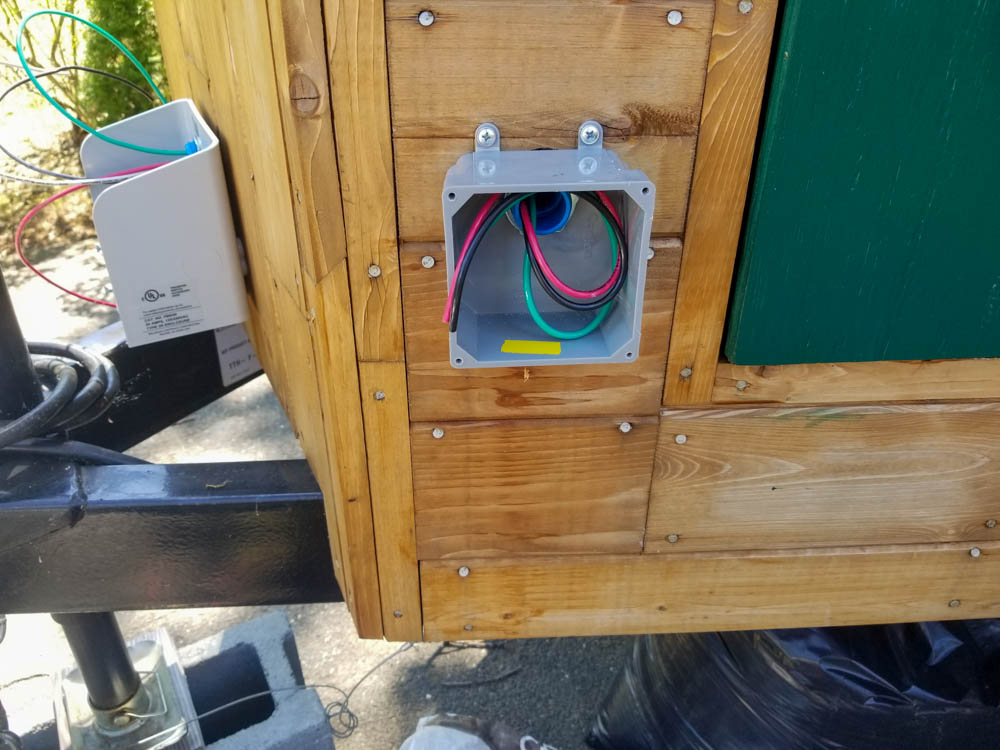
And speaking of destinations, each one got a matching strip of tape, too, so if you were in the generator inlet box (below), you’d see the green tape and know “ah, green is for greenerator!” and thus be able to know which wires were yours back through the whole run. In this case, the generator’s receptacle is already in place, so I could actually finish wiring it up, which I did (after this).

There is no solar array yet, nor is there a well pump. For these, the wires just terminate in empty boxes. I don’t even know what kinds of connectors they will want. And that’s fine. I can drill holes for the connectors when the time comes. Yellow = sunshine.
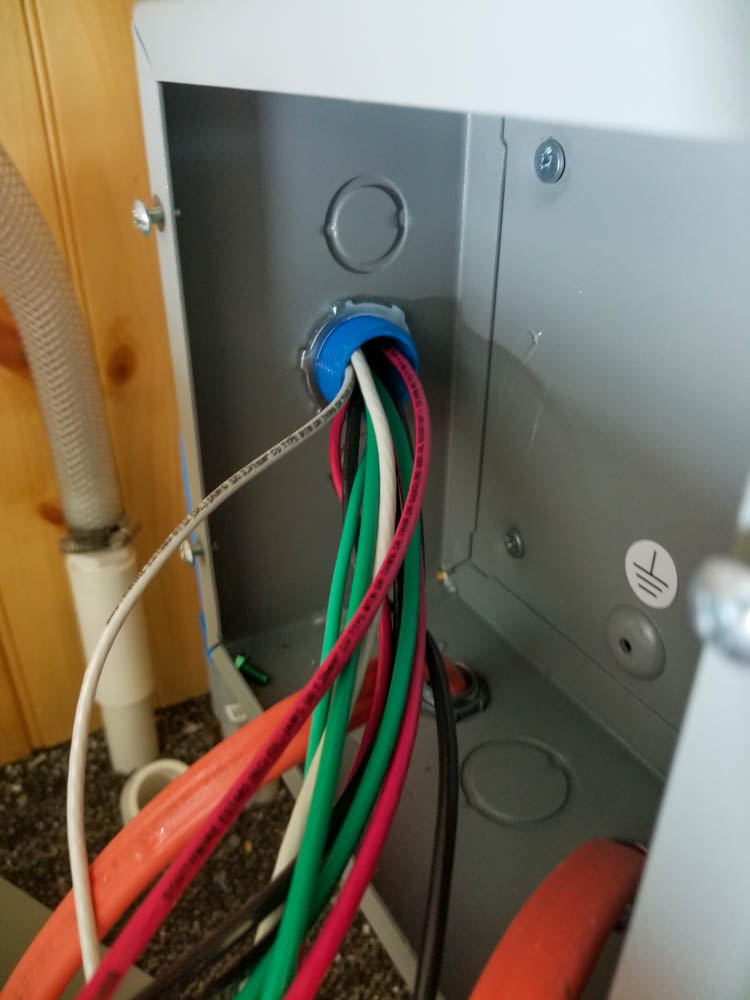
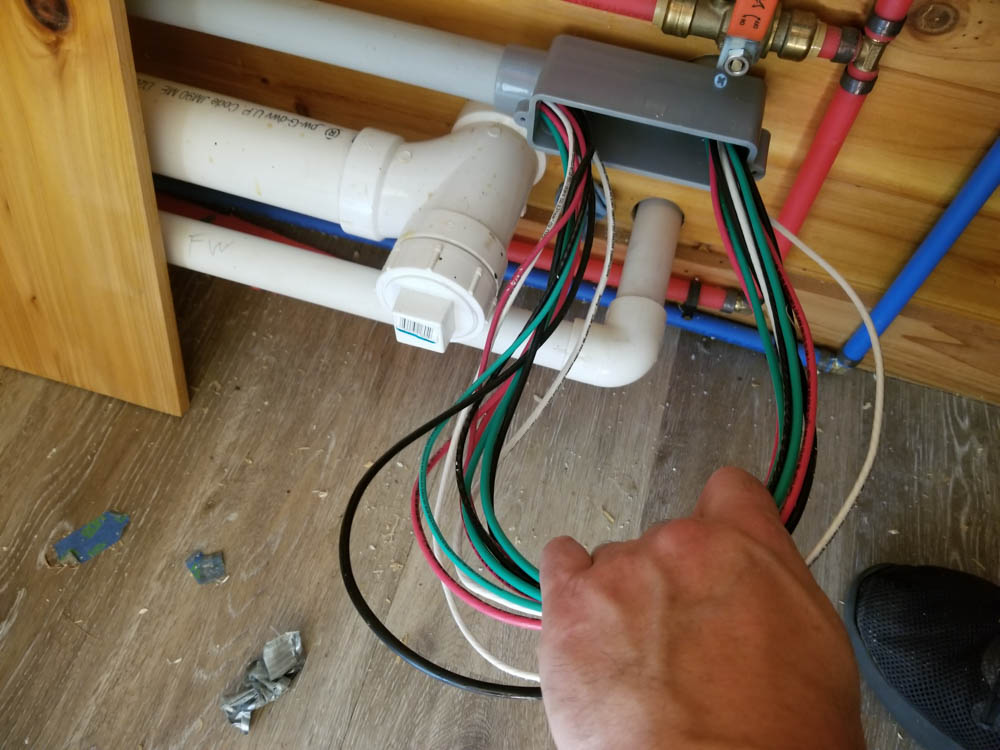
Back upstairs (well, up-ladder, technically) to the SUL to finish. The wires are all pulled to their terminal boxes but they also need to have their other ends hooked in. And here we are:
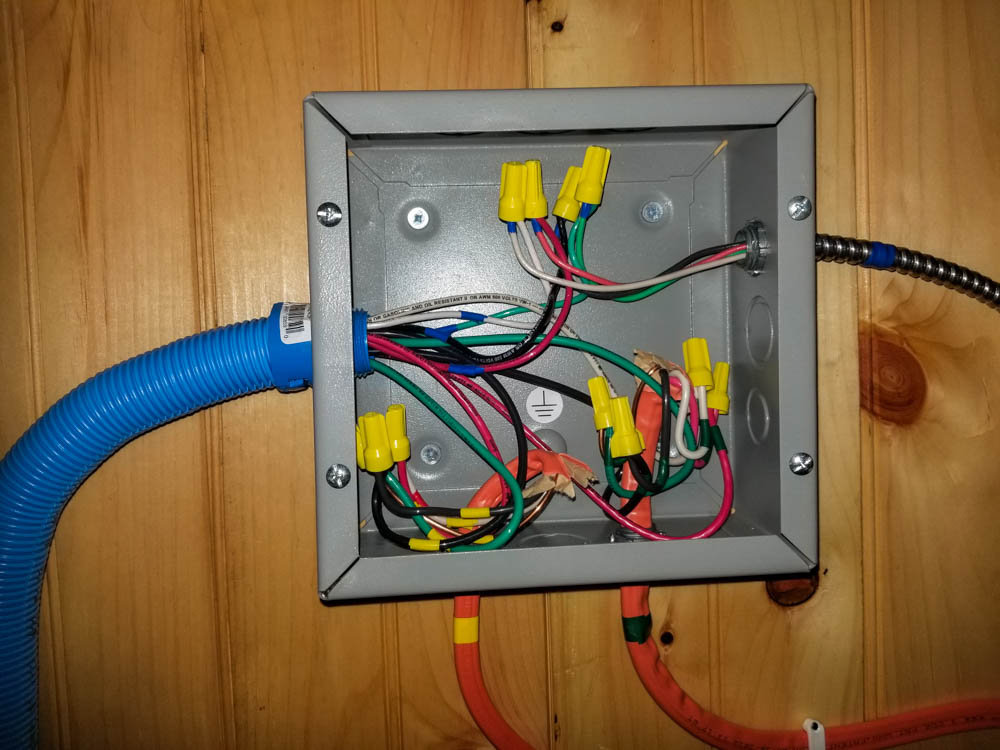
Again with the color coding. When there are three different circuits in the same box, color coding sure does help. I’m a big fan of making things self-identify as correct. Yellow-tagged wires should join with other yellow-tagged wires. Yellow-tagged red goes to the other yellow-tagged red, etc. Yellow-tagged wires should emerge from the yellow-tagged cable. Yep, all checks out. This saves a lot of headache and wondering. I do the same kind of thing in my software work, too, though it does not involve tape.
Before I was doing all my own electrical work, I did actually occasionally hire an electrician to do things. I learned a lot from this one fellow named Jim, who was happy to talk to me as he worked. Indeed, he’d talk your ears right off. But you’d enjoy it 🙂 One of the really valuable things he taught me was to point wire nuts upward like as shown here. Why? Well, if they should come loose, at least they don’t drop off; gravity will keep them in place, potentially keeping the loose wires under its cone from flying off under spring force and shorting against other things. Or just leaving the twisted connection exposed, to present a hazard to the next person going in there. Good advice I have ever since followed strictly. I also try to keep things as organized as possible in any given junction box. There’s often not enough room to be very organized, but keeping things from being a total rat’s nest is helpful. here, the three systems area both color-coded and sectioned off into different areas of the box. That makes it easy to know I’ve accounted for all the things, too. Four blue-tagged wires done? Yep, 1-2-3-4, all there. Etc.
Awrighty then, junction box is done, too.

Put a lid on it and suddenly it’s like legit and stuff! I even ran the cables and conduit into the box in a way that was meaningful. The power center is to the right. So, too, the cables.
Since I’m working without the benefit of electric power, it’s kinda dark up in the corner of the SUL where I’m working and I don’t have a fan, either. Remember that shot of me laying down behind the fresh water tank, installing the box and the conduit? Yeah, that’s the spot (blue arrow) where all those wires got pulled from and then became that tidy box in the previous pic. To mitigate the darkness, a headlamp.
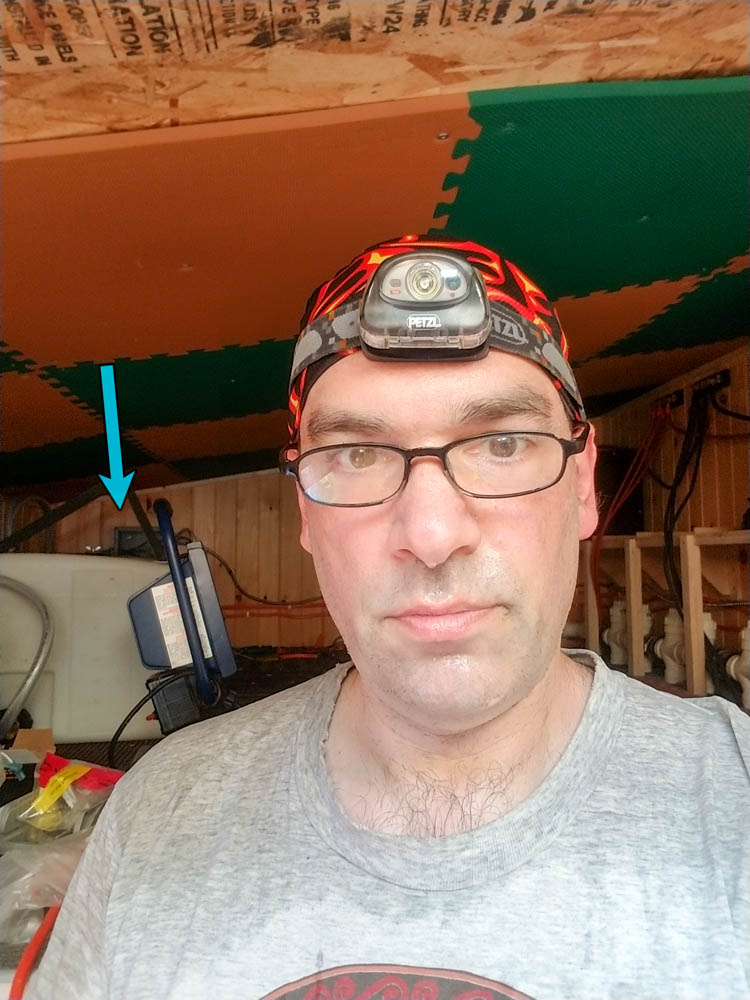
It is, however, August and 90 degrees out. To mitigate the heat, some sweat-wicking headgear. Working in a confined space that is for all intents and purposes an attic means that sweat-wicking headgear isn’t going to be enough. And as the last three letters of “enough” so eloquently put it: ugh.
Before I leave the SUL, though, there’s one more bit of electrical work I can do today and that’s finally hooking up all the things to the power center.

It’s quite crowded in there, even for as big as it is. Those #0 battery bus cables (center) really get in the way of everything, too. Newly here, all the arrows! Green arrows are the generator hookup. Yellow, the solar. The hot pink arrow is a thin wire that is the temperature sensor (actually one of two) for the battery bank. It will help the inverter/charger compensate generator-based charging for temperature variations of the battery bank itself. The solar charge controller has a temperature sensor for the same purpose. Inconveniently, they can’t just share one. Orange arrows are where the AC power output of the system hooks up. This was the whole point, right? Batteries and solar and generator all come together to give me AC power to distribute throughout the house for doing stuff. These lines disappear down the blue conduit (left of center, bottom) en route to the AC Load Center.
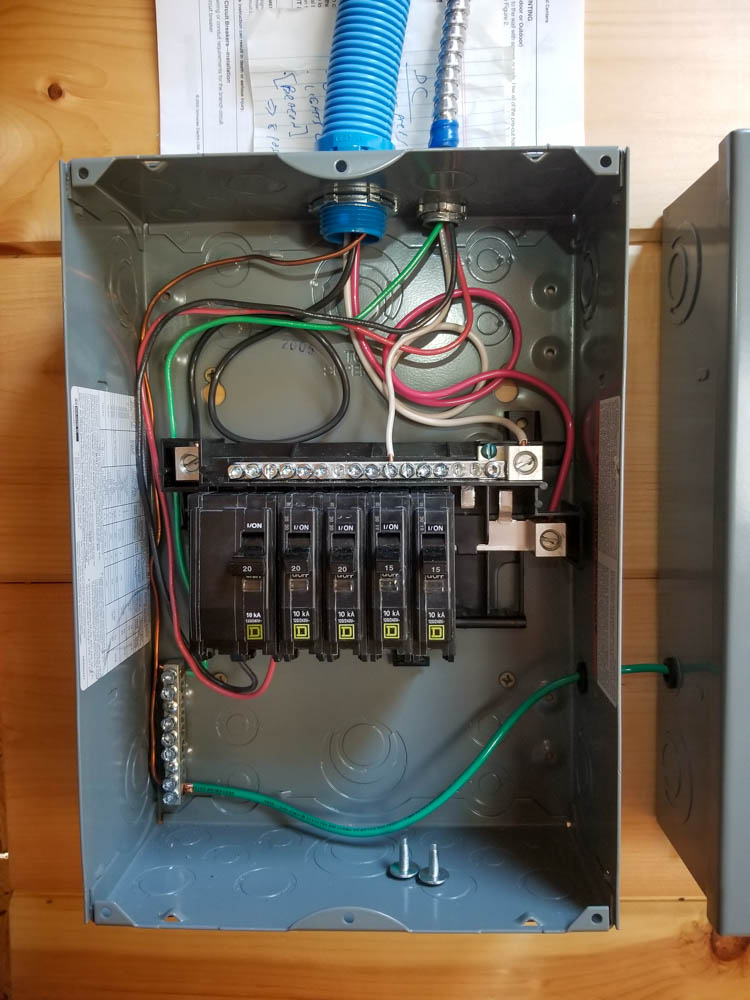
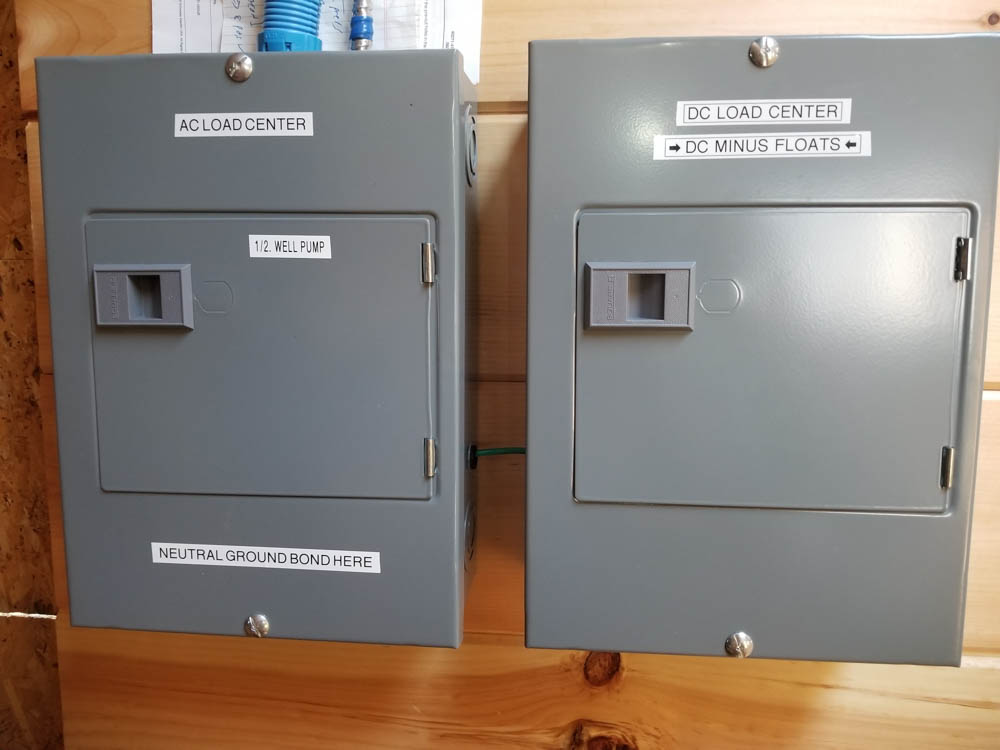
This is the other end of that and one of very few things that this house shares with a conventional house: a perfectly ordinary load center (a/k/a breaker box). I mean, it’s much smaller than the one in your house, most likely (though if you live in an apartment, you might even have this exact one).
See all those circular shapes in the metal? They’re called “knock-outs” and are where the metal has been intentionally weakened so with a few solid raps with a blunt object a tidy hole will be revealed through which one may pass wires, install cable clamps, conduit, etc., such as at the top of this image.
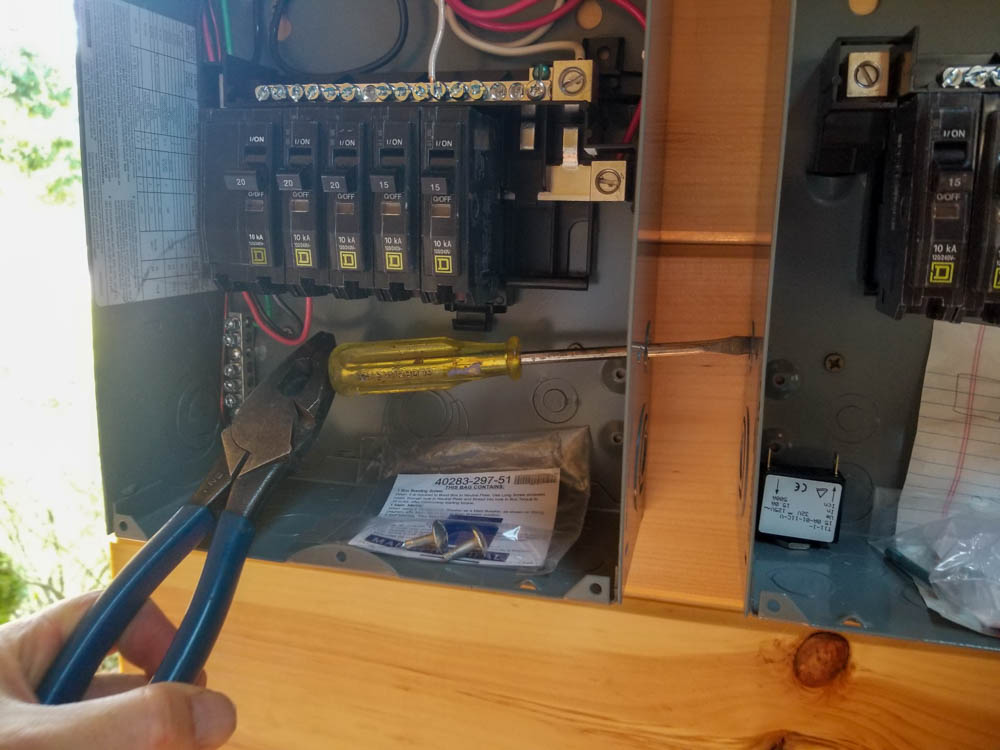
Jim said to me once, “if it can’t be done with pliers, it’s not Electrician’s work”. Fair enough, I thought. Though you should see a serious set of electrician’s pliers. They’re not the dainty “flat scissors” you’ll find in most homeowners’ toolboxes. These are heavy enough to cause some hurt if they landed on your bare feet.
What does this have to do with anything? Well, electricians need to knock out those knock-outs. And indeed, no hammer is necessary if you have electrician’s pliers. A solid whack with this thing and those knock-outs don’t stand a chance. They also work well for delivering raps in tight spaces, like this through-the-wall action where I was actually knocking out something on the second box, to the right.
I would revise Jim’s statement slightly to “if it can’t be done with pliers or a screwdriver, it’s not Electrician’s work”. Indeed, that pretty much covers everything (especially considering the pliers will also cut wire). Okay, okay, what about a wire stripper? I dunno, I bet many electricians just close the cutting part of their pliers part way and use that. I prefer a purpose-built stripper tool, though.
And that’s about all I have energy for today. It’s hot, I don’t have use of my power tools, and it was a stressful workweek at my day job, so I’m rather inclined to spend at least some of the weekend relaxing. Cleanup time and then a couple of labels on the load centers to make them look totally legit and I’m done for the day.