In a conventional home, the supply plumbing job starts at the municipal inlet (water meter) or well head and then gets distributed variously to the points of use throughout the dwelling.
In my tiny home, the plumbing, like so many other aspects, happens mostly backwards. While it is true that I ran the pipe for the main freshwater inlet first, it just ends abruptly in the SUL (storage/utility loft, which you may pronounce “sool”). There’s a lot more work to do up there. Most of the plumbing supply activity centers around starting at the various points of use and then working backward toward the supply, way-finding the route for the pipes through whatever else is already there. And, of course, realizing that if the pipes must transit an area where construction has yet to happen, doing that construction first. That’s why the pine boards were installed recently when really my goal was to do this plumbing!
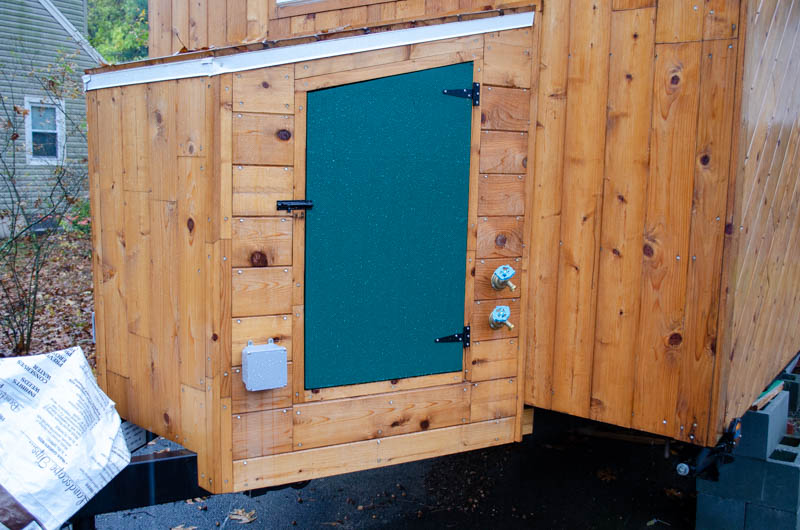
Shown above, two fixtures which would ordinarily be called “sillcocks”, but since there’s no sill here, that seems to be a bit of misnomer. Anyway, it’s where we’ll hook up the garden hose as well as the outdoor shower (that’s why there’s two: cold & hot) when the weather is suitable for such things.

Behind the faucets are the supply pipes, which enter the main house through the Propane Porch. One of the many things that’s so delightful about crosslinked polyethylene tubing (a/k/a PEX) is that unlike copper, it flexes readily and can deal with wacky angles without fuss. The walls of the Propane Porch are toed in at 55 degrees. No problem for the PEX as long as one gives it enough run so it can flex.
You might not realize it, but those holes are actually fairly deep. It stacks up as follows: 5/8″ cedar exterior planks, 7/16″ OSB sheathing, 3.5″ of wall bay (full of spray foam), 7/16″ interior sheathing, 1/4″ cedar interior planks. To drill it all the way, I had to do some from this side and some from the other side. To improve my chances of meeting in the middle correctly, I used an 8″ long skinny drill bit to pilot the tunnel and provide reference positions at both ends. Did it actually meet in the middle perfectly? Well, perfectly enough 🙂
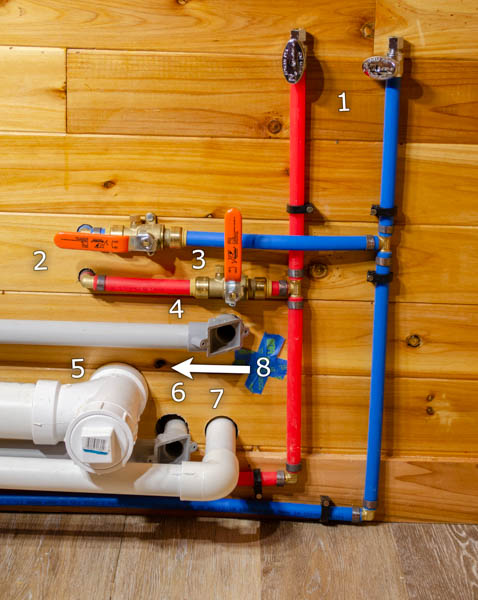
Remember when I said something like it took some doing to plan out how all the pipes and conduit were going to come and go from the house? This is what I was talking about. There’s a lot going on here and it’s not even finished!
What’s new today is everything relating to the red and blue pipes. That’s another thing I really like about the PEX – the color coding. No more guessing which is which. The supply comes in from the left at the bottom, rises up to what will become the wash sink shut-off/hookups (1). It tees off to the shut-off valves for the outdoor supply (3) and goes into the Propane Porch en route to the sillcocks at (2).
What else is here? The solar array feeds in through (4). Graywater drain exits at (5). Power for the well pump will go out at (6) and fresh water will come in at (7). What’s 8? X marks the spot where the propane line will come in (remember propane? this is a song about propane). That line will proceed to the left, as shown, low enough along the wall to be out of the way but high enough to be sure not to get kicked.
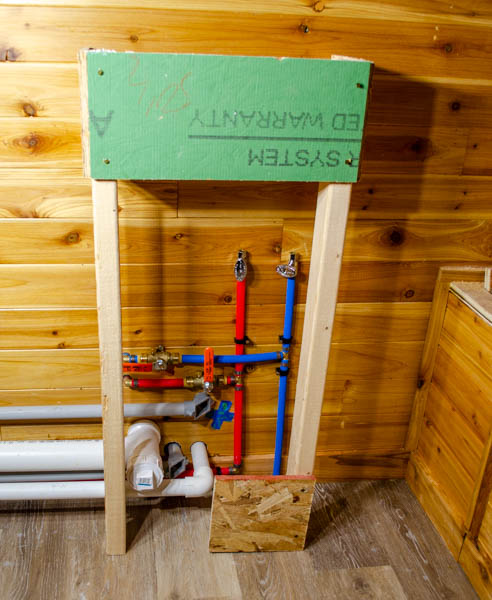
Most of this stuff will be hidden by the wash sink/vanity cabinet. This thing here is just a quick mock-up to show approximate placement and size. The sink/vanity will not look very much like this at all.
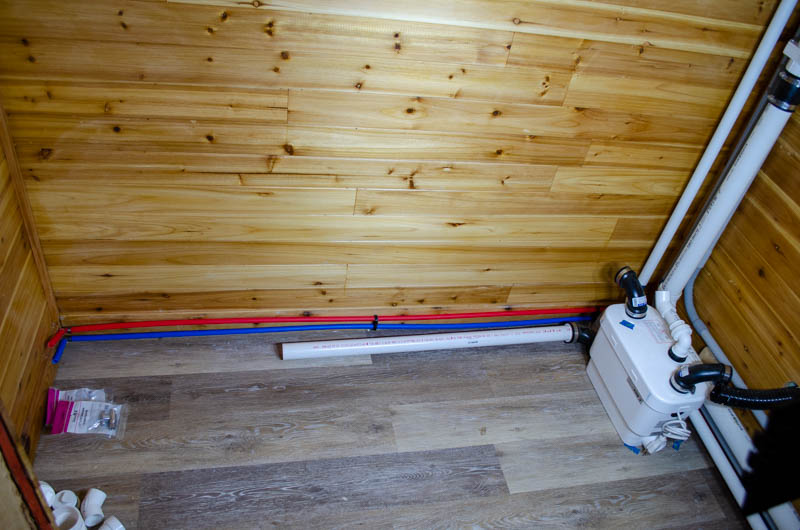
The supply pipes travel behind the tub (shown here wearing its invisibility cloak). The supply penetrates the wall at left, into the 1FUA (first floor utility area, “one-fwah”). We’ll get to that in a sec. The astute observer will notice that besides going into the wall, the supply lines also tee off and come forward as little stubs. Those stubs are standing in for the lines that will feed the tub. I haven’t designed the shower head/tub fill system yet. Soon, though.
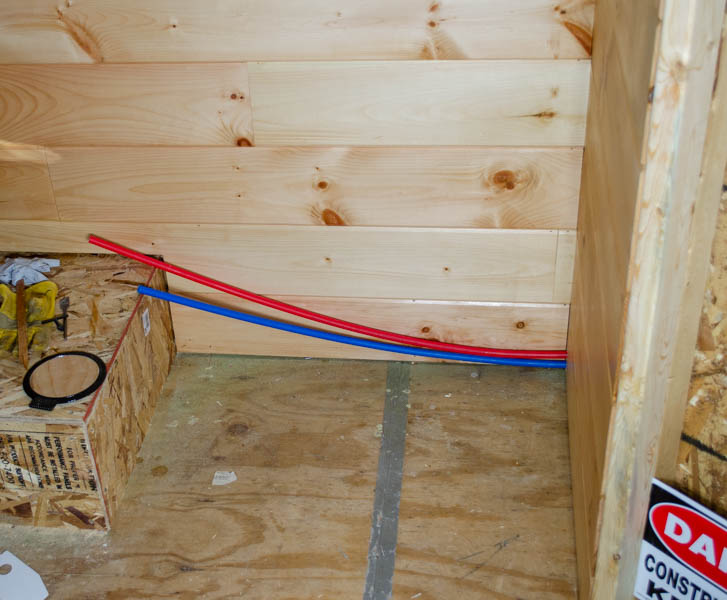
Here’s the other side of the bathroom partition wall. The refrigerator will stand here. The 1FUA is actually that space at the left, on top of the wheel cover box. I don’t know exactly how that all works out just yet, but I do know that cold water will come down from the SUL more or less where the blue pipe ends, tee off into the 1FUA to (a) supply the water heater and (b) supply the kitchen and bathroom with cold water. The water heater will return hot water to the red pipe into the bathroom (tub, wash sink, ultimately outdoor shower) and the kitchen sink (to the far left, not shown).
I don’t know how long these pipes need to be, but I do know they need to be not-much-shorter than the width of this space, so I have cut them to “just a little long” and will trim them to fit as the rest of the plumbing for the 1FUA takes shape.
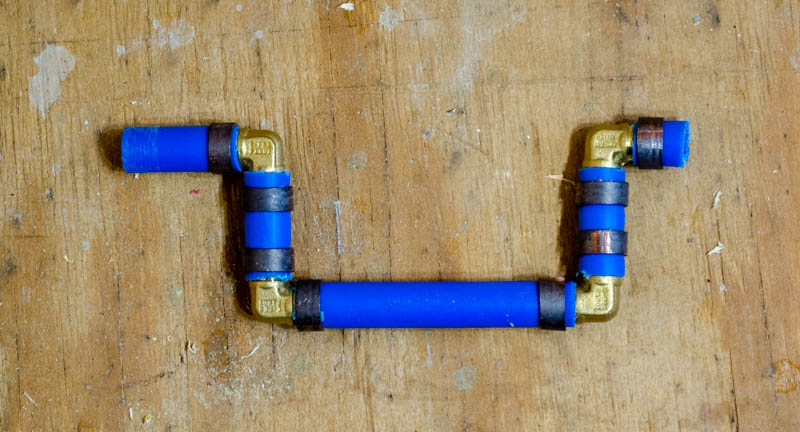
One thing you might not have noticed on that crowded picture with all the numbers on it: the blue pipe crosses right over the red one on its way from the supply to the shut-off valve for the outdoor faucets. That’s another nice thing about PEX. In copper, you’d probably have to do something like this because copper pipe just doesn’t want to bend that way. I actually did do it this way first (which is why this thing is a thing — I’m accustomed to somewhat more rigid pipe materials like copper and PVC) and then realized what a waste of fittings (and reduced flow because of 4 unnecessary turns) that was. The blue pipe does enter the shut-off valve at a slight angle but I’m pretty sure that’s ok. It straightens out as it seats inside. I’ll snip the crimp rings off this error and return the fittings to stock for future use.
Oh! I almost forgot! I did a full capacity test of the in-ceiling graywater tank, too! There was another tiny leak in the drain manifold which was only possible to see once the larger leaks due to alignment issues (we talked about this) were resolved. The good news is that the tank appeared to hold just fine. I let it stand full for about 3 hours. Except for a single drip every few seconds from that one spot (which has since been slathered in sealant), there was no other evidence of leakage. No drip sounds. No wet spots. It looks like I was right: all the hard-to-reach stuff in the ceiling that was assembled at ground level is fine. It’s just the drain manifold that’s been giving me crap because that’s where all the minor alignment issues came to bear on some slip joints. I’m not delighted that there are any leaks (ruining my PVC plumbing reputation) but I am very pleased that the only problems are out where I can see them and address them easily. It was very dramatic when I opened the drain gate and dumped 50+ gallons of water onto the driveway. You wanna talk about “going like a racehorse”? Race horses got nothing on this tank.
And the ceiling didn’t even blink about holding upwards of 500# of water, either. I didn’t think it would. These are douglas fir 2×6 rafters. Pretty strong stuff. It’s gonna get a lot heavier up there before all is said and done.
What’s next? Well, there are a few options: I could start working on the wash sink, which I’ll be fabricating. I could start fleshing out the 1FUA (requires purchase of water heater, stove, furnace, and drives propane line, as well). I could begin the water service aspects of the SUL (though I’d have to paint/finish the walls up there first, which become inaccessible once any real work on installing machinery gets going). The tub needs a shower head/filler spout and their attendant mixing valve, too. Plenty to do. It is quickly approaching the end of building season, though, as the weather gets cold. Happily, any work I can do strictly inside the HomeBox I can do in the winter, too, as it is insulated and thus readily heated by a simple electric radiator. Anything that requires the workshop, though, becomes a non-starter as soon as it’s too cold in there to work safely (wood glue needs >50F, power tools need non-frozen hands). What’s really next? Some pondering about what’s next is next!