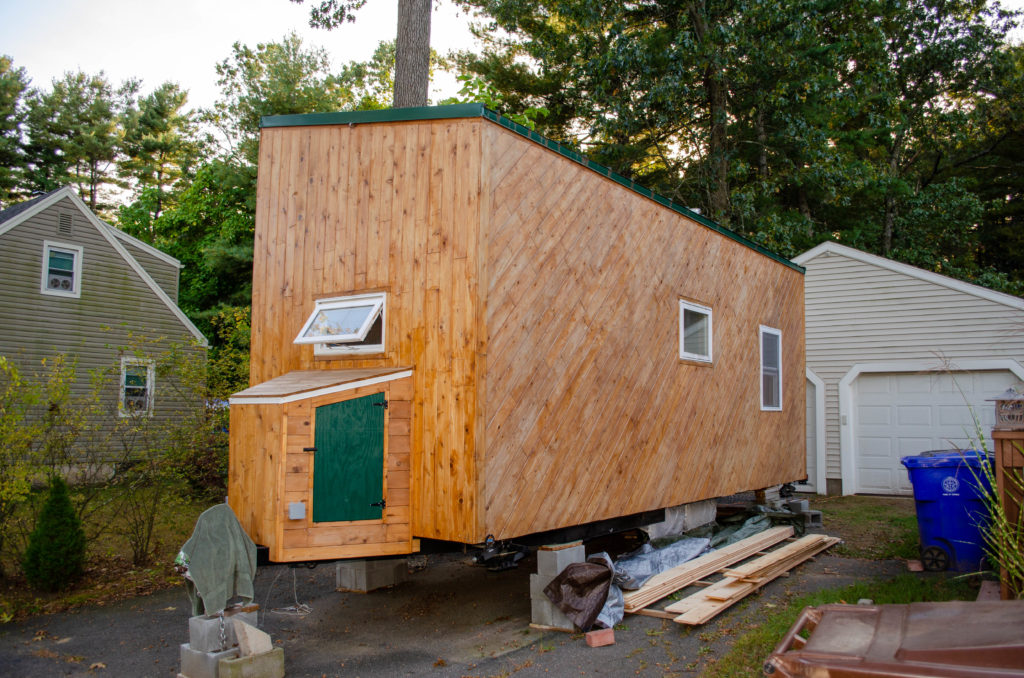
It’s been a while since I’ve posted pics of the big picture rather than just close-ups of specific parts I’m working on. So, I present to you, the front, as of today. What’s new? Well, the Propane Porch has had some work done.
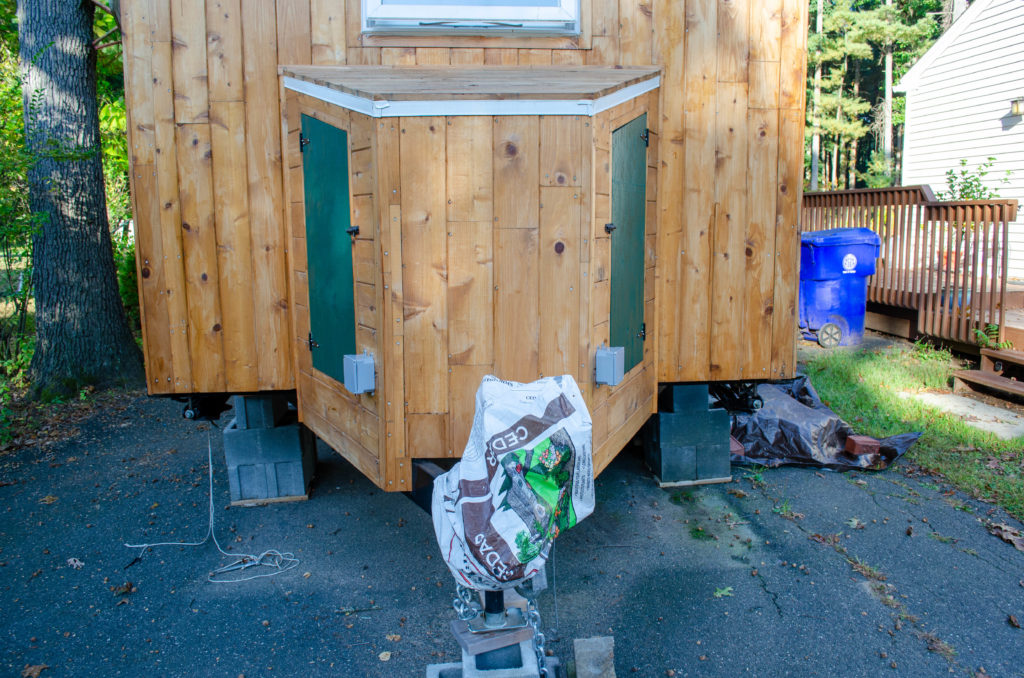
Those little gray boxes are for solar hookup (left) and well pump power (right). I don’t actually know what kind of hookups either one will need, but I know they’ll need something, so here’s where that something will go.
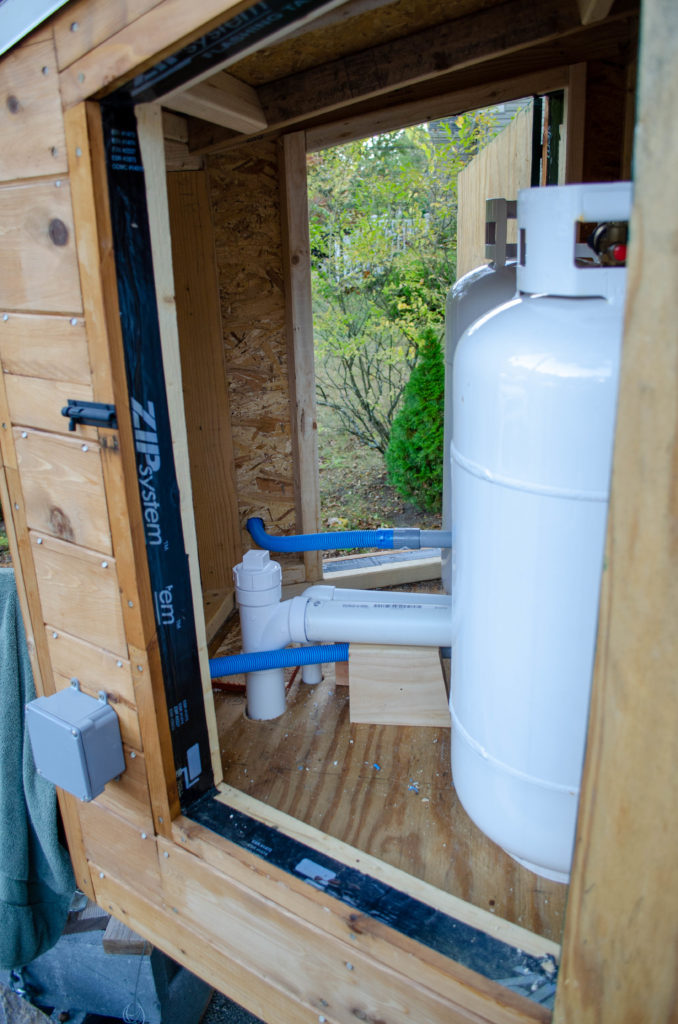
Inside the Propane Porch one may see flex conduit (blue) from the gray boxes connecting to rigid conduit (gray) which then passes through into the bathroom, which we’ll talk about shortly. the propane tanks themselves are here but not connected to anything. Their hookup (including auto-switch regular) will be a bit later. The big white pipe with the cap is the gray water drain. The skinny white pipe behind it, mostly obscured, is the fresh water inlet.
I have had a lot of ideas on how to keep the fresh water inlet from freezing — without blowing my energy budget on trying to actually keep it warm. Since the fresh water pipes will be mostly underground, below the frost line, except exactly where they come up and enter this space, there’s actually only like 8 feet of exposure to potentially freezing temps. If I insulated that run and simply ran the well pump just a smidge every now and then in freezing weather, that would have a similar effect as letting a faucet drip but woud be far less wasteful. I only need to keep 8 feet of pipe clear. Running the pump for a couple of seconds every few hours is probably enough. I could even put a temperature probe in there and have it run only when the water gets to 34F, say, and stop when it reaches groundwater temp. My only concern with that scheme is keeping the fresh water tank from over-filling. If it had a relief pipe, that would solve that — but it would also create a patch of ice somewhere. Hm. Still pondering that one.
There are still two more pipes that need to be in here: the outdoor shower/garden hose hookup. There’s a reason I haven’t done that yet, which I’ll get to (the reason, not the doing) shortly.
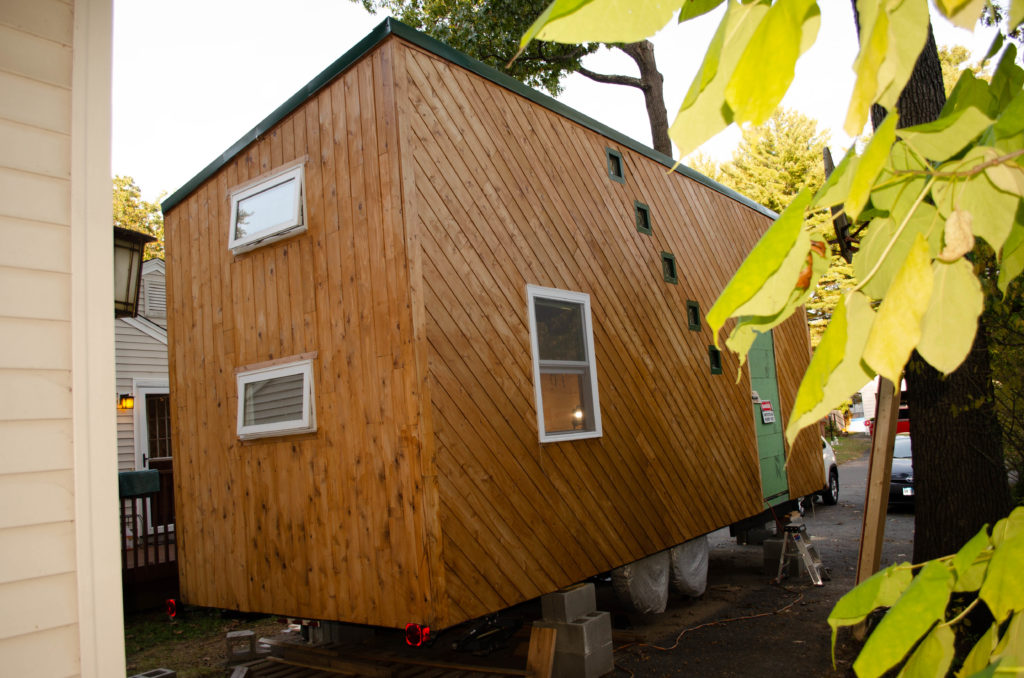
As long as we’re talking about the exterior, here’s the other two sides, largely unchanged in the last 12 months.
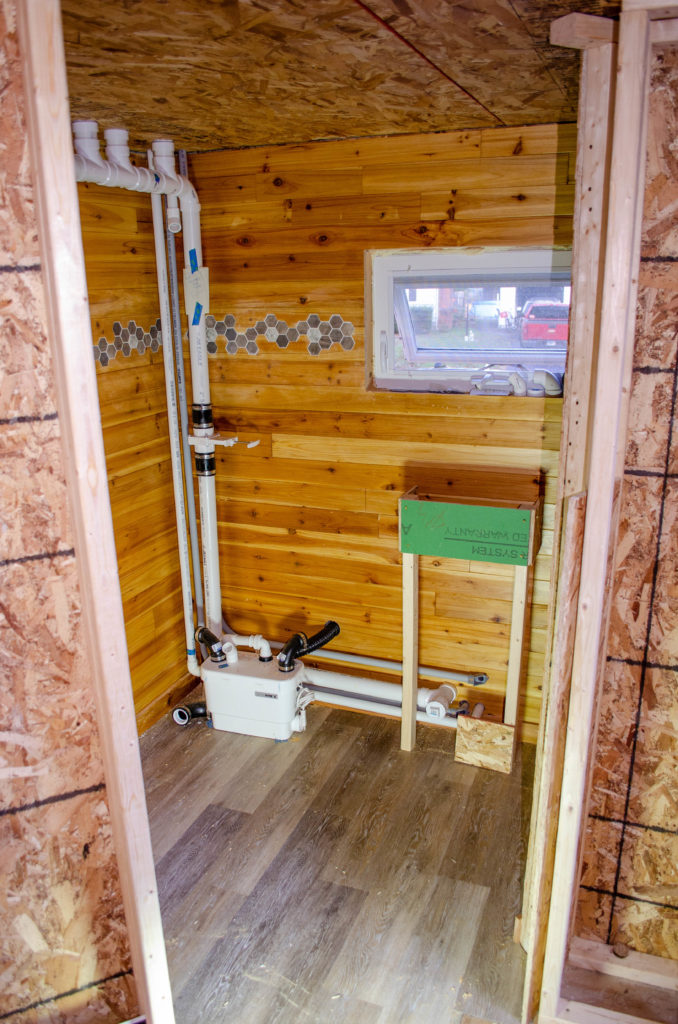
Those pipes and conduit in the Propane Porch enter the house below the wash sink (represented here in green), make a left turn, and mostly rise up in the corner to the storage/utility loft. That white box is the gray water lift pump which also happens to be the drain nexus for the whole house. The tub will fit in that space to the left, against the wall (mostly obscured here) and it will hide the pump.
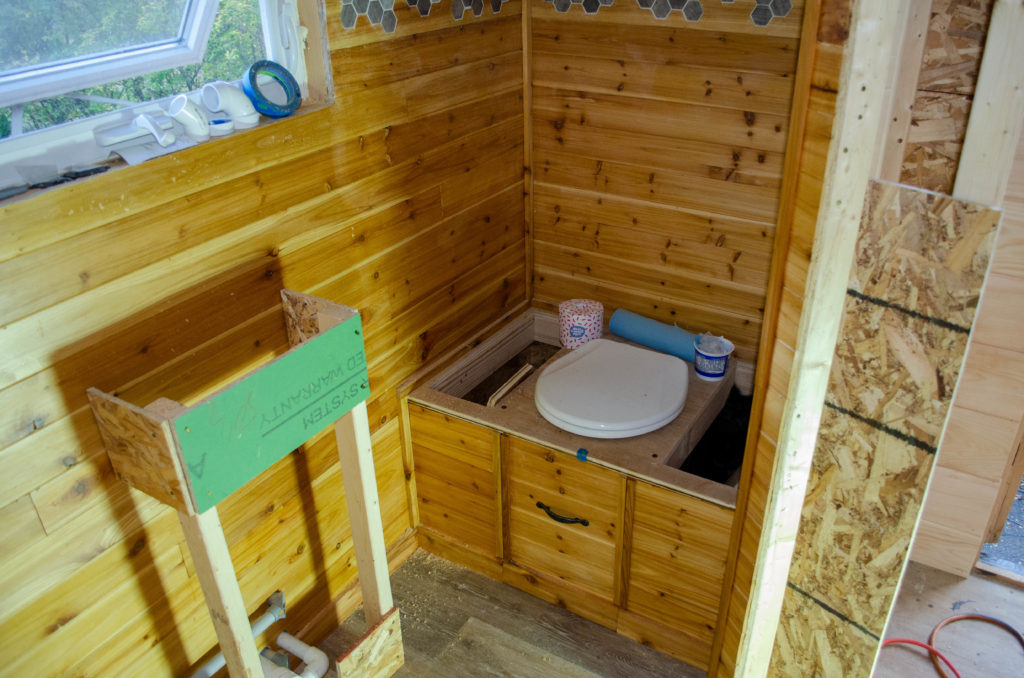
Here’s the T.H.R.O.N.E., essentially done. What’s missing is putting hinged lids on those storage spaces to either side. The handle in the middle is to pull out a heavy-doody slide that holds the compost transfer bucket. This will make it easy to lift straight up rather than having to bend over and lift it cantilevered.
The green board and OSB box to the left is standing in for the wash sink. It’s just a mock up to get a sense of size and placement. . . so I can contemplate hiding the pipe penetrations and think about how to route the hot and cold water lines and the drain.
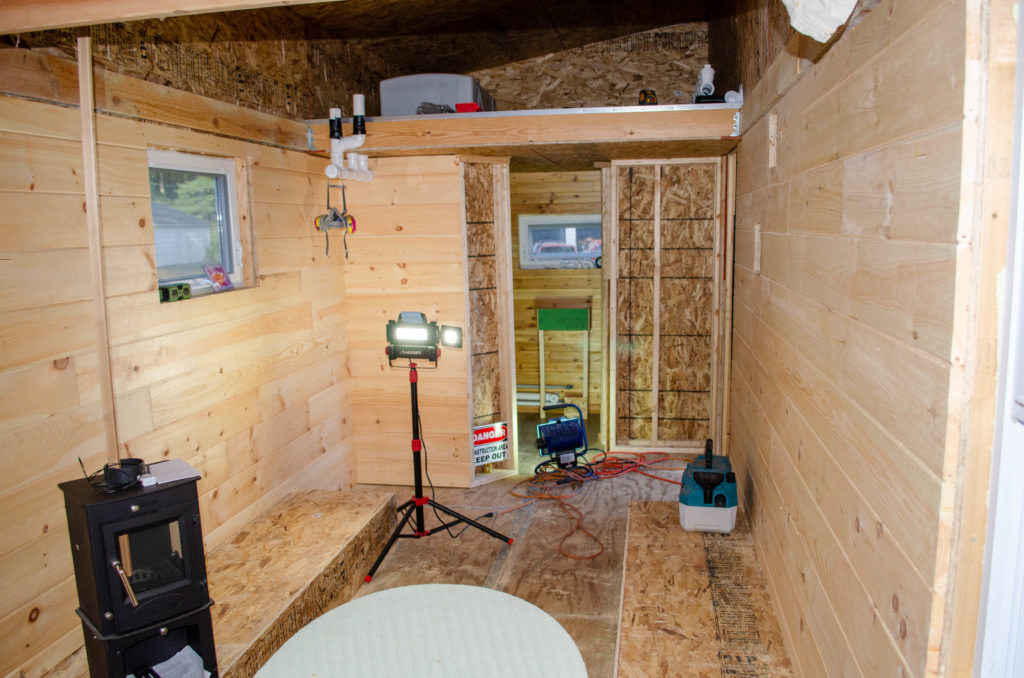
Hey, guess what? I spent all weekend installing these beautiful pine boards on the interior! This falls under the ever-present heading of “before anything may be done, something else must first be done”. In this case, I wanted to start running hot and cold lines to the bathroom so I could get started on the wash sink and the tub fixtures. But passing pipes through unfinished walls makes finishing the walls much harder and far less attractive because there need to be a lot of cuts to piece in around the holes rather than just drilling a single hole through the finished surface. Also, in my particular case, since all the utilities are OUTSIDE the walls, I can’t exactly run pipes along a wall that doesn’t exist yet. And if I did run them close to where the wall would be, putting the finished wall in place would be very challenging. Gah. Okay, then, in keeping with the somewhat-backwards construction order of this thing, interior walls get finished before plumbing!
The kitchen sink and oven will appear in a structure along the left-hand wall, approximately under that window. You can see the wood stove here on the left, too, along with a piece of lumber standing in for a section of flue pipe I haven’t bought yet.
That unfinished space on the left will be shallow pantry. The unfinished space on the right is the boot dock (below) and hall cabinet (above) and coat rack (in front).
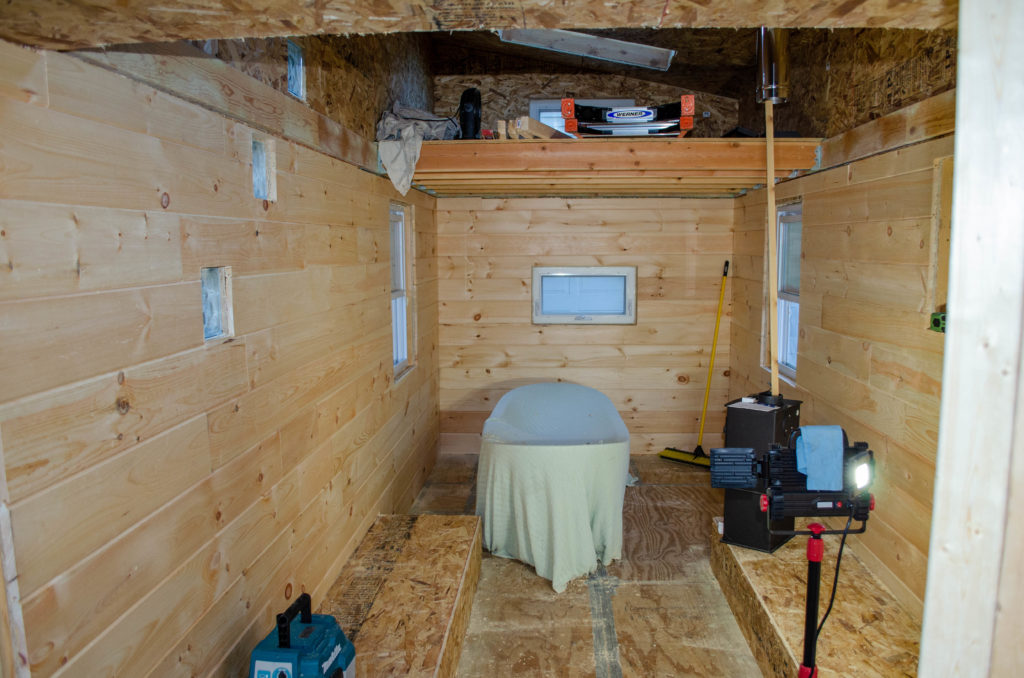
A view of the BeDeLiA showing the rest of the interior finish work.
That thing under the drape is the tub, standing by. Every now and then I need to test fit it in the bathroom as I develop the plumbing plan. It’s easiest to have it right here, where I can go do that as needed. It does get in the way sometimes but mostly it’s not too much bother.
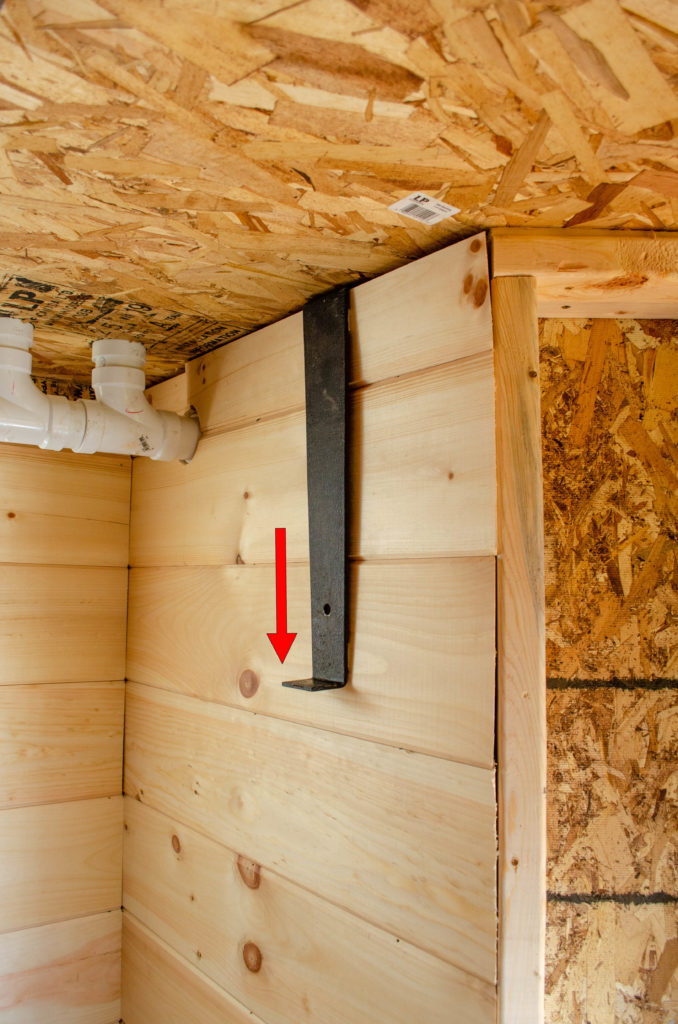
How do you set the top board when you can’t get your fingers in there to pull it down? You use a puller bar, of course. These are generally intended for assisting with the installation of hardwood floors but they’re perfectly useful for softwood walls. Pull on the tab or strike it with a hammer, as needed.
You see how the drain manifold (background) penetrates the wall right between two boards? Yeah, that’s the kind of messy stuff I would like to avoid in the future.
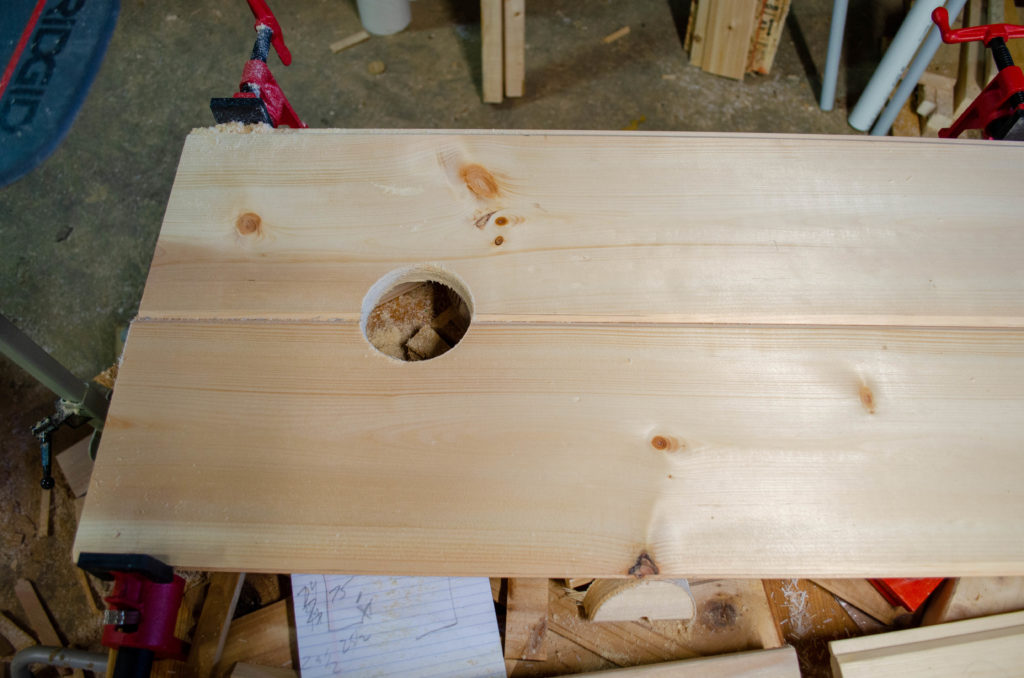
Instead of just drilling a hole through the finished wall, if you run a pipe before the wall is finished, you have to drill a hole through the finish materials first, to accommodate the pipe.
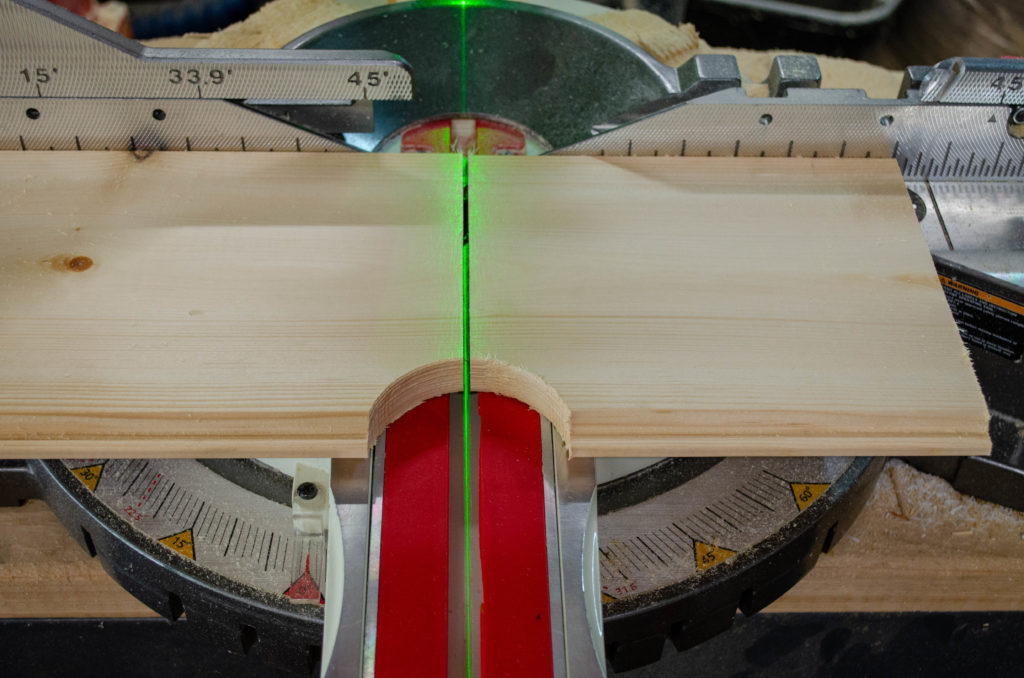
But because the pipe is already through the wall, you have to also cut it vertically and piece all four pieces in place around it. Instead of one hole through whatever is there, you now have two (or four, as in this case) pieces which now have to precisely meet the pipe. And there has to be something to support them at the parting line, too, otherwise they’ll just flap around. It’s best to just install the walls and drill later. And that is how all the rest of it will be, now that the wall planks are in place.
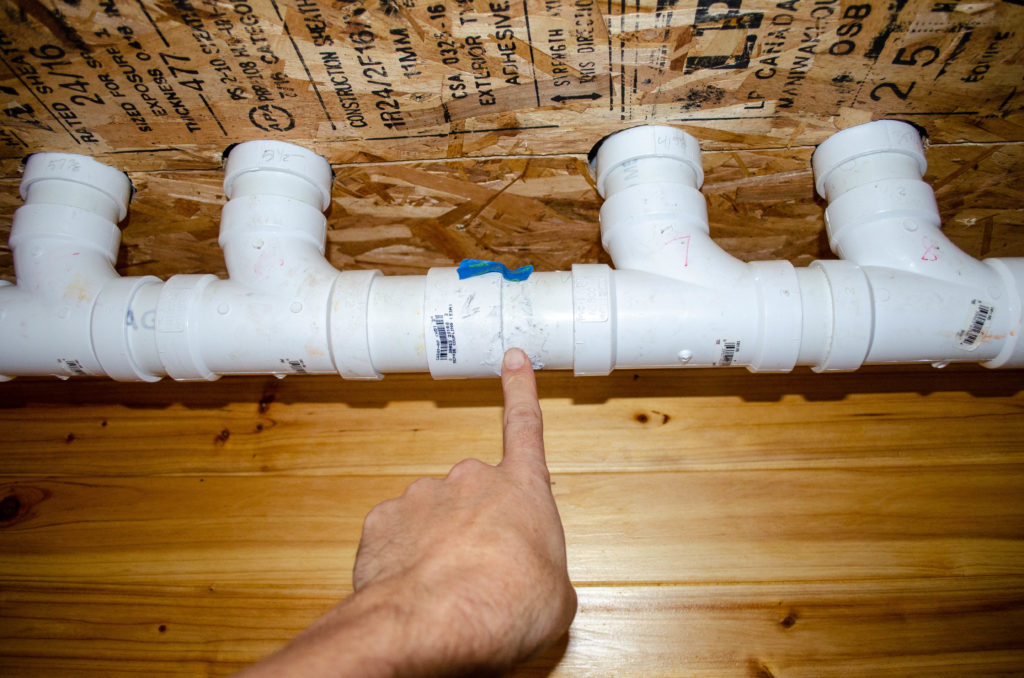
A side thing I did this weekend was to test the in-ceiling gray water tank. It turns out the drain manifold unions between the pairs of chambers are not water-tight! This is sad but unsurprising. This was a very tricky bit of plumbing to assemble correctly, since there are 88″ long pipes in the ceiling, with several fittings on each end, all of which have to line up *just so* on BOTH ends. I tried so hard. I got pretty close. Close isn’t the same as “got it”, though. Thus, as I tried to join these pairs of chambers, I struggled against some mis-alignment which also meant there were shear forces on the joints. You’re not supposed to stress the joints for 2 hours after gluing. These were under stress immediately. I hoped they’d be okay but it turns out they are not. Happily, they are readily accessible! Okay! Epoxy putty to the rescue!
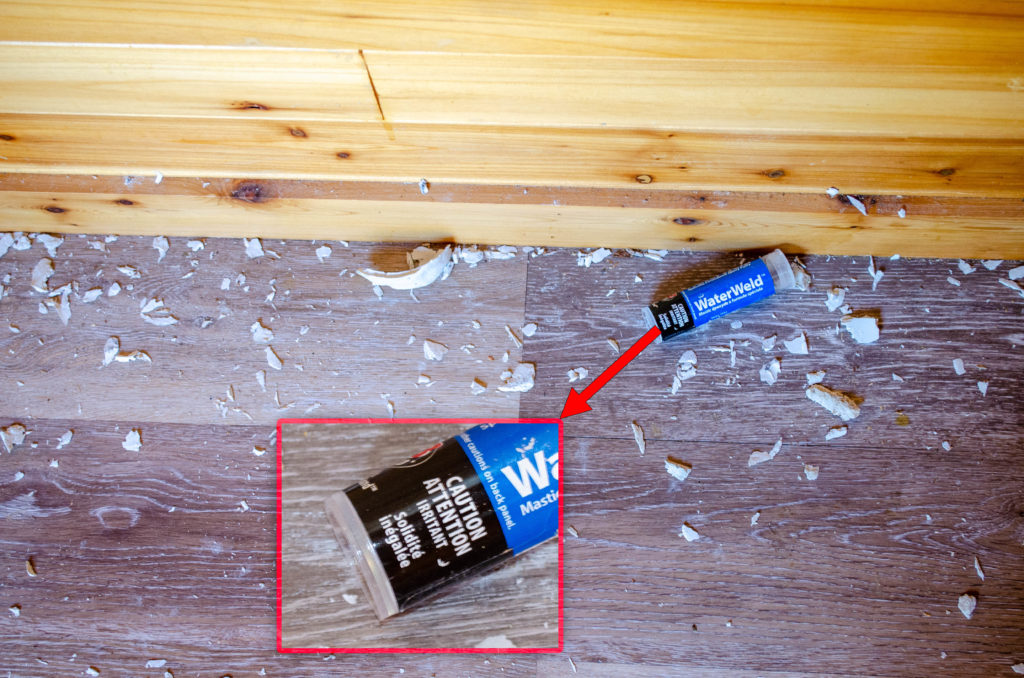
See all this epoxy putty on the floor? It’s there because I had to scrape it off. I had to scrape it off because despite “bonds to PVC” advertised prominently on the package and despite roughing up the area with some #100 sand paper for good measure, it just didn’t make a good seal. It stuck well enough to be hard to remove but not well enough to keep all the water in.
And then I noticed this: “Caution – Irritant” — truthful! I was rather irritated after using it.
I will need some other kind of sealant.
I do expect the in-ceiling chambers to be perfectly water-tight, though. They were built individually in such a way that there were no stresses on them as the glue dried. I’ve made *a lot* of PVC joints and they have been universally watertight. . . except these right here, the failure of which is readily explained by the circumstances of their construction. Once the drain manifold is all set, I can then get on with testing the main tank, which I definitely want to do before the mural is ready to install.
Here’s a walk-through video, for your pleasure. I was tired when I shot it, so it’s short on cinematography and lively commentary, but it does give you a bit of a sense of the place as it stands today.
Missing from this video is a discussion about what happens on the wall with the diagonal windows. I know I’ve talked about that plenty before, but I still like to have these walk-through videos self-contained and complete.
For those new to the story, that wall is where the more active storage areas (i.e., not in the loft) will go. Also, perhaps some clever slide-out ladder/stair for the cozy loft. The storage/utility loft is intended for longer-term/off-season holding.