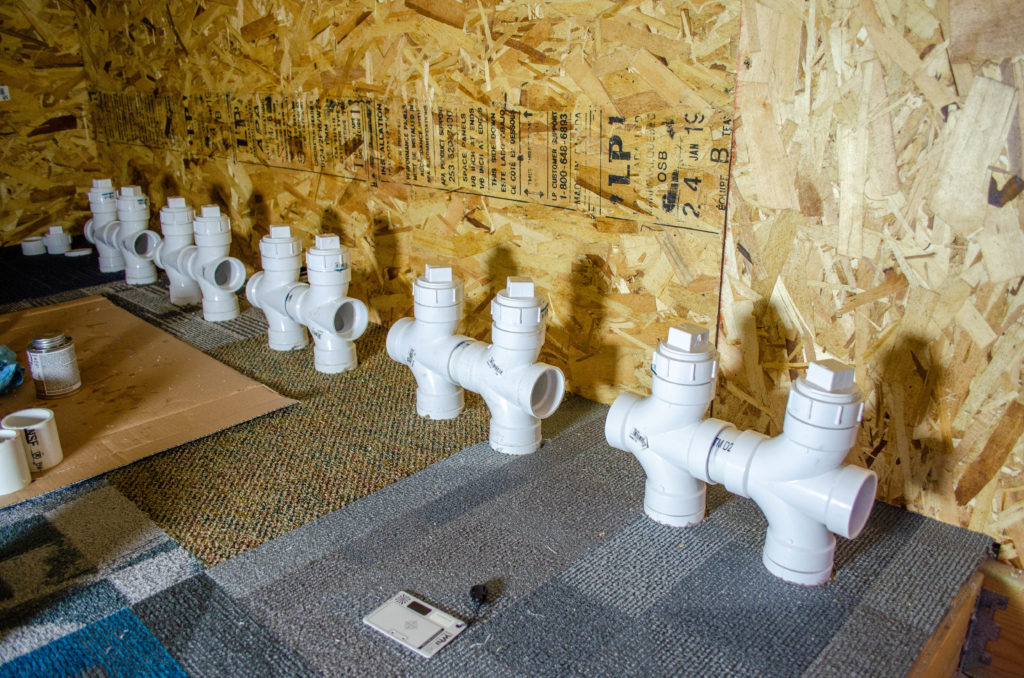
Welcome to the utility/storage loft. While I was up here, I installed some mix-n-match carpet squares to (a) save my knees and (b) cover the pipe hanger strap ends on the floor which are sharp.
Here is the fill/vent manifold for the in-ceiling (which is just BELOW this scene) gray water storage tank. Each of these fittings connects to the inlet of one of the pipe-tank chambers.
Water will enter from the far left of this frame, traveling horizontally and falling into any empty pipes it finds. Yes, the water level in the pipes will equilibrate, but the speed at which that happens, relative to the speed of inflow, is not known. This means just directing water only to the first pipe-chamber and hoping things work themselves out has a real chance of becoming a real problem if that equilibraiton is slow. Instead of worrying about that, I’ve designed this manifold to allow water to fill any pipe that’s got room. The end of the manifold (far right of frame) will be let out as some kind of vent, allowing displaced air from the pipe-chambers to escape readily (to the outside). That same vent will provide fresh air IN when the tank drains.
One thing I realized while contemplating this manifold is that it’s possible some kitchen gunk might get into these pipes and conceivably clog them. There must be a way to clear such a clog. How do you clear a clog in any of 11 pipe-chambers? Well, you add an access port to each of them. Voila – the square caps you see at the top of each fitting. Unscrew yonder cap and snake away! The other end of these chambers is the drain manifold you’ve already met in the downstairs. That has a cap at the end which allows cleanout, too.
A keen observer might notice that the 4-way fittings are actually nominally on their side rather than upright. That’s true! It turns out that having them upright gives me -0.5″ of clearance between them. Had I realized I was going to use *these* fittings for this task early on, I would have spaced the pipes +1 inch further apart — there’s room — such that there would be +0.5 inches of clearance between the fittings. Sadly, the original design of this manifold was identical to the drain manifold which uses smaller fittings that can be more closely spaced. When I realized I needed a more interesting fitting so I could snake out the chambers, I was happy to find this one which could accommodate the need, albeit on its end, with a slightly obstructed path for the clean-out use case. That obstruction is insignificant to the execution of the task, though, so okay, it’ll do. And if I hadn’t told you, you may not have even noticed they’re sideways 🙃.
One other consequence of this being such a complicated bit of plumbing assembly is that there was a little bit of irregularity in the positioning of all the parts. There are actually several different pieces that have to all come together for this thing. Some of which must be cut and each of which must be positioned and glued in place. You might imagine that when four or five pieces stack up, that doing this 11 times might result in one or two that aren’t exactly the same as some of the others. Indeed, this happened. And, there’s nothing to be done about it. And, it also means that each one of these pairs of fittings on the fill/vent manifold doesn’t quite line up with its neighbors. Some of them are very close. A few… not so much with the “very”. What to do?
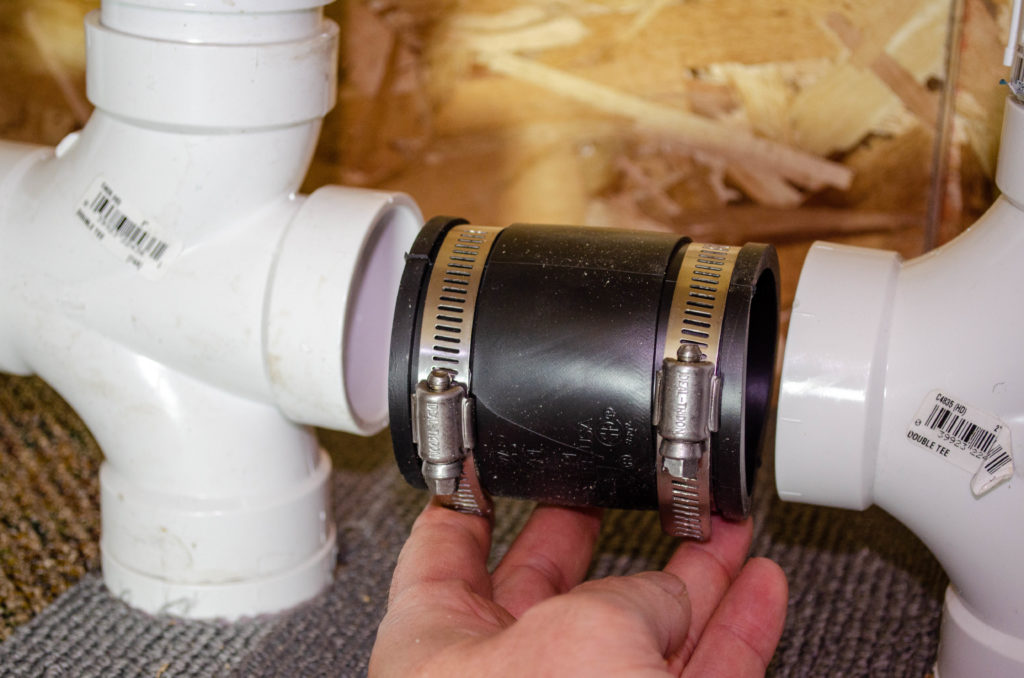
I thought of using these flexible rubber couplers to solve the problem. They will surely take up the slight imperfections in alignment. However, due to the tight fit, there’s actually no way to have a big enough gap between the pipes to slide it onto one of them such that it may then be slipped over both of them and cinched down. As soon as there’s enough pipe stub from each of the fittings to engage the coupler’s clamps, there’s not enough room to actually slip the coupler on (including flexing it as much as it would go, which isn’t much)! Oopsie. Need a solution.
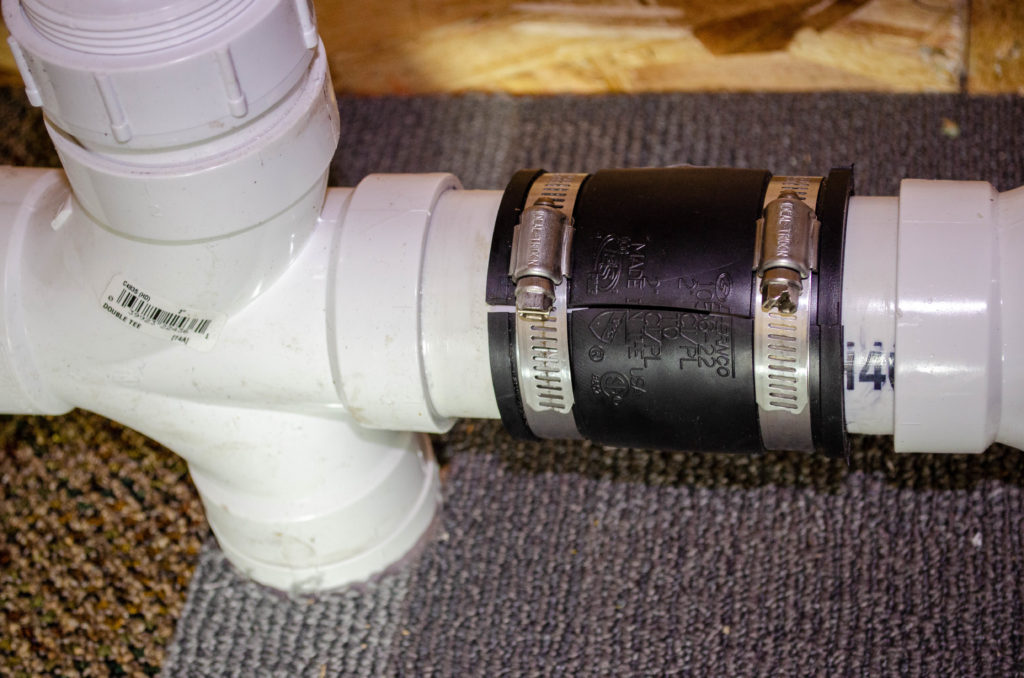
My solution at first seems counter-intuitive. Slit the coupler so it may be readily installed. This works great for getting it there, but doesn’t that make a leaky union? Yes and no.
The yes is that left as-is, there is surely a leak in the horizontal conduit formed by the couplers and the fittings. In this picture, I hadn’t finished cinching the clamps down so the slit was extra obvious. When clamped fully, the slit closes up pretty well. The truth of the matter is that this is actually a very low-pressure system, even at high flow. This is because the pipe is so big (2″ diam) and the 11 pipe-chambers will all take water faster than it could possibly come. Chances are that even if I just left this coupler clamped shut, no water would force its way out the slit.
Still, I worry that maybe it would. My plan is to simply wrap the whole coupler in waterproof repair tape, then re-clamp it. That will take care of any small amount of water that wants to leave.
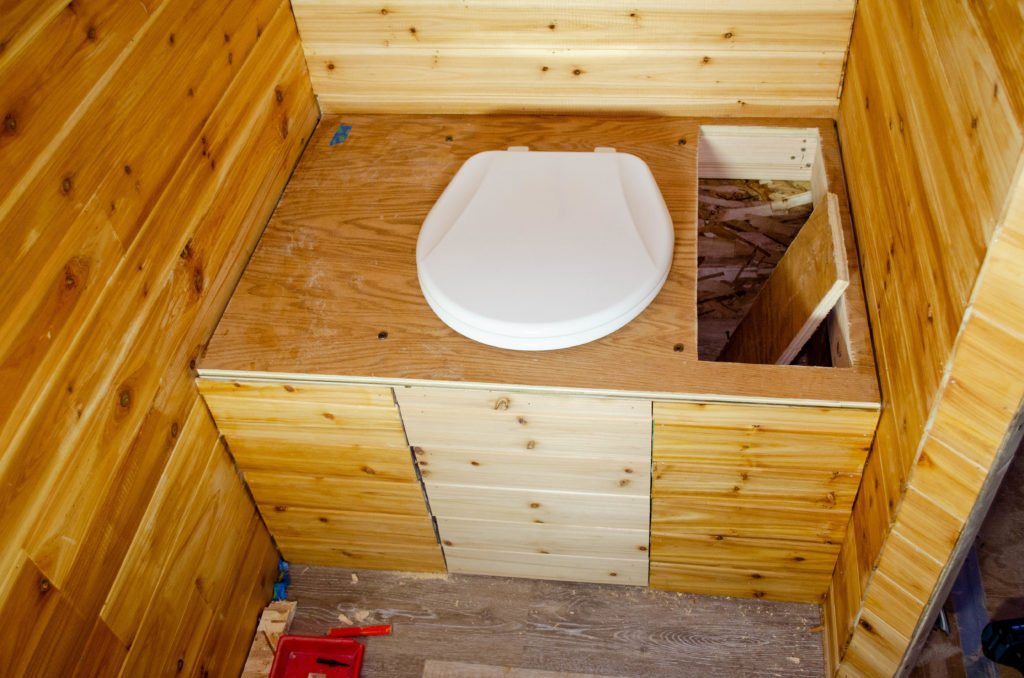
This is most of the T.H.R.O.N.E. bench. The space to the right is where the sawdust/peat moss will be stored. Some kind of hinged lid will be placed there. The space to the left will house the bilge pump (unrelated to the T.H.R.O.N.E., but it’s a convenient spot to place it). There are four machine screws (tiny black circles along the middle third) that hold the butt deck in place, thanks to some threaded inserts in the bench framing. This allows me to remove the deck easily, providing full access to the bilge pump for service. A panel/door/etc., would still obstruct the access at least a little and wouldn’t look as nice anyway. This was easy enough and gives maximum access.
The middle, light colored part is the bucket drawer. It is lighter simply because it hasn’t had finish applied to it yet. There will also be a handle… later.
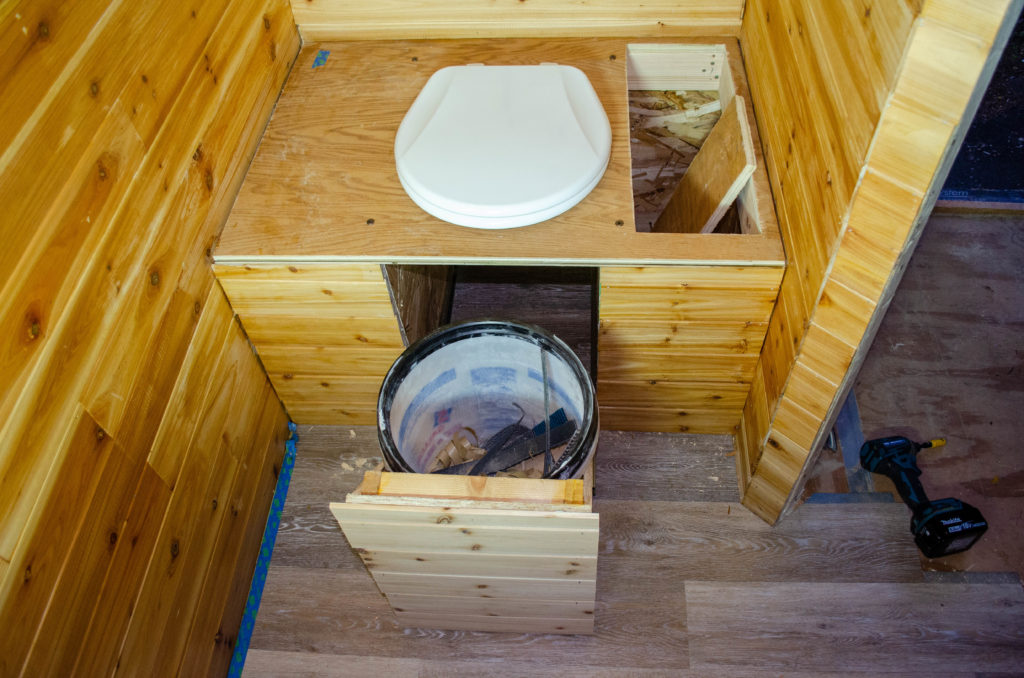
Bucket access like so. This pull-out makes bucket service much easier, as there’s no leaning over the T.H.R.O.N.E. to do a cantilevered lift. This way, the lift is straight up.
Hey, wanna talk about re-use? The bucket used to hold ultracal-30 way back when I was making molds with that for silicone masks. The butt deck is a piece of plywood from my old “command center” desk I built for my previous house, years ago.