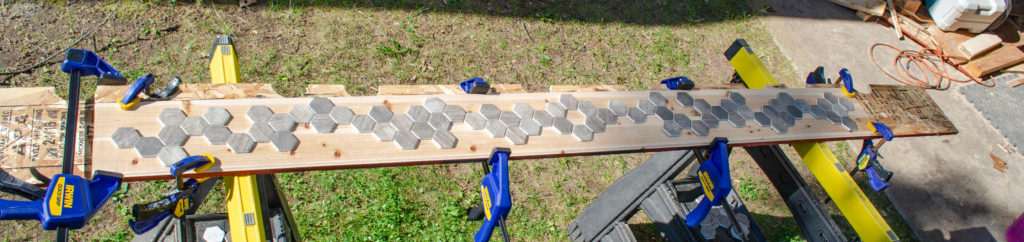
Remember I said I was going to do something cool with those mosaic tiles? I did something cool with those mosaic tiles. Step 1 – cut them out in a wandering path and lay them out on a couple of the interior finish planks for the bathroom. The mosaic tiles come lightly glued to a plastic mesh in more-or-less 12″ squares. This holds them generally together, which is useful, and maintains their spacing, which is also useful. Of course when laying out something other than a rectilinear pattern, one does not get to use the mesh-attached tiles quite as directly. However, one may still take advantage of that mesh as one cuts patterns *across* and *through* those squares, creating wandering strips of attached tiles from the square. This 75″ section shown has like 5 or 6 such strips. Beats the heck out of remembering the exact pattern on a tile-by-tile basis, that’s for sure!
Step 2 – trace the tile pattern onto the wood. Step 3 – Jig saw the crap out of it. As soon as I started to even *think* about using the jigsaw on this 1/4″ thick planking, I realized the saw is heavy and the planking is thin and fragile and some of the cuts will get quite close to the edge, leaving perhaps an inch wide section of that 1/4″ thick plank — no way is it going to support itself while I machine it.
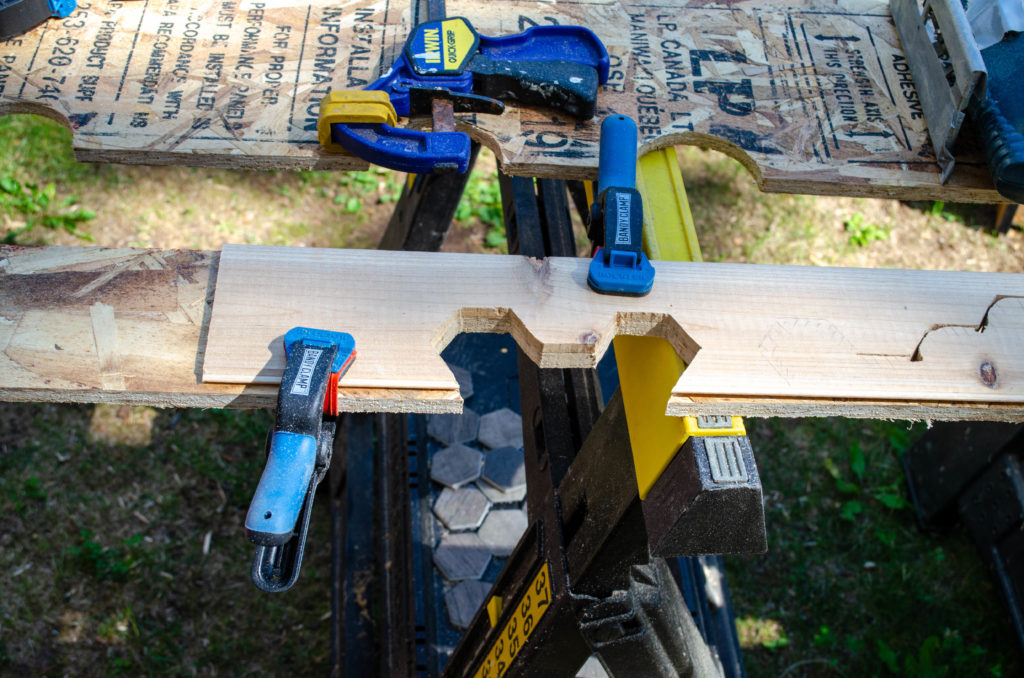
Ok, then, I clamp it to a scrap of OSB to give it some backing. This supports the tool and helps the board support itself as I work along its length.
Even the backer board wasn’t enough, though, as the cuts accumulated. 1/2″ thick OSB is pretty effective at dulling my jigsaw blades but when it, too, is only an inch wide (such as to the upper-left of the foot of the clamp, center), it’s not going to keep the whole thing from sagging and breaking.
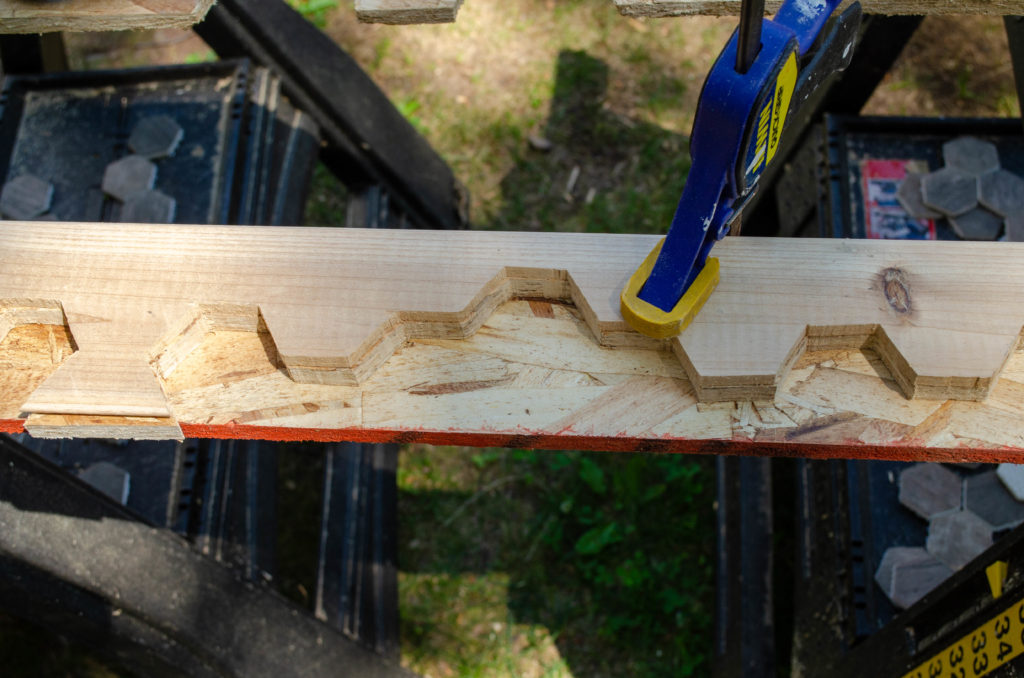
Okay, then, a SECOND backer board was pressed into service. As soon as any given section was cut through, I advanced the intact backer board beneath it for full support. I left the sacrificial backer in place, too, since it was necessary for the remaining cuts and wrangling them separately was just asking for trouble.
Cutting the hexagon profiles with the jigsaw was laborious! I spent hours at it and even then it wasn’t what I’d call “fine carpentry”. It, like so much else, is “good enough” — the entire endeavor of house building has been rather humbling in regards to my carpentry skills, I tell you.
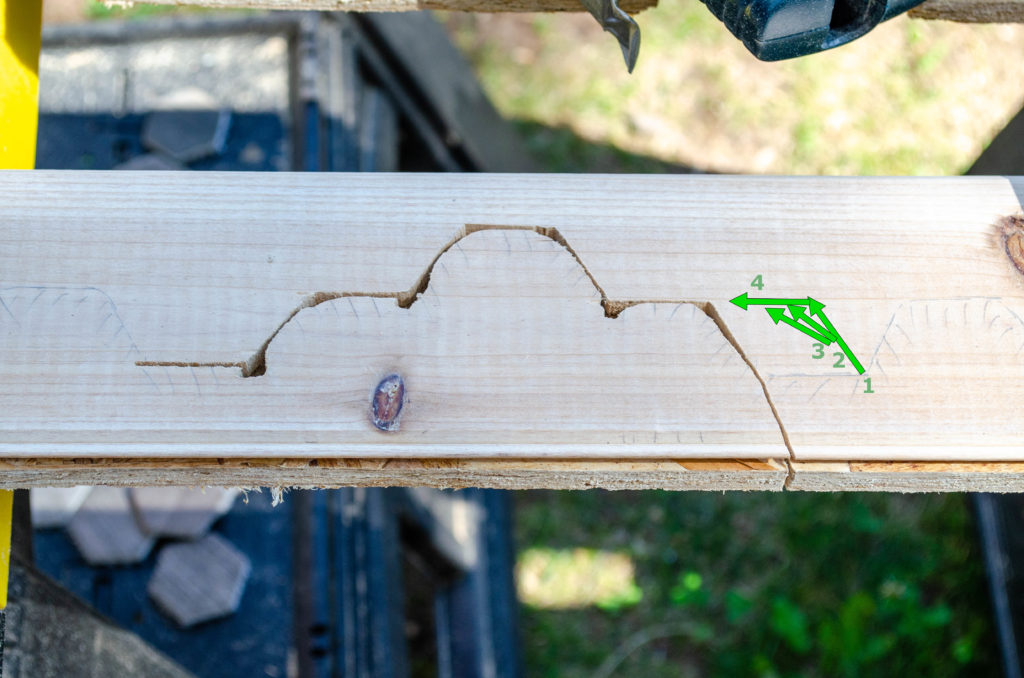
One of the challenges for cutting the hexes were the abrupt angles. Jig saws can make tight arcs if their blades are thin enough but they cannot make an abrupt turn. To keep from having to cut in from the bottom every time (very time consuming and lots of excess blade wear), I would just back the saw up and cut again at the maximum angle a few times (shown here 2 extra cuts but really it was more like 4 or 5 passes) until I had made a hollow big enough to accommodate the whole blade. Once I had that hollow, I could simply place the jig saw in the new orientation (in this example, arrow “4”, horizontal to the left) and proceed. This was effective but time consuming and it was easy to go too far on those relief cuts, making the area a bit jagged. It was very hard to remain patient and go at it slowly enough to finesse it, especially since a fair bit of force was required to keep the machine under control. Force and finesse don’t play well together, even if one is *good* at jig sawing.
For those of you with a band saw, this works for band saws, too.
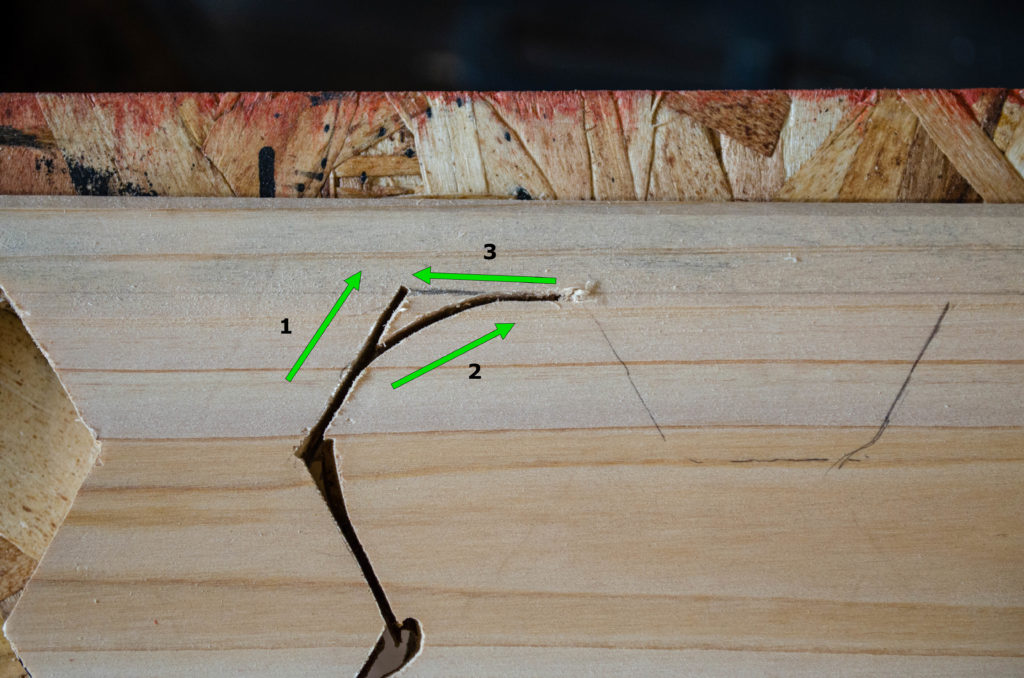
Some time later, it occurred to me I could do this much more easily. Instead of 4 or 5 or 9 successive relief cuts, I could just cut the best arc the saw could cut (arrow “2”) until it met the target line. Straighten out, cut to the end of the line, then pick up the saw and *reverse it*, cutting off the arched corner piece away in one stroke (arrow “3”). This worked great and kept my perimeter a lot cleaner, as I wasn’t constantly touching it obliquely with the running blade as I was making relief cuts. It was also a bunch faster (and nicer to my blade), since it was only one extra stroke instead of several.
You can’t do this on a band saw, like you can that other technique, but I wasn’t using a band saw here 😀
Indeed, my band saw couldn’t handle something this long that requires so much maneuvering anyway.
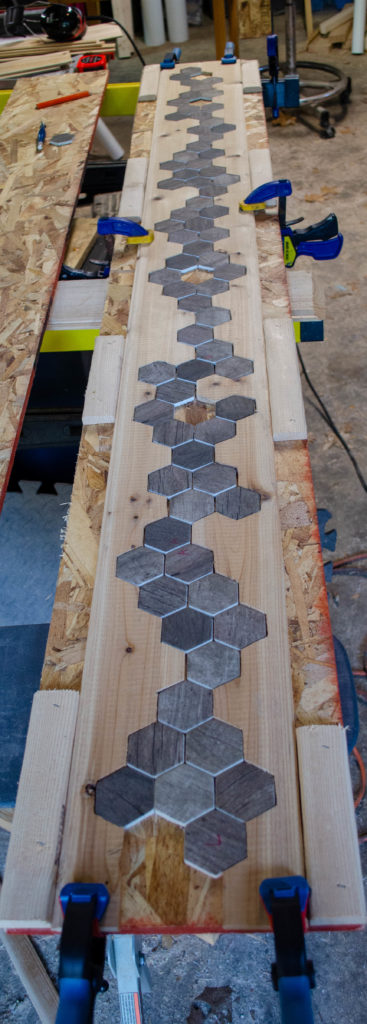
After several hours at the jigsaw (neck and shoulders quite plaintive from all the looking-down-while-operating-power-tools they had been doing), I test fit the tile inlay into the planking. In order to keep the planks tight together, which they no longer wanted to do after having cut so much from them, I built this simple jig with blocks to keep the planks pressed together, as they would be when glued and tack-nailed to the wall. There was some refinement of the edges required here and there, which is to be expected. It was a lot better when I worked on later sections of the inlay, where I was using the 3-stroke technique for turning corners. I don’t know if that’s because it was a more accurate technique (it was certainly a faster, cleaner, and easier one), or if I had just accumulated some practice cutting hexagons accurately in general.
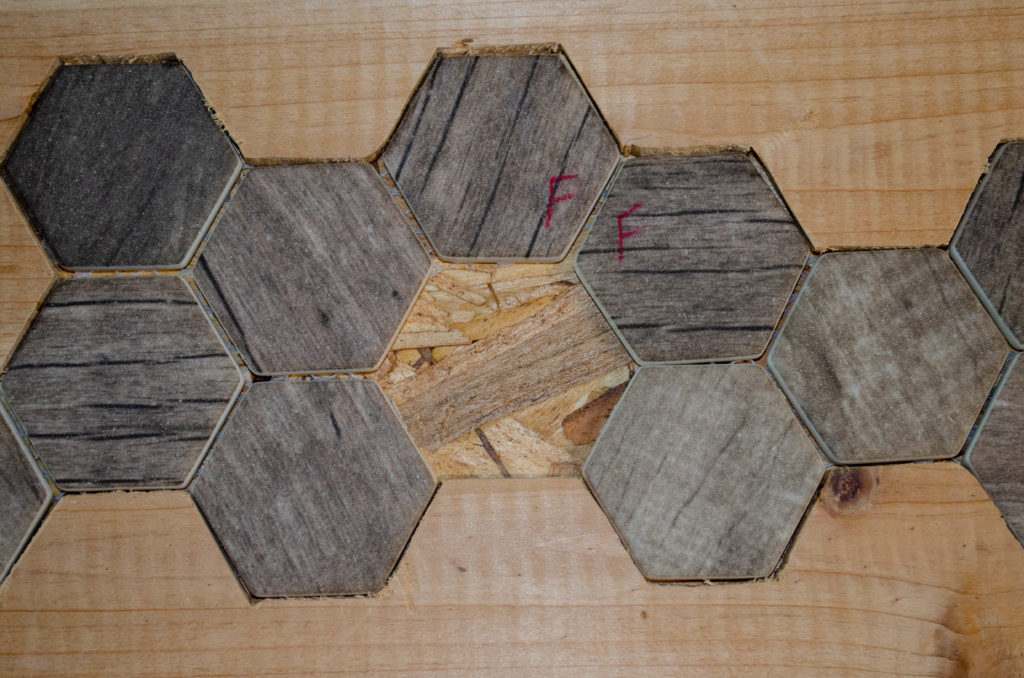
To facilitate final assembly, each mesh-bound strip of wandering tiles was tagged with a grease pencil with a matching tag on the adjacent strip. The strip on the left has an E where it meets its other neighbor to the left. The strip on the right has a G where it meets its other neighbor to the right.
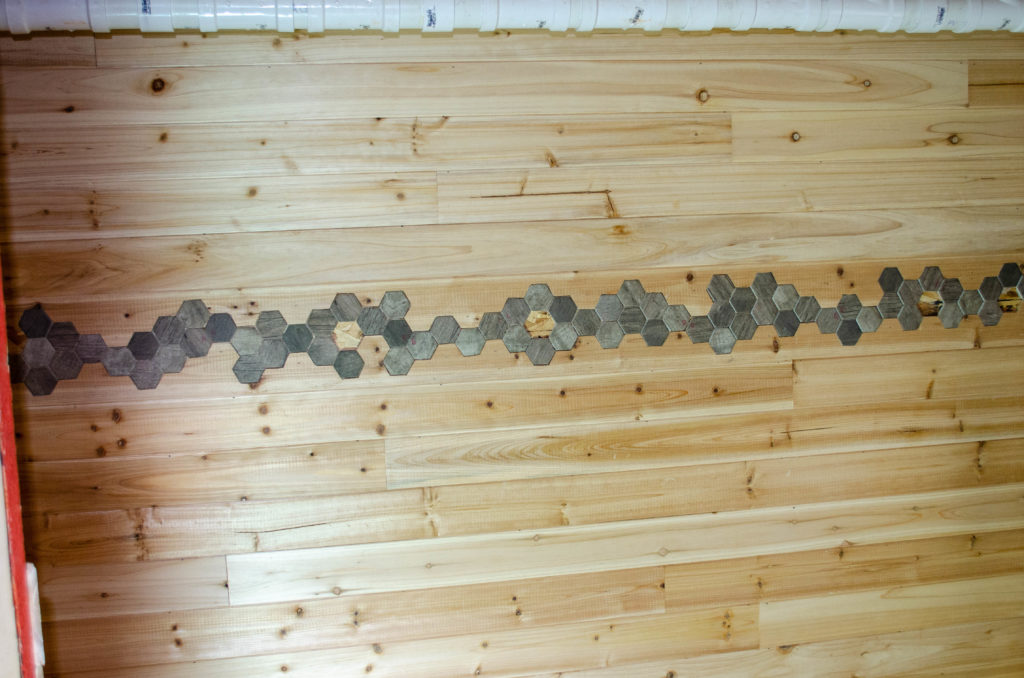
The 75-inch section of tile inlay! There is grouting to do and some other finish work, but this is the look. I like it 😀
I was inspired by some video I saw where they feathered the interface between a hardwood floor and a tile floor in a similar fashion, where there was some interleaving of materials. It was quite striking and I thought “hey, maybe I can do that on the wall as an accent”. Indeed, it turns out I can.
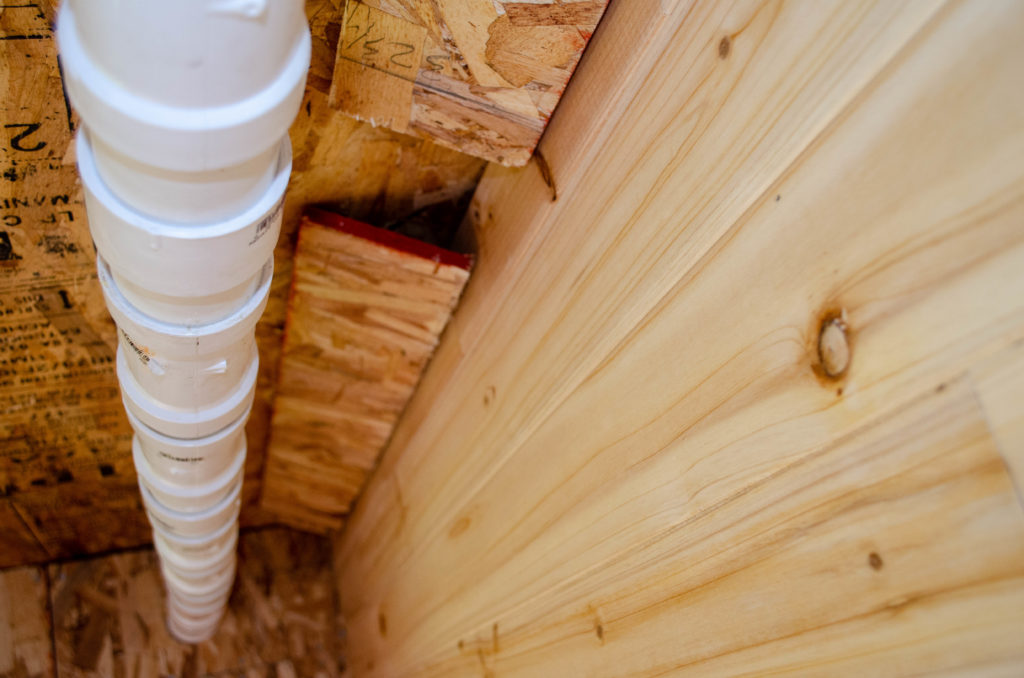
One unexpected thing arose when installing the remainder of the planking on that wall with the inlay (actually, the inlay goes all around the bathroom but I’m talking about *this* wall). The drain manifold for the gray water tank is sufficiently close to the wall that my finish nailer couldn’t get in there to tack the top boards in place. There is adhesive behind them but without the tack nails, the boards don’t necessarily want to stay close to the wall while the adhesive cures (24h). Oh no! How to keep those planks in place?
I tried a couple of things, finally settling on this clever use of some scap boards. I angled them to apply some holding pressure to those top planks. I had to be careful about how I attached these hold-downs to the ceiling, though, since roughly 0.75″ from the interior face of those ceiling boards are the pipes that make up my in-ceiling GW tank! I tacked the hold-downs to the ceiling using 1″ finish nails. Since the hold-down boards are 0.5″ thick and so is the ceiling, that’s like 0.25″ of clearance! Ha! In my tiny house, that’s equivalent to half a mile in a conventional house! 🙃
Just to be absolutely on the safe side, I also drove those nails through the hold-down boards only *between* pipes, as best I could estimate based on the manifold fittings which were visible. I’m pretty confident I didn’t hit any pipes. I guess we find out later, eh?
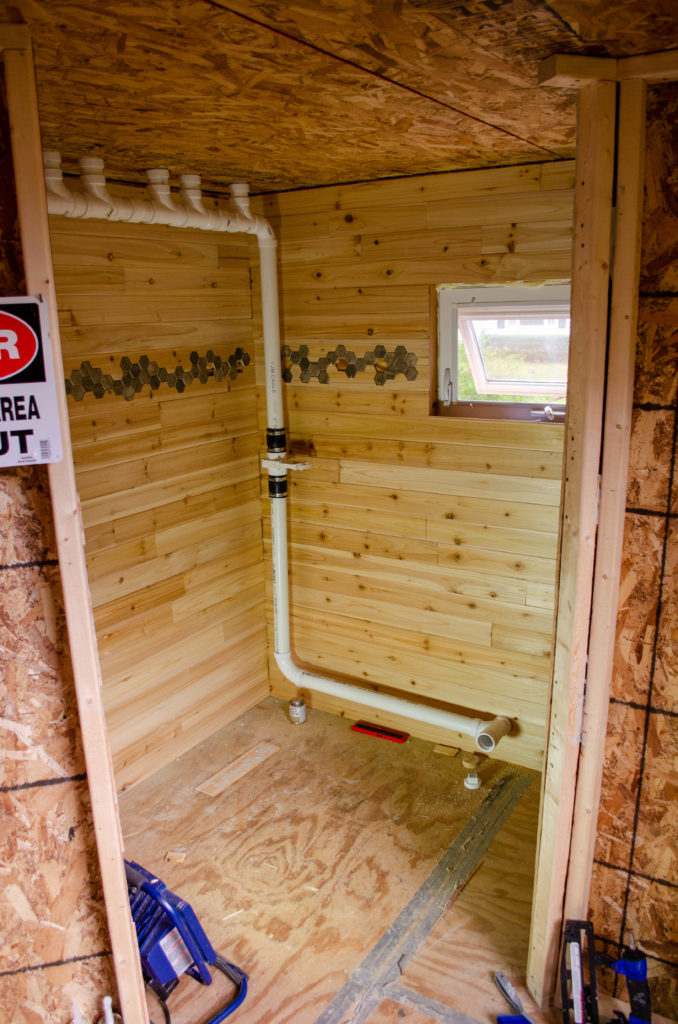
Meanwhile, speaking of pipes, now that I have enough of the interior planking in, I can move some of the plumbing along, too. Shown here, the gray water manifold (ceiling), downspout (corner), release valve (middle corner), and transit to the outside (under window). There’s a clean-out port just as the pipe passed into the wall. I had the forethought to install the release valve using rubber couplers rather than solvent welding it in place. This will allow easy unclogging or replacement of the valve at such time as either becomes necessary. It also makes it easy to clean out the downspout (upper and lower regions) as well as the mostly-horizontal runner. There’s a clean-out at the far end of the manifold, too (extreme upper left, not shown), rounding out the access suite. I should be able to roto-root whatever might need it without working too hard.
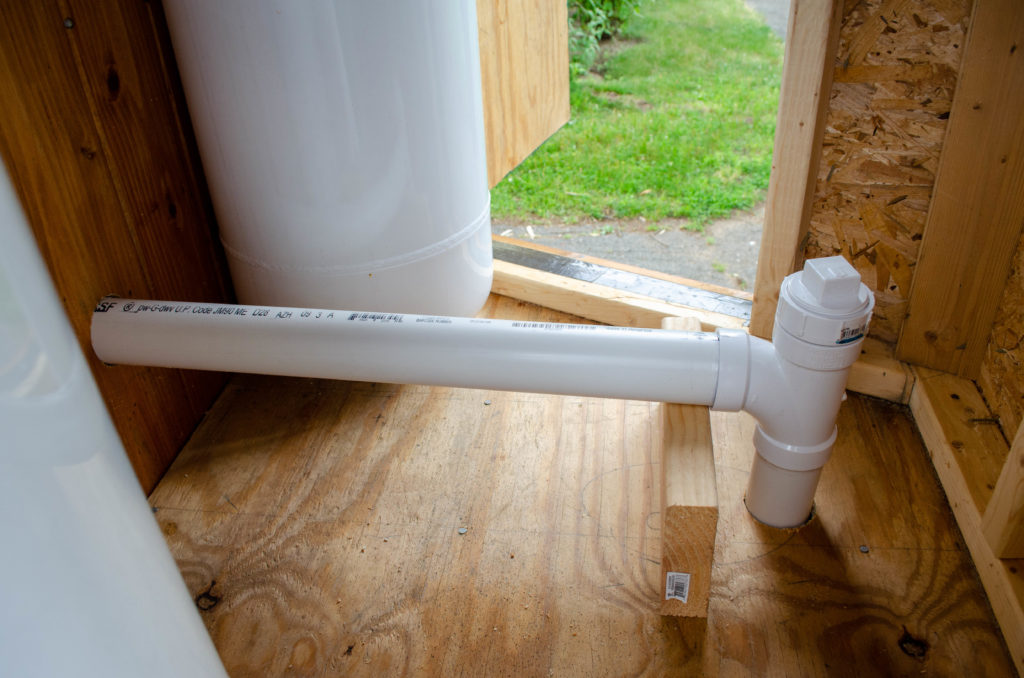
Yes, I checked that the tub will clear the pipe. The tub is 69 inches long. The front of the pipe is 71 inches to the far wall. That’s like a million miles, in tiny house years.
There are two reasons I bought a pair of 40# propane tanks long before doing any actual propane work. Both of those reasons have to do with plumbing. The first, so I could understand what was necessary for routing the propane feeder lines and regulator. The second, so I could route the *rest* of the plumbing around the propane stuff.
Shown here, the final turn for the GW drain (and yet another cleanout port). I’m not worried about this pipe freezing since it will contain 95%+ air most of the time. It’s only full of water when the house pees and that water is (a) at house temperature (warm enough not to freeze) and (b) moving quickly (also combats freezing, see your local river for an example). When the GW tank dump finishes, perhaps a little bit of water may remain in the bottom 5% of the pipe and maybe that does freeze. And that’s fine. There’s plenty of room for it to expand without bursting the pipe and the next time 50 gallons of warm water come rushing through, I’m confident any tiny ice river at the bottom of the pipe will get melted and washed through.
And if I’m wrong, well, I’ll figure something out to mitigate it 😀
The fresh water inlet will have a similar scheme for keeping from freezing. My plan is for it to be mostly air most of the time, except when on-boarding fresh water. When the FW tank is full, the feed line for the house will be drained back into the well (or maybe just exhausted to the environment, to prevent “backwash” that might possibly be bad for the well — I need to learn more about wells). In either case, the FW feed pipe will be largely purged of water before it rests so that it, too, does not freeze solid. And when new water flows to the house, while it won’t be all that warm in winter, it will be warmer than freezing (by definition) and is just as likely to melt any minor icicles left from the previous run.