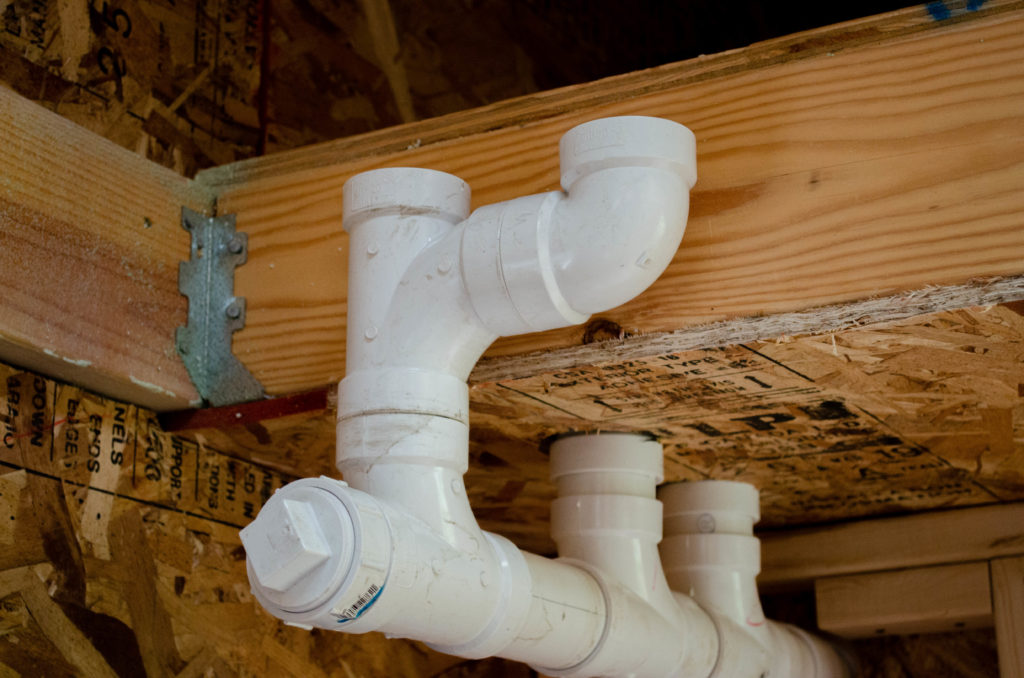
How does one measure the level in a tank that’s composed of a bunch of pipes in the ceiling? One takes advantage of the fact that liquid seeks a uniform level. The pipes are parallel to the rafters (can’t see ’em now). The straight path will accommodate my depth gauge probe. I’ll need to extend that up just a little more to get full excursinon of the probe’s float, but you can see how this will work, yes?
So what’s the riser on the side for? The depth gauge tells me how full it is on a dial but I want to also have guaranteed no-overfill. The second riser (and a stub of pipe not installed yet to get it to the right height) also echoes the level in the pipe-tank. It will accommodate a simple float switch that when the water level indicates full will electrically prevent the bilge pump from sending gray water up to the (already full) tank. Obviously, one does not want to get to the point of having water to send to a full tank but in case I forget to observe the gauge and perform a dump cycle, this float switch will act as a secondary mechanism for preventing over-filling (i.e., something leaks out or the bilge pump strains against the full tank).

In other progress today, much of the cedar planking has been installed in the bathroom. The ragged corners will be dressed with trim later. What comes next, though, is something interesting. An inlaid tile accent border.
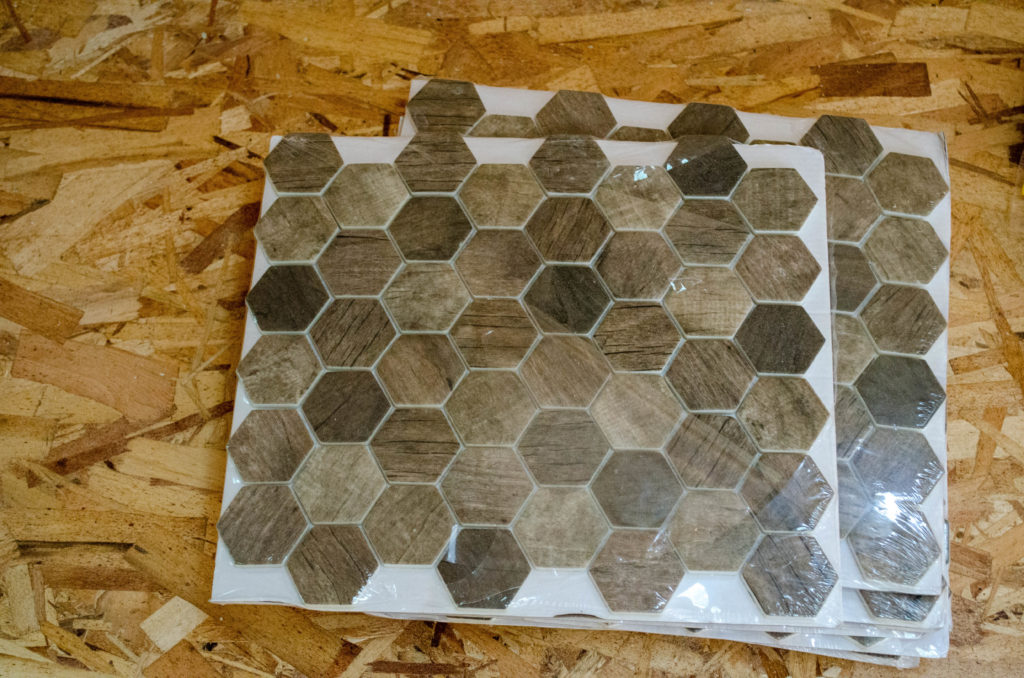
These are the mosaic tiles for the accent border. I’m not going to use them exactly like this. I will cut them out in a wandering, undulating way and actually cut the surrounding planking to meet them exactly. To keep the little hexagons from sliding down into each other when they are applied to the wall with wet adhesive, I have some 1/16″ tile spacers that will be inserted at every interface. I haven’t actually figured out precisely how I’m going to work this… but I will… and there will be pictures.
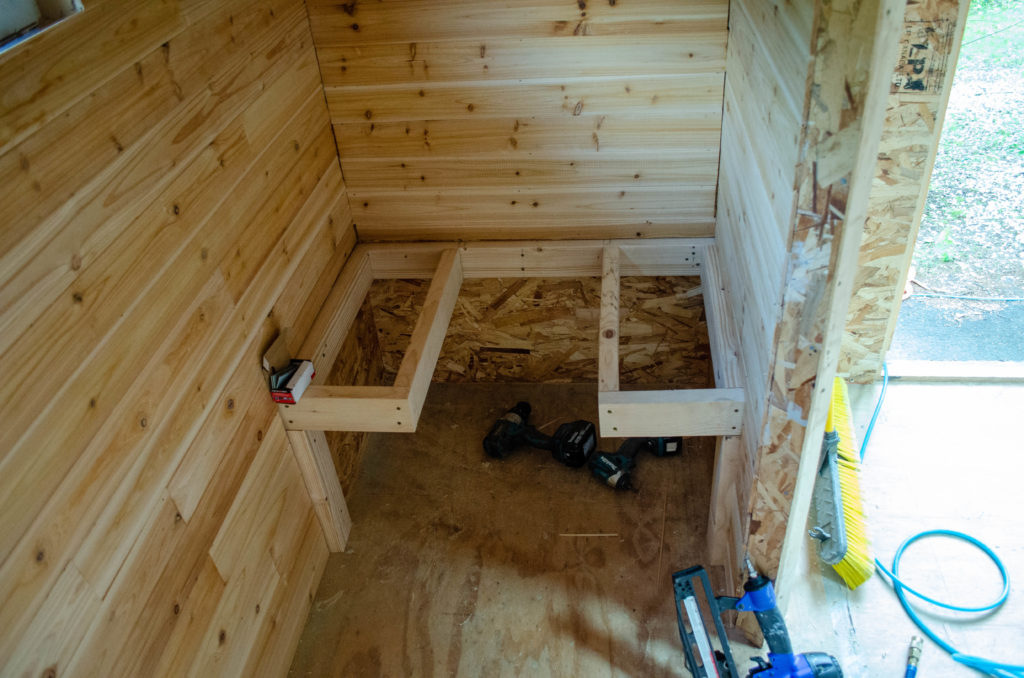
No sense wasting perfectly good cedar planking *inside* the T.H.R.O.N.E. bench, right? Right. So, in the time-tested tradition of “before anything may be done, something else must first be done”, I actually framed out the T.H.R.O.N.E. bench before starting the installation of the planking. This framing is incomplete — it’s just enough to define the space.
The bay on the left will contain the bilge pump that will lift the gray water up to the in-ceiling GW tank. The bay on the right will be some kind of cabinet. I don’t know whether it opens from the top (probably) or pulls out from the front (less likely) but it sure seems like the perfect place to store some TP, does it not? Maybe two compartments, one for TP and the other for peat/sawdust cover material. Or maybe it is all for cover storage and the TP is on a spindle elsewhere. We shall see.
That space in the middle is for the humanure container. I have some super duty, full-extension drawer slides that were harvested from my “command center” desk that will be perfectly re-purposed here. The container will slide out effortlessly. I’ll build a shelf and a false front — basically a “drawer” but without tall sides or a back, none of which are necessary. A platform with some blocking to secure the container is sufficient. The front will be tall and close up the passage. It will be fabulous.