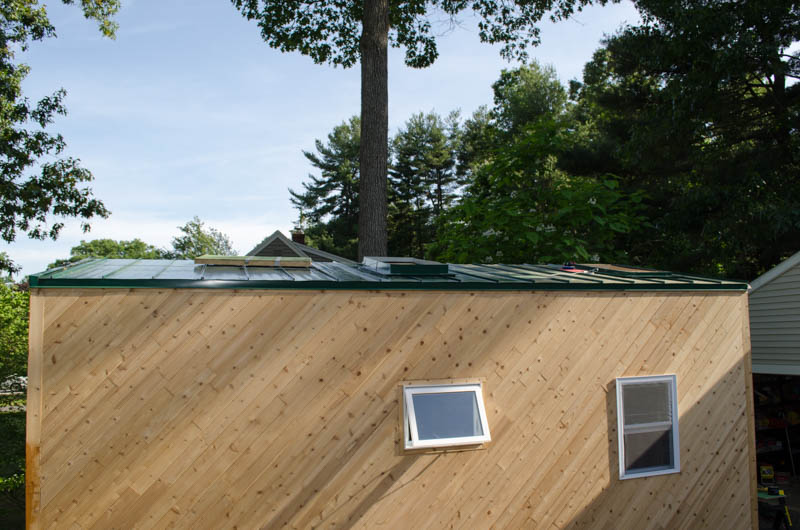
Lots of roof progress! Shown here: the main field of panels installed, as well as the low eave trim. The left rake wall trim is up, too, though it’s hard to see.
One thing that’s easy to see: note the sky light flashing on the left (center of image) is somewhat taller than the flashing on the right. This is because the flashing material is 4″ high and the skylight curb is 3.5″ high… and the surface of the roof, above which the flashing material sits, is 1″ high… so there’s a bunch of material above the curb line. This would have been a razor sharp edge during installation, had I pre-cut it. No thanks, I already have 5 stitches from another razor sharp edge. Instead, I cut it down after installation. How, given the odd angle? I’ll show you in the next image.
For now, let us bask in the loveliness of the roof and the creativity required to actually get some flashing around the sky lights. The standing seams of the roof definitely introduce challenges when it comes to flashing. Ordinary techniques do NOT get it done with this kind of roof. I watched a lot of You Tube before I fully understood the language of the problem and how the metal roofing system’s components could be made to do the job. Sadly, the roofing company was of no help at all here. I actually sent them an email saying basically, “hey, I’m a DIY builder; can you give me some advice or point me at some advice with regards to flashing around things like sky lights?” They did not respond at all. I asked the local rep, too (a local lumber yard) the same question. Also crickets. I get it that nobody wants to be liable for someone else’s mistakes, but good grief, the least they could do is say as much rather than simply leaving me hanging. Alas, so it was.
After much You Tube watching, including quite a lot of stuff that didn’t apply to my situation (they do not index it according to *my* preferred search terms), I was ultimately able to piece together a solution. Or at least, what I think is a solution 😀.
I will test it with a hose to simulate some rainfall once it is all together… and make remedies if needs be.
Anyway, so much of the roof is done and I am pleased that this is the case. This has been a bunch harder than I expected. Or, rather, I knew metal working was quite unlike wood working and I knew that I had very little experience with metal working, so I expected it to be challenging to some extent. But it’s been harder than that. I think the biggest issue is that this is not just metal working – it’s metal working 11 feet off the ground, on a slippery slope (pollen makes a pretty good dry lubricant), where there’s not much room to kneel without encountering roof ribs or other things in the way of being comfortable. Also, one must try to be mindful of keeping one’s tools from sliding off the roof, sharp edges which one cannot grasp to steady oneself, trying not to scratch the finish with tools or parts… and then there’s managing 10ft stock aloft. It was a lot of very slow work.
What remains? The rear rake wall trim, the peak trim, which will be a fair bit of work but it is just like other work I have already done, so at least I know what to expect, and the stove pipe boot, which should actually be easy. Then, of course, actually installing the sky light windows themselves. This I save for last, since I’m using the sky light openings as an easy way to get myself and materials to the roof, without having to negotiate them up a long ladder.

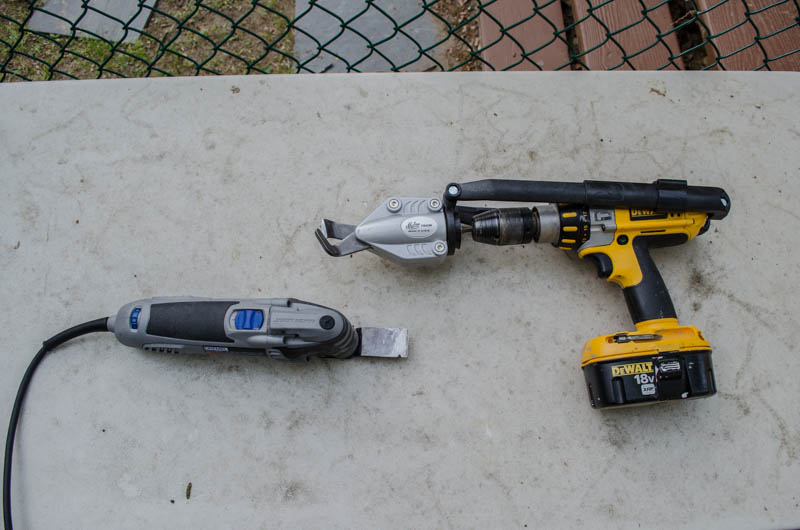
These are a few of my favorite things! On the right, my trusty DeWalt drill (it’s been with me since the 2002 bathroom project at the house in Lowell — you might recognize it, Lorelei), mounted with a new widget: the Electric Beak! This is a pretty cool thing – it’s metal shears powered by the drill, turning it into a sheet metal eating monster. Very handy for curves or long straight cuts. It’s proper name is Malco Turbo Shear, but I prefer “electric beak”.
On the left, the Dremel Multi Max. Oh, how I love thee, Mutli Max. Its claim to fame is that it can do flush plunge cuts. The end blade vibrates just enough to get some cutting action, but does not require being grossly drawn across the work piece, like most saws. The vibration does the back-and-forth required for sawing, but the movement is so slight you can basically just plunge the blade straight into the work. This is great for cutting a nail between studs — it’s somewhat less violent than a Sawzall, which is the customary tool for this job — and it can trim trim in place like nobody’s bidness (that’s what I bought it for about two years ago) Today, the relatively gentle saw action was employed to trim the too-tall flashing around the sky lights. Any ordinary saw would have been too violent, shaking the metal and bending it. This was gentle enough that I could generally draw it around the perimeter of the opening and cut off the excess metal without tearing it apart. Hot, sharp, noisy, yes, but at least it was *possible*. The aftermarket carbide cutter end is, as they say, “the shizz”.