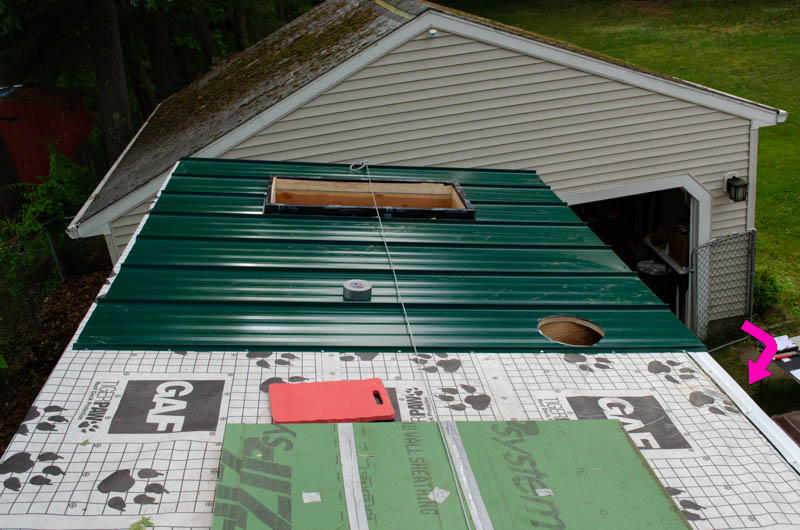
As promised, when the roofing material arrived, it got priority. What you can’t see (pink arrow) is the low eave trim already installed. Roofs are built from the low point to the high point so all the overlaps are in the preferred direction for water shedding.
So, what’s up with the gap on the left? That’s intentional. The peak trim will cover this area. The instructions say to leave an inch clearance. I’m not sure why, actually, but that’s what they want and who am I to argue?
That round hole is for the stove flue. By the time it gets here, the pipe is 6″ in diameter. It requires 2″ minimum clearance all around for fire safety… so that’s now a 10″ diam hole. This hole is 11″ diam, but is also at a slight angle, which reduces the clearance a tiny bit. Better safe than on fire, right? Of course right.
I have a super hi-temp silicone boot that will fit over this area, providing water-tightness. I’m not ready to install the stove just yet, so I’ll just put a cap on it instead of the flue pipe until then.
For now, though, taking advantage of a warm, dry week, it’s all roofing all the time. I’m confident it can be finished by the end of next weekend, perhaps a bit sooner, depending on the vagaries of life.
The “Ivy Green” color from American Building Components looks really sharp and complements the cedar nicely.
And for those of you who know certain things, the “tiger paw” trade name for the roofing underlayment may give you a smile.
And that’s mostly sawdust on the panels, not damage. They pass through the interior of the house on their way up here, which has a lot of sawdust.