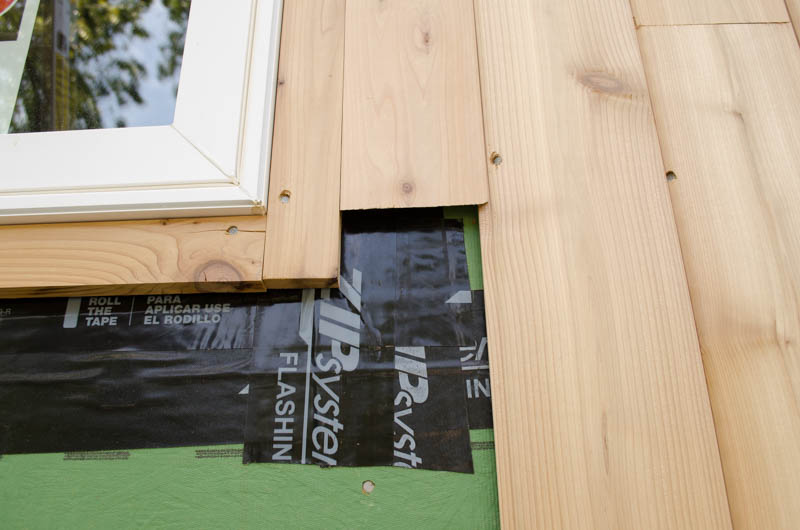
Sometimes, things get a little tricky. For example, cutting a piece to mate perfectly in this spot. At first, it looks simple enough, but when you factor in that there is a loose tongue-and-groove joint on the right and a potentially not-quite-exactly-square angle around the window frame (I do my best, but my best isn’t always square when I want square), you realize that if you just measure and cut, you’re going to be disappointed.
Why? Because the things that look square aren’t square, so a perfectly cut-out corner won’t actually mate nicely with what’s there. If I had more carpentry skill, square things would be more square, but I am what I am and I just gotta go with what is, ya know? Also, the tonge edge of the adjacent board is tricky to measure against, even if it were perfectly parallel/perpendicular, which it probably isn’t, because it has no square edges at all, in fact.
So, okay, without employing a great deal of wood filler (there will be more than my fair share employed anyway), what’s a fellow to do?
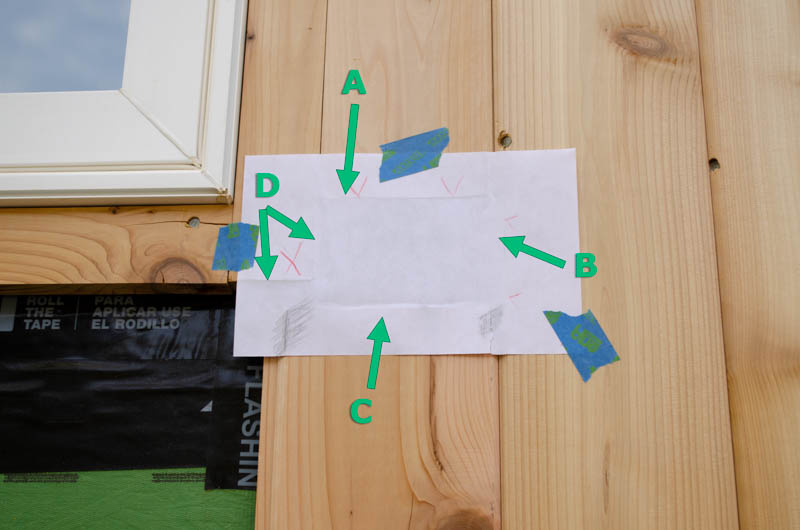
Answer: make a template! Shown here, a board slid up as close as possible to the tricky spot. I placed a piece of paper over the area and went over it such that all the edges made impressions on the paper. This gives me a perfect reference of the relative positions of everything.
A – edge under which the mating, beveled nose of the next piece will fit.
B – reference edge for the piece to the right. I won’t be able to reference much of the board-to-be-cut, so this will serve as a surrogate line.
C – I didn’t actually need this line 🙃.
D – Impression of the corner I need to accommodate. This is the exact shape, square or no, perpendicular or no, plumb and level or not, it’s what is really there.
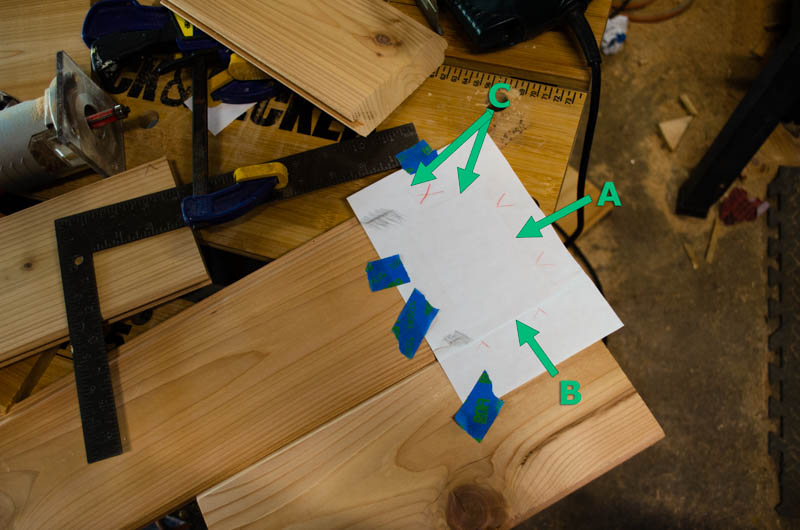
There’s a dummy piece of board (lowest in frame) mated to the board I’m going to cut. This stands in for the right-side reference, annotation B in both this and the previous picture.
I align A to the end of the bevel (already cut on this board) that will slide under A in the previous picture.
C is the outline of the corner. After taking great care to align all the references to the boards, I tape the paper down and with a sharp knife, cut along the shadow of C, right through the paper, leaving marks on the wood below.
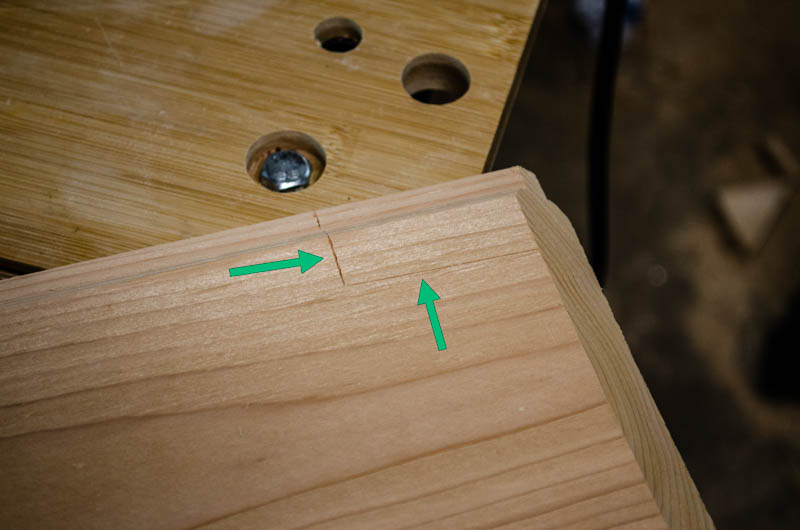
Those marks look like this. They are precisely where I need to cut to accommodate the corner, without regard to the degree of perfection embodied by said corner.
Cut carefully with jigsaw.
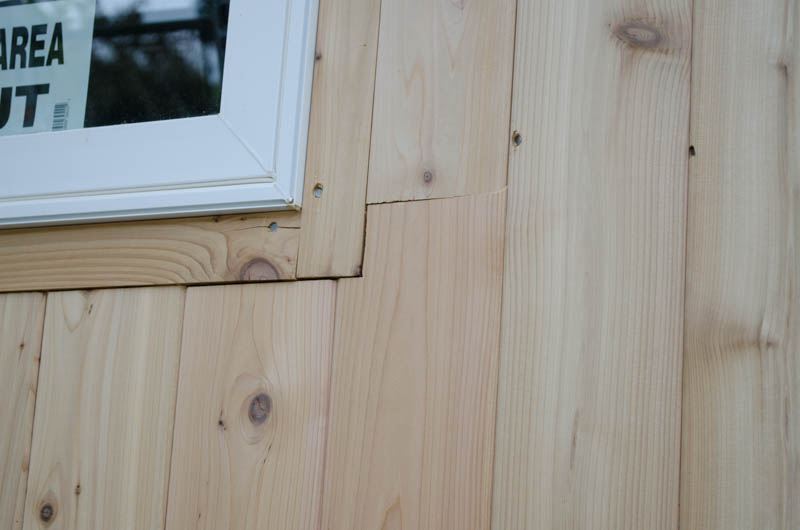
Hey, it fits! It looks easy, perhaps, but I promise you, if I hadn’t used the template, there would have been a moderate to horrible gap (and probably at an angle, too) because it’s so hard to measure this interface exactly.
They didn’t all go this easy – sometimes there were multiple tries, as things slipped, or there were other alignment issues.
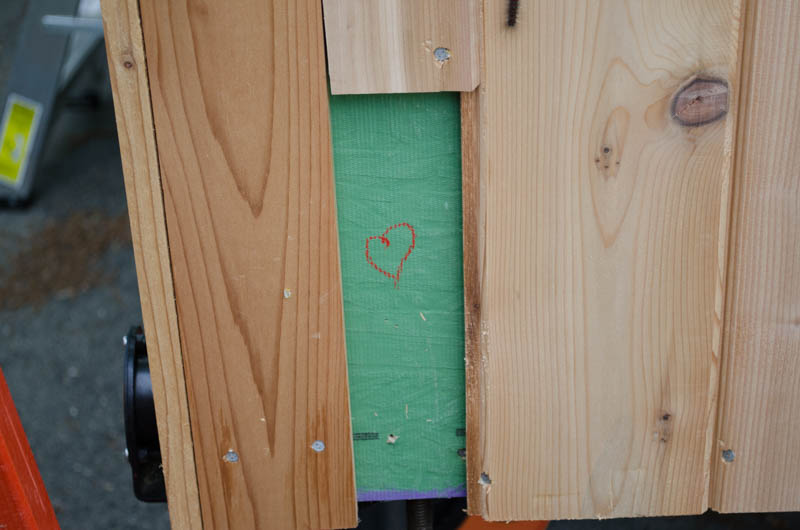
And as I get to the end of a wall, I scribe a little love-blessing onto the sheathing (and on the back of the last board, too (not shown).
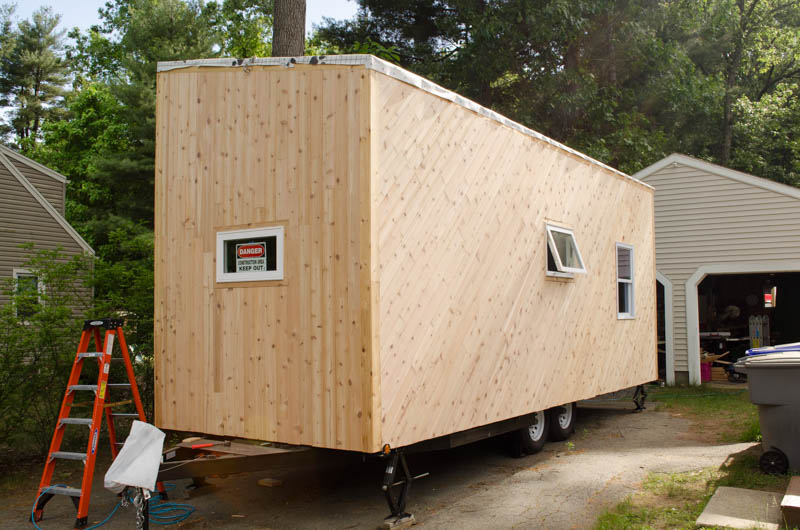
And voila! Two walls complete!
You may be thinking there is a shortage of windows. There’s not. The window midway is over the sink and the window at the far end is in the BeDiLiA, where it keeps company with two other windows (not seen). That’s the main living area, with plenty of light. There are also two sky lights you can’t see from here. The little window up front is in the bathroom. Why so little? It’s enough for light and for not feeling like you’re in a box, but the rest of the wall space I really want available for cabinetry, shelving, etc. It looks big, but at 8′ wide and 24′ long, it’s not that big when you start actually laying out the interior. Storage space is precious! Any time there’s a window, there’s no closet, cabinet, coat hook… you get the idea. Windows where they’re needed. Only. Also, at this angle, the open area looks bigger than it actually is.
I toyed with the idea of doing something interesting with the orientation of the siding boards on that larger open space but ultimately decided that was a lot of work for a little value. There’s always an opportuinty to hang something decorative there – some low-profile art such as a metal cut-out.
I’ve definitely been improving my siding technique as I learn by doing. By the time I’m done, I’ll probably have it figured out 🙃.
In other news – the roof is on order and is expected approximately two weeks from May 26. That might be as soon as this week.
I have also ordered the wood stove. It won’t get installed for a while, but I do need to know how it sits in the room so I can run the flue optimally – which is relevant for roof installation, which *is* going to be soon-ish.
So far, $22,375 has been spent on this project. About $300 on equipment rental. The rest is materials. In rough terms, that’s $8k for the trailer chassis, $3.5k for the siding, $2k for the stove, $1.5k for the roof, and the rest for lumber, nails (I have used *thousands*), specialty things of various kinds, windows (including high-impact rated skylights), and a nice bathtub. There are still a couple of bigger-ticket items pending (propane heater, cooking device TBD, potty TBD, water heater) but one thing at a time!