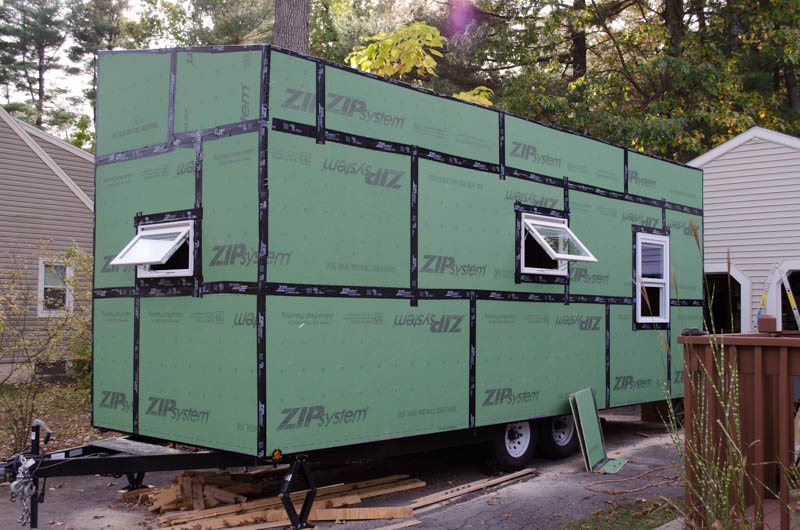
Sheathing done, front corner view of windows. Open windows are bathroom (left) and kitchen (right). The double-hung window in the rear is one of three in the BeDeLiA.
What’s a BeDeLiA? Well, it’s the BEd room, DIning room, LIving room, All-other-purposes room. BeDeLiA. No Amelias will be decorating it.
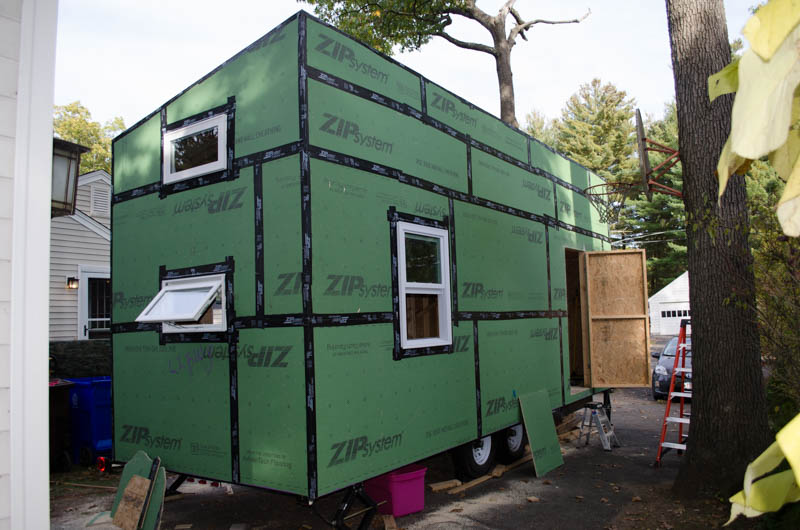
Rear corner view of windows. Cozy loft (upper) and BeDeLiA (lower). That’s a “construction door” in the background. Just something to cover the doorway hole during construction. It’s not the final door at all. I will custom build something beautiful to be the door. This is just some scraps of sheathing and 2×3 quickly nailed together so I could close it up.
For those of you who might remember back that far, I recognized the paint on the hinges I grabbed from my spare hardware pile. They belonged to The Crypt – a Halloween prop I built years ago. There are no conclusions to be drawn from this other than that I am occasionally thrifty and will harvest hardware from things being demolished if I think there’s a strong chance it’ll be re-used.
I can hear you say, “Hey, wait! When you did the sheathing, you totally DIDN’T cut out for the windows!” And you’d be right. I didn’t. I went right over them. Later, a hole was drilled in the corner of each window framing. Then, a router was used with a flush trim bit to restore the opening, perfectly aligned with the framing. How? The inset shows the technique in a different application (thanks, Internet!). The green arrow is where the cutting happens. In this case, the top of the box is being trimmed flush with the sides. The red arrow points in the direction of operation, to the left is done, to the right is next-to-be-done. Note the overhang of the top on the right side and the flushness of it on the left. The blue arrow points to the secret: the bearing wheel which traces the side of the box, keeping the cutter portion exactly flush with the side as it is drawn across the width of the face. Now instead of the face of a box, imagine that’s the window rough opening framing. And instead of the lid (it’s probably the bottom, actually, flipped over for working) of the box, it’s the green sheathing boards getting trimmed. And, instead of trimming the outside flush to a wall, I’m tracing around the INSIDE of a frame, cutting a path all the way around until the panel just falls out. In the main photo, the router path was to poke through the big hole, get drawn to the edge of the framing, then make a perimeter circuit of the interior of the framing, cutting a path in the sheathing along the framing until there was no sheathing connected to the framing at all inside the window area. It just fell out. Presto – a perfect hole for the window. I realize the box example in the inset is kind of the inverse of what I did, but it’s the best picture I could find of how this works and I didn’t think to take an action shot. I made a sketch showing how this applies to windows (and doors) – next photo.
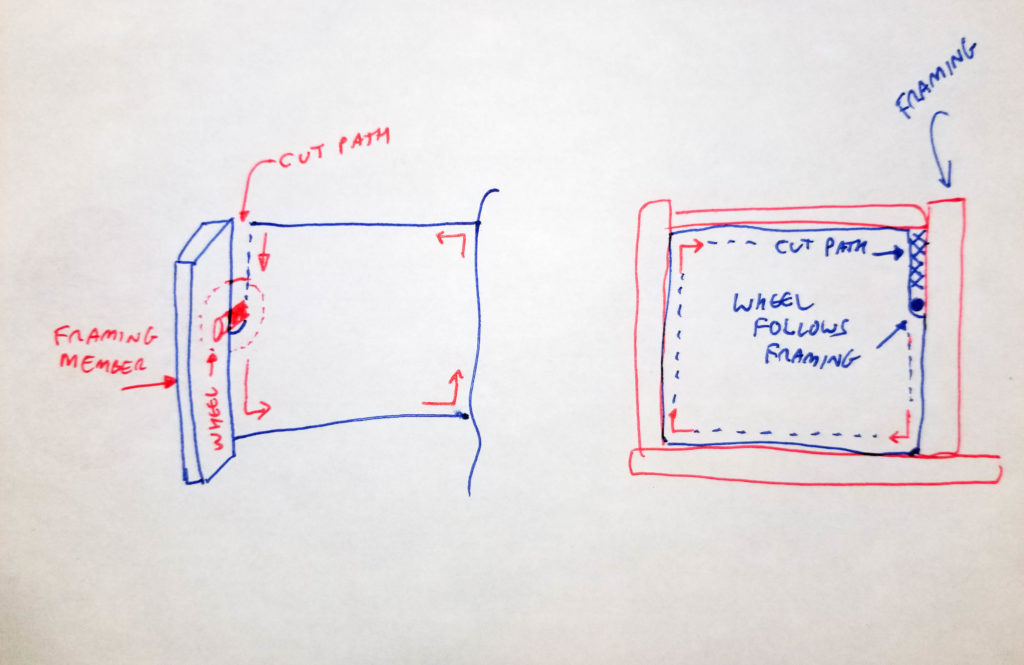
Here’s how it works. The left is the view from INSIDE. The router bit wheel traces along the framing member (only one of four shown). As it does, the cutter area (solid red) removes material from the sheathing (rear blue square). Following the framing (red corner arrows), a panel of sheathing is liberated.
The right sketch it the view from the OUTSIDE. The red lines are the framing of the window opening, not actually visible from the outside. The wheel of the bit (solid blue dot) follows the framing (red corner arrows), and the cutter part of the bit removes material (blue cross hatch) from the sheathing board. Follow it all the way around and you can see how a panel, slightly smaller than the opening (because of the material removed by the cutter; blue dotted line), is liberated and the opening is perfectly flush to the framing.
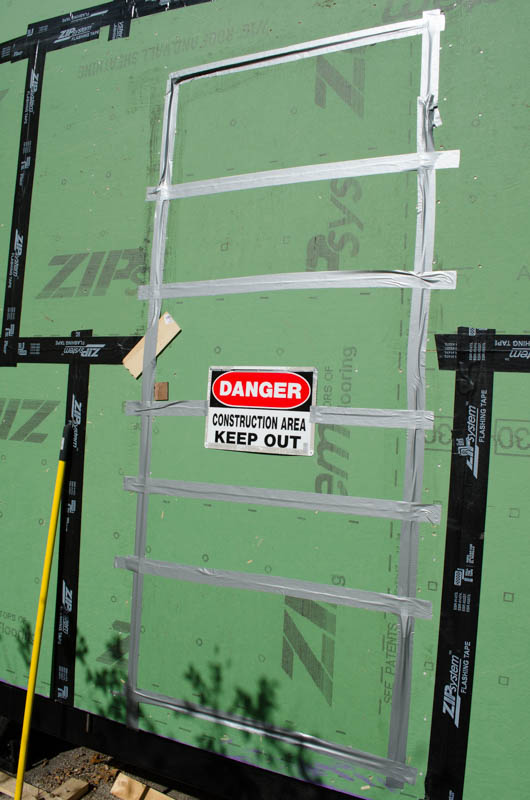
Before wrapping it up for the winter, a quick sealing of the “construction door” with the handyman’s best friend: duct tape. Which, by the way, really is DUCK tape, where “duck” comes from the name of a type of canvas cloth (not kidding) from which the original tape was made. Only later did someone think it might be good for HVAC *duct* work sealing. It’s not great at that, actually, but the “duct” name stuck. True story. Look it up.

Time to wrap this up for the winter. It kinda looks like a chocolate present 😀.
The angled roof made it impossible to get a tidy look at the end. No matter, there’s a clear plastic sheet hung beneath the ends, too (you can see it in the lower right), so everything is nicely covered.
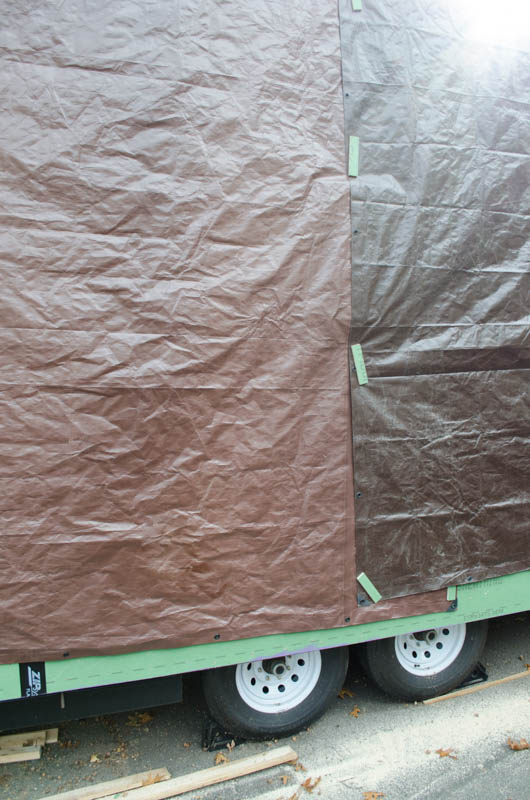
I used strips of scrap board and staples to hang those clear plastic sheets at the ends. Melissa suggested using that same technique to secure the tarp. I resisted at first, not wanting to pierce the tarps with tiny staple holes, but hey, the holes are covered by the battens for now and in the future, tiny holes will be okay – the green board is intended to shed small amounts of water. Even so, I’ll probably cover up this last little bit at the bottom before winter hits.
Two tarps – same brand, same model, bought at the same time . . . didn’t realize until I opened them up that one was milk chocolate and the other dark!