As I check all the things before the helpers arrive, I notice this window opening is too narrow. Oops. Another one of those cases where I changed the window on the plan but failed to update the layout marks on the wood. But it’s all built and locked together. Crap.
Actually, this is not a problem at all. I have tools.
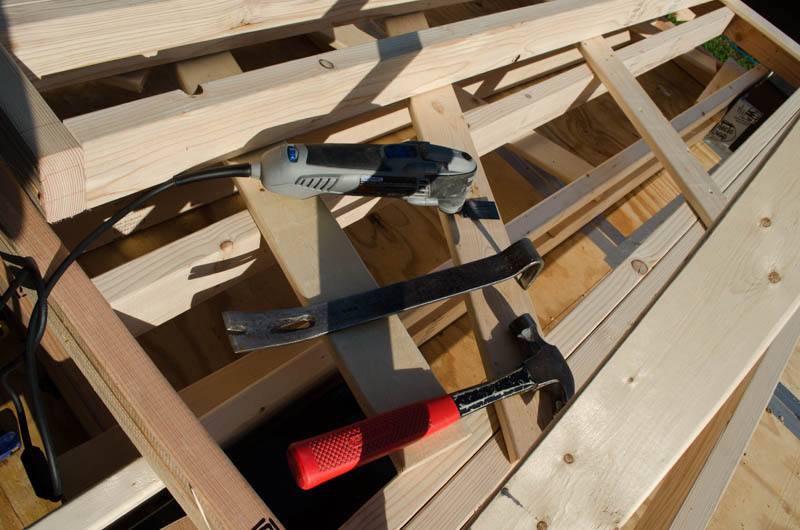
Some of my favorite rework tools. Top, a very special tool from Dremel which vibrates a thin, flexible blade that can just get right in there and make a flush plunge cut. It also has a blade that can cut metal (nails). No easier way to free a stud than to cut the nails. You can do that with a sawzall, too, but you’re gonna (a) lose wood and (b) it’s quite violent. This little wonder just buzzes a bit and presto, the wood is liberated. The blade is so thin you hardly notice the wood changed size.
And sometimes, rework calls for more brute force than finesse. Flat bar and hammer will get it done.
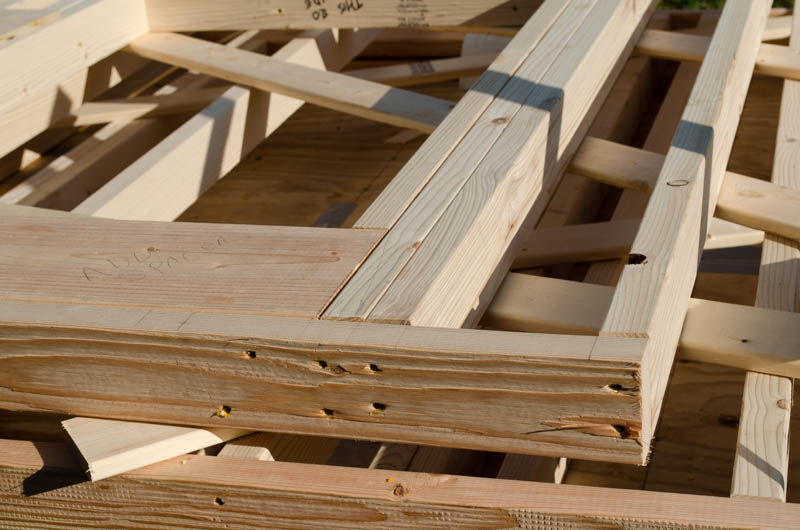
This is that same corner (in different light). Note the header extends one more stud’s worth to the right. That notch it sits in was cut with the Dremel tool. I didn’t have to disassemble anything that wasn’t being removed.
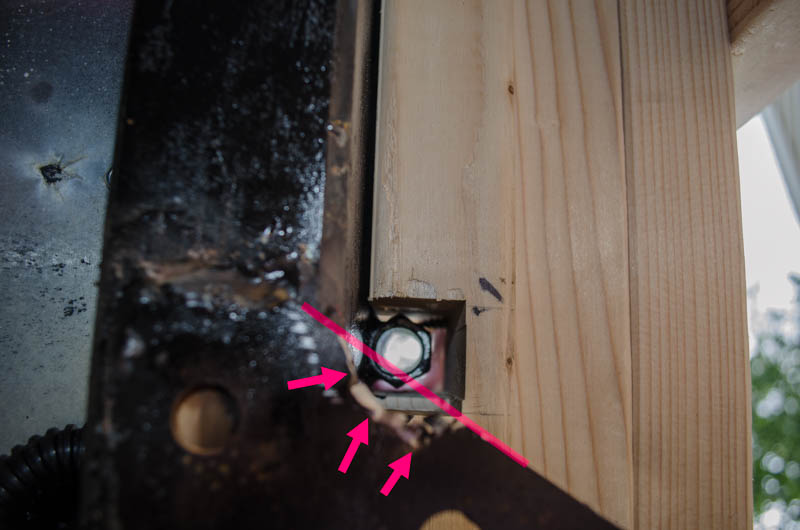
The newly-welded-on tail light bracket was installed about 1/4″ closer to the threaded rod receiver than the one it replaced. That resulted in interference such that the rod could not travel freely below the deck. It needs to. This photo is a view looking up into the underside of the trailer. The diagonal line shows the original profile of the bracket, intersecting just barely (barely is enough) the aperture of the rod receiver. I didn’t really have the right tools to rework this thick metal bracket in close quarters, but I managed to get it done (not beautifully) by attacking it with an abrasive wheel on my other Dremel tool (the more widely known rotary one).
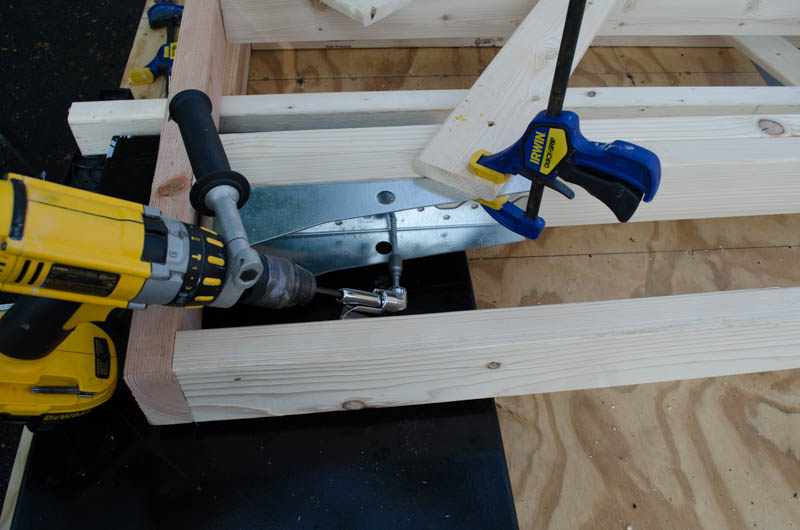
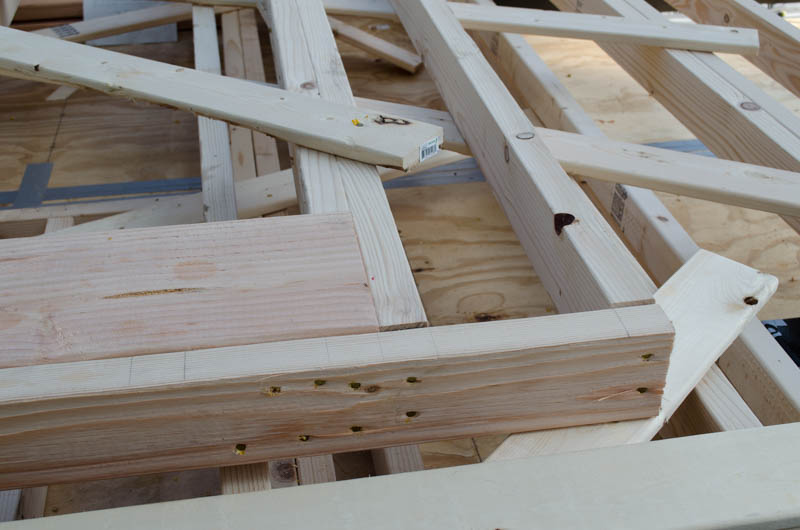
So what are those threaded rods for, anyway? Well, they mate with these metal hold-down brackets to secure the house to the trailer. Kind of important. Sometimes, though, the brackets wind up in inconvenient places with respect to where I need my framing studs to go. This is one such case. I really didn’t want to install these until the walls were placed on the deck so I could be sure to align the hole in the bottom of the bracket with where the rod came up through the deck. However, a few of these brackets would be impossible to install in place given the proximity of their neighbors. In this case, there actually was room to get a right-angle driver in place to install the screws. Because f that, I could have actually done this one after the wall was placed, but for some reason I felt compelled to install it ahead of time. The other ones, which even this angle driver couldn’t touch in place, absolutely had to be installed as the walls were being built – not even just after, as shown here. Those involved a bit of guess work. The hole for the rod is 1″ diameter. The rod is just over a half inch in size (5/8). The entry for the rod into the bracket is about 3/4″ – just a little bit of clearance. So where on that 1″ hole in the wood do I position that 3/4″ entry hole of the bracket? Center? Off to one side? It matters. Not every rod comes up perfectly centered. Do I know which is which? I do not and I’m in no position to do anything about that. Best guess, Mr. Sulu.
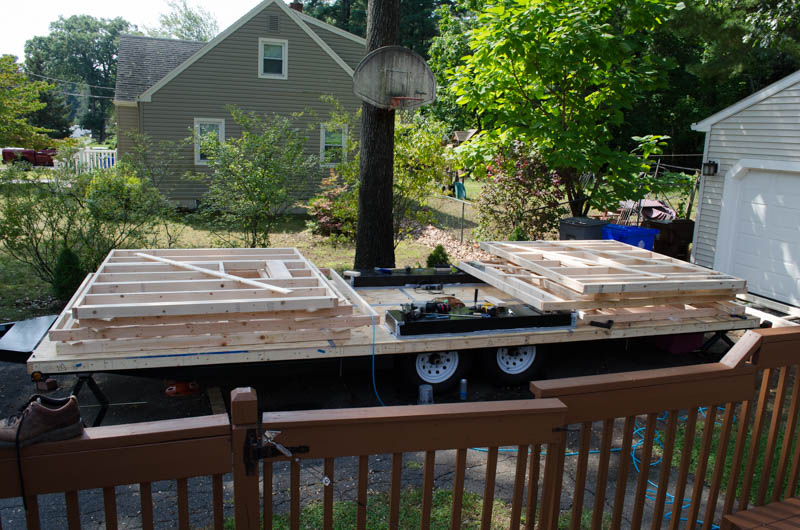
Okay, all the pre-rework is done. All the brackets that have to be installed (and one or two that didn’t have to be, but were anyway) have been installed. Two stacks of pre-fabricated wall modules standing by for helpers to arrive.
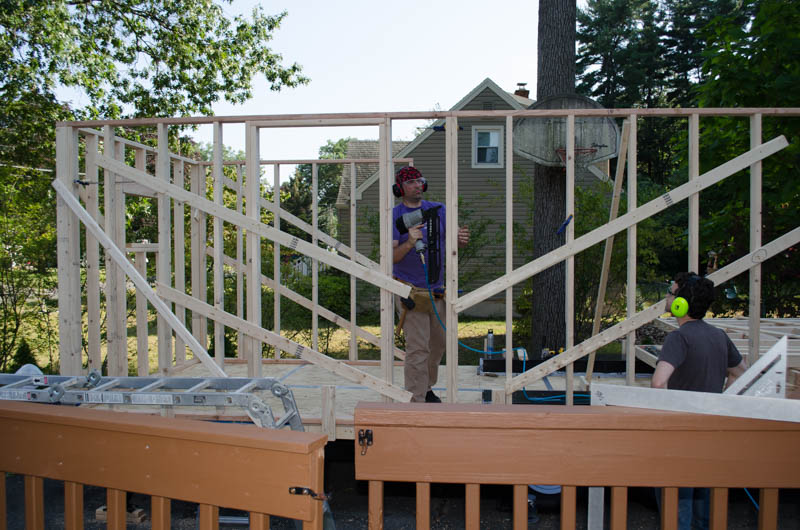
At about 3pm, my helpers arrive. The first wall goes up quick and easy. It is necessarily the easiest one, as there are no other things it has to fit with yet 😀.
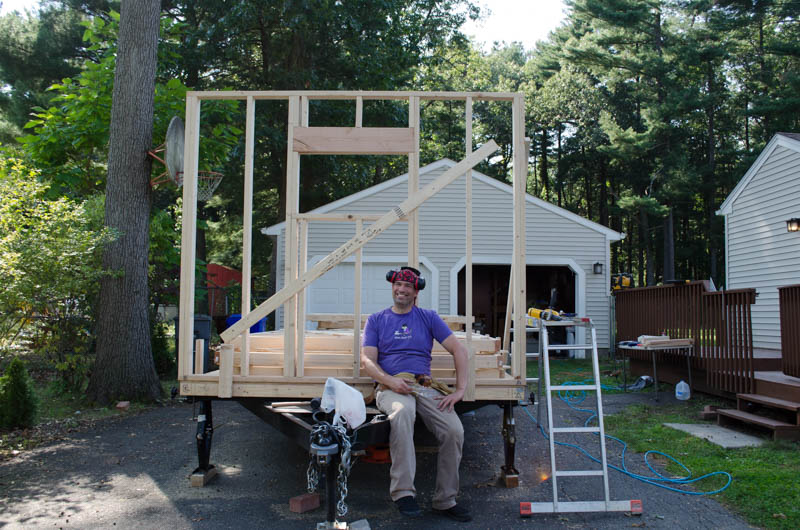
I stop for a moment and strike a pose. Forgetting, as I usually do, that my ear muffs are parked on my head.
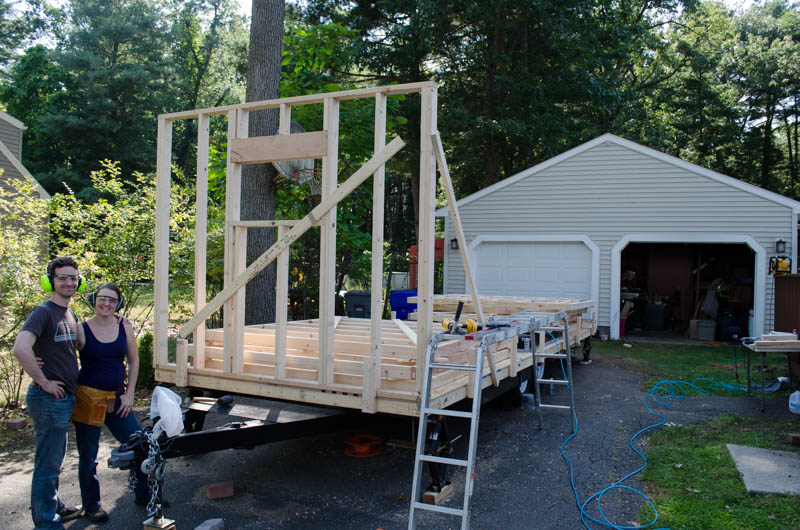
Huge thanks to Sage Inglis and her husband Dan for spending 4 hours with me today. That was enough to get all 8 wall sections raised, adjusted (if necessary), and secured in place. THANK YOU SO MUCH. You were a huge help.
Also: Sage – you are the BESTEST HELPER EVER. Cleaning up without being asked, keeping tools organized, anticipating what I was going to need and handing me the next things even before I asked. Also – lots of good braining for managing site logistics! You can come help any time!
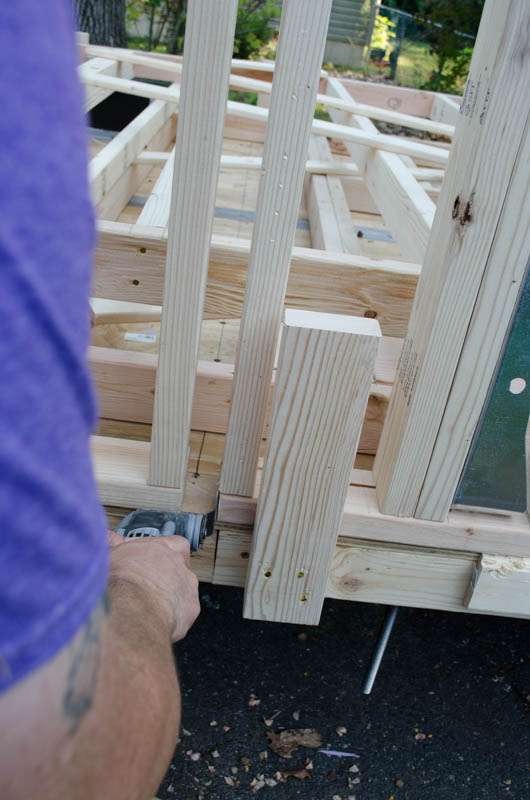
There were just a few bits of on-site rework that needed to be done. In every case, they were quite minor – no more than 1/8″ of adjustment needed to be made. This is a testament to how carefully the modules were laid out and built. Shown here, using that vibrating Dremel tool to shave off about 1/16″ off the sole plate of one of the wall modules. NOW it fits.
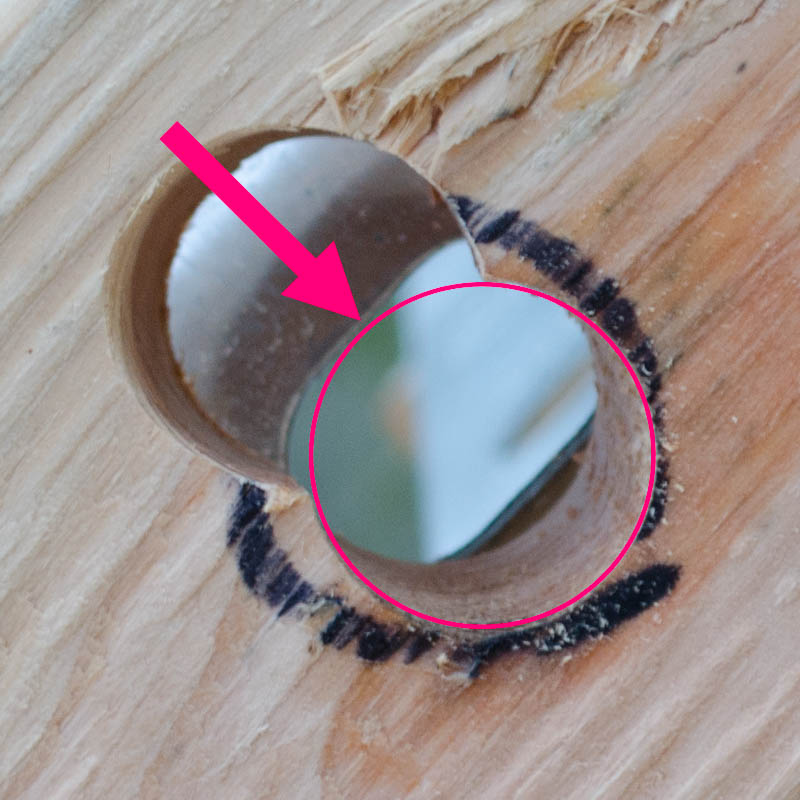
Bottom view of one of the hold-down brackets (silver, background) and its alignment to the hole in the sole plate below it. The hole in the bracket actually lines up perfectly with the middle of the hole in the wood, but it turns out the rod does not. The rod actually comes up through the wood close to the side of the circle where the arrow points. I needed just a teeny tiny bit more clearance so the rod could make it into the bracket. A second hole was drilled to accommodate it and I was able to get about 1/16″ of play out of the bracket – just enough to get them to mate.

So, sure, there was a little bit of rework required on the fly. Not much, though, and definitely no rebuilding necessary, which made me very happy. In most cases, things came together perfectly. Shown here, the end of a 24′ long wall, comprised of 3 sections and intersecting with a fourth, all adding up to within A PENCIL LINE’S WIDTH of where it’s supposed to be. That’s precision.
As it turns out, the trailer and deck are so perfectly level that we had a wall standing for several minutes without being secured at all! A seven foot wall standing on a 3.5″ wide piece of lumber, perfectly in balance. Yup.
I would discover later that early precision is no indication of later precision! Stuff gets bumped. Wood just moves on its own, for various reasons. Despite occasional brushes with perfection, there was a lot about the house that’s not flat, square, or level by the time it got a lot more put together. — DBS 2019-10-12.
Action shot – Daniel has a nail gun and is not afraid to use it. This gun has been with me for about 15 years. I bought it to rebuild the bathroom in the Lowell house in 2002. It has served me well for all this time and shows no sign of stopping. Porter Cable. Good stuff.
First stack is DONE (four sections on the left; two on the foreground side, one on the end, one on the background side). Second stack begins by raising the end wall.

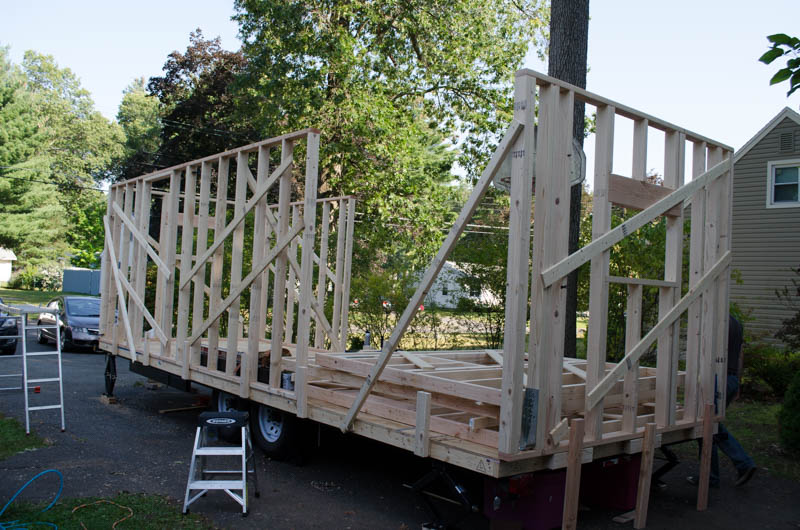
6:30pm or so, today’s framing job IS DONE. There’s more work to do, of course, but the walls are up and square and plumb and braced in place. I’ll leave those diagonal braces on until I install the sheathing. They will keep everything nice and square til then.
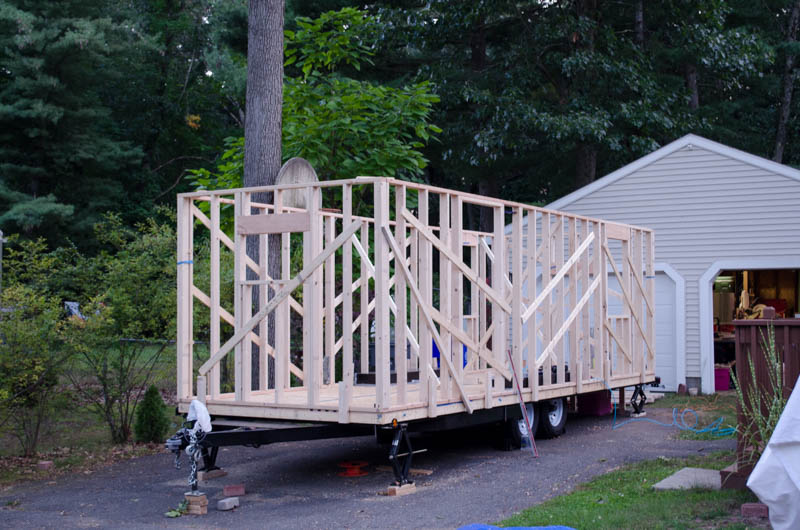
A longer view showing today’s work. Holy crap… I’m actually building a house…
I mean, I knew that.
But now I am feeling it.
Whoah.