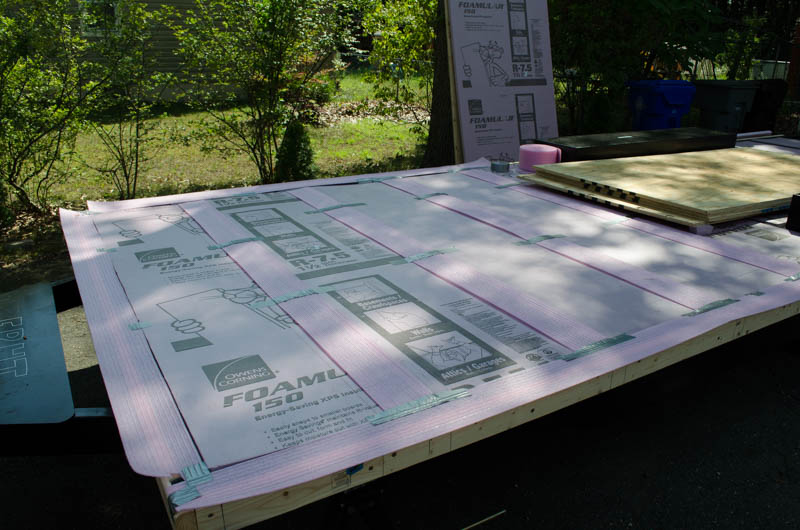
Once the insulation boards are in, there’s still the matter of the metal parts. Those parts will be very cold in the winter given that they will be in contact with the outside air from below. Enter: more pink stuff! This time, it’s a plastic-y foam called “sill seal” which provides a thermal (and moisture) break between the metal and what comes next. This is the same stuff that would go on top of your concrete foundation walls before the sole plate of your framed wall (that’s the bottom piece of wood the studs fasten to).
The instructions that came with the trailer said to use construction adhesive to hold the sill seal in place. How very silly. Adhesive will take a day or more to cure and will require some special attention to hold the curly-because-it-was-on-a-roll sill seal in place during cure. Once the floor deck is installed, the sill seal isn’t going anywhere. So I just need it to be held well enough to position the floor deck. Duct tape will do just fine 🙂

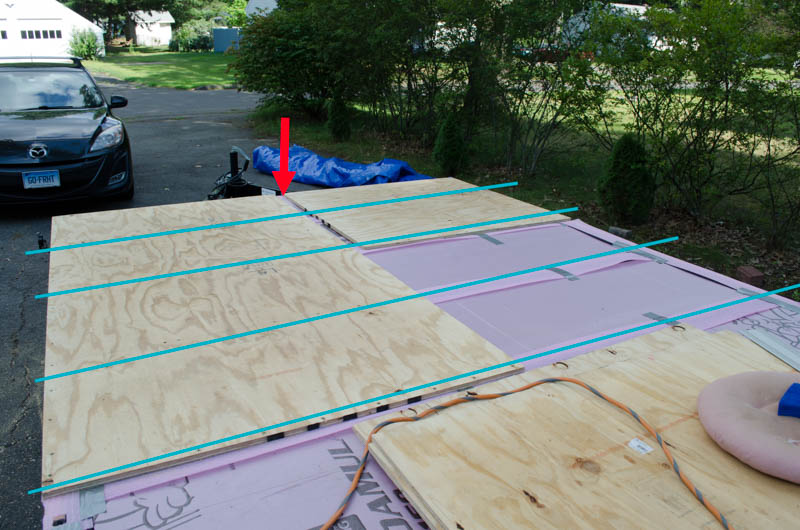
Laying out the first two floor deck boards. The aqua colored lines indicate where the metal Z-brackets are beneath the deck. I will set self-drilling screws along those lines to fasten the subfloor to the trailer chassis. Note these screws will go righ through the sill seal and will definitely hold it in place by compression. Yes, there will be a tiny bit of thermal conductivity provided by the screws themselves. There’s only so much you can do… and the finish flooring will provide a buffer anyway.
So, why the long and short boards? It’s good practice to stagger the seams since those are often slightly weaker points. You wouldn’t want the seam going all the way across — you’d want a solid board to help bear whatever was happening there, hence the stagger.
With the skirt joist (that wood I screwed around the exterior of the chassis) in place, the floor deck is actually 99 inches wide. Plywood is 48 inches wide. Two sheets would be 96. The guidance that came with the trailer suggested dressing the two main courses of boards close together and filling the last 3 inches with a narrow strip along one edge. I didn’t like that idea, as it gave the edge no support from the middle and meant the right-most large board wouldn’t have the support of the right edge of the chassis, either. No bueno. I put the two main courses dressed to the outside of the chassis such that they each had one edge along the frame. The extra three inches is now right down the middle. I’ll cut a narrow strip and screw that down last. It’s so skinny that I could almost leave it open, knowing the finished floor would easily span it, but for absolute support as well as flexibility with respect to what kind of finish floor I install (hardwood spans 3″ no problem, laminate or carpet, not so much!) now or in the future, full coverage is the name of the game.

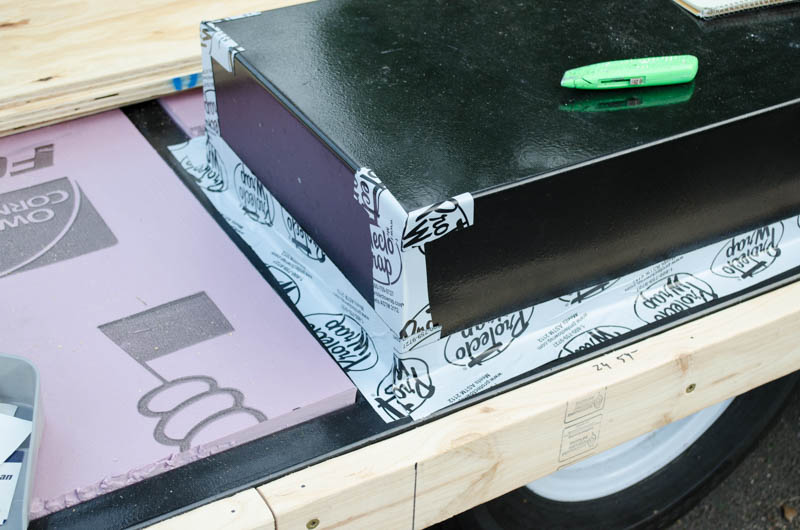
Those wheel well covers are actually just sheet metal that’s been folded down and welded in place. The corners are open and the welds along the perimeter have gaps which are open to the outside below. At first I thought to use caulk here but then realized that some window sealing tape (which is heavy duty asphalt-impregnated super sticky and flexible) would get it done better and quicker. Hello Protecto Wrap. I mean, really, how can you resist Protecto Wrap?

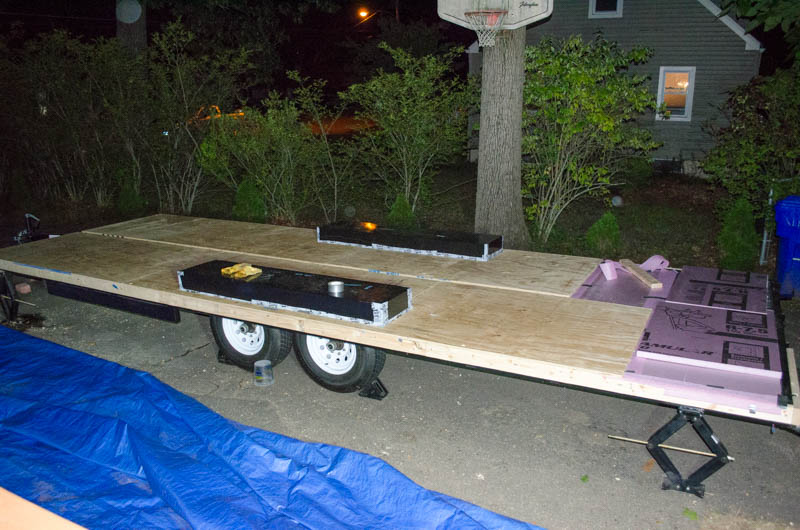
August 23, 2017, 9pm. It’s getting darker earlier and earlier, but I’m still working up to the “you gotta be quiet now” time of 9pm on workdays. Two hours isn’t much (I get home by 6:30, have some dinner and quick change into work clothes by 7pm), but it isn’t nothing, either. Today I got two more deck boards cut, fit, and screwed down. There’s only that short space at the tail remaining. I need to do some insulation work in the corner by the newly-repaired tail light (it looks insulated here, but actually that’s just the uncut XPS boards sitting on top of where they neet to be cut-to-fit into), finish the skirt joist around the back (I left that off, too, so it woudn’t get scorched by the welding), then complete the deck. Maybe this will be done before the weekend. There’s a decent chance of it.
Once the deck is done, it’s time to do some layout for the walls and the build them! I suppose it’s time to think about windows and doors, too, since wall planning requires accommodation for those, too.

Putting up walls is dramatic and fun! Doing it solo is going to be Very Challenging (though of course I have a handful of ideas on how to get it done safetly and effectively if necessary). If you would like to be of service, being available over Labor Day Weekend (Sept 2-3-4) would be a great help. No construction experience necessary (though welcome, of course), though a strong body is needed. You don’t have to be a brute, but this isn’t dainty work.
Please chime in below or pm me if interested and available. And if interested but NOT available, please chime in with that, too, so that I may add you to the “help build FRHT” list for future calls.